Heehee. Some projects make me feel like a child again (or, in this case, like a character in a Brontë novel)! I cannot tell you how excited Jenny and I are about bringing you this pattern. Charlotte’s Dream has been just that: A dream!
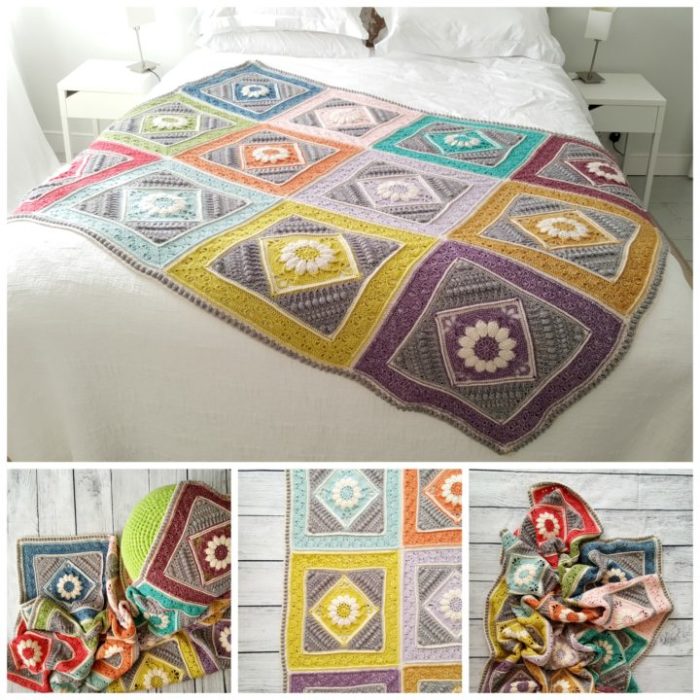
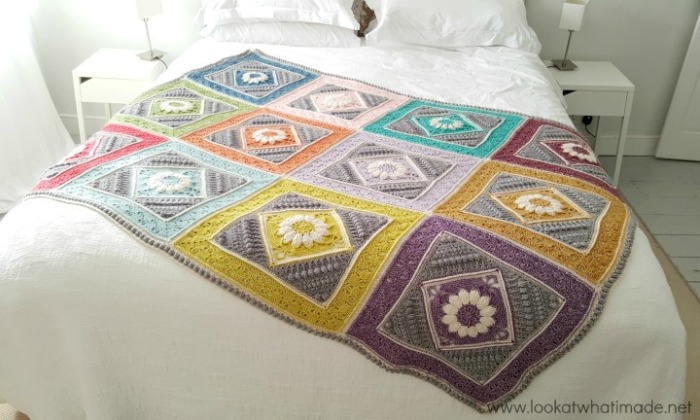
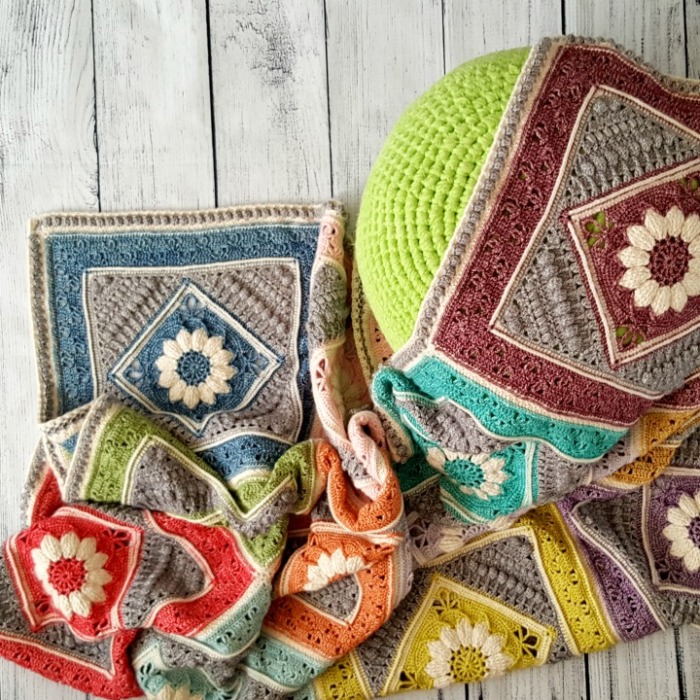
This blanket was made by my dear friend Jenny and consists of 12 Charlotte squares in 12 different colours. It is bordered with a simple popcorn edge. From the very first square, this blanket sparked my imagination. I keep imagining myself sitting on it under a huge tree, reading a really good book while the dappled sunlight dances over the pages.
Jenny and I have spent many happy hours choosing colours, chatting about a name, and oohing and aahing over the individual squares. I hope this project brings you as much joy as it has brought us.
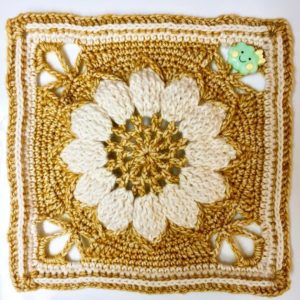
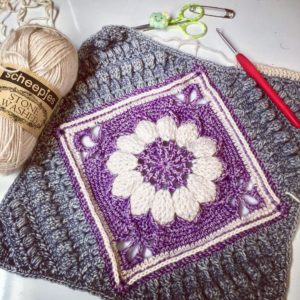
The Charlotte Square was specifically designed for 67 Blankets for Mandela Day. I would like to thank my friend John Kelly for allowing me to use a smaller version of the flower he designed for his Mandala in Bloom pattern.
Charlotte’s Dream Pattern
© Dedri Uys and Jenny Lowman 2016. All Rights Reserved.
Resources
- Add this pattern to your Ravelry Queue
- Video Tutorials: You can find video tutorials for the squares (only) HERE on It’s All in a Nutshell.
- Hashtag: Please use #charlottesdream so that we can see your work.
If you prefer a formatted ad-free US PDF version of this pattern (with charts by the talented Masako Kawahara), you can buy it in my Ravelry Store HERE or in my Etsy Shop HERE.
Translations
- Dutch Translation by Dianne Baan
- French Translation
- German Translation by Ivonne Zimmer
- Hebrew Translation
- Korean Translation
- Swedish Translation
Materials
- 3.5 mm crochet hook (US 4/E, UK 9)
- Scheepjes Stonewashed (Sport weight/#2)
- Contrasting Colours (CC)/ Colour A* – 2 skeins (220 meters) each of Rose Quartz (820), Yellow Jasper (809), Lilac Quartz (818), Garnet (810), Deep Amethyst (811), Lemon Quartz (812), Carnelian (823), Amazonite (813), Canada Jade (806), Blue Apatite (805), Coral (816), and Green Agate (815)
- Main Colour 1 (MC1)/ Colour B* – 12 skeins (1500 meters) of Moon Stone (801)
- Main Colour 2 (MC2)/ Colour C* – 12 skeins (1450 meters) of Smokey Quartz (802)
* The square was originally designed using the colour references Colour A, Colour B, and Colour C. When following the photo tutorials for the individual squares, you will replace Colour A with CC, Colour B with MC1, and Colour C with MC2 as listed above.
Yarn packs for this project are available from Wool Warehouse (offers international shipping and includes printed version of the pattern) and Deramores. You can also buy Stonewashed from Scheepjes (NL).
Abbreviations
US Terminology {US/UK Conversion HERE}
- Ch – Chain
- BP – Back post (insert your hook from back to front around the post of the indicated stitch and complete the stitch as normal)
- CC – Contrasting colour
- Dc – Double crochet
- FP – Front post (insert your hook from front to back around the post of the indicated stitch and complete the stitch as normal)
- Hdc – Half-double crochet
- MC – Main colour
- Sc – Single crochet
- Sl st – Slip stitch
- St/st’s – Stitch/stitches
The rest of the Abbreviations and Special Stitches will be found in the individual parts for the Squares (see Charlotte Squares below).
Punctuation
* An asterisk indicates pattern repeats. You will need to repeat all the instructions between asterisks the number of times specified. This is a hard-core repeat and will consist of multiple instructions.
Parentheses () indicate repeats. You will need to repeat the instructions between parentheses the number of times specified. This is a lower level repeat. Parentheses are also used to indicate a group of stitches to be worked into the same stitch/space.
Gauge
At the end of Round 18, your square should measure 20 cm (8”). Each finished square should measure 42 cm (16.5”).
Size
172 cm (68”) x 130 cm (51”)
Notes
The central flower of this square is textured and raised slightly above the surface. When you have only made the flower, it will look like it bulges too much (because of all those front post stitches) but, as the square progresses, this will become less noticeable. With use, the flower will relax down even further, but it will always remain slightly raised above the surface of the square.
If you find that your flower bulges a lot and the rest of your square refuses to become ‘square’ by Round 18, you are making your chains too tight, and you will need to either relax your tension when making your chains or use a bigger hook for chains only.
Instructions
Charlotte Squares
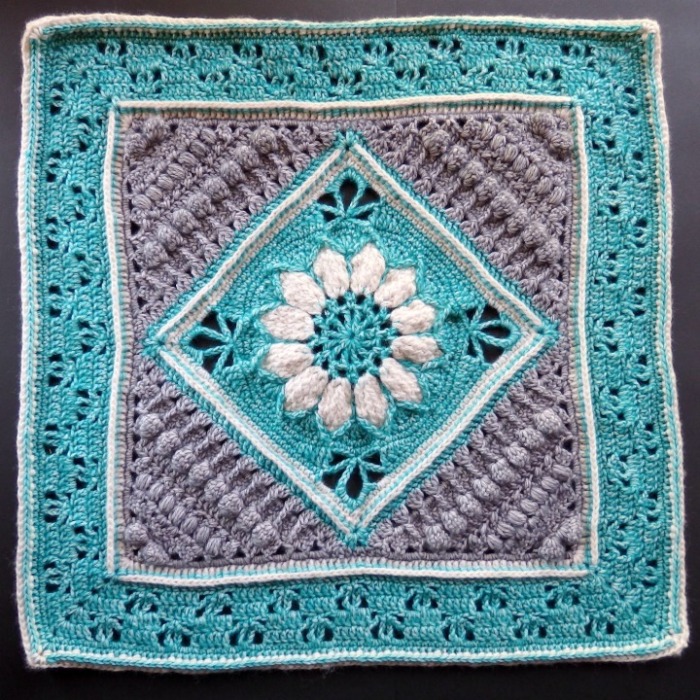
You will need to make 12 squares, using a different Contrasting Colour (CC) for each square. Below you will find the links to the 3-part Charlotte Square (published at the start of the year), as well as the two additional rounds that will need to be added to each square before joining. Remember to reference the colours and hook size (above) when making your squares.
- Rounds 1 – 18: Charlotte Square Part 1 – 20 cm (8″) at the end of Part 1 (gauge check)
- Rows 19 – 28: Charlotte Square Part 2
- Rounds 29 – 36: Charlotte Square Part 3 – don’t fasten off at the end of Round 36!
- Rounds 37 and 38: Extra Rounds Below
- Teil 1
- Teil 2
Round 37 (CC)
Sl st into the next ch-2 corner space. Ch 2 (counts as hdc). (Hdc, ch 2, 2 hdc) into the same ch-2 corner space. This is your first corner made.
*Skip the first (hidden) stitch. Hdc in each of the remaining 85 st’s across. (2 hdc, ch 2, 2 hdc) in the next ch-2 corner space.* Repeat from * to * 3 more times, omitting the last corner on the last repeat. Join to the top of the beginning ch-2 with a sl st. Fasten off and work away your ends.
Stitch Count: 356 hdc’s and 4 ch-2 corner spaces {89 hdc’s per side}
Round 38 (MC1)
Join your yarn by making a standing single crochet in any ch-2 corner space. (Ch 2, sc) in the same ch-2 space. This is your first corner made.
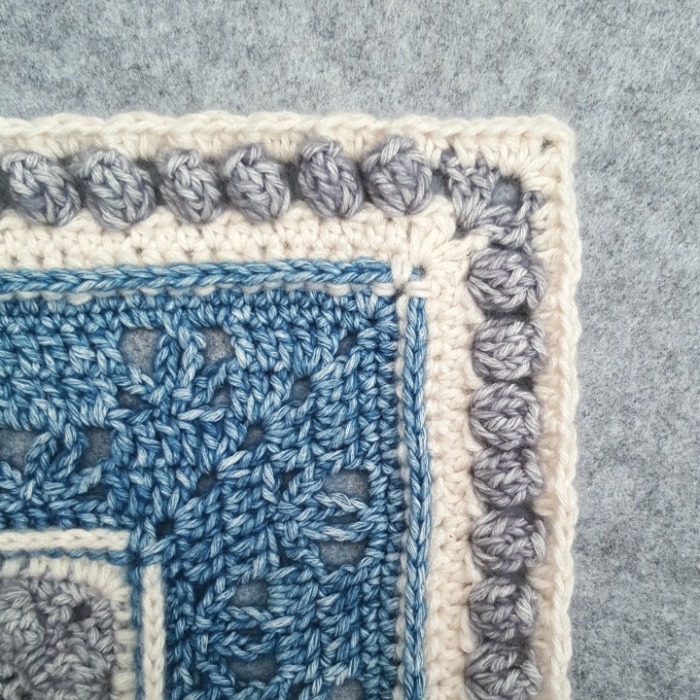
*BPhdc around each st. (Sc, ch 2, sc) in the next ch-2 corner space.* Repeat from * to * 3 more times, omitting the last corner on the last repeat. Join to the first sc with a sl st. Fasten off and work away your ends.
Stitch Count: 8 sc’s, 356 BPhdc’s, and 4 ch-2 corner spaces {2 sc’s and 89 BPhdc’s per side}
Deciding on Your Layout
When you have made all 12 squares, you will need to join them to each other. I am going to show you how we chose to do our layout, but you are free to move the colours around. If you do decide to move the colours, try not to put too many light or dark colours next to each other as this will make the blanket appear a bit lopsided.

Joining the Charlotte Squares
The squares are joined using a (Sc, ch 1, skip 1) join. It yields a flat seam on the front of your work that will look like little stitches. On the back of your work, the seam will be raised (but not as much as if you had made a sc in each stitch). This seam is reasonably elastic, provided that you don’t make your chains too tight.
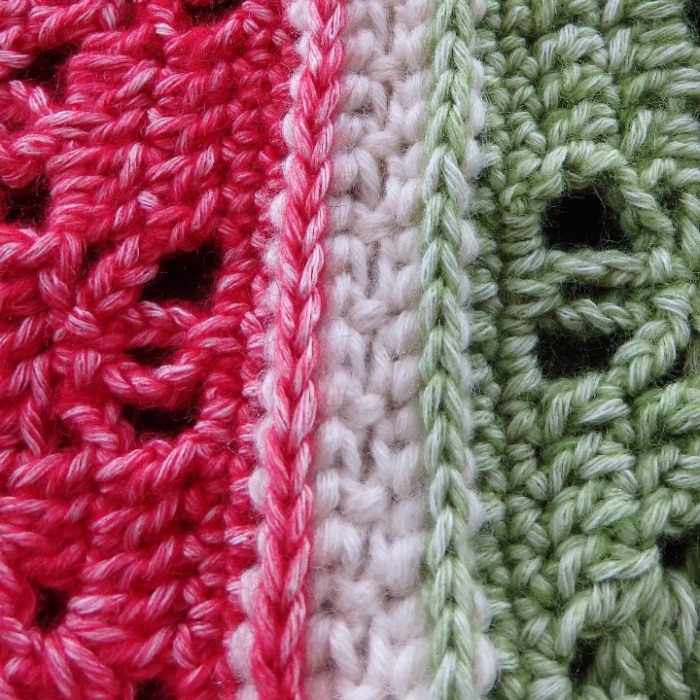
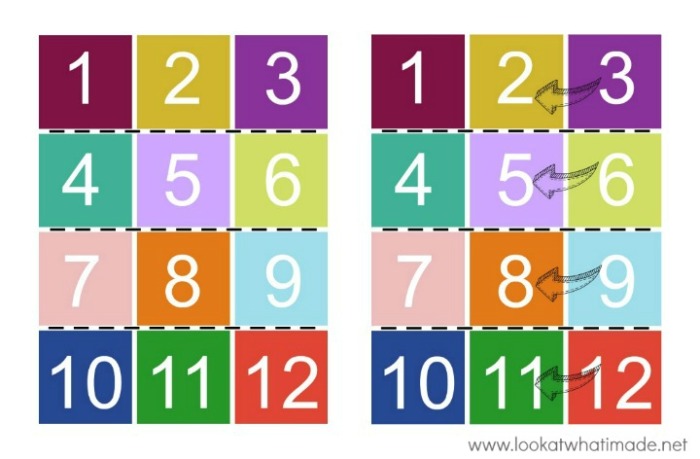
The squares are joined in a grid. You will be making all the horizontal joins first, followed by the vertical joins. Unless otherwise specified, you should be inserting your hook into both loops of both layers for each indicated stitch. To make it easier for you to understand, I have numbered the squares from 1 to 12, starting in the top left-hand corner and ending in the bottom right-hand corner.
Place Square 9 on top of Square 12 with right sides together. With a slip knot (MC1) already on your hook, start joining the two squares by making a standing single crochet in the ch-2 corner space. (Ch 1, skip the next st, and sc in the next st) until you have one stitch left before the next corner space. Ch 1, skip the last st, and sc in the ch-2 corner space. Ch 1 before joining the next 2 squares.
Place Square 8 on top of Square 11 with right sides together. *Make a sc in the ch-2 corner space, again remembering to work though both layers. (Ch 1, skip the next st, and sc in the next st) until you have one stitch left before the next corner space. Ch 1, skip the last st, and sc in the ch-2 corner space. Ch 1.*
Without fastening off, place Square 7 on top of Square 10 with right sides together and repeat from * to *. Fasten off and work away your ends.
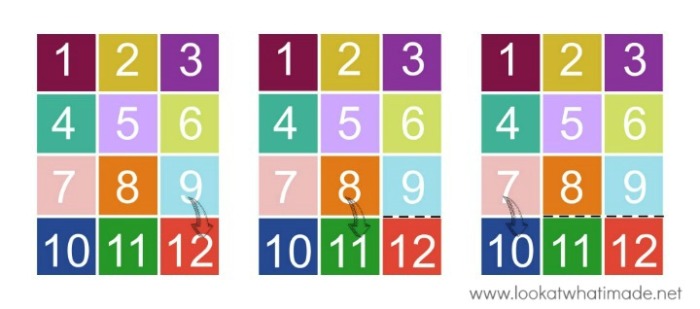
You have now completed your first horizontal strip. Repeat the whole process, laying Square 6 on Square 9, Square 5 on Square 8, and Square 4 on Square 7. Then repeat it again with the last 3 squares.
Now turn your blanket 90 degrees so that you can start joining the squares vertically. Fold the row containing squares 3, 6, 9, and 12 onto the row containing squares 2, 5, 8, and 11.
Just like when you were joining the squares horizontally, repeat the instructions between asterisks (*) above for each square, remembering to chain 1 between squares. Fasten off when you have joined all four squares and then repeat the process to join squares 2, 5, 8, and 11 to squares 1, 4, 7, and 10.
Adding the Border
When you have joined all your squares to each other, you are ready to add your border. The Popcorns in this border are created over 2 rounds. In Round 2, you will make a series of 5-dc groups. In Round 3, you will turn these 5-dc groups into Popcorns by using front post stitches.
Border Round 1 (MC1)
When adding the first round of the border, the ch-2 corners of each square (along the edges of the blanket) will count as a stitch and should be worked into. Only the four ch-2 spaces in the corners of the blanket will be referred to as a ch-2 space.
Join your yarn by making a standing double crochet in the ch-2 corner space at the start of any long side. (Dc, ch 2, 2 dc) in the same ch-2 space. This is your first corner made.
*Hdc in each st, remembering that the ch-2 spaces along the edge count as stitches and should be worked into. (2 dc, ch 2, 2 dc) in the next ch-2 corner space.* Repeat from * to * 3 more times, omitting the last corner on the last repeat. Join to the first dc with a sl st. Fasten off and work away your ends.
Stitch Counts:
- Long Sides: 370 hdc’s and 4 dc’s
- Short Sides: 277 hdc’s and 4 dc’s
Border Round 2 (MC2)
Join your yarn by making a standing double crochet in the ch-2 corner space at the start of any long side. (Dc, ch 2, 2 dc) in the same ch-2 space. This is your first corner made.
*(Ch 2, skip the next 2 st’s, and make 5 dc’s in the next st) until you have 2 st’s left. Ch 2 and skip the last 2 st’s. (2 dc, ch 2, 2 dc) in the next ch-2 corner space.* Repeat from * to * 3 more times, omitting the last corner on the last repeat. Join to the first dc with a sl st. Fasten off and work away your ends.
Stitch Counts:
- Long Sides: 124 5-dc groups and 125 ch-2 spaces (not including corner spaces)
- Short Sides: 93 5-dc groups and 94 ch-2 spaces (not including corner spaces)
Border Round 3 (MC1)
To make a FPhdc around a 5-dc group, yarn over and insert your hook from front to back into the ch-2 space before the 5-dc group. Insert your hook from back to front into the next ch-2 space so that the 5 dc’s lie on top of your hook. Complete your hdc as normal, making sure that your working yarn is above the 5 dc’s, not in front of them. This will pull the 5 dc’s together and form a neat Popcorn. If you want more help, have a look at my tutorial for the Really Lazy Popcorn.
Join your yarn by making a standing half-double crochet in the ch-2 corner space at the start of any long side. (Hdc, ch 2, 2 hdc) in the same ch-2 space. This is your first corner made.
*Hdc in the first 2 st’s and make 2 hdc’s in the first ch-2 space. (Make a FPhdc around the next 5-dc group, make 2 hdc’s in the next ch-2 space) until you have worked into every ch-2 space. Hdc in the last 2 st’s. (2 hdc, ch 2, 2 hdc) in the corner ch-2 space.* Repeat from * to * 3 more times, omitting the last corner on the last repeat. Join to the first hdc with a sl st. Fasten off and work away your ends.
Stitch Counts:
- Long Sides: 382 hdc’s
- Short Sides: 289 hdc’s
And that is Charlotte’s Dream all done :)
Thank you for choosing to make this blanket. If you would like to share photos of your finished project, please use hashtag #charlottesdreamcrochetblanket so that Jenny and I can see it!
Want to see more of our Charlotte’s Dream journey?

This blog post contains affiliate links. I only link to products I personally use or would use. All opinions are my own.


Fiona says
Hi Dedri thank you so much for this pattern it really is beautifully im only doing 8 squares as its going to sit across the bottom of my bed. I live in Australia so Dk/8ply yarn is easier to get which is what im doing mine. Im also doing your In bloom cal can I say your you tube tutorials are porobably the best than ive used.
Once again thank you
Fiona
Dedri Uys says
Hi Fiona. Thank you :) The youtube tuts are actually made by Esther Dijkstra, and I agree that they are excellent!
Katja Stijnis says
Hallo!
Haken kan ik niet helaas, wel ervan genieten haha.
Vertalen kan ik wel. Al zal ik eerst even in het haakjargon moeten duiken, maar wie weet!
Fijne dag en veel krea-plezier!
Vrolijke groet van mij,
Katja
Farida says
Hi Dedri , I think I hit jackpot when I found your blog. Everything is SO beautiful ; what to make or leave :) . I’ve already made the Charlotte blanket as it was the first one I found and I just had to make it. Since I live outside UK and couldn’t get my hands on the specified yarn :( I tried to stay as close as I could possibly to the color scheme, and I love it ! I think you and Jenny are an inspiration to all of us adventurous beginners. Thanks for making all the wonderful patterns available t.o us
Dedri Uys says
Hi Farida. Thank you for your lovely message :) I am so glad you love your Charlotte. Take care x
Ronni Hannon says
I have started this beautiful blanket and seem to be using one whole skein of the Smokey Quartz colour and close to one of the Moon Stone per square. How many extra skeins do you think I’ll need to join the squares and make the border? I don’t want to rip out everything I’ve done so far, so buying more yarn seems to be the best solution.
Jenny says
Ron I, without knowing the size of your squares or how your tension works up for the border, it is very difficult to ‘guesstimate’ how much extra yarn you will need.
Jenny
Linds says
I ran out of moonstone half way through border round 1. I ordered one more, but I don’t think it will get me around border row 3 also, so I’ll get one more.
The Smokey Quartz ran out in the 12th square of border round 2 so I need to get one more of those.
All the other colors had enough; I have about s marble size of each left.
Kristin says
I’ve never crocheted a blanket out of cotton and I’m a bit scared it will shrink like crazy when washed and dried. Have you dried yours?
Dedri Uys says
It has been washed and air-dried without any shrinkage.
Gloria J Mihna says
Thank You so much for Charlotte squares. I made a blanket for my little grandaughter and bought a Cabbage Patch doll to go with it as a keepsake from me . Something for her to keep and your square is part of it. Thank you again. Gloria
Dedri Uys says
That is so special!
Mary Rounds says
Wow! What a beautiful blanket. I am just finishing the last square and am in love with the whole look! Thank you for sharing the pattern and all the time and energy that went into the instructions, not to mention the illustrations. Clear and easy to follow. It is a joy to create, thank you again!!
Dedri Uys says
I am very happy to hear that x
Ria verheezen says
Goodmorning and thak you for this beautyful patern,I love them.Whissing you all the best for 2019.greetings Ria.
Karen Conway says
Hi is there a PDF version of this pattern that you can print out? Can you buy it any where. I want to print it out as I don’t like to follow it on my iPad as it keeps turning off after so long.
Thanks
Karen
Jenny says
Karen, all pets of Charlotte’s Dream are free to print out in PDF form using the green print friendly button at the end of each pattern pet after Dedri’s signature. Hope that helps you. Jenny :)
christine tsendidou says
its beautiful. i have made bed spreads with both wool and cotton and hav eone in process in beige egyptian cotton. i now am involved with making purses and handbags on canvas with needlepoint and crochet. i am hoping to sort out a website soon i am looking for supplietrs of materials online as its costing me an arm and a leg in materials from shops. if fyou have any information i would be grateful. t hak you… keep up the good work, have a great christmas
Dedri Uys says
Hi Christine. I’m glad you like it :) I always buy from wool warehouse. They ship fast and their customer service is great.
Krissy Holladay says
Hi,
Would I be able to use I Love This Yarn or Caron Simply Soft instead?
If so which hook size should I go with for whichever or both kinds of yarn?
Thank you so much for sharing this pit’s amazing! It’s amazing!
Dedri Uys says
Hi ;) You can use any yarn/hook combination you choose. The hook size would depend on your personal tension and whether or not you crochet tightly or loosely. If you crochet tight, you should use the hook recommended for the specific yarn (on the yarn band).
Sandra Douglas says
Hi Destiny or Jenny,
The afghan is stunningly beautiful! I ordered the yarn but was not able to get all of the yarn as Sheepjes stonewashed. Some of the skeins I ordered are Sheepjes Stone Washed XL. Is there going to be a problem with using both combinations?
Thank you.
Dedri Uys says
Hi Sandra. Stonewashed and Stonewashed XL are different weights, so you won’t be able to use them together in this specific pattern. Did you order a kit and were both weights supplied in the kit? If so, we need to get it sorted so that you can continue with the pattern.
Sandra Douglas says
Hi Dedri,
Yes I realized that after I ordered the yarn that they were different weights. I did not order the kit but that’s ok I will make one blanket with the XL and one without.
Thanks
Dedri Uys says
I hope you love working with the yarn :)
Remy Franco says
Hello Deidre,
As promised I tried crocheting the Charlottes Universe Part I and came out nice but I think I made a mistake in counting cause it came out lap sided on one side when I laid it down. This pattern is so beautiful even if you just do part 1 of the pattern. I will try again and will be careful this time on the part where I think I made mistake in counting the stitches. Thank you for sharing this pattern to us and inspiring me not to be scared and disappointed to make mistake. For sure I will let you know.
Dedri Uys says
Hi Remy. What a bummer, but I love your attitude towards it. It’s all a learning curve and once you figure out what went wrong, you’ll have learned a new skill :) I always embrace the errors as a learning opportunity :) I’d love to see a photo. Maybe I can help x
Cheryl says
I was looking for a challenging pattern and came across your pattern. My husband picked out the colors and I made the Afghan. It got so many positive comments I entered it in our local county fair. It won first place, best of show and best overall crochet or knitted project. Thank you for a truly beautiful project.
Dedri Uys says
Oh wow. Congratulations! Husbands choosing colours… what a wonderful thought :)
Luisa María says
Hola Dedri, te sigo desde hace unos años, cuando tropecé con el Universo de Sophie. Creo que haces auténticas maravillas con tu corazón, tus manos y un crochet. Estoy totalmente enamorada de tus creaciones.
¡¡¡Gracias!!!
Dedri Uys says
Thank you so much Luisa xx
Alana says
Help! I just purchased the yarn pack from Wool Warehouse and am so excited to get started! One question: the Ravelry page says to use a 3.25 hook, while the Wool Warehouse page says I need a 3.5. Help!
Dedri Uys says
Hi Alana. Jenny used a 3.5 mm hook and I have corrected that on Ravelry. Thank you for flagging that. However (!!!!), you will need to match gauge if you don’t want to run out of yarn, so it is incredibly important that you check your gauge where specified and adjust your hook size accordingly. Both Jenny and I crochet tightly, so you might find that you need to go down to a 3.25 or even a 3.
Remy Franco says
Hello Deidre,
I happen to stumble on your website last year when I was looking for a pattern to make for my daughter’s 5th wedding anniversary. I am a novice in crocheting and I admired your patterns but scared to try and get disappointed in the end so I did not try. Today is a year when I saw your website, still admire all your work and now you have added the Ubuntu. I’m still scared but I will attempt to start crocheting the Charlottes Dream (Square) and I will let you know the outcome of my adventure. Thank you for your beautiful work and sharing it to us.
Dedri Uys says
Hi Remy. That ‘fear’ is exactly why I write my patterns so comprehensively (some might say long-winded). I want to give you the tools to create something you thought too daunting, and the confidence to know that every stitch is JUST a stitch and once you understand how they all slot together, you can tackle anything! Please don’t be scared. No-one will know how much you grumble as you go along :) Why don’t you try Part 1 of Sophie’s Universe with scrap yarn? There are step-by-step photos and step-by-step video tutorials. It might be a bit of a challenge, but if you can do part 1 of Sophie, you can do anything (!!!!) your heart desires. And if you don’t like the result, you can always gift the resulting small mandala – I, for one, won’t say no to being gifted a mandala. Win-win, I think :) Please do not be daunted! You’ve got this x
Tessa Hamilton says
This was the most delightful afghan to make! The pattern is beautifully written and very easy to follow, and the counts for each round are extremely helpful. Thank you so much for making it available!
Dedri Uys says
Thank you, Tessa! I’m so happy to hear that x
Gerrie Jeter says
I bought the kit and would like instructions on the colour choices of each square. Thanks!
Dedri Uys says
Hi Gerrie. If you bought it from wool warehouse, it will already contain a printed version of the pattern. If you bought it from somewhere else, you will find the instructions for which colours to use in this post. If you scroll to Materials, it tells you which colours are Main Colour and Contrasting Colours. If you scroll down to instructions, it tells you which colours to use for the squares. I hope that helps.
carlene b nitkowski says
It doesn’t give directions to begin the pattern. row 1 for example.
Jenny says
You need to begin with thw Charlotte squares which are linked to in this write up.
Jenny :)