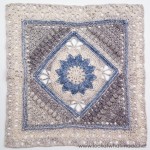
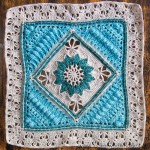
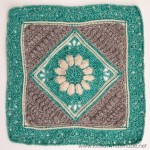
Welcome to Part 3 of Charlotte, my new Large Crochet Square. At the end of this part, you will have a lovely BIG square to use however your heart desires. Yes, I will be growing this square later on, and I am already working on it, but for now, this is all she wrote!
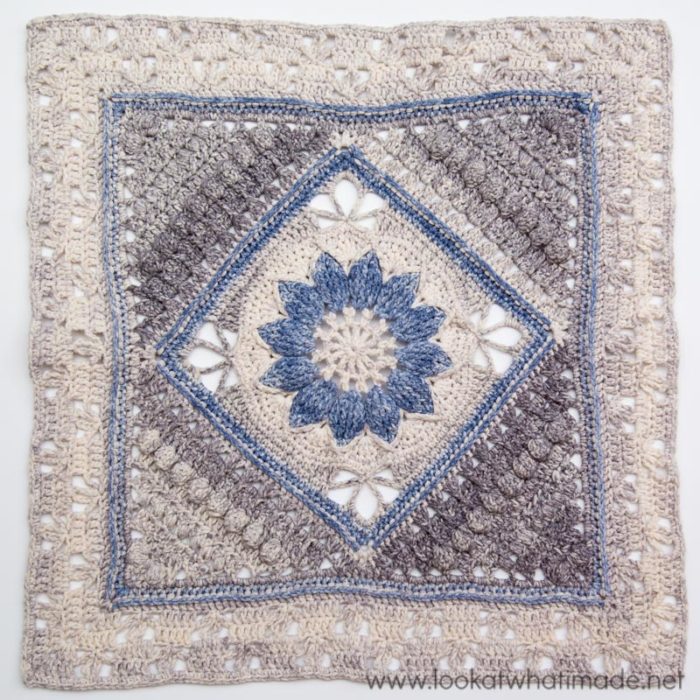
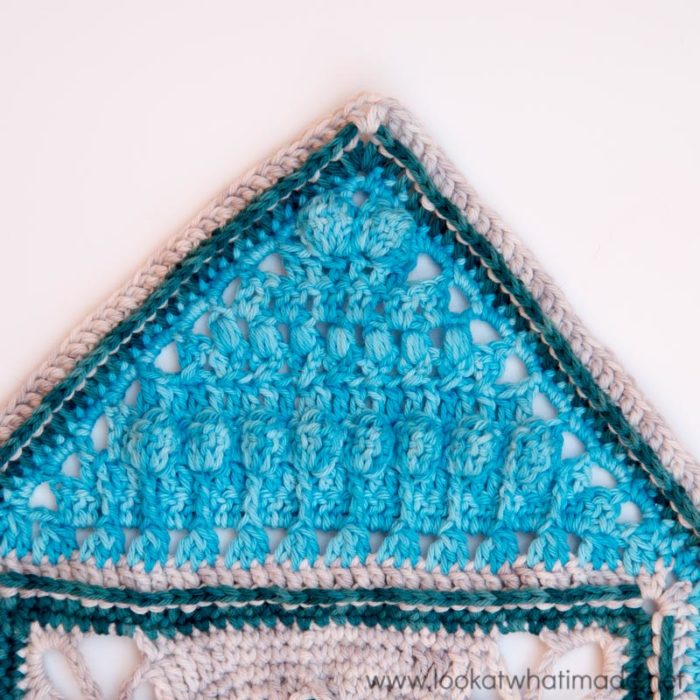
Today we will be adding a border to the small central square from Part 1 and the Triangles from Part 2.
For the photo tutorial below, I have used Scheepjes Sunkissed in shades 04, 06, and 16. Please note that the photos are only to show you how to make the rows and do not reflect the colours I have used in the written pattern.
Update 2021: This post has been updated as part of the Charlotte’s Universe CAL 2021.
Charlotte Large Crochet Square Part 3: Banksia Border
Resources
- You can find links to the right and left-handed video tutorials (US) for Part 2 HERE on It’s All in a Nutshell.
- If you need help with any of the special stitches or techniques used in this pattern, please see Special Stitches and Techniques.
Original Translations
Updated Translations With Charts
- German Translation by Sabi Bulla and Silke Schippa-Witte
- Hebrew Translation by Michal Ben-Hur, Iris Fait, Tami Sultan Nudelman, Tali Shchori, and Sarit Grinberg
Abbreviations
US Terminology (US/UK Conversion HERE)
- Beg – Beginning
- BP – Back post (insert your hook from back to front around the post of the indicated stitch and complete the stitch as normal)
- Ch – Chain
- Dc – Double crochet
- Hdc – Half-double crochet
- Sl st – Slip stitch
- Sp/sps – Space/spaces
- St/sts – Stitch/stitches
- () and * – Repeat instructions between parentheses and/or asterisks the amount of times specified
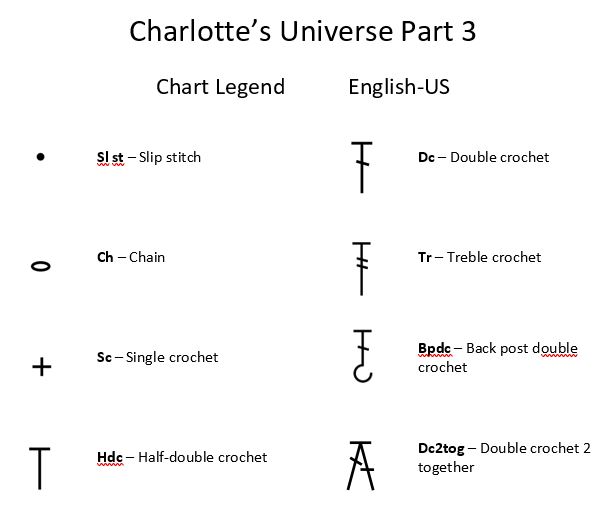
Charts
Credit: Masako Kawahara from Crochet_Hmmm
Please follow the charts in a counter-clockwise direction, regardless of whether you are right or left-handed.
Instructions
© Dedri Uys 2016. All Rights Reserved.
Round 29 (Colour C)
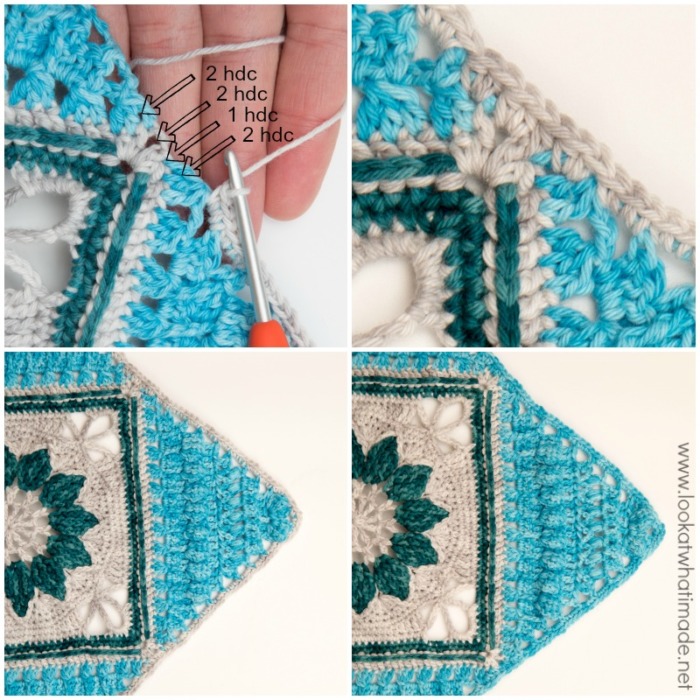
With RS facing, join your yarn by making a standing sc in any ch-2 corner sp. (Ch 2, sc) in the same sp. This is your first corner made.
*Sc in the first 3 sts. Sc between the 5-tr Bobble and the top of Row 27 of the Triangle. Make 3 sc in the side of each of the next 8 rows. Make 2 hdc in the side of the Cluster. Hdc in the st that contains the last leg of the Cluster. Make 2 hdc in the next ch-2 sp from Round 28.
Make 2 hdc in the side of the next Cluster. Make 3 sc in the side of each of the next 8 rows. Skip the sl st. Sc in the last 3 sts. (Sc, ch 2, sc) in the next ch-2 corner sp.*
Repeat from * to * 3 more times, omitting the last corner on the last repeat. Join to the first sc with a sl st. Fasten off and work away your ends.
Stitch Count Per Side: 64 sts {57 sc and 7 hdc – not including ch-2 corner sps}

Round 30 (Colour B)
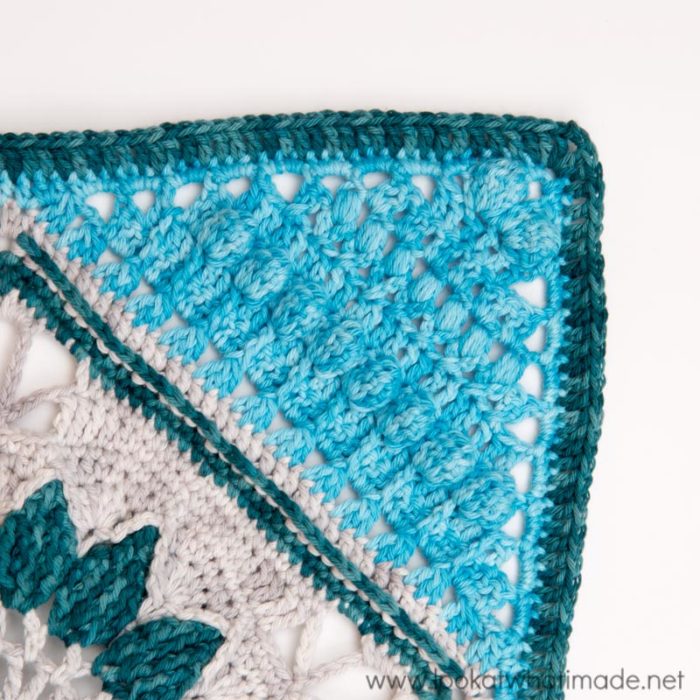
Join your yarn by making a standing dc in any ch-2 corner sp. (Dc, ch 2, 2 dc) in the same sp. This is your first corner made.
*Dc in each of the 64 sts across. (2 dc, ch 2, 2 dc) in the next ch-2 corner sp.*
Repeat from * to * 3 more times, omitting the last corner on the last repeat. Join to the first dc with a sl st. Fasten off and work away your ends.
Stitch Count Per Side: 68 dc per side – not including ch-2 corner sps
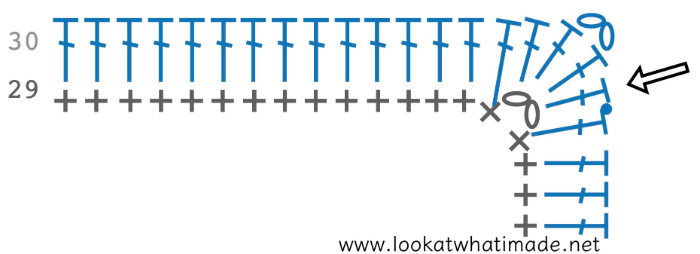
You can find the chart for the next 6 rounds at the end of Round 36.
Round 31 (Colour A)
Join your yarn by making a standing hdc in any ch-2 corner sp. (Ch 2, hdc) in the same sp. This is your first corner made.
*BPdc in each of the 68 sts across. (Hdc, ch 2, hdc) in the next ch-2 corner sp.*
Repeat from * to * 3 more times, omitting the last corner on the last repeat. Join to the first hdc with a sl st.
Stitch Count Per Side: 68 BPdc and 2 hdc per side – not including ch-2 corner sps
Round 32 (Colour A)
Sl st into the next ch-2 corner sp. (Ch 3, dc, ch 2, 2 dc) in the same ch-2 corner sp. This is your first corner made.
*Skip the first (hidden) st. Dc in the next 2 sts. (Ch 3, skip the next 2 sts and sl st in the next st. Ch 8 and sl st into the same st so that you form a ch-8 loop. Ch 3 and skip the next 2 sts. Dc in the next 5 sts) 6 times. Each of these repeats should fall over 10 sts.
Ch 3, skip the next 2 sts and sl st in the next st. Ch 8 and sl st into the same st so that you form a ch-8 loop. Ch 3 and skip the next 2 sts. Dc in the last 2 sts. (2 dc, ch 2, 2 dc) in the next ch-2 corner sp.*
Repeat from * to * 3 more times, omitting the last corner on the last repeat. Join to the top of the beg ch-3 with a sl st.
Stitch Count Per Side: 38 dc, 7 ch-8 sps, and 14 ch-3 sps – not including ch-2 corner sps
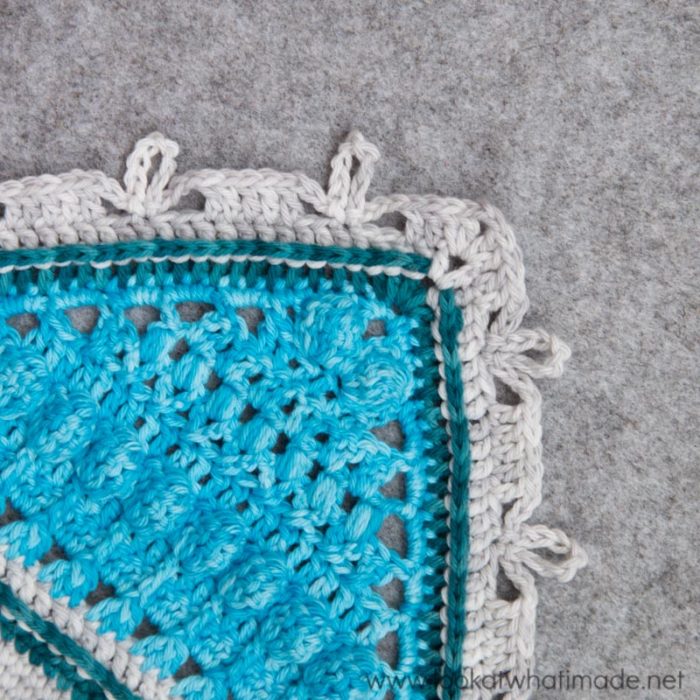
Round 33 (Colour A)
Sl st into the next st and into the next ch-2 corner sp. (Ch 3, dc, ch 2, 2 dc) in the same ch-2 corner sp. This is your first corner made.
*Dc in the first 4 sts. (Ch 5, skip the two ch-3 sps and the ch-8 loop, and dc in the next 5 dc) 6 times. Ch 5, skip the two ch-3 sps and the ch-8 loop, and dc in the last 4 dc. (2 dc, ch 2, 2 dc) in the next ch-2 corner sp.*
Repeat from * to * 3 more times, omitting the last corner on the last repeat. Join to the top of the beg ch-3 with a sl st.
Stitch Count Per Side: 42 dc and 7 ch-5 sps – not including ch-2 corner sps
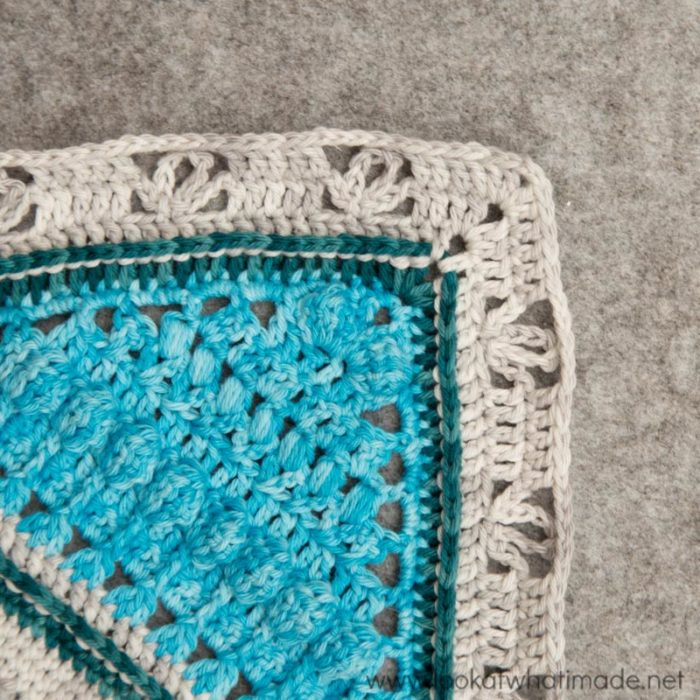
Round 34 (Colour A)
Sl st into the next st and into the next ch-2 corner sp. (Ch 3, dc, ch 2, 2 dc) in the same ch-2 corner sp. This is your first corner made.
*Dc in the first st. (Ch 3, skip the next 2 sts and sl st in the next st. Ch 8 and sl st into the same st so that you form a ch-8 loop. Ch 3 and skip the next 2 sts {Photo 1}. Dc in the next ch-5 sp. Dc2tog in the same ch-5 sp {Photo 2}. Catch the ch-8 loop from Round 32 by making a dc into the ch-8 loop and the ch-5 sp {Photo 3}. Dc2tog in the same ch-5 sp. Dc in the same ch-5 sp {Photo 4}) 7 times.
Ch 3, skip the next 2 sts and sl st in the next st. Ch 8 and sl st into the same st so that you form a ch-8 loop. Ch 3 and skip the next 2 sts. Dc in the last st. (2 dc, ch 2, 2 dc) in the next ch-2 corner sp.*
Repeat from * to * 3 more times, omitting the last corner on the last repeat. Join to the top of the beg ch-3 with a sl st.
Stitch Count Per Side: 41 dc, 8 ch-8 sps, and 16 ch-3 – not including ch-2 corner sps
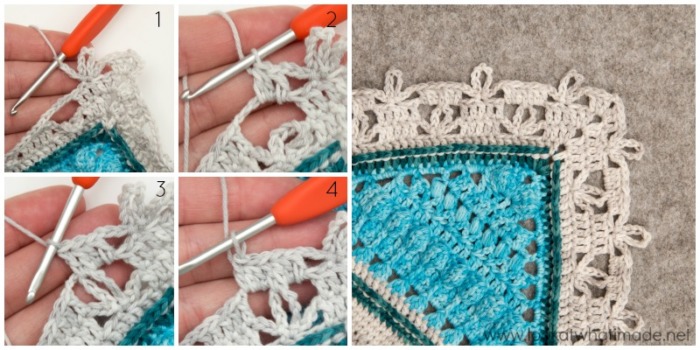
Round 35 (Colour A)
Sl st into the next st and into the next ch-2 corner sp. (Ch 3, dc, ch 2, 2 dc) in the same ch-2 corner sp. This is your first corner made.
*Dc in the first 3 sts. (Ch 5, skip the two ch-3 sps and the ch-8 loop, and dc in the next 5 dc) 7 times. Ch 5, skip the two ch-3 sps and the ch-8 loop, and dc in the next 3 dc. (2 dc, ch 2, 2 dc) in the next ch-2 corner sp.*
Repeat from * to * 3 more times, omitting the last corner on the last repeat. Join to the top of the beg ch-3 with a sl st.
Stitch Count Per Side: 45 dc and 8 ch-5 sps – not including ch-2 corner sps
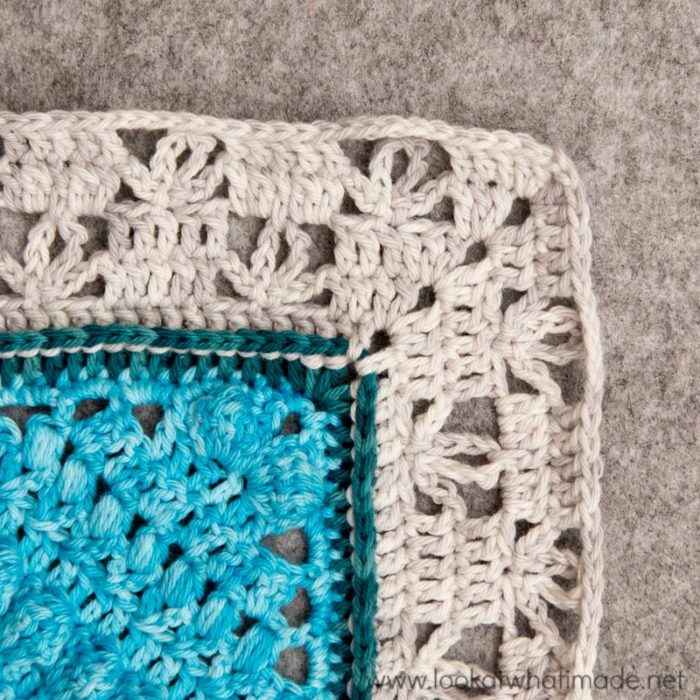
Round 36 (Colour A)
Sl st into the next st and into the next ch-2 corner sp. (Ch 1, sc, ch 2, sc) into the same ch-2 corner sp. This is your first corner made.
*Skip the first (hidden) st. Sc in the next 4 sts. (Make 2 sc in the next ch-5 sp. Catch the ch-8 loop from Round 34 by making a sc into the ch-8 loop and the ch-5 sp. Make 2 sc in the same ch-5 sp. Sc in the next 5 dc) 7 times.
Make 2 sc in the last ch-5 sp. Catch the ch-8 loop from Round 34 by making a sc into the ch-8 loop and the ch-5 sp. Make 2 sc in the same ch-5 sp. Sc in the last 5 sts. (Sc, ch 2, sc) in the next ch-2 corner sp.*
Repeat from * to * 3 more times, omitting the last corner on the last repeat. Join to the top of the first sc with a sl st. Fasten off and work away your ends.
Stitch Count Per Side: 86 sc – not including ch-2 corner sps
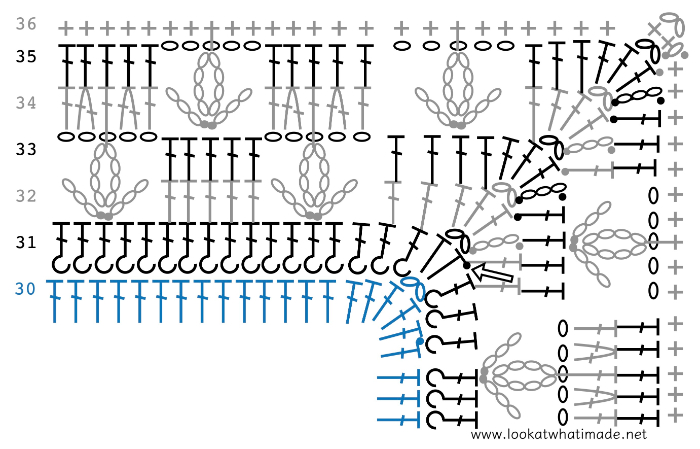
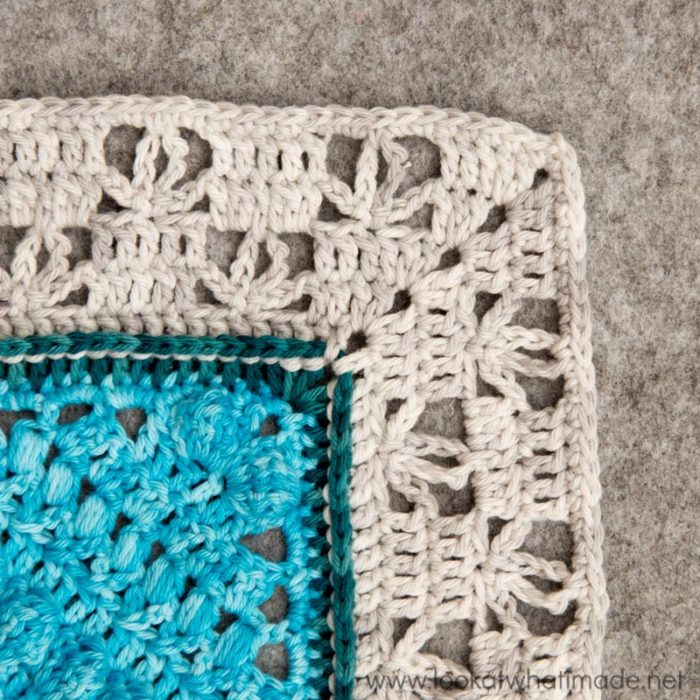
Remember to check your gauge at the end of this round.
And that is all for now! I hope you enjoy making your Large Charlotte Squares. I would love it if you would share pictures of your completed squares with me. You can use #simplycharlotte on any of the social media platforms listed below.
- Vintage Charlotte
- Scheepjes Sunkissed
- Scheepjes Stonewashed
Update 2021: If you would like to continue growing your square, you can now do so by following the Charlotte’s Universe CAL HERE.
Thank you so much for your continued encouragement and enthusiasm. It does me the world of good!

This blog post contains affiliate links. I only link to products I personally use or would use. All opinions are my own.


Kim says
I made this a few years ago and donated it to be raffled off to help pay hospital bills. The people who got it loved it and I admit its one of the most beautiful afghans I’ve ever made. Now I’m starting on my second one…thank you for a beautiful pattern!
Sherry Shoup says
A question about row 29, it says we should have 64 stitches minus the corner. But it shows 24 +24 + 7 + 4 +4 = 63, somy question is what am I missing?
Dedri Uys says
Hi Sherry,
Can you have another look at the start of the round? There are 5 sc before the first 24, not 4 sc like at the end of the round. I think that is the one you are missing?
Dedri
Lana says
Hi. I love the pattern, my mother guilted me into taking up crocheting two years ago with a hidden agenda to make a granny rug of which I haven’t done or started to look into till today.
My questions are
Can you buy a printed version of your pattern
Can you use DK acrylic yarn as opposed to cotton yarns
As im not sure on the warmth of a cotton blanket .
Thank you
Jenny Lowman says
Hi Lana. We like your Mother!
The Charlotte square can be done in any yarn
You want. Cotton, acrylic, wool, etc. Are you wanting to take part in the Charlotte’s Universe CAL? This was planned originally in acrylic Softfun aquarelle, and is also in cotton/acrylic mix with the whirls and Whirlettes.
In my experience, cotton blankets are still cosy, but obviously less so than some thicker yarns. For the Charlotte’s Dream, I can tell you the drape is devine, and good for spring and autumn. You may need to double up for severe winters (good excuse to make two!) :)
BW
Jenny
Sally Bruckheimer says
I saw the ‘big’ Charlotte, and I love it. Are you ever going to finish the instructions for it? It has been a year and more, and I waited a while to start, so will I get to finish it?
Dedri Uys says
Hi Sally. You won’t have to wait much longer.
Karen Foster says
I love this pattern. I added my own twist to the last borders. Once I figure out how to share a picture I will.
Thanks for sharing the pattern.
Dedri Uys says
Ooh, nice! I look forward to seeing what you did :)
Veronica Wyatt says
This turned out beautifully! Thanks for the video tutorials- very helpful.
Dedri Uys says
I’m so pleased to hear that. Esther’s videos are fantastic.
sf says
Thanks so much to share this amazing work with us. So kind of you all!!!
I love Charlotte Square and Sunshine´s Baby Blanket.
All isPerfect: instructions, color´s yarns , photos, video, notes……
I will have my blanket too!!
Thannnnnnkssssss…. From Argentina. Silvana
Alejandra says
You are amazing, thank you soooo much for sharing your art with is freely, you are so kind.
This is the second of your designs that I made and I am in love with both.
Love
Dedri Uys says
Thank you Alejandra.
Stay safe!
Dedri
Katie says
This is THE BEST written pattern i have EVER had the pleasure to follow. It truly makes this beautiful art that we all love that much more fun! Thank you so much! I’m not even finished yet but i couldn’t do one more stitch without letting you know how pleased i am with this. I will be recommending this to all my crochet Facebook pages.
Dedri Uys says
Thank you very much Katie.
I do try my best to write in a beginner-friendly way (even though the patterns are advanced). Your feedback is very much appreciated x
Ginger M says
Just started part 3. I hope to be able to turn this into a full sized blanket for a September birthday present. Very excited to see how it turns out. Thank you!!!!