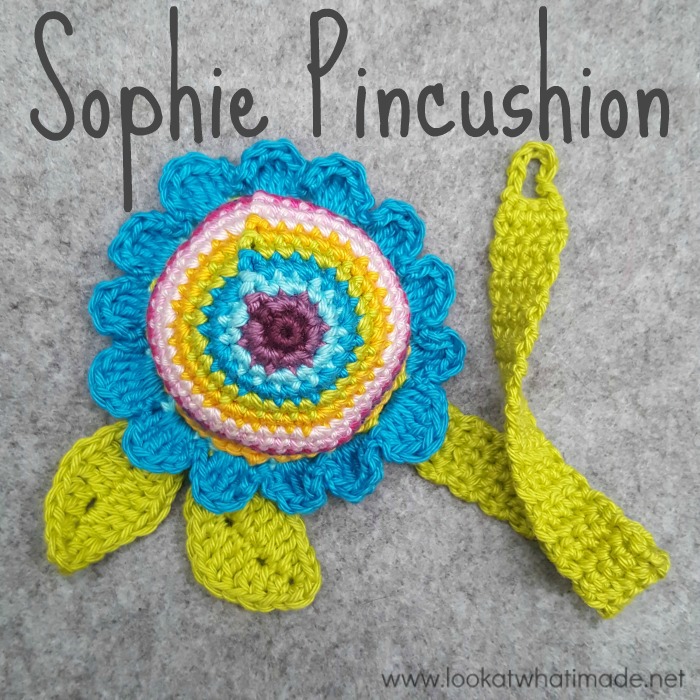
It’s always nice to have a scrap yarn pattern that is not only pretty but useful as well. With its vibrant colours and versatile nature, this Sophie pincushion ticks both boxes. Attach it to your wrist or use it as a scissor keep.
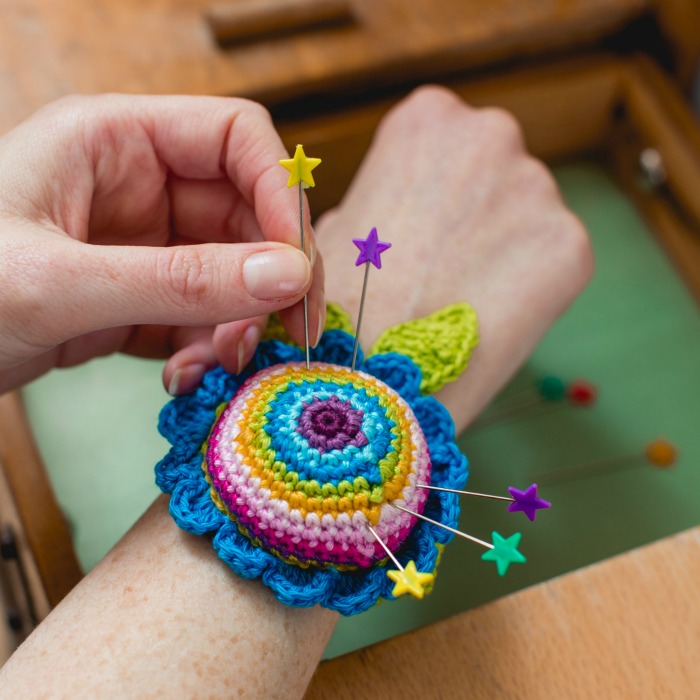
Photo Credit: Lucy Williams
I designed this little pincushion for Issue 98 of Inside Crochet back in January 2018. I used left-overs from my Sophie Stool project to make it. Not only is it handy, it also uses up small bits of yarn :) And I think it would make a great gift… maybe accompanied by the A Touch of Colour Clutch (also made with scraps from the same project)?
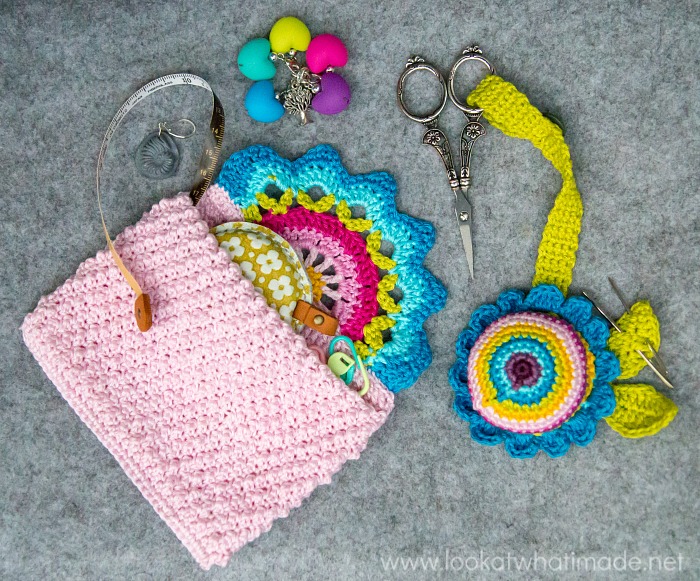
I’ve decided to include the column that accompanied the pattern. If you wish to skip straight to the pattern, just scroll right past ‘The Chatty Bit’.
The Chatty Bit
January 2018 Column for Inside Crochet
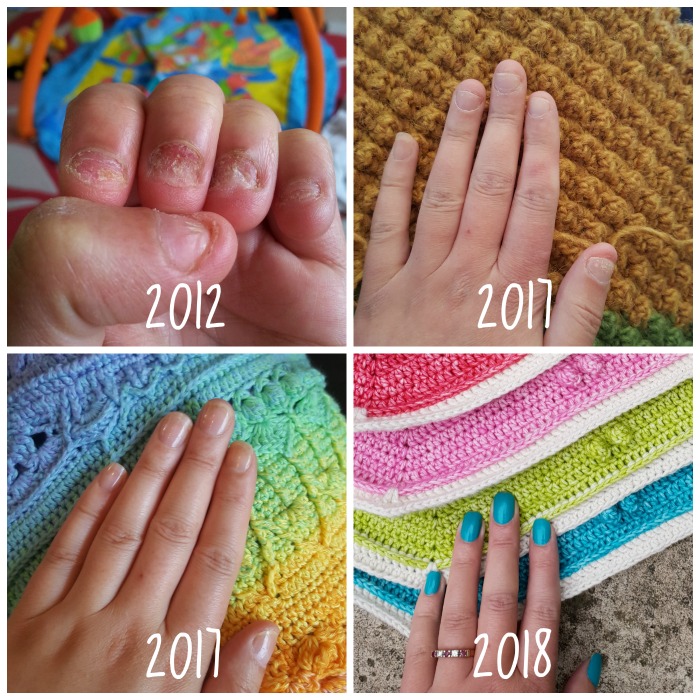
My new year’s resolutions have remained much the same throughout my entire life: stop biting your nails, stop putting yourself down, stop caring so much what other people think! For years, these three things were the first thing I resolved to do when I woke up in the morning and the last thing I regretted not being able to accomplish when I closed my eyes each night.
Over the last eight years, my resolutions have become much more positive: be more mindful, learn to say no so that you have the time and resources to say yes when it matters, try new things (like writing this column).
I would like to be able to say that this change started when I became a mother, but it actually started when I resolved to start blogging about my crafty endeavours. That first year, my blog featured wonky fondant cakes, scary (in hindsight) sewn dolls, favourite family recipes, and paper crafts.
It wasn’t until the next year, when I made my first crochet blanket after not having touched a hook for decades, that my attitude towards life started changing.
All of a sudden, I no longer had time to make wonky cakes and misshapen dolls. I found myself waking up early (and eagerly) to crochet before leaving for work, and falling asleep late with patterns and ideas dancing around in my head!
In this happy crochet bubble, there was no space for dwelling on how I had not yet managed to stop biting my nails (which I have now done, yay) and no time to put myself down. I was far too busy creating!
If you have ever visited my website, you will have seen this little blurb:
Crochet is more than just a craft. It is a lifesaving panacea, a necessary creative outlet, a calming tool and a rewarding passion.
If I look back now, I can trace every change in my outlook, mental well-being, confidence, and finances back to the moment when I picked up my crochet hook to make that blanket.
I do have less philosophical resolutions and would like to share the ones that relate to crochet: use up all your scrap yarn, crochet something colourful every day, be kind to someone who has been unkind to you, finish an unfinished project every month.
I think the majority of you will have ‘use up all your scrap yarn’ as a new year’s resolution and if you are anything like me, you will have loads of left-over kit-yarn! I decided to design a pattern that is not only pretty and useful but uses small amounts of various colours so that we can all start stash-busting together.
This Sophie pincushion was made using the left-over yarn from the my Sophie Stool.
As I read that piece again, I realised, for the first time, how self-centered my resolutions used to be – even the positive ones! And maybe the thing that changed was NOT that crochet had given my creative mind wings, but rather that it shifted my focus away from myself and directed it instead to encouraging and empowering other people through the medium of yarn and colour.
I spent this last weekend at Yarndale, working on the Scheepjes/Black Sheep Wools stall with Tatsiana (designer of the Scheepjes Rozeta CAL 2019 – which starts next week!)
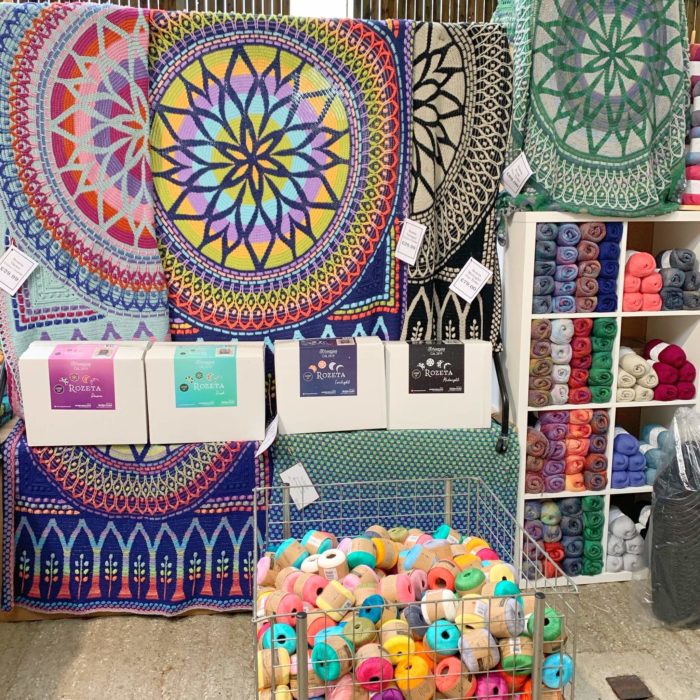
I also had the honour of being one of the people interviewed by Matt (from A Boy and Bunting).
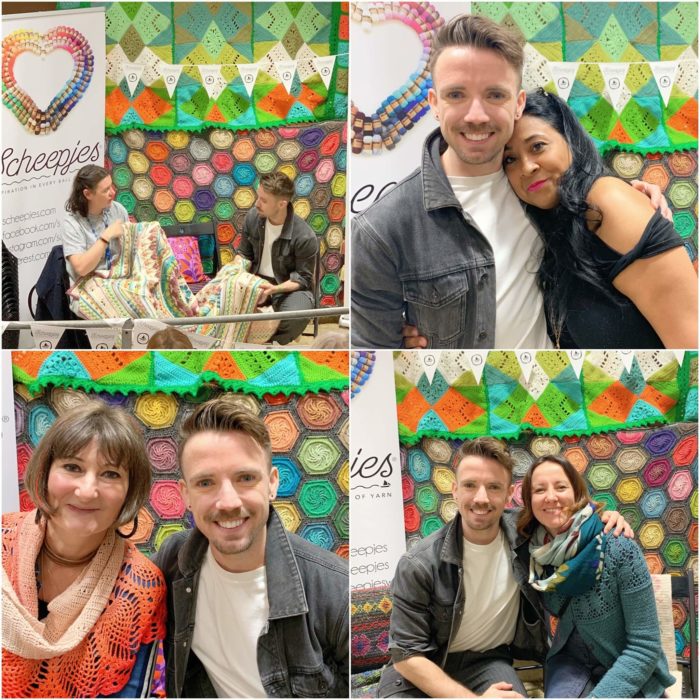
Top Left: Me; Top Right: Helda Panagary; Bottom Left: Sara Huntington; Bottom Right: Tatsiana Kupryianchyk.
It was crazy busy in the best possible way, and utterly AMAZING! Not because I was surrounded by so much yarn and so many pretty projects, but because it afforded an opportunity to hear people’s stories. I do not think there is a more heady drug than watching people’s faces light up when they share their creations and personal journey with you. These look-at-what-I-made moments are precious beyond words.
And so, here are my new resolutions:
- Be More Present
- Empower Others
Sophie Pincushion Pattern
©Dedri Uys 2018. All Rights Reserved.
First Published in Issue 98 of Inside Crochet Magazine.
Resources
- Add to Your Ravelry Queue
- UK Version: An abbreviated UK version of this pattern is available in Issue 98 of Inside Crochet HERE. The pattern below is the US version.
- Hashtag: If you share photos, please use #sophiepincushion so that we can find your projects and have a gleeful look.
- PDF: You can use the print-friendly button at the bottom of this post to save it to PDF.
Materials
I used left-overs from my Sophie Stool, but you can use any of the Scheepjes Catona Cutie Pies as the pattern requires less than 10g of each colour.
- Scheepjes Catona, 100 % Cotton, 10g/25m/27yds
- Yarn A – 394 x 1 ball (Dark Purple)
- Yarn B – 240 x 1 ball (Light Purple)
- Yarn C – 397 x 1 ball (Light Blue)
- Yarn D – 146 x 1 ball (Dark Blue)
- Yarn E – 245 x 1 ball (Green)
- Yarn F – 208 x 1 ball (Yellow)
- Yarn G – 238 x 1 ball (Light Pink)
- Yarn H – 222 x 1 ball (Medium Pink)
- Yarn I –114 x 1 ball (Dark Pink)
- 3mm hook*
- 15mm button
*I use Clover Amour Crochet hooks. You can buy them from Amazon.co.uk, Amazon.com, or Habbedash.
Gauge
Tension is not important, as long as you work as tight as you comfortably can.
Size
Flower: 8cm/3”
Strap: 17cm/6.6” (unfastened) – This can easily be made longer by adding more rows.
Abbreviations
US Terminology Used
- Ch – Chain
- Dc – Double crochet
- Dtr – Double treble
- Hdc – Half-double crochet
- Rem – Remains/remaining
- RS – Right side
- Sc – Single crochet
- Sl st – Slip stitch
- Sp/sps – Space/spaces
- St/sts – Stitch/stitches
- Tr – Treble crochet
Punctuation
- () – Used to indicate stitches made into the same st/sp.
- [] – Used to indicate repeats – Repeat instructions between square brackets the number of times specified.
Special Stitches
(FP) Front Post – Identify the post of the stitch you want to work around. Insert your hook from the front to the back and then from the back to the front around the post of the stitch so that the post lies in front of your hook. Complete your stitch as normal.
Standing Stitches are used to start the round when using a new colour. They are the same as regular stitches, except that they are made ‘in air’, without being attached to a previous stitch. I suggest always starting with a slip knot already on your hook. You can see my tutorial for the standing single crochet HERE.
Notes
Changing Colours: Change colours on the last yarn-over of the last st before the colour change.
Fastening Off: For a neat finish, consider using the Invisible Join when fastening off a specific colour.
Instructions
Top
If you do not like the visible step created by changing colours in the traditional way, please feel free to use standing stitches and the invisible join instead (links to both above).
With Yarn A, make a magic ring. Alternatively, ch 3 and join to the first ch with a sl st to form a ring.
Round 1: Ch 1 (doesn’t count as a st throughout), make 6 sc into the magic ring, join to the first sc with a sl st, change to Yarn B – 6 sc.
Round 2: Ch 1, 2 sc in st at base of ch-1, make 2 sc in each of the next 5 sts, join to the first sc with a sl st, change to yarn C – 12 dc.
Round 3: Ch 1, 2 sc in st at base of ch-1, sc in the next st, [2 sc in the next st, sc in the next st] 5 times, join to the first sc with a sl st, change to yarn D – 18 sc.
Round 4: Ch 1, 2 sc in st at base of ch-1, sc in next 2 sts, [2 sc in the next st, sc in the next 2 sts] 5 times, join to the first sc with a sl st, change to yarn E – 24 sc.
Round 5: Ch 1, 2 sc in st at base of ch-1, sc in next 3 sts, [2 sc in the next st, sc in the next 3 sts] 5 times, join to the first sc with a sl st, change to yarn F – 30 sc.
Round 6: Ch 1, 2 sc in st at base of ch-1, sc in next 4 sts, [2 sc in the next st, sc in the next 4 sts] 5 times, join to the first sc with a sl st, change to yarn G – 36 sc.
Round 7: Ch 1, 2 sc in st at base of ch-1, sc in next 5 sts, [2 sc in the next st, sc in the next 5 sts] 5 times, join to the first sc with a sl st, change to yarn H – 42 sc.
Round 8: Ch 1, sc in each st around, join to the first sc with a sl st, change to yarn I – 42 sc.
Round 9: As Round 8, change to yarn B – 42 sc.
Round 10: As Round 8, fasten off and work away ends. OR…
Just use your ends as part of the stuffing, like I did :)
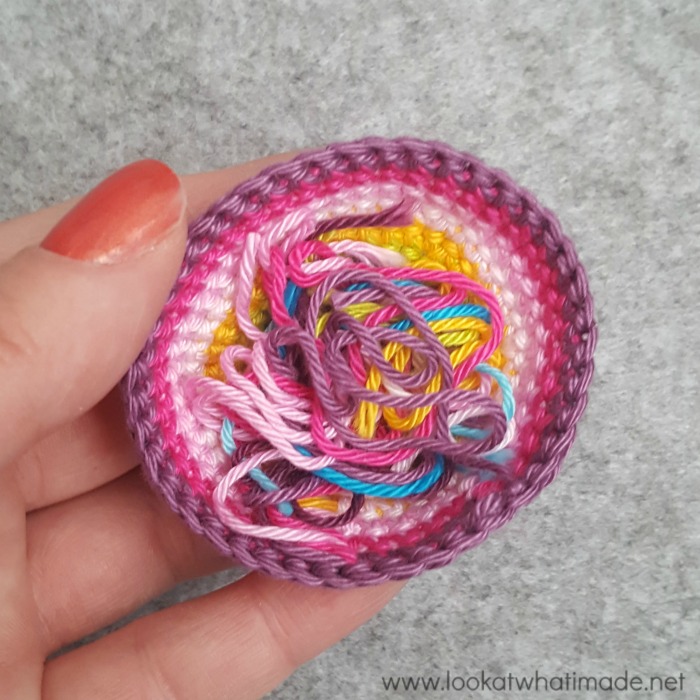
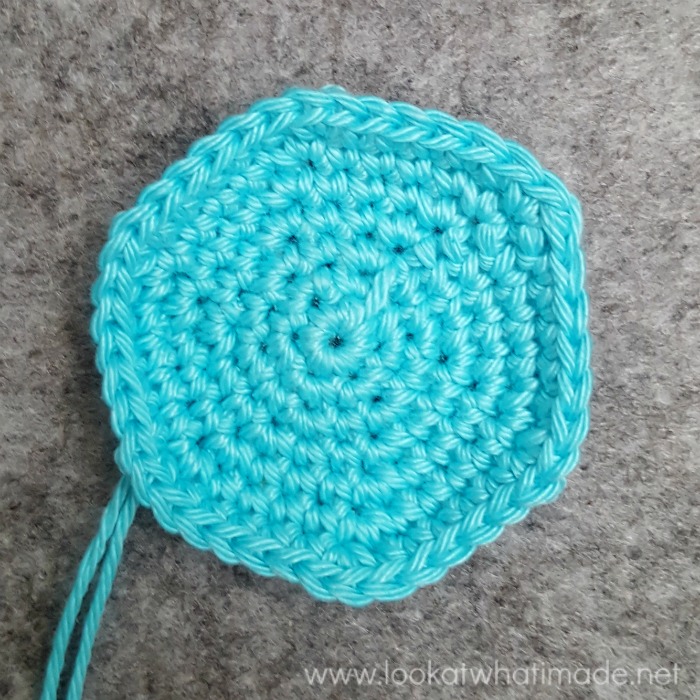
Here is what the top will look like:
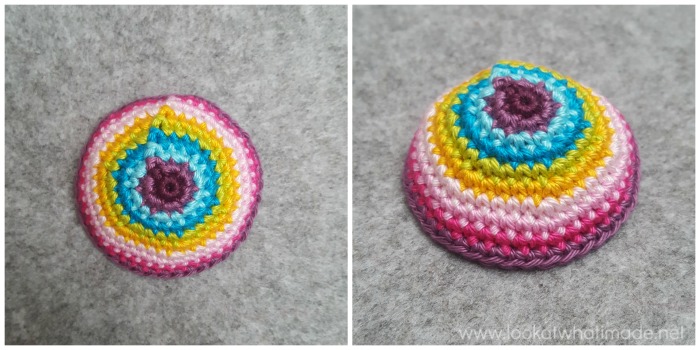
Bottom
With Yarn C, make a magic ring.
Rounds 1 – 7: As Rounds 1 – 7 of Top, using yarn C for all rounds.
Flower
Turn the top of the pincushion over and fill with scraps of yarn or stuffing. Place the bottom of the pincushion on top of it with RS facing you.
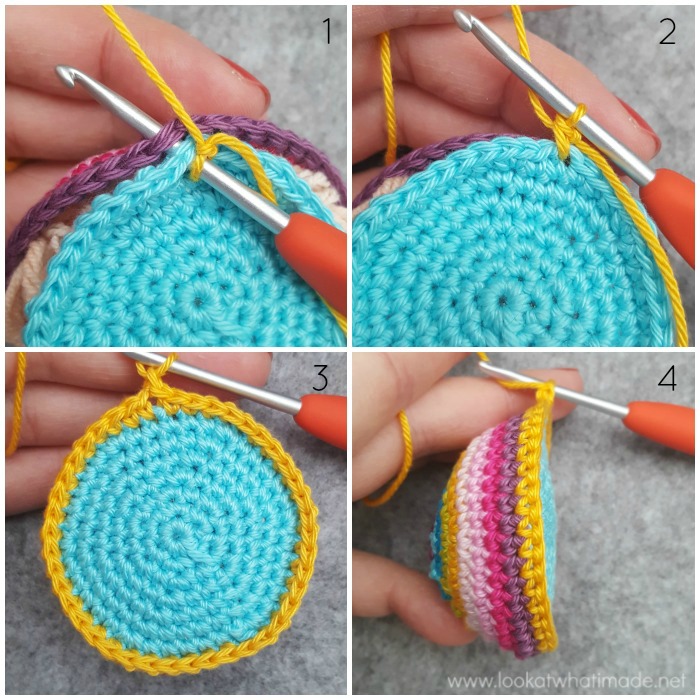
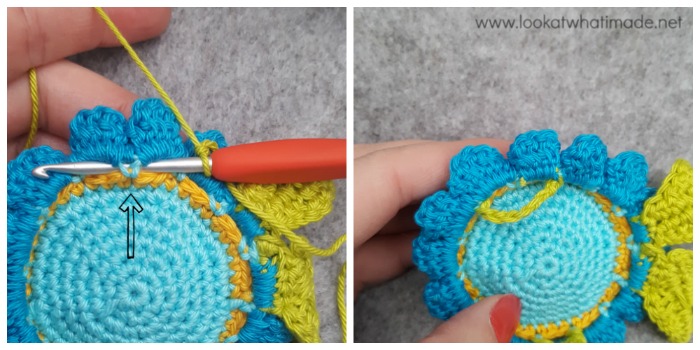
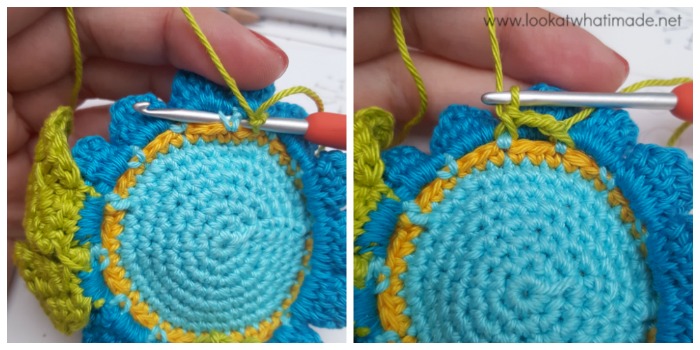
Round 1: With a sl knot already on your hook and RS of Bottom facing you, join Yarn F by making a standing sc through both layers of any st around {Photos 1 and 2}, sc in each rem st, working through both layers and stuffing as needed, join to the first sc with a sl st {Photos 3 and 4}, change to yarn C, TURN – 42 sc.
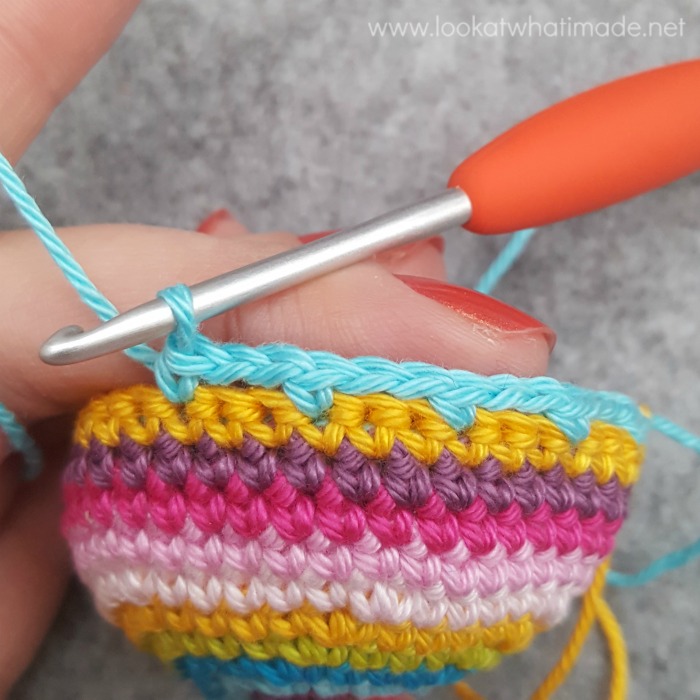
Round 2: With RS of Top facing you, ch 1, sc in st at base of ch-1, [ch 2, skip the next 2 sts, sc in the next st] until 2 sts rem, ch 2, skip the last 2 sts, join to the first sc with a sl st, fasten off – 14 sc and 14 ch-2 sps.
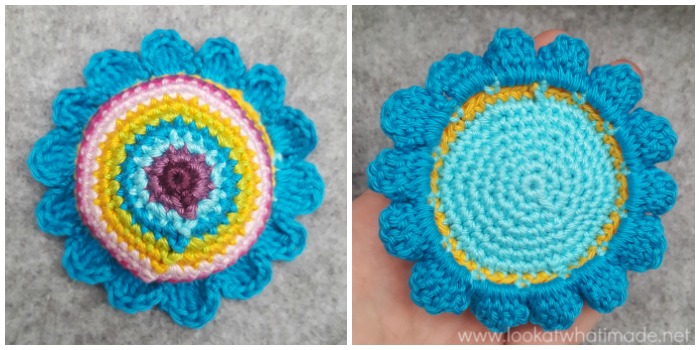
Round 3: With RS of Top facing you, join Yarn D by making a sl st in any sc around, ch 2, [(tr, 3 dtr, tr) in the next ch-2 sp, ch 2, sl st in the next sc, ch 2] until one ch-2 sp rem, (tr, 3 dtr, tr) in the next ch-2 sp, ch 2, join to the first sl st with a sl st, fasten off and work away ends – 14 Petals, each containing 2 ch-2 sps, 2 tr, and 3 dtr.
Leaf
(Make 2)
With Yarn E, ch 9, leaving a 10cm/4” yarn end.
Round 1: Working into one loop only of each ch st, sc in second ch from hook, hdc in the next st, 2 dc in the next st, tr in the next 2 sts, 2 dc in the next st, hdc in the next st, 4 sc in the last st, continue working into remaining loops of ch sts and OVER the initial yarn end, hdc in the next st, 2 dc in the next st, tr in the next 2 sts, 2 dc in the next st, hdc in the next st, sc in the last st, fasten off, do not work away ends. – 6 sc, 4 hdc, 8 dc, and 4 tr.
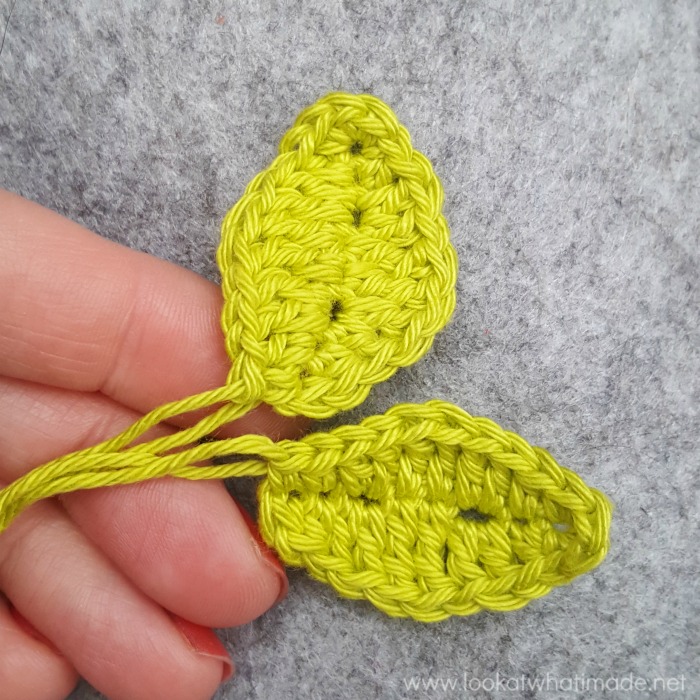
Attaching the Leaves to the Flower
When you have made both leaves, knot all four yarn ends together, close to the base of the leaves.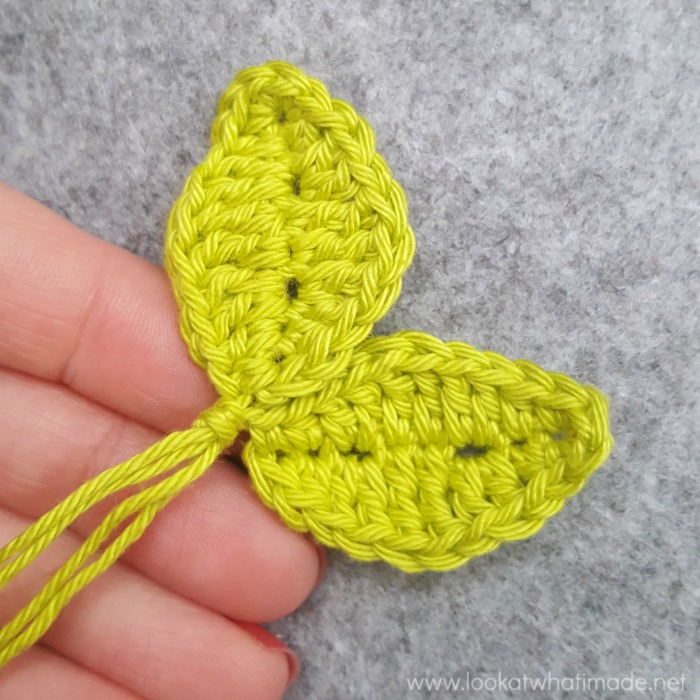
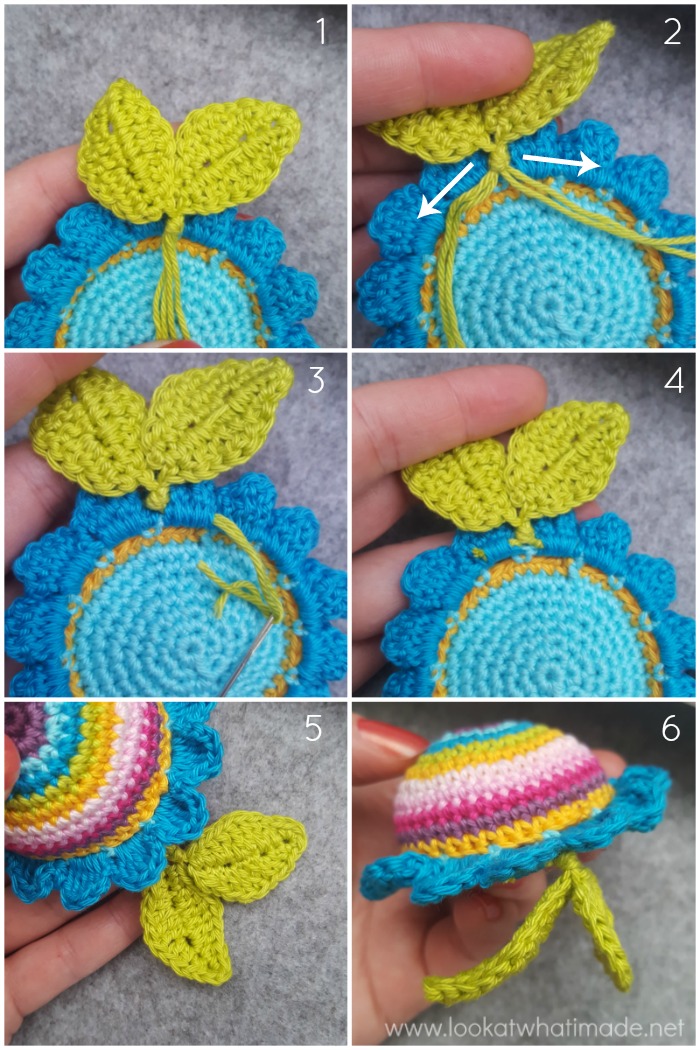
To attach the leaves, turn the Flower WS facing. Turn the leaves WS facing and place them on top of the Flower, placing the knot over the sl st between any two petals of the Flower {Photo 1}.
Split the yarn ends from the leaves into two groups of two {Photo 2}. Using a yarn needle, work the one pair of ends away into the stitches of the petal to the right. Work the other pair of ends away into the stitches of the petal to the left {Photos 3 and 4}. Fasten off and work away your ends. At this point, the leaves will be a bit ‘floppy’ {Photos 5 and 6}. We will need to sew them to the flower petals to secure them.
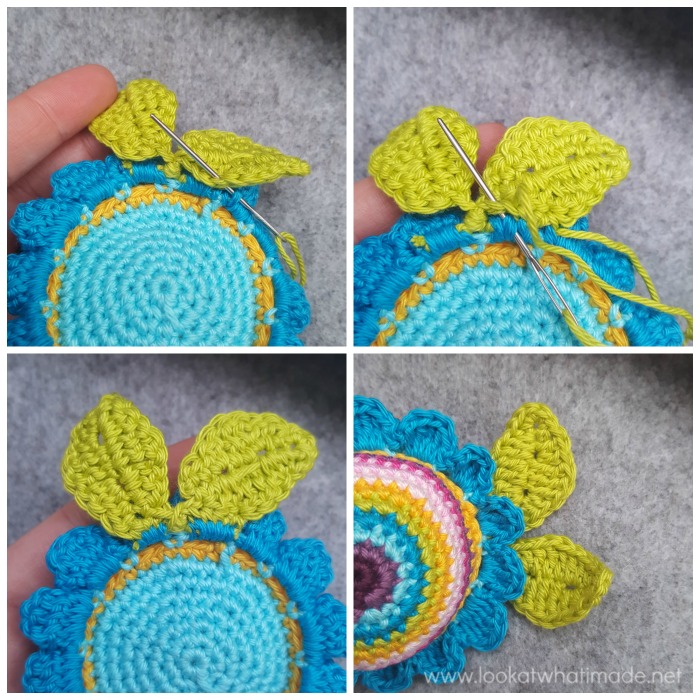
Using a 20cm/8” length of Yarn E, secure the leaves to the Flower by sewing through the leaves and the back of the same petals, as demonstrated in the photos below.
Loop
Round 1: With WS of Flower facing you and a Yarn E sl knot already on your hook, skip two ch-2 sps from Flower Round 2 to the left of the left-most leaf (to the right of the right-most leaf, if you are left-handed) and join your yarn by making a FPsc in the next sc of Flower Round 2, ch 5, skip the next 2 ch-2 sps and make a FPsc in the next sc, fasten off and work away your ends – 2 sc and 1 ch-5 sp.
Strap
Row 1: With WS of Flower facing you and a Yarn E sl knot already on your hook, skip 5 ch-2 sps after the Loop and join your yarn by making a FPsc in the next sc of Flower Round 2, ch 2, skip the next ch-2 sp and make a FPsc in the next sc, TURN – 2 sc and 1 ch-2 sp.
Row 2: Ch 1, sc in st at base of ch-1, 2 sc in the ch-2 sp, sc in the next st, TURN – 4 sc.
Row 3: Ch 1, sc in each st, TURN – 4 sc.
Rows 4 – 43: As Row 3 – 4 sc.
Note: If you need to check if the strap is long enough to fit comfortably around your wrist, do so now. If you feel that it needs a bit more length, please repeat Row 3 a few more times before moving on to the instructions for Row 44.
Row 44: Ch 8, skip the next 3 sts, sl st in the last st, fasten off and work away your ends – 2 sc and 1 ch-8 sp.
Adding the Button
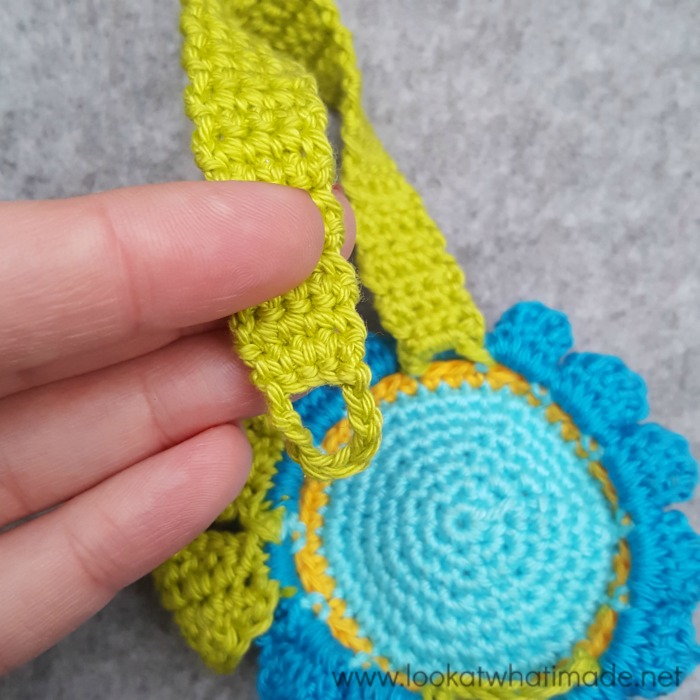
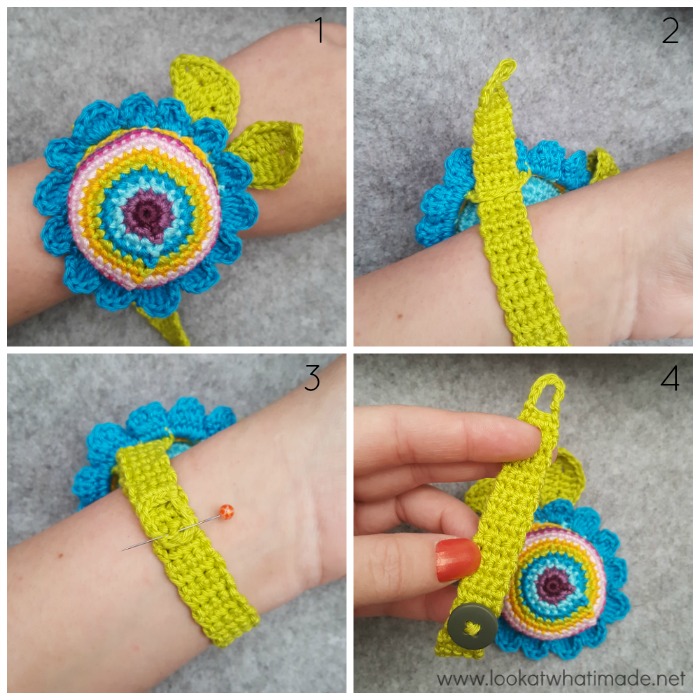
Put the pin cushion on your wrist and pull the strap through the loop {Photos 1 and 2}. Mark the spot on the strap where the button needs to go in order for it to fit securely around your wrist {Photo 3} and sew the button onto the strap {Photo 4}.
Usage Options
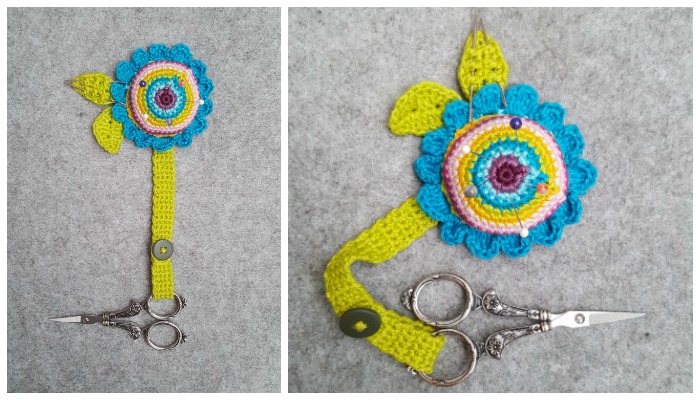
You can attach a pair of scissors to your pincushion, threading your needles through one of the leaves. This is how I use my little pincushion most of the time.
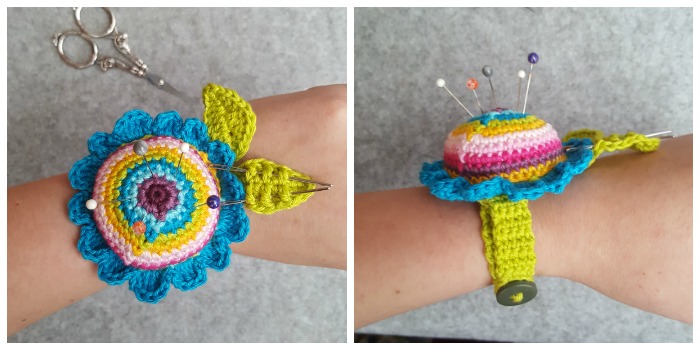
Or you can use the strap to attach the pincushion to your wrist when blocking projects.
I hope you enjoy this joyful little project! If you prefer something a little bit more dainty, you might enjoy making Aunty Mary’s Thing instead.
More Inside Crochet Projects

This blog post contains affiliate links. I only link to products I personally use or would use. All opinions are my own.


Eide Xavier says
Adorei sua história ! As unhas pintadas foram uma superação.
Vou fazer o alfineteiro de punho.
Maha Meer says
Thank you for your kindness.you are awesome,Ihad made sophie universe with you,and translate the sophie Pincushion to Arabic to make a work SHOP to my friends in my club(creating club)in Jeddah,Saudua Arabia.
Leslie Mansfield says
I love this thank you
Synthia Richardson says
So kind of you to share some of your most precious moments with us lovers if the YARN,. Inspiring and encouraging, the great thing about your experience is that you discovered a part of yourself that needed some TLC , and thats one of the qualities of spending personal time crafting gives you. Congrats Sofia. SGR, HOUSTON.
Dedri Uys says
I often have AHA moments when crafting :) You are so right.
Heather Murray says
Your story was very inspirational. Thanks for sharing! For me, crochet provides a productive hobby as I tend to munch too much without it, especially during the long cold winter months.
Now, I make little inexpensive gifts for people and keep my hands busy. Thanks again for sharing…
Dedri Uys says
Well done for recognising what you need and doing it. Now that you mention it, I snack MUCH LESS when I am crocheting. I never even noticed :)
eimearg says
thank you for sharing your lovely pattern and story – I too think crochet is amazing and when I am bothered or stressed I will always get my hook to make something as crochet seems to help unravel my thinking as I only ever have to concentrate on one stitch at a time.
Dedri Uys says
That is exactly how I feel! One stitch at a time. It’s a kind of meditation :)
D