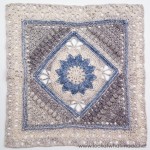
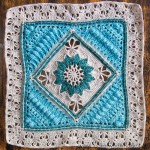
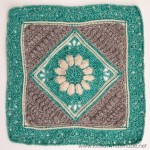
Welcome to Part 3 of Charlotte, my new Large Crochet Square. At the end of this part, you will have a lovely BIG square to use however your heart desires. Yes, I will be growing this square later on, and I am already working on it, but for now, this is all she wrote!
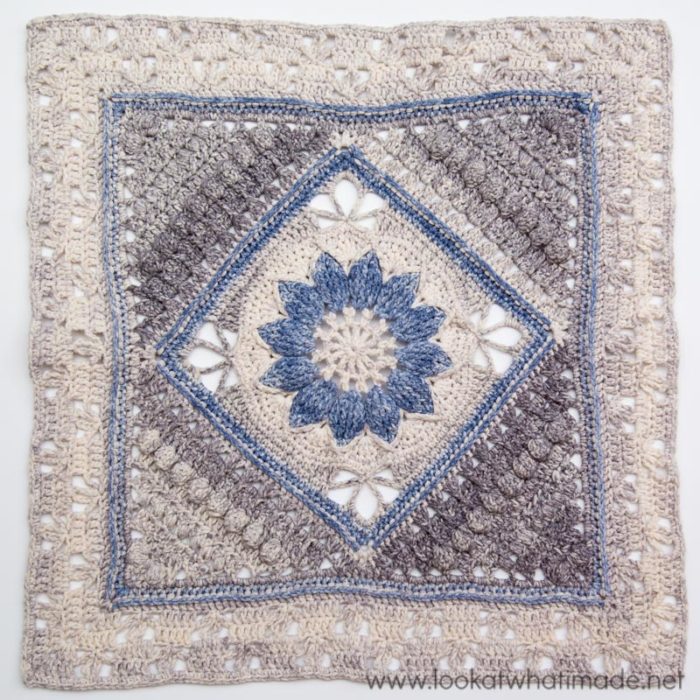
Today we will be adding a border to the small central square from Part 1 and the Triangles from Part 2.
For the photo tutorial below, I have used Scheepjes Sunkissed in shades 04, 06, and 16. Please note that the photos are only to show you how to make the rows and do not reflect the colours I have used in the written pattern.
Update 2021: This post has been updated as part of the Charlotte’s Universe CAL 2021.
Charlotte Large Crochet Square Part 3: Banksia Border
Resources
- You can find links to the right and left-handed video tutorials (US) for Part 2 HERE on It’s All in a Nutshell.
- If you need help with any of the special stitches or techniques used in this pattern, please see Special Stitches and Techniques.
Original Translations
Updated Translations With Charts
- German Translation by Sabi Bulla and Silke Schippa-Witte
- Hebrew Translation by Michal Ben-Hur, Iris Fait, Tami Sultan Nudelman, Tali Shchori, and Sarit Grinberg
Abbreviations
US Terminology (US/UK Conversion HERE)
- Beg – Beginning
- BP – Back post (insert your hook from back to front around the post of the indicated stitch and complete the stitch as normal)
- Ch – Chain
- Dc – Double crochet
- Hdc – Half-double crochet
- Sl st – Slip stitch
- Sp/sps – Space/spaces
- St/sts – Stitch/stitches
- () and * – Repeat instructions between parentheses and/or asterisks the amount of times specified
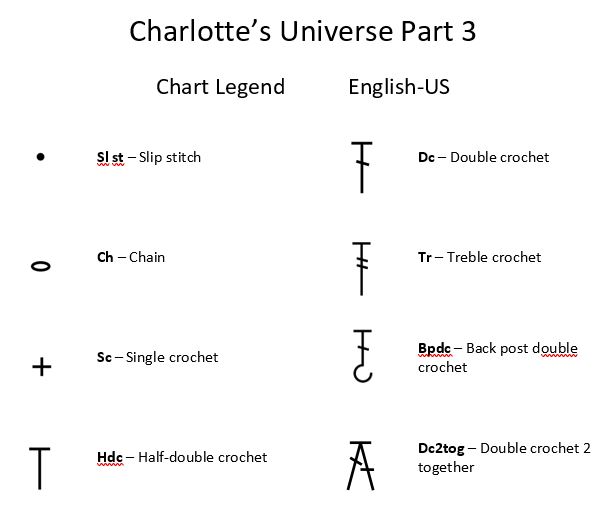
Charts
Credit: Masako Kawahara from Crochet_Hmmm
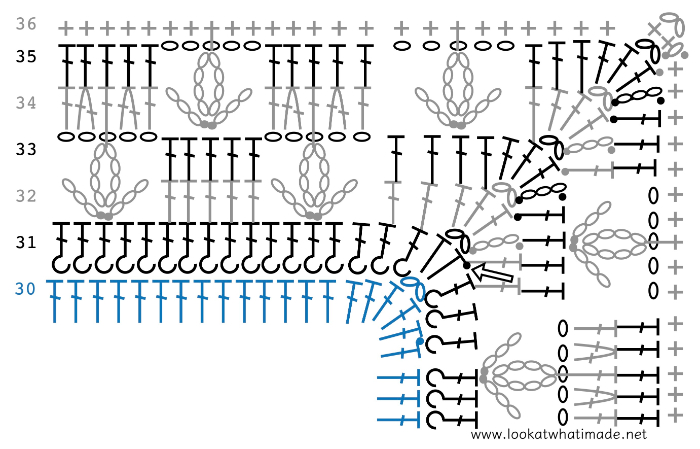
Please follow the charts in a counter-clockwise direction, regardless of whether you are right or left-handed.
Instructions
© Dedri Uys 2016. All Rights Reserved.
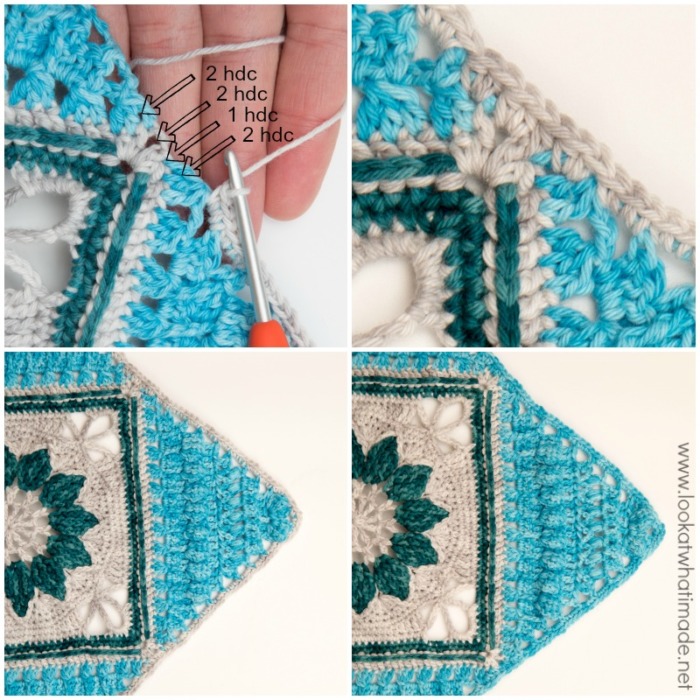
Round 29 (Colour C)
With RS facing, join your yarn by making a standing sc in any ch-2 corner sp. (Ch 2, sc) in the same sp. This is your first corner made.
*Sc in the first 3 sts. Sc between the 5-tr Bobble and the top of Row 27 of the Triangle. Make 3 sc in the side of each of the next 8 rows. Make 2 hdc in the side of the Cluster. Hdc in the st that contains the last leg of the Cluster. Make 2 hdc in the next ch-2 sp from Round 28.
Make 2 hdc in the side of the next Cluster. Make 3 sc in the side of each of the next 8 rows. Skip the sl st. Sc in the last 3 sts. (Sc, ch 2, sc) in the next ch-2 corner sp.*
Repeat from * to * 3 more times, omitting the last corner on the last repeat. Join to the first sc with a sl st. Fasten off and work away your ends.
Stitch Count Per Side: 64 sts {57 sc and 7 hdc – not including ch-2 corner sps}

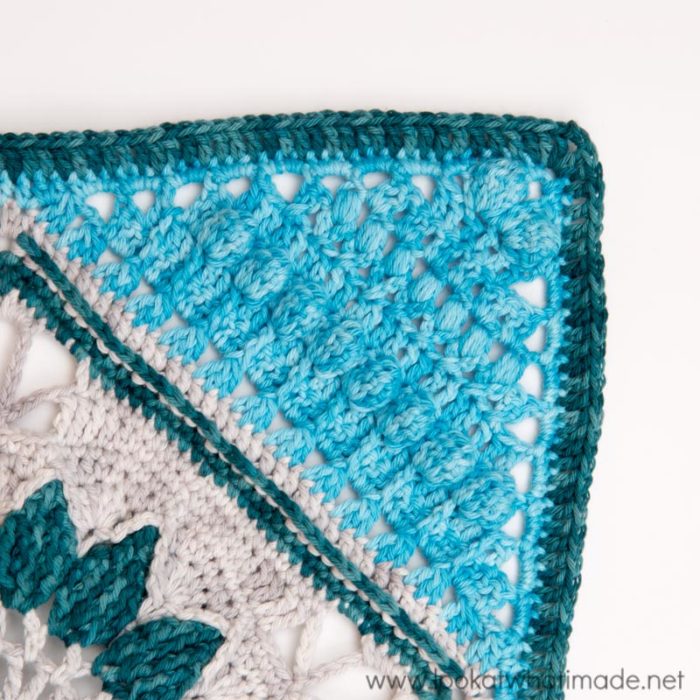
Round 30 (Colour B)
Join your yarn by making a standing dc in any ch-2 corner sp. (Dc, ch 2, 2 dc) in the same sp. This is your first corner made.
*Dc in each of the 64 sts across. (2 dc, ch 2, 2 dc) in the next ch-2 corner sp.*
Repeat from * to * 3 more times, omitting the last corner on the last repeat. Join to the first dc with a sl st. Fasten off and work away your ends.
Stitch Count Per Side: 68 dc per side – not including ch-2 corner sps
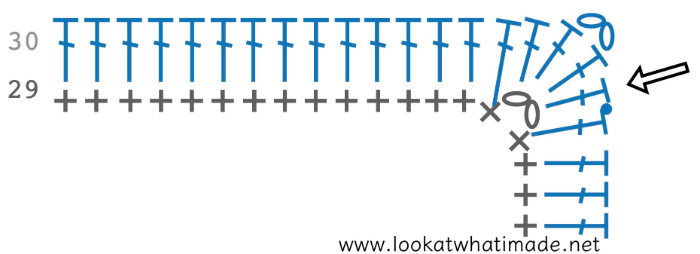
You can find the chart for the next 6 rounds at the end of Round 36.
Round 31 (Colour A)
Join your yarn by making a standing hdc in any ch-2 corner sp. (Ch 2, hdc) in the same sp. This is your first corner made.
*BPdc in each of the 68 sts across. (Hdc, ch 2, hdc) in the next ch-2 corner sp.*
Repeat from * to * 3 more times, omitting the last corner on the last repeat. Join to the first hdc with a sl st.
Stitch Count Per Side: 68 BPdc and 2 hdc per side – not including ch-2 corner sps
Round 32 (Colour A)
Sl st into the next ch-2 corner sp. (Ch 3, dc, ch 2, 2 dc) in the same ch-2 corner sp. This is your first corner made.
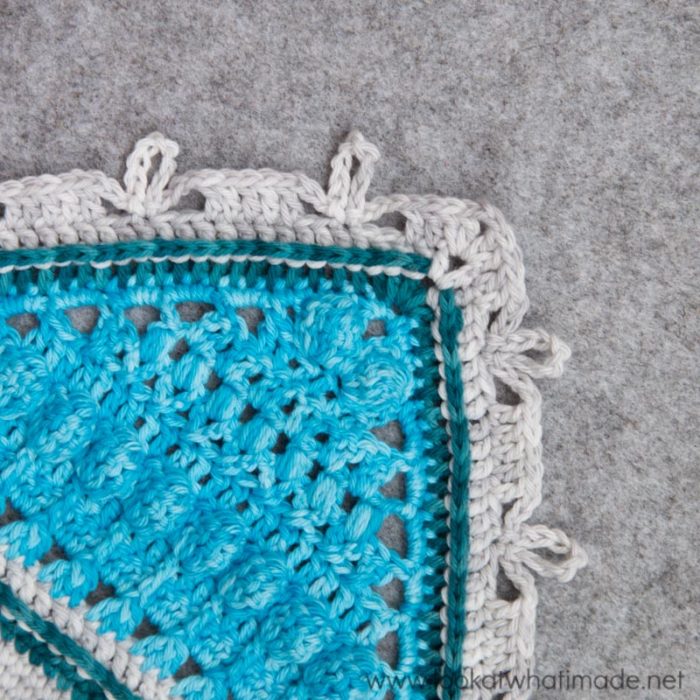
*Skip the first (hidden) st. Dc in the next 2 sts. (Ch 3, skip the next 2 sts and sl st in the next st. Ch 8 and sl st into the same st so that you form a ch-8 loop. Ch 3 and skip the next 2 sts. Dc in the next 5 sts) 6 times. Each of these repeats should fall over 10 sts.
Ch 3, skip the next 2 sts and sl st in the next st. Ch 8 and sl st into the same st so that you form a ch-8 loop. Ch 3 and skip the next 2 sts. Dc in the last 2 sts. (2 dc, ch 2, 2 dc) in the next ch-2 corner sp.*
Repeat from * to * 3 more times, omitting the last corner on the last repeat. Join to the top of the beg ch-3 with a sl st.
Stitch Count Per Side: 38 dc, 7 ch-8 sps, and 14 ch-3 sps – not including ch-2 corner sps
Round 33 (Colour A)
Sl st into the next st and into the next ch-2 corner sp. (Ch 3, dc, ch 2, 2 dc) in the same ch-2 corner sp. This is your first corner made.
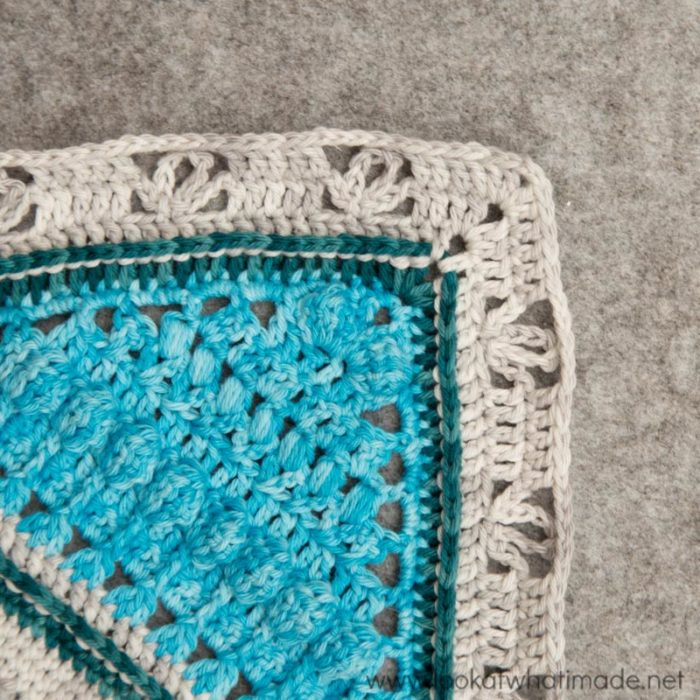
*Dc in the first 4 sts. (Ch 5, skip the two ch-3 sps and the ch-8 loop, and dc in the next 5 dc) 6 times. Ch 5, skip the two ch-3 sps and the ch-8 loop, and dc in the last 4 dc. (2 dc, ch 2, 2 dc) in the next ch-2 corner sp.*
Repeat from * to * 3 more times, omitting the last corner on the last repeat. Join to the top of the beg ch-3 with a sl st.
Stitch Count Per Side: 42 dc and 7 ch-5 sps – not including ch-2 corner sps
Round 34 (Colour A)
Sl st into the next st and into the next ch-2 corner sp. (Ch 3, dc, ch 2, 2 dc) in the same ch-2 corner sp. This is your first corner made.
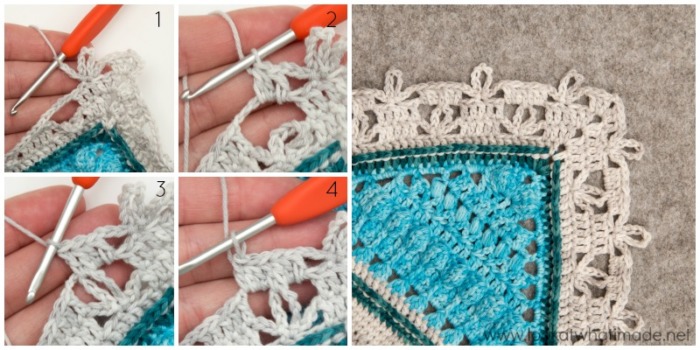
*Dc in the first st. (Ch 3, skip the next 2 sts and sl st in the next st. Ch 8 and sl st into the same st so that you form a ch-8 loop. Ch 3 and skip the next 2 sts {Photo 1}. Dc in the next ch-5 sp. Dc2tog in the same ch-5 sp {Photo 2}. Catch the ch-8 loop from Round 32 by making a dc into the ch-8 loop and the ch-5 sp {Photo 3}. Dc2tog in the same ch-5 sp. Dc in the same ch-5 sp {Photo 4}) 7 times.
Ch 3, skip the next 2 sts and sl st in the next st. Ch 8 and sl st into the same st so that you form a ch-8 loop. Ch 3 and skip the next 2 sts. Dc in the last st. (2 dc, ch 2, 2 dc) in the next ch-2 corner sp.*
Repeat from * to * 3 more times, omitting the last corner on the last repeat. Join to the top of the beg ch-3 with a sl st.
Stitch Count Per Side: 41 dc, 8 ch-8 sps, and 16 ch-3 – not including ch-2 corner sps
Round 35 (Colour A)
Sl st into the next st and into the next ch-2 corner sp. (Ch 3, dc, ch 2, 2 dc) in the same ch-2 corner sp. This is your first corner made.
*Dc in the first 3 sts. (Ch 5, skip the two ch-3 sps and the ch-8 loop, and dc in the next 5 dc) 7 times. Ch 5, skip the two ch-3 sps and the ch-8 loop, and dc in the next 3 dc. (2 dc, ch 2, 2 dc) in the next ch-2 corner sp.*
Repeat from * to * 3 more times, omitting the last corner on the last repeat. Join to the top of the beg ch-3 with a sl st.
Stitch Count Per Side: 45 dc and 8 ch-5 sps – not including ch-2 corner sps
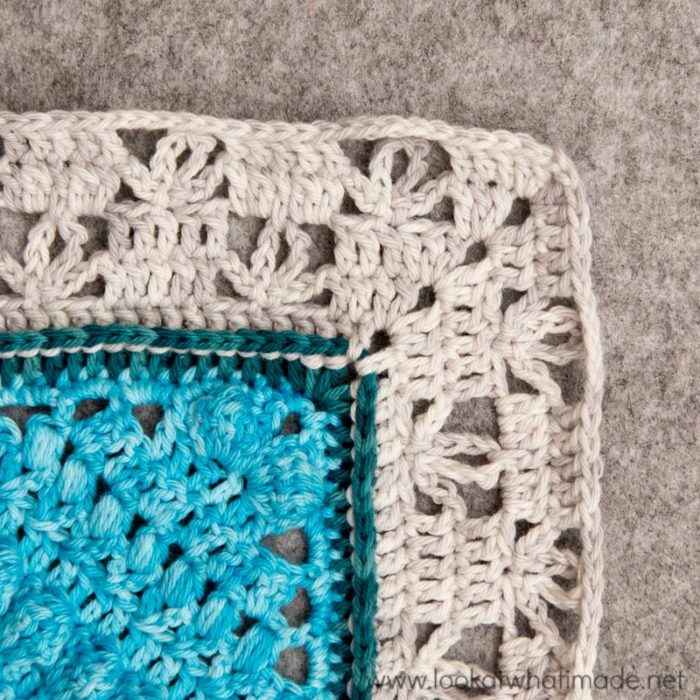
Round 36 (Colour A)
Sl st into the next st and into the next ch-2 corner sp. (Ch 1, sc, ch 2, sc) into the same ch-2 corner sp. This is your first corner made.
*Skip the first (hidden) st. Sc in the next 4 sts. (Make 2 sc in the next ch-5 sp. Catch the ch-8 loop from Round 34 by making a sc into the ch-8 loop and the ch-5 sp. Make 2 sc in the same ch-5 sp. Sc in the next 5 dc) 7 times.
Make 2 sc in the last ch-5 sp. Catch the ch-8 loop from Round 34 by making a sc into the ch-8 loop and the ch-5 sp. Make 2 sc in the same ch-5 sp. Sc in the last 5 sts. (Sc, ch 2, sc) in the next ch-2 corner sp.*
Repeat from * to * 3 more times, omitting the last corner on the last repeat. Join to the top of the first sc with a sl st. Fasten off and work away your ends.
Stitch Count Per Side: 86 sc – not including ch-2 corner sps
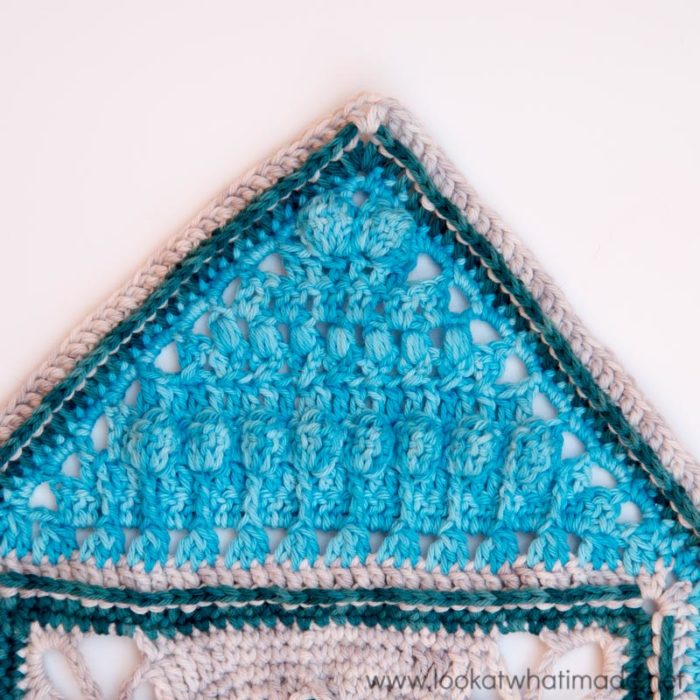
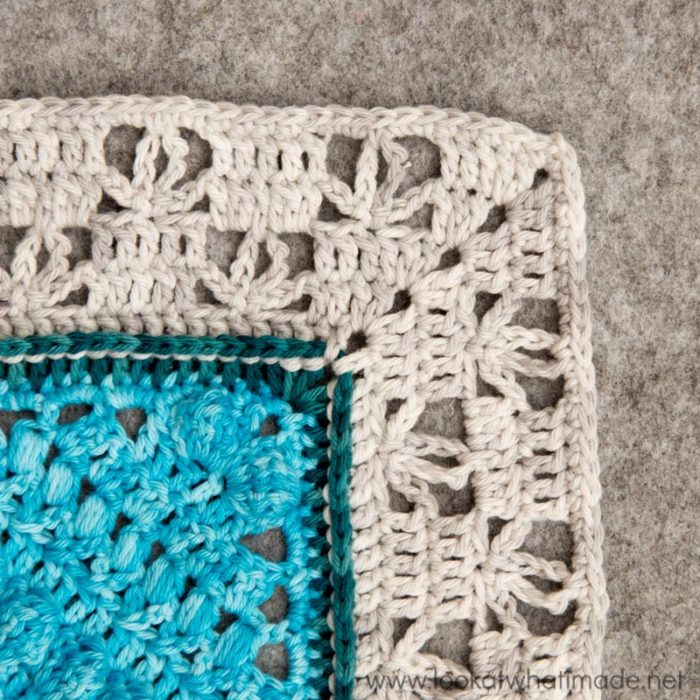
Remember to check your gauge at the end of this round.
And that is all for now! I hope you enjoy making your Large Charlotte Squares. I would love it if you would share pictures of your completed squares with me. You can use #simplycharlotte on any of the social media platforms listed below.
- Vintage Charlotte
- Scheepjes Sunkissed
- Scheepjes Stonewashed
Update 2021: If you would like to continue growing your square, you can now do so by following the Charlotte’s Universe CAL HERE.
Thank you so much for your continued encouragement and enthusiasm. It does me the world of good!

This blog post contains affiliate links. I only link to products I personally use or would use. All opinions are my own.


Jenn says
This is the best pattern I have ever used. It is so clearly written and every step had pictures. Thank you. My square came out beautifully.
Dedri Uys says
I am so pleased to hear that! Thank you :)
Rukhsana Faiz says
Hi dedri
It was a really wonderful experience to crochet this sequare under your supervision, instructions were so clear and in easy language, I followed all and have a perfect sequare with perfect measurement. Thank you very much
I am looking for its edging, do you have any video or instructions for edging.
Please let me know if you have.
Thanks a lot
Dedri Uys says
Hi Rukhsana. I’m glad you like the square. It is a stand-alone square, so there are no further borders JUST for the square (only for a blanket made using multiple squares). You can always try adding Around the Bases or The Sunshine Owl CAL if you want to grow it.
Heli says
Hi, thank you for the pattern! I’ve crocheted several square already. The only thing I do in a different way is that I do not cut the yarn after each row in the middle square. You can continue crocheting alternately in color a and b.
Thank you very much!
Dedri Uys says
Hi Heli. You can indeed, and I do, but I didn’t want to complicate the pattern instructions more for beginners. Pros like you will hopefully figure it out themselves :) Have a lovely day.
Maureen says
I have used this exquisite pattern 3 times to make blankets and will no doubt do it again! I just wanted to thank you for your supreme generosity in sharing it and also the clarity of the tutorials for when I needed help.You are a star.
Thank you :)
Jenny says
Charlotte is indeed a lovely pattern! We are all lucky to have Dedri to design these beauties for us!
Jenny :)
Julie ann says
Hi Dedri I am loving this pattern and up till now my square has been lying perfect, I have now done rd 30 with the dc and my stitch count is spot on, but it wants to wave all around, I normally have no problem with this, so am I doing something wrong? please help :) I am using yarn I use for most of my projects which is DK by style craft and a 4 mm hook, I really want to complete this blanket thank you so much Julieann
Dedri Uys says
Hi Julie Ann, from what I recall, that round is slightly more wavy than the previous ones, but that fixes itself in the next few rounds. It shouldn’t be VERY wavy. Can you use the contact me tab to send me an email? Once I receive the email and reply, you’ll be able to send me a photo so that I can better assist you.
Laurel says
I have never joined squares before. What is the best join for this pattern. Would I use sc or dc? I used scheepjes stonewashed yarn.
Dedri Uys says
Hi Laurel. If you have a look at the Charlotte’s Dream blanket pattern, you will see how Jenny and I chose to extend and join the squares to each other. I hope that helps.
Diann Hayes says
Well. I have finished 9 squares! I used yarn I had around the home – Worsted weight (4), so my squares are huge (25″). Love, love, love this pattern. Because my squares are so large, I made only 9, and this afghan will be big enough to cover our queen-size bed! Will send picture later. However, and just to make a note: One of the persons who left a previous message (Adam Taylor, 2017) referenced the end directions for Row 36, which includes fastening off yarn. Row 37 begins with “slip st into the corner”, suggesting that Row 36 should not instruct to “fasten off yarn”. He is right. Rows 37 and 38 are not included in the pattern for Part 3, and yet are the ending and joining rows for all the squares. Rows 37 & 38 are found on a completely different page. I stumbled across this page and am so glad I found it. I am now going back over my squares to add these last two rows.
Dedri Uys says
Hi Diann. That sounds ginormous! The large Charlotte square was/is a stand-alone pattern. We created Charlotte’s Dream (the blanket made out of 12 Charlotte squares) later and needed a way to finish them off and join them neatly for that specific colourway. Rounds 37 and 38 are not part of the original Charlotte square pattern. They belong to the Charlotte’s Dream pattern, so the instructions for them have been included in the instructions for that specific blanket.
There is a note in the Charlotte’s Dream pattern that tells you NOT to fasten off at the end of Round 36 of Charlotte (when you are making Charlotte’s Dream only). If you are only making the large squares as published here, you would fasten off at the end of Round 36 and stop there.
I hope that clarifies it for you.
Have a lovely day,
Dedri
May says
Where can I find the pattern for rows 37 & 38?
Dedri Uys says
Rounds 37 and 38 are additional rounds, which form part of the Pattern for the Charlotte’s Dream Afghan HERE.
Riekie says
Wow Deidre ek het nie gedink jy kan weer n meesterstuk soos Sophies Universe ontwerp nie, maar ek is MAL OOR Charlotte. Kan nie ophou hekel nie. Baie dankie…jy is dierbaar.
Dedri Uys says
Hello Riekie. Dankie :) Charlotte groei nog so stadig maar seker. Ek wens ek het meer tyd gehad om haar in vrede en met genot the groei. God het my met drie real-life seuns geseën, en met 2 kombers-dogters. Laat my asb weet hoe jy vorder.
Lekker aand,
Dedri
DIANE KLEEMOLA says
Wow what a beautiful blanket this becomes when done. So very easy and economical. I finished this in 3 days. I am going to make 9 squares and make myself an afghan with this square., out of many colors. I love this square pattern. The video tutorials are fantastic., you are such a great inspiration and instructor. I will cherish this design for years to come. You have given me a project that I am going to give to my grandchildren.
Dedri Uys says
Thank you so much, Diane. I am so pleased that you like it!
Valerie says
I’m having trouble on round 32. After the “repeat 6 times”… the next paragraph does not look right, nor kinda follow the pattern… I’m confused. So far I have 6 ch-8 loops and I have 7 stitches left til I get to the corner ch-2 space. All row counts have been right so far.
Dedri Uys says
Hi Valerie. The first few instructions in the next paragraph are the same as the first few instructions of the ‘repeat’. It is correct that you should only have 7 stitches left after you have repeated 6 times. Could you try following those instructions and seeing what you end up with? I am confident that it will work out correctly.
Please let me know how you get on :)
Anna says
Hello! Thank you so much for this pattern and the videos… I’m loving it. I knit but have never been much of a crocheter but having videos to reference has made all the difference!
Two random things…
I think there may be a typo in row 35? It says to start (after the corner) with 3dc’s. Your reference picture has 4 dc’s and so does the video.
Thing two. I’m just completed my 3rd square and am starting to (preemptively) get excited about this turning into a blanket. Do you have detailed instructions on how to put the whole thing together? Or any videos I could reference?
Thanks again for the great pattern.
Dedri Uys says
Hi Anna. Thank you for getting in touch.
Thing One: Can you have another look at Round 35? There are 5 dc between the first corner space and the first ch-5 space. The first 2 dc are made into the corner space from the previous round. They are followed by 3 dc (into the first 3 sts). Maybe we are not looking at the same photo?
Thing Two: you can have a look at Jenny’s Charlotte’s Dream Blanket for instructions on joining and bordering.
I hope that is useful :)
Dedri
Adam Taylor says
I have been making this square and I absolutely LOVE it. So pretty! One suggestion that I have is to put a note at the end of part 3 to say that part 4 starts with the same color and not to cut your yarn if you’re doing part 4. I have made 3 squares so far and I have fastened off every time because I forget and because the last 2 rounds are on a separate page.
Jenny says
Charlotte square only has three parts to it, Adam. We’re a little puzzled as to what you mean, as it only tells you to fasten off wherever you need to on the pattern :)
Jenny
Laurie says
Hi Dedri, Thank you so much for this gorgeous pattern. You are such a brilliant designer. I also love the videos by Esther. I would love to know when you are planning on expanding on this beautiful square as I much prefer the one piece to many squares made into a blanket/mandala etc. I have made two different squares now and will just put them aside for now and wait patiently (?) for your instructions. I must say I also made 2 Sophies and loved loved loved making them (that is how I learned to crochet). Keep up the beautiful work.
Dedri Uys says
Hi Laurie. Thank you :) I can’t tell you when the expanded pattern will be ready. I am deliberately taking my time and enjoying the process in between my other commitments. I would have to have to rush it as it as getting to work on it is my reward for working hard on other things :) I must agree that I also prefer making things that grow rather than things with squares, although I am getting over the aversion quite rapidly.
Keyra says
I absolutely loved making this! and will definitely make more in the future. Beautiful!
Ellen says
Hi Dedri,
I just wanted to tell you that I’m currently on part 3 of the square and I am having so much fun! Thanks so much for such a beautiful and well written pattern. One of my sons commented on it the other day and he doesn’t usually notice much. It really is gorgeous. You have such a talent and we are so lucky you share with us!
Dedri Uys says
Thank you, Ellen. I’m very pleased to hear your son made a comment. I think they notice a lot of the things we do, they just don’t realize that we like them to acknowledge that they do?
Lo Cooper says
Hi Dedri, I had made my first attempt in a different yarn so I thought that by changing to the correct yarn it would have a bit more tensile/tacticle strength and feel. I have successfully made part 1 and part 2 now using the pack (link from your page) but I can’t master this part. It’s definiitely but I can;t get my count right.
I was wondering if you would suggest a different border pattern preferably minus filet as that makes counting even harder. Bobbles etc. are fine and actually work well. I was thinking of basically working with the first three / four rows of part two again. What do yo think? The altternative is my friend does this part which I wouldn’t like because I like to achieve something myself. Or just doing a nice join at the end of part two?
I hope you don;t mind me firing questions at you and I appreciate the effort you put in and thank you so much. Kindest regards Lorraine. PS would you like a photo minus the border still as I can get my husband to take one in the morning and post it here? Thx.
Dedri Uys says
Hi Lo. Using the first few rounds of Part 2 will work brilliantly, especially with your front-post-around-the-clusters tip.
Lorraine says
Hi I have made this beautiful square and the first part perfect, the triangles, perfect, but I must admit Ihave just done row 29 and taken 3 hours! It’s not you it;s my eyesight (Dedri knows I’m visually impaired) and I can never work out how many stitches for the sides i.e. the three chain and the bobble etc so I have had to frog it and work on 34 per quarter and fingers crossed after this it will be easy peasy. I used text to speech and try to memorise the instrction but they were a bit too complicated for me. I will send a pic of the finished item and you can tell me (honestly please) if it is ok. Thanks Lo Cooper
Dedri Uys says
Lo, I hope you’ve managed it now. The first round after the triangles is quite involved, especially I Ally for someone who is visually impaired. Mail me a photo and I’ll tell you what I think x
Marg says
I’m having trouble with round 29 . I have counted how many sc I should have and it doesn’t seem to add up . I am 3 stitches short . Please advise. Marg
Marg says
Sorry I’ve worked it . Oops
Dedri Uys says
Hi Marg. I’m glad you figured it out. I have triple checked the numbers and the stitch counts match up.
Dedri
Sharon lane says
I love this pattern. It’s easy yet beautiful . Thanks
Dedri Uys says
Thank you, Sharon :)
Mariah Blas says
I am loving this. It’s actually a *fun* pattern. I can’t twll you how many times I’ve picked up a pattern that looked fun only to leave frustrated and disappointed, but I’ve stayed up hours into the morning because I didn’t want to put this one down!
Ali says
This is so easy and so beautiful. Your instructions are just fantastic. Thank you for your kind generosity in sharing your creativity with us.