I made this Little Flower Garden Dishcloth almost two years ago and I have finally gotten around to writing a pattern for it. Whoohoo! I will be attending the Chelsea Flower Show tomorrow (first time visit) and I am SO excited. Sharing this crochet pattern is my way of spreading some of the floral joy!
Disclaimer: I attached my flowers and leaves to the wrong side of the dishcloth (I know!!! Noob move) and the photos are a tiny bit over-saturated. Please keep in mind that I made and photographed this 2 years ago!
Little Flower Garden Dishcloth
Before you get started, I just have to tell you some things. I used scrap yarn for this dishcloth. You can use any colours you choose! You can make more or less flowers/leaves/stems. You can add butterflies or completely different flowers. I am going to tell you how I made mine and then you can let your imagination run wild!
Size
23 cm x 23 cm (9″ x 9″)
Materials
- 4.5 mm Clover Amour crochet hook (US 7 – UK 7)
- 5 mm Clover Amour crochet hook (US 8/H – UK 6)
- Worsted weight yarn – 50 g for the dishcloth and 20 g for the surface detail (I have used Drops Paris Cotton – see Colours below)
- Yarn needle
Colours
I made this dishcloth so long ago that I wasn’t sure I would be able to list the colours I used, but luckily I have a wonderful yarn organization system! It took me all of 3 minutes to find the colours. Here they are:
- Main Colour – Off White (17)
- Flowers – Strong Yellow (14), Raspberry (38), Medium Pink (33), and Light Old Pink (59)
- Stems – Pistacho (39)
- Leaves – Army (42)
- Slip Stitch Detail – Raspberry (38), Pistacho (39), and Strong Yellow (14)
Abbreviations
- Ch – Chain
- Dc – Double crochet
- Sc – Single crochet
- St/st’s – Stitch/stitches
- () – Repeat instructions between parentheses the amount of times specified
Up-down Dishcloth
Add This Pattern to Your Ravelry Queue
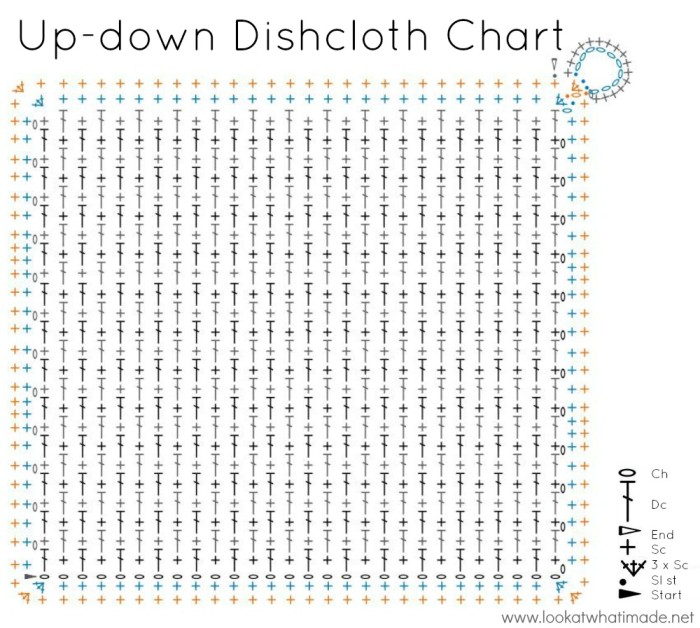
This dishcloth is called the Up-down Dishcloth because the stitch repeat used is most often referred to as the Up-down stitch. This is because the pattern is made up of alternating sc and dc stitches, with subsequent sc’s falling in the dc’s from the previous round, and subsequent dc’s falling in the sc’s from the previous round. Tamara Kelly from Moogly calls it the Griddle stitch and she has a video tutorial HERE. Please note that she starts with a dc and ends with a sc. I start my rows with a sc and end with a dc.
Start with a 4.5 mm hook!
Row 1: Ch 29. Sc in the second ch from the hook. Dc in the next ch. (Sc in the next ch, dc in the next ch) 13 times. Turn. {28 st’s – 14 sc’s and 14 dc’s}
Row 2: Ch 1 {doesn’t count as a stitch throughout}. Sc in the first st, which will be a dc. Dc in the next st, which will be a sc. (Sc in the next dc, dc in the next sc) 13 times. Turn. {28 st’s – 14 sc’s and 14 dc’s}
Rows 3 – 24: Repeat Row 2.
Change to a 5 mm hook!
Border Round 1: Ch 1. Make 3 sc’s in the first dc. Sc in the next 26 st’s. Make 3 sc’s in the last dc. Turn 90 degrees. Working into the sides of each row, make a sc in each row, increasing twice evenly so that you end up with 26 sc’s. Turn 90 degrees. Make 3 sc’s into the first ch of the foundation chain. Sc in the next 26 ch’s. Make 3 sc’s into the last ch of the foundation chain. Turn 90 degrees. Make a sc in each row, again increasing twice evenly so that you end up with 26 sc’s. Join to the first sc with a sl st. {28 sc’s per side, not including the central sc of the 3-sc corner}
Border Round 2: Sl st in the next st, which should be the central sc of the 3-sc corner. Ch 1. Make 3 sc’s in the same st. (Sc in the next 28 st’s, make 3 sc’s in the next st) 3 times. Sc in the last 28 st’s. Join to the first sc with a sl st. {30 sc’s per side, not including the central sc of the 3-sc corner}
If you don’t want to make a little loop to hang your dishcloth with, fasten off and work away your yarn ends. If you do want to make a loop, continue below.
Loop: Ch 10. Sl st in the third sc of the 3-sc corner to secure the loop. Turn your work so that the loop is facing you. Sl st in the central sc of the 3-sc corner. Sl st in the first sc of the 3-sc corner. This stitch will already contain a sl st. Ch 1 and make 16 sc’s into the ch-10 loop. Join to the first sc after the 3-sc corner with a sl st. Fasten off and work away your yarn ends.
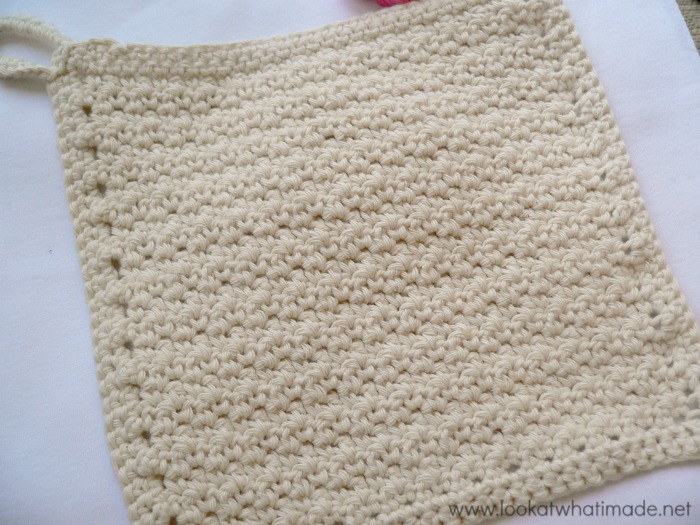
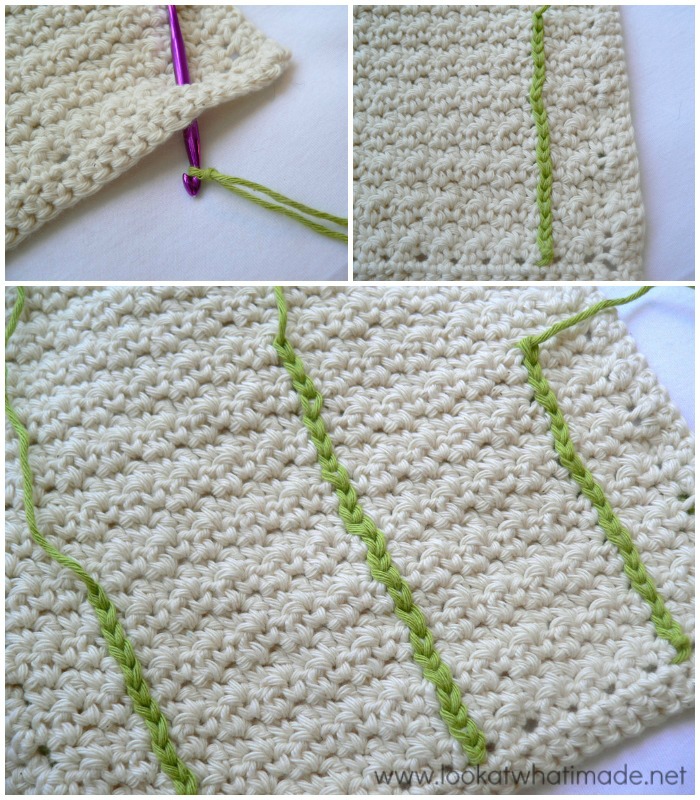
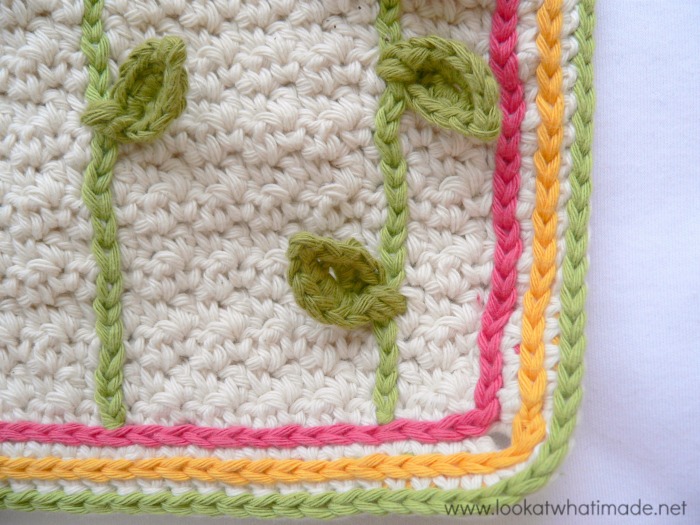
Yes, I accidentally took a photo of the back of the dishcloth… In fact, I attached the flowers and leaves to the wrong side too :( Live and learn!
Make the Flowers and Leaves
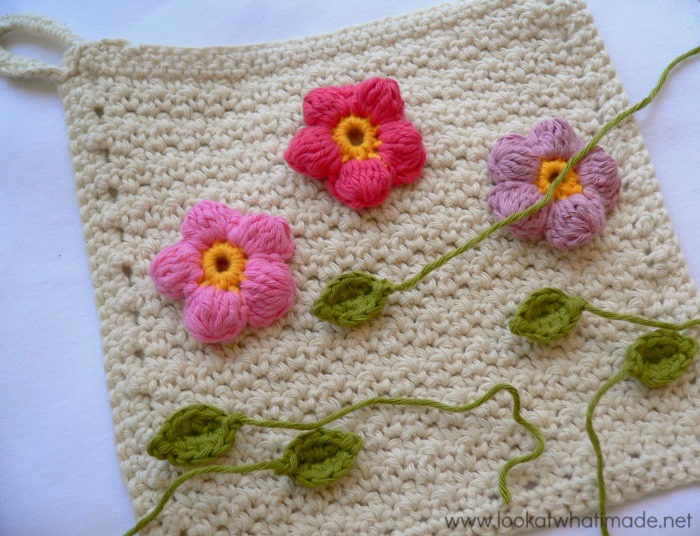
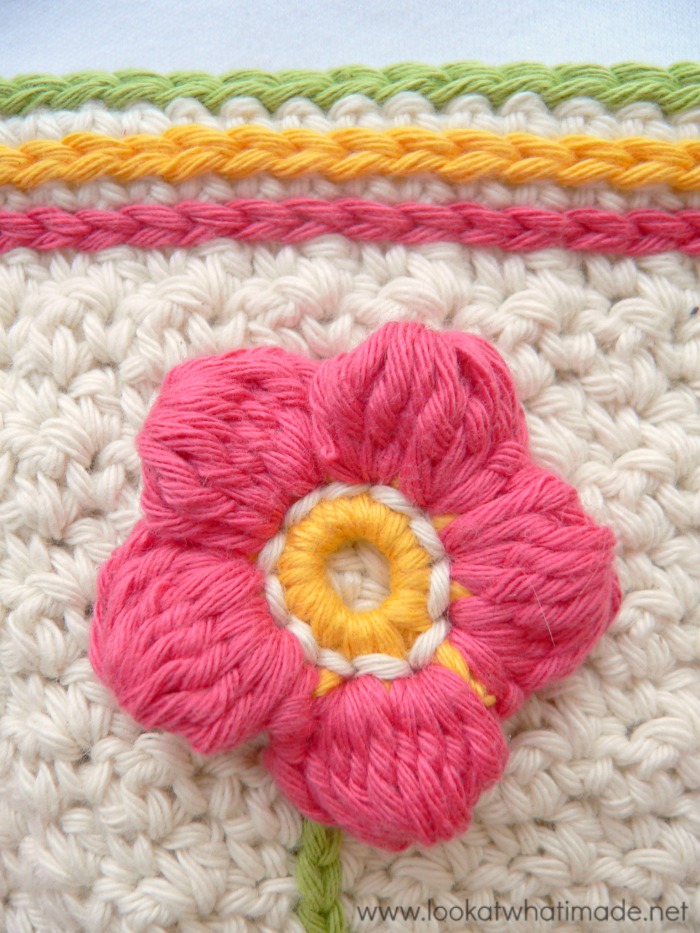
Once you have made the dishcloth, you will need to make the flowers and leaves. I made 3 of these Cluster Flowers from My Hobby is Crochet, using a 4.5 mm hook. I made 5 leaves using my This Little Leaf pattern (again with a 4.5 mm hook).
Decide on Your Layout
It is totally up to you where you want to put your flowers and how you want to arrange your leaves. I suggest playing around with your layout before sewing them onto your dishcloth. Once you know where you want to place them, you can either pin them to your work, or you can use a temporary fabric marker to draw around the outlines.
Add the Surface Slip Stitch Stems
Before you can attach the flowers and the leaves, you will need to create your stems using surface slip stitches. I always start my surface work by inserting my hook into my work and then putting a slip knot on the hook so that the slip knot is behind my work, not in front of it. If you don’t know how to make surface slip stitches, please see my tutorial HERE.
Attach the Flowers and Leaves to Your Dishcloth
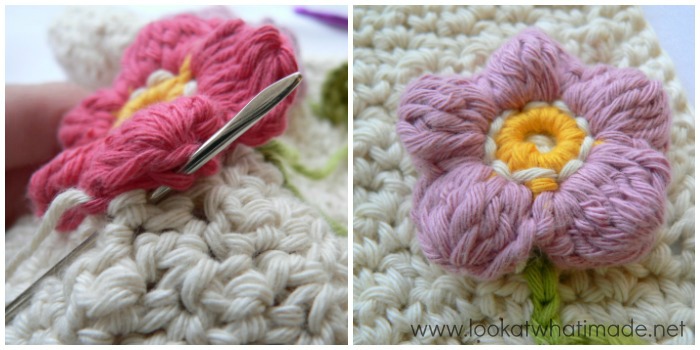
I suggest attaching the center of the flower first by making running stitches all around the first (yellow) round. Anchoring the flowers like this makes it much easier to work around the circumference without warping or shifting the applique. I used the same colour as the dishcloth for this, because it means that the stitches won’t be THAT visible on the back.
Once you have attached the center, sew the petals to the dishcloth, making sure that you work only into the back loops so that the stitches aren’t visible from the front.
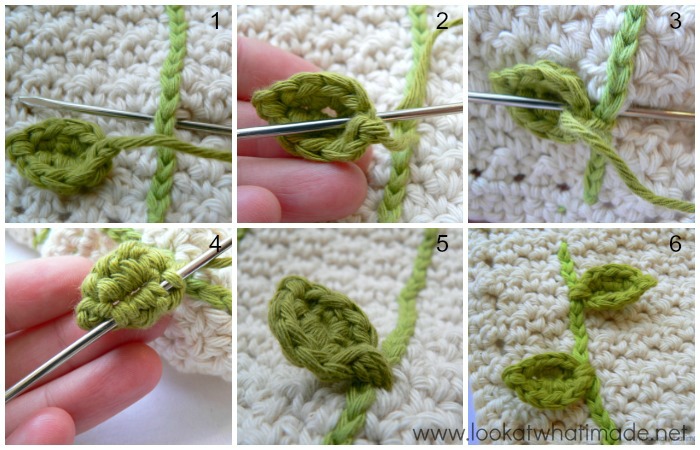
To attach the leaves, insert your yarn needle around the surface sl st stem and through the tip of the leaf that contains the final ch-1 bind-off {Photos 1 and 2}. Do this a few times {Photo 3}. When you are satisfied that your leaf is securely attached, work the yarn-end away into the stitches of the leaf where they will be less visible {Photo 4}. Photos 5 and 6 show the leaf/leaves attached.
The leaves will have a tendency to curl, so if this annoys you, feel free to tack them down.
Surface Crochet
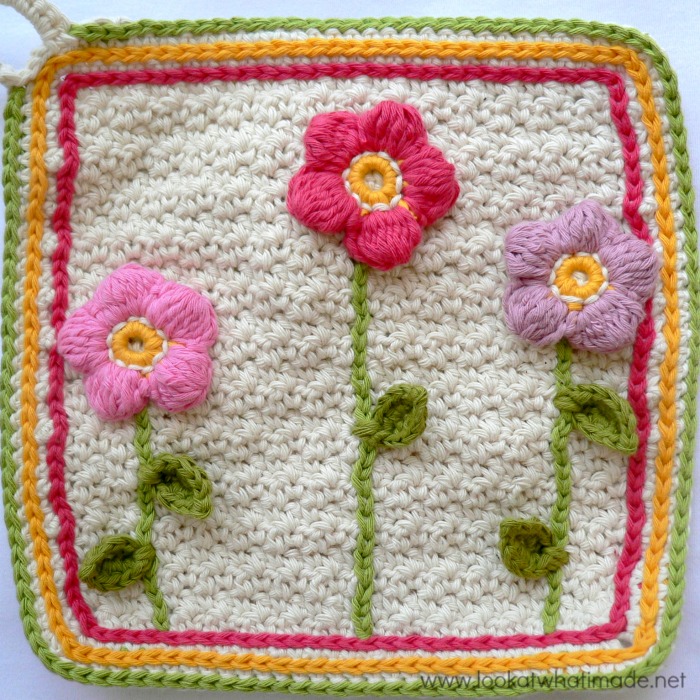
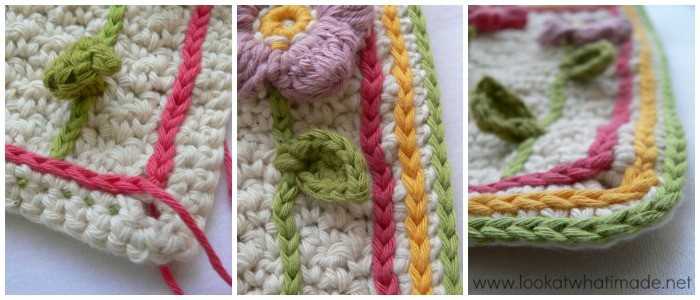
To finish the dishcloth, add 3 rounds of surface slip stitches. The first round will fall in the stitches/rows that contain the first Border Round. Basically you have to locate the ‘bottom’ of each stitch from Border Round 1 and then make a surface sl st at the bottom of that stitch. The second round of slip stitches will fall in the top of each stitch from Border Round 1 (much easier). The third round will be made into the top of each st from Border Round 2. If you need a reminder of how to join at the end, have a look at THIS TUTORIAL.
And there you have it! One Little Flower Garden Dishcloth. I have to admit that I don’t use mine for anything but looking at and going ‘Aaaah!’.
Do you have a favourite flower that you would add to your Little Flower Garden dishcloth? More importantly, do you make things just because they are pretty to look at and make you happy, or do they NEED to have a purpose?

This blog post contains affiliate links. I only link to products I personally use or would use. All opinions are my own.



Mona Esmat says
Thank you very much. I want to tell you that it is beautiful even on the wrong side of the tablecloth. I love the flower and leaves . Would you please share the pattern
Dedri Uys says
Thank you Mona. The pattern is in this post. If you scroll to where it says ‘Up-down dishcloth’, you will find the instructions (below size and abbreviations).
dedri
Mona Esmat says
Thanks alot
Michaele Birch says
I just found this, and think it’s adorable!! My crochet brain is listing the friends I will make it for and the flower colors for each! Thanks so much!
Dedri Uys says
I’m glad you like it so much :)
Karen says
This dishcloth is so pretty. I look forward to making it. Thanks for sharing.
Dedri Uys says
Thank you :)
Ann Van Gampelaere says
I love it on the “wrong” side. Looks very right to me. And I LOVE your blog. So, so inspiring.
Dedri Uys says
Thank you, Ann. The actual cloth is the same front and back, it’s just the sc’s around the edge that is back to front :)
Elizabeth says
Love this pattern and the instructions.
Thank you so much!
Dedri Uys says
You are most welcome!