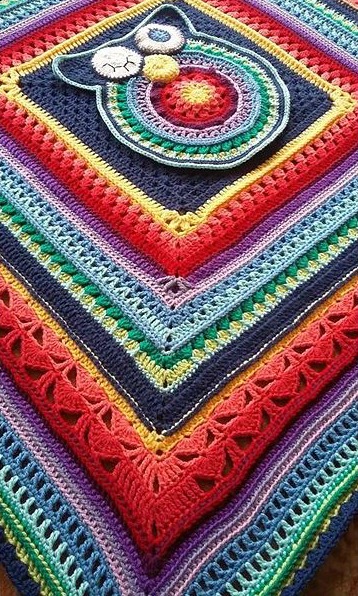
I am very pleased to introduce the pattern for ‘Charlotte’s Sunshine Baby’. This baby blanket is the brainchild of Misty Babcock and features my Charlotte Square and a few rounds from the Sunshine Owl CAL by Vanessa Smith, along with some extra rounds by Misty herself.
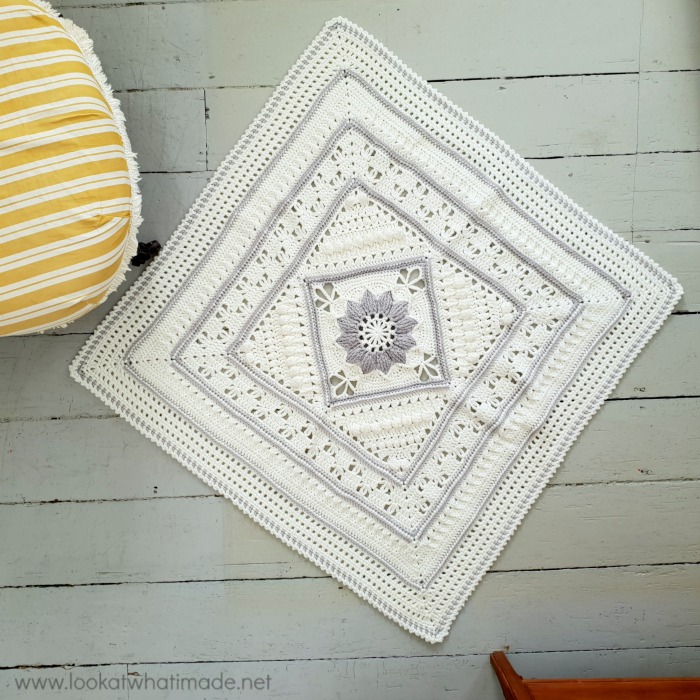
A Word From Me
I first became aware of this lovely mashup when I started receiving comments asking for the pattern for Charlotte’s Sunshine Baby. I had no idea what people were talking about. As more and more people started asking for the pattern, I decided to do some investigation. After much Googling, I finally found Misty’s Ravelry project (which has a staggering 2900 likes – that’s HUGE for a project!!!). A bit more Googling revealed that a fair few pattern farming sites were using the photo of her project and sending people to my website for the pattern (which, apart from in Misty’s head and notes, didn’t exist).
I contacted Misty and asked her if she would allow me to share a full pattern here on my website. I then asked Vanessa if she would be happy for me to share the relevant rounds from her pattern here as well. Maybe she said yes because I have a photo of her doing duck lips that I can use to blackmail her with, or maybe she said yes because she loves me almost as much as I love her! Either way, she said yes!
So I am very pleased to present (finally): Charlotte’s Sunshine Baby!
What will I do with all the time I am going to save replying to requests for the pattern? I’m going to keep growing Simply Charlotte*, of course. Wanna see a sneak peek before we proceed? Oh, go on then!
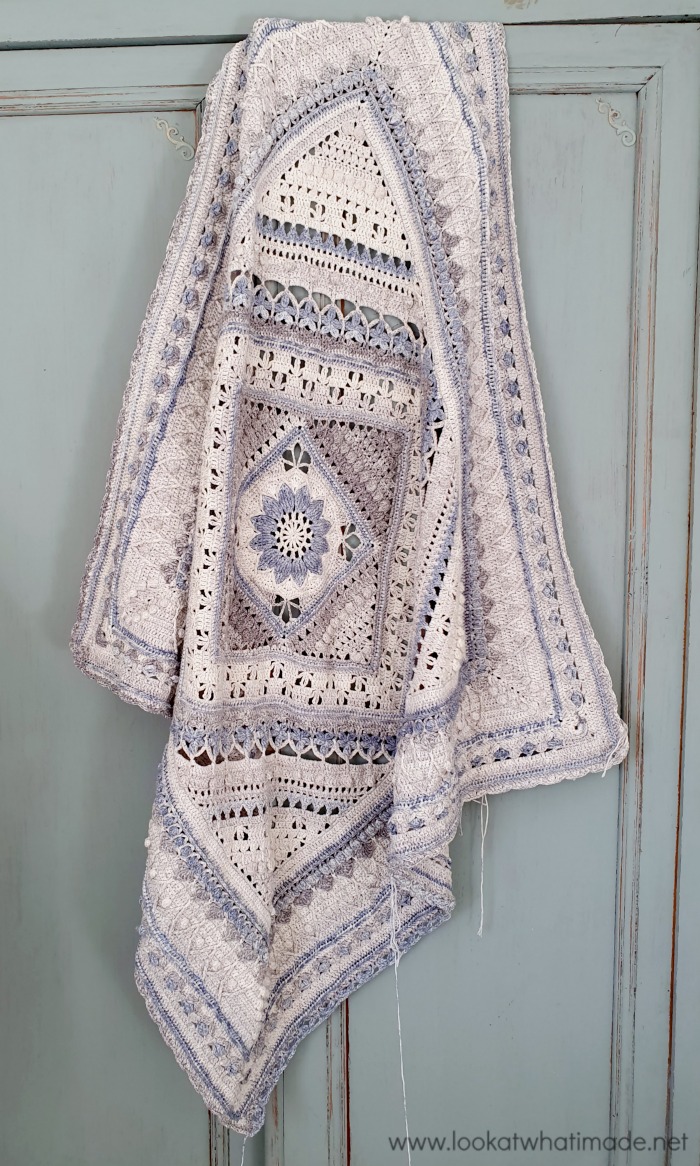
*If you are interested in the pattern for the blanket featured above (previously called Simply Charlotte), you can now find it as the FREE Charlotte’s Universe CAL (crochet-along) HERE.
A Word From Misty
My Charlotte’s Sunshine Baby blanket was a gift for the new baby of some friends in 2017. I first fell in love with the yarn – sadly discontinued now – then had a couple of false starts with other patterns that just didn’t feel right before deciding that, as the mum was named Charlotte, basing it on Dedri’s lovely Charlotte square would be most appropriate. To make it up to a cuddly blanket size, I added on elements from Hooked on Sunshine’s fun Sunshine Owl CAL.Once things were flowing I noted the details on Ravelry (as I do with most projects) and never expected the number of likes, pins, and comments it has subsequently received. I was excited when Dedri got in touch with the idea of making the blanket more accessible, as the project notes were only ever intended to be my own record of this pattern mashup.
I love combining colours and patterns in new ways to make unique gifts and I’m tickled that, in this instance, the results struck a chord with so many people.
You can find Misty HERE on Facebook and HERE on Ravelry. You can see her original Charlotte’s Sunshine Baby HERE.
Testers
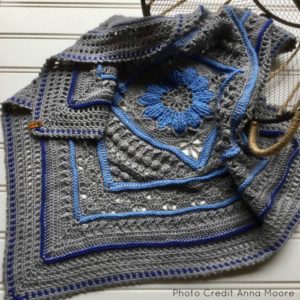
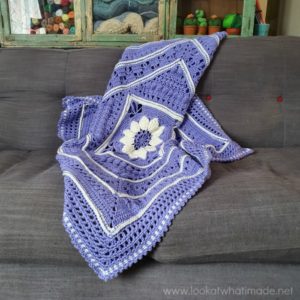
I would like to thank Anna Moore and Ulrika Larsson for testing this pattern for us. Anna’s blanket, using a 6mm hook and Aran yarn, was 92cm/36″. Ulrika’s blanket, using a 5.5mm hook and Scheepjes Chunky Monkey (Mauve 1188 Yarn A and Cream 1005 Yarn B), was 110cm/43.3″.
- Anna Moore
- Ulrika Larsson
Charlotte’s Sunshine Baby Pattern
© Dedri Uys, Vanessa Smith, and Misty Babcock 2019. All Rights Reserved.
Resources
- Ravelry: Add this to your Ravelry Queue
- Hashtag: #charlottesunshinebaby
- Print Pattern: Use the print-friendly button at the bottom of this post to print or save this pattern to PDF.
- Growing Alternatives: If you would like to grow your own Charlotte blanket, please see Charlotte Loves Sunshine at the bottom of this post.
Information
Materials
Please see Notes.
- Scheepjes Chunky Monkey (100% acrylic), 100g/116m/127yds
- Yarn A – Cream (1005) x 9 balls
- Yarn B – Pale Grey (1203) x 2 balls
- 5.5mm hook
Abbreviations
US Terminology
- Ch – Chain
- BP – Back post (insert your hook from back to front around the post of the indicated stitch and complete the stitch as normal)
- Dc – Double crochet
- FP – Front post (insert your hook from front to back around the post of the indicated stitch and complete the stitch as normal)
- Hdc – Half-double crochet
- Rem – Remaining/remains
- RS – Right side
- Sc – Single crochet
- Sp/sps – Space/spaces
- Sl st – Slip stitch
- St/sts – Stitch/stitches
- Tr – Treble crochet
Punctuation
* An asterisk indicates pattern repeats. You will need to repeat all the instructions between asterisks the number of times specified. This is a hard-core repeat and will consist of multiple instructions.
Parentheses () indicate repeats. You will need to repeat the instructions between parentheses the number of times specified. This is a lower level repeat. Parentheses are also used to indicate a group of stitches to be worked into the same stitch/space.
Square Brackets [] are used to indicate a group of stitches to be worked in the same stitch/space when using parentheses would be too confusing.
Curly Brackets {} are used to indicate additional information and photo references.
Special Stitches
- Cluster (Dc3tog) – Yarn over and insert your hook into the indicated stitch. Yarn over and pull up a loop. Yarn over and pull through 2 loops. (Yarn over and insert your hook into the next stitch. Yarn over and pull up a loop. Yarn over and pull through 2 loops) twice. Yarn over and pull through all 4 loops on your hook.
- Standing Stitches – Standing stitches are exactly the same as regular stitches, except that they are made ‘in air’, without being attached to a previous stitch. Start with a slip knot already on your hook and complete the stitch as normal.
Gauge
At the end of Round 18, your square should measure 31.5cm (12.4”). Please see Notes.
Size
102cm x 102cm (40.2” x 40.2”) – Please see Notes.
Notes
Size, Gauge, and Materials
If you prefer a smaller, heavier blanket with a bit more structure (perfect for tummy time), you can use a 5mm hook and one less ball of Yarn A. In that case, your gauge should be 28cm (11”) at the end of Round 18 for a final size of 92cm x 92cm (34.6” x 34.6”).
Structure
The central flower of this blanket is textured and raised slightly above the surface. When you have only made the flower, it will look like it bulges too much (because of all those front post stitches) but, as the blanket progresses, this will become less noticeable. With use, the flower will relax down even further, but it will always remain slightly raised above the surface.
If you find that your flower bulges a lot and the rest of your square refuses to become ‘square’ by Round 18, you are making your chains too tight, and you will need to either relax your tension when making your chains or use a bigger hook for chains only.
Colours Per Round
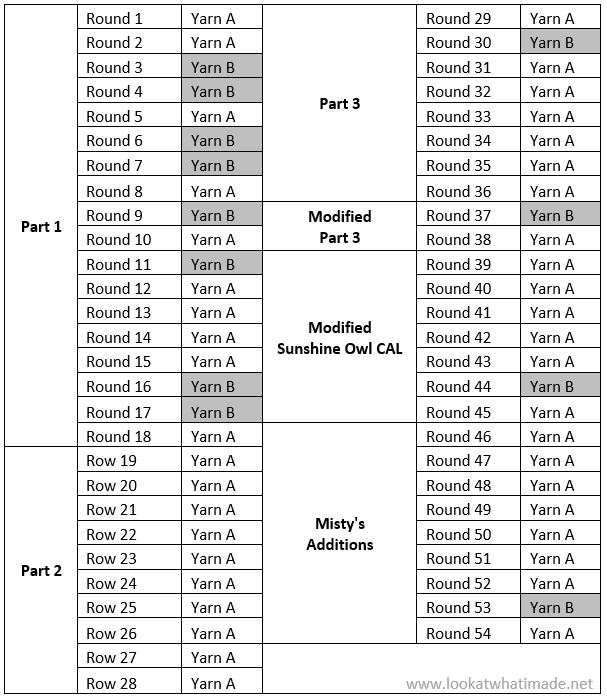
I have supplied a round by round table for the entire blanket below.
If you prefer using a ‘cheat sheet’ for first 36 rounds, here it is:
- Rounds 1 – 18: As written in the original tutorial
- Rows 19 – 28: Yarn A
- Round 29: Yarn A
- Rounds 30 – 36: As written in the original tutorial
Basically, use all the colours as written in the tutorial, except for Rows/Rounds 19 – 29, which will be in Yarn A. I’m thinking that might be one too many ways to say the same thing…
Making the Charlotte Square
Make a Charlotte Square up to the end of Round 36, remembering to use the colours listed under Colours Per Round above.
You can find the instructions, photo tutorials, and videos here:
- Part 1 – Central Square (ignore the Size, Gauge, and Materials listed in the original)
- Part 2 – Triangles
- Part 3 – Border
- Video Tutorials by Esther Dijkstra from It’s All in a Nutshell
Continuing the Blanket with Modified Rounds from Charlotte’s Dream
Misty Modified these two rounds from Charlotte’s Dream slightly so that she could ‘marry’ the square with the Sunshine Owl CAL.
It is worth noting that you can use Rounds 37 – 54 to grow any blanket or square, provided that your blanket/square has a multiple of 6 + 2 sts per side in the final round (not including ch-2 corner sps).
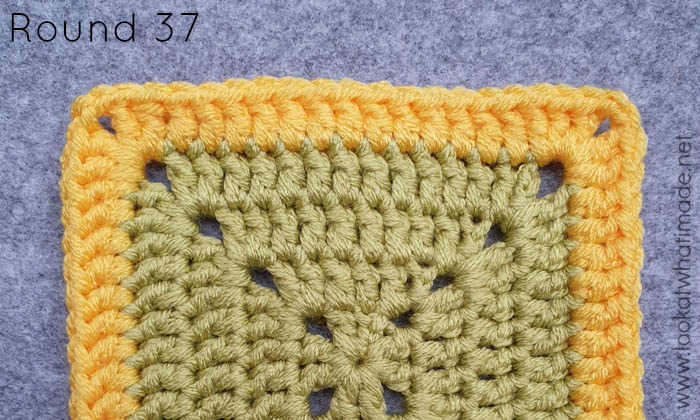
Please note that the photo tutorial below is done in different colours to better illustrate the stitches in each round. Also, I am demonstrating them on a smaller solid square.
Round 37 (Yarn B)
Round 37 of Charlotte’s Dream – modified.
Join your yarn by making a standing dc in any ch-2 corner sp. [dc, ch 2, 2 dc] into the same ch-2 corner sp. This is your first corner made.
*Dc in each of the 86 sts across. [2 dc, ch 2, 2 dc] in the next ch-2 corner sp.* Repeat from * to * 3 more times, omitting the last corner on the last repeat. Join to the top of the beg ch-3 with a sl st. Fasten off and work away your ends.
Stitch Count: 360 dc and 4 ch-2 corner sps {90 dc per side}
Round 38 (Yarn A)
Round 38 of Charlotte’s Dream – modified.
Join your yarn by making a standing hdc in any ch-2 corner sp. [Hdc, ch 2, 2 hdc] in the same ch-2 sp. This is your first corner made.
*BPdc around each st across. [2 hdc, ch 2, 2 hdc] in the next ch-2 corner sp.* Repeat from * to * 3 more times, omitting the last corner on the last repeat. Join to the first hdc with a sl st.
Stitch Count: 16 hdc, 360 BPdc, and 4 ch-2 corner sp {4 hdc and 90 BPdc per side}
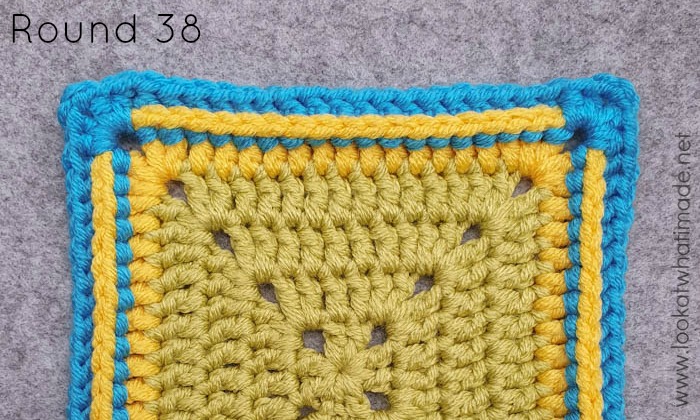
This is what your square should look like at the end of this part:
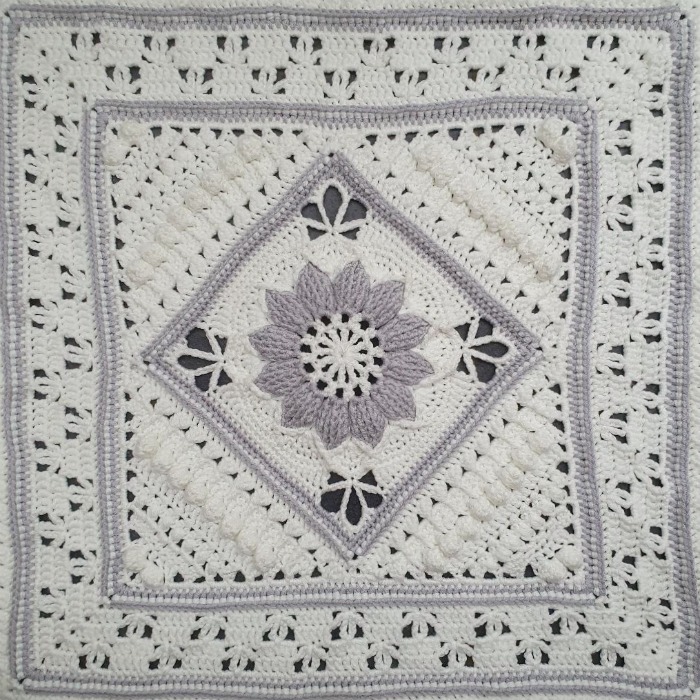
Continuing the Blanket with Modified Rounds from the Sunshine Owl CAL
The Sunshine Owl CAL was a popular crochet-along hosted in 2016. It was designed by the wonderful Vanessa Smith, whom I had the privilege of meeting when I did some workshops in South Africa in 2016. Although the crochet-along is now a paid-for pattern, Vanessa has kindly agreed to let me share Misty’s alterations of the following rounds in full. Thank you, Vanessa!
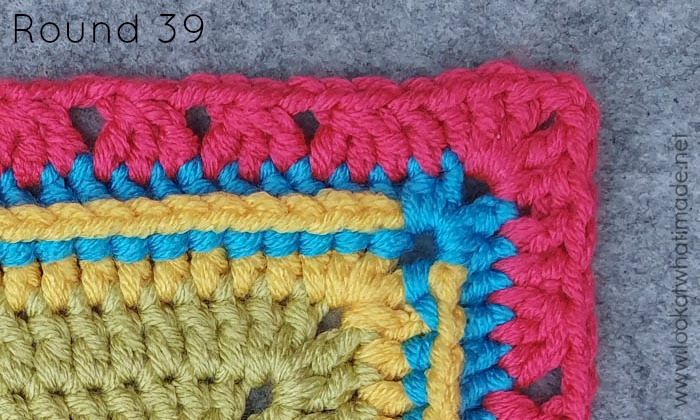
Round 39 (Yarn A)
Round 29 of Sunshine Owl CAL – modified in corners to marry to previous round of Charlotte’s Sunshine Baby.
Sl st into the next st and into the ch-2 corner sp. [Ch 3, dc, ch 2, 2 dc] in the same ch-2 corner sp. This is your corner made.
*Dc in the first 2 hdc, the first of which will be hidden. (Make a Cluster over the next 3 BPdc, ch 2) 29 times. There should now be 5 sts left before the ch-2 corner sp. Make a Cluster over the last 3 BPdc. Dc in the last 2 hdc. [2 dc, ch 2, 2 dc] in the next ch-2 corner sp.* Repeat from * to * 3 more times, omitting the last corner on the last repeat. Join to the top of the beg ch-3 with a sl st.
Stitch Count: 30 Clusters, 29 ch-2 sps, and 8 dc – not including ch-2 corner sps.
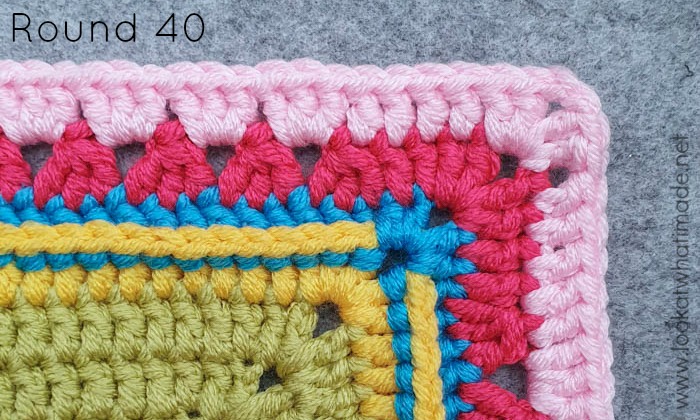
Round 40 (Yarn A)
Round 30 of Sunshine Owl CAL – modified in corners only (starting ch-2 changed to starting ch-3 for consistency).
Sl st into the next st and into the ch-2 corner sp. [Ch 3, dc, ch 2, 2 dc] in the same ch-2 corner sp. This is your first corner made.
*Skip the first (hidden) st. Dc in the next 3 sts. Dc into the top of the first Cluster. (Make 3 dc into the next ch-2 sp) 29 times. Dc into the top of the last Cluster. Dc in the last 4 sts. [2 dc, ch 2, 2 dc] in the next ch-2 corner sp.* Repeat from * to * 3 more times, omitting the last corner on the last repeat. Join to the top of the beg ch-3 with a sl st.
Stitch Count: 100 dc – not including ch-2 corner sps.
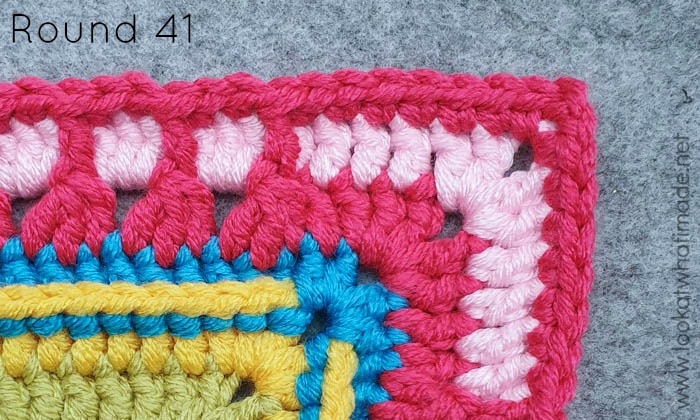
Round 41 (Yarn A)
Round 31 of Sunshine Owl CAL – modified (104 sts changed to 102 and sc corners changed to ch-2 corners).
Sl st into the next st and into the ch-2 corner sp. Ch 1 (doesn’t count as a st throughout). [Sc, ch 2, sc] in the same ch-2 corner sp. This is your corner made.
*Sc in the first 6 sts. The last sc should fall in the dc made into the top of the first Cluster. (FPdc around the next Cluster from Round 39, skip the next st from Round 40 and sc in the next 2 sts of Round 40) 29 times. There should now be one Cluster left. FPdc around the last Cluster from Round 39. Skip the next st of Round 40. Sc in the last 6 sts from Round 40. [Sc, ch 2, sc] in the next ch-2 corner sp.* Repeat from * to * 3 more times, omitting the last corner on the last repeat. Join to the first sc with a sl st.
Stitch Counts: 102 sts per side {30 FPdc and 72 sc – not including ch-2 corner sps}
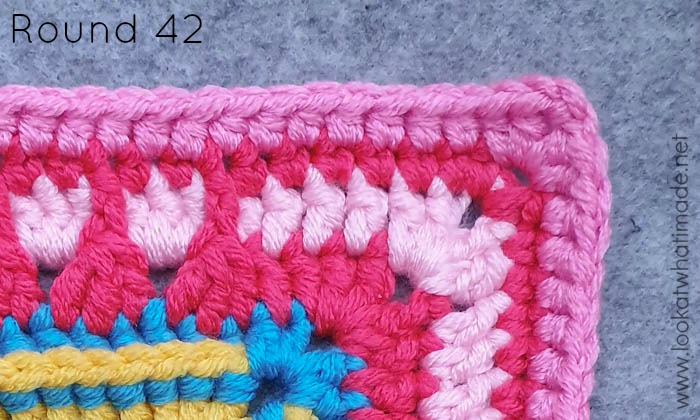
Round 42 (Yarn A)
Round 32 of Sunshine Owl CAL – modified (start of Round changed to a standing start and 108 hdc changed to 105).
Sl st into next ch-2 corner sp. Ch 2 (counts as hdc). [Hdc, ch 2, 2 hdc] in the same sp. This is your corner made.
*Skip the first (hidden) st. Hdc in each rem st across. [2 hdc, ch 2, 2 hdc] in the next ch-2 corner sp.* Repeat from * to * 3 more times, omitting the last corner on the last repeat. Join to the top of the beg ch-2 with a sl st.
Stitch Counts: 105 hdc per side – not including ch-2 corner sps
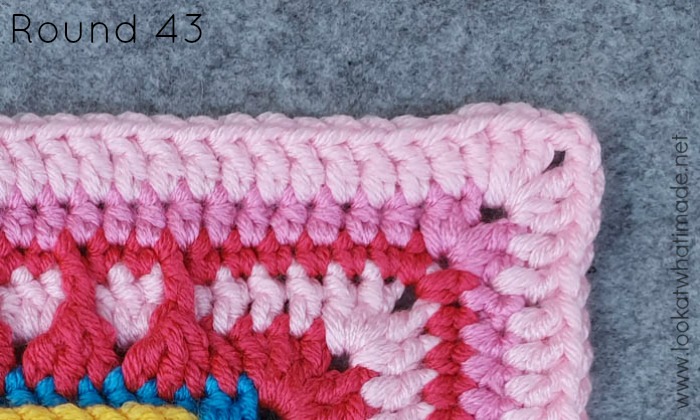
Round 43 (Yarn A)
Round 33 of Sunshine Owl CAL – modified (starting ch-2 changed to starting ch-3 for consistency and 112 dc changed to 109 dc)..
Sl st into the next st and into the ch-2 corner sp. [Ch 3, dc, ch 2, 2 dc] in the same ch-2 corner sp. This is your corner made.
*Dc in each st across. [2 dc, ch 2, 2 dc] in the next ch-2 corner sp.* Repeat from * to * 3 more times, omitting the last corner on the last repeat. Join to the top of the beg ch-3 with a sl st. Fasten off and work away your ends.
Stitch Counts: 109 dc per side – not including ch-2 corner sps
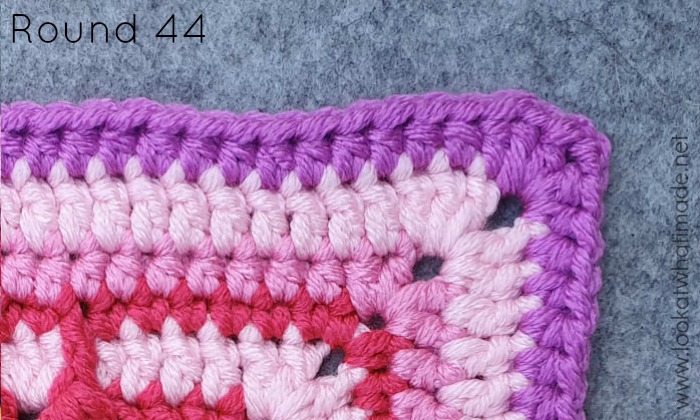
Round 44 (Yarn B)
Round 34 of Sunshine Owl CAL – modified (standing start and 116 hdc changed to 113 hdc).
Join Yarn B by making a standing hdc in any ch-2 corner sp. [Hdc, ch 2, 2 hdc] in the same sp. This is your corner made.
*Hdc in each st across. [2 hdc, ch 2, 2 hdc] in the next ch-2 corner sp.* Repeat from * to * 3 more times, omitting the last corner on the last repeat. Join to the first hdc with a sl st. Fasten off and work away your ends.
Stitch Counts: 113 hdc per side – not including ch-2 corner sps
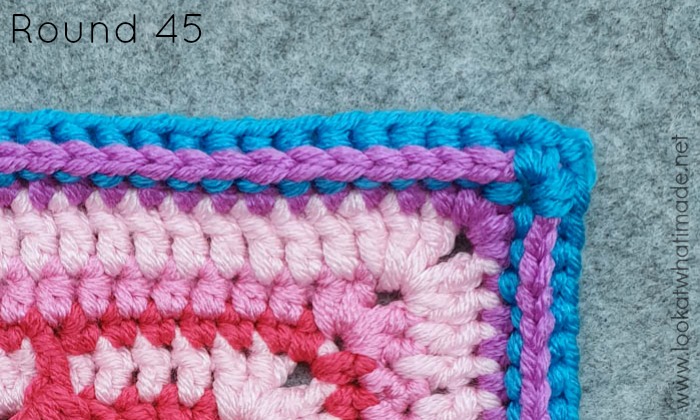
Round 45 (Yarn A)
Round 35 of Sunshine Owl CAL – modified (standing start, BPsc changed to BPhdc, 118 sts changed to 115).
Join Yarn A by making a standing sc in any ch-2 corner sp. [Ch 2, sc] in the same sp. This is your corner made.
*BPhdc in each st across. [Sc, ch 2, sc] in the next ch-2 corner sp.* Repeat from * to * 3 more times, omitting the last corner on the last repeat. Join to the first sc with a sl st.
Stitch Counts: 115 sts per side {2 sc and 113 BPhdc – not including ch-2 corner sps}
Continuing the Blanket with Misty’s Additional Rounds
From this point on, Misty ‘winged it’. Judging by the popularity of Charlotte’s Sunshine Baby and the number of queries I have received about it, she did a pretty amazing job!
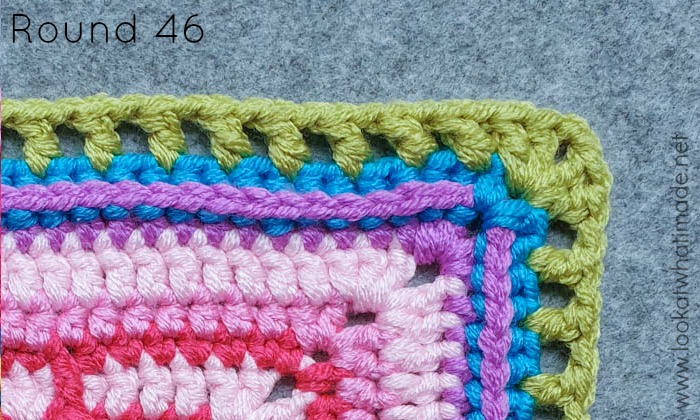
Round 46 (Yarn A)
Sl st into the next ch-2 corner sp. [Ch 3, dc, ch 2, 2 dc] in the same ch-2 sp. This is your corner made.
*(Ch 1, skip the next st, dc in the next st) until one st rem. Ch 1 and skip the last st. [2 dc, ch 2, 2 dc] in the next ch-2 corner sp.* Repeat from * to * 3 more times, omitting the last corner on the last repeat. Join to the top of the beg ch-3 with a sl st.
Stitch Counts: 61 dc and 58 ch-1 sps per side – not including ch-2 corner sps
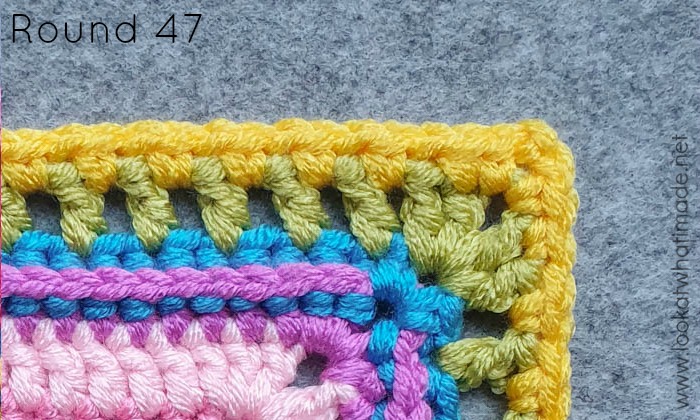
Round 47 (Yarn A)
Sl st into the next st and into the next ch-2 corner sp. [Ch 1, sc, ch 2, sc] in the same ch-2 corner sp. This is your corner made.
*Sc in the next st, ch 1 and skip the next st. (Sc in the next ch-1 sp, ch 1 and skip the next st) until one st rem. Sc in the last st. [Sc, ch 2, sc] in the next ch-2 corner sp.* Repeat from * to * 3 more times, omitting the last corner on the last repeat. Join to the first sc with a sl st.
Stitch Counts: 62 sc and 59 ch-1 sps per side – not including ch-2 corner sps
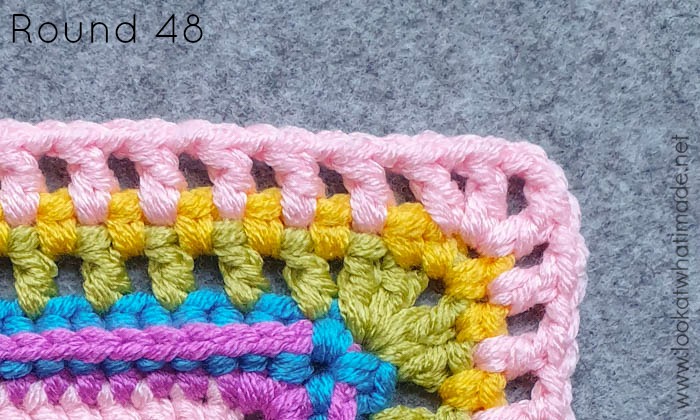
Round 48 (Yarn A)
If you need help identifying where to insert your hook to work into the ch-1 sps, please see THIS TUTORIAL.
Sl st into the next ch-2 corner sp. Ch 5 (counts as dc and ch-2 corner sp). Dc in the same ch-2 corner sp. This is your corner made.
*Ch 1. Dc in the first (hidden) st. (Ch 1, skip the next st, dc in the next ch-1 sp) until you have worked into every ch-1 sp. Ch 1 , skip the next st, dc in the next st, which should be the last sc of the previous round. Ch 1. [Dc, ch 2, dc] in the next ch-2 corner sp.* Repeat from * to * 3 more times, omitting the last corner on the last repeat. Join to the third ch of the beg ch-5 with a sl st.
Stitch Counts: 63 dc and 62 ch-1 sps per side – not including ch-2 corner sps
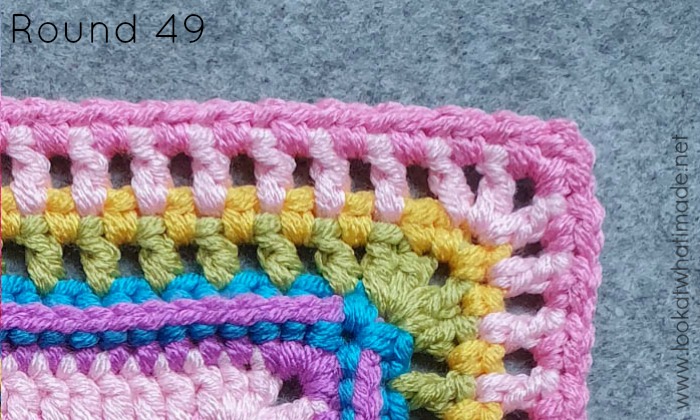
Round 49 (Yarn A)
Sl st into the next ch-2 corner sp. [Ch 1, sc, ch 2, sc] in the same ch-2 corner sp. This is your corner made.
*(Ch 1, skip the next st, sc in the next ch-1 sp) until 1 st rem. Ch 1, skip the last st. [Sc, ch 2, sc] in the next ch-2 corner sp.* Repeat from * to * 3 more times, omitting the last corner on the last repeat. Join to the first sc with a sl st.
Stitch Counts: 64 sc and 63 ch-1 sps per side – not including ch-2 corner sps
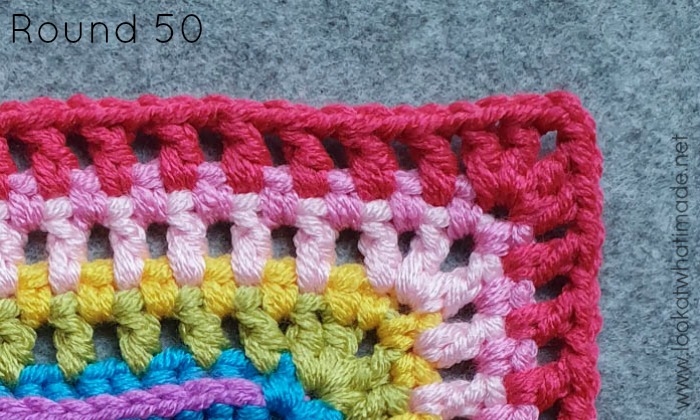
Round 50 (Yarn A)
Sl st into the next ch-2 corner sp. [Ch 3, dc, ch 2, 2 dc] in the same ch-2 sp. This is your corner made.
*(Ch 1, skip the next st, dc in the next ch-1 sp) until one st rem. Ch 1 and skip the last st. [2 dc, ch 2, 2 dc] in the next ch-2 corner sp.* Repeat from * to * 3 more times, omitting the last corner on the last repeat. Join to the top of the beg ch-3 with a sl st.
Stitch Counts: 67 dc and 64 ch-1 sps per side – not including ch-2 corner sps
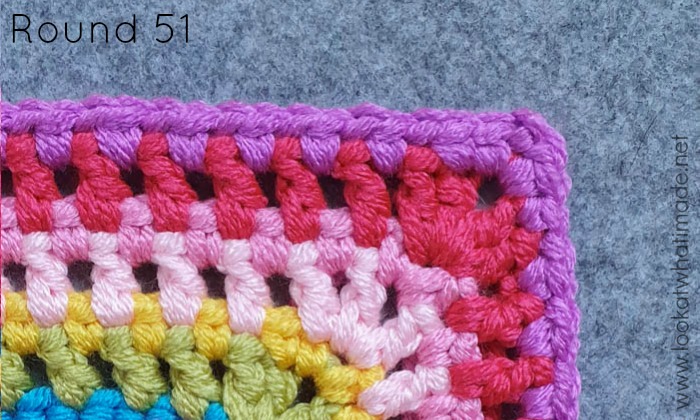
Round 51 (Yarn A)
Sl st into the next st and into the next ch-2 corner sp. [Ch 1, sc, ch 2, sc] in the same ch-2 corner sp. This is your corner made.
*Sc in the next st, ch 1 and skip the next st. (Sc in the next ch-1 sp, ch 1 and skip the next st) until one st rem. Sc in the last st. [Sc, ch 2, sc] in the next ch-2 corner sp.* Repeat from * to * 3 more times, omitting the last corner on the last repeat. Join to the first sc with a sl st.
Stitch Counts: 68 sc and 65 ch-1 sps per side – not including ch-2 corner sps
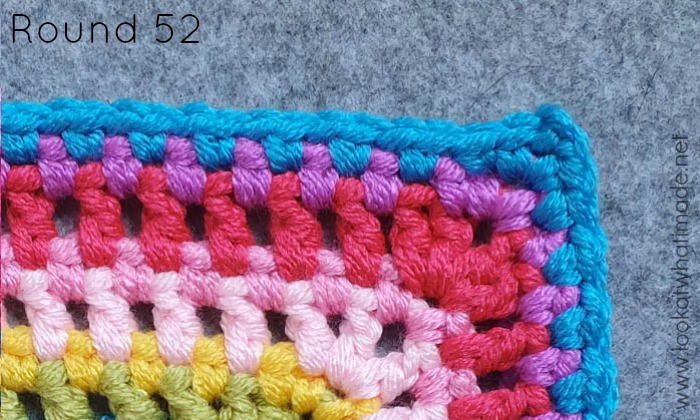
Round 52 (Yarn A)
Sl st into the next st ch-2 corner sp. [Ch 1, sc, ch 2, sc] in the same ch-2 corner sp. This is your corner made.
*Sc in the next st, ch 1 and skip the next st. (Sc in the next ch-1 sp, ch 1 and skip the next st) until one st rem. Sc in the last st. [Sc, ch 2, sc] in the next ch-2 corner sp.* Repeat from * to * 3 more times, omitting the last corner on the last repeat. Join to the first sc with a sl st. Fasten off and work away your ends.
Stitch Counts: 69 sc and 66 ch-1 sps per side – not including ch-2 corner sps
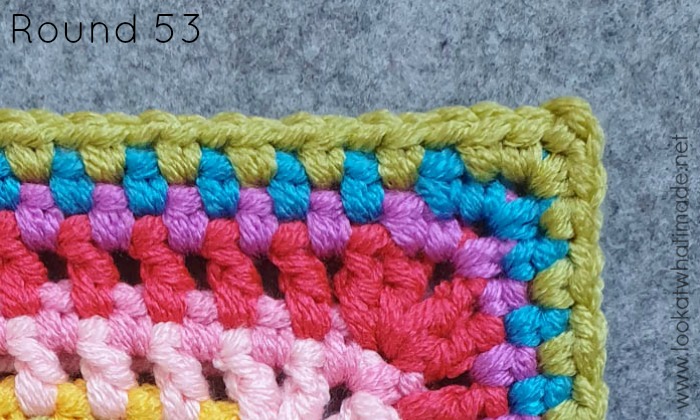
Round 53 (Yarn B)
Join Yarn B by making a standing sc in any ch-2 corner sp. [Ch 2, sc] in the same ch-2 corner sp. This is your corner made.
*Sc in the next st, ch 1 and skip the next st. (Sc in the next ch-1 sp, ch 1 and skip the next st) until one st rem. Sc in the last st. [Sc, ch 2, sc] in the next ch-2 corner sp.* Repeat from * to * 3 more times, omitting the last corner on the last repeat. Join to the first sc with a sl st. Fasten off and work away your ends.
Stitch Counts: 70 sc and 67 ch-1 sps per side – not including ch-2 corner sps
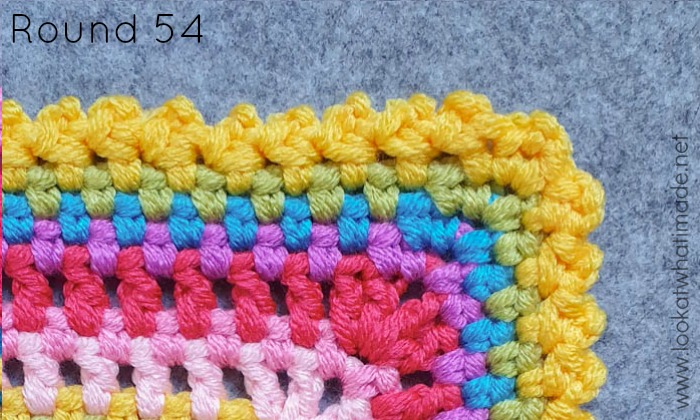
Round 54 (Yarn A)
Join Yarn A by making a standing sc in any ch-2 corner sp. [Ch 2, sc] in the same ch-2 corner sp. This is your corner made.
*Sc in the next st, ch 2, sc around the last sc made to form a Picot, skip the next st. (Sc in the next ch-1 sp, ch 2, sc around the last sc made to form a Picot, skip the next st) until one st rem. Sc in the last st, ch 2, sc around the last sc made to form a Picot. [Sc, ch 2, sc] in the next ch-2 corner sp.* Repeat from * to * 3 more times, omitting the last corner on the last repeat. Join to the first sc with a sl st. Fasten off and work away your ends.
Stitch Counts: 2 sc and 69 Picots per side – not including ch-2 corner sps
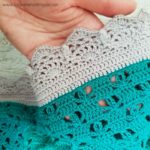
This is what these final rounds will look like at this point:
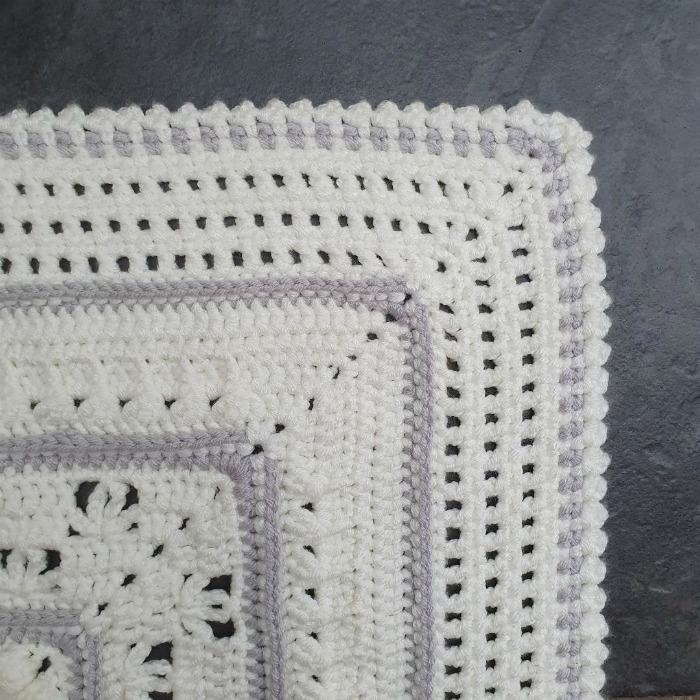
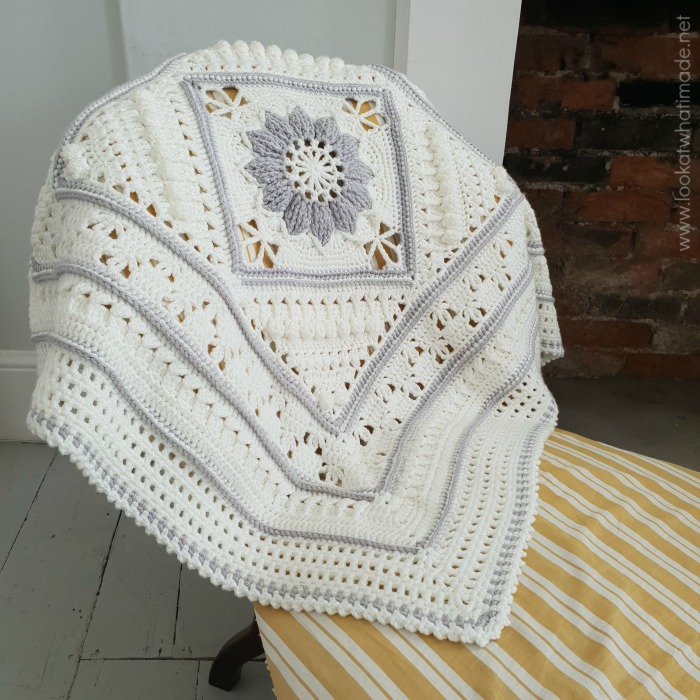
Et Voila!
Charlotte Loves Sunshine
If you want a bigger blanket than Charlotte’s Sunshine Baby, you can always follow the pattern above until you have completed Round 39 (a modified version of Round 29 of the Sunshine Owl CAL). After that, continue from Round 30 to Round 61 of the Sunshine Owl CAL, followed by the 5-round Border from Sunshine Owl. Please note that the Sunshine Owl CAL is a paid-for pattern. You can find it HERE on Ravelry.
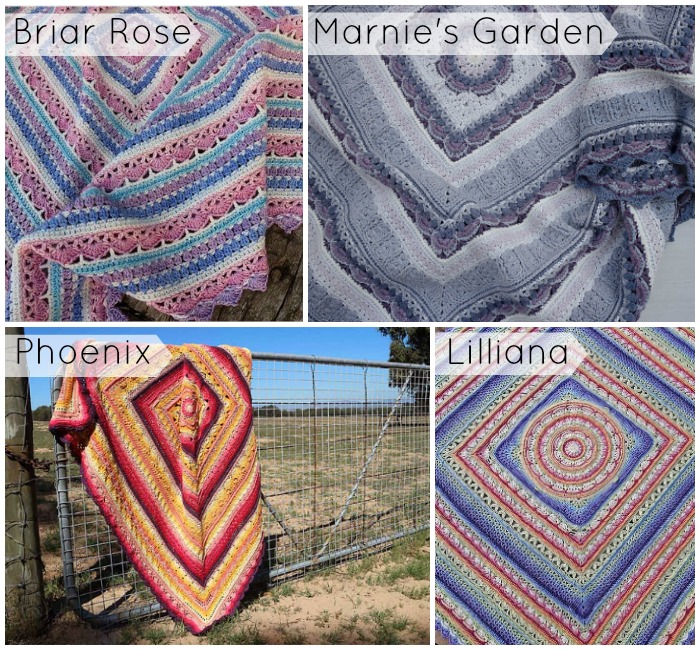
Vanessa has many other paid patterns that would be perfect for growing your own Charlotte (or any square, for that matter), provided that you do a bit of maths to get the stitch counts to marry up. Here are just a few:
You could also add/use one of the repeats from my Namaqualand blanket, if that suits your fancy?
As for borders? I have a few lying around. Each of them has instructions for how many stitches/multiples are needed in order for you to add the border. All you need to do is add rounds (be as adventurous as you wish) until you have the right number of stitches.
Borders
Phew. That was a fair bit of work!
I hope you enjoy making Charlotte’s Sunshine Baby!!!

This blog post contains affiliate links. I only link to products I personally use or would use. All opinions are my own.




Bio says
Lovely Blanket! I was wondering about the second photo> is there a pattern of it? Or are you going to make a pattern of this ‘growing’ Charlotte Sunshine Baby?
Jenny Lowman says
The second photo is Charlotte’s Dream. It is in the process of being finalised at the moment, so do watch this space!
BW
Jenny :)
Betsy Daley says
I love this pattern!
I can’t find the link to the PDF to actually print it.
Can you give me a hint on where it might be?
Thanks!
Betsy
Jenny Lowman says
Hi Betsy. Underneath Dedri’s signature there is a Print and PDF button to create your own PDFs or print straight off.
Hope that helps.
BW
Jenny :)
Linda McCall says
I’m not very good at crochet especially decreasing and increasing. I know all the stitches. I would love to make this blanket
Jenny says
Best thing to do is give it a try, Linda. Start off with the basic Charlotte square, and see how you get on.
Esther of It’s All In A Nutshell blog does have video tutorials for the Charlotte Square parts 1-3. They may help you to get started. Search for “It’s All In A Nutshell Charlotte’s Dream” on YouTube :)
Hope this helps a bit.
BW Jenny
Towana says
Love the Charlotte blanket. Waiting patiently on the simple Charlotte one. Thank you!!
Jenny says
Me too, Towana! Good things come to those who wait!
BW
Jenny :)
Dixe says
Is anyone else extremely curious about simply charlotte?!
Jenny says
Hi Dixe! It’s Jenny here, and the answer to that is a resounding YES! Even I am curious and haven’t seen her yet. Dedri wants SC to be absolutely perfect. Good things come to those of us who are prepared to wait ;)
silvana sarracco says
Thanks so so so much to share your knowledge and this perfect round to round !! I am from ARGENTINA ( don´t speak well english but and understand all) , hope you understand me . Fantastic design. Silvana
Dedri Uys says
Thank you very much, Silvana! xxx
Lisa Coffey says
Good morning!
I am planning on making the full Charlotte sunshine blanket and I want to make it in the 3 scheepjes aquarel colours. I can’t find how much yarn to purchase anywhere, and instructions on colour changes for those 3.
Am I missing something?
Dedri Uys says
Hi Lisa,
I am assuming you are talking about the sneak peek of the Charlotte blanket draped on the cupboard door (Charlotte’s Universe)? I am working on the pattern for that at the moment, so the yardages and instructions for that are not available yet. Charlotte’s Sunshine Baby is a small adaptation of the original square using Scheepjes Chunky Monkey.
DavetteB says
I hope the link works and you can see the finished blanket:
https://www.instagram.com/p/CE1A0tMgRwP/
Very proud of accomplishing this!
PS: I didn’t block – not enough space. the recipient knits so she can block if she wants
:-D
Dedri Uys says
I saw it Davette :) It is lovely!
DavetteB says
I’m almost finished my Charlotte Sunshine Baby.
Does it now need blocking? And for future reference, should it be blocked after finishing Charlotte, but before continuing to the extension?
Thanks
Dedri Uys says
Hi Davette, that is totally up to you. If you feel that it needs a good blocking to look more neat, please go ahead and do so. The extension is fairly simple and not too lacy, so the blanket comes out pretty square and neat without blocking.
Grace says
How do you get a pattern to print?
Jenny says
Hi Grace. There is a ‘print friendly’ tab at the bottom of Dedri’s posts near her signature. This allows you to print/create a pdf file.
BW Jenny :)
Karen Dunbar says
Dedri I just made my first Charlottes Sunshine Baby blanket with the Whipsiderry border. Oh my! Absolutely gorgeous. It will not be my last. As a matter of fact I’m starting another one right now. Thank you for the Whipsiderry border. It is the perfect compliment to this blanket. I even started to like the popcorn stitch. LOL. My only issue was I couldn’t get the PDF file to print correctly (long story) so I just printed the web page with the adds. I laugh every time I look at Part 1 as the add for easy ear wax removal is right there on page 1. It cracks me up. I seem to be easily amused these days
Dedri Uys says
Haha… ear wax removal! I am really glad you like the blanket and am quite curious to see how the Whispiderry border plays with the blanket. Regarding the PDFs, can you explain what is going awry? I had a complaint about one of the Sophie ones coming out all garbled with Print-friendly, but when I try it in Chrome, Firefox, and Edge, it prints out properly?
Thank you,
Dedri
DavetteB says
I use Print Friendly in Chrome all the time.
You can remove whatever you don’t want from links to other patterns or remove all photos to save ink. You can also increase or decrease the font size and decrease the photo size (50% works fine).
HTH
Martha Havenstein says
This is a lovely pattern. I am anxious to make it. What yarn and colors were used in the second photo from the top? I love that colorway.
Thank you,
Martha
Dedri Uys says
Hi Martha, that second photo is an extension of the pattern that hasn’t been released yet. It is made using Scheepjes Aquarel in Cloudscape, Cityscape, and Riverscape.
Caterina says
Dedri, thank you one more time for your incredible patterns. I just finished sunshine charlotte (not baby because I used alpaca yarn).
Dedri Uys says
You are most welcome :)
Anne Madore says
I absolutely love the Charlotte’s Sunshine Baby blanket. I would love to make a larger version for each of my 4 adult daughters. You said to do this I could complete round 39 then follow rounds 30-61 of the Sunshine Owl Cal blanket. How would that work with the stitch count, color scheme, and other adaptations for the Charlotte blanket? What would the final measurements be? Do you have a photo of this larger blanket?
I don’t thunk I could make these adaptations on my own. I’m hoping you can help me.
Thank you so much.
Dedri Uys says
Hi Anne
At the end of Round 39, you have the same number of stitches as for Round 29 of the Sunshine Owl CAL, so you can just continue following that pattern as written. As for colour scheme, that is totally up to you. You just use whichever colour you think will look best in a particular round, and then do the same for the next round. Maybe your daughters would like to choose their own colours? Likewise with size: It would depend on the yarn and hook you are using, and your personal tension. I have not personally made a version like that as it is not part of the pattern but rather a suggestion for people looking for growing alternatives.
I think that, once you start, it will be much less daunting than trying to figure all these things out at the start x
Dedri
Lizeri Alberts says
You have me tickled with the hint to “Simply Charlotte”. Cannot wait to see what you have in store for us!
Incidentally, I came about your site a few weeks ago , fell in LOVE with Charlotte’s Universe and started to make my own…and a by a freak coincidence chatted to a very lovely lady at Jaarn , all the way in Paarl Western Cape about your pattern only to find out that you guys actually know each other!
It’s a sign that I am on the right track with your pattern! :)
Jenny says
Hi Lizeri!
We have a Sophie’s Universe and a Charlotte’s Dream, so you have us guessing which blanket you are making!
So glad you are enjoying yourself!
J :)
Nancy Wendelboe says
Hi Dedri,
I have a question about the photo that you have which I shows a continuation of Charlotte’s Dream square but it is not the Sunshine Baby Blanket pattern. You stated “What will I do with all the time I am going to save replying to requests for the pattern? I’m going to keep growing Simply Charlotte, of course. Wanna see a sneak peek before we proceed? Oh, go on then! I cannot find a pattern for that blanket. Do you have one. I love it very much.
Nancy
Dedri Uys says
Hi Nancy.
I am still designing that one, so the pattern will be a while yet x
Dedri
Gail Coleman says
Any idea when Simply Charlotte might be available? It looks gorgeous
Dedri Uys says
No :) It is as much a mystery to me as to all of you. But I’m working hard on it x
Dedri
Shiranie says
This is so beautiful
Thank you so much for sharing and the detailed instructions
Terri says
Thank you & Misty!!! Oh and I can’t wait for you to finish Simply Charlotte!!!!!!! :)
Dedri Uys says
:)
Kim says
Thanks so much to all three of you I been waiting a long time for this being on a fixed income sucks. I will still be waiting for the rest of Charlotte but this is awesome until then.
Kim
Peter Bartlett says
Beautiful design, a lot of time and hard work has gone into its creation.
Thank you for sharing this pattern with us