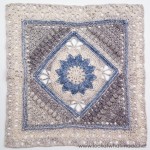
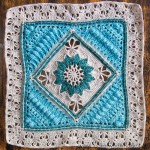
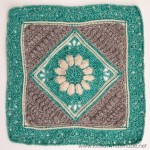
Welcome to Part 3 of Charlotte, my new Large Crochet Square. At the end of this part, you will have a lovely BIG square to use however your heart desires. Yes, I will be growing this square later on, and I am already working on it, but for now, this is all she wrote!
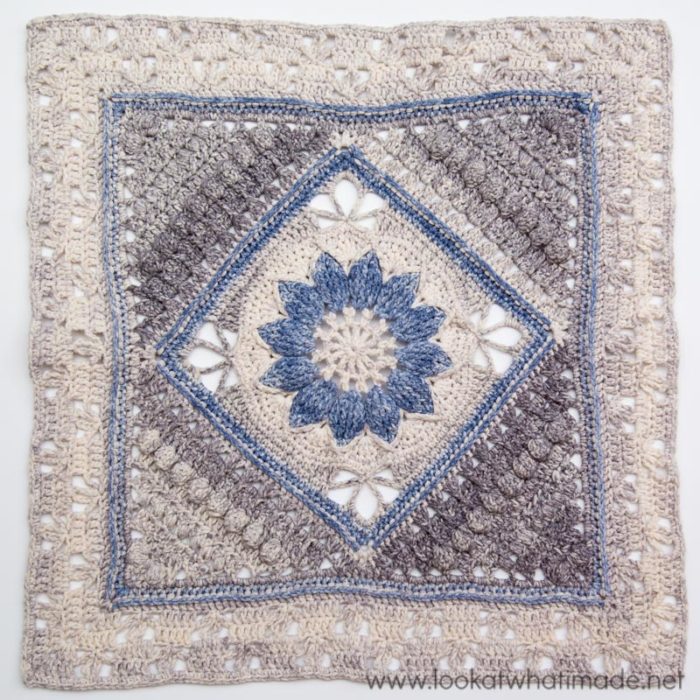
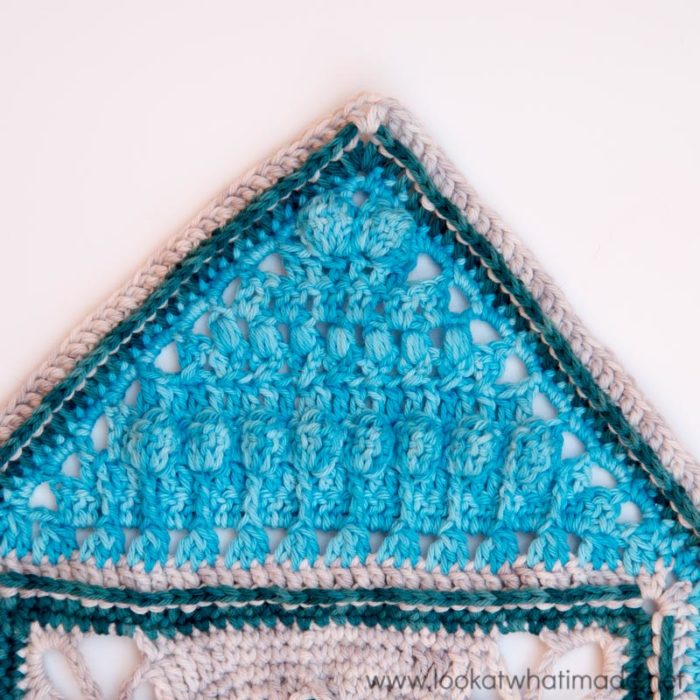
Today we will be adding a border to the small central square from Part 1 and the Triangles from Part 2.
For the photo tutorial below, I have used Scheepjes Sunkissed in shades 04, 06, and 16. Please note that the photos are only to show you how to make the rows and do not reflect the colours I have used in the written pattern.
Update 2021: This post has been updated as part of the Charlotte’s Universe CAL 2021.
Charlotte Large Crochet Square Part 3: Banksia Border
Resources
- You can find links to the right and left-handed video tutorials (US) for Part 2 HERE on It’s All in a Nutshell.
- If you need help with any of the special stitches or techniques used in this pattern, please see Special Stitches and Techniques.
Original Translations
Updated Translations With Charts
- German Translation by Sabi Bulla and Silke Schippa-Witte
- Hebrew Translation by Michal Ben-Hur, Iris Fait, Tami Sultan Nudelman, Tali Shchori, and Sarit Grinberg
Abbreviations
US Terminology (US/UK Conversion HERE)
- Beg – Beginning
- BP – Back post (insert your hook from back to front around the post of the indicated stitch and complete the stitch as normal)
- Ch – Chain
- Dc – Double crochet
- Hdc – Half-double crochet
- Sl st – Slip stitch
- Sp/sps – Space/spaces
- St/sts – Stitch/stitches
- () and * – Repeat instructions between parentheses and/or asterisks the amount of times specified
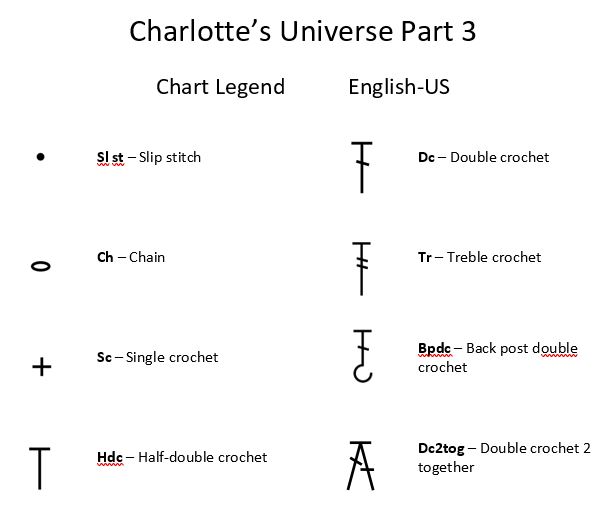
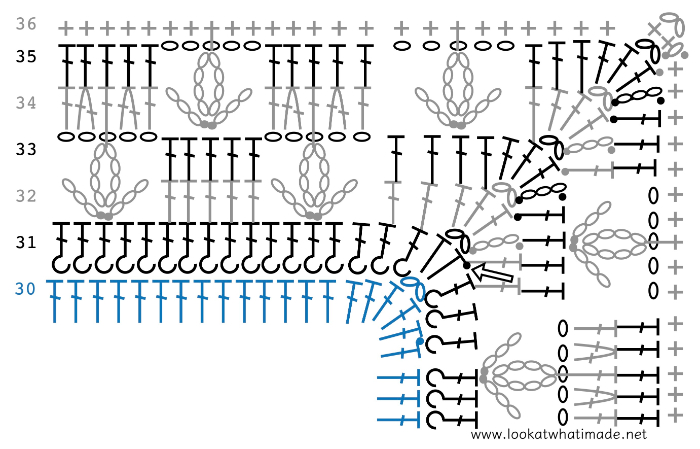
Charts
Credit: Masako Kawahara from Crochet_Hmmm
Please follow the charts in a counter-clockwise direction, regardless of whether you are right or left-handed.
Instructions
© Dedri Uys 2016. All Rights Reserved.
Round 29 (Colour C)
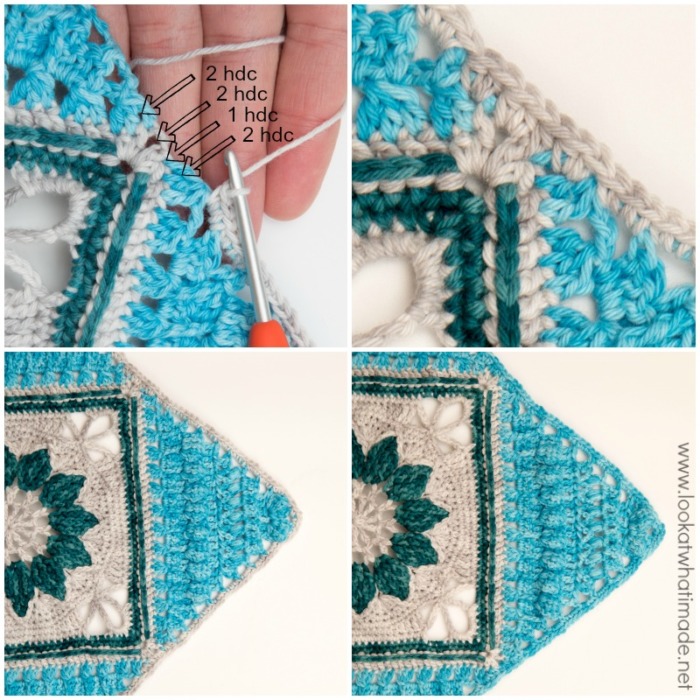
With RS facing, join your yarn by making a standing sc in any ch-2 corner sp. (Ch 2, sc) in the same sp. This is your first corner made.
*Sc in the first 3 sts. Sc between the 5-tr Bobble and the top of Row 27 of the Triangle. Make 3 sc in the side of each of the next 8 rows. Make 2 hdc in the side of the Cluster. Hdc in the st that contains the last leg of the Cluster. Make 2 hdc in the next ch-2 sp from Round 28.
Make 2 hdc in the side of the next Cluster. Make 3 sc in the side of each of the next 8 rows. Skip the sl st. Sc in the last 3 sts. (Sc, ch 2, sc) in the next ch-2 corner sp.*
Repeat from * to * 3 more times, omitting the last corner on the last repeat. Join to the first sc with a sl st. Fasten off and work away your ends.
Stitch Count Per Side: 64 sts {57 sc and 7 hdc – not including ch-2 corner sps}

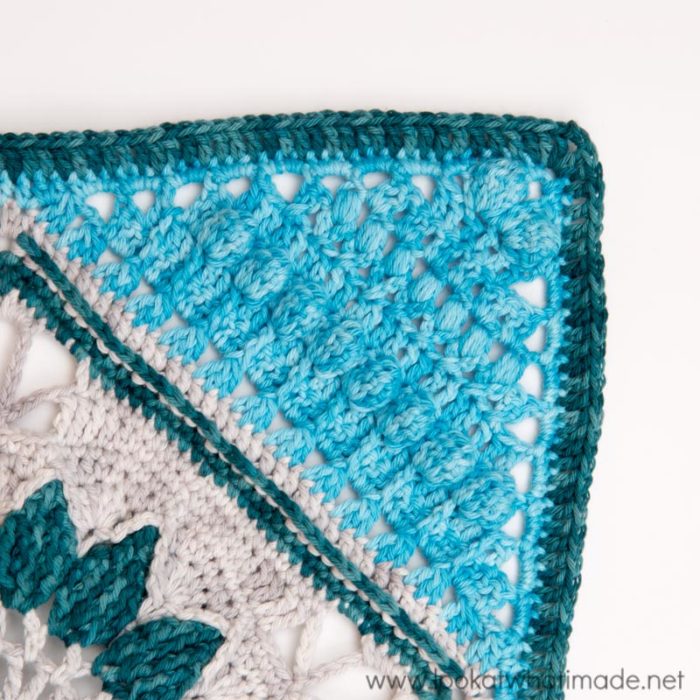
Round 30 (Colour B)
Join your yarn by making a standing dc in any ch-2 corner sp. (Dc, ch 2, 2 dc) in the same sp. This is your first corner made.
*Dc in each of the 64 sts across. (2 dc, ch 2, 2 dc) in the next ch-2 corner sp.*
Repeat from * to * 3 more times, omitting the last corner on the last repeat. Join to the first dc with a sl st. Fasten off and work away your ends.
Stitch Count Per Side: 68 dc per side – not including ch-2 corner sps
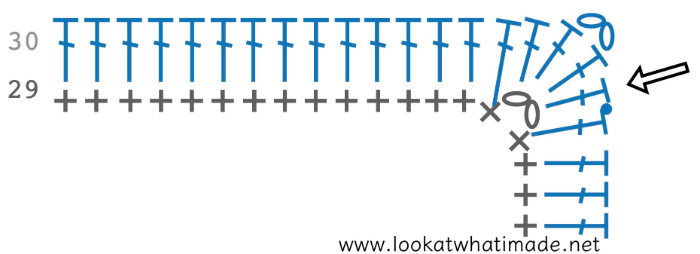
You can find the chart for the next 6 rounds at the end of Round 36.
Round 31 (Colour A)
Join your yarn by making a standing hdc in any ch-2 corner sp. (Ch 2, hdc) in the same sp. This is your first corner made.
*BPdc in each of the 68 sts across. (Hdc, ch 2, hdc) in the next ch-2 corner sp.*
Repeat from * to * 3 more times, omitting the last corner on the last repeat. Join to the first hdc with a sl st.
Stitch Count Per Side: 68 BPdc and 2 hdc per side – not including ch-2 corner sps
Round 32 (Colour A)
Sl st into the next ch-2 corner sp. (Ch 3, dc, ch 2, 2 dc) in the same ch-2 corner sp. This is your first corner made.
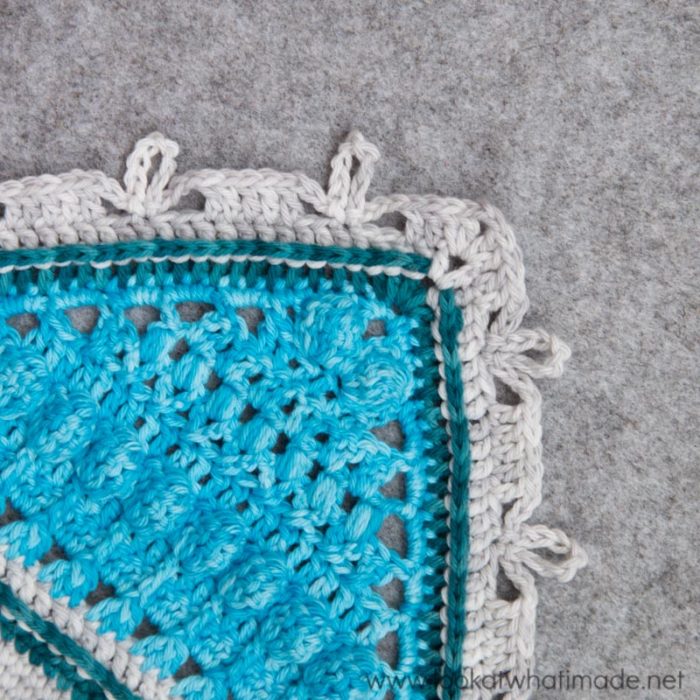
*Skip the first (hidden) st. Dc in the next 2 sts. (Ch 3, skip the next 2 sts and sl st in the next st. Ch 8 and sl st into the same st so that you form a ch-8 loop. Ch 3 and skip the next 2 sts. Dc in the next 5 sts) 6 times. Each of these repeats should fall over 10 sts.
Ch 3, skip the next 2 sts and sl st in the next st. Ch 8 and sl st into the same st so that you form a ch-8 loop. Ch 3 and skip the next 2 sts. Dc in the last 2 sts. (2 dc, ch 2, 2 dc) in the next ch-2 corner sp.*
Repeat from * to * 3 more times, omitting the last corner on the last repeat. Join to the top of the beg ch-3 with a sl st.
Stitch Count Per Side: 38 dc, 7 ch-8 sps, and 14 ch-3 sps – not including ch-2 corner sps
Round 33 (Colour A)
Sl st into the next st and into the next ch-2 corner sp. (Ch 3, dc, ch 2, 2 dc) in the same ch-2 corner sp. This is your first corner made.
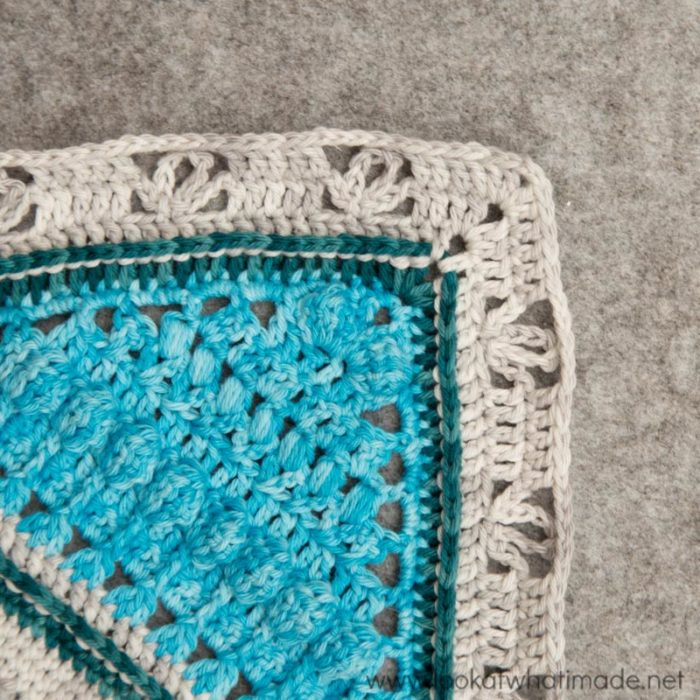
*Dc in the first 4 sts. (Ch 5, skip the two ch-3 sps and the ch-8 loop, and dc in the next 5 dc) 6 times. Ch 5, skip the two ch-3 sps and the ch-8 loop, and dc in the last 4 dc. (2 dc, ch 2, 2 dc) in the next ch-2 corner sp.*
Repeat from * to * 3 more times, omitting the last corner on the last repeat. Join to the top of the beg ch-3 with a sl st.
Stitch Count Per Side: 42 dc and 7 ch-5 sps – not including ch-2 corner sps
Round 34 (Colour A)
Sl st into the next st and into the next ch-2 corner sp. (Ch 3, dc, ch 2, 2 dc) in the same ch-2 corner sp. This is your first corner made.
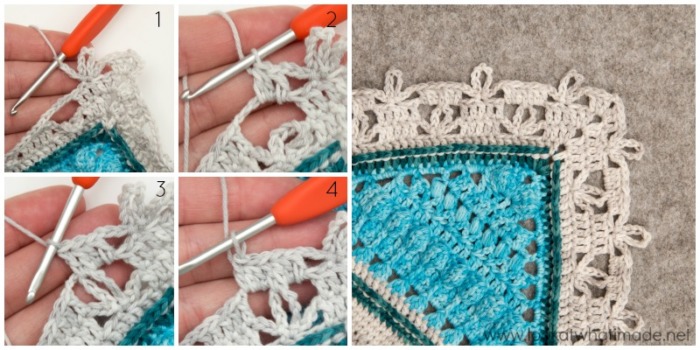
*Dc in the first st. (Ch 3, skip the next 2 sts and sl st in the next st. Ch 8 and sl st into the same st so that you form a ch-8 loop. Ch 3 and skip the next 2 sts {Photo 1}. Dc in the next ch-5 sp. Dc2tog in the same ch-5 sp {Photo 2}. Catch the ch-8 loop from Round 32 by making a dc into the ch-8 loop and the ch-5 sp {Photo 3}. Dc2tog in the same ch-5 sp. Dc in the same ch-5 sp {Photo 4}) 7 times.
Ch 3, skip the next 2 sts and sl st in the next st. Ch 8 and sl st into the same st so that you form a ch-8 loop. Ch 3 and skip the next 2 sts. Dc in the last st. (2 dc, ch 2, 2 dc) in the next ch-2 corner sp.*
Repeat from * to * 3 more times, omitting the last corner on the last repeat. Join to the top of the beg ch-3 with a sl st.
Stitch Count Per Side: 41 dc, 8 ch-8 sps, and 16 ch-3 – not including ch-2 corner sps
Round 35 (Colour A)
Sl st into the next st and into the next ch-2 corner sp. (Ch 3, dc, ch 2, 2 dc) in the same ch-2 corner sp. This is your first corner made.
*Dc in the first 3 sts. (Ch 5, skip the two ch-3 sps and the ch-8 loop, and dc in the next 5 dc) 7 times. Ch 5, skip the two ch-3 sps and the ch-8 loop, and dc in the next 3 dc. (2 dc, ch 2, 2 dc) in the next ch-2 corner sp.*
Repeat from * to * 3 more times, omitting the last corner on the last repeat. Join to the top of the beg ch-3 with a sl st.
Stitch Count Per Side: 45 dc and 8 ch-5 sps – not including ch-2 corner sps
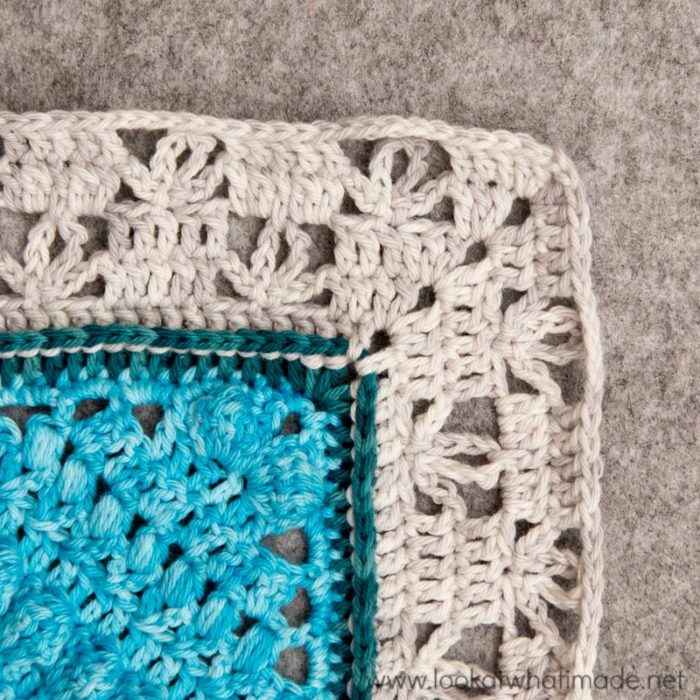
Round 36 (Colour A)
Sl st into the next st and into the next ch-2 corner sp. (Ch 1, sc, ch 2, sc) into the same ch-2 corner sp. This is your first corner made.
*Skip the first (hidden) st. Sc in the next 4 sts. (Make 2 sc in the next ch-5 sp. Catch the ch-8 loop from Round 34 by making a sc into the ch-8 loop and the ch-5 sp. Make 2 sc in the same ch-5 sp. Sc in the next 5 dc) 7 times.
Make 2 sc in the last ch-5 sp. Catch the ch-8 loop from Round 34 by making a sc into the ch-8 loop and the ch-5 sp. Make 2 sc in the same ch-5 sp. Sc in the last 5 sts. (Sc, ch 2, sc) in the next ch-2 corner sp.*
Repeat from * to * 3 more times, omitting the last corner on the last repeat. Join to the top of the first sc with a sl st. Fasten off and work away your ends.
Stitch Count Per Side: 86 sc – not including ch-2 corner sps
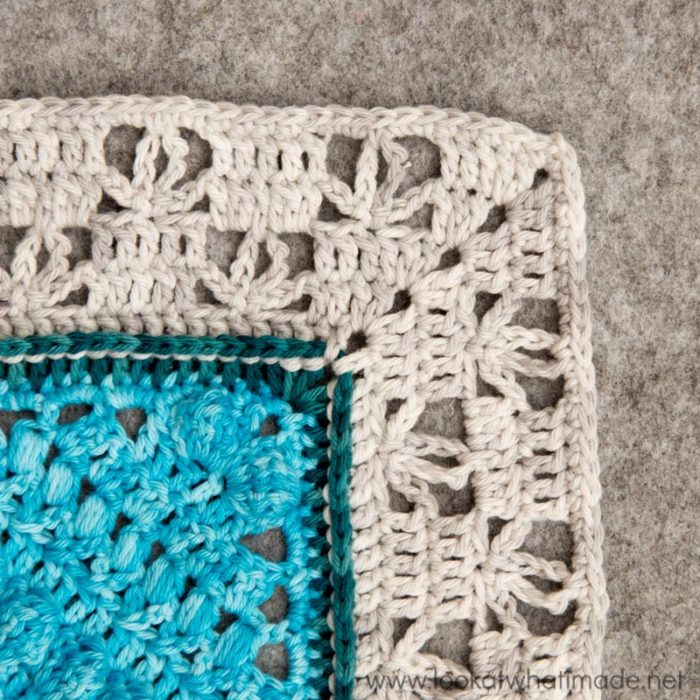
Remember to check your gauge at the end of this round.
And that is all for now! I hope you enjoy making your Large Charlotte Squares. I would love it if you would share pictures of your completed squares with me. You can use #simplycharlotte on any of the social media platforms listed below.
- Vintage Charlotte
- Scheepjes Sunkissed
- Scheepjes Stonewashed
Update 2021: If you would like to continue growing your square, you can now do so by following the Charlotte’s Universe CAL HERE.
Thank you so much for your continued encouragement and enthusiasm. It does me the world of good!

This blog post contains affiliate links. I only link to products I personally use or would use. All opinions are my own.


Lynn says
Thank you so much for this lovely pattern! Your instructions are so clear. I can’t believe I could make something so pretty!
Jenny says
Dedri’s pattern is so lovely, I have to agree, Lynn!
Jenny :)
Cheryl says
I’m stuck on round 32. For the life of me I can’t figure out how the repeats fall on anything other than 12 stitches. Moving along without including the chains: dc in 2, skip 2, slip stitch in the next, skip 2, dc in 5. That equals 12. I’d love any help!
Dedri Uys says
Hi Cheryl. The first 2 dc’s are not part of the repeat. They are not included in the parentheses. The repeat starts just after them.
Cheryl says
Of course. Thank you! I knew it must be something simple that I was missing.
Michele Shute says
Dedri,
I am so pleased to have found your Charlotte!I have made two Sophie’s, which I absolutely loved doing,and was looking for another “challenge”!
I find I can manage the tricky stitches in Charlotte having mastered so many new and unusual stitches in Sophie. It has been such a great learning experience and I now feel.confident to attempt much more intricate work than I could previously!
Dedri I do hope you will keep producing more wonderful new patterns to motivate us all!
Your work is so exciting and I am very grateful that a friend introduced me to your website!
Sincere thanks from another crazy crafter!! Michele
Dedri Uys says
Hi Michele. Thank you so much for your beautiful, encouraging comment. I am so pleased that you have found the patterns/tutorials useful and LOVE the fact that you have gained confidence. In the end every pattern is just a mix of simple stitches combined in different and interesting ways. Once we realize that, anything is possible!
Jana says
Hi Dedri,
I have started a sample Charlotte in ww to get the hang of it. So far, so good. I bought some Softfun Aquarel in the colors you used on the blue one. Its so thin! How will I make a blanket/throw from this yarn? I had no idea it was so thin. Its lovely!! But- can this be made into a nice blanket? Is stonewashed just as thin? I’m out if money and only have until January to get this done. What would you suggest?
Thank you in advance!!
Dedri Uys says
Jana, it is double knit (#3), not worsted weight, which is why you find it so thin. You can make a wonderful blanket with double knit yarn, it just takes a bit longer than with ww because you have to make more squares to get the same size. Jenny is making a Charlotte blanket out of regular stonewashed now (it is even thinner, but works to the same gauge as Aquarel) and it is going to be amazing when it is done. Stonewashed XL is worsted weight, but it will make for quite a heavy blanket.
plibellchen says
I love your Mandala’s and i wonna thank you for sharing them.
Best wishes from Germany
plibellchen
Elizabeth says
Why are there the charolette and then the large charolette what’s the difference?
Dedri Uys says
Elizabeth, there is only 1 Charlotte. The pattern is written in 3 parts. The first part will give you the equivalent of a 12″ square when worked in WW yarn. The second part adds triangles. The third part completes the square (which will be 24″ when worked in WW).
Beth says
I feel very silly, but am stuck on round 34. I can’t get it right. I must be missing something.
Dedri Uys says
Hi Beth. What are you struggling with? Can you use the contact me button at the top of the website to email me? Once I respond you can send me a photo and we can take it from there?
Beth says
I finally figured it out. I was putting the first double crochet in on each repeat.
Evelyn Brady says
Dedri….I love this pattern and am trying to work it into a bedspread for my Great nieces wedding gift.
i was wondering if you could /would tell me the best way to join the 4 central squares. I could just sew them together (but the edges) but it seems to me that maybe a wider separation of squares would be better I haven’t decided on the outer edge yet either…..
Ohhh the trials! ;)
Dedri Uys says
Hi Evelyn. I am not sure what you mean by ‘joining the 4 central squares’. Are you making 4 of the Part 1 Charlottes and wanting to join them to each other before making the rest?
Jana says
I am so intrigued by this square Dedri. I have been searching for the perfect pattern to make my almost 30 year old daughter a blanket (my baby).
Now I’ve found it!!! I wanted to know, however, what yarn and colors did you make the soft gray and blue one out of? She is very ‘earthy” and I love that color combo but was thinking of using a deep purple or forest green with that wheat color you have up there.
Please tell me what yarn that is? Thank you!!!
Jana
Jana says
Oh duh I just saw it down below. Sorry!!
Dedri Uys says
Glad you found the answer, Jana. I still refer to my almost-30 sister as my baby sister :)
Anne Harris says
Thank you so much! This is my first complicated pattern, and I’m having such fun! It’s very beautiful. Your directions are very clear. One question though – I am struggling with the very last round (36), as it seems the count keeps coming up 87 sc per side, not 86. Should the direction “Sc in the last 5 st’s” actually read the last 4 stitches so it matches with the other end? Or am I missing something else? Thanks again.
Dedri Uys says
Hi Anne. Round 35 has 45 dc’s and 8 ch-5 spaces. Each ch-5 space will accommodate 5 stitches in the next round, so that gives you an equivalent of 85 st’s. In the next round you add 2 st’s per side (corners) and SKIP the first stitch (which takes away one of the 2 added stitches), giving you 1 extra stitch per side. So Round 36 should def be 86 st’s per side. Are you remembering to skip the first (hidden) stitch?
Sonya Federman says
I could cry. I have a limited amount of linen yarn and supplemented cotton to make a summer top. I didn’t have a pattern and decided to make a central square which I wanted to turn diamond-way. I didn’t have the wit (after much cogitation I might add) to then make a square out of the diamond, so I pulled out everything I did. And now I see this beautiful pattern. Thank you for it.
Dedri Uys says
Oh no! I would cry too if I had to rip out all my work. I hope this pattern will go some way towards aiding you in your summer top.
Caterina says
Thank you for being so generous and sharing your patterns in such a clean and didactic way. I have just finished Part 1 of Charlotte, and I am in love with it <3 <3 <3 thinking that I might join four squares to make a larger blanket because I'm using very fine baby alpaca. I'll send you a picture if I succeed.
Dedri Uys says
Hi Caterina. I would love to see it when it’s done. I am so pleased that you like the pattern :)
Carol says
Beautiful, as always, Dedri!
Hmmm! this stitch patterns reminds me of another of your projects I just finished….Banksia, perhaps? I actually have at least one more of those to make! (probably using the other skein I dyed at Retreat,)
Dedri Uys says
Carol, I have been working with this Banksia stitch a lot lately and yes, I have done a shawl, a square, and a border with it in a very short space of time :) I love how your first Banksia shawl turned out, and I cannot wait to see the green one and the other rasta one :)
Wendy says
Gorgeous!
Carla Briggs says
You make the most beautiful amazing things! Love the colors! Thank you so very much!
Helen says
Thank you for your inspiration. I had no intention of completing the Charlotte but it kept on making an appearance and it looked modern yet in touch with the traditional. I am now on the third of the four triangles of part 2 having started at the weekend and ordered some more yarn to make more!!!! I will post you a photo once I’ve got a completed Charlotte. Thank you again x
Caro says
Another gorgeous creation, Dedri! Thank you so much.
Caro
So says
thank you so much dedri!
(I can’t wait for part 4 ^^)
Dedri Uys says
Ah, So, you will be waiting a wee while. This is all I am doing (for now)!
Carmen Jorissen says
Gahhh, Dedri, this is so beautiful!! Love it!!
Dedri Uys says
Thank you, Carmen :)
agus says
very beautifull! I’ll do it:)