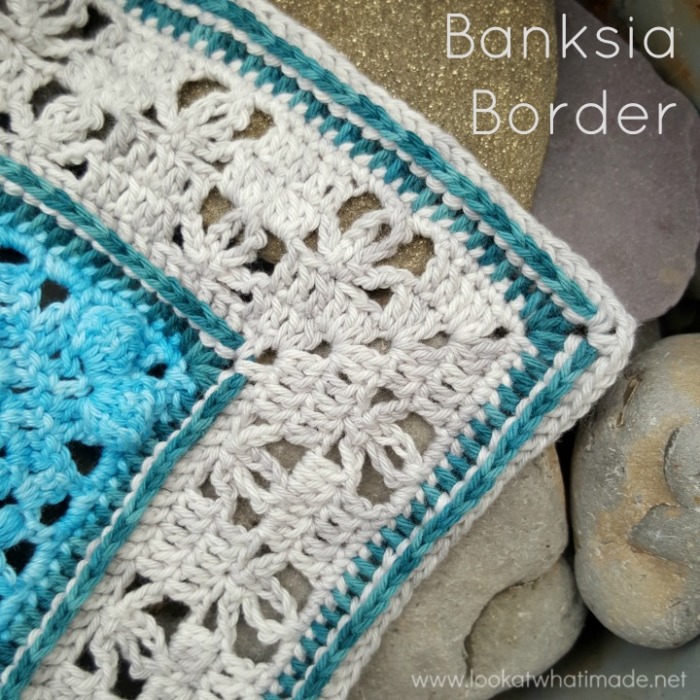
The Banksia Border is an extension of the Banksia band at the end of Part 3 of Charlotte, and very similar to the Banksia Shawl I designed for the February Retreat with Devon Sun Yarns. In fact, I have used modified versions of this border for quite a few projects over the last six months, so you will see it cropping up a lot. I love the delicacy of the Banksia flowers between the solid back post parts.
Banksia Border Crochet Pattern
The Banksia Border can be used to add a border to your blanket, or it can be used to ‘extend’ an individual square to make it bigger. Please pay attention to the stitch multiples needed in the Base Round.
Resources
- Ravelry: Add this pattern to your Ravelry Queue
- Social Media: Share photos using #banksiaborder
Translations
Translations were supplied by the CAL – Crochet A Long group on Facebook.
Materials
Use the same hook and yarn you have used for whichever project you will be adding the border to.
Abbreviations
US Terminology
- Ch – Chain
- BP – Back post (insert your hook from back to front around the post of the indicated stitch and complete the stitch as normal)
- Dc – Double Crochet
- Dc2tog – Double crochet 2 together (see Special Stitches)
- Hdc – Half-double crochet
- Sc – Single Crochet
- Sl st – Slip stitch
- St/st’s – Stitch/Stitches
- () and * – Repeat instructions between parentheses and asterisks the number of times specified
Special Stitches
- Dc2tog – Yarn over and insert your hook into the indicated stitch. Yarn over and pull up a loop. Yarn over and pull through 2 loops. Yarn over and insert your hook into the next stitch. Yarn over and pull up a loop. Yarn over and pull through 2 loops. Yarn over and pull through all 3 loops on your hook.
- Standing Stitches – Standing stitches are the same as regular stitches, except that they are made ‘in air,’ without being attached to a previous stitch. Start with a slip knot already on your hook and complete the stitch as normal. Here are some tutorials for the standing double crochet and standing single crochet to get you started.
Chart
Please read Base Round below for crucial information about following this chart. The chart starts with the Base Round.
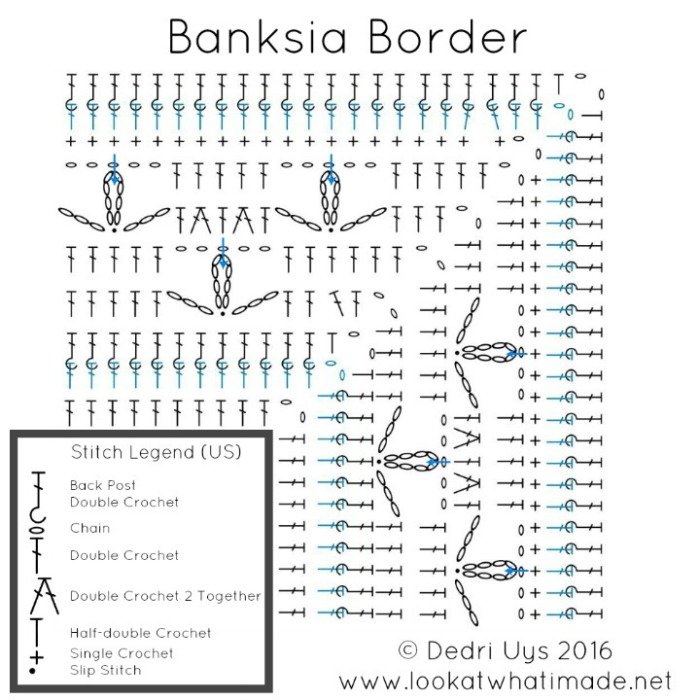
The first round of this chart (the Base Round) needs to be a multiple of 10 + 4 stitches per side for the border to work.
Gauge and Size
N/A
Instructions
Base Round
You will need to create a Base Round around your blanket for the border to work out. You want to end up with a multiple of 10 + 4 stitches per side, and 4 ch-2 corner spaces. Depending on how you choose to attach your squares to each other, and the number of stitches in each square, you might need to make two or three base rounds to get the correct multiples. I suggest using dc’s.
Once you have a multiple of 10 + 4 stitches on each side (not including the corner spaces), proceed with the border as written below.
Round 1
Join your yarn by making a standing dc in any ch-2 corner space. (dc, ch 2, 2 dc) in the same space. This is your first corner made. *Dc in each st across. (2 dc, ch 2, 2 dc) in the next ch-2 corner space.* Repeat from * to * 3 more times, omitting the last corner on the last repeat. Join to the first dc with a sl st. Fasten off and work away your yarn ends.
Stitch Count: Multiples of 10 + 8 stitches per side, and 4 ch-2 corner spaces
Round 2
Join your yarn by making a standing hdc in any ch-2 corner space. (Ch 2, hdc) in the same space. This is your first corner made. *BPdc in each st across. (Hdc, ch 2, hdc) in the next ch-2 corner space.* Repeat from * to * 3 more times, omitting the last corner on the last repeat. Join to the first hdc with a sl st.
Stitch Count: Multiples of 10 stitches per side, and 4 ch-2 corner spaces
Round 3
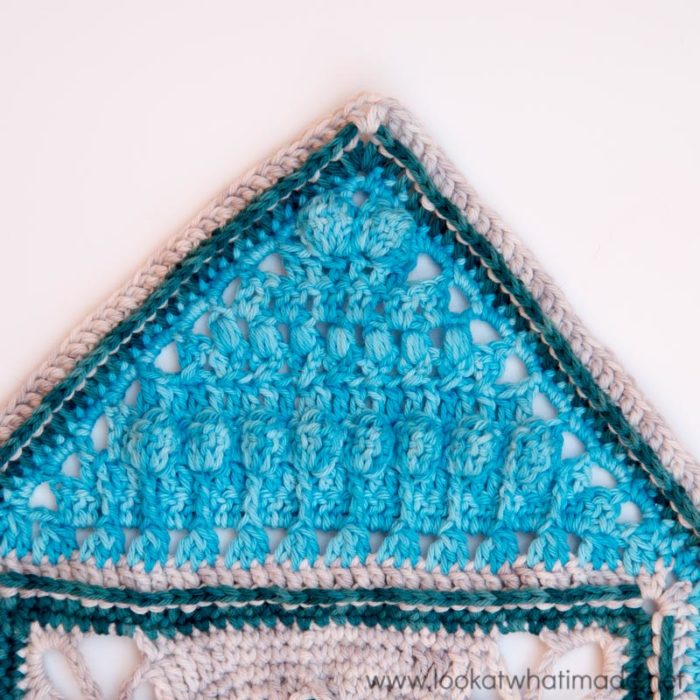
Sl st into the next ch-2 corner space. Ch 3 (counts as your first dc). (Dc, ch 2, 2 dc) in the same ch-2 corner space. This is your first corner made.
*Skip the first (hidden) stitch. Dc in the next 2 st’s. (Ch 3, skip the next 2 st’s and sl st in the next st. Ch 8 and sl st into the same stitch so that you form a ch-8 loop. Ch 3 and skip the next 2 st’s. Dc in the next 5 st’s) until you have 7 st’s left. Each of these repeats should fall over 10 stitches.
Ch 3, skip the next 2 st’s and sl st in the next st. Ch 8 and sl st into the same stitch so that you form a ch-8 loop. Ch 3 and skip the next 2 st’s. Dc in the last 2 st’s. (2 dc, ch 2, 2 dc) in the next ch-2 corner space.* Repeat from * to * 3 more times, omitting the last corner on the last repeat. Join to the top of the beginning ch-3 with a sl st.
Round 4
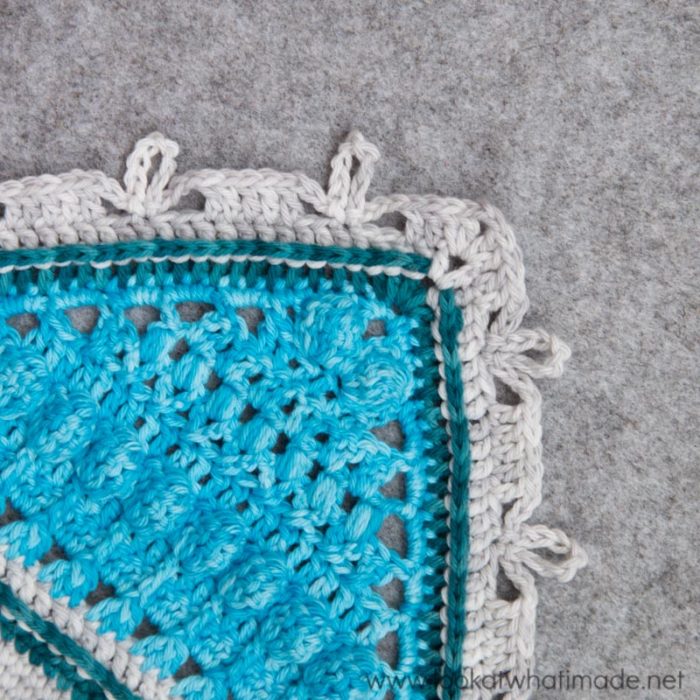
Sl st into the next st, and into the next ch-2 corner space. Ch 3 (counts as your first dc). (Dc, ch 2, 2 dc) in the same ch-2 corner space. This is your first corner made.
*Dc in the first 4 st’s. (Ch 5, skip the two ch-3 spaces and the ch-8 loop, and dc in the next 5 dc’s) until you have 2 ch-3 spaces and 1 ch-8 loop left.
Ch 5, skip the two ch-3 spaces and the ch-8 loop, and dc in the last 4 dc’s. (2 dc, ch 2, 2 dc) in the next ch-2 corner space.* Repeat from * to * 3 more times, omitting the last corner on the last repeat. Join to the top of the beginning ch-3 with a sl st.
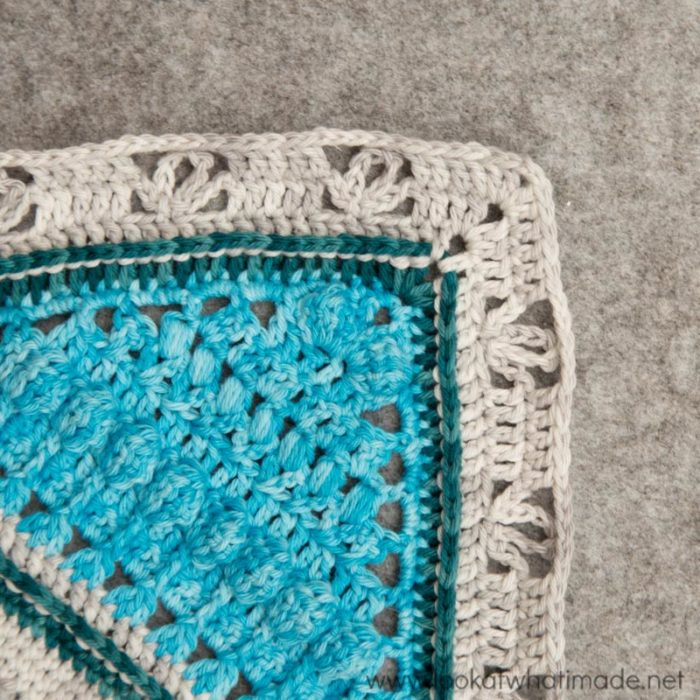
Round 5
Sl st into the next st, and into the next ch-2 corner space. Ch 3 (counts as your first dc). (Dc, ch 2, 2 dc) in the same ch-2 corner space. This is your first corner made.
*Dc in the first st. (Ch 3, skip the next 2 st’s and sl st in the next st. Ch 8 and sl st into the same stitch so that you form a ch-8 loop. Ch 3 and skip the next 2 st’s {Photo 1}. Dc in the next ch-5 space. Dc2tog in the same ch-5 space {Photo 2}. Catch the ch-8 loop from by making a dc into the ch-8 loop and the ch-5 space {Photo 3}. Dc2tog in the same ch-5 space. Dc in the same ch-5 space {Photo 4}) until you have worked into every ch-5 space.
Ch 3, skip the next 2 st’s and sl st in the next st. Ch 8 and sl st into the same stitch so that you form a ch-8 loop. Ch 3 and skip the next 2 st’s. Dc in the last st. (2 dc, ch 2, 2 dc) in the next ch-2 corner space.* Repeat from * to * 3 more times, omitting the last corner on the last repeat. Join to the top of the beginning ch-3 with a sl st.
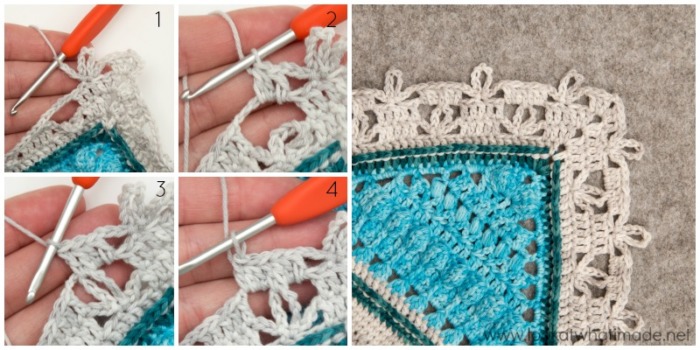
Round 6
Sl st into the next st, and into the next ch-2 corner space. Ch 3 (counts as your first dc). (Dc, ch 2, 2 dc) in the same ch-2 corner space. This is your first corner made.
*Dc in the first 3 st’s. (Ch 5, skip the two ch-3 spaces and the ch-8 loop, and dc in the next 5 dc’s) until you have 2 ch-3 spaces and 1 ch-8 loop left.
Ch 5, skip the two ch-3 spaces and the ch-8 loop, and dc in the next 3 dc’s. (2 dc, ch 2, 2 dc) in the next ch-2 corner space.* Repeat from * to * 3 more times, omitting the last corner on the last repeat. Join to the top of the beginning ch-3 with a sl st.
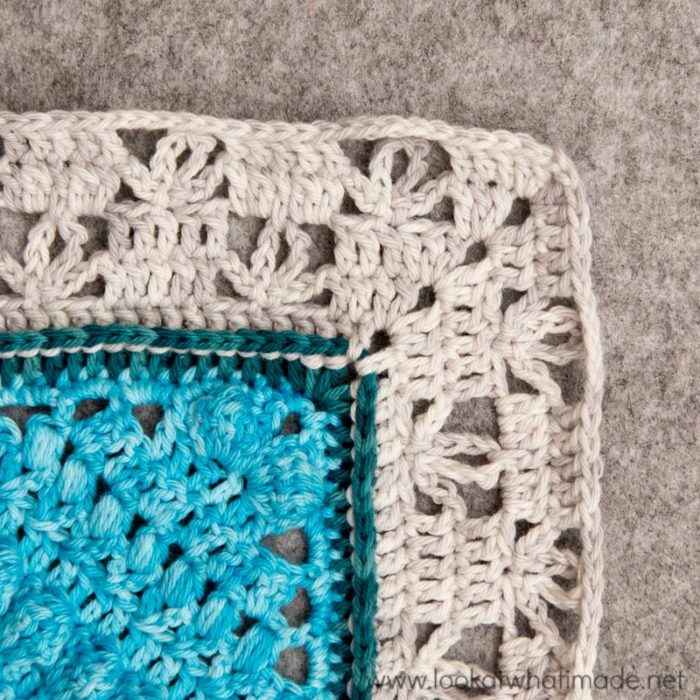
Round 7
Sl st into the next st, and into the next ch-2 corner space. (Ch 1, sc, ch 2, sc) into the same ch-2 corner space. This is your first corner made.
*Skip the first (hidden) stitch. Sc in the next 4 st’s. (Make 2 sc’s in the next ch-5 space. Catch the ch-8 loop from Round 5 by making a sc into the ch-8 loop and the ch-5 space. Make 2 sc’s in the same ch-5 space. Sc in the next 5 dc’s) until you get to the ch-2 corner space. (Sc, ch 2, sc) in the next ch-2 corner space.* Repeat from * to * 3 more times, omitting the last corner on the last repeat. Join to the top of the first sc with a sl st. Fasten off and work away your yarn ends.
Stitch Count: Multiples of 10 + 6 stitches per side, and 4 ch-2 corner spaces
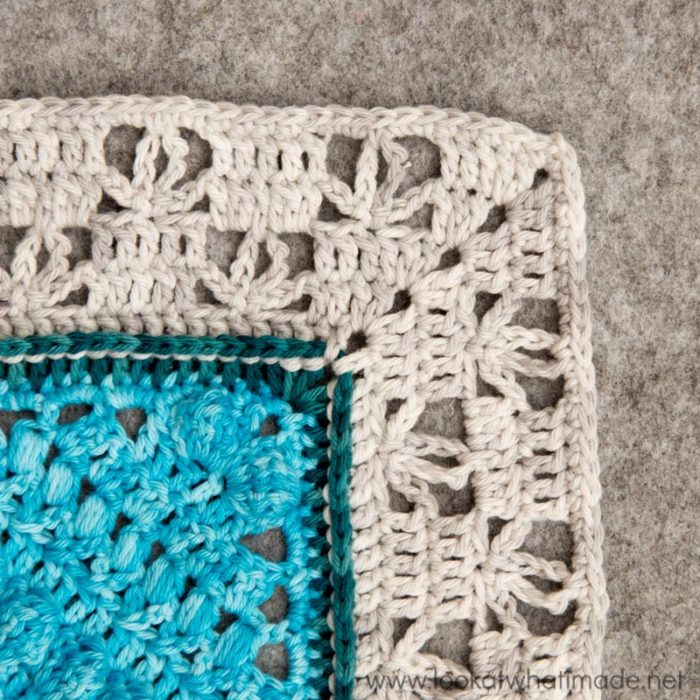
Round 8
Join your yarn by making a standing dc in any ch-2 corner space. (Dc, ch 2, 2 dc) in the same space. This is your first corner made. *Dc in each st across. (2 dc, ch 2, 2 dc) in the next ch-2 corner space.* Repeat from * to * 3 more times, omitting the last corner on the last repeat. Join to the first dc with a sl st. Fasten off and work away your yarn ends.
Stitch Count: Multiples of 10 stitches per side, and 4 ch-2 corner spaces
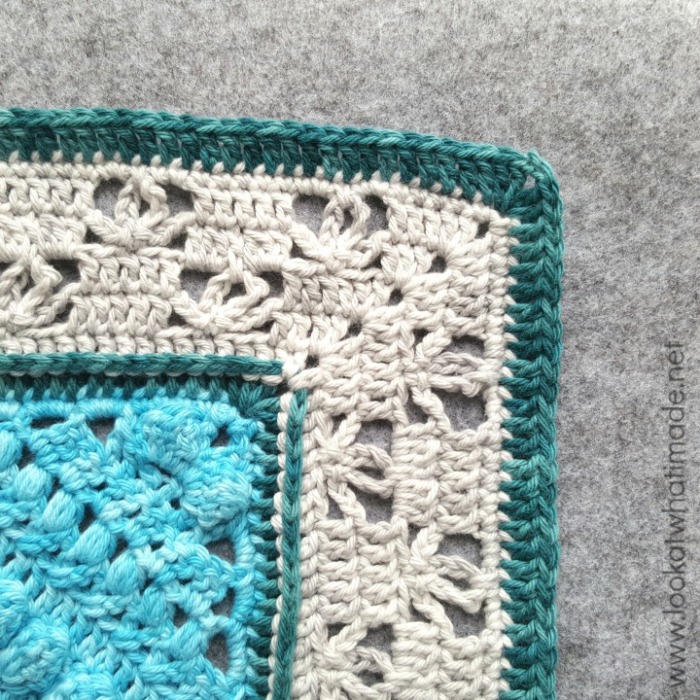
Round 9
Join your yarn by making a standing hdc in any ch-2 corner space. (Ch 2, hdc) in the same space. This is your first corner made. *BPdc in each st across. (Hdc, ch 2, hdc) in the next ch-2 corner space.* Repeat from * to * 3 more times, omitting the last corner on the last repeat. Join to the first hdc with a sl st. Fasten off and work away your yarn ends.
Stitch Count: Multiples of 10 + 2 stitches per side, and 4 ch-2 corner spaces
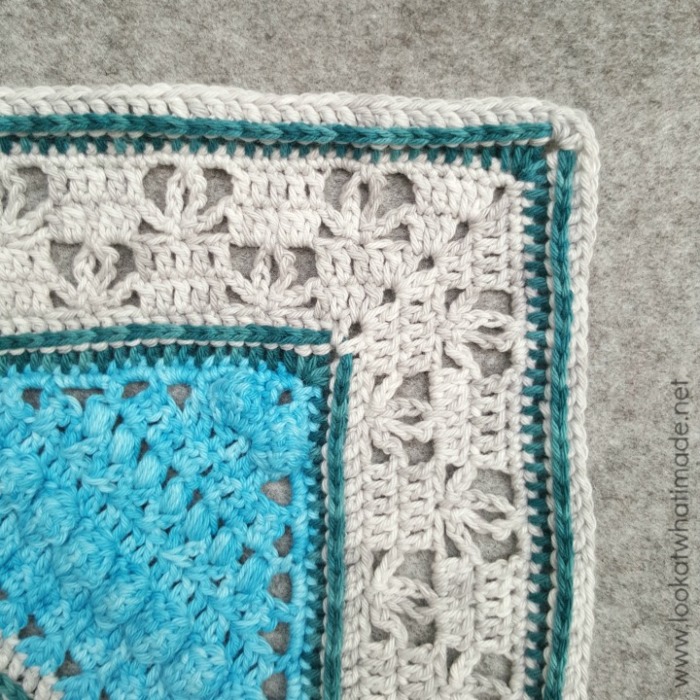
If you use this border for one of your projects, please use hashtag #banksiaborder when posting your photos so that we can find them.

This blog post contains affiliate links. I only link to products I personally use or would use. All opinions are my own.


Paulina says
Hi Dedri!! I’m using this border to finish off a blanket I’m making, but I have a question about Round 5…I think that the starting asterisk should be just before the ch3 and not before the dc so that it matches the photos? Thank you so much for a lovely pattern <3
Dedri Uys says
Hi Paulina,
I have checked this round again and it looks correct to me? The repeat starts after the first corner is made and includes the next corner. On the last repeat, the last corner is omitted because it has already been made before the repeats started.
I hope that helps,
Dedri
Jane Catalano says
This is such a beautiful border! I don’t currently have a project to use this on, but will save it and I know I will use it soon.
I love your posts. I always learn something new. Thanks so much for sharing your knowledge and love of crocheting!
Ellen says
I want to use this border but can’t figure out how to print it. I downloaded the PDF converter.
Jenny says
The ‘Print Friendly’ button is the one you need to click at the bottom of the blog pattern, Ellen. This will allow you to print out the pattern.
Jenny :)
Brenda says
I am currently doing Sophie’s universe and Demelza in Stonewashed so perhaps it is just me overusing stonewashed!lol
My favorite yarn right now is Merino Soft so I am hoping you find something cool to make with the new Merino Brush colors!
Jenny says
Brenda, is there actually such a thing as overusing the gorgeous Scheepjes Stone Wash yarns? I am struggling to believe that LOL
Jenny :)
Brenda says
I found the Charlotte Blanket color packs for sale at woolwarehouse. It is using Stone wash.
Is this your final blanket with the Charlotte and does it use the new boarder you just posted?
Will there be other color packs? Stonewashed has kinda been done to death and scheepjes has several newer yarns that look fun.
Thanks for you response!
Jenny says
The colour packs at Weil Warehouse are for my Charlotte’s Dream blanket consisting of 12 squares of Charlottes, Brenda. It is in the Stone Wash yarn.
Dedri is still working on growing her individual Charlotte square.
Jenny :)
Dedri Uys says
Hi Brenda. I am sorry that you feel that way about Stonewashed. I love it and don’t think I will ever get bored with it. You are welcome to use any yarn you prefer. The pattern will be available on the website (for free) on the 28th of October and it will tell you exactly how much yarn you will need for the blanket to enable you to put together your own colourway in your preferred yarn.
The blanket is not edged with the Banksia Border, but the border we have chosen to use will be included in the pattern.