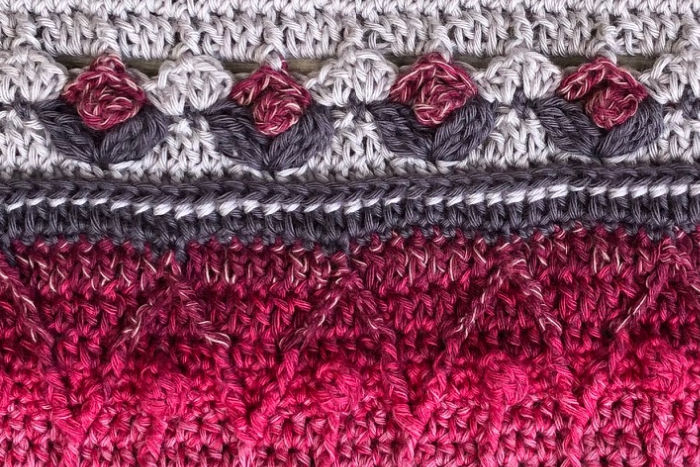
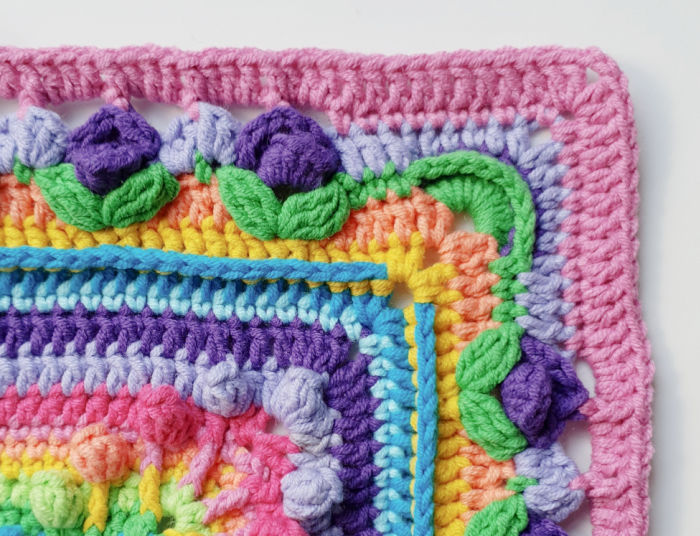
Welcome to Part 10 of Charlotte’s Universe. This week, we are making Roses. One hundred of them! Reading back through my notes, I found a very candid one about making all those roses. I think I will include it after the Rose round so that you can get a glimpse into my mind.
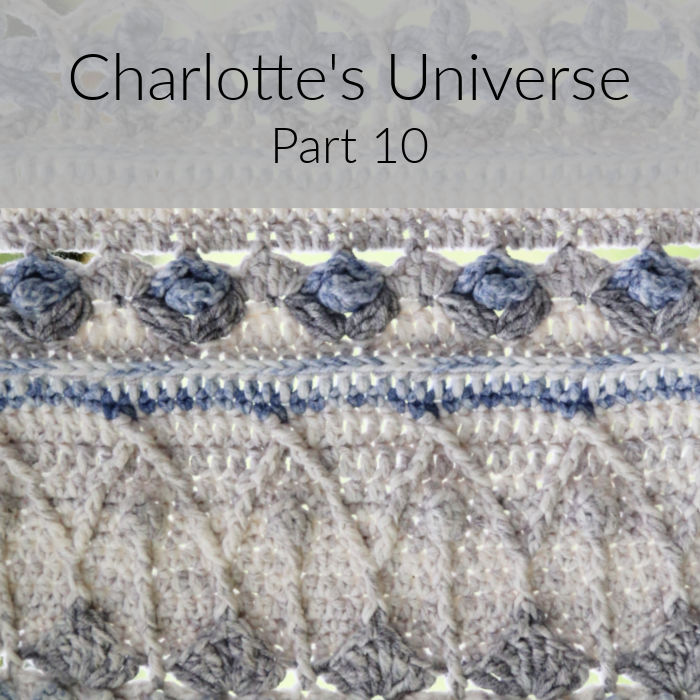
The roses are by far my favourite stitch combination EVER. It took me four days of making and frogging to figure out how to do them in Sophie’s Universe, and I am so pleased with how they turned out. I just want to use them over and over again. And since Charlotte and Sophie are sisters, they HAD to be in this design.
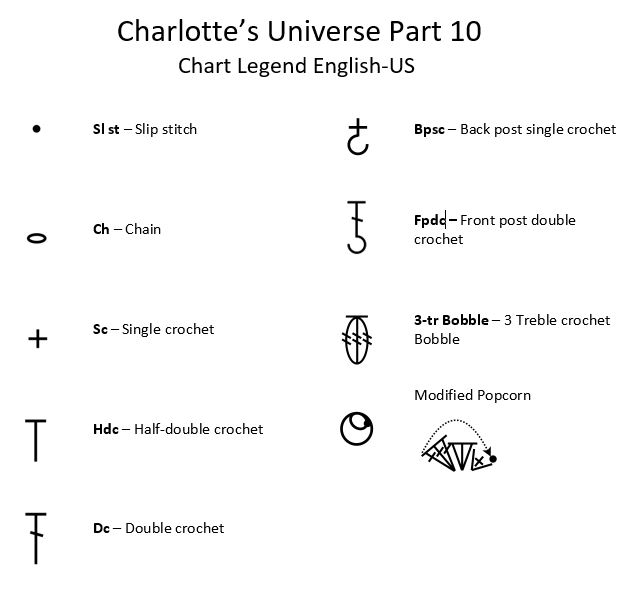
Many people have asked me if they can chart Sophie, and my answer has always been: “If you can chart the Roses, you can chart Sophie”. Five years went by, and the challenge remained unanswered. And then I met the very talented Masako, who has done all the charts for Charlotte and Sophie’s Dream (and is working on charting the entire Sophie pattern). I cannot tell you how delighted I am with her solution for charting the roses. Masako, you are brilliant!
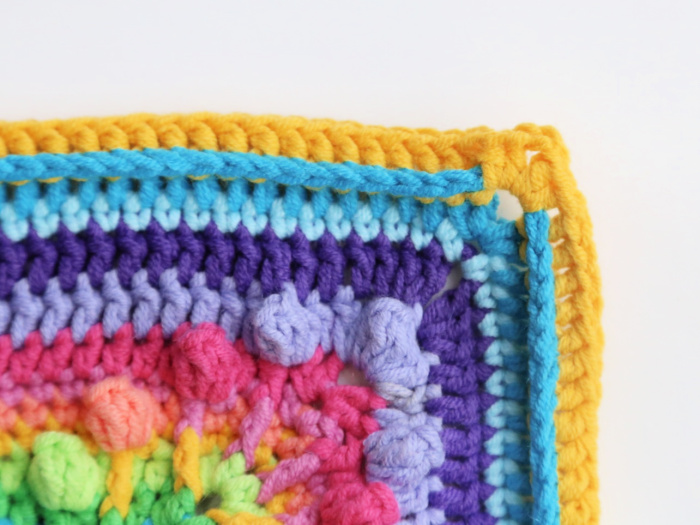
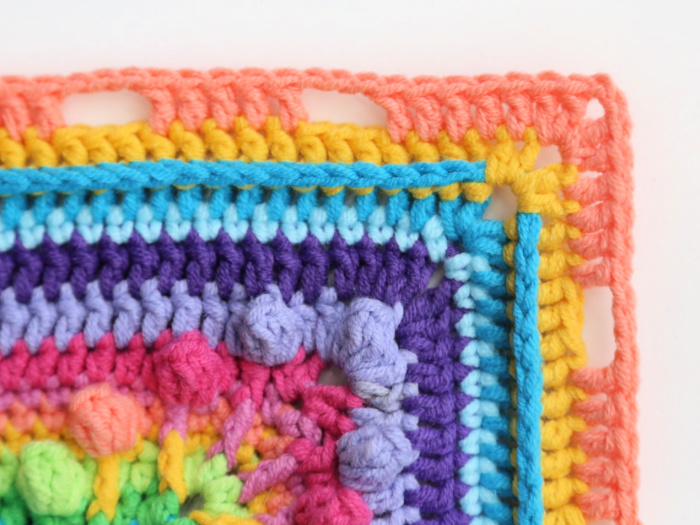
On another note, and since I am sharing glimpses, I had difficulty figuring out the corners for this part. At one point, I cut back to the end of Part 9 to fix the corner design.
I asked Xander to take a little video clip of it for me, and this was his face when I told him that I was about to take scissors to the blanket!

Ok, I know you are excited to start, so I will stop rambling.
Charlotte’s Universe Part 10: Roses
Resources
- You can find links to the right and left-handed video tutorials (US) for Part 10 HERE on It’s All in a Nutshell.
- Add this pattern to your Ravelry Queue.
Translations
- Dutch Information and Links by Dianne Baan
- German Translation – by Sabi Bulla and Silke Schippa-Witte
- Hebrew Translation by Michal Ben-Hur, Iris Fait, Tami Sultan Nudelman, Tali Shchori, and Sarit Grinberg
- Japanese Information and Links by Masako Kawahara
- Swedish Translation by Åza Karlsson and Ulrika Larsson
Abbreviations and Special Stitches
Please see Special Stitches and Techniques (worth bookmarking or saving as a PDF as we go forward – Take a look at THIS TUTORIAL if you don’t know how to use the print-friendly button).
Charts
Credit: Masako Kawahara from Crochet_Hmmm
Please follow the charts in a counter-clockwise direction, regardless of whether you are right or left-handed.
Colours Per Round
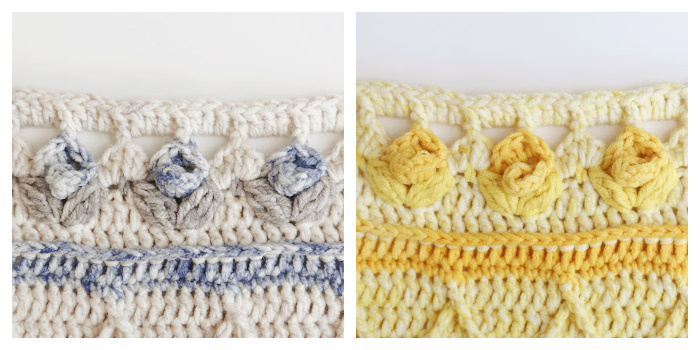
Vintage and Sunshine
Follow the colour reference next to each round title {for example, Round 1 (Colour A)}.
Pink Charlie
- Round 90 – B
- Round 91 – B
- Round 92 – C
- Round 93 – A
- Round 94 – B
- Round 95 – B
- Round 96 – B
Bonus Colourways
- Sunflower Charlotte – Michael Wassenaar (Chunky Monkey)
- Space for Grace – Sabi Bulla (Skies Light)
- Latte With Love – Jenny Lowman (Scheepjes Softfun)
Esther Dijkstra will be sharing her Scheepjes Stonewashed Colours Per Round HERE.
Instructions
© Dedri Uys and Scheepjes 2021. All Rights Reserved.
Round 90 (Colour A)
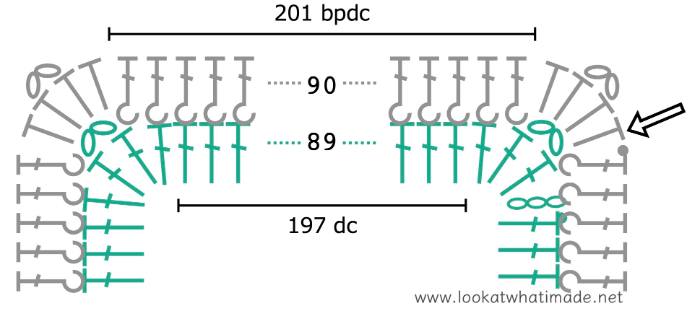
Join your yarn by making a standing hdc in any ch-2 corner sp. (Hdc, ch 2, 2 hdc) in the same ch-2 sp. This is your first corner made.
*BPdc around each of the 201 sts across. (2 hdc, ch 2, 2 hdc) in the next ch-2 corner sp.*
Repeat from * to * 3 more times, omitting the last corner on the last repeat. Join to the first hdc with a sl st.
Stitch Count Per Side: 4 hdc and 201 BPdc
Round 91 (Colour A)
Sl st in the next st and into the ch-2 corner sp. (Ch 3, dc, ch 2, 2 dc) in the same sp. This is your first corner made.
*Skip the first (hidden) st. Dc in the next 5 sts. (Ch 3, skip the next 3 sts, dc in the next 5 sts) until 7 sts remain before the ch-2 corner sp. Ch 3, skip the next 3 sts, dc in the last 4 sts. (2 dc, ch 2, 2 dc) in the next ch-2 corner sp.*
Repeat from * to * 3 more times, omitting the last corner on the last repeat. Join to the top of the beg ch-3 with a sl st. Fasten off and work away your ends.
Stitch Count Per Side: 133 dc and 25 ch-3 sps

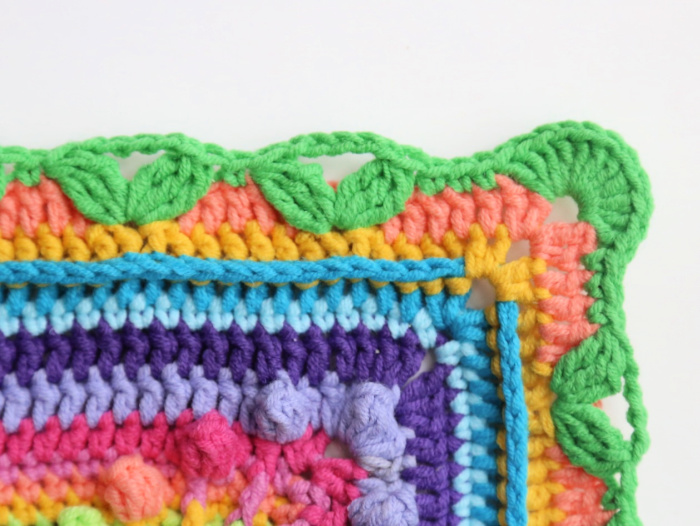
Round 92 (Colour C) – Leaves
Join your yarn by making a standing dc in any ch-2 corner sp. Make 10 more dc in the same ch-2 sp. This is your first corner made.
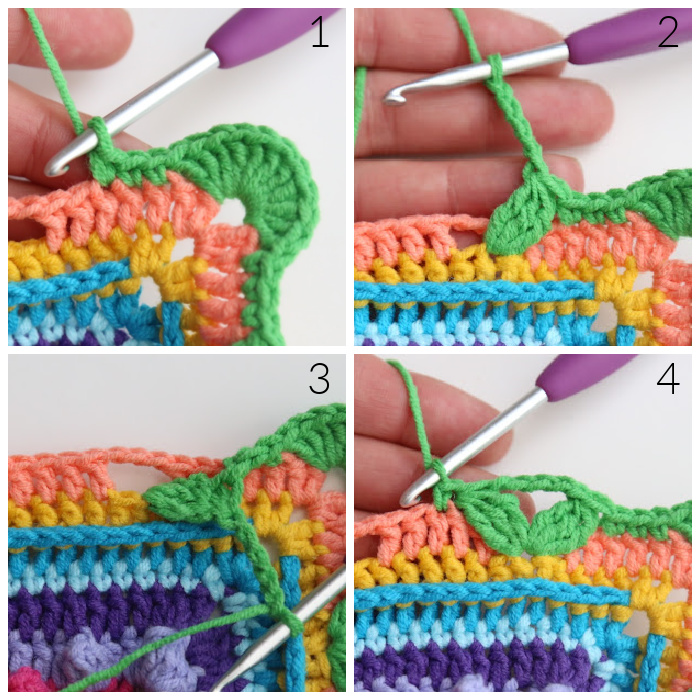
*Skip the first 2 sts (the first of which will be hidden) and sc in the next 3 sts {Photo 1}.
(Skip the next 2 sts. Working in front of the ch-3 sp from Round 91, make a 3-tr Bobble in the central skipped st from Round 90. This is your first ‘leaf’ made. Ch 5 and make a 3-tr Bobble in the same st. Skip the next 2 sts of Round 91 and sc in the next st {Photos 2 -4}) until 3 sts remain before the next ch-2 corner sp.
Sc in the next 2 sts. Skip the last st. Make 11 dc in the next ch-2 corner sp.*
Repeat from * to * 3 more times, omitting the last corner on the last repeat. Join to the top of the standing dc with a sl st. Fasten off and work away your ends.
Stitch Count Per Side: 30 sc, 50 3-tr Bobbles (Leaves), and 25 ch-5 sps – not including the 11 dc in each corner.

Round 93 (Colour B) – Roses
Apart from when you make the corners, you will be working only into the ch-3 sps from Round 91 and the ch-5 sps from Round 92.
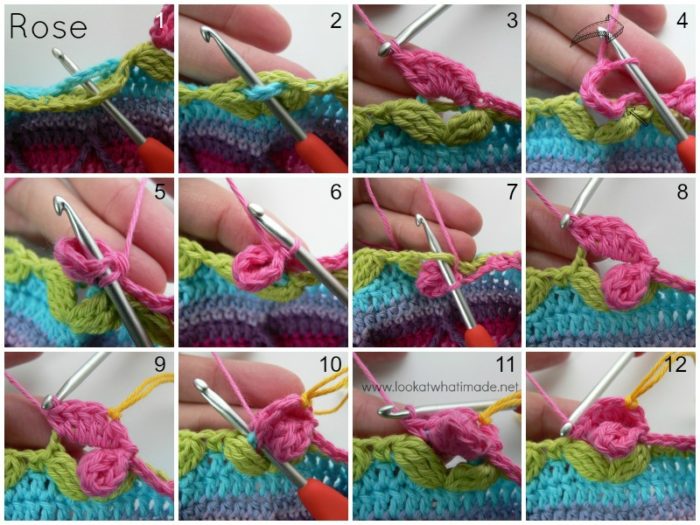
Before we get started with this Round, I am going to show you how to make the Roses when the pattern calls for them. If you have already made Sophie’s Universe, you’ll remember these beauties with varying degrees of fondness.
Roses
Pull the ch-3 sp from Round 91 through the ch-5 sp from Round 92 {Photos 1 and 2}. Working in front of the ch-5 sp, (2 sc, 3 hdc, 3 dc) in the ch-3 sp only {Photo 3}. Bring the last st around the back of your work {Photo 4} and join to the first sc with a sl st, forming a ring {Photos 5 and 6}. Let’s call this a Modified Popcorn.
(Sc, hdc, 3 dc, hdc) into the ch-5 sp from Round 92, which should be behind the Modified Popcorn {Photos 7 and 8}. Mark the first of the 3 dc with a piece of scrap yarn if you are going to have trouble identifying it later on {Photo 9}. To finish the Rose, make a sc into the ch-3 sp from Round 91, again making sure to work in front of the ch-5 sp {Photos 10 – 12}.
Right. Let’s get started. I hope you are excited!
Join your yarn by making a standing BPsc around the first dc in any corner. BPsc around the remaining 10 dc. Mark the sixth BPsc of the 11 with a SM. This is your first corner made.
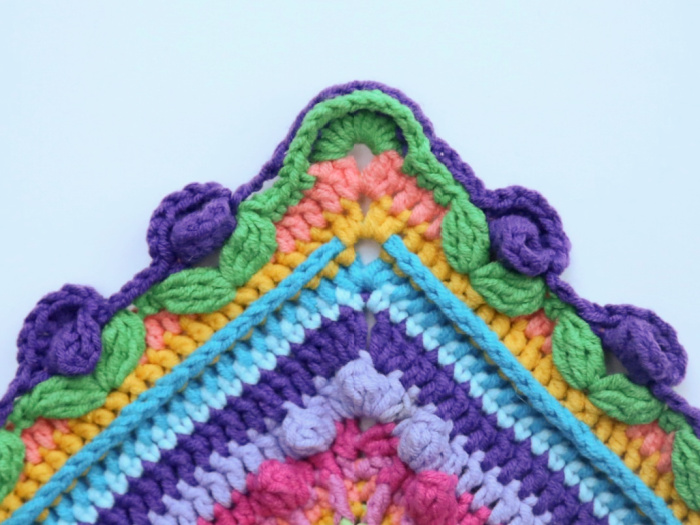
*Ch 4. Skip the first 3 sc and the first 3-tr Bobble. Make a Rose in the next ch-3/ch-5 sp (see Rose at the start of this round). (Ch 4 and make a Rose into the next ch-3/ch-5 sp) until you have worked into every ch-3/ch-5 sp. Skip the last 3-tr Bobble and the next 3 sc. Ch 4. BPsc around each of the next 11 corner dc, marking the sixth BPsc with a SM.*
Repeat from * to * 3 more times, omitting the last corner on the last repeat. Join to the top of the first sc with a sl st. Fasten off and work away your ends.
Stitch Count Per Side: 25 Roses and 26 ch-4 sps – not including the 11 BPsc in each corner.

Note to me, from me: “This took for freaking ever! Watched Dear John AND Safe Haven while I did this round, so 3 hours (might have got distracted some). 57 seconds per rose. Go and have a nap. You deserve it!”
Round 94 (Colour A)
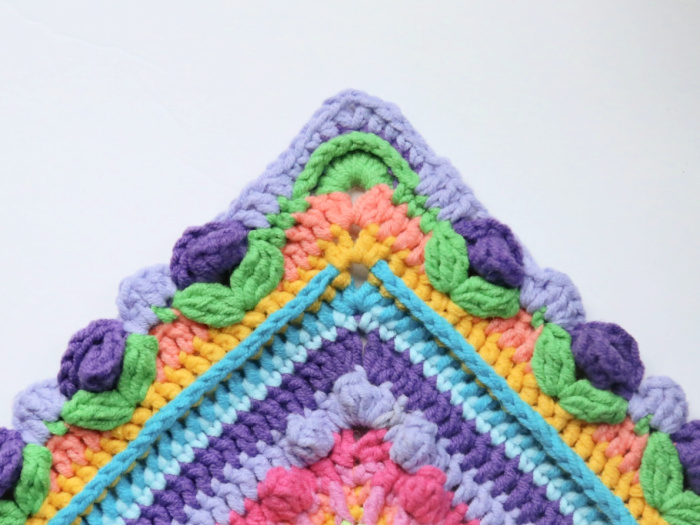
In this round, you will be working into Round 92 and IN FRONT OF all the ch-sps from Round 93. The only exception to this will be the corners, where you work into the 11 BPsc from Round 93.
Join your yarn by making a standing hdc in any sixth (marked) corner BPsc around. Ch 2, hdc in the same BPsc. This is your corner made.
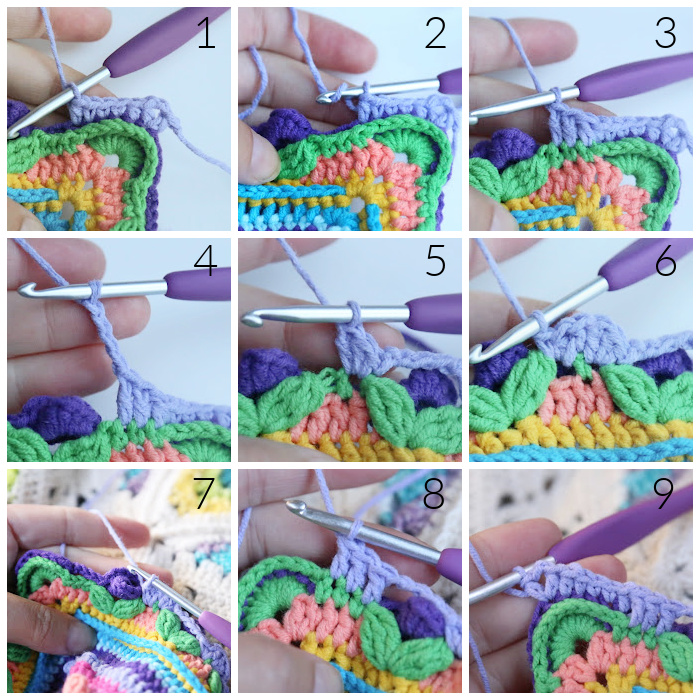
*Hdc in the next BPsc. Sc in the next 3 BPsc, hdc in the last BPsc {Photo 1}. Dc in the first 3 sc from Round 92 {Photos 2 and 3}. Ch 4 and skip the next Rose and both its Leaves {Photo 4}.
(Sc, hdc, dc) in the next sc from Round 92 {Photo 5}. (Dc, hdc, sc) between the same sc and the next Leaf. To work between these 2 sts, insert your hook under all the loops of the Leaf, not just into the top two loops. This is one Scallop made {Photo 6}.
(Ch 4 and skip the next Rose and both its Leaves. [Sc, hdc, dc] in the next sc from Round 92. [Dc, hdc, sc] between the same sc and the next Leaf) until 1 Rose remains {Photo 7}.
Ch 4 and skip the last Rose and both its Leaves. Dc in the next 3 sc from Round 92 {Photo 8}. Hdc in the first corner BPsc from Round 93. This stitch will be hard to identify. Make sure that you identify it correctly. Sc in the next 3 BPsc. Hdc in the next BPsc. (Hdc, ch 2, hdc) in the next BPsc {Photo 9}. This st should contain the SM. If it doesn’t, you’ve missed that first (hidden) BPsc.*
Repeat from * to * 3 more times, omitting the last corner on the last repeat. Join to the top of the first hdc with a sl st.
Flick all the ch-4 sps to the back of your work so that they do not lie in front of your Roses.
Stitch Count Per Side: 24 Scallops, 6 sc, 6 hdc, 6 dc, and 25 ch-4 sps – not including ch-2 corner sps

Round 95 (Colour A)
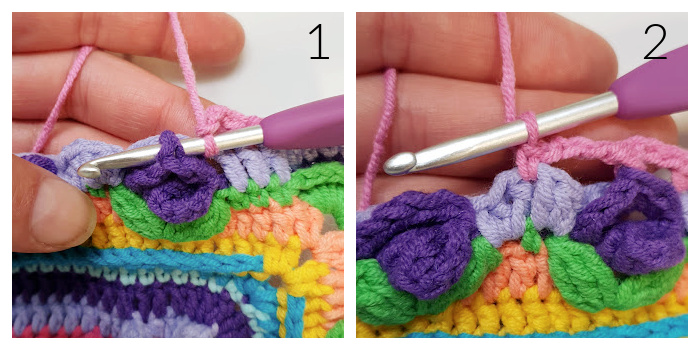
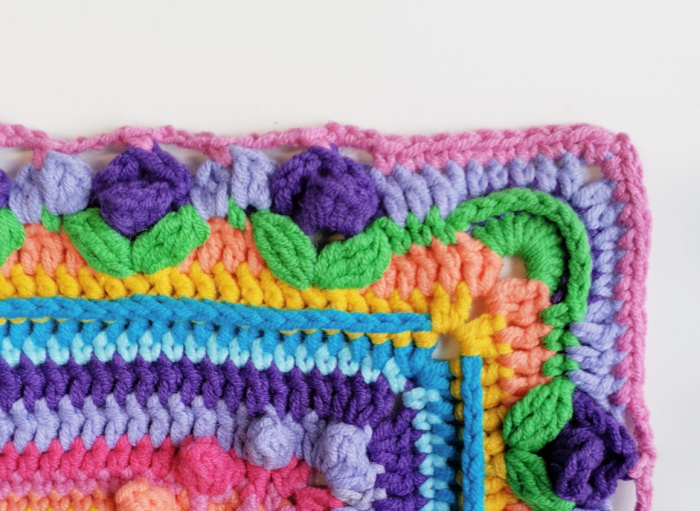
In this round, you will be working into the tops of the Roses from Round 93 and between the central 2 dc of each Scallop from Round 94. It will be helpful if you familiarise yourself with the “anatomy” of the Roses first. Have a look at one of the Roses. The “top” of the Rose is formed by the (sc, hdc, 3dc, hdc) made into the ch-5 sp from Round 91. When making your BPsc sts, you will make them into the first of the 3 dc sts.
Make sure that your ch-4 sps from Round 94 are behind your Roses! You will be super annoyed if they aren’t. Trust me. I’ve done this. More than once 😊
Sl st into the ch-2 corner sp. (Ch 1, sc, ch 2, sc) in the same sp. This is your first corner made.
*Sc in the first 9 sts. Ch 3 and make sure that your ch-4 sp from Round 94 is behind your next Rose. Make a BPsc around the post of the first dc of the 3 dc at the top of the Rose from Round 93 {Photo 1}.
(Ch 3 and make a sc between the next 2 dc at the centre of the next Scallop {Photo 2}. Ch 3 and make a BPsc around the post of the first dc of the 3 dc at the top of the next Rose, making sure that your ch-4 sp from Round 94 is behind the Rose) until you have worked into every Rose.
Ch 3. Sc in the last 9 sts of Round 94. (Sc, ch 2, sc) in the next ch-2 corner sp.*
Repeat from * to * 3 more times, omitting the last corner on the last repeat. Join to the top of the first sc with a sl st.
Stitch Count Per Side: 44 sc, 25 BPsc, and 50 ch-3 sps – not including ch-2 corner sps

Round 96 (Colour A)
Sl st into the ch-2 corner sp. (Ch 3, dc, ch 2, 2 dc) in the same sp. This is your first corner made.
*Skip the first (hidden) st. Dc in the next 9 sts. (Make 3 dc in the next ch-3 sp, FPdc around the next sc) until one ch-3 sp remains. Make 3 dc in the last ch-3 sp. Dc in the last 10 sts. (2 dc, ch 2, 2 dc) in the next ch-2 corner sp.*
Repeat from * to * 3 more times, omitting the last corner on the last repeat. Join to the top of the beg ch-3 with a sl st.
Stitch Count Per Side: 222 sts {173 dc and 49 FPdc} – not including ch-2 corner sps

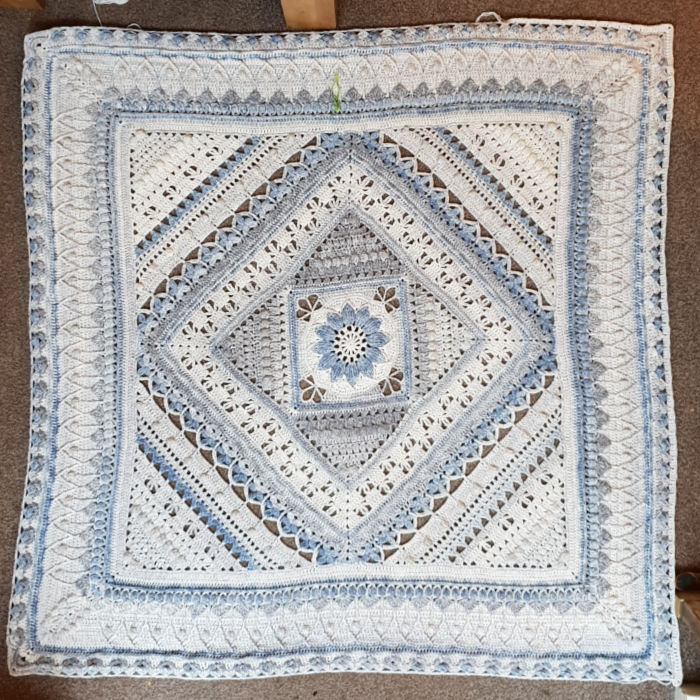
Now that we have completed the Roses, everything that comes after will be a breeze (except, maybe, for the Forget-Me-Nots, which will make an appearance again next week).

This blog post contains affiliate links. I only link to products I personally use or would use. All opinions are my own.


Gerry says
Phew! 100 red roses completed. One side took me 40 minutes, so a lot slower than you – but there might have been a few distractions & the yarn I’m using is Stylecraft batik which is not so easy to crochet with. Looking good though. Thanks for your designs.
Dedri Uys says
Well done! Now only the second set of Forget-me-nots :) Everything else will go quicker.
Lana says
I love this “Note to me, from me: “This took for freaking ever! Watched Dear John AND Safe Haven while I did this round, so 3 hours (might have got distracted some). 57 seconds per rose. Go and have a nap. You deserve it!”” I was like I can do this in 3 hours, get settled start making roses … 3 days later I’m half way though lol
Jenny Lowman says
Hehe I suspect there may have been a fair bit of distraction involved! :)
Tippy6 says
The photo of the expression on your child’s face – PRICELESS! I have personally shot this look at so many people throughout my lifetime without uttering a sound or word. That facial expression says it all in any language, anywhere on the planet earth. Thanks so much for sharing. You made my day!
Bridget Rolenc says
I have a question about the roses and leaves, there appears to be a gap between them.will there be a stem there to shut that gap?
Jenny Lowman says
No stems for the roses, Bridget. If you look through the pattern, there are scollops that go between them on the row after the roses.
Beth says
It use to be that a pattern was too complicated for a chart; no more, charted rounds are awesome for Charlotte Uni…yay!!
Jenny Lowman says
The charts are works of art in themselves I think!