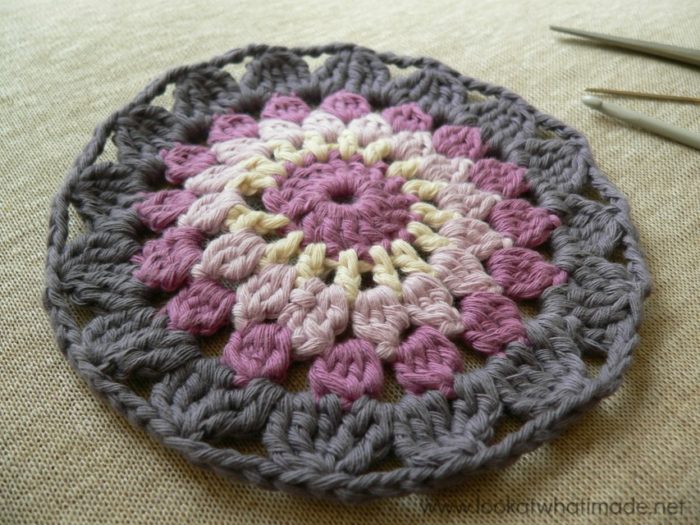
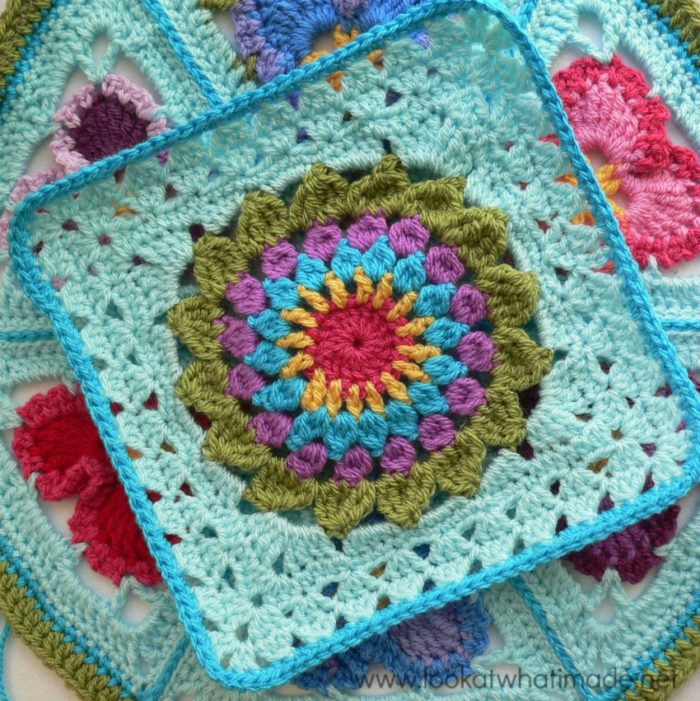
Block 18 of the Block a Week CAL (hosted by Kimberly Slifer) is Penny Davidson’s gorgeous (and surprisingly easy) Kata. After making this square I can definitely say that I am a bobble girl! Once you get into the rhythm of making the bobbles/clusters, they just fly off your hook.
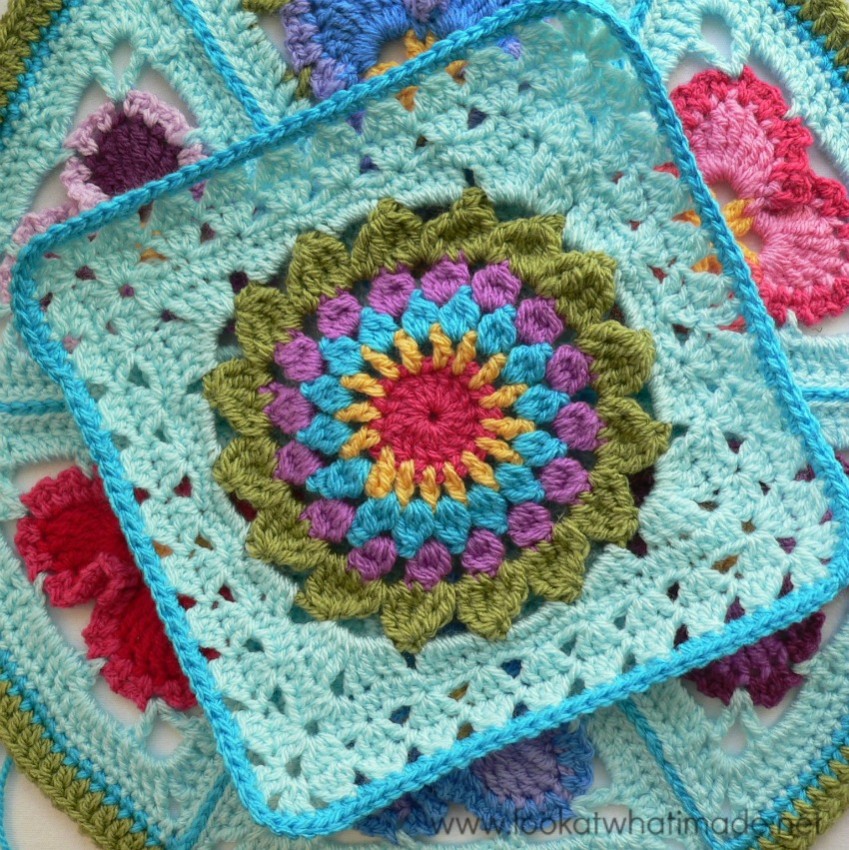
Kata Crochet Square
{Pattern © Penny Davidson from The Creative Penny. Photo tutorial done with kind permission}
Pattern
- Add it to your Ravelry queue
- Pattern on Penny’s website
Suggested Materials
Penny lists two options, as well as gauge and size (see pattern).
Size
- Using a 4 mm crochet hook (US G/6 UK 8) and double knit yarn, as I have done, your finished square should be about 7.5″.
My Yarn and Colour Choices
I am using the Stylecraft Special DK.
- Pomegranate (Round 1)
- Saffron (Rounds 2 and Optional Round 12)
- Turquoise (Rounds 3 and 10)
- Magenta (Rounds 4 and Optional Round 11)
- Meadow (Round 5)
- Sherbet (Rounds 6-9)
Notes
- The initial ch st’s in each round are counted as a stitch, except for the sc rounds, where the initial ch st does NOT count as a st.
- Stitch counts have not been supplied for all the rounds, so I have added them here.
- US Crochet Terminology used. (See this comparative chart if you need help transcribing from US to UK)
- Please Note: The yarn used in most of the tutorial photos is Drops Paris Cotton.
Special Stitches
- 3dc cluster (also known as bobble stitches)
- 4dc cluster
- tr cluster (split 5 treble crochet clusters)
- outside cluster
Do not be daunted by the long list of explanations at the beginning of the pattern. All these stitches work on the same principle. Once you’ve made that first round of clusters, you will have a fair understanding of how they work. Each subsequent round is an evolution of the previous one. It’ll be like learning to count!
Kata Square Photo Tutorial
This photo-walkthrough is NOT the actual pattern and should not be used instead of the pattern, but rather in conjunction with it.
Thank you very much to Penny Davidson for giving us permission to do this photo-tutorial for her Kata Square. And a special thank you to Kimberly Slifer for letting me do these tutorials and for obtaining the necessary permission.
Round 1
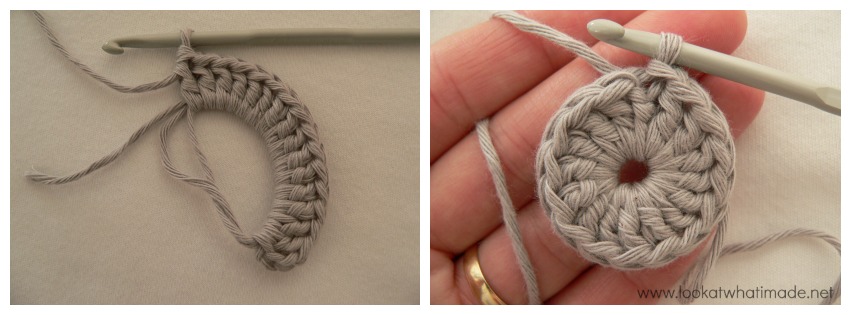
Into a magic ring: ch 3 (this counts as your first dc). Dc x 15 into the ring and pull the ring tight. Join to the top of the initial ch-3 with a sl st. If you are not familiar with working into a magic ring, this video tutorial from The Crochet Crowd is very good. Please remember, when working into a magic ring you HAVE to work away your initial tail very well. If you just cut it, your whole square might unravel!
Stitch count: 16 dc’s
Round 2
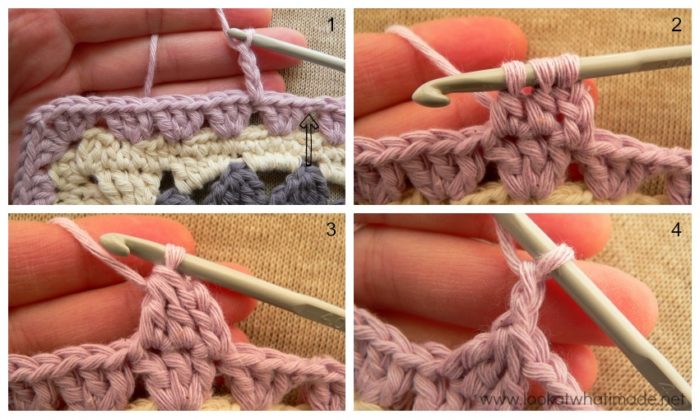
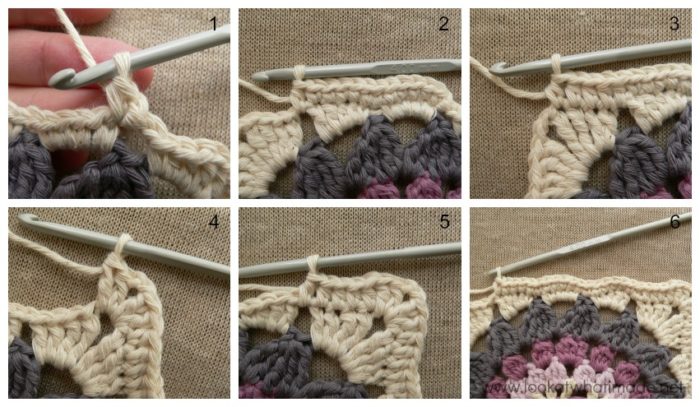
Ch 4 (Photo 1). This counts as your first dc and ch-1. *Dc (Photo 2) and ch 1(Photo 3) into each st around. Join to the third ch of the beginning ch-4 with a sl st. Don’t join as untidily as I did!
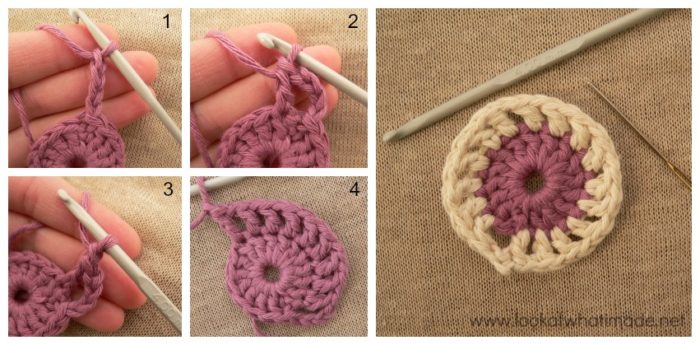 Stitch count: 16 dc’s and 16 ch-1 spaces
Round 3
Now let’s make some 3-dc clusters. The links below will take you to the photo tutorial for making a 3-dc clusters/bobble stitch.
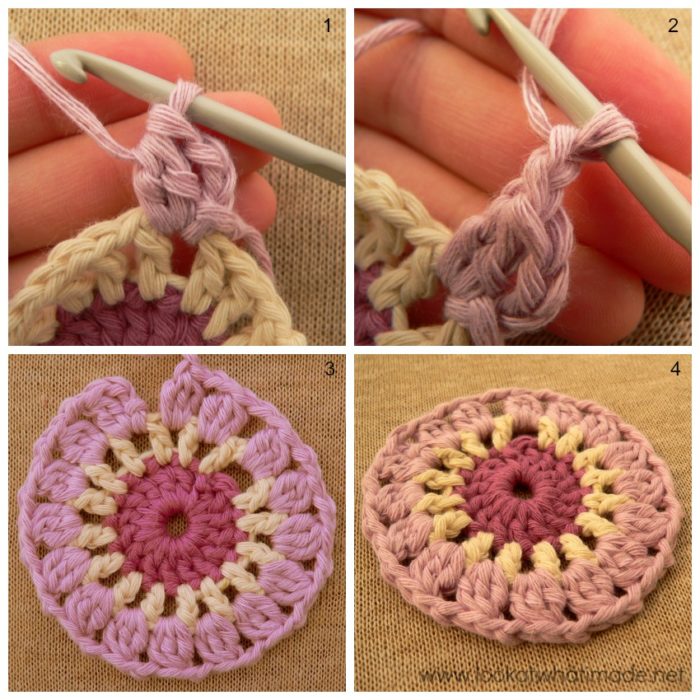
Sl st into the next ch-1 space or join your new colour by making a sl st in any ch-1 space around. Make a First Bobble (Photo 1) and ch 2 (Photo 2). (Make a Subsequent Bobble, ch 2) in each ch-1 space around. Join to the top of the first bobble stitch with a sl st.
Stitch count: 16 bobble stitches/clusters and 16 ch-2 spaces
Round 4
Have you got the hang of the clusters/bobbles? Do you understand that the ones you have just made were basically dc3together, all worked into the same stitch?
In this round you will be making 4-dc clusters. They are the same as the 3-dc clusters, except for the fact that you will be making 4 partial dc’s in each stitch, not 3.
Sl st into the next ch-2 space or join your new yarn by making a sl st in any ch-2 space around.
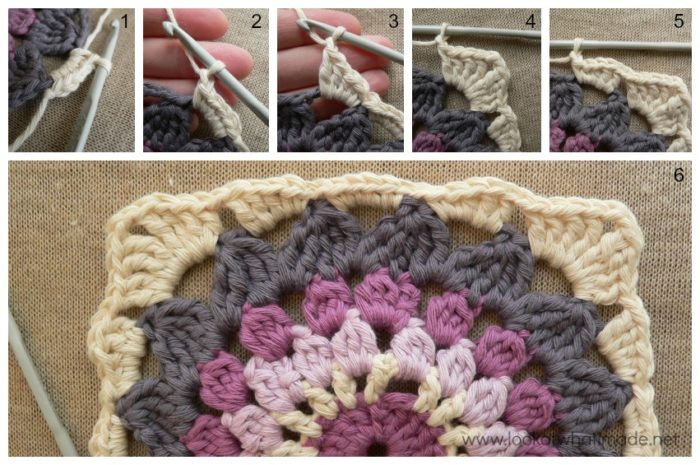
Following the same instructions as above, add one more dc to your first cluster/bobble. You should have 4 loops on your hook (Photo 1) before yarning over and pulling through all the loops (Photo 2). Ch 3 (Photo 3).
When making subsequent 4-dc clusters, you should have 4 partially-completed dc’s (so 5 loops) on your hook (Photo 4) before yarning over and pulling through all the loops on your hook. Don’t forget to ch-3 between clusters (Photo 5).
When joining, remember to join to the top of the first cluster (indicated with an arrow in Photo 6) with a sl st.
You should end up with one 4-dc cluster in each ch-2 space around, each separated by 3 ch st’s.
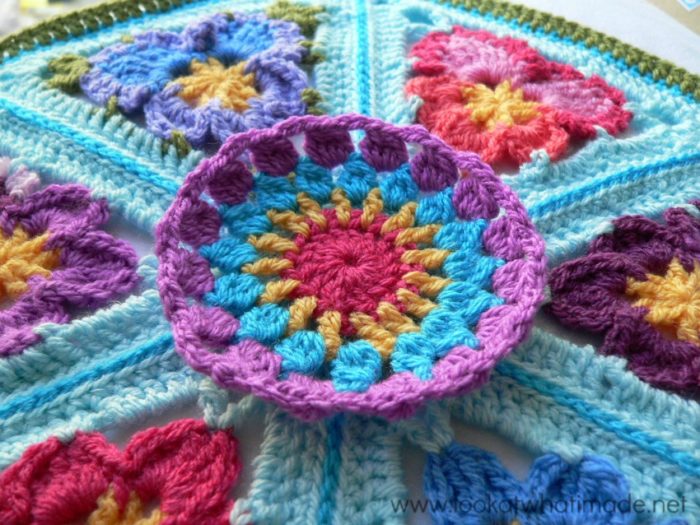
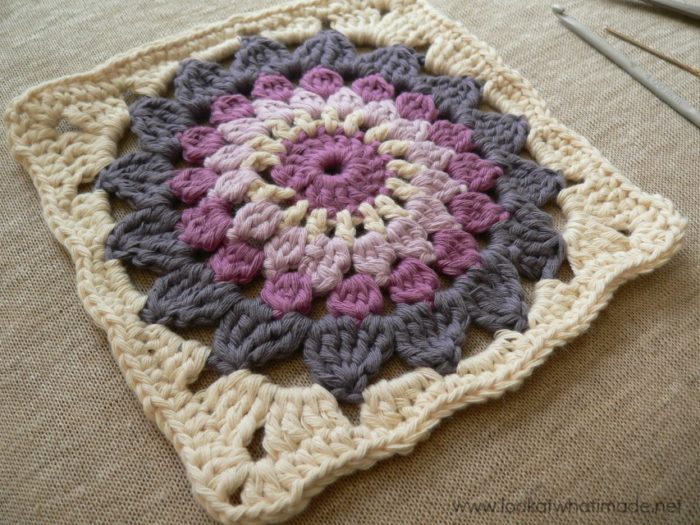
This is Round 4 completed in the Stylecraft yarn. It’s having a little snooze on my Pansy Pizza, which was blocking in my usual “photography” spot.
Stitch count: 16 4-dc clusters and 16 ch-3 spaces
Round 5
Are you feeling proud of yourself yet for mastering clusters/bobbles? Or have I just managed to confuse you?
In Round 5 we are pulling out the big guns: Split Treble crochet clusters! These clusters consist of 5 tr’s and are each spread over 2 ch-3 spaces. Each cluster begins in the same ch-3 space as what the last one ended in. Scroll down a bit and have a look at the completed round. It’ll help you understand what you’re aiming for.
First (Split) Treble Crochet Cluster
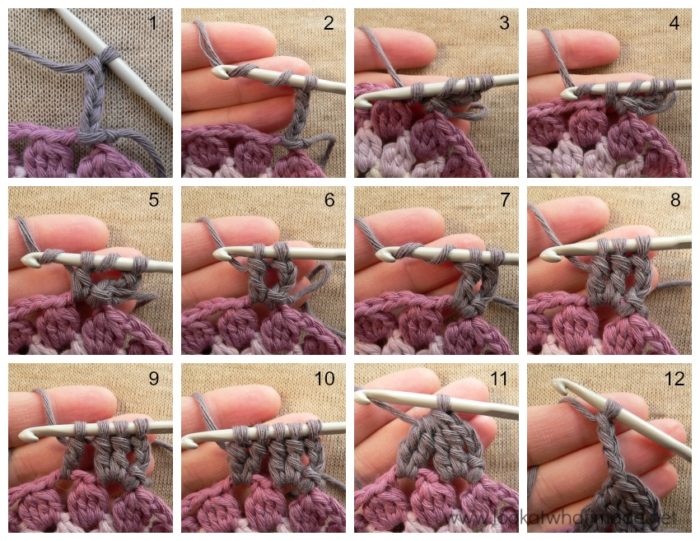
Join your yarn by making a sl st in any ch-3 space around. Ch 4 (Photo 1). Yarn over twice (Photo 2). Insert your hook into the same ch-3 space and pull up a loop (Photo 3 – 4 loops on hook). Yarn over (Photo 4) and pull through 2 loops (Photo 5 – 3 loops on hook). Yarn over again and pull through 2 loops (Photo 6 – 2 loops on hook). You should still have one loop of the first treble crochet on your hook.
Yarn over twice (Photo 7), insert your hook into the same ch-3 space and pull up a loop. (Yarn over and pull through 2) twice. You should now have 3 loops on your hook (Photo 8).
Yarn over twice, insert your hook into the NEXT ch-3 space and pull up a loop. (Yarn over and pull through 2) twice. You should now have 4 loops on your hook (Photo 9).
Yarn over twice, insert your hook into the same ch-3 space and pull up a loop. (Yarn over and pull through 2) twice. You should now have 5 loops on your hook (Photo 10).
Yarn over and pull through all the loops on your hook (Photo 11). Ch 4 (Photo 12).
 Subsequent Treble Crochet Clusters
Remember to start each cluster in the same space that the last one ended in. You want to have 16 clusters at the end of this round, not 8!
*Yarn over twice. Insert your hook into the same ch-3 space and pull up a loop. (Yarn over and pull through 2 loops) twice* x 3. Remember that there should be one more loop on your hook after each partially completed tr. You should now have 4 loops on your hook (Photo 1).
Yarn over twice, insert your hook into the NEXT ch-3 space and pull up a loop. (Yarn over and pull through 2) twice. You should now have 5 loops on your hook.
Yarn over twice, insert your hook into the same ch-3 space and pull up a loop. (Yarn over and pull through 2) twice. You should now have 6 loops on your hook (Photo 2).
Yarn over and pull through all 6 loops on your hook (Photo 3). Ch 4 (Photo 4).
Repeat the subsequent treble clusters until you get back to the beginning of the round. Join to the top of the first cluster with a sl st.
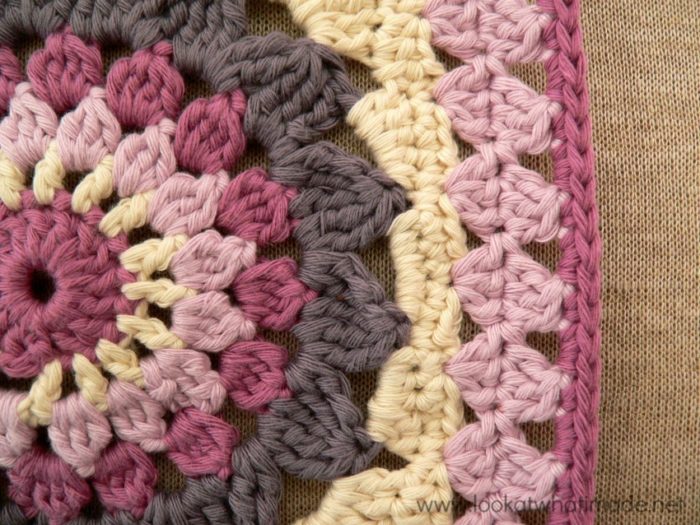
See? Sixteen Split Treble Clusters. If you are a keen observer, you will notice that I made the central tr of the 5 tr’s into the top of the clusters from the previous round. This was just a personal preference.
Stitch count: 16 split treble clusters and 16 ch-4 spaces.
Round 6
Now we start squaring up.
Start in any ch-4 space around. I have started with a standing single crochet instead of the traditional (ch-1, sc) join. Either way, you want to end up with 5 sc’s in the first ch-4 space (Photo 1). Ch 1 (Photo 2). (sc, 2 hdc, 2 dc, ch 1) in the next ch-4 space (Photo 3). (2 dc, 2 tr, ch 2, 2 tr, 2 dc, ch 1) in the next ch-4 space. This is your first corner made (Photo 4). (2 dc, 2 hdc, sc, ch 1) in the next ch-4 space (Photo 5).
Repeat around as instructed in the pattern. Join to the first sc with a sl st.
Do not forget those ch-1’s between ch-4 spaces!!
- Per Side: 7 sc’s, 4 hdc’s, 8 dc’s, 4 tr’s, and 4 ch-1 spaces {23 st’s per side}
- Total: 28 sc’s, 16 hdc’s, 32 dc’s, 16 tr’s, 16 ch-1 spaces, and 4 ch-2 corners {92 st’s}
Round 7
Ch 1. Sc into the same st as the sl st join (Photo 1) and each of the next 4 st’s. Sc in the next ch-1 space. Sc in the next 5 st’s. Hdc in the next ch-1 space (Photo 2). Hdc in the last 4 st’s (Photo 3). (2 dc, ch 2, 2 dc) into the corner ch-2 space (Photo 4).
Hdc into the next 4 st’s. Hdc into the next ch-1 space (Photo 5). Please note that the top of the first stitch after the corner might be slightly hidden by the stitches you just made into the corner. See this tutorial if you need help identifying which loops belong to which stitch.
Sc in the next 5 st’s. Sc in the next ch-1 space.
Repeat around as instructed in the pattern and join to the top of the first sc with a sl st. Sl st in the next 2 st’s. You want to end up in the third sc of the first 5 sc’s.
Stitch counts:
- Per Side: 17 sc’s, 10 hdc’s, 4 dc’s {31 st’s per side}
- Total: 68 sc’s, 40 hdc’s, 16 dc’s {124 st’s and 4 ch-2 corners}
Round 8
If you are going to join new yarn, make sure that you join it to the third sc of the first 5 sc’s from the previous round.
Ch 3. This counts as your first dc. Alternatively, start with a standing double crochet. Dc twice more into the same stitch (Photo 1). (Skip 3 st’s, make 3 dc’s in the next st) three times (Photo 2).
*(3 dc, ch 2, 3 dc) into the corner ch-2 space (Photo 3). (Skip 3 st’s, make 3 dc’s in the next st) until you get to the corner.* Repeat around. Join to the top of the beginning ch-3 (or standing double crochet) with a sl st.
When making the corners in this round, the corner stitches will obscure the top of the first stitch after the corner (indicated with an arrow in Photo 4). If you have a look at Photo 4, you will see that it looks like I have only skipped 2 st’s after the corner. This is because the loops at the top of the first dc are hidden beneath the corner stitches. Make sure that you count that stitch.
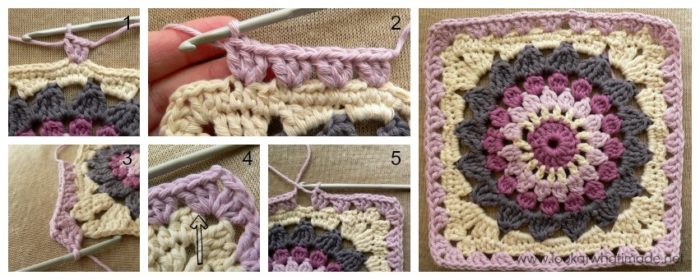
Stitch counts:
- Per Side: 9 3-dc groups per side {27 dc’s per side}
- Total: 36 3-dc groups {108 dc’s and 4 ch-2 spaces}
Yes, this round has less stitches than the previous round. It is not a typo.
Round 9
In this round you will be making little diamonds.
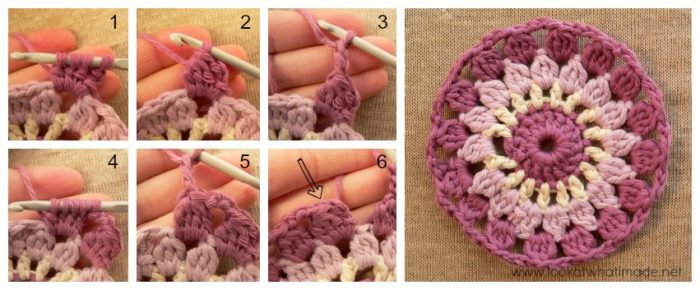
Sl st into the next 3 st’s. You don’t have to do this. The pattern works perfectly if you start in the same st as the sl st join. Whatever you do, you want to start this round in the first st of any 3-dc grouping. In Photo 1 you can see the slip stitch join indicated with an arrow.
For this round you will be using outside clusters. They are basically dc3together’s. If you know how to dc3tog, ignore my explanation below. If you don’t know how to dc3tog, read on.
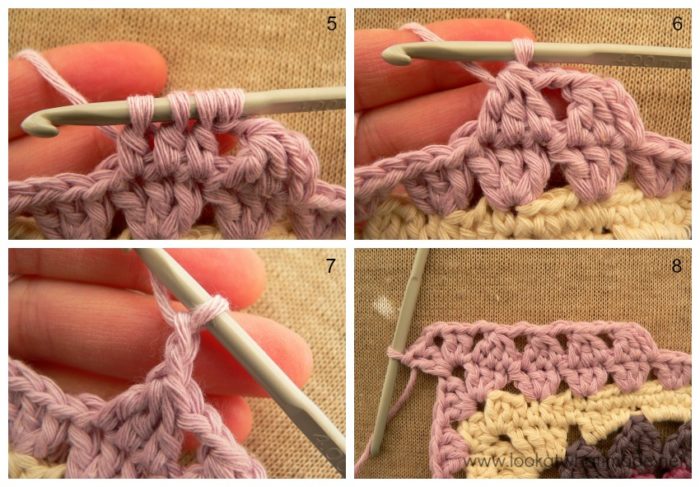
To make the first outside cluster, follow the instructions for the First Bobble, but don’t insert your hook into the same stitch every time. See Photos 2 and 3. You should insert your hook into the next 2 st’s, so that your outside cluster falls over all 3 st’s of the relevant 3-dc grouping in the previous round. Once you’ve made the first outside cluster, ch 2 (Photo 4).
Now make a subsequent outside cluster by following the instructions for the Subsequent Bobble. Remember that you shouldn’t insert your hook into the same stitch. You want each subsequent outside cluster to fall over the 3 dc’s from the 3-dc grouping in the previous round. See Photos 5 and 6. Remember to ch 2 after each outside cluster (Photo 7).
When you get to the corner, (2 dc, ch 2, 2 dc, ch 2) in the corner ch-2 space. Don’t forget that last ch-2!
Repeat around as instructed in the pattern. Join to the top of the first outside cluster with a sl st.
Stitch counts:
- Per Side: 9 clusters, 4 dc’, and 10 ch-2 spaces per side, not including the corner ch-2 space
- Total: 36 clusters, 16 dc’s and 44 ch-2 spaces, including the corner ch-2 spaces
Round 10
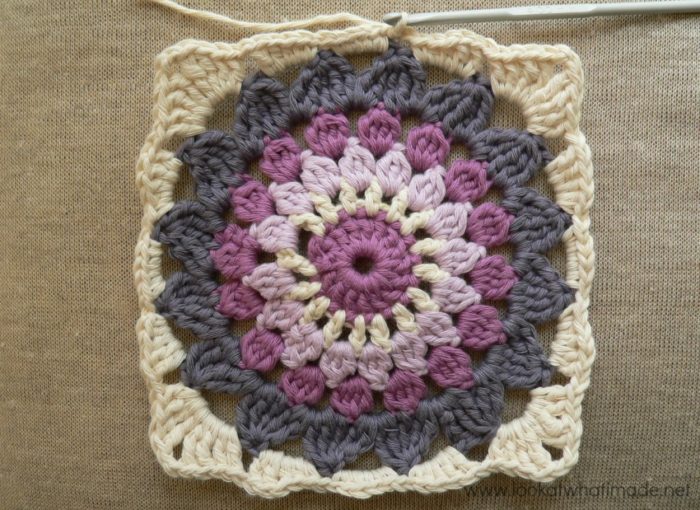
Round 10 is a standard sc round. I found it easier to join my yarn in one of the corner ch-2 spaces.
Make 2 sc in the ch-2 corner space (Photo 1). Sc in the next 2 dc’s (Photo 2). *Make 2 sc’s in the next ch-2 space (Photo 3). Sc in the top of the next outside cluster (Photo 4)* x 9. Sc in each of the last 2 dc’s.
Repeat around and join to the top of the first sc with a sl st.
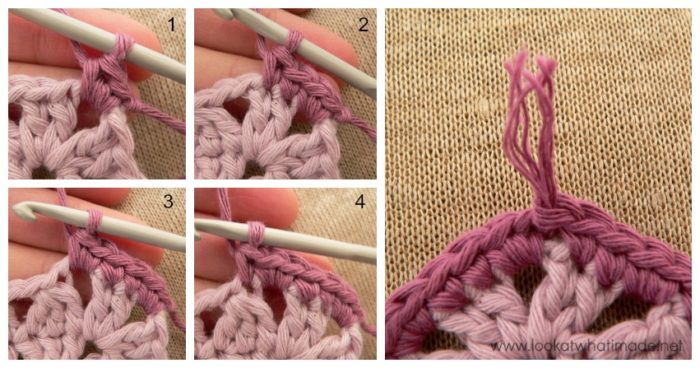
See that little tassel thingy? That’s how much yarn I had left when I finished the last round. How’s that for luck?
Stitch counts:
- Per Side: 35 sc’s per side, including the 2 corner sc’s
- Total: 140 sc’s
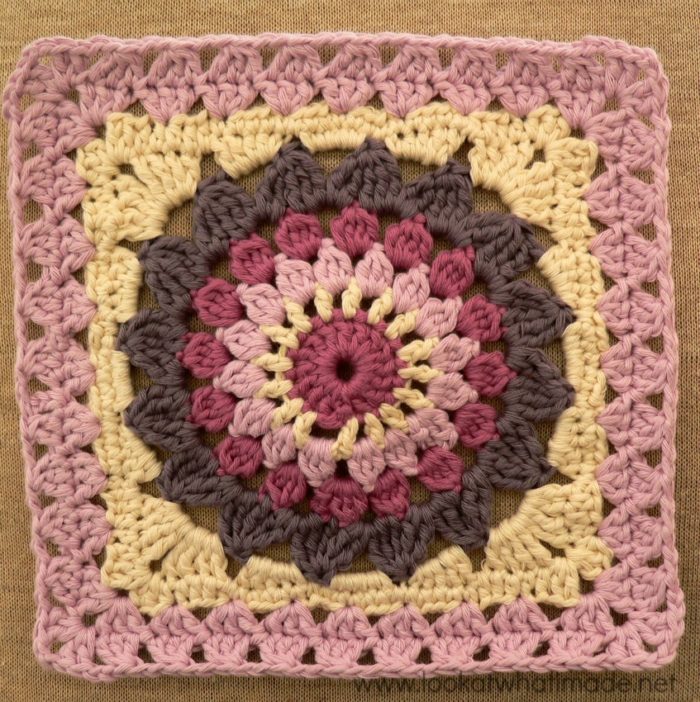
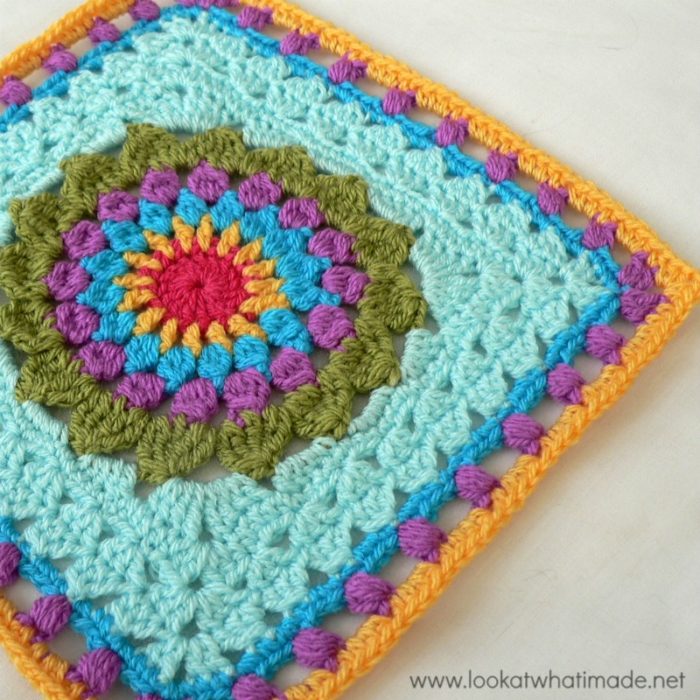
I have added an Optional Additional Round 11 and 12 to get my square to the same size as the other squares. You can find the instructions for that HERE.
Remember to subscribe to my Weekly Newsletter if you would like to be kept in the loop. You can also like my Facebook page or follow me on Bloglovin, Google+, Pinterest, Twitter, or Instagram.
Happy Hooking!




Anne-Marie says
The pansy pizza – o yes that will be nice to have that pattern, It is beautiful! Thanx Deidri.
Martie Viljoen says
I would like the pattern for the triangles that form ‘n round en product. It is under the Kata 18 block.
Dedri Uys says
Hi Martie, I am still working on the pattern for the Pansy Pizza, but it will hopefully be up by the end of the month.
Petra says
That would be awesome, I was admiring it too – at least what we can see from it. Looks very interesting.
Looking forward to it. Thanks in advance ;-)
Ida says
Thank you so much for the wonderful tutorials! I enjoyed making the Kata.
Dedri Uys says
Just a pleasure, Ida :)
Mary says
Are you going to just tease us with you pansy pizza……I would love to make it for my center table in my garden room. I love it!! Please let me know if you decide to put the pattern in your store on Raverley. I do not want to miss it!
Dedri Uys says
Lol, Mary…I’m going to tease you for a little while. The pattern will be up soon enough :)
Mary Sheets says
Anticipation! Something to look forward to making. I bought my yarn to make the pansies. I plan on making a few this weekend as it is a long holiday weekend.
Dedri Uys says
Nice. Feel free to share pictures of your finished pansies :)
Mary says
Are you going to just tease us with you pansy pizza……I would love to make it for my center table in my garden room. I love it!! Please let me know if you decide to put the pattern in you store on Raverley. I do not want to miss it!
Elize Schoeman says
Dit is so aansteklik mens wil net besig bly met al die mooi goed wat daar gewys word sjoe dis mooi
Dedri Uys says
Ag dankie, Elize. ‘n Mens MOET besig bly :)
Carrie says
Reminds me of a sunflower… lol
Davida says
I always look forward to a new week and a new square to try. I’ve made 8 so far and can’t wait to make the other ones!
Dedri Uys says
Davida…I am so looking forward to seeing your squares!
Natalia says
Hi, I just started again my adventure with hooking. I learned a little bit when I was a kid, but there was no internet that time :-) so I only had an old, black&white book from my mom. Not good, actually. So this time I use very helpful instruction from youtube and now I discovered Your excellent blog! And I’m delighted! I’m doing now the squares and I’m planning to make a blanket for my little, 5-months doughter.
I really would like to hook my national traditional pattern (it calls “łowicki”), but I cannot yet transform this into a crochet pattern. But maybe one day :-) http://folkstar.pl/pl,categories,show,147,1,,,,,,,Wycinanki-ludowe.html
Ps. Sorry for my pidgin English, but I’m Polish :-)
Dedri Uys says
Natalie, I have seen those traditional patterns and they are awesome and intricate. I am so pleased that you are following along with the blocks. Have you joined the facebook group? Lots of helpful ladies on there.
Kim says
Thanks for all you do…you’re the best!! <3
Dedri Uys says
Thank you kindly, Kim x