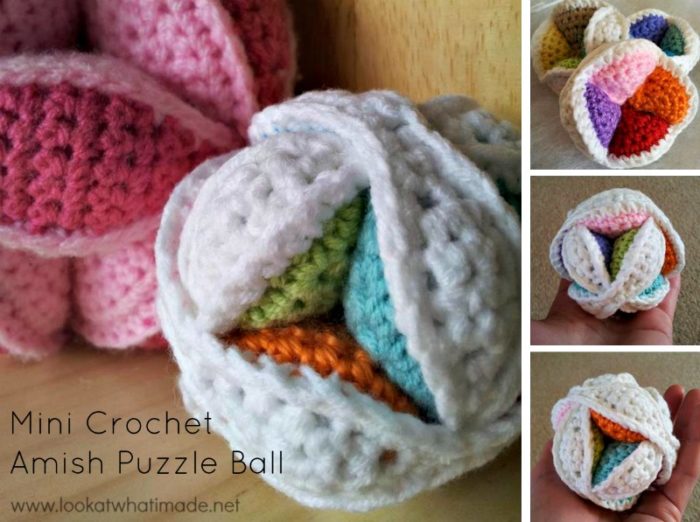
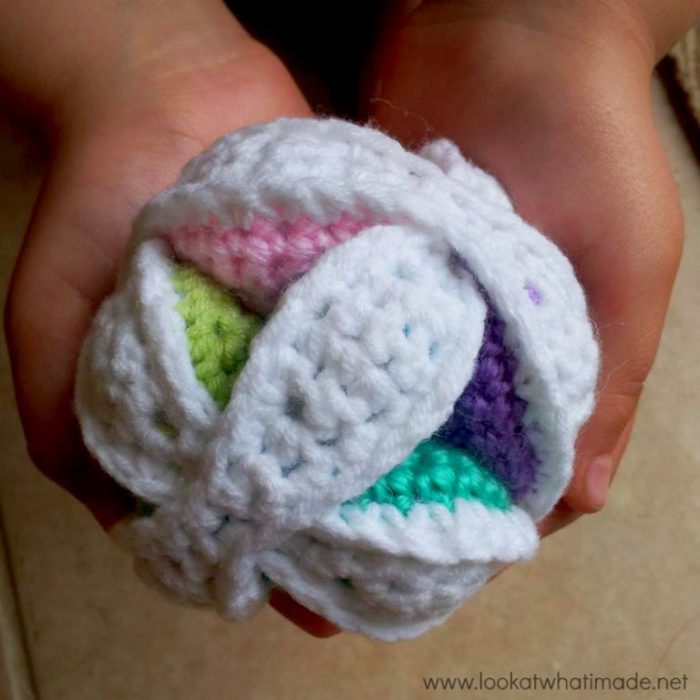
If you have visited my site before, you have probably already seen my Crochet Amish Puzzle Ball or one of my Amamani (Amigurumi Amish Puzzle Animals). Now I would like to share my Mini Crochet Amish Puzzle Ball Pattern with you.
Sometimes we just want to make something in a hurry, and although the original Crochet Amish Puzzle Ball doesn’t take ages and ages, it does get quite boring making the 12 wedges.
The Mini Crochet Amish Puzzle Ball is significantly quicker to work up (although I still prefer the look of the original Puzzle Ball) and is therefore perfect for a last-minute gift.
For the more adventurous among you there is always the Free Crochet Kiwi Puzzle pattern (based on the Mini Crochet Amish Puzzle Ball) or the Free Crochet Octopus Puzzle (based on the Original Crochet Amish Puzzle Ball).
You can also find the Elephant, Giraffe, Turtle, Dinosaur, and Lion in my first book, Amamani Puzzle Balls, or buy the Cow. Rhinosaur, and Horse on Ravelry.
- Photo: Pam Perkins
Mini Crochet Amish Puzzle Ball Pattern
©Dedri Uys 2013. All Rights Reserved.
Feel free to make as many (or as few) of these Mini Crochet Amish Puzzle Balls as you want, both for personal use and for small scale sale. All I ask is that you credit me as and when you make anything using this pattern, even if you alter it. It would also be nice if you would link back to this post.
You may in no way copy/reproduce this pattern or put it forward as your own work. I retain all rights to the actual pattern.
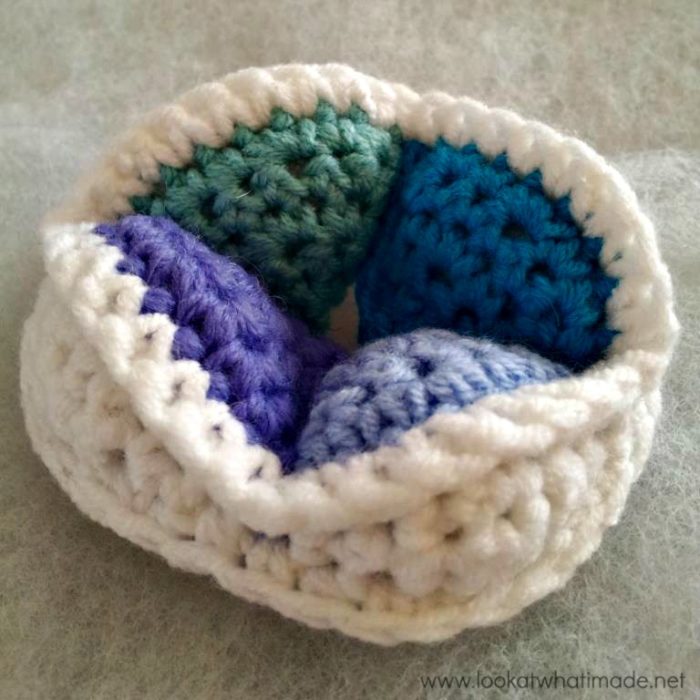
This Mini Crochet Amish Puzzle Ball works up to less than 10 cm in diameter. It comes apart into 3 segments that have to be assembled to form the ball. The segments of this ball fit together quite snugly, so you might have to put a bit of elbow into it, but that is just the nature of the beast. Once assembled the ball is snug and compact. You can use as many or as few colours as you want, so the possibilities are absolutely endless!
Materials
- 4 mm Crochet Hook
- Double Knit yarn in any colours
- Yarn Needle
- Stuffing
Abbreviations
- Ch Chain Stitch
- Sc Single Crochet
- Sc Inc Single Crochet Increase (make 2 sc’s in the same stitch)
- Sc2tog Single Crochet 2 Together (sc decrease)
- Sl st Slip Stitch
Instructions
Note: Repeat all instructions between (parentheses) the number of times stated. (Sc inc, sc) 3 times, for example, will mean Sc inc, sc, sc inc, sc, sc inc, sc.
Wedges
(Make 12)
- Ch 2. Make 3 sc’s in the second ch from the hook. Ch 1 and turn. (3)
- Sc inc in each of the 3 st’s. Ch 1 and turn. (6)
- (Sc inc, sc) 3 times. Ch 1 and turn. (9)
- (Sc inc, 2 x sc) 3 times. Ch 1 and turn. (12)
- (Sc inc, 3 x sc) 3 times. Ch 1 and turn. (15)
- (Sc inc, 4 x sc) 3 times. Ch 1. (18)
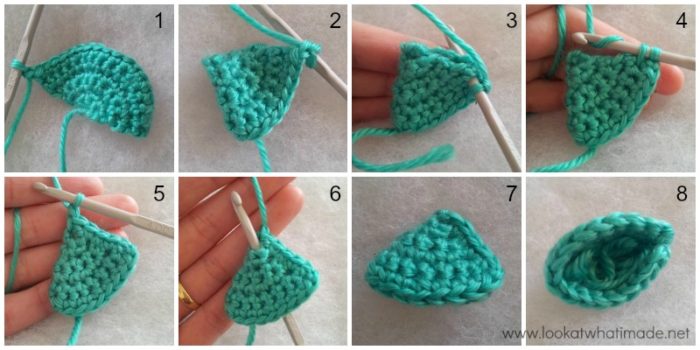
Fold the half-circle (Photo 1) in half and join the open side of the resulting wedge together by making 5 sc’s along this edge (Photos 2 – 5). You will effectively be working one sc through both layers of each row. Ch 1 and bind off.
Work away the tails of yarn. The easiest way to do this is to place the initial tail of yarn inside the folded wedge before sc-ing it closed, and then pulling the final tail of yarn through one of the stitches at the pointy end of the wedge (Photos 6 – 7). Stuff the tails of yarn inside the wedge and use them as part of the stuffing for the wedge (Photo 8).
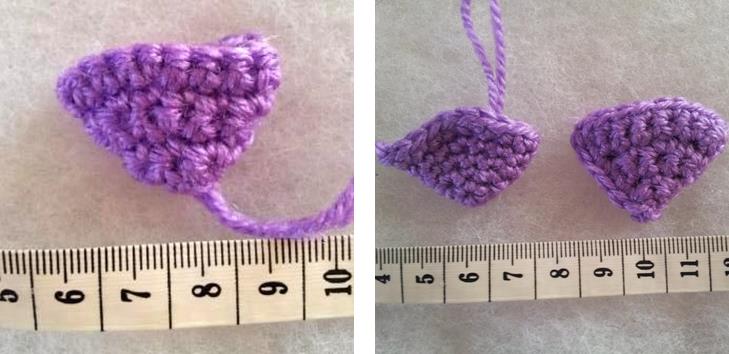
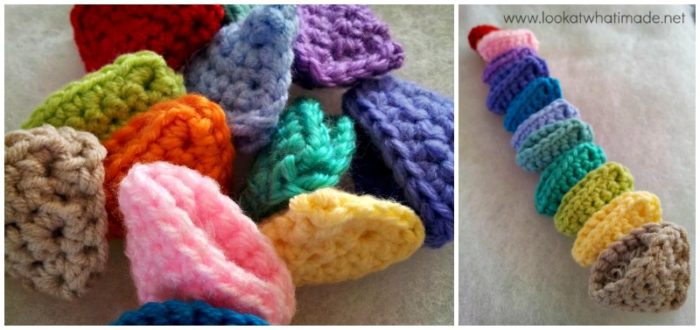
Some people have asked me if they can work the wedges in a spiral instead. The photo below (right) shows the difference in the shape of the wedge if it is worked in a spiral. It comes out much shorter than when worked as above and will therefore not have the same interlocking effect. It does still work, but I much prefer the wedge worked as instructed. You won’t save masses of time working in a spiral, and I personally don’t think it’s worth it.
The image on the left (below) shows what the wedge looks like if turned inside out, which quite a few people have done as well. Again, you lose some definition when turning the wedge inside out and assembly is slightly more fiddly.
Ultimately it is up to you, of course, but I have made so many of these balls that I can’t count them anymore and I always go back to making the wedges the way I have written them above.
Lids
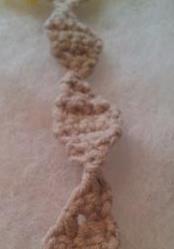 Hold your horses! Don’t make the following wedge lids just yet. This is just an explanation of how to do them when they appear in the pattern. So when I say “make a wedge lid”, this is how you will do it. And you will need to do it 12 times, so study up.
- Ch 2. Sc inc in the second ch from the hook. Ch 1 and turn (2)
- Sc in both st’s. Ch 1 and turn. (2)
- Sc inc x 2. Ch 1 and turn. (4)
- Sc in each of the 4 st’s. Ch 1 and turn. (4)
- Sc in each of the 4 st’s. Ch 1 and turn. (4)
- Sc2tog x 2. Ch 1 and turn. (2)
- Sc in both st’s. Ch 1 and turn. (2)
- Sc2tog.
“Chain of lids” Segment
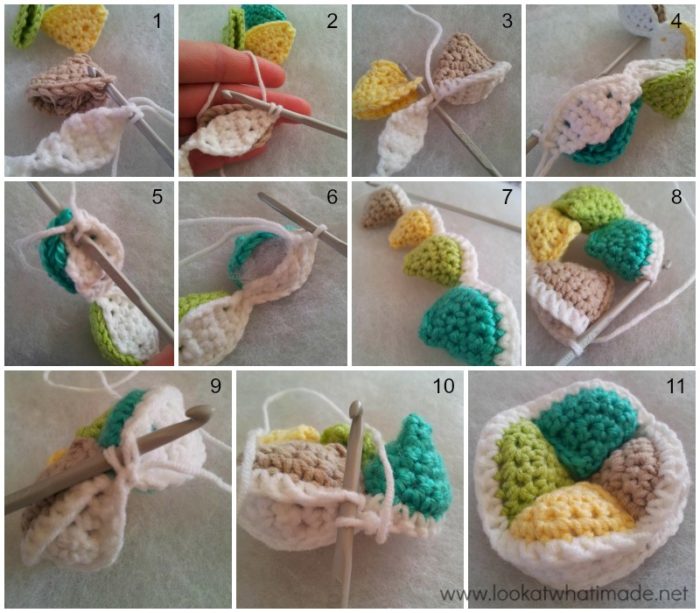
Following the instructions above, work a wedge lid. When you get to the end of row 8, start again at row 1 (Photo 1). Repeat rows 1 – 8 three more times (Photos 2 and 3). This will give you a chain of 4 “lids”. At the end of the very last “lid” of the chain, ch 1.
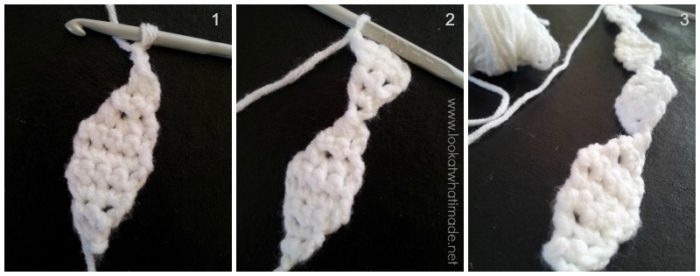
Now insert your hook into the last st of the lid and the first st of one of the wedges (Photo 1). Make a sc (Photo 2). Continue working a sc through both layers (into each row of the lid and each st of the wedge) until you have worked 9 sc’s.
Hint: start with the sc seam of the wedge to your right.
Add the next wedge, again placing it behind the lid (with the seam to the right) and inserting your hook through the first row of the lid (the st at the top of the sc2tog) and the first st of the wedge (Photo 3). Work 9 sc’s through both layers. Continue working around until you have worked one side of each of the 4 wedges (Photo 4). Now you are going to work around the other side of the chain of lids.
Make the first sc of the opposite side into the first st of your chain of lids (which will already have a st worked into it) and the NEXT st of the wedge (Photo 5). Continue working around the fourth wedge, stuffing as you go (Photo 6). Continue closing each of the remaining 3 wedges in the same fashion, working 9 sc’s through both layers of each wedge and lid and stuffing as you go (Photo 7).
When you get back to the last st of the first wedge, join to the first st with a sl st and bind off. Use the tail of yarn to join the tips of the first and last wedges together.
Alternatively, you can sl st them together before binding off, which is what I prefer. Here’s how:
Identify the 2 st’s at the tip of the lid furthest away from you (the 4th wedge). Sl st into the first of these 2 st’s (the one on the right – see Photo 8) and then sl st into the next one (the one to the left of that one – see Photo 9). Then sl st into the first st of the assembly round (the first st of the first wedge – see Photo 10). Sl st into the next st and bind off. Work away your tails of yarn (Photo 10).
This is your first segment done.
Now you will need to repeat the instructions above 2 more times so that you end up with 3 segments, each containing 4 wedges.
“Building” your Mini Crochet Amish Puzzle Ball
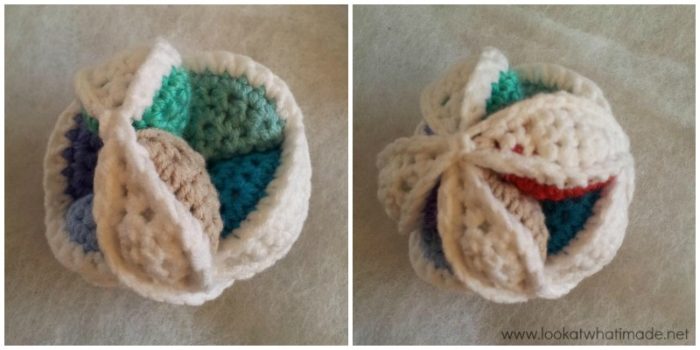
Take 2 of the segments. Slip one segment over the other so that they form a cross (below left). All the wedges should have their pointy bits towards the centre and the lids should all be on the outside of the ball. Take the third segment and slip it over the other two segments perpendicularly so that each of its wedges falls into one of the “gaps” formed by assembling the first 2 segments (below right).
I am well aware of the fact that the instructions for “building” the ball leave something to be desired, but you try explaining it in words! (If you can explain it better I would love to use your instructions instead, so leave me a comment!) But if you look at the pictures provided, you should be fine. And it IS a puzzle, after all, so have a bit of fun with it.
If you REALLY get stuck, you can have a look at this little YouTube video by Elizzza. There’s a good demonstration of how to “build” the puzzle ball about 7 minutes in.
I hope you enjoy making (and playing with) your Mini Crochet Amish Puzzle Ball.
Remember to have a look at my original Crochet Amish Puzzle Ball or my Flower Amish Puzzle Ball. And if you really want to make an Amish Puzzle Ball, but you don’t crochet, or prefer knitting, here’s a link to my Knit Amish Puzzle Ball.
Remember to subscribe to my Weekly Newsletter if you would like to be kept in the loop. You can also like myFacebook page or follow me on Bloglovin, Google+, Pinterest, Twitter, or Instagram.
Happy Hooking!








Clarisse says
So happy with this pattern. I love it and I have made it for mij cousins 12th birthday. Thanks a lot for this pattern from the Netherlands. (I know my Englisch is very bad. But I can read Englisch patterns)
Sharon says
I love your puzzles balls, having trouble with ‘joining’
I sew it to the top but it is the ends that I am having trouble with. They at too narrow Ned I had to ‘make them work. Any help would be apprecisted
Dedri Uys says
Hi Sharon. on the ends, you are working into the big hole created by making the first round, and the last st of the last round. Have you had a look at the photo with the arrows in the pattern here?
Sandi says
I was so excited to find your great instructions for this mini ball. I just finished making a bigger one and it was fun and came out great but this mini one looks so adorable I have just started it. Read thru your directions and I find them very easy to understand and wanted to thank you in advance for taking time to share this and not charge.
Angela Vincent says
I know this is for beginners, but I don’t know how to do “single crochet increase”!! Can you talk us through it, please? (As it is, I have to translate most crochet patterns into UK terminology, which gives an added dimension, as you can imagine!!) Thank you! x
Dedri Uys says
Hi Angela.
I am sorry that you find it confusing. A single crochet increase simply means that you make 2 sc’s in the same stitch. If you are used to UK terms, just substitute all the sc’s for dc’s – insert hook into stitch, yarn over and pull up a loop, yarn over and pull through both loops on hook.
This video tutorial is short, but sweet, and it shows you how to make 2 sc’s in the same stitch: https://www.youtube.com/watch?v=2ueAmvoyZmU