Welcome to Part 10 of the Scheepjes Ubuntu CAL 2018. I can’t believe that we have only two parts left after this one! Last week, we introduced a little bit of colour back into the border. This week, we will add some more colour and lay the foundation for the Flowers that will grace each corner.
You will find all the links and information you need under ‘Resources‘ below. If you have stumbled on this post accidentally and don’t know what Ubuntu is, you can read more about it HERE (Information) and HERE (Concept).
Resources
- Part 10 Pattern PDF
- Part 10 Video Tutorial (UK terminology) by Esther Dijkstra from It’s All in a Nutshell
- Official Scheepjes – International Group (English) or the Official Scheepjes – Nederlandse Groep (Dutch). You have to be logged into Facebook in order to access the link to the groups.
- Add the CAL to your Ravelry Queue
- If you are on Instagram, you can find me HERE. Please add your photos using #scheepjesubuntucal2018 or #scheepjesubuntucal.
- Special Stitches and Techniques (including a gauge square)
Ubuntu CAL 2018 Part 10: Border Part 4
Although this pattern will not have a step-by-step photo tutorial, I will be sharing photos of each completed round (and some of the trickiest bits). I am using a different colour for each round so that you can clearly see stitch placement. I will also share notes and tips as I go. Please note that you should be following the colours listed in the pattern, NOT the ones I am using for these photos.
Border Round 14
This is a pretty easy round.
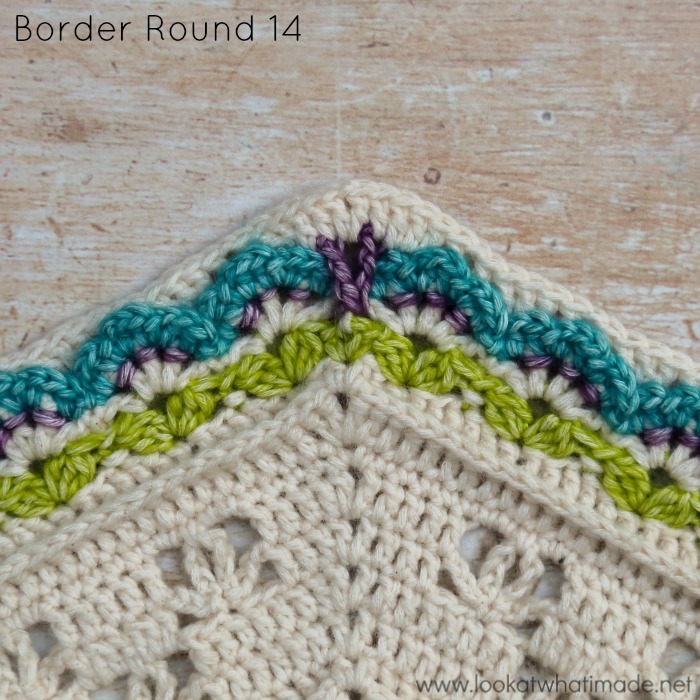
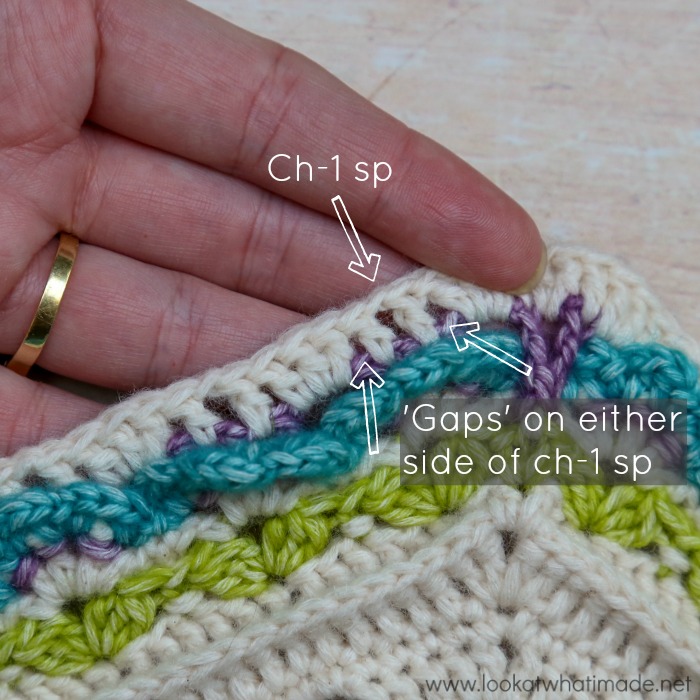
When you have completed this round, fold the Flowers from Border Round 12 down and take a moment to familiarise yourself with the ch-1 sps created in Border Round 14. Behind each Flower, there will be 3 visible ‘gaps’ between the posts of the stitches. The central gap will be the ch-1 space. The other two gaps are created by skipping the stitches between ch-spaces. Don’t accidentally confuse one of those gaps with your central ch-1 space.
Border Round 15
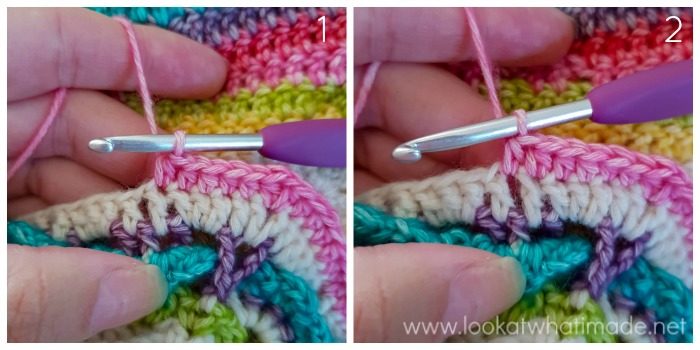
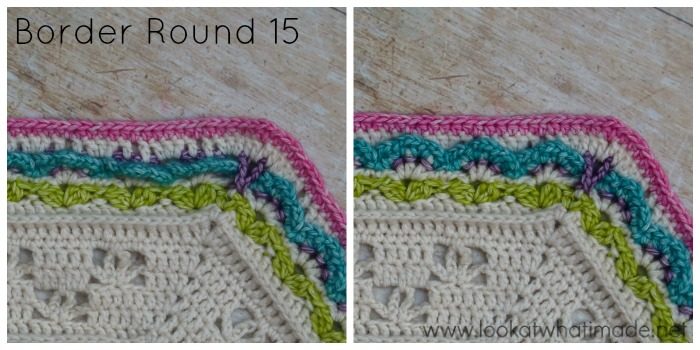
Remember to skip the first (hidden) stitch {Photo 1}. Also, remember to identify your Border Round 14 ch-1 sps correctly. Photo 1 shows the stitches of Border Round 15 completed up to the first ch-1 sp of Border Round 14. Photo 2 shows the stitch made INTO the ch-1 sp.
Hdc stitches make me so happy :) They just trip off my hook!
Border Round 16
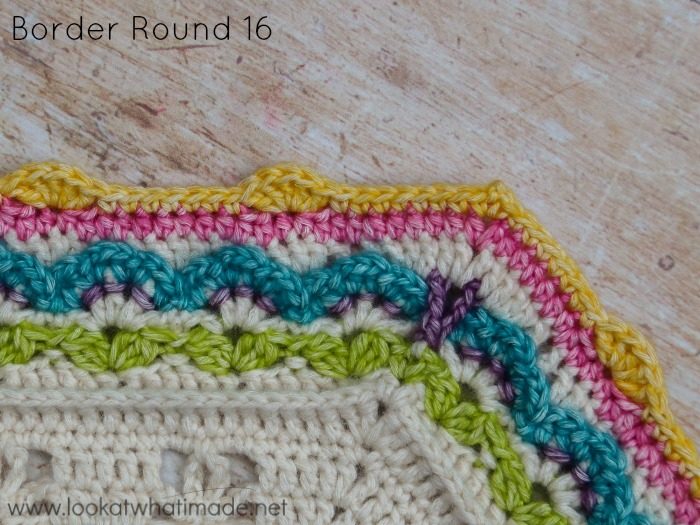
The 5-dc groups in this round should fall in the hdc from Round 15 that falls in the last dc of a 3-dc group from Round 14.
I always check my landmarks (like the one above) as I go. Checking your repeats at each step is a really good habit to cultivate. It means that you won’t complete a whole round/side before realising that you have skipped/introduced a stitch somewhere along the line.
Border Round 17
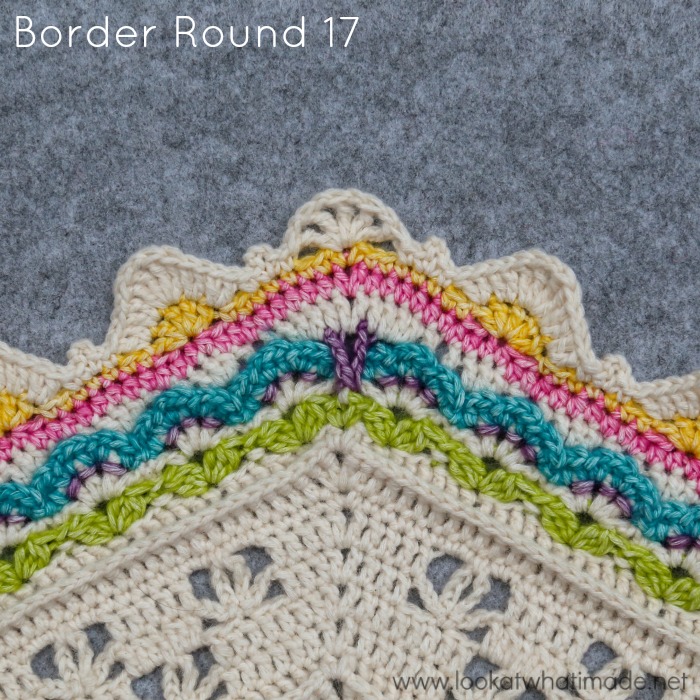
In this round, we will be laying the foundation for the Corner Flowers we will create in the next part. It is always tricky to count stitches per side when the corner arrangement changes. When counting your stitches for this round, remember that the Corner Scallops are not included in the stitch count. Each Scallop will consist of 5 tr and 4 ch-1 sps {photo below}.
You will notice that I have introduced a zigzag pattern in this round: ‘big’ hills interspersed with ‘small’ hills.
Border Round 18
You will be marking 24 stitches with a SM in this round (see Important Note below). Also, this round will wobble a bit.
Photos 1 and 2 show the 5 corner BPsc and the 4 ch-1 corner sps completed from the front {Photo 1} and the top {Photo 2}.
Photo 3 shows the ch-2 sp at the start of the round (before the repeat starts).
If you pause for a moment and have a look at Photo 3, you will see that the small ‘hills’ are created by an (sc, [sc, ch 3, sc], sc) combination. In other words, 4 sc with a ch-3 sp at the centre. You will ignore the first and last sc of this combination and work ONLY around the central two sc sts.
When making a BPsc around the central (sc, ch 3, sc) from the previous round, insert your hook from back to front around the post of the first sc {Photo 4}, then insert your hook from front to back around the post of the second sc {Photo 5}. Complete a BPsc as normal. In other words, you will be making ONE bpsc around TWO posts {Photos 6 and 7}.
Remember the ch-1 sps at the start and end of each ‘big’ hill {Photo 8}.
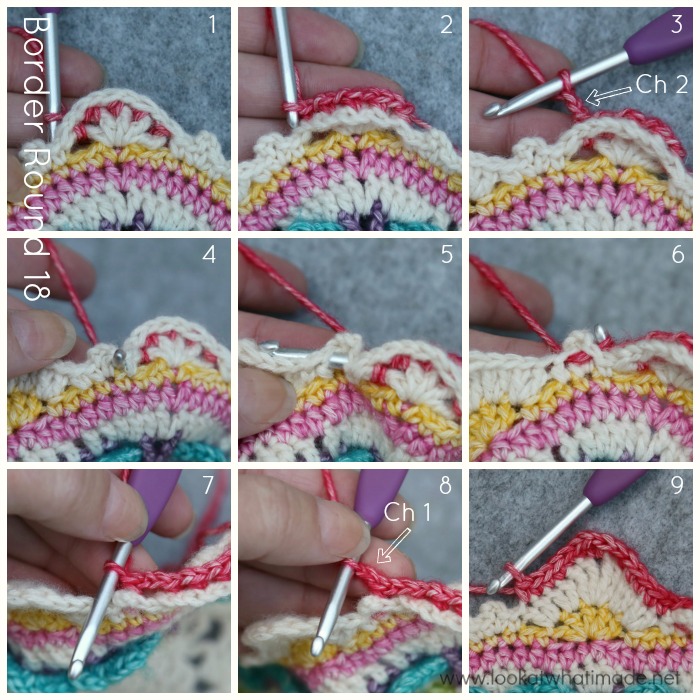
Finally, also remember that the round starts and ends with a ch-2 sp between the Corner Scallop and the first/last ‘small’ hill.
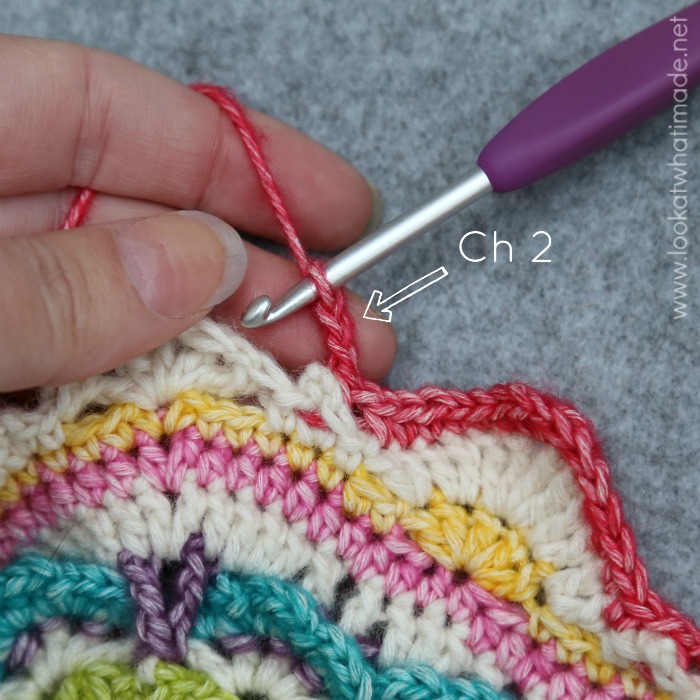
Doesn’t that just look so pretty?

Important Note
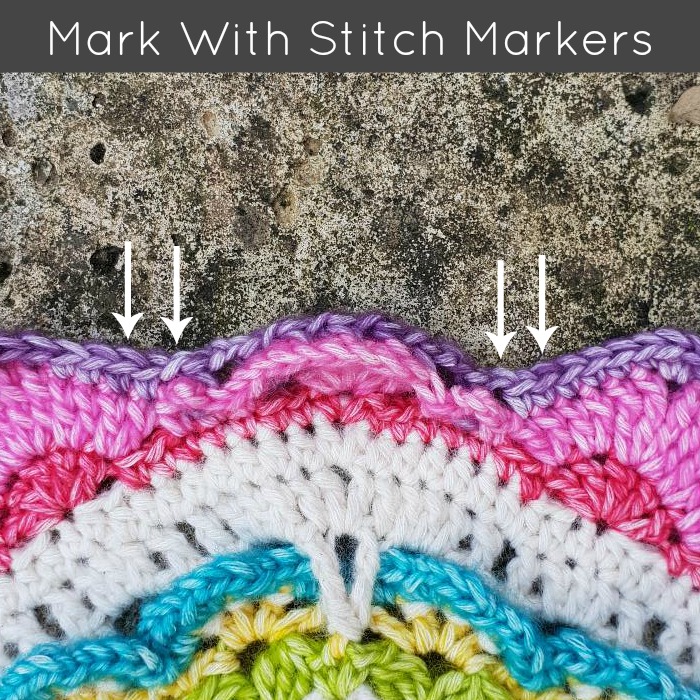
Before you go on, please mark the following sts/sps on EACH side with a SM:
- Locate the first ch-2 sp after a corner Scallop and place a SM in the next ch-1 sp.
- Skip the next sc and place a SM in the next sc.
- Locate the last ch-2 sp before a corner Scallop and place a SM in the ch-1 sp directly before it.
- Place a SM in the second-to-last sc before this ch-1 sp.
I hope you have enjoyed this part and that you have a wonderful, relaxing week! I’ll see you back here for Part 11 next week.
Post Scriptum!
You know the colours I’ve been using for the photo tutorials? Well, I’ve been using them with an idea in mind, and it has been very hard for me to not share photos of my progress. I know I have shown you snippets, but I have not actually shown you a zoomed-out version.
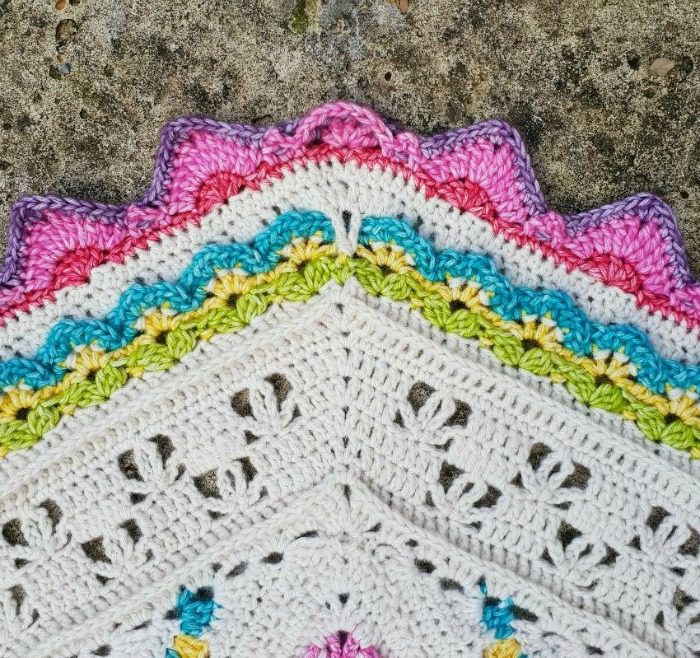
Now I can finally show you my Rainbow Ubuntu!
You guys know that I love using lots of colour, so sticking to single-colour diamonds has been very hard for me (although essential in this specific design). Even so, I really wanted to see what Ubuntu would look like if I mixed all the colours up. It took a fair bit of maths and quite a lot of head-scratching to figure out how I would do it, but I finally figured it out. So, I have used the colours (in the photo tutorials) in such a way that you can create a Rainbow version yourself (using the medium kit). I am so very excited to tell you that I will be posting the colours-per-round for the Rainbow Version (and other information) in the next few days.
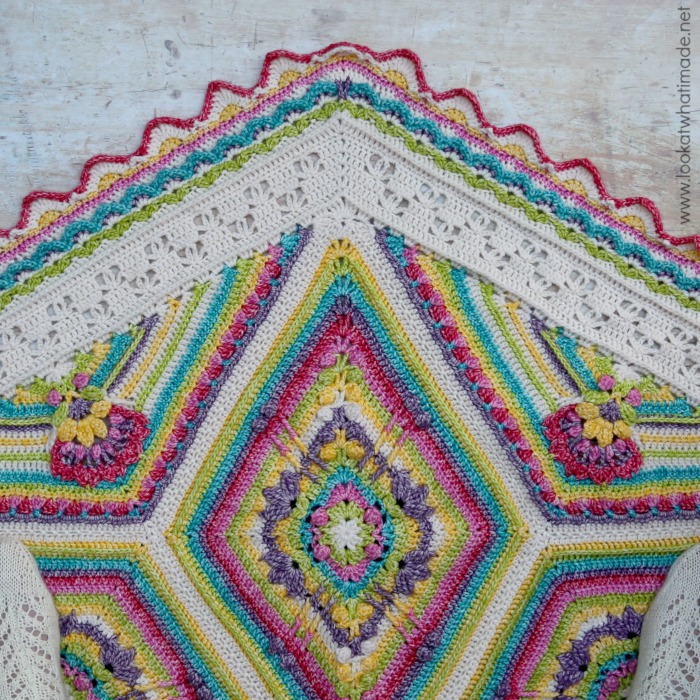
Not only does this Rainbow Version echo the ‘Be Someone’s Rainbow’ message on the button, but it also celebrates my motherland as the Rainbow Nation and the heart and soul of Ubuntu.

This blog post contains affiliate links. I only link to products I personally use or would use. All opinions are my own.


Becky says
I was wondering if in round 15 you can catch the middle of the ruffles right below. The blue ruffles in your photos. The ch 1 spaces line up nicely. Would it still be a hdc or should it be a dc?
Dedri Uys says
Hi Becky. Yes, you can catch the ruffles if you want, although I don’t recommend doing it. I would use a dc working only into the ruffle, not into the ch-1 sp of Round 14.
Bridgette says
You are truly a beautiful person whom God has gifted. Thank you for all the hard work that you do that helps us be able to recreate your beautiful designs.
Dedri Uys says
Thank you very much, Bridgette x
Eve Ferrett says
WOW!!! Absolutely love the “rainbow” Ubuntu – now I’ll have to make one to go with my medium kit Ubuntu. Well that will be after I have woven in all the ends and joined all the squares of my/your stunning 2014 CAL that I started just over a year ago for one of my granddaughters. So glad I found you on the net – you have inspired me to really play with colour and try new techniques. Thank you just doesn’t seem enough Dedri but THANK YOU
Dedri Uys says
Thank you for your lovely comment, Eve. Please let me know if you share photos of your 2014 blanket. I would LOVE to see it :)