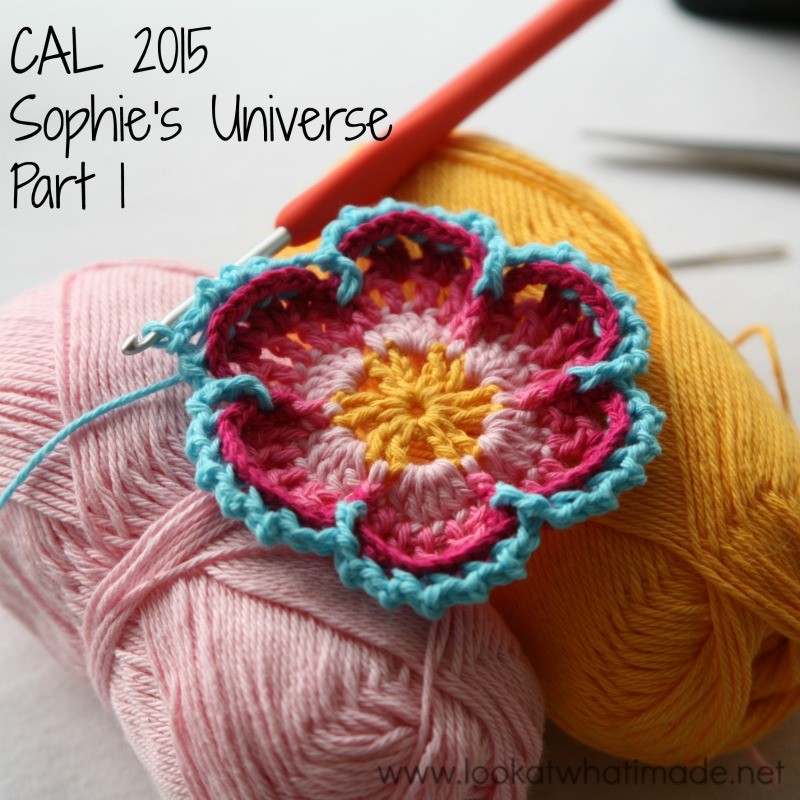
Welcome to Sophie’s Universe Part 1. I hope you are all super excited and eager to get started! If you haven’t already read the Information Post, please take a minute to do so now. It contains important details like yarn weight, hook size, and completed size, as well as a quick outline of what to expect and which resources are available.
It is worth bookmarking that post because it also contains a list of all 20 tutorials, which I will update with links as soon as each tutorial is available.
Once you have read all of that, make a cup of coffee (or tea if you must), find a cosy corner, and come join me for Part 1 of Sophie’s Universe. And then join me for Part 2. Part 2? Yes!! To reward you all for your not-so-patient waiting we are kicking this crochet-along off with 2 Parts!
Sophie’s Universe Part 1 {Photo Tutorial}
©Chris Simon and Dedri Uys 2014. All Rights Reserved.
The first 6 rounds of this Mandala were heavily inspired by Chris Simon’s Lace Petals Square (Block 16 of the Block a Week CAL 2014). In fact, if you take away the front post stitches and back loop stitches, it is an unashamed copy of Chris’ gorgeous design. So before I could even think about publishing this pattern, I had to get Chris’ permission to use her centre. Luckily she agreed. Thank you very much, Chris!
Resources
- Add this CAL to your Ravelry Queue
- Sophie’s Universe CAL 2015 Information
- Use the Print-friendly button at the bottom (right) of this post to print/save this tutorial. Don’t know how? Find out HERE.
- **Part 1 VIDEO TUTORIAL** by Esther Dijkstra from It’s All in a Nutshell
Translations
- Dutch Translation by Dianne Baan
- German Translation by Gabriele Rogers
- Spanish Translation by Lynda Hernandez
- Danish Translation by Tina Poulsen
- Finnish Translation by Sari Åström
- French Translation by Sandra Larvin (with Video Tutorials by Géraldine Cymer)
- Russian Translation (with Videos) by Natalie V. Alimpieva
- Swedish CAL Information by Emma Vingqvist, Agnetha Magnusson, Åza Karlsson, and Ulrika Larsson
- Arabic Video Tutorial by Banan Felimban
Materials and Colours
For the purposes of this tutorial, I am using Scheepjeswol Cotton 8 (available from Deramores) and a 3.25 mm Clover Amour Crochet Hook (US D/3 UK 10).
Remember to check the Helpful Tips before starting. There is some important information about adjusting your hook size to prevent bulging.
Colour Packs for Sophie’s Universe
If you are interested in the colour packs for Sophie, you can find them below.
Wool Warehouse
- Cotton 8 (Small)
- Softfun (Medium)
- Stonewashed XL (Large)
- **NEW** Colour Crafter Pack (Medium) – You can find the details HERE.
Deramores
- Cotton 8 (Small)
- Softfun (Medium)
- Stonewashed XL (Large)
Colours Per Round for Part 1
| Cotton 8 | Softfun | Stonewashed XL | |
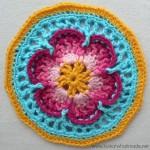 |
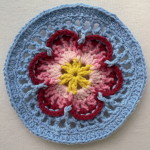 |
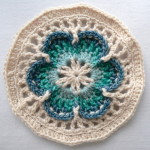 |
|
| Round 1 | Canary | Canary | Moonstone |
| Round 2 | Light Pink | Light Rose | Amazonite |
| Round 3 | Pink | Rose | Green Agate |
| Round 4 | Fuchsia | Bordeaux | Blue Apatite |
| Round 5 | Light Turquoise | Light Blue | Moonstone |
| Round 6 | Light Turquoise | Light Blue | Moonstone |
| Round 7 | Light Turquoise | Light Blue | Moonstone |
| Round 8 | Canary | Light Blue | Moonstone |
Abbreviations
US Terminology used (US/UK comparison chart HERE)
- BLO – Back loop only
- Bpsc – Back post single crochet
- Ch – Chain
- Dc – Double crochet
- Fpdc – Front post double crochet
- Fpsc – Front post single crochet
- Hdc – Half-double crochet
- Sc – Single crochet
- Sl st – Slip stitch
- St/st’s – Stitch/stitches
- * – Repeat instructions between asterisks the amount of times specified. This is a hardcore repeat and will consist of multiple instructions.
- () – Repeat instructions between parentheses the amount of times specified. This is a lower level repeat.
Special Stitches
- Standing Stitches: Standing sc’s, hdc’s, and dc’s are stitches used to start the round without the need for the traditional beginning chain. Links to tutorials are supplied in each relevant round.
Invisible Join
If you would like to use the invisible join instead of the sl st join at the end of each round, you can find a step-by-step photo tutorial HERE. If you DO decide to use it, make very sure that you understand which stitch to join to and which stitch to start your new round in, otherwise your blanket is going to come out all wonky!
Instructions
Round 1
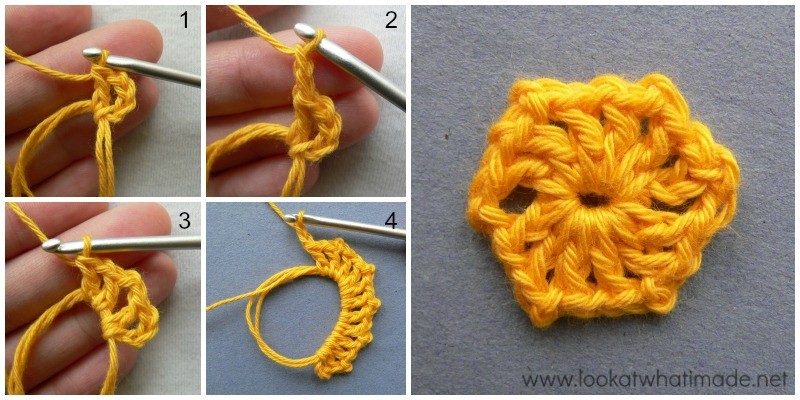
Into a magic ring: ch 4 (this counts as your first dc and ch 1) and then make a dc {Photo 1}. (Ch 2, dc, ch 1, dc ) five times {Photos 2 – 4}. Ch 2 and join to the third st of the beginning ch-4 with a sl st.
If you are not familiar with working into a magic ring, this video tutorial by Tamara from Moogly is very good. Please remember, when working into a magic ring you HAVE to work away your initial tail very well. If you just cut it, your whole project might unravel!
Stitch Count: 12 dc’s, 6 ch-2 spaces and 6 ch-1 spaces
Round 2
- If you are going to use the same colour for Round 2, sl st into the next ch-1 space, ch 1 and sc in the same space.
- If you are going to use a new colour for Round 2, join your new yarn by making a standing single crochet in any ch-1 space around {Photo 1}.
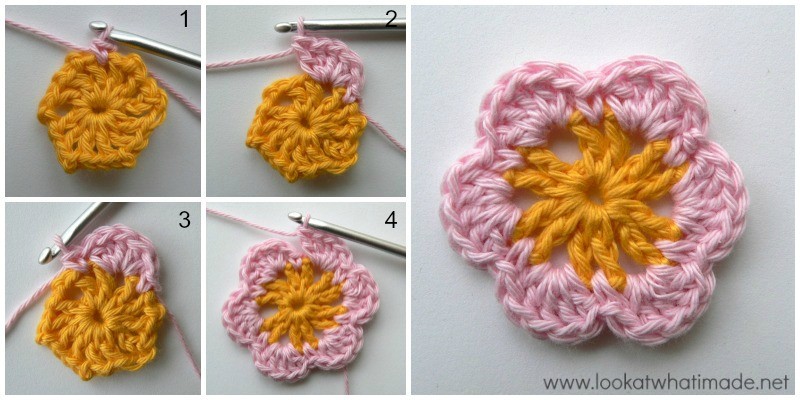
(Make 5 dc’s in the next ch-2 space {Photo 2}, sc in the next ch-1 space {Photo 3}) five times. Make 5 dc’s in the last ch-2 space {Photo 4}. Join to the first sc with a sl st.
Stitch Count: 30 dc’s and 6 sc’s {6 Petals}
Round 3
- If you are using the same colour, ch 1 and make a fpsc around the post of the same sc.
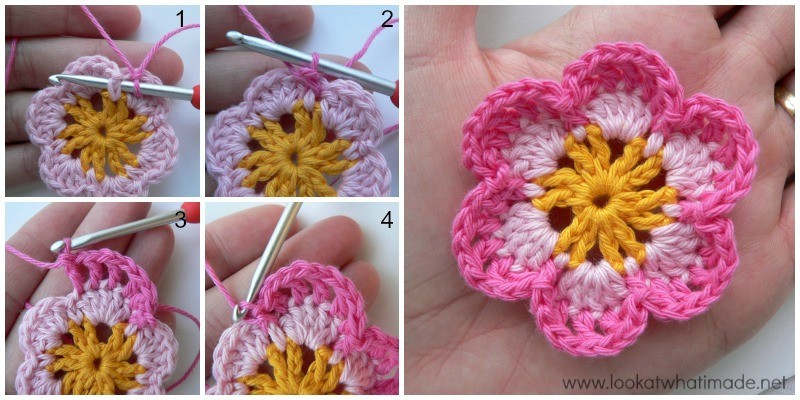
- If you are using a new colour, join your new colour with a fpsc around the post of any sc from the previous round. You will make the fpsc exactly the same as the standing single crochet, but working around the post of the stitch instead of into the top 2 loops {Photos 1 and 2}.
*(Dc, ch 1) in the next 4 dc’s. Dc in the last dc {Photo 3}. Fpsc in the next sc {Photo 4}.* Repeat from * to * 5 more times, omitting the last fpsc on the last repeat. Join to the top of the first sc with a sl st.
If you started with a standing fpsc, you might find it tricky to join to it with a sl st. Pull the beginning tail of yarn so that you can see the top loops of the stitch. If you cannot manage to poke your hook through both loops, you are more than welcome to join to the FLO of the standing fpsc.
You should now have 6 Petals. Each Petal should contain 5 dc’s and 4 ch-1 spaces. There should be one FPsc between Petals.
Stitch Count: 30 dc’s, 6 fpsc’s, and 24 ch-1 spaces {6 Petals}
Round 4
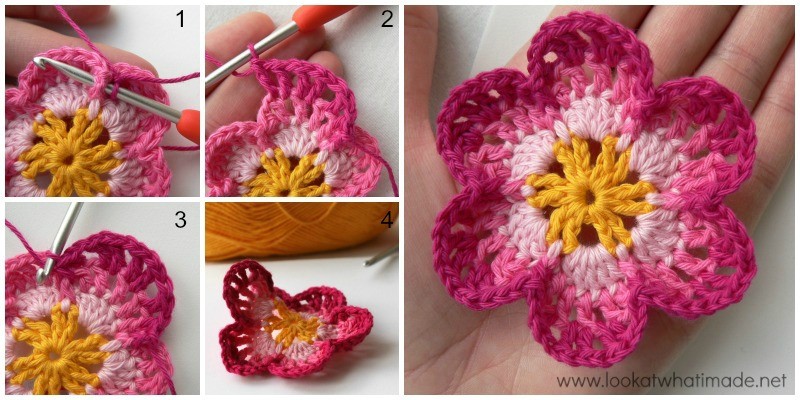
Round 4 is simple, but you have to concentrate! I had to frog this round a few times because I either forgot the ch-1′s or I made the stitches in the wrong spots. At the end of this round your flower will probably buckle. Don’t worry about it! See Photo 4 below.
- If you are using the same colour, ch 1 and fpsc around the post of the same fpsc as the sl st join.
- If you are using a new colour, start with a fpsc around the post of any fpsc around {Photo 1}.
*Hdc in the first dc. This first dc might be slightly tricky to get into because it is right next to the fpsc. (Ch 1, dc in the next dc, ch 1, dc in the next ch-1 space) twice. Ch 1 and dc in the next dc {Photo 2}. Ch 1 and hdc in the last dc. Fpsc in the next fpsc {Photo 3}.* Repeat from * to * 5 more times, omitting the last fpsc on the last repeat. Join to the first fpsc with a sl st. Fasten off and change colours.
Stitch Counts:
- Total: 48 st’s and 36 ch-1 spaces {6 fpsc’s, 12 hdc’s, 30 dc’s, and 36 ch-1 spaces}
- Per Petal: 2 hdc’s, 5 dc’s, and 6 ch-1 spaces per petal {1 fpsc between petals}
Round 5
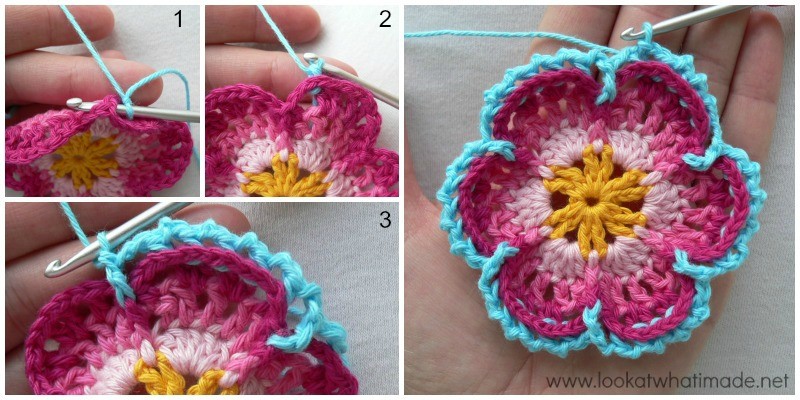
You will not be working into the hdc’s in this round. In other words, you will skip the first and last st of every petal, which will be the hdc’s.
Join your new yarn by making a standing single crochet around the back of the post of the last dc of any petal around {Photos 1 and 2}. Phew…I say “of” a lot in that sentence! Hehe. You are basically starting with a standing back post sc.
*Ch 2 and fpdc around the post of the fpsc between the petals. (Ch 2, bpsc around the post of the next dc) 5 times.* Repeat from * to * 5 more times. Omit the last bpsc of the last repeat. Join to the first bpsc with a sl st.
Stitch Counts:
- Total: 30 bpsc’s, 6 fpdc’s, and 36 ch-2 spaces
- Per Petal: 5 bpsc’s and 6 ch-2 spaces per petal, and 1 fpdc between petals
Round 6
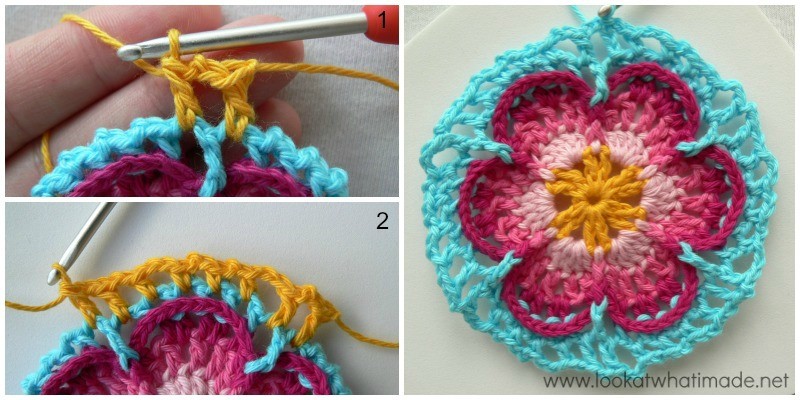
- If you are going to use the same colour, sl st into the next ch-2 space. Ch 5 (this counts as the first dc plus ch-2) and dc in the next ch-2 space. These 2 dc’s should fall on either side of the fpdc from the previous round {Photo 1}.
- If you are going to use a different colour, start with a standing double crochet in the next ch-2 space. Ch 2 and dc in the next ch-2 space. These 2 dc’s should fall on either side of the fpdc from the previous round {Photo 1}.
*Ch 2 and hdc in the next ch-2 space. (Ch 2, sc in the next ch-2 space) twice. Ch 2, hdc in the next ch-2 space. (Ch 2, dc in the next ch-2 space) twice {Photo 2}.* Repeat from * to * 4 more times.
Ch 2 and hdc in the next ch-2 space. (Ch 2, sc in the next ch-2 space) twice. Ch 2 and hdc in the next ch-2 space. Ch 2 and join to the third ch of the beginning ch-5 (or the standing double crochet) with a sl st.
Notice that the dc’s fall on either side of the fpdc’s from the previous round {Photo 2}. Notice also that I am using yellow in Photos 1 and 2 so that you can see the stitch placement better.
Stitch Count: 36 st’s and 36 ch-2 spaces {12 sc’s, 12 hdc’s, 12 dc’s and 36 ch-2 spaces}
Round 7
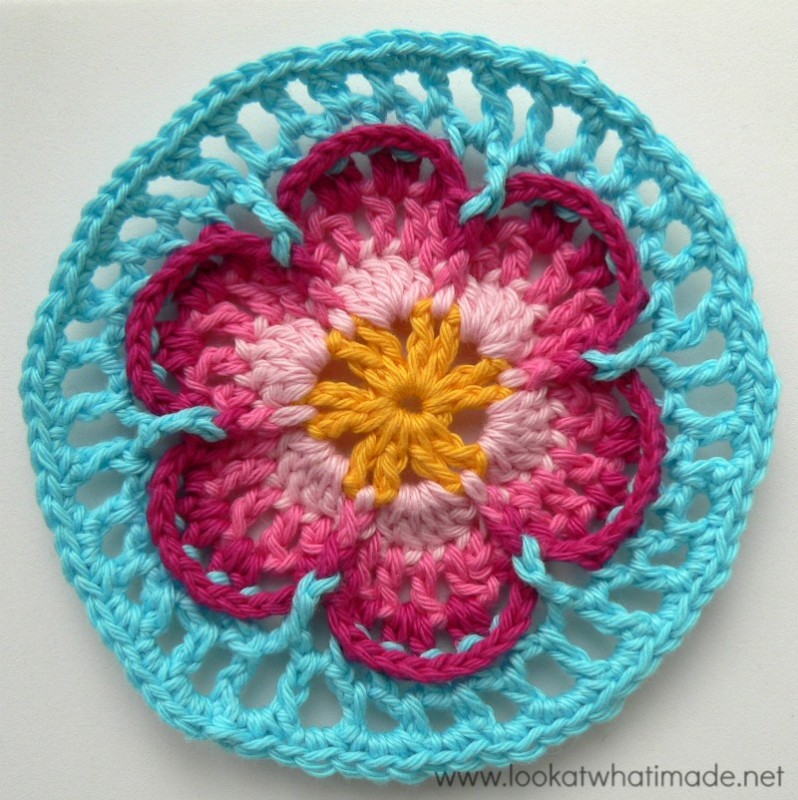
- If you are going to use the same colour, sl st into the next ch-2 space. Ch 1 and make 2 sc’s in the same ch-2 space.
- If you are going to use a different colour, start with a standing single crochet in the next ch-2 space and then make another sc in the same ch-2 space.
Make 2 sc’s in the next ch-2 space. Make 3 sc’s in the next ch-2 space. *Make 2 sc’s in each of the next 2 ch-2 spaces, make 3 sc’s in the next ch-2 space.* Repeat from * to * 10 more times. Join to the BLO of the first sc with a sl st.
Stitch Count: 84 sc’s
Count your stitches!
Round 8
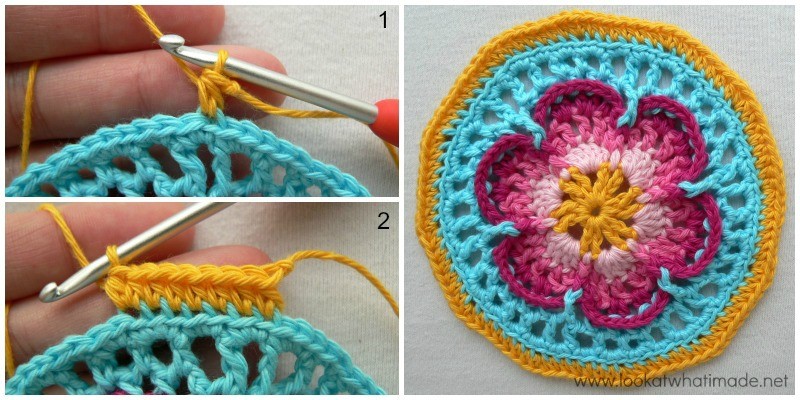
You will be working in the back loops only (BLO) for this round.
- If you are going to use the same colour, ch 2 (this counts as your first hdc).
- If you are going to use a different colour, start with a standing hdc in the BLO of the same st as the sl st join. {Photo 1}
Hdc in the BLO of the next 5 st’s and make 2 hdc’s in the BLO of the next st {Photo 2}. *Hdc in the BLO of the next 6 st’s, make 2 hdc’s in the BLO of the next st.* Repeat from * to * 10 more times. Join to the top of the beginning ch-2 (or the standing hdc) with a sl st.
Stitch Count: 96 hdc’s (worked into the BLO)
There! Now that wasn’t so hard, was it?
If you want to check your gauge, this is an excellent time to do it. Refer to the Gauge listed HERE to check if you are on the right track.

This blog post contains affiliate links. I only link to products I personally use or would use. All opinions are my own.


Jackie says
Dedri – I commented a couple months ago about how excited I was to start this journey. I’m now on Part 8 (I had a few blankets to make for gifts so my Sophie has been my filler between other projects). I am in love with how this is turning out! My plan is to turn her into a wall hanging – probably hanging on a dowel. Do you have any suggestions on how best to attach her to the dowel? I imagine making a pocket along one side to slide the dowel into, but I’m not sure where to begin.
Any help would be greatly appreciated! Thank you again so much for this wonderful project!
Jenny says
Hi Jackie. If you want to make a pouch or sleeve, I would just pick up stitches all the way along one side and then crochet a strip long enough to wrap around your dowel and then sew it shut. Sc or hdc would be strong enough I would say, or you could crochet tie loop strips in the same way at intervals along the hanging edge.
Maybe have a search through Ravelry to see how others may have hung their Sophies?
BW
Jenny
Elizabeth Stuart says
Dedri, I have been looking at this, and loving this since you first posted it. Five years on, a cancer diagnosis, and an oncologist who says I can be cured (a year after diagnosis, and being told incurable!) I now feel ready to to start. I was in awe looking at this, but now have the yarn and I have printed off Part 1. I was great at Amigurumi but I have done so many bits and bobs since, baskets, snoods and hats. Given these to my clinical team with a wonderful response. I work full time, and have a wonderful boss. Now, I am finally doing something for me. That you sooooo much! I don’t know how I would have got through this pandemic without my husband, my daughter, my work, and last but by no means least, my crochet.
Jenny says
Oh Elizabeth! What a journey you have had already!
We sincerely hope that Sophie will give you much comfort and joy as you continue onwards with your path through such challenges of life.
We hope you share your progress so we can follow along with you!
Best wishes
Jenny and Dedri :)
Anja says
Lovely Pattern, but I am confused at round 7. I have 36 chain 2 spaces from round 6. In round 7 you make 2 sc in 2 chain spaces and than 3 sc in 2 chain spaces. So for my count I would have 18x 2sc and 18x 3sc = 90 sc. But your pattern says I am supposed to have only 84 sc. Where am I wrong?
Dedri Uys says
Hi Anja,
Thank you for your query. In Round 7, you do 2 sc in TWO chain spaces and 3 sc in ONE chain space, which equals 7 sts over 3 spaces. That will give you 7 x 12 = 84 sts. I hope that makes it more clear. If you hit any more snags, please do reach out again. The videos are also excellent and I highly recommend them if you get stuck.
Merry Christmas,
Dedri
Mary says
This project has been a true blessing as I worked it along with a friend, filling the many hours of home time caused by COVID. It was challenging enough that my mind was focused and occupied. At the same time, it was a sort of meditative practice. I’m starting #2 and am so very happy with #1. Thank you for sharing this with us and to my friend for stumbling on it at this time. I know of at least two people who you have helped get through this difficult time, in the best possible way.
Kindly,
Mary D
Jenny says
Hello Mary. Sophie is such a comfort right from the very first stitch.
Enjoy your journey, and please share pics with us on our Facebook page!
BW Jenny and Dedri :)
Jackie says
Dedri,
I haven’t started this breathtaking project yet, but I just have to tell you how excited I am to get started! You are such a talented and generous person to provide this for free, especially considering how much time I am positive you put into this. As a single mother who doesn’t have much money to spare, to find such a high quality project is truly inspiring. A big big ‘Thank you’ to you! <3
Dedri Uys says
Hi Jackie,
Thank you very much for your lovely comment. I hope you are enjoying the journey :)
Dedri
gayle parks says
How would I make this beautiful mandala into one large square for a throw, instead of sewing squares together?
Thank you
Dedri Uys says
Hi Gayle,
The blanket is a continuous square pattern. There is no need to sew anything together.
Amy says
Hello, I am fairly new to crochet and I am in love with this pattern! I am practicing and find that my gauge is waaaay off! Do you have advice for me?
I have a worsted weight yarn that is 100% cotton from my stash that I am practicing with (I want to use the Scheepjes Whirl). I made a sample through part 1 with a 3.5 mm (E/4) hook. It is 7 inches and does not look like at all like what I want – it is too clunky and not elegant looking! I will practice with other yarns and hooks but I am feeling lost.
Any advice for me?
Many thanks!
Dedri Uys says
Hi Amy,
I am sorry to hear that you are struggling with the pattern/gauge. You can use the contact tab at the top of the website to send me an email and we can take it from there.
Dedri
Ferry P says
Hi Dedri,
I started my first Universe in late April. I started my second Universe in the beginning of May and worked two at the same time.
Today, July 15th, I started my third already!
I took your original colour scheme and matched those colours with soft tone colours for a more pastel-like look. It will be gorgeous, again.
Thank you SOOOO much for everything!
With kind regards,
Dedri Uys says
Hi Ferry,
I’m curious to know if all three are still going :)
Madelein says
Thank you for giving this to us for free, after so many years. You know you are blessed and loved, Deirde.
I started last night. So much fun with the colour photo’s and perfect instructuons, I missed it.
After I completed 2 x CAL2014’s for my daughters, I swore not to make a block again, so I chose to make a 1 colour Sophie for myself. It looks like a pink grapefruit.
Its the middle of the day and Im enjoying my round 6 in the lovely winter sun, in Gauteng, RSA.
Dedri Uys says
Hi Madelein.
You are most welcome. I am very curious to see your grapefruit Sophie. Have you shared any photos somewhere?
Stay safe!
Liana Joubert says
Hi Madelein, I am interested to start this for my daughter in a single colour too. May I ask what wool and how many balls you used? I am also in Gauteng. Thanks, Liana
Jennifer says
Loving this pattern! I’m on rnd 5, if you are using the same coulor how do you start rnd5? Thank you so much for your generosity
Dedri Uys says
Hi Jennifer
I’m really pleased that you are enjoying the pattern.
Wherever possible/advisable, I have included instructions for starting with the same OR a different colour. Where I have NOT given you this option, you will have to cut your yarn regardless of which colour you are using. This is because the next round starts in a different place from where the previous one ended.
I hope that helps,
Dedri
BRIGITTA ARVA says
Hi! I’m not able to find the final dimensions of the blanket.If you’d be so nice to mention it.I’m loving the pattern so much,and I hope with the yarn I could find in our country(Romania) I’l be able to make a beautiful work.I’m 80 years old but this pattern fascinated me,and I want to make it.Thank you for being so nice to share it for free.I wish you all the best and stay safe!!!!!
Dedri Uys says
Hi Brigitta :)
You can find all the size and gauge information in the information post for the blanket HERE. Hopefully you will be able to find a yarn similar in weight to one of the three sizes listed.
Good luck!
Dedri
Uzma says
I have just started it and am enjoying it because not only is it beautiful but the instructions are very easy to follow. Thanks for the share
Dedri Uys says
I am so pleased you think so, Uzma x
Gemsy says
Love this pattern, thankyou so much for sharing, I hope many people around the world get to know how wonderful the yarn arts like knitting, crochet, spinning etc is coz its super fun and relaxing and the yarns you can get these days are anazeness.. :)
Also Animal Crossing..thats another great thing..or crocheting/knitting with a good anime on in the background like Clannad, Inuyasha, Gegege no Kitaro, Gintama for laughs and sweetness or Death Note for serious or Naruto- slow start but an excellent show, seriously absolute fantastic, my fave story ever. Another show I really like was Upstairs, Downstairs the 1970s classic ersion or sitcoms,my fave being Fraiser, then Everybody Loves Raymond etc.
That interspaced with a good long walk, talking with family/friends etc. Treat yourself and make your life good, you might never get another chance to try new things :)))
Becky Murkin says
Love. Want to follow
Julianna says
I have not started yet, but I just wanted to say a big thank you for your generosity of time and effort to put this detailed pattern out there for free. The texture is beautiful, and the portability of squares always gets my attention. From someone that loves to crochet and knit but does not have skill or time to design THANK YOU!
Dedri Uys says
I hope you enjoy it a lot once you get started, Julianna
Dedri
Maureen Meiring says
Thankful for your generosity !
Dedri Uys says
You are most welcome :)
Aramis says
I can’t believe this CAL is free! It is such an amazing pattern and it’s looking great already! The instructions are the best instructions I’ve ever seen. Thank you, thank you, thank you!
Jenny says
Hi! We hope you enjoy your journey with Sophie!
Jenny :)
Mandy says
Thank you so much for sharing this wonderfully written pattern and so many photos along with each step! I’ve had this pattern pinned on Pinterest for forever and finally just started working on mine. I had a few hiccups and frogging/reworking on a couple of rounds, but those were my fault, for misreading and once skipping a round by accident haha. I was in the mood for something colorful and fun to work on, and this has definitely fulfilled that! It’s gorgeous and challenging yet simple.
Jenny says
We are so happy that Sophie is bringing you joy, Mandy.
Jenny :)
Inbar says
So much fun!! I raely love the detailed instructions. And photos of cuorse.
Thank you!
Renee Epstein says
I started crocheting a couple months ago, I like the detailes that you write and of course the photos are a very helpful of Sophia’s universe!
Unfortunately I do not have different color yarn to play with but I do not Care , I am just having so much fun with this pattern that I just started a day ago! Thanks again for sharing!
Jenny says
Enjoy the journey, Renee. Sophie looks fabulous in just one colour. The stitch details will really pop!
Jenny :)