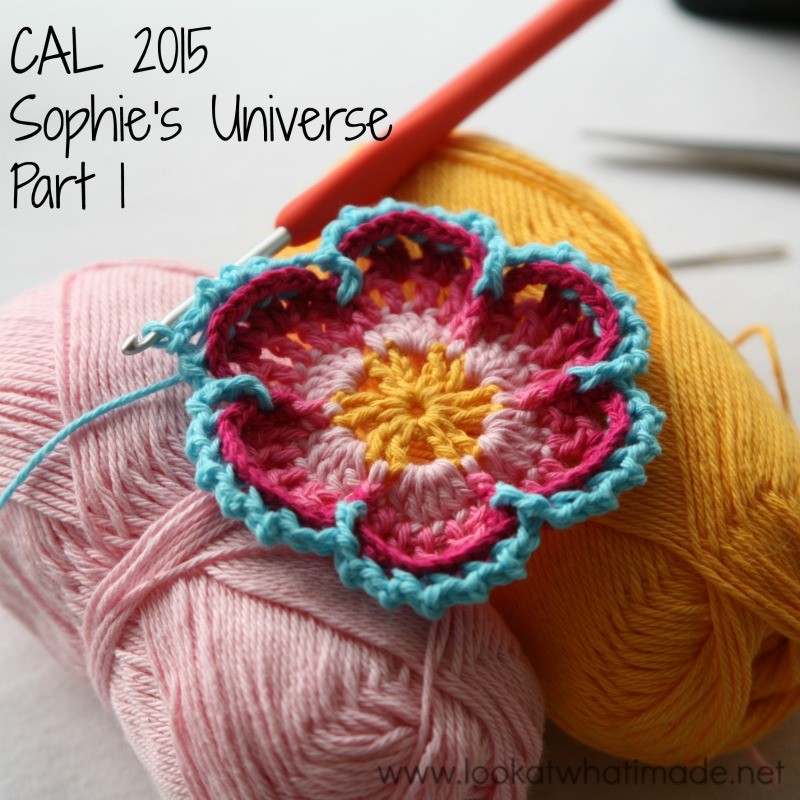
Welcome to Sophie’s Universe Part 1. I hope you are all super excited and eager to get started! If you haven’t already read the Information Post, please take a minute to do so now. It contains important details like yarn weight, hook size, and completed size, as well as a quick outline of what to expect and which resources are available.
It is worth bookmarking that post because it also contains a list of all 20 tutorials, which I will update with links as soon as each tutorial is available.
Once you have read all of that, make a cup of coffee (or tea if you must), find a cosy corner, and come join me for Part 1 of Sophie’s Universe. And then join me for Part 2. Part 2? Yes!! To reward you all for your not-so-patient waiting we are kicking this crochet-along off with 2 Parts!
Sophie’s Universe Part 1 {Photo Tutorial}
©Chris Simon and Dedri Uys 2014. All Rights Reserved.
The first 6 rounds of this Mandala were heavily inspired by Chris Simon’s Lace Petals Square (Block 16 of the Block a Week CAL 2014). In fact, if you take away the front post stitches and back loop stitches, it is an unashamed copy of Chris’ gorgeous design. So before I could even think about publishing this pattern, I had to get Chris’ permission to use her centre. Luckily she agreed. Thank you very much, Chris!
Resources
- Add this CAL to your Ravelry Queue
- Sophie’s Universe CAL 2015 Information
- Use the Print-friendly button at the bottom (right) of this post to print/save this tutorial. Don’t know how? Find out HERE.
- **Part 1 VIDEO TUTORIAL** by Esther Dijkstra from It’s All in a Nutshell
Translations
- Dutch Translation by Dianne Baan
- German Translation by Gabriele Rogers
- Spanish Translation by Lynda Hernandez
- Danish Translation by Tina Poulsen
- Finnish Translation by Sari Åström
- French Translation by Sandra Larvin (with Video Tutorials by Géraldine Cymer)
- Russian Translation (with Videos) by Natalie V. Alimpieva
- Swedish CAL Information by Emma Vingqvist, Agnetha Magnusson, Åza Karlsson, and Ulrika Larsson
- Arabic Video Tutorial by Banan Felimban
Materials and Colours
For the purposes of this tutorial, I am using Scheepjeswol Cotton 8 (available from Deramores) and a 3.25 mm Clover Amour Crochet Hook (US D/3 UK 10).
Remember to check the Helpful Tips before starting. There is some important information about adjusting your hook size to prevent bulging.
Colour Packs for Sophie’s Universe
If you are interested in the colour packs for Sophie, you can find them below.
Wool Warehouse
- Cotton 8 (Small)
- Softfun (Medium)
- Stonewashed XL (Large)
- **NEW** Colour Crafter Pack (Medium) – You can find the details HERE.
Deramores
- Cotton 8 (Small)
- Softfun (Medium)
- Stonewashed XL (Large)
Colours Per Round for Part 1
| Cotton 8 | Softfun | Stonewashed XL | |
 |
 |
 |
|
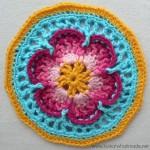
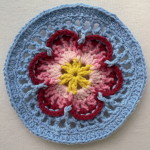
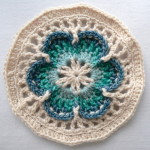
| Round 1 | Canary | Canary | Moonstone |
| Round 2 | Light Pink | Light Rose | Amazonite |
| Round 3 | Pink | Rose | Green Agate |
| Round 4 | Fuchsia | Bordeaux | Blue Apatite |
| Round 5 | Light Turquoise | Light Blue | Moonstone |
| Round 6 | Light Turquoise | Light Blue | Moonstone |
| Round 7 | Light Turquoise | Light Blue | Moonstone |
| Round 8 | Canary | Light Blue | Moonstone |
Abbreviations
US Terminology used (US/UK comparison chart HERE)
- BLO – Back loop only
- Bpsc – Back post single crochet
- Ch – Chain
- Dc – Double crochet
- Fpdc – Front post double crochet
- Fpsc – Front post single crochet
- Hdc – Half-double crochet
- Sc – Single crochet
- Sl st – Slip stitch
- St/st’s – Stitch/stitches
- * – Repeat instructions between asterisks the amount of times specified. This is a hardcore repeat and will consist of multiple instructions.
- () – Repeat instructions between parentheses the amount of times specified. This is a lower level repeat.
Special Stitches
- Standing Stitches: Standing sc’s, hdc’s, and dc’s are stitches used to start the round without the need for the traditional beginning chain. Links to tutorials are supplied in each relevant round.
Invisible Join
If you would like to use the invisible join instead of the sl st join at the end of each round, you can find a step-by-step photo tutorial HERE. If you DO decide to use it, make very sure that you understand which stitch to join to and which stitch to start your new round in, otherwise your blanket is going to come out all wonky!
Instructions
Round 1
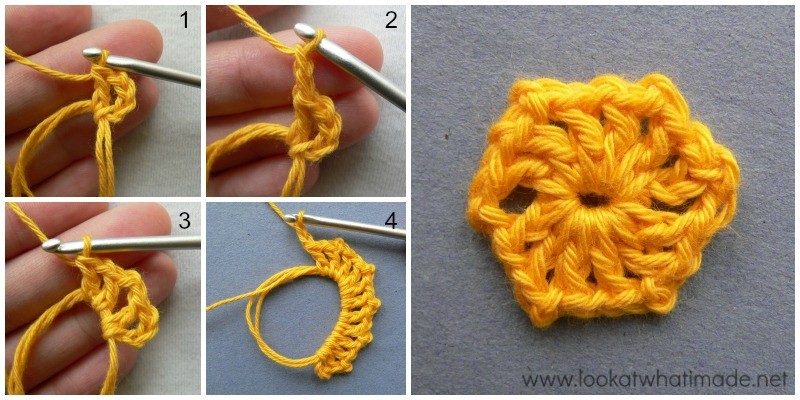
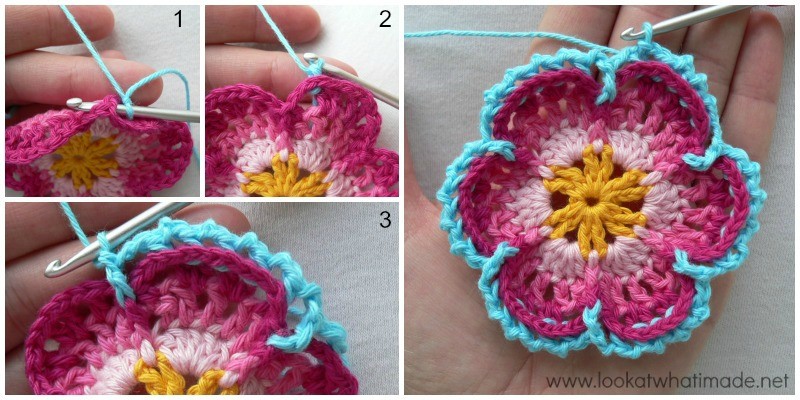
Into a magic ring: ch 4 (this counts as your first dc and ch 1) and then make a dc {Photo 1}. (Ch 2, dc, ch 1, dc ) five times {Photos 2 – 4}. Ch 2 and join to the third st of the beginning ch-4 with a sl st.
If you are not familiar with working into a magic ring, this video tutorial by Tamara from Moogly is very good. Please remember, when working into a magic ring you HAVE to work away your initial tail very well. If you just cut it, your whole project might unravel!
Stitch Count: 12 dc’s, 6 ch-2 spaces and 6 ch-1 spaces
Round 2
- If you are going to use the same colour for Round 2, sl st into the next ch-1 space, ch 1 and sc in the same space.
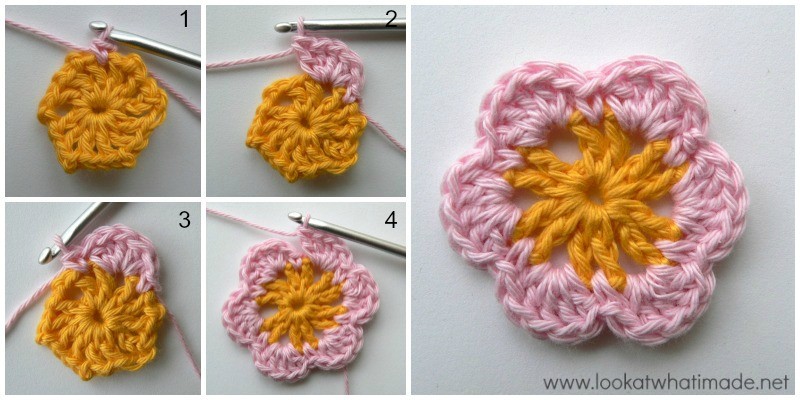
- If you are going to use a new colour for Round 2, join your new yarn by making a standing single crochet in any ch-1 space around {Photo 1}.
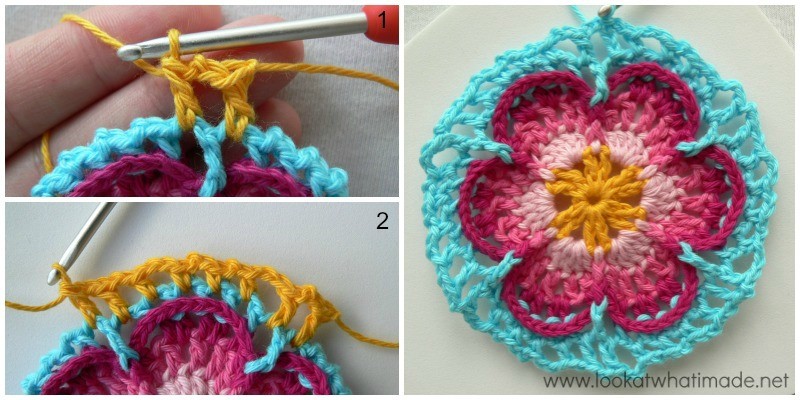
(Make 5 dc’s in the next ch-2 space {Photo 2}, sc in the next ch-1 space {Photo 3}) five times. Make 5 dc’s in the last ch-2 space {Photo 4}. Join to the first sc with a sl st.
Stitch Count: 30 dc’s and 6 sc’s {6 Petals}
Round 3
- If you are using the same colour, ch 1 and make a fpsc around the post of the same sc.
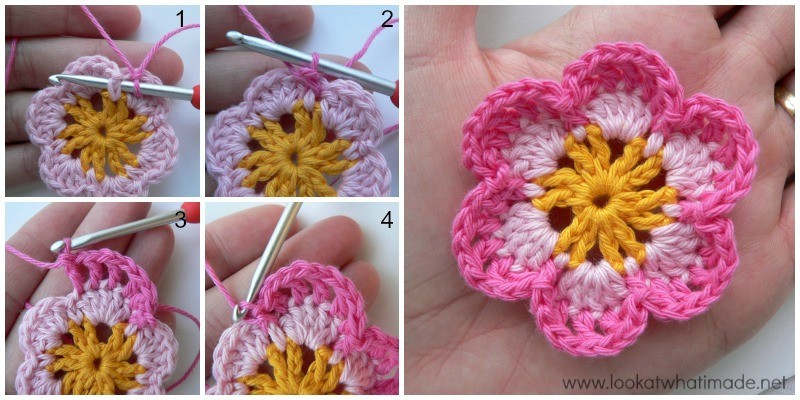
- If you are using a new colour, join your new colour with a fpsc around the post of any sc from the previous round. You will make the fpsc exactly the same as the standing single crochet, but working around the post of the stitch instead of into the top 2 loops {Photos 1 and 2}.
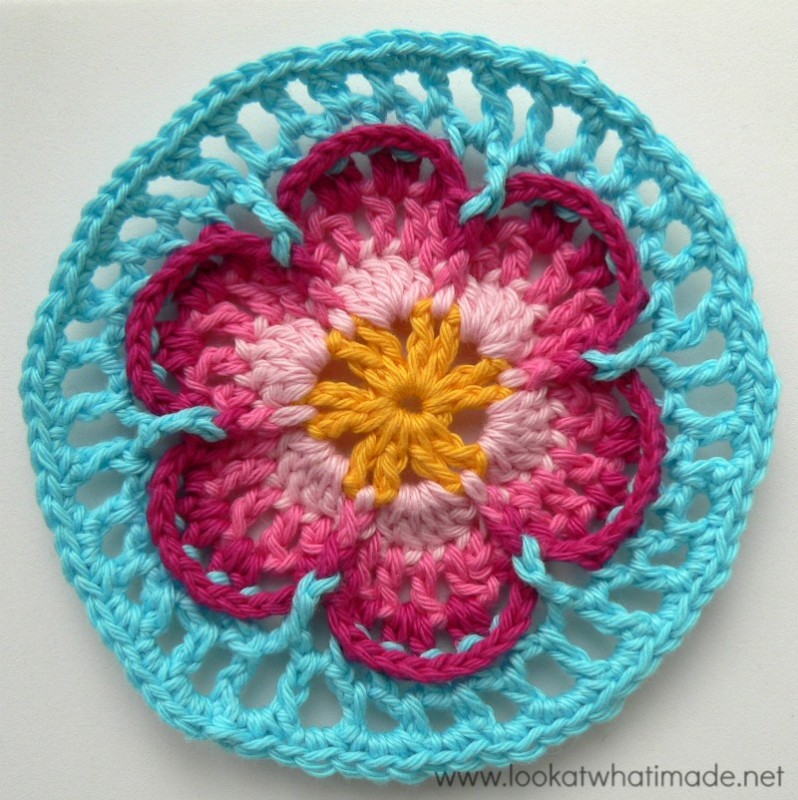
*(Dc, ch 1) in the next 4 dc’s. Dc in the last dc {Photo 3}. Fpsc in the next sc {Photo 4}.* Repeat from * to * 5 more times, omitting the last fpsc on the last repeat. Join to the top of the first sc with a sl st.
If you started with a standing fpsc, you might find it tricky to join to it with a sl st. Pull the beginning tail of yarn so that you can see the top loops of the stitch. If you cannot manage to poke your hook through both loops, you are more than welcome to join to the FLO of the standing fpsc.
You should now have 6 Petals. Each Petal should contain 5 dc’s and 4 ch-1 spaces. There should be one FPsc between Petals.
Stitch Count: 30 dc’s, 6 fpsc’s, and 24 ch-1 spaces {6 Petals}
Round 4
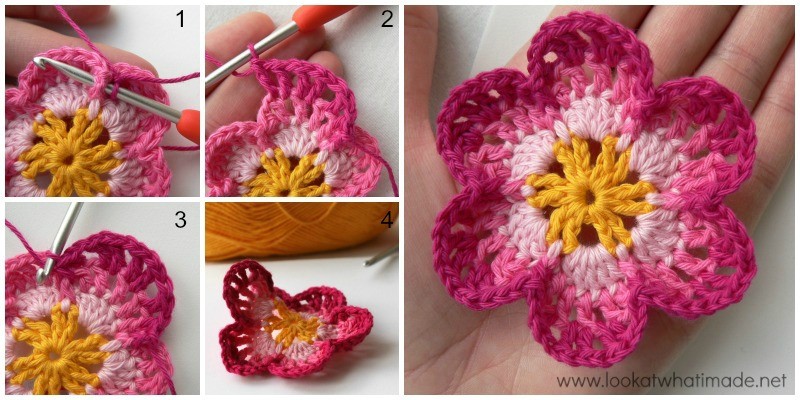
Round 4 is simple, but you have to concentrate! I had to frog this round a few times because I either forgot the ch-1′s or I made the stitches in the wrong spots. At the end of this round your flower will probably buckle. Don’t worry about it! See Photo 4 below.
- If you are using the same colour, ch 1 and fpsc around the post of the same fpsc as the sl st join.
- If you are using a new colour, start with a fpsc around the post of any fpsc around {Photo 1}.
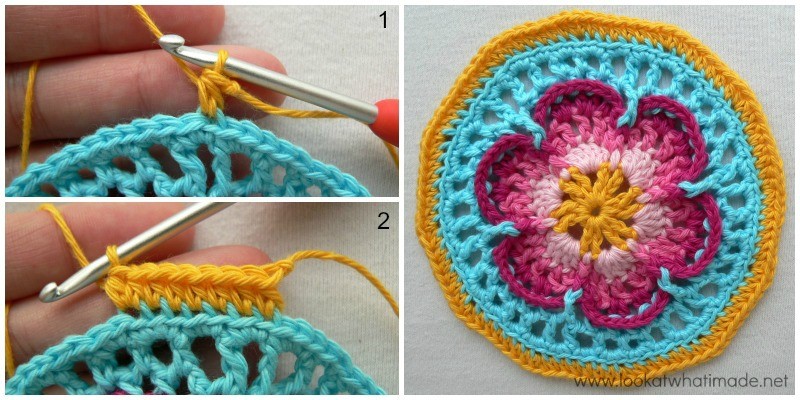
*Hdc in the first dc. This first dc might be slightly tricky to get into because it is right next to the fpsc. (Ch 1, dc in the next dc, ch 1, dc in the next ch-1 space) twice. Ch 1 and dc in the next dc {Photo 2}. Ch 1 and hdc in the last dc. Fpsc in the next fpsc {Photo 3}.* Repeat from * to * 5 more times, omitting the last fpsc on the last repeat. Join to the first fpsc with a sl st. Fasten off and change colours.
Stitch Counts:
- Total: 48 st’s and 36 ch-1 spaces {6 fpsc’s, 12 hdc’s, 30 dc’s, and 36 ch-1 spaces}
- Per Petal: 2 hdc’s, 5 dc’s, and 6 ch-1 spaces per petal {1 fpsc between petals}
Round 5
You will not be working into the hdc’s in this round. In other words, you will skip the first and last st of every petal, which will be the hdc’s.
Join your new yarn by making a standing single crochet around the back of the post of the last dc of any petal around {Photos 1 and 2}. Phew…I say “of” a lot in that sentence! Hehe. You are basically starting with a standing back post sc.
*Ch 2 and fpdc around the post of the fpsc between the petals. (Ch 2, bpsc around the post of the next dc) 5 times.* Repeat from * to * 5 more times. Omit the last bpsc of the last repeat. Join to the first bpsc with a sl st.
Stitch Counts:
- Total: 30 bpsc’s, 6 fpdc’s, and 36 ch-2 spaces
- Per Petal: 5 bpsc’s and 6 ch-2 spaces per petal, and 1 fpdc between petals
Round 6
- If you are going to use the same colour, sl st into the next ch-2 space. Ch 5 (this counts as the first dc plus ch-2) and dc in the next ch-2 space. These 2 dc’s should fall on either side of the fpdc from the previous round {Photo 1}.
- If you are going to use a different colour, start with a standing double crochet in the next ch-2 space. Ch 2 and dc in the next ch-2 space. These 2 dc’s should fall on either side of the fpdc from the previous round {Photo 1}.
*Ch 2 and hdc in the next ch-2 space. (Ch 2, sc in the next ch-2 space) twice. Ch 2, hdc in the next ch-2 space. (Ch 2, dc in the next ch-2 space) twice {Photo 2}.* Repeat from * to * 4 more times.
Ch 2 and hdc in the next ch-2 space. (Ch 2, sc in the next ch-2 space) twice. Ch 2 and hdc in the next ch-2 space. Ch 2 and join to the third ch of the beginning ch-5 (or the standing double crochet) with a sl st.
Notice that the dc’s fall on either side of the fpdc’s from the previous round {Photo 2}. Notice also that I am using yellow in Photos 1 and 2 so that you can see the stitch placement better.
Stitch Count: 36 st’s and 36 ch-2 spaces {12 sc’s, 12 hdc’s, 12 dc’s and 36 ch-2 spaces}
Round 7
- If you are going to use the same colour, sl st into the next ch-2 space. Ch 1 and make 2 sc’s in the same ch-2 space.
- If you are going to use a different colour, start with a standing single crochet in the next ch-2 space and then make another sc in the same ch-2 space.
Make 2 sc’s in the next ch-2 space. Make 3 sc’s in the next ch-2 space. *Make 2 sc’s in each of the next 2 ch-2 spaces, make 3 sc’s in the next ch-2 space.* Repeat from * to * 10 more times. Join to the BLO of the first sc with a sl st.
Stitch Count: 84 sc’s
Count your stitches!
Round 8
You will be working in the back loops only (BLO) for this round.
- If you are going to use the same colour, ch 2 (this counts as your first hdc).
- If you are going to use a different colour, start with a standing hdc in the BLO of the same st as the sl st join. {Photo 1}
Hdc in the BLO of the next 5 st’s and make 2 hdc’s in the BLO of the next st {Photo 2}. *Hdc in the BLO of the next 6 st’s, make 2 hdc’s in the BLO of the next st.* Repeat from * to * 10 more times. Join to the top of the beginning ch-2 (or the standing hdc) with a sl st.
Stitch Count: 96 hdc’s (worked into the BLO)
There! Now that wasn’t so hard, was it?
If you want to check your gauge, this is an excellent time to do it. Refer to the Gauge listed HERE to check if you are on the right track.

This blog post contains affiliate links. I only link to products I personally use or would use. All opinions are my own.


carol embleton says
this looks wonderful
Kathleen says
Thank you for your generosity ❣️
منانه منصوریان says
Hi
I translated part1 to persian language.
How send to you?
Dedri Uys says
Have we discussed you doing a Persian translation? If so, could you please email me again so that I can follow up?
Jeannie says
I am enjoying making this in Lion Brand Landscapes – absolutely brilliant colors. When I needed to frog a few rows it was stitch by stitch – it clings to itself so much, so I ripped it all the way back and spun the whole hank more tightly and like the way it looks. It looks like it might pill, so am planing to just use it as a throw.
On row 4, I came out with 16 posts instead of the five or six needed for the next row so I accommodated my directions so that row would work, and it looks fine.
Thanks for going to all the work of writing it out for us and sharing it – Jeannie
Julianne Schumacker says
Went to Michaels to pick up some bobbins for thread and saw they had Caron Big Cakes for $5.59 instead of $9.99. It was the encouragement/motivation I needed to actually take the dive into this blanket! I can’t wait to see how the changing colors in this yarn affect the look of the final product. Either way, it’ll be a nice cozy blanket that will be very happy at home in my new apartment :)
Thank you for not only creating this pattern, but for answering questions and replying to comments years later!
Dedri Uys says
Hi Julianne. What a lucky find! I hope you share some photos of your project so that I can see how it progresses.
Dedri
becki says
I am on round four and only coming out with 4 DC on each petal,
Dedri Uys says
Hi Becki. Have you had a look at the video tutorial for Part 1? It might help you see exactly which dc’s are placed where? Esther’s videos are amazing.
Dedri
becki says
I got it,had a duh moment!!!! on row 25 now and going great!! making in only pink for a wedding gift!! thanks so much for making this pattern available!!!!
Dedri Uys says
Oh yay!!! 25 already? That was quick. What a special gift. I hope it is for someone very special! Ask if there is anything else x
Tammy Taylor says
I just wanted you to know this Mandala is one of the most beautiful I’ve seen. I keep showing my granddaughter and she’s like “Oh yeah Mamaw I love your color choices.” I haven’t done any fp or bp stitches in a while. Thank God for Google and YouTube.
Also little does she know the blanket is for her. I did that last Xmas. Sat and made all their gifts with the fam right in the same room. But I just wanted you to how beautiful your work is.
Dedri Uys says
Hi Tammy. There are videos for each part of this pattern, so if you get stuck again, just have a look at those. I’m glad she likes it xx
Robyn says
Hi there! I am working on end of round 5 beginning of round 6 with one color. The instructions say (end of round 5) “join to the first bpsc with a sl st” and then start round 6 with “sl st into next ch 2 space. Ch 5 & dc In next ch 2 space.” I do that and they look fine. But then the next line says “These 2 dc’s should fall on either side of the fpsc.” That’s where things get wonky. If I do the first sl st into the next ch space, the next chain space is past the fp, not before it, so my dc’s aren’t on either side of.
Do I make sense?
Dedri Uys says
Once you sl st into the ch sp after the bpsc, you are in the ch-sp before the fpdc, so your first ch-3 (of the ch-5) which counts as your first dc, will be before the fpdc. The next dc will be AFTER the fpdc in the next ch-sp.
Kristi says
I am so excited to be working on this blanket, but I have a quick question! Where did all your tails go? It doesn’t look like your weaving them in, but I could just be missing something.
Do you fasten off and weave in every round?
Thanks!
Kristi
Dedri Uys says
You are welcome to fasten off and work away your ends at the end of each round, or not as it suits you. Unless specifically instructed to fasten off for a round, the choice is yours :) If you do decide to change colour after a round, you will need to fasten off and work away your ends.
Chante says
Hi! I recently saw a photograph of Sophie’s universe and knew I had to have one. Unfortunately it seems that I’m unable to download the pdf files to work offline. If anyone can help me, that would be great!
Love from South Africa
Xxx
Dedri Uys says
Hi Chante. Are you using the Print Friendly button to save the parts to PDF? That should let you open them offline. You will also be able to remove the photos you don’t want to save by clicking on them.
Let me know if that helps.
Mooi bly,
Dedri
jocelyne gallien says
Hi I am doing this pattern in one color only. My question is for the beginning of row 5. You do not say how to get to the point needed to start row 6. I tried but I can’t find a nice looking transition from row 5 to 6 without breaking the yarn.
Dedri Uys says
Hi Jocelyne. Most rounds are written for starting the round using the same colour or a new colour. The ones that ONLY tell you how to start with a new colour (after fastening off at the end of the previous round) are the rounds that don’t have a neat transition. For these rounds, you DO have to fasten off at the end of the previous round and start in the new indicated place, even if you are using only one colour. There aren’t too many places where you have to do that.
Desiree Reviglio says
Hi Dedri,
I have a huge problem. All my rounds, up to round 7 work out perfectly, but once I am done with round 7 I end up with 90 stitches. I have now tried this round over and over again and I cannot get to 84 stitches.
If there is 36 spaces, then you should end up with 18 spaces with 3 stitches each and 18 spaces with 2 stitches each which should then be 90 stitches in the end and not 84. I might be reading something wrong in the pattern.
Could you please help me?
Dedri Uys says
Hi Desiree. Only every third space will have 3 st’s in it, so there are only 12 spaces with 3 and 24 spaces with 2. Please have another look at the pattern and see if that makes sense.
Connie says
Can you tell me which round is the one that uses more yardage of yarn than the other eight colors? I can tell which is the “base” color and has the largest yardage. Thx
Jenny says
Look here At the photograph of the yarn pack, Connie. It shows the dark green has more balls in the pack.
Jenny :)
Gemma Cropper says
Hi Dedri, I really want to have a go at your Sophie’s Universe creation. Do you know if anyone has done a left handed version of the video. I’m quite new to crochet and find that being left handed seems to make my work look backwards and inside out compared to right handed work. My friend says my crochet looks like crab stitch to her! I sometimes get confused where to put the crochet hook because my work doesn’t look like the pictures provided in books etc. I have found YouTube far more helpful than trying to interpret books for right handed crochet.
I haven’t a clue which colours to pick either
Thank you for your time
Gem x
Dedri Uys says
Hi Gemma, there aren’t any left-handed videos. I’m curious…if your friend says your crochet looks like crab stitch, are you trying to work from right to left with your left hand?
If you are left-handed you should still be following the pattern exactly as it is written, but you will be working from left to right instead of right to left. Your blanket will turn out the same as it is a symmetrical pattern visually (even though the instructions are ever-so-slightly assymetrical sometimes). If you really struggle, put a large mirror about 50 cm away from your computer (at a slight angle), sit down next to your computer, not in front of it, and watch the videos in the mirror. I hope that helps!
If it doesn’t, please use the contact me tab at the top of the website to send me an email and I will assist you one-to-one.
Rebecca Bullock says
I just read the response to your statement…..I have a left handed sister, she sat in front of me and learned to crochet that way……good luck…
Gayle says
Hi, am in love with Sophie, have admired her from afar for, well forever it seems. I have decided to embark on the journey that is Sophie however I’m often limited in my internet. I would like to print just the pattern without the tutorials and or save the whole thing in one file on my computer. Is there a written version without the photos etc?
Thanks Gayle
Dedri Uys says
Hi Gayle, due to the complexity of some of the stitches, I have decided not to do a written-only version. You can use the print-friendly button to save each part as a pdf so that you can access them offline. Printfriendly gives you the option to click on images to remove them.
I hope that helps,
Dedri
Cherry says
Hello Ms. Dedri, do u have a pattern for sophies garden crochet square all around aside from diamond type of design? I mean for a blanket or table cloth type? I saw it on pinterest but i cant find the pattern please help. Thank u so much…
Dedri Uys says
Hi Cherry. Some people have made it bigger using the Around the Bases CAL.
adelaide dubini says
volevo fare un campione x poi proseguire ma non mi trovo con i titoli del cotone da noi il cotone n°8 è sottile e si lavora con uncinetto 1,25/8 e è adatto x pizzo
mentre x cotone ad esempio x borse amigurumi e lana hanno un’altra numerazione e sono + grossi si parte dal n°1-1,50- 2-2,50 ecc sino ai più grossi es. n°10
Dedri Uys says
Hi Adelaide. I am sorry, I don’t understand what you are asking at all. I tried using Google translate without success.
adelaide dubini says
Grazie Dedri anch’io ho difficoltà con traduttore però anche con video riesco a decifrare,spero che capisca questo volevo sapere tipo di filato che posso trovare in italia x fare al meglio, ho visto che però usate filati diversi, grazie di tutto posterò foto, mia figlia Aurora sa inglese tedesco spagnolo un po francese ,ma non abita con me io abito sola vicino a figlia AnnaMaria con 3 bambini di cui 1 bambina e 2 gemelli grazie buona notte qui sono le 23,50
Dedri Uys says
Hi :) Using Google translate I am struggling to understand your message. All I could make out was that you have 3 grandchildren. Can you ask your daughter to help you communicate with me and I would gladly help you.
Dedri
Lucy says
Dear Dedri
I am considering embarking on making a Sophie! Perusing however the instructions and comments first, I came across the Italian one. I know it was a little while ago now, but having grown up there, I wanted to let you know that the questions was about the type of yarn used. The OP found that the numbering system was different in Italy and wondered if you had any idea what sort of yarn available in Italy would be best.
I’m sure I read somewhere about free worldwde shipping, but nonetheless, perhaps you have an insight… I didn’t start crocheting until March, so I don’t know anything about Italian yarn!
Best wishes and thanks for the pattern. By the way. Is there a download function (as opposed to print?)
Thanks
Dedri Uys says
Hi Lucy. Thank you so much for taking the trouble to translate the question for me.
There is a download function. If you select pdf when you have pressed the print-friendly button, it will allow you to save the instructions as a pdf instead.
Robert Leaver says
When you write dc and sc do you mean double treble and single treble?
Dedri Uys says
Hi Robert. I am using US terms. A single crochet is: insert hook into the next st. Yarn over and pull up a loop. Yarn over and pull through both loops. A double crochet is: yarn over and insert hook into the next st. Yarn over and pull up a loop. (Yarn over and pull through 2 loops) twice.
Thais Gloor says
Is there a particular approach to choosing yarn colors? I see all kinds of variations on the color scheme, but they all look so beautiful. I’m sure there’s a way to NOT do the colors correctly, or is there? Do you have any suggestions so that it doesn’t look completely haphazard if I decide to go after a scheme other than yours?
Dedri Uys says
Hi Thais. First of all, you don’t have to use my colour scheme at all. It is a reflection of my personality, as your Sophie should be of yours! Secondly, I have yet to see an ‘ugly’ Sophie. The fact that the pattern was designed with so many colours makes it clear that most rounds will work with a colour change, so you can use a single colour (I have seen some gorgeous ones) or multiple colours. You can use a selected colour palette or scrap yarn. In short, whatever your heart desires. As long as you like your colours, that is all that matters. You can see some amazing examples on Ravelry.
jeanne says
I think I need to retire from my job so I can focus solely on completing this blanket. It is stunning. But so many new things to learn how to do. Oh my goodness.
Dedri Uys says
I am glad you like it. Sometimes I feel that way too! So many things, so little time :)