If you’re anything like me, you probably have a growing collection of leftover yarn from blankets and crochet-alongs and… well… yarn you bought because it was pretty but you don’t know if you’d actually use it. Not enough to make another project, but far too much to throw away! This Simple Crochet Hexagon was designed with exactly those leftovers in mind. It works beautifully in a wide range of yarns, making it an ideal stash-busting project whether you’re using sewing thread, DK, Aran or chunky yarn. As an added bonus, it uses only basic stitches and is super easy to memorise after only a few goes.
The finished motifs can be joined together to make blankets, cushions, bags, table runners, wall hangings… or simply tucked away until inspiration strikes.
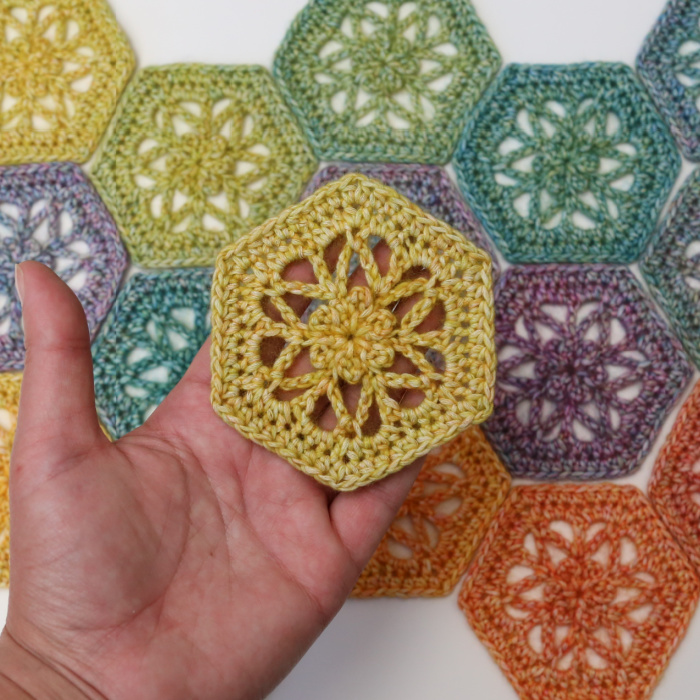
Simple Crochet Hexagon
A Little Inspiration
The idea for this hexagon came from one of my lucky stones – a smooth pebble I’d covered in free-form crochet years ago at one of the Devon Sun Yarns retreats in Lyme Regis. It was keeping me company as I prepared for the final assessment of my coaching course, and it kept catching my eye. I noticed that it looked like a flower wrapped in a star and wondered what it would look like turned into a motif. And that is how all my patterns start… with the phrase: “I wonder”.
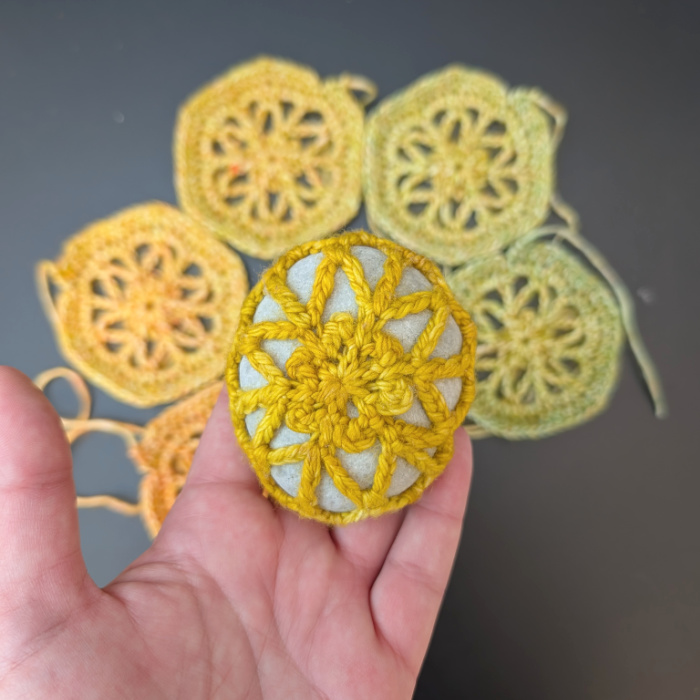
So once my assessment was over, I decided to give myself a gold star for effort in the form of a crochet hexagon (or twenty), using some of the yarn left over from my Little Love Notes Blanket (and other behind-the-scenes design endeavours).
A Happy Discovery
After making 19 of the motifs in one evening, I decided to sew in my ends… at which point I turned the first motif over and realised that the flower in the very centre looked much more defined from the back. The only sensible thing to do (well… perhaps not the only sensible thing, but definitely the most Dedri thing) was to undo the final two rounds on all nineteen motifs, turn them, and remake them with the wrong side of the first 3 rounds facing the front.
Was I annoyed at myself for not noticing this sooner? Yes, I was! Am I glad I did it? Absolutely!
I’ll show you the difference below so you can decide whether it was worth the extra effort.
This is my happy pile before I started re-doing…
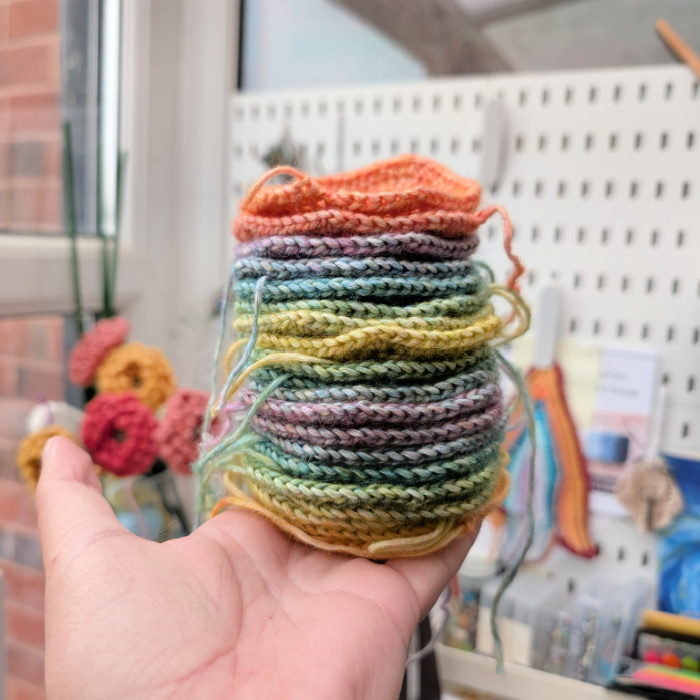
And this is the (subtle) difference:
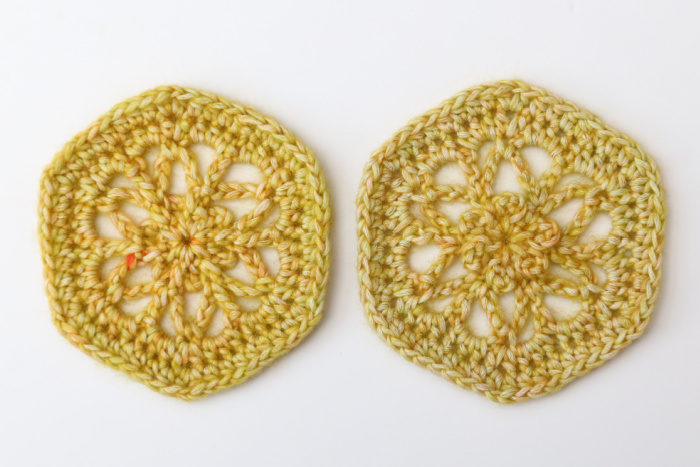
On the left, you can see what the motif looked like without turning at the end of Round 3. On the right, you can see what it looks like if you DO turn at the end of Round 3. The difference is so subtle, but once I saw it, I couldn’t unsee it.
Perfect for Scrap Yarn
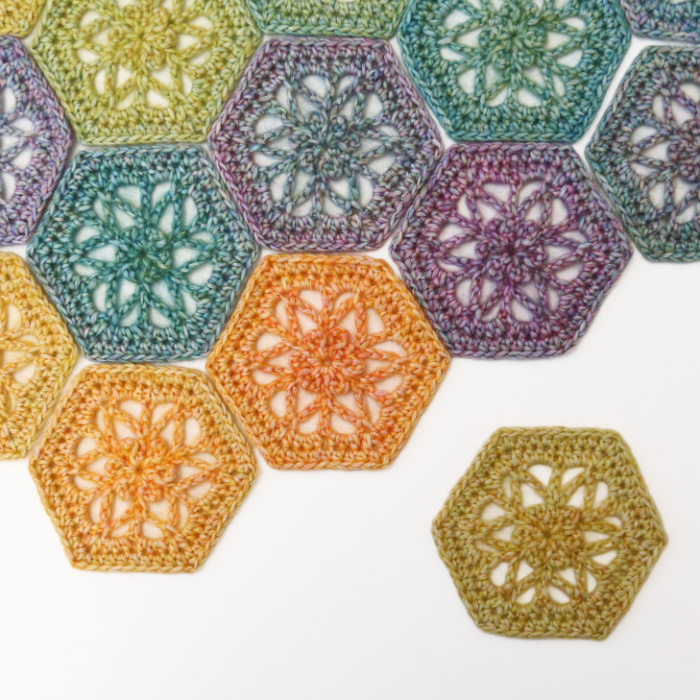
Making these from my leftover Yarnsmiths Pebble Haze Prints made me realise just how perfect this pattern is for using up the leftovers from larger projects.
If you’ve ever finished a CAL or MAL and found yourself with small amounts of every colour left over, you’ll know exactly what I mean. So why not turn them into a collection of hexagons? Before long, you’ll have enough to create something entirely new.
Finished Sizes
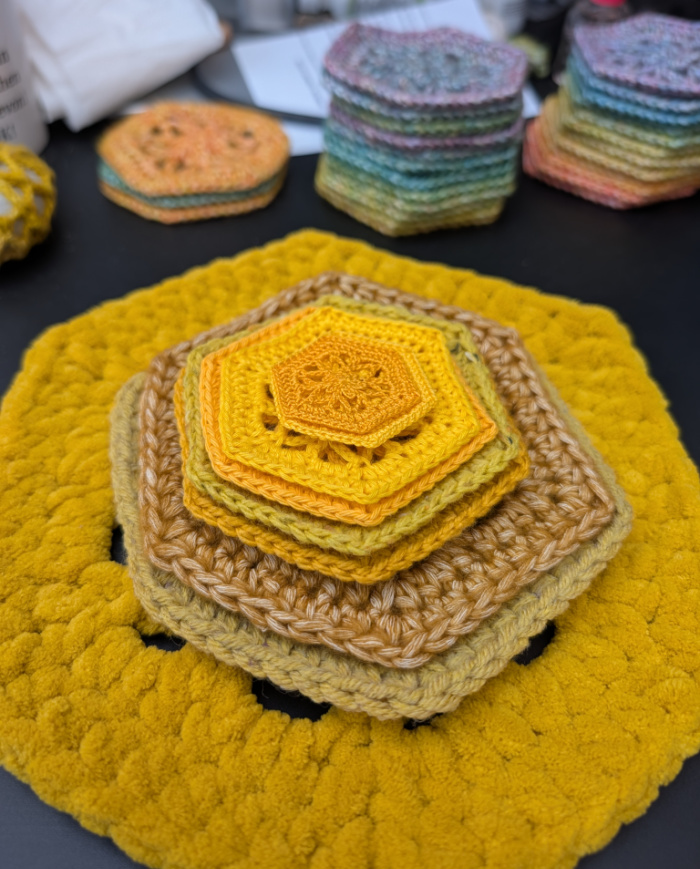
So off I went hunting for leftover yarns from previous projects to see how differently this motif behaves in various yarns (and to give you that information so you don’t have to trial-and-error it yourself).
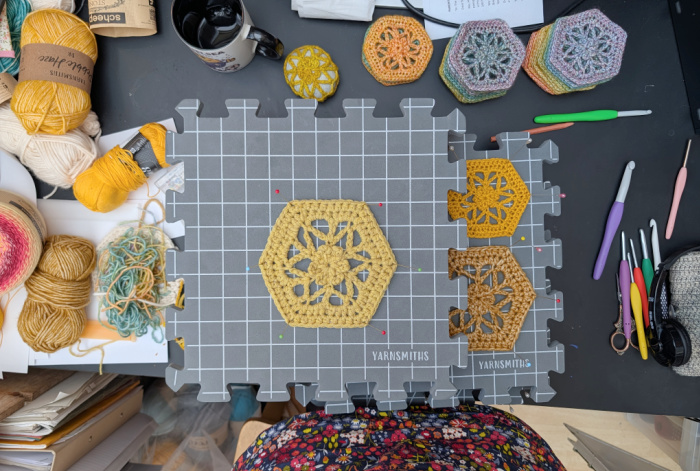
It is probably the bit I enjoyed most while designing this pattern! Here you can see some of the chaos from that process.
This isn’t an exhaustive list by any means. It’s simply a record of the yarns I had to hand and the sizes they produced. I have to say, though, I love how the same pattern changes personality depending on the yarn you choose.
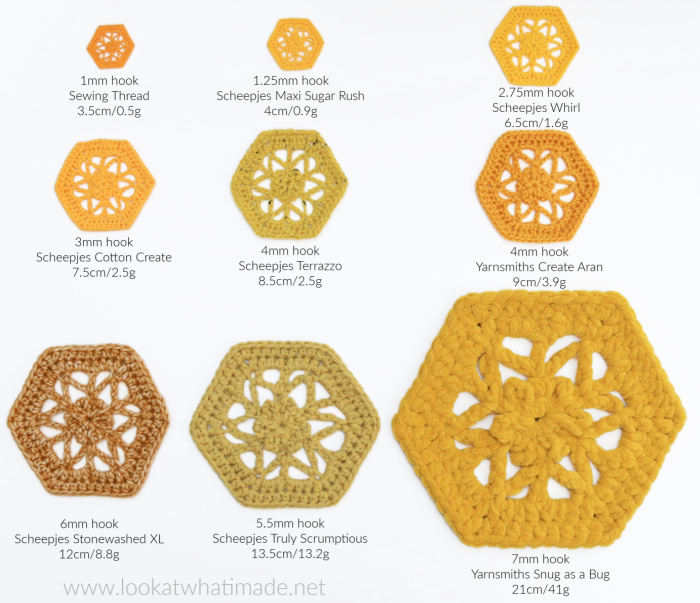
| Hook | Yarn | Size | Approx. Weight |
| 1 mm | Sewing Thread | 3.5 cm | 0.5 g |
| 1.25 mm | Scheepjes Maxi Sugar Rush | 4 cm | 0.9 g |
| 2.75 mm | Scheepjes Whirl | 6.5 cm | 1.6 g |
| 3 mm | Scheepjes Cotton Create | 7.5 cm | 2.5 g |
| 4 mm | Yarnsmiths Pebble Haze Prints DK | 8 cm | 3.5 g |
| 4 mm | Scheepjes Terrazzo | 8.5 cm | 2.5 g |
| 4 mm | Yarnsmiths Create Aran | 9 cm | 3.9 g |
| 5.5 mm | Scheepjes Truly Scrumptious | 13.5 cm | 13.2 g |
| 6 mm | Scheepjes Stonewashed XL | 12 cm | 8.8 g |
| 7 mm | Yarnsmiths Snug as a Bug | 21 cm | 41 g |
Simple Crochet Hexagon Pattern
© Dedri Uys 2026. All Rights Reserved. Chart by Masako Kawahara.
Resources
- Ravelry: Add this Pattern to Your Ravelry Queue
- Hashtag: #SimpleCrochetHexagon
- Video Tutorial: You can find a US Terminology right-handed tutorial HERE on YouTube.
Translations
- None Available Yet
Materials
You can use any hook/yarn combination you fancy.
I am using:
- 4mm crochet hook
- Yarnsmiths Pebble Haze Prints DK (2D350)
Size Using Above Yarn and Hook
- 8cm from side to side
- 3.5g per motif
Notes
- These hexagons are perfect for using up small bits of scrap yarn.
- Please Note: If you are using a yarn that breaks easily when you yank on it, replace the magic ring at the start as follows: Ch 4, sl st into the 4th ch from the hook to form a ring. Work your stitches into this ring.
Abbreviations
US Terminology
- Beg – Beginning
- Ch – Chain
- Dc – Double crochet
- Hdc – Half-double crochet
- Sc – Single crochet
- Sl st – Slip Stitch
- Sp/sps – Space/spaces
- St/sts – Stitch/stitches
- [] – Stitches to be made in the same st/sp
- () – Repeat instructions between brackets the number of times specified
- {} – Stitch Counts
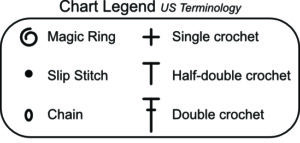
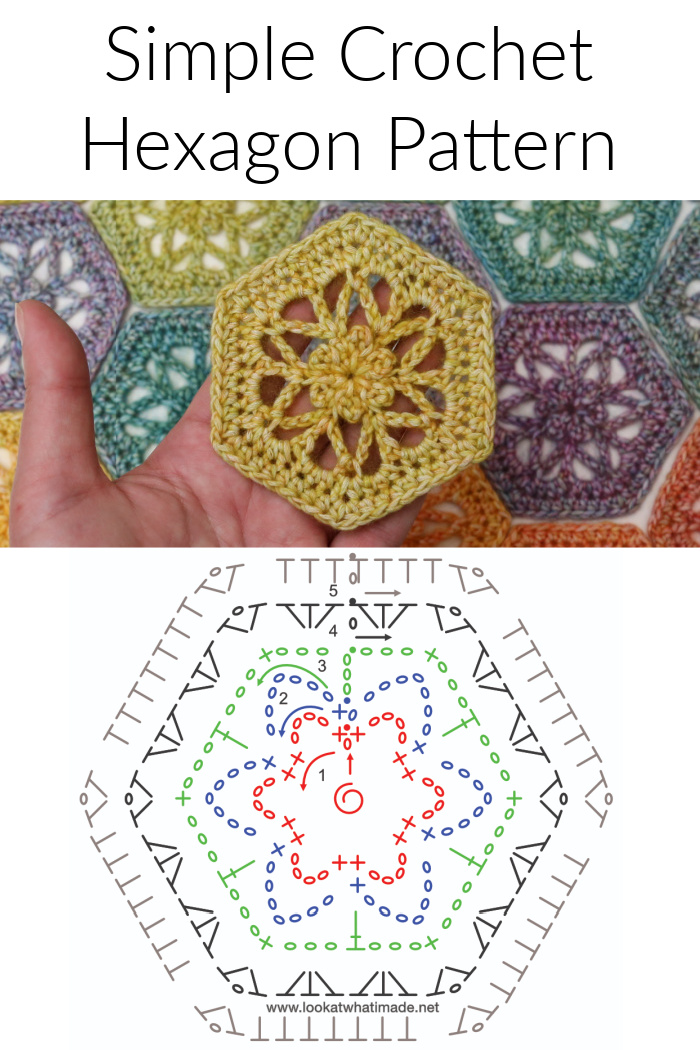
Chart Legend
Instructions
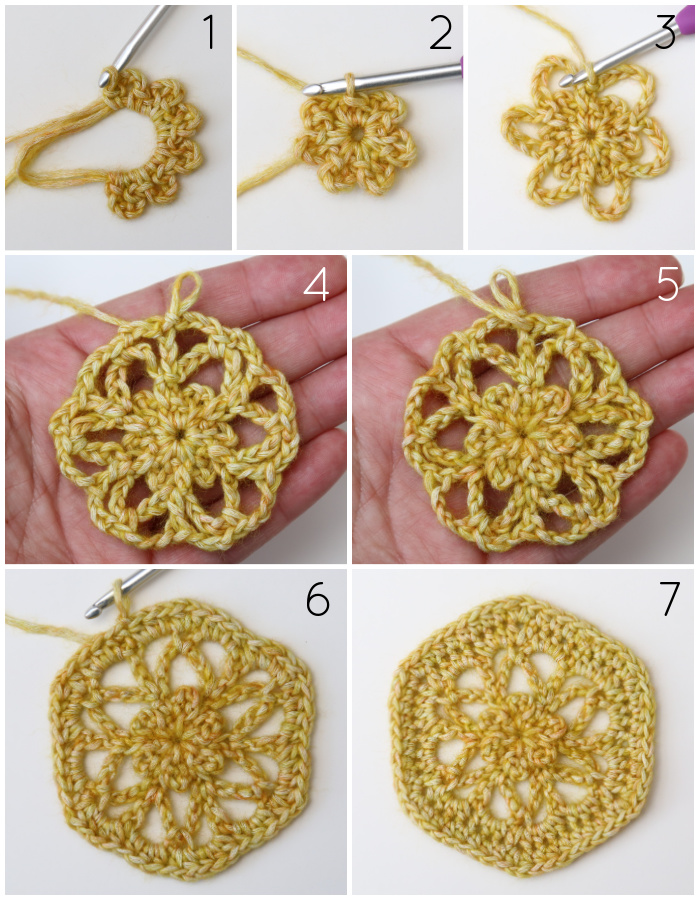
Round 1: Working into a magic ring (see Notes above), (sc, ch 4, sc) 6 times {Photo 1}. Join to the first sc with a sl st and close the magic ring {Photo 2}. {12 sc and 6 ch-4 sps}
Round 2: Ch 1 (doesn’t count as a st throughout), sc in the same st. (Ch 7, skip the ch-4 sp and the next sc, sc in the next sc) 6 times, omitting the last sc on the last repeat. Join to the first sc with a sl st {Photo 3}. {6 sc and 6 ch-7 sps}
Round 3: Ch 6 (counts as dc and ch-3). Sc in the next ch-7 sp, ch 3. (Dc in the next sc, ch 3, sc in the next ch-7 sp, ch 3) 5 times. Join to the top of the beg ch-3 with a sl st {Photo 4}. {6 sc, 6 dc, and 12 ch-3 sps}
Turn your work so that the back of the first 3 rounds is facing you. You will notice that the Flower from Round 1 is more pronounced on this side {Photo 5}.
Round 4: Ch 1. (Make 3 hdc in the next ch-3 sp. [Hdc, ch 1, hdc] in the next sc, make 3 hdc in the next ch-3 sp, skip the next dc) 6 times. Join to the top of the first hdc with a sl st {Photo 6}. {8 hdc per side, not including ch-1 corner sps}
Round 5: Ch 1, hdc in the same st. Hdc in the next 3 sts. ([Hdc, ch 1, hdc] in the next ch-1 sp. Skip the next st, hdc in the next 7 sts) 5 times. [Hdc, ch 1, hdc] in the next ch-1 sp. Skip the next st, hdc in the last 3 sts. Join to the top of the first hdc with a sl st. Fasten off and work away your ends {Photo 7}. {9 hdc per side, not including ch-1 corner sps}
I am excited to see what you do with this pattern! Please remember to use the hashtags #lookatwhatimadedotnet and #simplecrochethexagon so that I can find your work!
This blog post contains affiliate links. I only link to products I personally use or would use. All opinions are my own.



Joan says
What a fantastic idea! Thanks for going through all the yarn types scenarios. I love hexagons!
Jenny Lowman says
We love them too! :)
Savetikio says
What a lovely idea for using up those little bits of yarn that are too precious to throw away! I especially love how this simple hexagon combines creativity with stash-busting practicality. The inspiration from a crochet-covered lucky stone makes the design feel even more special, and the “I wonder” philosophy is such a beautiful reminder that the best patterns can begin with a simple spark of curiosity. This would be a wonderful project for creating colourful blankets, cushions, or unique handmade décor from leftover yarn.
Jenet Gardiner says
Thanks for the pattern. I have made fifteen already. Would it be easy to make a half hexagon as I am thinking of turning them into a rectangular bag xx
Jenny Lowman says
Maybe have a go by using the chart, and let us know how you get on? :)
Sophie Batsleer says
Hi Dedri
Thanks for sharing your lovely patterns !
I am a fan of your work and I’m looking forward to all your future creations.
Kind regards from Belgium
Sophie
xxx
Jenny Lowman says
Thank you Sophie!