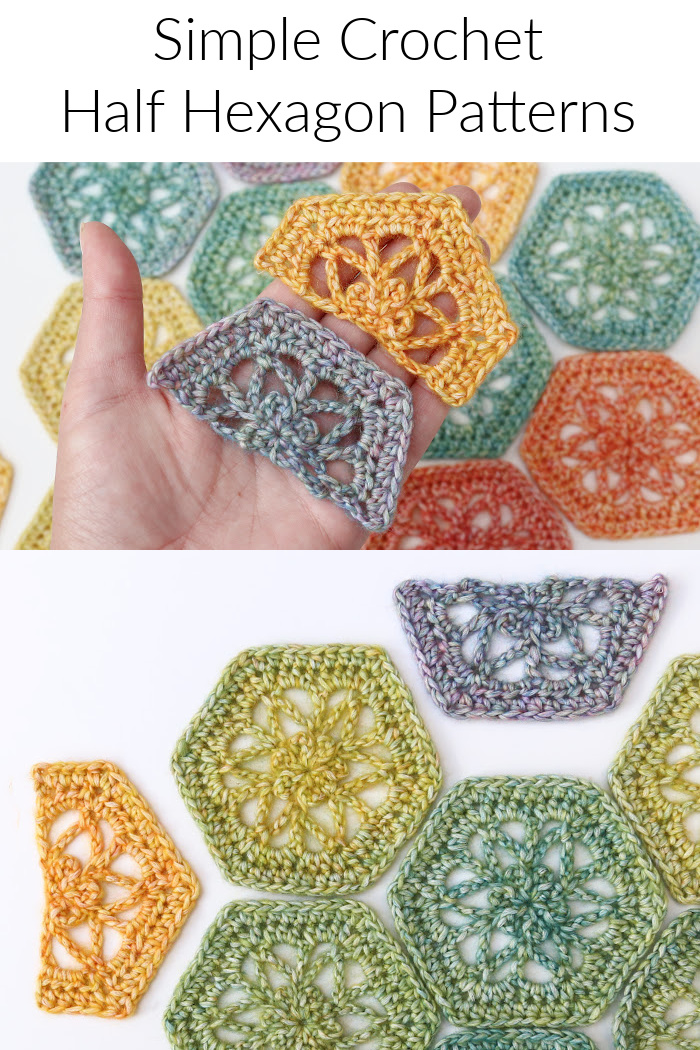
Following on from the Simple Crochet Hexagon Pattern I shared in my last post, I have created patterns for two crochet half hexagons: one pointy and one flat – depending on which edge you would like to add them to.
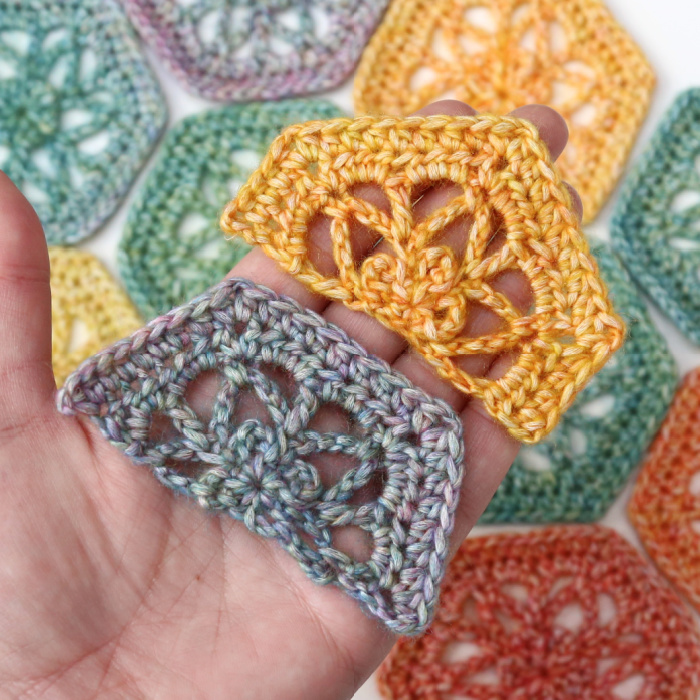
Simple Crochet Half Hexagon
These half hexagons feature the same lace design as the full hexagons, which took me a bit of (delicious) trial and error to figure out.
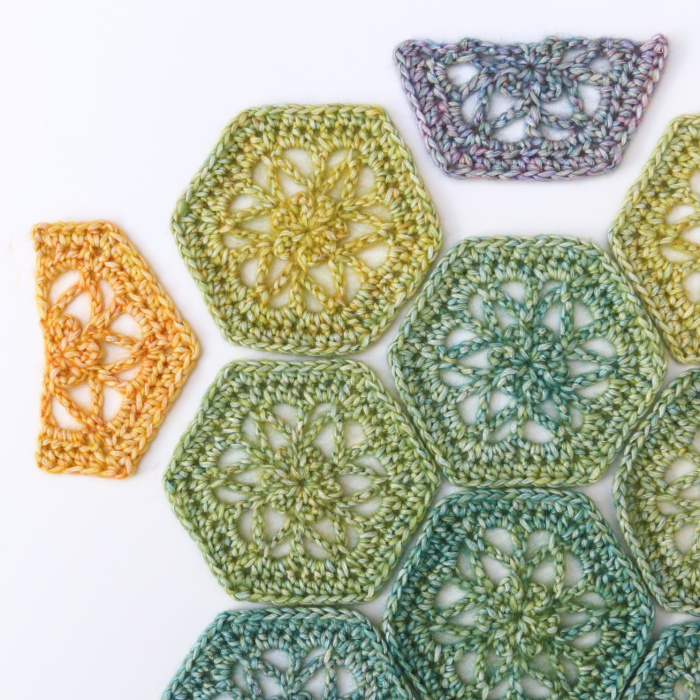
The flat half hexagons slot into the spaces (valleys) created where three hexagons meet.
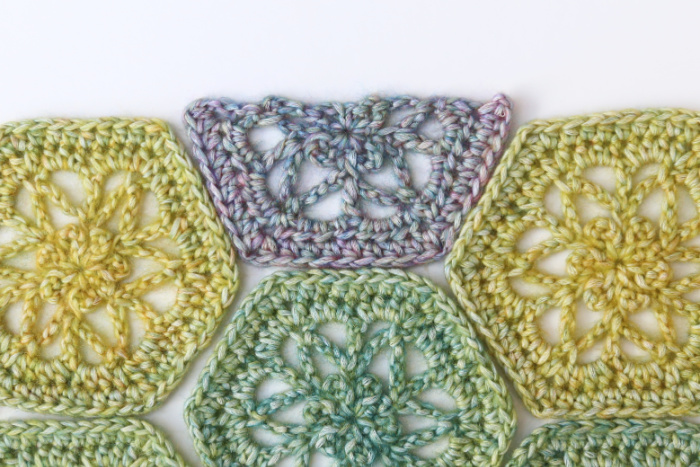
The pointy half hexagons slot into the more shallow valleys where two hexagons meet.
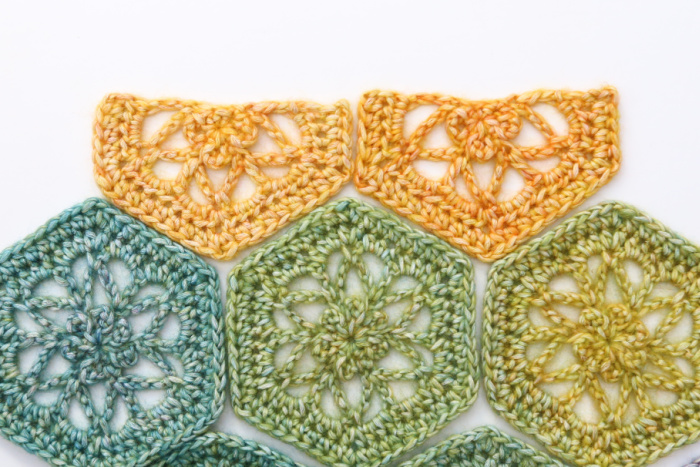
Both of these work really well for filling in the ‘missing bits’ in projects like bags or tops where the full hexagons are joined in a tubular fashion. Annoyingly, using these to create a straight border for a blanket leaves a quarter-hexagon-shaped hole in each corner, so I’m curious to see if any of you manage to solve that riddle. So far, I am stumped!
Simple Crochet Half Hexagon Patterns
© Dedri Uys 2026. All Rights Reserved. Chart by Masako Kawahara.
Resources
- Ravelry: Add this Pattern to Your Ravelry Queue
- Hashtag: #SimpleCrochetHalfHexagon
- Simple Crochet Hexagon Pattern
Translations
- None Available Yet
Materials
You can use any hook/yarn combination you fancy.
I am using:
- 4mm crochet hook
- Yarnsmiths Pebble Haze Prints DK (2D350)
Note
Please Note: If you are using a yarn that breaks easily when you yank on it, replace the magic ring at the start as follows: Ch 4, sl st into the 4th ch from the hook to form a ring. Work your stitches into this ring.
Abbreviations
US Terminology
- Beg – Beginning
- Ch – Chain
- Dc – Double crochet
- Hdc – Half-double crochet
- Sc – Single crochet
- Sl st – Slip Stitch
- Sp/sps – Space/spaces
- St/sts – Stitch/stitches
- [] – Stitches to be made in the same st/sp
- () – Repeat instructions between brackets the number of times specified
- {} – Stitch Counts
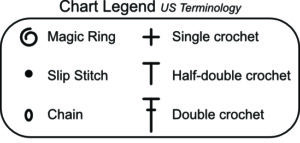
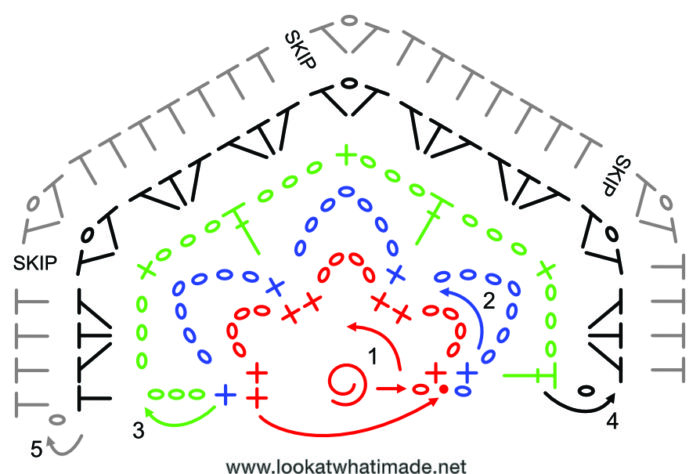
Chart Legend
Flat Simple Half Hexagon Pattern
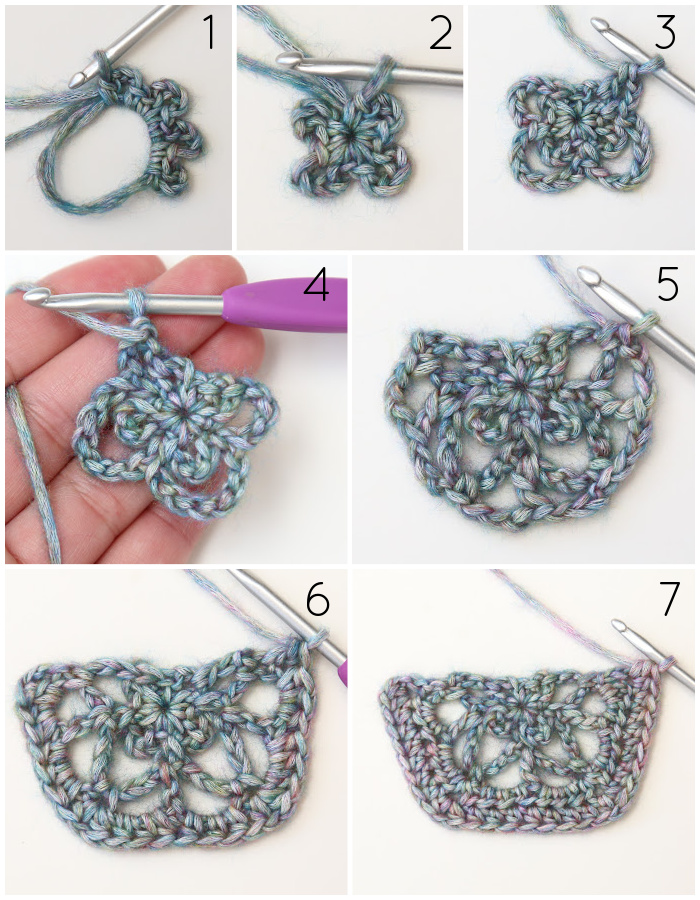
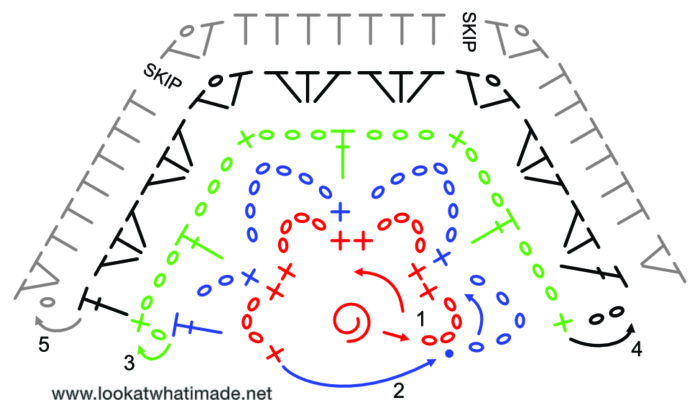
Round 1: Working into a magic ring (see Notes above), (ch 4, make 2 sc) 3 times. Ch 3, make a sc {Photo 1}. Close the magic ring. {Photo 2}. {7 sc, 1 ch-3 sp, and 3 ch-4 sps}
Round 2: Sl st in the next ch-4 sp. Ch 5, skip the next sc and make a sc in the next sc. (Ch 7, skip the ch-4 sp and the next sc, sc in the next sc) twice. Ch 2, make a dc in the last ch-3 sp {Photo 3}. Turn your work so that the back of the first 2 rounds is facing you {Photo 4}. {3 sc, 1 dc, 1 ch-2 sp, 1 ch-5 sp, and 2 ch-7 sps}
Round 3: Ch 1 (doesn’t count as a st throughout). Sc in the first dc, ch 3. (Dc in the next sc, ch 3, sc in the next ch-7 sp, ch 3) twice. Dc in the next sc, ch 3, sc in the next ch-5 sp {Photo 5}. Turn your work so that the front of the first 2 rounds is facing you. {4 sc, 3 dc, and 6 ch-3 sps}
Round 4: Ch 2 (doesn’t count as a st). [Dc, 2 hdc] in the next ch-3 sp, skip the next dc. (Make 3 hdc in the next ch-3 sp. [Hdc, ch 1, hdc] in the next sc, make 3 hdc in the next ch-3 sp, skip the next dc) twice. Make 3 hdc in the last ch-3 sp, dc in the last sc {Photo 6}. Turn your work so that the back of the first 2 rounds is facing you. {21 hdc, 2 dc, and 2 ch-1 corner sps}
Round 5: Ch 1, make 2 hdc in the first dc. Hdc in the next 6 sts and skip the next st, which will be tricky to get into anyway. [Hdc, ch 1, hdc] in the next ch-1 sp, hdc in the next 7 sts. Skip the next st, [hdc, ch 1, hdc] in the next ch-1 sp. Hdc in the next 6 sts, make 2 hdc in the last st. Fasten off and work away your ends {Photo 7}. {9 hdc per side, not including ch-1 corner sps}
Pointy Half Hexagon
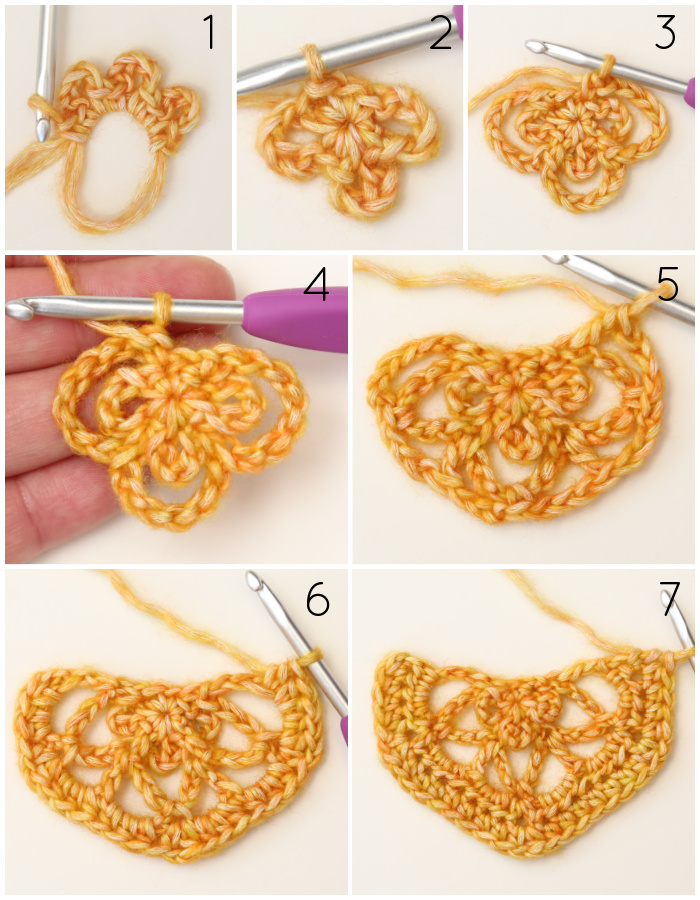
Round 1: Working into a magic ring (see Notes above), ch 1 (doesn’t count as a st throughout). Make a sc. (Ch 4, make 2 sc) 3 times {Photo 1}. Close the magic ring and join to the first sc with a sl st. {Photo 2}. {7 sc and 3 ch-4 sps}
Round 2: Ch 1, sc in the same sc. (Ch 7, skip the ch-4 sp and the next sc, sc in the next sc) 3 times {Photo 3}. Turn your work so that the back of the first 2 rounds is facing you {Photo 4}. {4 sc and 3 ch-7 sps}
Round 3: Ch 6 (counts as dc + ch-3 sp). (Sc in the next ch-7 sp, ch 3, dc in the next sc, ch 3) twice. Sc in the last ch-7 sp, ch 3, dc in the last sc {Photo 5}. Turn your work so that the front of the first 2 rounds is facing you. {3 sc, 4 dc, and 6 ch-3 sps}
Round 4: Ch 1 (doesn’t count as a st). (Make 3 hdc in the next ch-3 sp. [Hdc, ch 1, hdc] in the next sc, make 3 hdc in the next ch-3 sp, skip the next dc) twice. Make 3 hdc in the next ch-3 sp. [Hdc, ch 1, hdc] in the next sc, make 3 hdc in the next ch-6 sp. Make an hdc in the third ch of the beg ch-6 {Photo 6}. Turn your work so that the back of the first 2 rounds is facing you. {25 hdc and 3 ch-1 corner sps}
Round 5: Ch 1, hdc in the first 4 sts and skip the next st, which will be tricky to get into anyway. ([Hdc, ch 1, hdc] in the next ch-1 sp, hdc in the next 7 sts, skip the next st) twice. [Hdc, ch 1, hdc] in the next ch-1 sp. Hdc in the last 4 sts. Fasten off and work away your ends {Photo 7}. {9 hdc per full side, 5 hdc per half side, not including ch-1 corner sps}
I am excited to see what you do with this pattern! Please remember to use the hashtags #lookatwhatimadedotnet and #simplecrochethalfhexagon so that I can find your work!

This blog post contains affiliate links. I only link to products I personally use or would use. All opinions are my own.



Minette says
What a wonderful [mɪˈna(d)ʒəri] of crafts :)
Adrie Strong says
Thank you dear Dedri. Just love your crochet gifts! I too have a lot of stuff that I was keeping for my old age… I’m now 77 years old and not sure how many years I’m doing to have to live to get through all my stuff! Quite a quandary I think!
Minette says
Her mum is 67 and taking a leaf out of Dedri’s book. I’m in the same quandary as you, dear.