The Lazy Waves Shawlette is tiny! It is dense and mildly textured. Made in a slow colour-change sock yarn, it is perfect for using as a neckerchief. Depending on your personal tension, it can even be used as a small shawl.
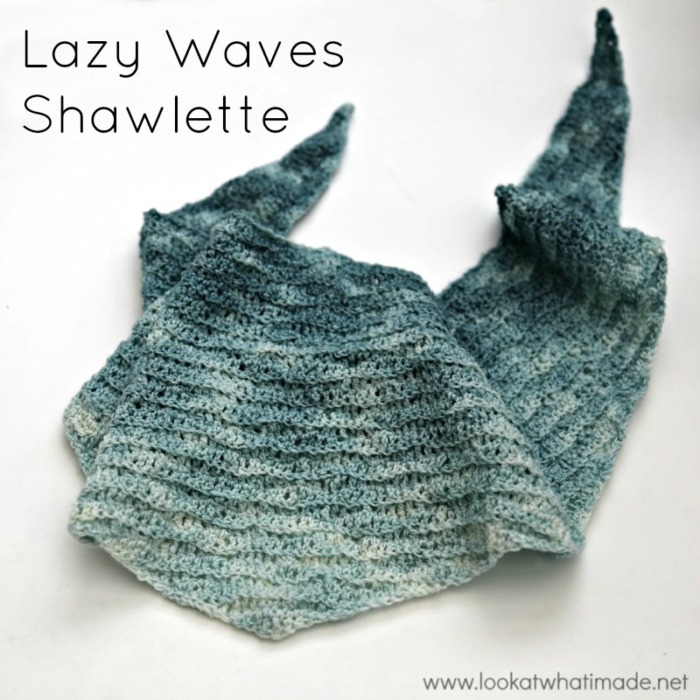
I designed this pattern for the Devon Sun Yarns Yarn Retreat I attended last week (you can read more about that HERE). It is made with the Lazy Waves stitch I used for the Lazy Waves Blanket and the Summer in Swanage Blanket.
The ladies at the retreat all used hand-dyed sock blanks for their shawlettes. You can find some Devon Sun Yarns Sock Blanks HERE (just scroll to the bottom of the page).
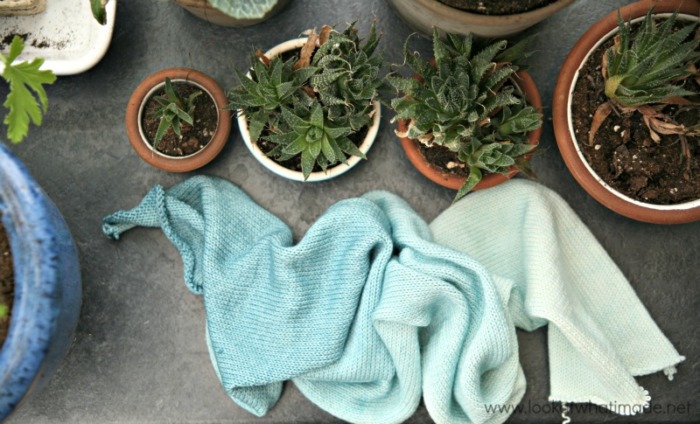
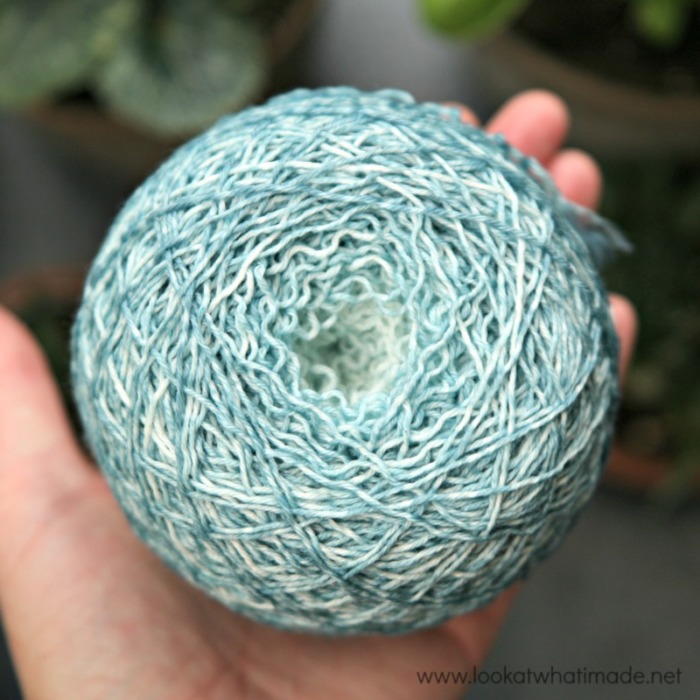
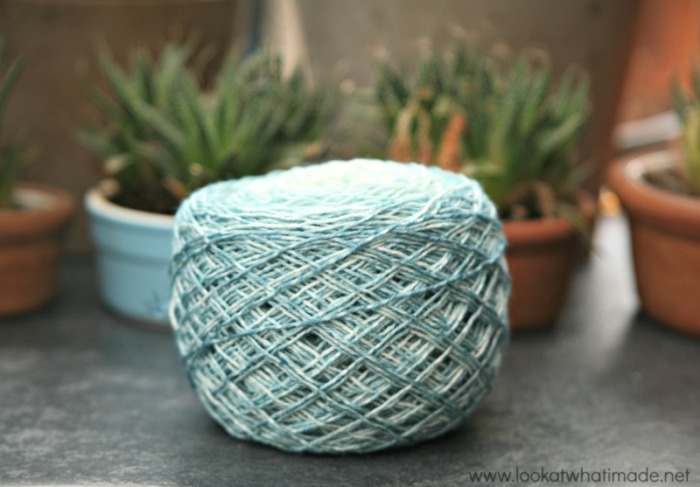
I made a yarn cake before starting, but everyone on the retreat just crocheted straight from their blanks.
I have to say, though, that crocheting with sock weight yarn (and a blank) is a wholly new concept for me and it took me a while to get my tension even.
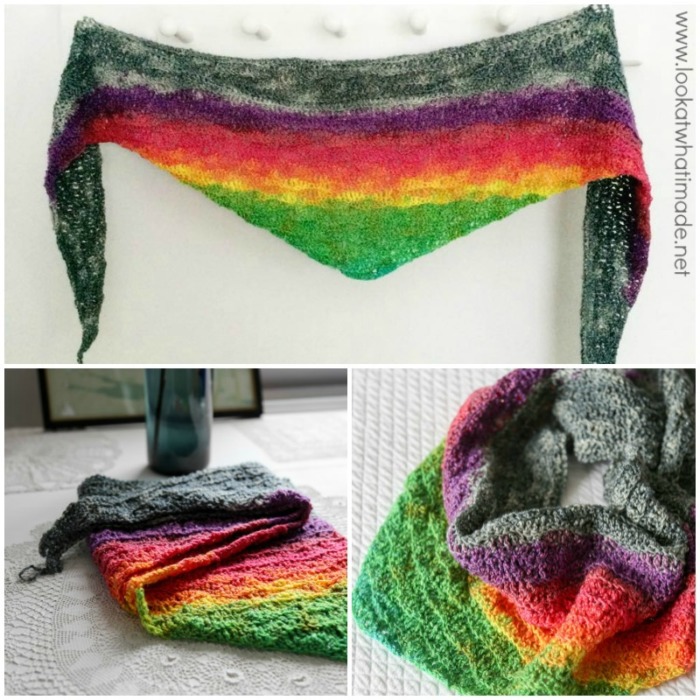
The photos below show a completely different colourway and a more relaxed gauge. This shawlette was made by Clare Wood and I LOVE it!
Photos by Devon Sun Yarns
Lazy Waves Shawlette Crochet Pattern
©Dedri Uys 2015. All Rights Reserved.
Add Pattern to your Ravelry Queue
This shawlette is worked from the top down. That means that your tension has to be pretty close to mine in order to make the whole thing with a 100 g (400 meter) skein of sock weight yarn. I ended up using 73 grams of yarn, so you do have some leeway, but I strongly urge you to make a gauge swatch before starting!
Size
120 cm long, 26 cm wide across the widest part (unblocked).
Materials
- 4 mm Clover Amour Crochet Hook
- Sock Yarn/Fingering Weight Yarn/#1 {300 – 400 meters, depending on personal tension}. I suggest using a slow colour-change yarn like the Sock Blanks by Devon Sun Yarns (UK) or Invicta Colour by Scheepjes.
- Yarn Needle
Abbreviations
US Terminology Used
- Ch – Chain
- Dc – Double Crochet
- Hdc – Half-double Crochet
- Sc – Single Crochet
- Sl st – Slip Stitch
- St/st’s – Stitch/Stitches
- Tr – Treble Crochet
- * – Repeat instructions between asterisks the amount of times specified
Gauge
Gauge is only important if you have to make the whole shawlette out of less than 400 meters of yarn. If yardage is not an issue, skip all the gauge-related bits below and start making your shawlette!
Dc Swatch
Using dc stitches (US Terminology): 24 stitches and 16 rows per 10 cm (4″) square.
Please Note: The best way to determine gauge and yardage would be to make a mini triangle in the same design as the pattern (see below). Doing this will enable you to either adapt your gauge to mine, or to figure out how much yarn you will need if you choose to work more loosely.
Making a Mini Triangle Gauge Swatch
Follow the instructions (below) for Rounds 1, 2, 3, 33, and 34, starting with 43 chains (5 repeats of 8 + 3) and ignoring all references to working into the back loop only. This will give you a tiny shallow triangle that should be roughly 18 cm long by 4 cm high (at the highest point). Your little swatch should weigh a diddy 2 grams.
Figuring Out How Much Yarn You Will Need (If Using a Different Gauge)
There are 595 ‘Waves’ in the completed shawlette. To work out how much yarn you will need, make a test triangle as instructed above. Weigh your triangle, using an accurate scale (because your triangle will weigh next to nothing).
Divide the weight by 15 to give you the Yardage per Wave and then multiply that number by 595 to calculate the total yardage needed for your personal gauge.
Adding More Repeats
If you would like to add more repeats, start with an even-numbered repeat (for example 40). Take this number and add one (41). Multiply that by half the number of repeats (20) to get the Total Number of Waves in your shawlette.
Multiply the Yardage per Wave (see Figuring Out How Much Yarn You Will Need above) with the Total Number of Waves to calculate the total yardage needed for your adapted pattern.
Notes
- Counting – Each repeat forms one ‘Wave’.
- Shaping – This shawlette is worked from the top down (I KNOW!!). Each row will have one less “Wave” than the previous row, creating a shallow triangular piece.
- Multiples – You will need a multiple of 8 + 3 chains to start. If you would like to make a larger wrap, simply add multiples of 8 chains, making sure to use an even number of repeats. Remember that the wrap is triangular, so adding repeats will automatically add rows.
- Stitch Marker – To make it easier to see where your rows start, use a stitch marker to mark the first sc of each row.
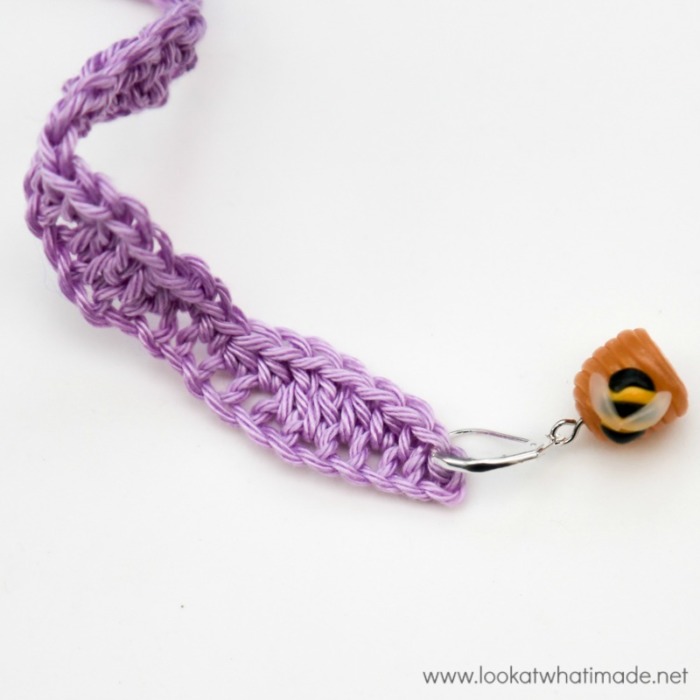
Instructions
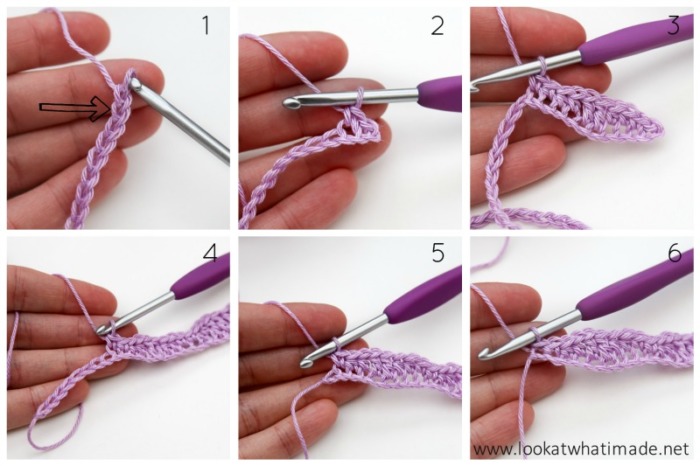
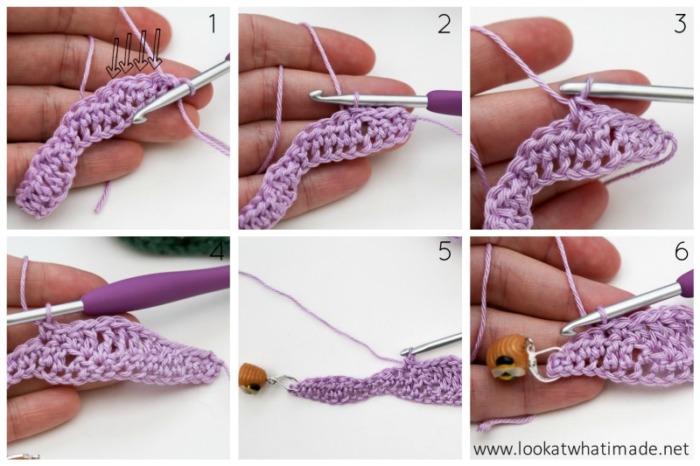
Row 1: Ch 275 (34 repeats of 8 + 3). Sl st in the second ch from the hook (indicated with an arrow in Photo 1). Sc in the next ch (Photo 2). *Hdc in the next 2 ch’s, dc in the next 2 ch’s, hdc in the next 2 ch’s, sc in the next 2 ch’s (Photo 3).* Repeat from * to * until you have 8 chains remaining (Photo 4). Hdc in the next 2 ch’s, dc in the next 2 ch’s, hdc in the next 2 ch’s, sc in the next ch (Photo 5), sl st in the last ch (Photo 6). Turn.
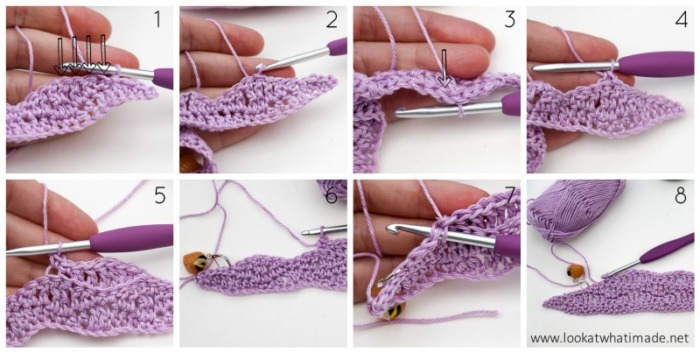
Row 2: Skip the sl st. Sl st into the first 4 st’s (indicated with arrows in Photo 1 and illustrated in Photo 2). The last sl st should fall in the first dc. Sc in the next dc (Photo 3). *Dc in the next 2 hdc’s, tr in the next 2 sc’s, dc in the next 2 hdc’s, sc in the next 2 dc’s (Photo 4).* Repeat from * to * until you have 11 stitches remaining (Photo 5). Dc in the next 2 hdc’s, tr in the next 2 sc’s, dc in the next 2 hdc’s, sc in the next dc, sl st in the next dc (Photo 6). Turn, leaving the remaining 3 st’s unworked.
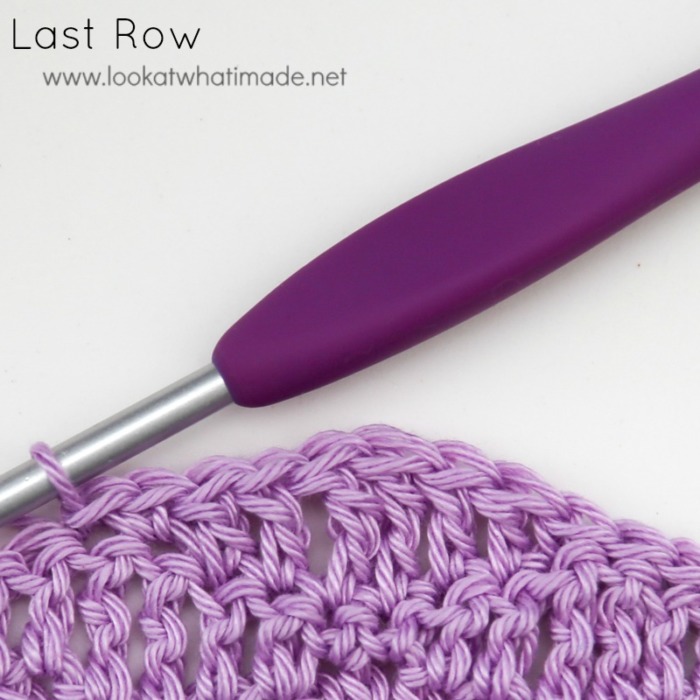
Row 3: Skip the sl st. Sl st into the first 4 st’s (indicated with arrows in Photo 1 and illustrated in Photo 2). The last sl st should fall in the first tr. Work in the back loop only for the remainder of the row (indicated with an arrow in Photo 3). Sc in the next tr (Photo 4). *Dc in the next 2 dc’s, tr in the next 2 sc’s, dc in the next 2 dc’s, sc in the next 2 tr’s (Photo 5).* Repeat from * to * until you have 11 stitches remaining (Photo 6). Dc in the next 2 dc’s, tr in the next 2 sc’s, dc in the next 2 dc’s, sc in the next tr, sl st through both loops of the next tr (Photos 7 and 8). Turn, leaving the remaining 3 st’s unworked.
Row 4: Repeat Row 3, working through both loops of every stitch.
Rows 5–32: Repeat Rows 3 and 4 so that each alternate row is worked in the back loop only.
Row 33: Skip the sl st. Sl st into the first 4 st’s. Work in the back loop only for the remainder of the row. Sc in the next tr. Dc in the next 2 dc’s, tr in the next 2 sc’s, dc in the next 2 dc’s, sc in the next 2 tr’s. You should now have 11 stitches remaining. Dc in the next 2 dc’s, tr in the next 2 sc’s, dc in the next 2 dc’s, sc in the next tr, sl st through both loops of the next tr. Turn, leaving the remaining 3 st’s unworked.
Row 34: Skip the sl st. Sl st into the first 4 st’s. Sc in the next tr. Dc in the next 2 dc’s, tr in the next 2 sc’s, dc in the next 2 dc’s, sc in the next tr, sl st in the next tr. Fasten off and work away your tails of yarn.
For best results you should block your shawlette before wearing it. I use these Interlocking Foam Exercise Mats and these Clover Fork Blocking Pins.

This blog post contains affiliate links. I only link to products I personally use or would use. All opinions are my own.


Holly says
Hi! I finally decided on this pretty shawl pattern after searching for hours online. I want to make it a little bit looser and longer though, more like the second picture (from Clare). Could I go up a hook size to do that or is there another way?
Jenny says
Hi Holly.
Going up a hook size and loosening your tension will definitely help, as would using a heavier or thicker weight of yarn.
BW Jenny :)
Eve Decker says
Thank you for the detailed instructions. I followed the pattern and made not one mistake…yey..first time ever!
Love it. I am making a third one.
Eve
Dedri Uys says
Oh well done! Have you shared any photos that I can see?
Rachel says
I made the mini with yarn equivalent to size #3 crochet thread and a 3mm hook and it’s the correct depth and weight but 21cm long lol Close enough for me! Such a pretty pattern! I’m using a light seafoam, light gray, and medium blue self striping cotton yarn with a silver metallic streamer running through it. This pattern will make it the perfect sparkling ocean waves it is destined to be! (The yarn is Red Heart Croquette in the color Calming) Thanks for yet another great pattern!
Dedri Uys says
Hi. Do you mean it is only 21cm in the longest direction? That seems VERY small to me?
Delva says
Hi Dedri
thanks for this free pattern!
I want to make one of those shawls that are decorated with lots of flowers and flowers hanging off the end. Do you this this pattern will work? and do you think I might have to use a ‘heavier’ wool to do it?
Many thanks
Delva Pelser
Bloemfontein
Jenny says
Hi Delva, Jenny here.
I think this pattern would work, but you want a yarn with good drape. Have you looked at Dedri’s My story Shawl, too? That may work nicely as well :)
Barbara Stempien says
I am new to you and your site, just can’t get enough of all you patterns and ideas. I am going to make this shawlette with the ‘whirl’ yarn. I one cake(ball) enough or should I get 2 just to make sure I have enough? Thank you…Barb
Dedri Uys says
One cake will be more than enough. In fact, you might want to start with a longer starting chain, otherwise, your shawlette will be tiny!
Ruth Busby says
Thanks for the great pattern! I’ve made a few already. I love to wear it as a scarf since it’s light and warm. About 6.5 hrs it takes me to make one. I find that a lightweight yarn is best to use with either a 3.5 or 4 mm hook. My favourite yarn to use for this pattern (so far, until I find my next fav. yarn ) is Red Heart Unforgettable with a 3.5mm hook. I use almost 1.5 skeins.
Christin says
I love this shawl and would like to make it more open with a larger hook with sock yarn. The best way I can think to be sure if having enough handspun is to work from point up. Do you have an idea how to increase the waves and go up as opposed to decreasing and going down? That way one could plan to end their shawl at the last row they have ample yarn for. Thanks!
Dedri Uys says
Hi Christin. The original was made bottom-up, but I didn’t like the fact that the edges were slightly jagged. Top-down gave a neater edge, so I didn’t write down how I did it. If you are comfortable with foundationless crochet, you can adjust it by making one wave to start with, and then chaining 5 at the end before turning. *Sc in the second chain from the hook, dc in the next 2 chains, tr in the next ch*. **Then work into the previous wave: tr, 2dc, 2sc, 2dc, tr**. ***Then foundationless crochet: Tr, 2 dc, sc. Chain 5 before turning***. Repeat * to *, work into both waves from ** to **, finish from *** to ***. Repeat for each row. I hope that makes sense. I am trying to remember it as I type. You might have to tweak the edges.
Dedri
Bandhna Banga says
Hey Dedri,
I am about to start this project but want to make it for a guy and was thinking of increasing the length by half but don’t want to increase the width, can you help me with the maths and also am making it in dual colour, any suggestions for that?
Bandhna
Dedri Uys says
Hi. Unfortunately this pattern is written in such a way that adding width automatically increases length and vice versa. This is because each row has a repeat less so that the edges are straight on the diagonal. If you are making it for a man, may I suggest following the lazy waves blanket pattern for about 40 rows to give you a rectangular scarf instead? It is the same stitches, but without the decreases. You just have to remember to adjust your yarn thickness and hook size, because the blanket pattern double strand and big hook won’t work as well for a scarf. I hope that helps.
Janice Parker says
Hi, I love your shawlette, they all look great but I will make it in a lime green for a friend, as it is her favourite colour. I’m from Australia and not familiar with the term ‘sock blank’. Would you enlighten me please.
Thanks for your lovely pattern.
Crafty Cougar.
Dedri Uys says
Hi Janice. A sock blank is a big tube of knitted undyed yarn (you knit it with a little knitting loom). You then dip this tube in dye or paint it with dye and when you unwind it, your yarn has either an ombre or a striped feel, rather than the speckled feel you would get from dyeing a skein. You can see photos in this post.
Sarah says
I am thinking about making this with a beautiful gradient set I just got. I have some beads to match that I would love to try to incorporate. Do you have any suggestion on where in the repeats I should add the beads?
Jenny says
You could add the beads on the sc stitches, Sarah :)
Sarah Kendall says
Thanks, Jenny! I am leaning more and more towards this pattern for that yarn and sprinkling the beads in on the sc seems like it will work nicely.
Dedri Uys says
Ooh, that will look great! Alternatively you can add them on every 6th or 8th row in each stitch? It just depends on how beady you want it to be. I am not skilled in the art of bead-crochet yet :(
Jqn Denton says
Thank you for the pattern! I have been looking for a shawl like this for some special yarn! You are great!
Dedri Uys says
I hope you enjoy making it!
Sofia Tsotros says
Thanks Dedri Uys for the shawl its beautiful, What do you think if I make it in a colorful 1 skein yarn?
My daughter wants me to make her one,
Thanks again Sofia.
Dedri Uys says
Sofia, that should work really well :)
Jenni says
Hi!
Thank you for another awesome and especially, FREE pattern that you generously share with us!
I made a christmas present for my friend with the shawlette pattern, but changed the yarn after every row- using approx. 6 different yarn skeins in the process.
Here’s my shawlette:
http://ravel.me/YennieCat/cs7ut
Thank you Dedri. You’re a great designer.
Dedri Uys says
Hi Jenni. Your shawl looks great! Thank you for sharing the link with me :)
Leila Marcial says
Thank you!
Margaret says
I love the shawlette on the first photo. Soms sock yarn don’t feel soft. How is the feel of this yarn?
Have a nice day, Margaret
Dedri Uys says
Hi Margaret. This is an extremely soft sock weight yarn.