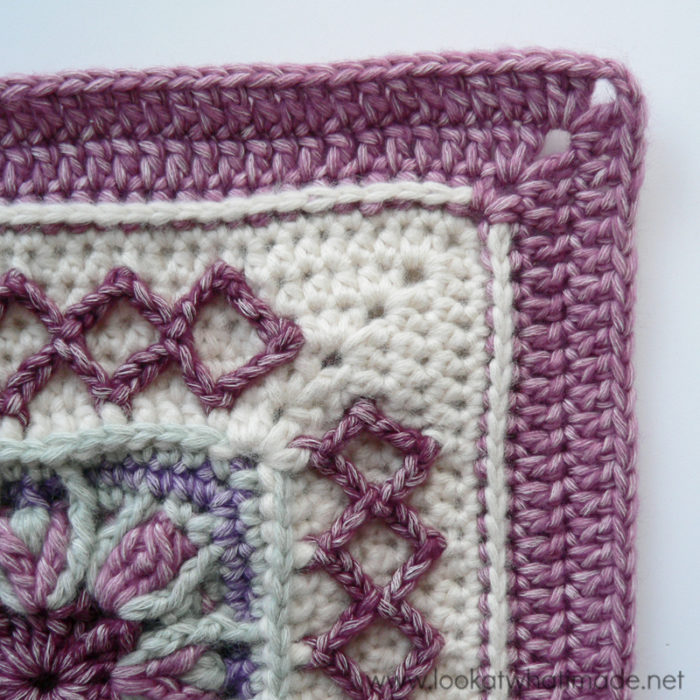
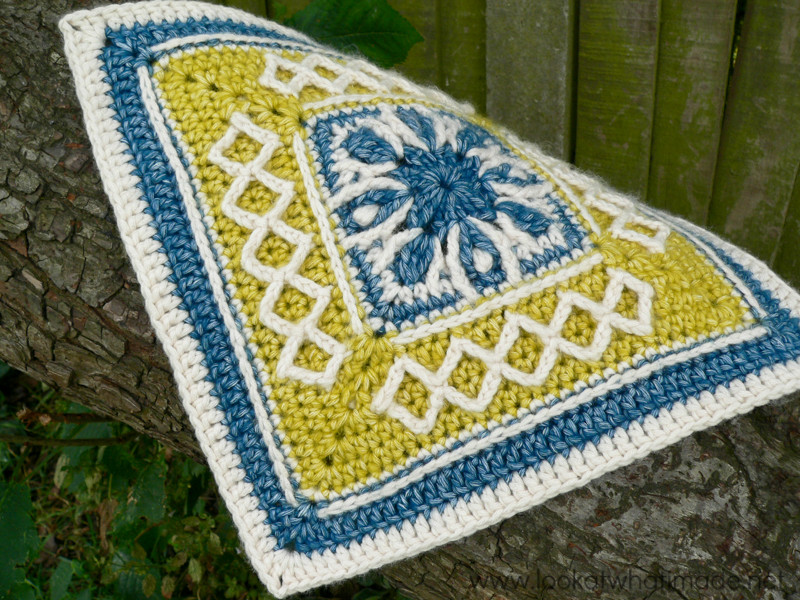
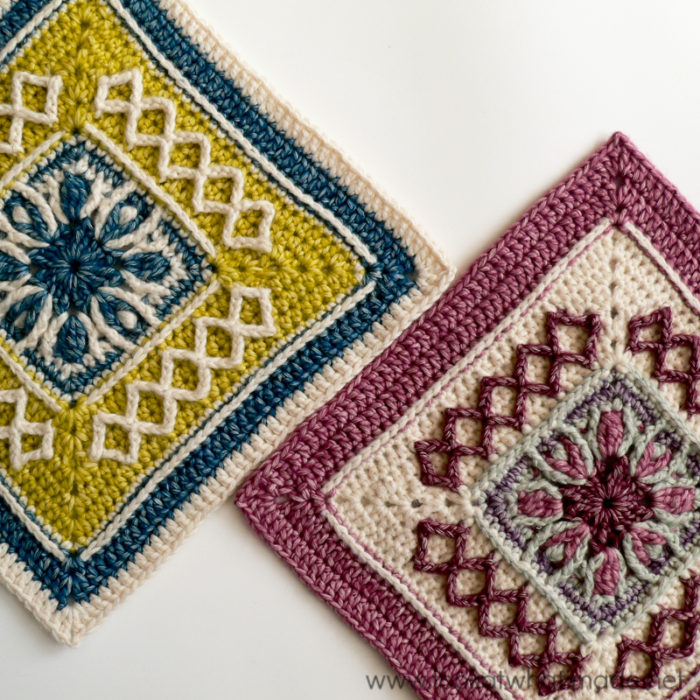
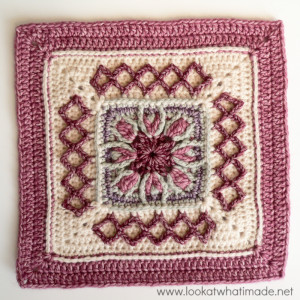
Esme’s Winter Cottage has a busy center, surrounded by less and less ‘busy’. It is like the calm after the storm for me and I wanted something that was busy but also quiet and peaceful, if that makes sense.
I would like to thank Andrea Andres Schultz and Amanda Nelson Bush for providing me with a name for this square. I received so many brilliant suggestions that I now have an arsenal of names clamouring for patterns. In fact, one of the names has already inspired my next big project…well, the big project AFTER my next big project.
Photo tutorials are provided for the tricky rounds, so although this pattern is Intermediate, I am going out on a limb and saying that it is suitable for Adventurous Beginners.
This square is equivalent to four of my 6″ Two-Colour Linen Stitch Squares, so you can use it as the centre for a Linen Stitch Manghan, or you can create a chequer-board design by alternating this square with Linen Stitch Foursquares.
If you would like to use this square as the centre for the Around the Bases CAL, you will need to add one dc round at the end to get to the correct stitch count. To do this, simply repeat Round 17 so that you end up with 46 dc per side.
Enjoy!
Esme’s Winter Cottage Square
© Dedri Uys 2015. All Rights Reserved
Resources
- Printing/PDF: There is a Print-friendly button in the bottom right-hand corner after every post. Please use this print-friendly button to print/save this pattern. Take a look at THIS TUTORIAL if you don’t know how to use the print-friendly button.
- Ravelry: Add this pattern to your Ravelry Queue
- Dutch Translation by Esther Dijkstra from It’s All in a Nutshell
- Video Tutorial: This square was featured as the first square of the Nuts About Squares CAL 2017. You can find the video tutorial by Esther Dijkstra HERE.
Size
12”
Materials
- 120 – 130 meters of Worsted Weight Yarn (#4) – I have used Stonewashed XL Yarn
- 5.5 mm Clover Amour crochet hook (US 9/I UK 5)
Colours
- A: Blue Apatite
- B: Moonstone
- C: Lemon Quartz
For the photo tutorial, I have used different colours:
- Garnet: Rounds 1, 9, and 12
- Crystal Quartz: Rounds 2, 4, and 6
- Corundum Ruby: Rounds 3, 15, 16, and 17
- Deep Amethyst: Round 5
- Moonstone: Rounds 7, 8, 10, 11, 13, and 14
Gauge
At the end of Round 6, your square should measure 12.5cm/5”.
Abbreviations
- BLO – Back loop only
- BPdc – Back post double crochet
- BPhdc – Back post half-double crochet
- Ch – Chain
- Dc – Double crochet
- FPdc – Front post double crochet
- FPsc – Front post single crochet
- Hdc – Half-double crochet
- Sc – Single crochet
- Tr – Treble crochet
- Sl st – Slip stitch
- Sp/sps – Space/spaces
- St/sts – Stitch/stitches
- () – Repeat instructions between parentheses the number of times specified
- * – Repeat instructions between asterisks the number of times specified (hard-core repeat)
Special Stitches
- Tr Bobble: Yarn over twice and insert your hook into the indicated stitch. Yarn over and pull up a loop. (Yarn over and pull through 2 loops) twice – 2 loops on your hook. Yarn over twice and insert your hook into the same stitch. Yarn over and pull up a loop – 5 loops on your hook. (Yarn over and pull through 2 loops) twice – 3 loops on your hook. Yarn over twice and insert your hook into the same stitch. Yarn over and pull up a loop – 6 loops on your hook. (Yarn over and pull through 2 loops) twice – 4 loops on your hook. Yarn over and pull through all 4 loops.
- Puff Stitch: Yarn over and insert your hook into the specified st/sp. Yarn over again and pull up a long loop. (Yarn over and insert your hook into the same st/sp. Yarn over again and pull up a long loop) three more times. Yarn over and pull through all 9 loops on your hook. Ch 1 to close the Puff Stitch. See THIS PUFF STITCH TUTORIAL.
Helpful Tutorials
Notes
Starting Each Round
When changing colour, start with a standing stitch equivalent to the first stitch in the pattern.
Example: If the round starts (Sc, ch 2, sc), use a standing single crochet for the first sc.
Here are the links to the standing stitches:
If you prefer to join your yarn with a sl st and an initial chain instead, see THIS DIAGRAM by Oombawka Design if you don’t know how many turning chains to make for a specific stitch.
Instructions
Round 1 {Colour A}
Into a magic ring: ch 2 (counts as your first hdc). (Dc, Tr, Ch 2, Tr, Dc, Hdc) 4 times, omitting the last hdc on the last repeat. Join to the top of the beginning ch-2 with a sl st. Fasten off and work away your ends. Alternatively, use the Invisible Join (here and throughout when changing colours).
Stitch Count: 20 sts and 4 ch-2 corner sps {2 tr, 2 dc, and 1 hdc per side}
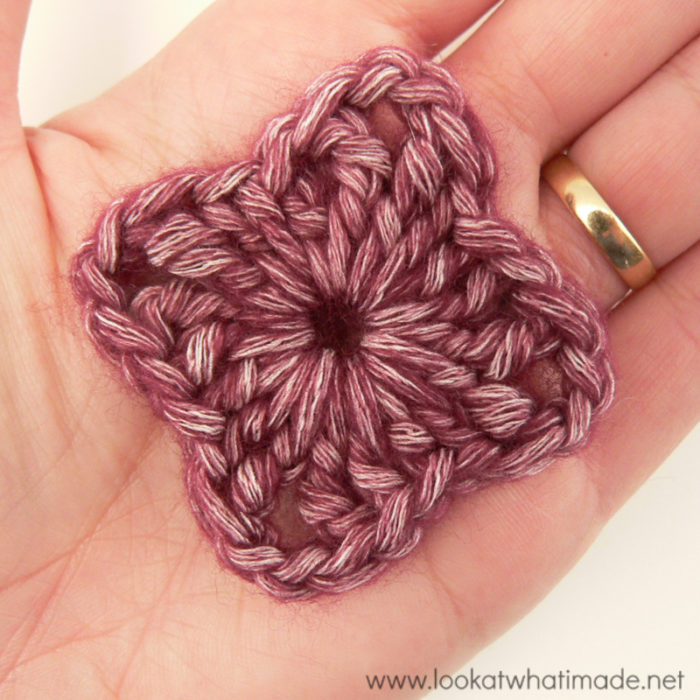
Round 2 {Colour B}
*(Dc, ch 4, dc) in ch-2 corner sp. Skip the first 2 sts. (Tr, ch 3, tr) in the next st. Skip the last 2 sts.*
Repeat from * to * 3 more times. Join to the first dc with a sl st. Fasten off and work away your ends.
Stitch Count: 16 sts, 4 ch-3 sps, and 4 ch-4 corner sps {2 tr, 2 dc, and 1 ch-3 sp per side}
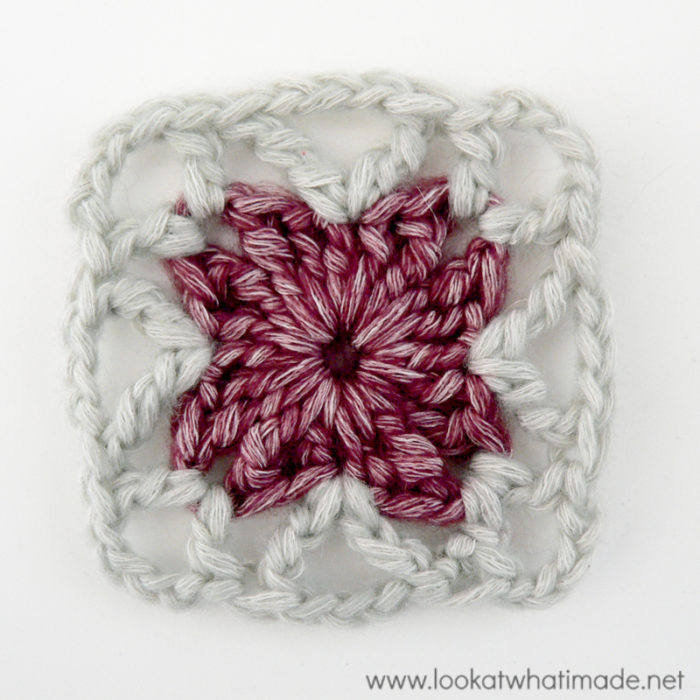
Round 3 {Colour A}
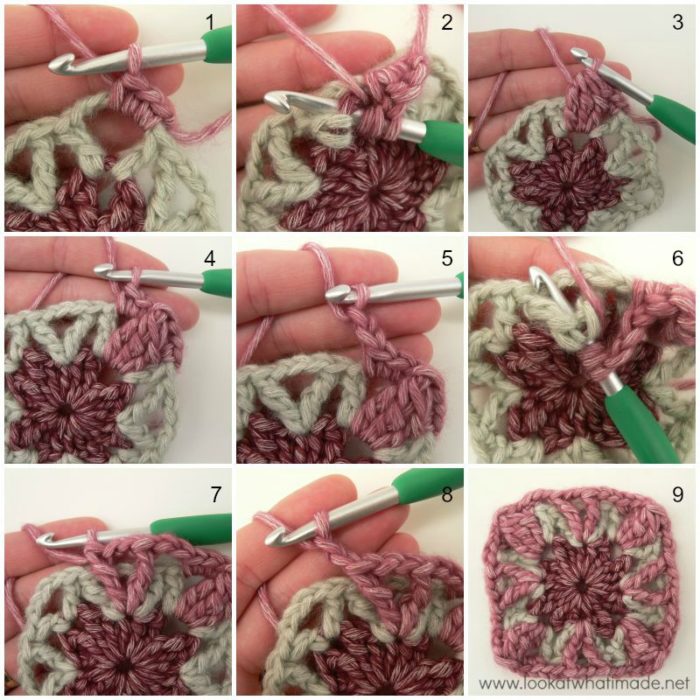
*Make 3 sc into the ch-4 corner sp from Round 2 {Photo 1}. Make a Tr Bobble in the ch-2 corner sp from Round 1, working in front of the ch-4 corner sp from Round 2 and between the 2 dc from Round 2 {Photos 2 and 3}. Make 3 sc into the same ch-4 corner sp from Round 2 {Photo 4}. This is your corner made.
Skip the first 2 sts. Ch 2 {Photo 5}. (Tr, ch 2, tr) into the hdc from Round 1 that already contains the (tr, ch 3, tr), making sure to work between the posts of the tr sts and in front of the ch-3 sp from Round 2. See Photos 6 and 7. Ch 2. Skip the last 2 sts {Photo 8}. *
Repeat from * to * 3 more times. Join to the first sc with a sl st. Fasten off and work away your ends.
Stitch Count: 36 sts, and 12 ch-2 sps {6 sc, 2 tr, and 3 ch-2 sps per side, not including corner Tr Bobble }
Round 4 {Colour B}
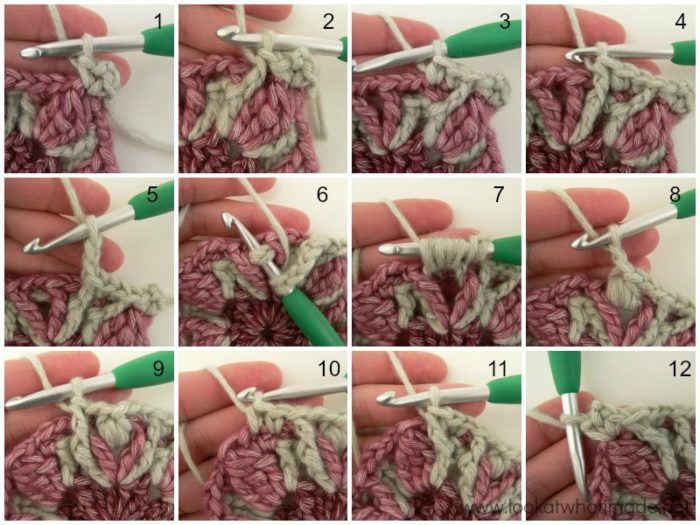
(Sc, ch 2, sc) into any corner Tr Bobble – Photo 1.
*FPdc around the dc from Round 2 directly after the Tr Bobble {Photo 2}. Skip the first sc of Round 3 and sc in the next 2 sts {Photo 3}. FPdc around the next st from Round 2, which will be the tr {Photo 4}. Ch 2 {Photo 5}. Skip the next ch-2 sp and the next tr from Round 3. Pull the ch-3 sp from Round 2 through the ch-2 sp from Round 3. Working in front of the ch-2 sp from Round 3, make a Puff Stitch into the loop formed by the pulled-up ch-3 sp from Round 2 {Photos 6 and 7}. Ch 2 {Photo 8}.
FPdc around the tr from Round 2 {Photo 9}. Skip the next tr and the ch-2 sp from Round 3. Sc in the next 2 sts of Round 3 {Photo 10}. FPdc around the dc from Round 2 directly in front of the Tr Bobble {Photo 11}. Skip the last sc of Round 3. (Sc, ch 2, sc) into the next Tr Bobble {Photo 12}.*
Repeat from * to * 3 more times, omitting the last corner on the last repeat. Join to the first sc with a sl st. Fasten off and work away your ends.
Stitch Count: 44 sts, and 12 ch-2 sps – including ch-2 corner sps {6 sc, 4 FPdc, 1 Puff Stitch, and 2 ch-2 sps per side}
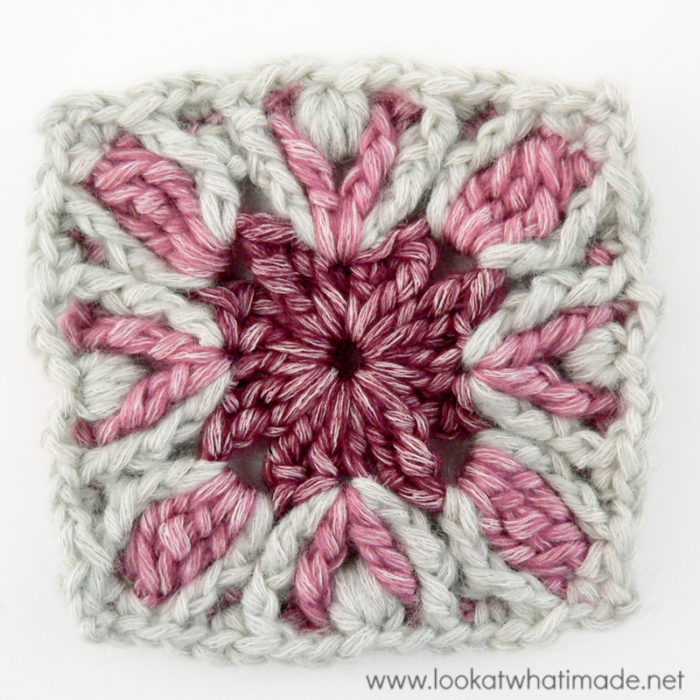
Round 5 {Colour A}
*(Sc, ch 2, sc) into the ch-2 corner sp. Sc in the next 5 sts. The last sc should fall in the FPdc. Sc in the next ch-2 sp. FPsc around the Puff Stitch. Sc in the next ch-2 sp. Sc in the next 5 sts.*
Repeat from * to * 3 more times. Join to the first sc with a sl st. Fasten off and work away your ends.
Stitch Count: 60 sts, and 4 ch-2 corner sps {14 sc and 1 FPsc per side}
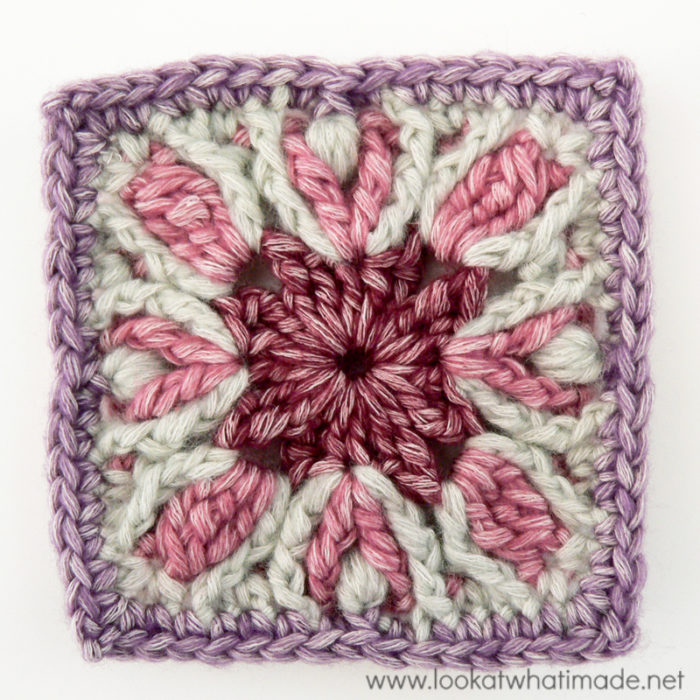
Round 6 {Colour B}
*(Sc, ch 2, sc) into the ch-2 corner sp. Skip the first (hidden) stitch. Sc in the next 5 sts. FPdc around the FPdc from Round 4 and skip the next sc of Round 5. Sc in the next 2 sts of Round 5, which should be the FPsc and the sc. FPdc around the next fPpdc from Round 4 and skip the next sc of Round 5. Sc in the last 5 sts.*
Repeat from * to * 3 more times. Join to the first sc with a sl st. Fasten off and work away your ends.
Stitch Count: 64 sts, and 4 ch-2 corner sps {14 sc and 2 FPdc per side}
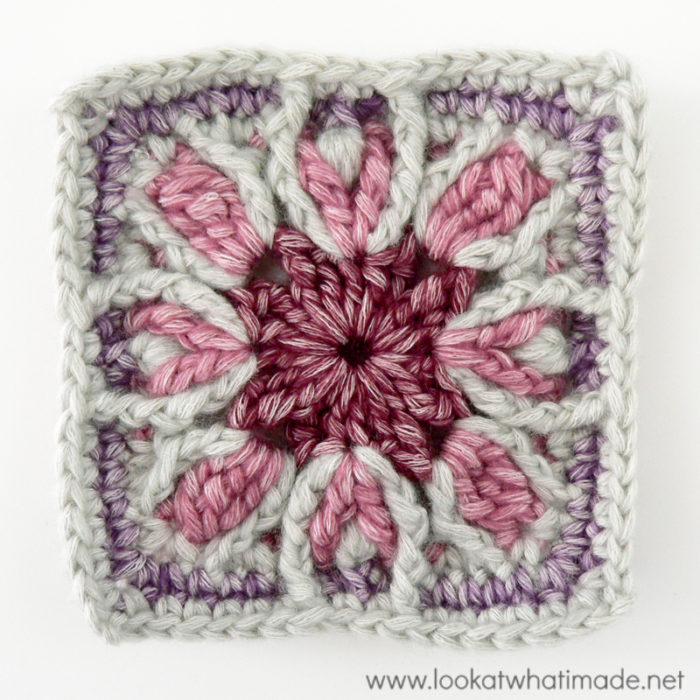
Round 7 {Colour C}
*(2 hdc, ch 2, 2 hdc) into any ch-2 corner sp. BPdc in each of the 16 sts across.*
Repeat from * to * 3 more times. Join to the first hdc with a sl st. Sl st into the next hdc and into the ch-2 corner sp.
Stitch Count: 80 sts, and 4 ch-2 corner sps {4 hdc and 16 BPdc per side}
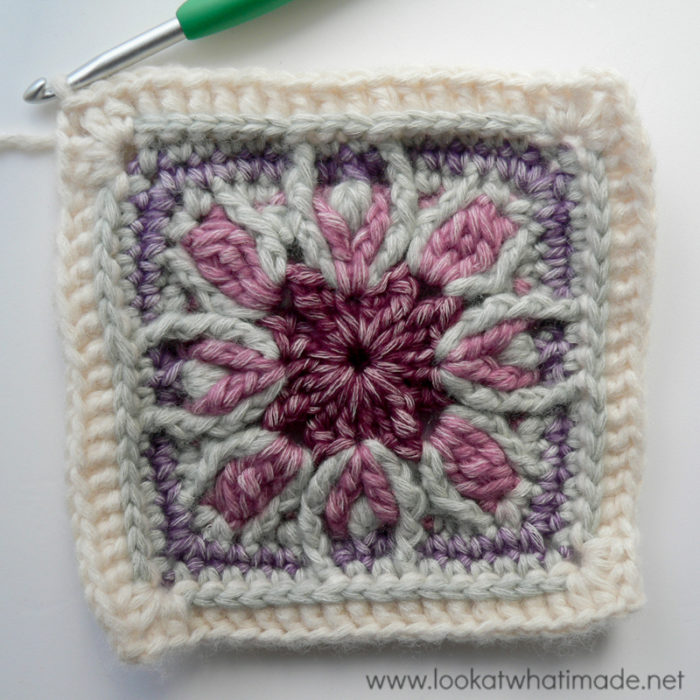
Round 8 {Colour C}
Ch 3 (counts as first dc). (Dc, ch 2, 2 dc) into the same ch-2 corner sp. This is your first corner made.
*Skip the first (hidden) st. Dc in the next st. (Dc in the BLO of the next st, dc in the next 3 sts) 4 times. There should now be 2 sts left before the ch-2 corner sp. Dc in the BLO of the next st. Dc in the last st. (2 dc, ch 2, 2 dc) into the ch-2 corner sp.*
Repeat from * to * 3 more times, omitting the last corner on the last repeat. Join to the top of the beginning ch-3 with a sl st. Fasten off and work away your ends.
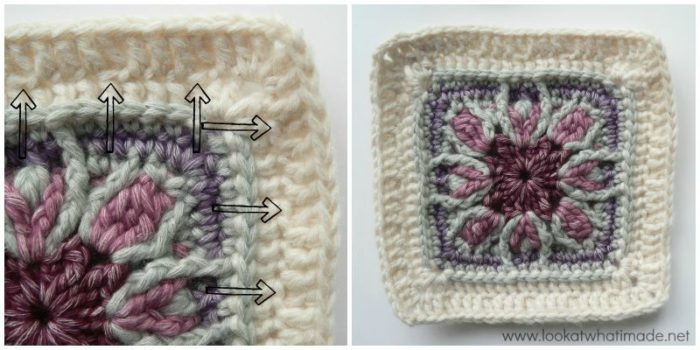
Stitch Count: 92 sts, and 4 ch-2 corner sps {23 dc per side, of which 5 are BLO – see arrows below}
Round 9 {Colour B}
In this round, you will be working primarily around the posts of the stitches from Round 7 that already contain a BLO dc. You will see that the front loops of these stitches form a dotted line across your work, making it easier to identify them – see arrows above. If you need more help, see Round 107 of Sophie’s Universe HERE.
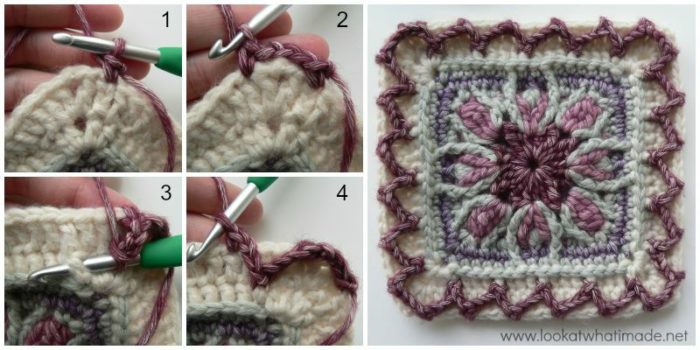
Join your yarn by making a standing single crochet in the second-to-last dc of any side {Photo 1}.
*Ch 3. Skip the last dc, the ch-2 sp, and the first dc of the next side. Sc in the next st {Photo 2}. Ch 3. Working in front of the sts from Round 8, make a sl st around the front post of the first BPdc from Round 7, which already contains a BLO dc {Photo 3}. Ch 3, skip the next 3 sts of Round 8 and make a sc in the next st, which will be the central of the 3 dc between BLO dc {Photo 4}.
(Ch 3. Working in front of Round 8, skip the next 3 sts of Round 7 and make a sl st around the next st, which already contains a BLO dc. Ch 3. Skip the next 3 sts of Round 8 and make a sc in the next st, which will be the central dc of the 3 dc between BLO dc) 4 more times. There should now be one dc left before the ch-2 corner sp.*
Repeat from * to * 3 more times, omitting the last sc on the last repeat. Join to the first sc with a sl st. Fasten off and work away your ends.
Flip the corner ch-3 sps to the back of your work. Note that the zigzags look skew. That is ok.
Stitch Counts:
- Total: 24 sc and 44 ch-3 sps {including ch-3 corner sps}
- Per Side: 6 sc and 10 ch-3 sps {not including ch-3 corner sps}
Round 10 {Colour C}
It is important that you work in front of the ch-3 sps from Round 9 when making your corners. You will be using these ch-3 sps when you make the second part of your diamond pattern in Round 12. If you need more help, see Round 108 of Sophie’s Universe HERE.
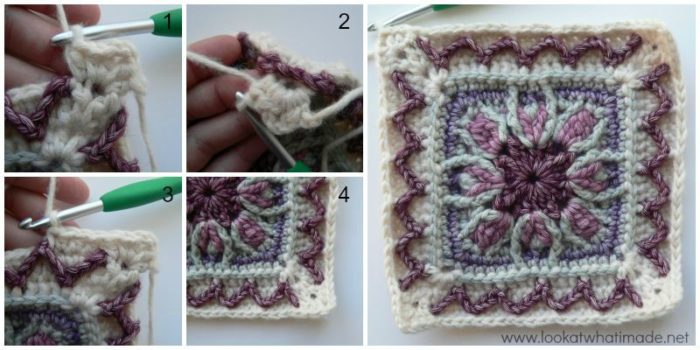
Working in front of the ch-3 sp from Round 9, join your yarn by making a standing half-double crochet in any ch-2 corner from Round 8. (Hdc, ch 2, 2 hdc) in the same corner sp.
*Still working in front of the ch-3 corner sp from Round 9, hdc in the first (hidden) st of Round 8 {Photos 1 and 2}. Skip the first sc from Round 9.
(Hdc in the next 3 sts from Round 8, between the sc sts that form the “zigzag hills”. Make a BPsc around the next sc from Round 9 {Photo 3}) 5 times.
Working in front of the corner ch-3 sp from Round 9, hdc in the last dc from Round 8. Still working in front of the ch-3 corner sp from Round 9, (2 hdc, ch 2, 2 hdc) in the next ch-2 sp from Round 8.*
Repeat from * to * 3 more times, ending with a hdc in the last dc from Round 8 and omitting the last corner on the last repeat. Join to the top of the standing half-double crochet with a sl st. Sl st into the next hdc and into the ch-2 corner sp.
Stitch Count: 104 sts and 4 ch-2 corner sps {5 BPsc and 21 hdc per side}
Round 11 {Colour C}
(Ch 2, hdc, ch 2, 2 hdc) in the same ch-2 sp. This is your first corner made.
*Skip the first (hidden) st. Hdc in the remaining 25 sts across. (2 hdc, ch 2, 2 hdc) in the next ch-2 corner sp).*
Repeat from * to * 3 more times, omitting the last corner on the last repeat. Join to the top of the beginning ch-2 with a sl st. Fasten off and work away your ends.
Stitch Count: 116 hdc and 4 ch-2 corner sps {29 hdc per side}
Round 12 {Colour B}
In this round, you will complete the Diamond Pattern by making some more “zigzag hills”. The first and last “hills” on each side are formed differently to the rest. Pay special attention when making them. If you need more help, see Round 110 of Sophie’s Universe HERE.
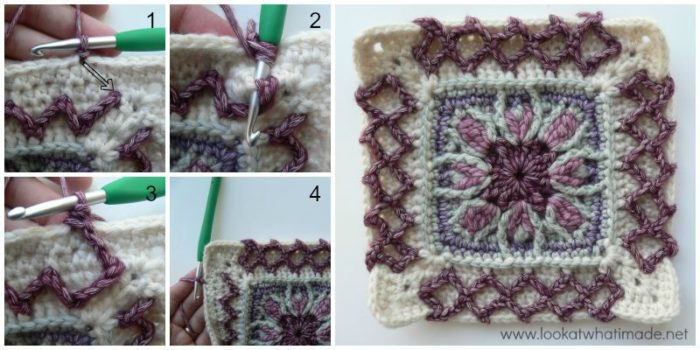
Join your yarn by making a sl st in the eighth hdc at the start of any side. It will look like this stitch is too far over. Don’t worry about it {Photo 1}.
*Make a tr in the st that contains the first sc from Round 9. To do this, insert your hook from top to bottom into the stitch containing the sc (because this is the easiest way), making sure that you work to the left of the first ch-3 from Round 9 (to the right if you are left-handed) – indicated with an arrow in Photo 1 and illustrated in Photos 2 and 3. Ch 3. Make a sl st around the back post of the next sc from Round 9.
(Ch 3, skip the next 3 sts from Round 11 and make a sc in the next st, which will be the hdc made into the BPsc from Round 10. Ch 3. Make a sl st around the front post of the next sc from Round 9) 3 times. Ch 3. Make a tr around the top of the last ch-3 from Round 9. Skip the next 3 sts from Round 11 and sl st in the next st, which should be the hdc made into the BPsc from Round 10. Ch 4. Skip the last 5 hdc of Round 11. Sl st into the ch-3 sp from Round 9, which you will find behind your work. Ch 4. Skip the first 7 hdc of the next side and sl st into the eighth hdc {Photo 4}.*
Repeat from * to * 3 more times, omitting the last sl st on the last repeat. Join to the first sl st with a sl st. Fasten off and work away your ends.
Stitch Counts:
- Total: 20 sts, 32 ch-3 sps, and 8 ch-4 sps behind the corners – not including sl sts
- Per Side: 5 sts and 8 ch-3 sps – not including sl sts {3 sc and 2 tr}
Round 13 {Colour C}
*(2 hdc, ch 2, 2 hdc) in the next ch-2 corner sp. Skip the first (hidden) st. Hdc in the next 6 sts from Round 11. Make a BPsc around the top of the first “zigzag hill” from Round 12. If you need more help, see Round 111 of Sophie’s Universe HERE.
(Hdc in the next 3 sts from Round 11, between the sc sts that form the “zigzag hills”. Make a BPsc around the top of the next “zigzag hill” from Round 12) 4 times. Hdc in the last 5 sts from Round 11.*
Repeat from * to * 3 more times, omitting the last corner on the last repeat. Join to the top of the standing half-double crochet with a sl st. Fasten off and work away your ends.
Stitch Count: 128 sts and 4 ch-2 corner sps {5 BPsc and 27 hdc per side}
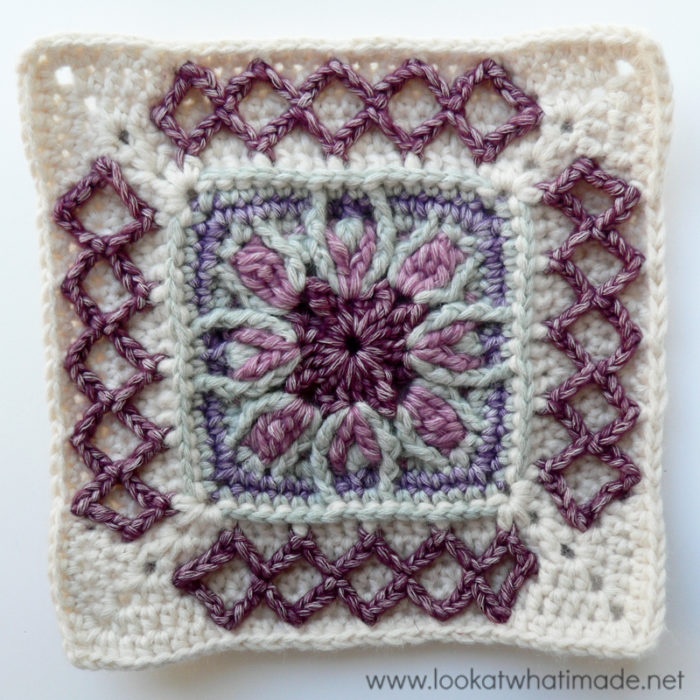
Round 14 {Colour B}
*(Sc, ch 2, sc) in any ch-2 corner sp. Skip the first (hidden) stitch. Sc in each of the 31 sts across.*
Repeat from * to * 3 more times. Join to the first single crochet with a sl st. Fasten off and work away your ends.
Stitch Count: 132 sc and 4 ch-2 corner sps {33 sc per side}
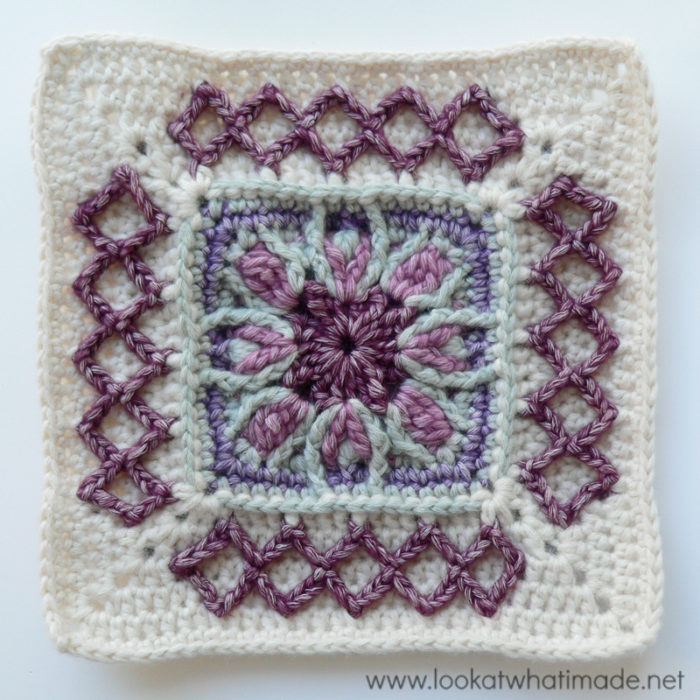
Round 15 {Colour A}
*(Sc, ch 2, sc) in any ch-2 corner sp. BPhdc in each of the 33 sts across.*
Repeat from * to * 3 more times. Join to the first sc with a sl st. Sl st into the ch-2 corner sp.
Stitch Count: 140 sts and 4 ch-2 corner sps {33 BPhdc and 2 sc per side}
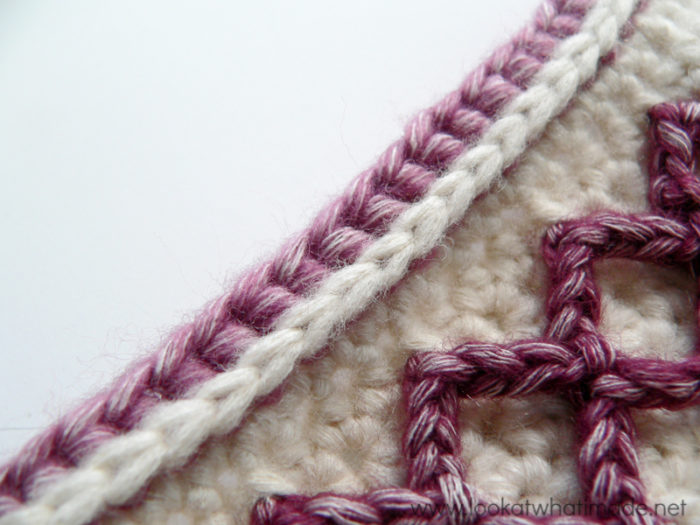
Round 16 {Colour A}
(Ch 3, dc, ch 2, 2 dc) into the same ch-2 sp. This is your first corner made.
*Skip the first (hidden) st. Dc in each of the remaining 34 sts across. (2 dc, ch 2, 2 dc) in the next ch-2 corner sp.*
Repeat from * to * 3 more times, omitting the last corner on the last repeat. Join to the top of the beginning ch-3 with a sl st. Fasten off and work away your ends.
Stitch Count: 152 sts and 4 ch-2 corner sps {38 dc per side}
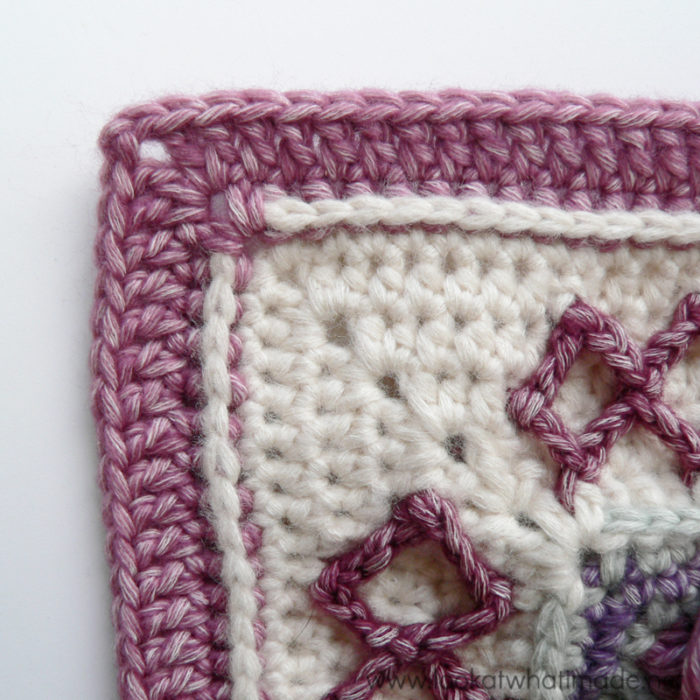
Round 17 {Colour B}
*(2 dc, ch 2, 2 dc) into any ch-2 sp around. This is your first corner made. Dc in each of the 38 sts across.*
Repeat from * to * 3 more times. Join to the first dc with a sl st. Fasten off and work away your ends.
Stitch Count: 168 sts and 4 ch-2 corner sps {42 dc per side}
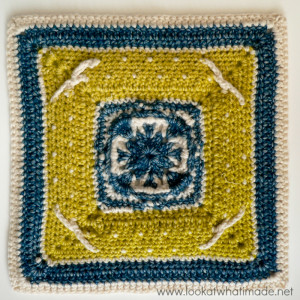
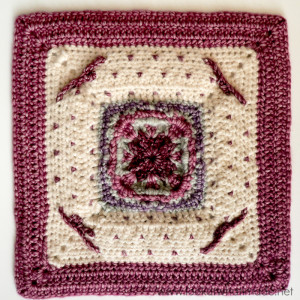
I quite like the back of this square as well. It looks like 4 birds flying around a cross… or am I the only one that sees that?

This blog post contains affiliate links. I only link to products I personally use or would use. All opinions are my own.


Kimberly says
I really like this pattern, the Esme’s winter cottage square. It turned out really beautiful. I was thinking I’d do as you suggested and alternate it with the linen stitch foursquare. The linen stitch pattern says to use thicker yarn and the 8 mm hook. Will it not match up if I use the same yarn? Just wanting to clarify what I need to do to make it work.
Thanks!
Dedri Uys says
Hi Kimberly. I’m glad you like it. If you use the same yarn for both the Esme square and the Linen Stitch squares, you will need to use the hooks specified in the pattern (or hooks needed to obtain gauge). I used 5.5 and 8mm respectively. The linen stitch, as already mentioned, is very dense, so using the 8mm hook gives it a nice drape. If you are a loose crocheter, you might need to go down a hook size. I suggest making your Esme square first and then making one linen stitch square with the large hook and checking that it is a quarter of the size of your Esme. You can then adjust hook sizes as needed for the linen stitch squares and go from there.
Gowoon Choi says
Hi, Dedri!
I found this beautiful pattern through Esther’s Nuts About Squares CAL 2017 and I love it so much!
I’m living in South Korea and have an online knit & crochet club of 320 people.
Around 10 to 12 people gather every Friday night at a cafe and we knit & crochet :)
I’m wondering if I can introduce your pattern to my club by translating it into Korean.
English is not the official language here, so unfortunately many Korean crocheters can’t understand English patterns.
My hope is that I could sell the Nuts About Squares kit with the yarns available here in Seoul and I already got Esther’s permission for it.
Now, I’m gonna contact every designers to get the permission to translate it.
Please consider this with every options you have.
I’ll definitely introduce every designers with the original page link on the club page, my blog and the kit sale page.
I’d be more than happy to get a chance to translate your elaborate work and try it here!
Looking forward to hearing from you soon.
Thank you,
Gowoon
Dedri Uys says
HI :) You are welcome to translate my pattern. Would you allow me to share a PDF version of your translation on my site?
Tatyana says
Hi Dedri! This square is outstanding and unique. I LOVE it very much. I hope I will be able to crochet it! Good job! Thank you very much!
Dedri Uys says
Thank you :)
Sally says
Hello, would like to attempt to make a blanket just using the Esme’s winter cottage Squares.. My question is, how many squares do you think it would take to make a decent size blanket??
Dedri Uys says
That would depend on which yarn you intend to use and what your personal tension is. Could you give me more information?
Maeve Dunne says
I cant find the written pattern anywhere ,Its so difficult to find it . I keep looking at the bottom of every page .
Dedri Uys says
This pattern is only available as a photo tutorial, not a written-only pattern.
Ariella Orgal says
Many thanks for your excellent explanations.
The most important to me was the number of stitches per row side, you have mentioned .
Appreciate it very much.
Maxine Sutherland says
Hi Dedri – once again a beautiful design and pattern. I am making this as part of the NAS CAL, I cannot however find the button for the print friendly version… please could you explain where to find it. Many thanks :)
Dedri Uys says
Hi Maxine :) The print friendly button is just below my signature (on the right under the content and before the related posts)
D
Lee Ann Steinmetz says
I love this pattern! I was having trouble with the zig zags at first, so I enlarged the photo and counted the stitches on it. That worked! I have almost finished the 2014 CAL, after that, I’ll make Sophie. I just love all the beautiful crochet on your blog.
Lee Ann
Jenny says
Glad you got the hang of the zigzags!
Enjoy Sophie when you get to her :)
Jenny
Janneke says
Dedri, I think you have outdone yourself! This is GORGEOUS!
Dedri Uys says
Thank you, Janneke :)
Lo Cooper says
Hi, I have made 4 squares of Charlotte, Swanage is next and then this beautiful pattern. Thank you from the bottom of my heart for the beautiful patterns and inspiration. I may make a few minor alterations so that i can keep count but essentially everythings works out. How can I send you photos of the items I have made? I have made Firenze, plus of course Sophie which you have seen. But I would love to send you pics of the items I finish.
Thank you so much once again. Merry Christmas much love x
Dedri Uys says
I would love to see them, Lo. I think you’ve sent me some photos with Facebook before (or maybe via email)?
Fara says
It looks gorgeous Dedri:). Can’t wait to make it as a pillow cover. I want to combine it with the 2-colour-linen-stitch, with this one in the center. As a beginner, combining stuff is a big step for me though, so I hope it works out. Thanks for sharing your designs! Together with the Dutch youtube channel I learned crocheting from you:). I’m also working at your Sophie’s universe CAL, but since it’s my first CAL and I’m very slow, so it already has taken me a year or so (now starting part 7, haha)
Dedri Uys says
Hi Fara. I am almost finished with Part 7 on my latest Sophie, so we are making it together, it seems :)
TigerKim says
Good God this is beautiful! Your photos are brilliant at showing the progression. I am going to call myself an adventurous beginner now because I am saving for future fun. Thanks so much for sharing this. It’s outstanding!
Dedri Uys says
Kim, anyone who contemplates making something outside their comfort zone is definitely adventurous, so I say give it a go!
Joyce says
I cannot get the “printer friendly” button to work for this pattern.
Dedri Uys says
Hi Joyce. What are you having problems with? I have just checked it and it works for me?
Joyce says
I click the “print friendly” button and nothing happens.
Joyce says
Thanks Dedri. I switched to Google Chrome and it worked.
Dedri Uys says
Great
Nancy says
Just beautiful and like you I love the backs also! What a treasure! Thank you so much!
Dedri Uys says
Thank you, Nancy :)
Doris says
I made it in 2 colors, beige & black
Amaaaaazing!
Great pattern, Dedri dear!
Dedri Uys says
Thank you, Doris :)
Clotilde/Craftybegonia says
It is gorgeous, Dedri, I totally love it. It is very unique. You did a good job.
Dedri Uys says
Thank you, Clotilde :)
Cassie Rice says
I love this square, and am planning to use it for the Around the Bases CAL. I do have a question about the last three rounds — I am assuming that if you are changing colors, you join your yarn with the appropriate standing stitch in any corner. Is this correct?
Thank you again for your wonderful patterns and tutorials!
Dedri Uys says
Thank you :) Yes, if you want to change colours, use the appropriate standing stitch to start the round. The links are provided at the start of the tut.
Gilliane says
Thank you for patterns and beautiful .
Heather Gibbs says
Just STUNNING!!!! Love this new block pattern!
Kerrie says
This square has lots of possibilities, thank you so much for sharing.
Dedri Uys says
Thank you, Kerrie.
Sharon says
Love the colors that were chosen in this square.