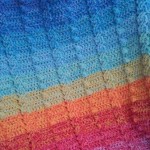
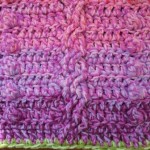
This Cable and Bobble Stitch Blanket was designed and made for my little niece Lienke, who has finally arrived in all her wrinkly awesomeness and hairy cuteness. I wanted a blanket that was a little bit more complicated than just single crochet but wouldn’t take me months (or even weeks) to finish. By using 3 strands of double knit yarn at the same time, this blanket grows very quickly.

I used the Attic24 Yarn Pack (which I bought a while ago) to make this particular version. Right at the bottom of the post, you will find instructions for making an exact replica, but you can use any yarn you fancy. The yarn and hook suggested below will give you a blanket that is roughly 80 cm wide by 90 cm long (31.5″ x 35.5″).
You do not have to go cheerful and chunky as I have gone. By using a smaller hook and thinner yarn (or less strands of yarn) and increasing the amount of repeats per row, you can make a more dainty version.
You could also go completely crazy and make a king-sized blanket…
Basic Cable and Bobble Stitch Blanket Pattern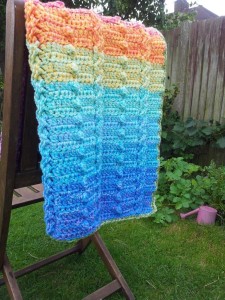
Suitable for Advanced Beginners
The cable and bobble pattern repeats every 15 st’s, so if you want to make a bigger blanket, just start with multiples of 15 stitches and take away 1 stitch. For example, for 10 repeats: 10 x 15 – 1 = 149.
Materials
- 3 Strands of Double Knit yarn (Light Worsted Weight/#3/8 ply) together OR 2 Strands of Chunky yarn (12 ply) together
- 8 mm crochet hook (US 11/L) – (You can also use a 9 mm crochet hook (US 15/N). Just remember that your blanket will come out slightly bigger.)
- Yarn Needle (This is optional. I suggest that you crochet OVER your tails of yarn, but if you don’t like crocheting over your yarn ends, you are more than welcome to work them away with a yarn needle.)
Please see Attic24 Yarn Pack at the bottom of this post for the specific yarn/colour combination I used.
Abbreviations
US Terminology Used.
- Ch – Chain
- Dc – Double Crochet
- Fdc – Foundationless Double Crochet – video tutorial here.
- BPtr – Back Post Treble Crochet
- FPtr – Front Post Treble Crochet – video tutorial for both front AND back post treble crochet here.
- St/sts – Stitch/stitches
- () – Repeat all instructions in parentheses the number of times specified.
Special Stitches
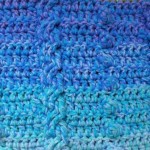
- {Cable 2} – Dc2tog and skip the next st. BPtr in the next 2 sts. Now go back to the st below the last st of the dc2tog and BPtr around that st. BPtr around the next st, which doesn’t contain a st yet. You will need to twist your work quite a bit to be able to do this. Now dc2tog, starting in the st at the top of the last BPtr.
- {Cable 3} – Dc2tog. FPtr in the next 4 sts, working around the posts of the BPtr’s from the previous row. Dc2tog, starting in the st at the top of the last BPtr.
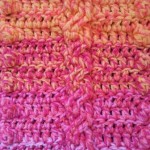
- {Cable 4} – Dc2tog and skip the next FPtr. BPtr in the next 2 sts. Now go back to the FPtr below the last st of the dc2tog and BPtr around that st. BPtr around the next FPtr, which doesn’t contain a st yet. Dc2tog, starting in the st at the top of the last FPtr.
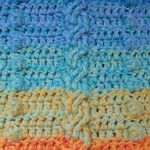
- Popcorn Stitch: Make 4 dcs in the same st. Drop the loop from your hook. Insert your hook into the first of the 4 dcs and pull the dropped loop through the stitch.
Notes
Change colour on the last yarn over of the last stitch of the row before the colour change.
Pattern
Please Note: The turning chains are NOT counted as a stitch.
Using your 8 mm crochet hook and 3 strands of double knit yarn (or 2 strands of chunky/bulky yarn):
- Start with 74 Fdc (not including the initial ch-3). Turn. {74}
- Ch 2 (doesn’t count as a st throughout). Make a dc in each of the first 4 sts, starting in the st at the base of the beginning ch-2. {Cable 2 – as in the instructions above}. (Dc in the next 9 sts, {Cable 2}) 4 times. Dc in the last 4 sts and turn. {74}
- Ch 2 and make a dc in each of the first 4 sts, starting in the st at the base of the initial ch-2. {Cable 3}. (Make a dc in each of the next 4 sts, make a Popcorn in the next stitch, dc in the next 4 sts, {Cable 3}) 4 times. Dc in the last 4 sts and turn.
- Ch 2 and dc in the first 4 sts, starting in the st at the base of the initial ch-2. {Cable 4}. (Dc in the next 9 sts, {Cable 4}) 4 times. Dc in the last 4 sts and turn.
Repeat Rows 3 and 4 until your blanket is as long as you want it to be. My blanket ended up being 52 Rows long.
At the bottom of this post, you will find instructions for bordering your blanket with a round of single crochet.
To make my Rainbow version of the Cable and Bobble Stitch Blanket, you will need to buy yourself some Stylecraft Special DK Yarn (15 balls to be exact), but don’t worry, this yarn is incredibly affordable. Let’s talk about the yarn first, because it’s the most important part of the Rainbow Blanket.

Attic 24 Yarn Pack
Stylecraft Special DK Yarn

Yarn specifications
- 100% Acrylic
- 295 m/322 yards per 100 g ball
- Machine washable at 40
- Cool tumble dry, cool iron
- Knitting needles: UK 8/US 6/4 mm
Most of you will have heard of Lucy from Attic24. And even if you haven’t heard of her, you’ll have seen one of her blankets on the internet…you just might not realize it.
Lucy has some gorgeous blanket patterns. My favourites are her Ripple Blanket and her Granny Stripe Blanket. Her colour work is amazing, so it’s no wonder that you can now buy the “Attic 24 Yarn Pack”, inspired by her Granny Stripe Blanket, from quite a few yarn retailers.
This post contains a list of all the colours in the Yarn Pack (17 in total), as well as Lucy’s personal experience with working with Stylecraft Special DK.
Please Note: You don’t HAVE to make this blanket with Stylecraft. If you can’t get your hands on any, you can use the colour chart below to buy colours that are similar to the ones I have used. But if you CAN get your hands on an Attic24 Yarn Pack, I suggest that you do. Unpacking those 17 balls is a feast for your eyes and I can bet you that you will be inspired to make so many pretty things that you won’t know where to start.
Making the Rainbow Cable and Bobble Stitch Blanket
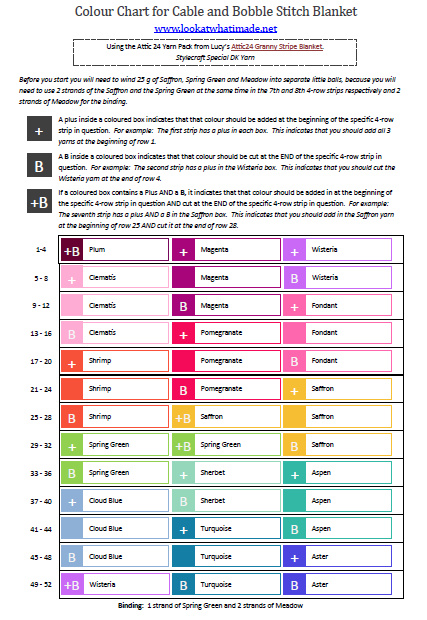
To make the Rainbow Cable and Bobble Stitch Blanket, you will follow the pattern for the Basic Version, but you will start with 3 strands of yarn, each in a different colour (as specified in the colour chart below). You will work the first 4 rows in these 3 colours. This is your first 4-row strip.
At the end of the fourth row, you will cut one of the colours (Plum in this case) and add in the next colour (Clematis in this case). You will then work the next 4 rows. At the end of that 4-row strip, you will again cut one colour and add in the next colour (following the colour chart below). You will continue in this way until you have made thirteen 4-row strips.
Adding and taking away one colour at a time like this gives the blanket a variegated rainbow feel which I am crazy about.
Important Notes
- I did not use the Lipstick and Lavender yarn from the Attic 24 pack. This was not by choice. They got lost in the move.
- The blanket eats approximately 900 g (2 lb) of yarn. That is roughly 2.6 km (1.6 miles) of yarn. Yikes!
- Each 4-row strip takes about 23 g of each colour (70 m/76 yards), and I didn’t use more than one ball of any one colour. In fact, you should have enough left to make a Crochet Ten Stitch Blanket with.
- Before you start, you will need to wind 25 g (just to be on the safe side) of Saffron, Spring Green and Meadow into separate little balls, because you will need to use 2 strands of the Saffron and Spring Green at the same time in the 7th and 8th 4-row strips respectively, and 2 strands of Meadow for the binding.
- Occasionally, you will need to cut 2 colours at the end of a 4-row strip and add 2 new ones.
Click on the image below to open the pdf version of the colour chart.
Border For The Cable and Bobble Stitch Blanket
Everyone has a different way of finishing off their blankets. Sometimes you don’t want to add a border at all! But for this blanket, I suggest that you at least add one round of single crochet all the way around the blanket, because the first stitch will buckle slightly at the beginning of each cable column. You are more than welcome to add any kind of border you want.
To bind your blanket, start with 2 strands of Meadow and 1 strand of Spring Green. With a slip knot already on your hook and the right side of the blanket facing you:
Sc in each st of the last row of the blanket. In the last st of the last row (the corner stitch): sc, ch 2, sc. Turn your blanket through 90 degrees and continue working around, this time making 2 scs in the end of each row down. Turn your blanket through 90 degrees and (sc, ch 2, sc) into the first available st of the foundation double crochet row. Make a sc into each st of the first row. When you get to the last stitch, (sc, ch 2, sc) into it. Turn your work through 90 degrees again and make 2 sc’s into each row up the side of the blanket. Ch 2 and make a sc into the stitch that contains the first sc of your border round. Join to the top of the first sc with a sl st and fasten off. Work away your tails of yarn.
You can find an excellent tutorial for bordering a blanket HERE. It is by Crochet Happy and is chock-full of photos. Just remember that your blanket is made up of double crochet stitches, so you will need to make 2 scs into each row, not one as she does.
I hope this tutorial is clear enough. If you have any questions or suggestions, please leave me a comment.
Other than that, have fun!

This blog post contains affiliate links. I only link to products I personally use or would use. All opinions are my own.






Heather says
Would you consider taking pictures of the instructions, for the beautiful cable and bobble afghan? For instance, (BPtr in the next 2 sts.) does that mean the 2 sts of one BPtr or 2 BPtr?); Also, where exactly is the st below the last st of the dc2tog to BPtr around? And where do you BPtr around the next st, that doesn’t contain a st yet? and which is the st at the top of the last BPtr.?
I’m self taught and can usually figure out pattern instructions. These are moves I’ve never seen and could not make sense of after many tries. Thank you, Heather
Jenny says
I will try and help where I can, Heather.
BPtr in the next 2 stitches means one back post treble stitch in each of the next two stitches.
BPtr round the next stitch that doesn’t contain a stitch means exactly that. Take the next unworked stitch from the previous row and make a back post treble around the post of that unworked stitch.
As for the other two questions, I am afraid this is one blanket I haven’t yet worked on, so I can’t ‘show’ you where to work in a photo for example. I may see if I can have a further look at the pattern if I get a moment.
BW Jenny :)
Betsy says
I love love love this blanket! I’m always drawn to rainbow blankets and I’m smitten with the mixing of the colors for the shading effect. 2 questions, if I want to make it bigger, more adult size would I need to order another Attic 24 pack or just a few extra skeins of yarn? Also I’d love to work in the 2 colors that were misplaced, where would you work them into the color scheme? My skill level is just barely intermediate so I’m not overly confident in my color skills yet and I don’t want to mess up the beautiful color way you created! Thank you, I hope one day to be skilled enough to attempt Sophie, it’s so beautiful!!
Dedri Uys says
Hi Betsy. It is quite a heavy little blanket due to using 3 strands, so I wouldn’t recommend making an adult sized one. It would be sooo heavy!
YasminSA says
Hi, thank you for this beautiful pattern, just love how simple it is, and I was looking for a pattern for a baby boys blanket ;) and bingo found it
Best regards,
Yasmin
Bonnie says
Your blanket is amazing. I am not a very good crocheter.
Could your rainbow color scheme work for the granny stripe design?
I have tried unsuccessfully to grasp the idea of backpost or frontpost stitches, but cannot understand the cable stitch.
Dedri Uys says
Hi Bonnie. I am sure that the colour scheme will work for any type of blanket worked in rows. I am sorry to hear that you cannot get to grips with post stitches. Have you tried looking at some video tutorials on youtube?
Rhondda Mol says
Hi Dedri :) I included your super fantastic blanket design link in this post :) Free Pattern Friday – Let’s Get Warm! Crochet Blanket Pattern Round Up! Here’s the link: http://oombawka.blogspot.ca/2013/12/free-pattern-friday-lets-get-warm.html Hugs, Rhondda
Julie Corbisiero says
Hi, this blanket you made is stunning and I love the colors, so bright! I saw it on crochet happy.
Julie from julieslifestyle.blogspot.com
Dedri Uys says
Thank you, Julie. I’m already following you. Very chuffed that you like it :)
Kathy Lashley says
So beautiful!
Dedri Uys says
Thank you so much, Kathy :) I’ve had a quick look at your site. I love the boot cuff patterns. And the woman modeling the hat in your page header is gorgeous! Is that you?
Rhondda Mol says
Congratulations! You tied for the most clicked projects at Link & Share Wednesday!
http://oombawka.blogspot.ca/2013/09/link-share-wednesdays-sowhats-on-your_11.html
Dedri Uys says
Chuffed to bits. Thank you, Rhondda x
Rhondda Mol says
Hello :) Thank you for linking up at Link & Share Wednesday! I love this blanket Dedri :) Love it! Rhondda
Linda says
Your blanket is beautiful! thank you for the great tutorial, I will definitely be trying this once I have got some of my wips out of the way. :)
Dedri Uys says
Thank you, Linda. Good luck with those wip’s. The never get any less. It’s like they have babies in the night!
Tracy Joyner says
I am officially in Love with this blanket now…so many loves and not nearly enough time to make them all!
You did a FANTASTIC job with this Tutorial! I’ve totally Pinned, Posted, Shared and Scooped it everywhere :D
Thanks so much for the Link-back to my Tutorial for binding the edges! I’ve actually got the photos and everything to make another one for Double Crochet…had plans to post it later that same week but Life just kinda ‘blew up’ before I could get it done! Sheesh!
cheryl says
great blanket so beautiful colours
Ance Strydom says
Dis so pragtig Dids!
Dedri Uys says
Dankie, Ance :)
Rae Haller says
This is wonderful! I love Attic 24 yarn colors, and the way you used three colors for each row, then dropped on is brilliant. Love the cables and bobbles, too. All in all a wonderful afghan/blanket. Thanks for sharing!
Rae
Gigi Lee says
What a wonderful blanket. I don’t get excited very often, but this is a fabulous post. I’ll be back and thanks for sharing!
Dedri Uys says
Thank you very much, Gigi. Please let me know how it goes if you decide to make one :)
Magda de Wet says
‘n Fees vir die oog!! Die kleure is so mooi! Dit klink of jy dit baie geniet het. Dankie vir die deel daarvan.
Dedri Uys says
Net ‘n plesier, Magda. Baie dankie vir die mooi kommentaar x
Minette says
A labour of love, indeed. It is beautiful.
Dedri Uys says
Dankie, Mamma