“A Place for Everything, and Everything in its Place” was the reasoning behind this A Touch of Colour Clutch.
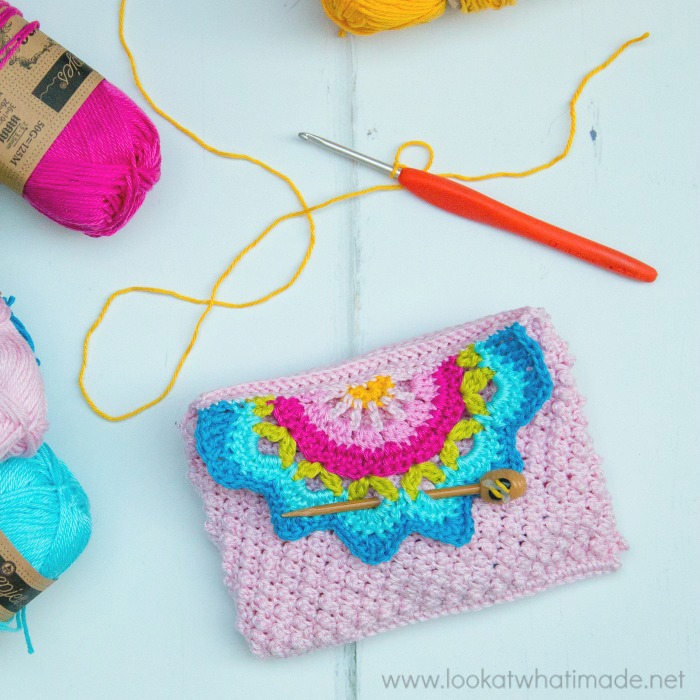
I designed this little clutch for Issue 99 of Inside Crochet back in February 2018. I used left-overs from my Sophie Stool project to make it. Not only is it handy, it also uses up small bits of yarn :) And I think it would make a great gift… maybe accompanied by Aunty Mary’s Thing?
I’ve decided to include the column that accompanied the pattern. If you wish to skip straight to the pattern, just scroll right past ‘The Chatty Bit’.
The Chatty Bit
I seem to be forever losing things! Someone told me, ages ago, that the way to get around this was to live by the following motto: ‘a place for everything and everything in its place’. That works extremely well for items like kitchen utensils, blankets, and furniture. It even works for my wallet (always in my coat pocket) and my keys (always in the same cluttered bowl).
It doesn’t, however, work quite as well for the craft items I lug to and from work on a daily basis so that I can crochet on the tube. I’m thinking specifically of scissors, tape measure, needles, and stitch markers.
This wouldn’t be a problem if I had loads of them, but I don’t. I have one pair of crochet scissors, one container of needles and stitch markers, and one tape measure, each of them special to me for one reason or another. Sometimes, I take all three of those and place them in my bag along with the project I am working on, but most often I only need one or two. This is where things start going wrong.
Usually, I can’t remember when I last used an item or which bag I put it in when I did. Sometimes I put them in a ‘safe place’, and you just know that putting something in a ‘safe place’ is code for ‘hide it from yourself forever’.
For a while, I kept the essentials in a separate bag so that I would always know where they were, but the bag was big enough to put yarn into, so before long, that too became a ‘project’ bag.
I recently made myself a crochet hook roll. I have no idea why I hadn’t done it before! Now I always know where my hooks are. They no longer live with my works-in-progress; they live in my hook roll on my desk and only come out to play when I need them.
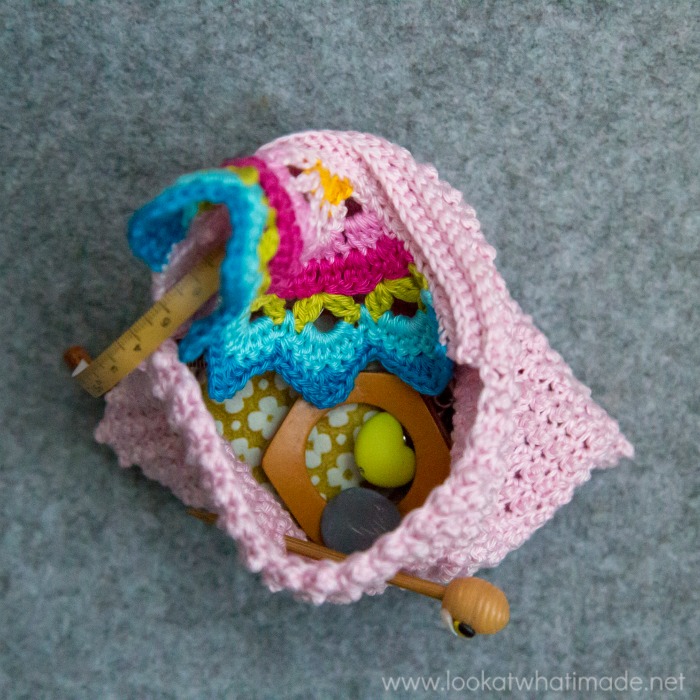
With this system working so well (and keeping in mind my resolution to use more scrap yarn) I decided that my crochet essentials should also have their own dedicated home. I needed a clutch that was too small to fit yarn or hooks into, but big enough to fit everything else.
As with last month’s pincushion, I used mostly scrap yarn leftover from my Sophie Stool cover. I also decided to use a shawl pin as a closure because that is another item I can never lay my hands on when I need it. Now I will always know where to find it!
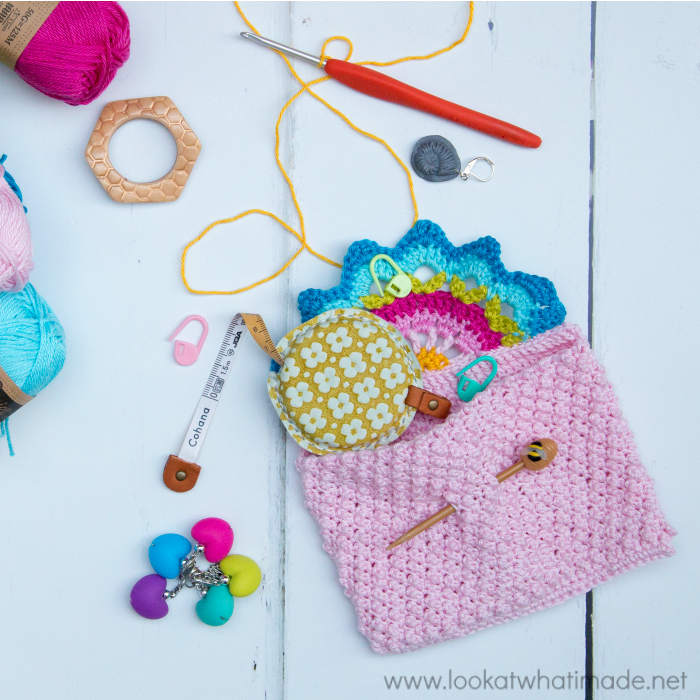
The clutch will still migrate from bag to bag, but at least I will know that everything I need is inside it. I have a suspicion that items will slowly emigrate from this new home, but I am optimistic that it will work for a while, at least.
***
For those of you who wonder how long I managed to keep this ‘Everything in its place” going, it lasted until after I got back from the cruise this February. I don’t, for the life of me, remember where I put my little clutch – luckily all the important bits had managed to make their way out of it during the cruise.
***
A Touch of Colour Clutch Pattern
©Dedri Uys 2018. All Rights Reserved.
First Published in Issue 99 of Inside Crochet Magazine.
Resources
- Add to Your Ravelry Queue
- UK Version: An abbreviated UK version of this pattern is available in Issue 99 of Inside Crochet HERE. The pattern below is the US version.
- Hashtag: If you share photos, please use #atouchofcolourclutch so that we can find your projects and have a gleeful look.
- PDF: You can buy a print-friendly, ad-free, US/UK PDF of this pattern from my Ravelry Store HERE. Please note that these PDFs do not contain the photo tutorial. Alternatively, you can use the print-friendly button at the bottom of this post to save it to PDF.
Gauge
Exact tension is not important, as long as you work as tight as you comfortably can, otherwise the Bubbles won’t Pop as much.
Materials
- Scheepjes Catona, 100 % Cotton, 50g/125m/137yds
- Yarn A –238 x 1 ball (Light Pink)
- Scheepjes Catona, 100 % Cotton, 10g/25m/27yds
- Yarn B – 208 x 1 ball (Yellow)
- Yarn C – 222 x 1 ball (Medium Pink)
- Yarn D – 114 x 1 ball (Dark Pink)
- Yarn E – 245 x 1 ball (Green)
- Yarn F – 397 x 1 ball (Light Blue)
- Yarn G – 146 x 1 ball (Dark Blue)
- 3mm hook*
- 3.25mm hook
- Shawl Pin
*I use Clover Amour Crochet hooks. You can buy them from Amazon.co.uk, Amazon.com, or Habbedash.
Size
15 cm x 12cm (5.9” x 4.7”)
Abbreviations
US Terminology
- Beg – Beginning
- Ch – Chain
- Dc – Double crochet
- Hdc – Half-double crochet
- Rem – Remains/remaining
- RS – Right side
- Sc – Single crochet
- SM – Stitch marker
- Sl st – Slip stitch
- Sp/sps – Space/spaces
- St/sts – Stitch/stitches
- Tr – Treble crochet
- WS – Wrong side
Punctuation
- () – Used to indicate stitches made into the same st.
- [] – Used to indicate repeats – Repeat instructions between square brackets the number of times specified.
Special Stitches
Cluster – Yarn over and insert your hook into the indicated st/sp. Yarn over and pull up a loop. Yarn over and pull through 2 loops. Yarn over and insert your hook into the same st/sp. Yarn over and pull up a loop. Yarn over and pull through 2 loops. Yarn over and pull through both loops on hook.
(BP) Back Post – Identify the post of the stitch you want to work around. Insert your hook from the back to the front and then from the front to the back around the post of the stitch so that the post lies behind your hook. Complete your stitch as normal. You might find it easier to twist your work forward so that you can see what you are doing.
(FP) Front Post – Identify the post of the stitch you want to work around. Insert your hook from the front to the back and then from the back to the front around the post of the stitch so that the post lies in front of your hook. Complete your stitch as normal.
Notes
When making the bag, the Bubbles will pop away from you while you are working. Turn your work inside-out when instructed so that the Bubbles will be visible on the outside of the clutch.
Changing Colours: Change colours on the last yarn-over of the last st before the colour change.
Instructions
Clutch
Body
This part is worked in a continuous spiral, amigurumi style. Use a SM to mark the first st of every round! I tend to use a running stitch marker (which is a scrap of yarn flung back and forth over your work before the first st of every round. When working in a spiral like this, the running stitch marker should creep steadily right (left, if you are left-handed) as your rounds progress. If there is a jog in this line, you will instantly know that something has gone awry in your last round. This scrap can be removed by pulling it out once you are done.
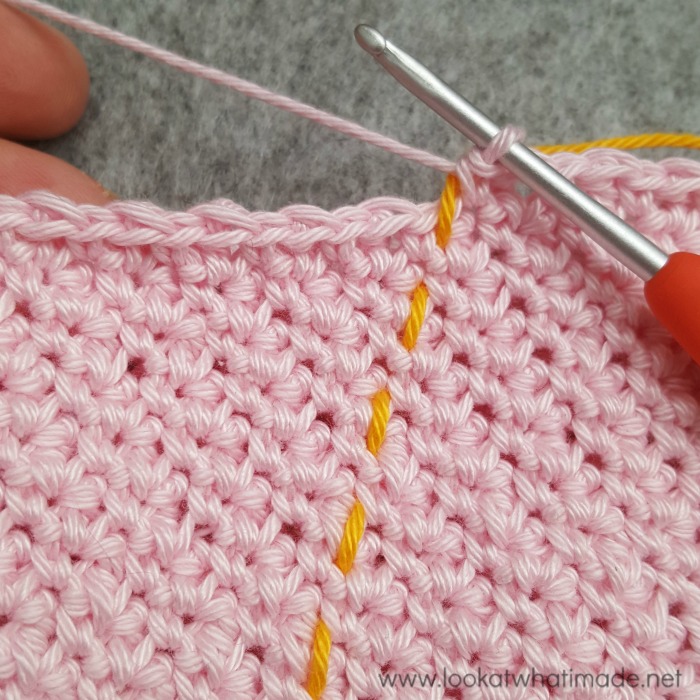
With Yarn A and 3.25 hook, ch 69. Place a SM in 63d st and do not remove it until instructed to do so.
Round 1: Join by making a sc in one loop only of the ch st farthest away from your hook, making sure not to twist the foundation ch, sc in one loop only of each rem ch – 69 sc.
Round 2: Change to 3mm hook, [sc in next st, tr in next st] 34 times, sc in last st – 35 sc, 34 tr.
Round 3: [tr in next st, sc in next st] 34 times, tr in last st – 34 sc, 35 tr.
Rounds 4 – 17: As Rounds 2 and 3.
Round 18: As Round 2.
Top Flap
This part is worked in rows.
Row 19: Ch 1 (doesn’t count as a st), hdc in the next 36 sts, turn – 36 hdc.
Row 20: Ch 2 (counts as hdc throughout), BPdc in the next 34 sts, hdc in the last st, turn – 2 hdc and 34 BPdc.
Row 21: Ch 2, FPdc in the next 34 sts, hdc in the last st, fasten off and work away your ends – 2 hdc and 34 FPdc.
Closing The Bottom
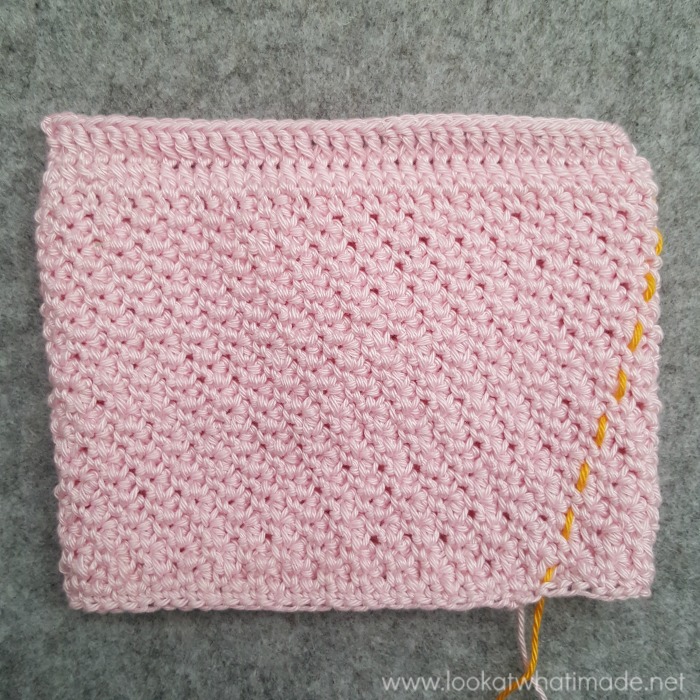
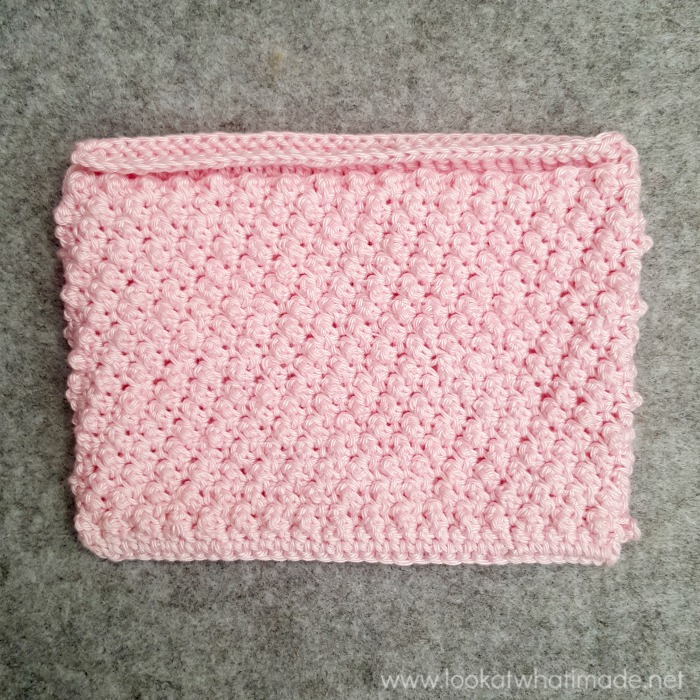
Turn the bag inside out so that the Bubbles are facing out. With the bottom of the Clutch facing up, fold the clutch in half so that the SM from the foundation chain falls on the fold.
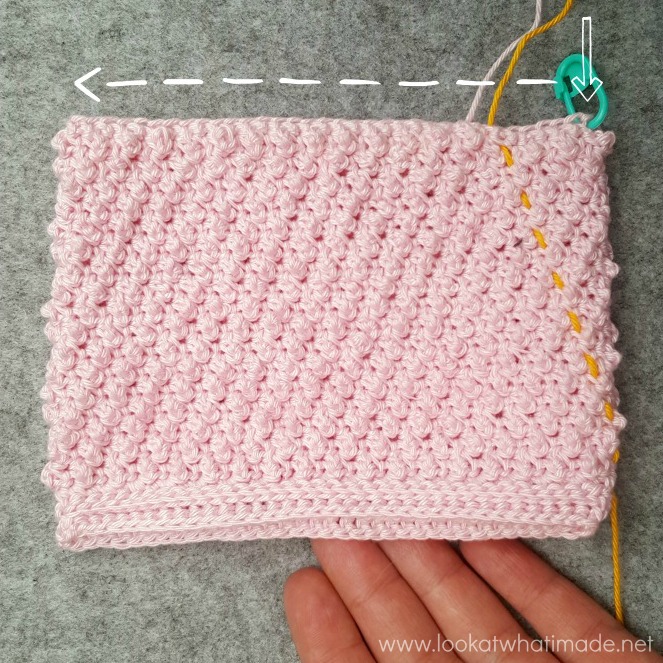
With a 3.25 mm hook, join yarn A by making a sl st in the marked ch, working through both layers and both rem loops of each ch st, make 34 sc to close the bottom. Fasten off and work away your ends.
Closure
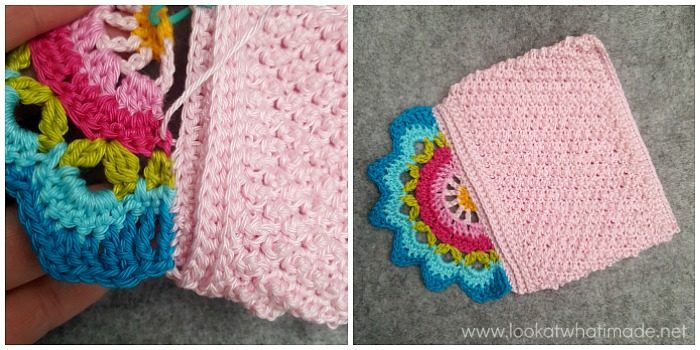
With Yarn B and 3.25 hook, make an adjustable ring.
Round 1: Ch 2 (counts as hdc throughout), make 6 hdc, change to yarn A, turn – 7 hdc.
Round 2: With WS facing, ch 5 (counts as dc and ch-2 sp), [dc in the next st, ch 2] 5 times, dc in the last st, change to yarn C, turn – 7 dc and 6 ch-2 sps.
Round 3: With RS facing, ch 3 (counts as dc throughout), [make 3 dc in the next ch-2 sp] 6 times, dc in the third ch of the beg ch-5 from the previous round, change to yarn D, turn – 20 dc.
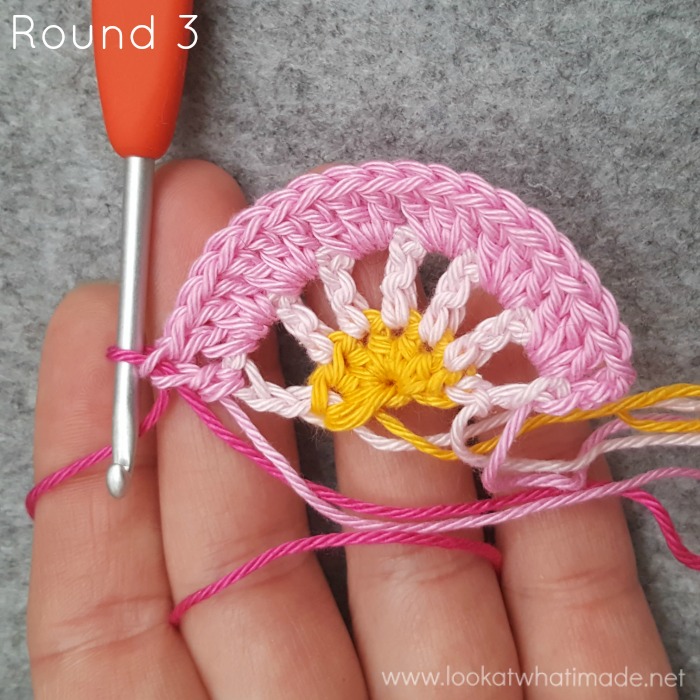
Round 4: With WS facing, ch 3, dc in the st at the base of the ch-3, [dc in the next 2 st, 2 dc in the next st] 6 times, dc in the last st, change to yarn E, turn – 27 dc.
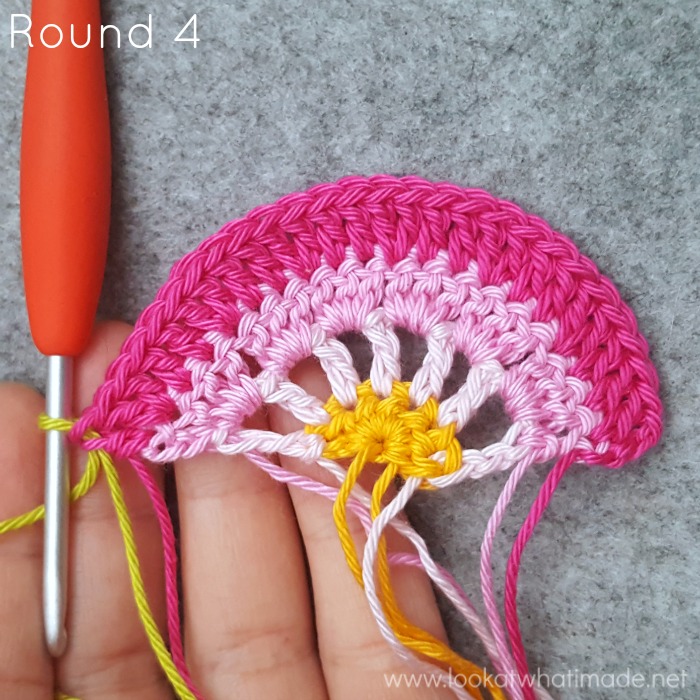
Round 5: With RS facing, ch 3, dc in the st at the base of the ch-3, skip the next 2 sts, (Cluster, ch 5, Cluster) in the next st, [skip the next 3 sts, (Cluster, ch 5, Cluster) in the next st] until 3 sts rem, skip the next 2 sts, make 2 dc in the last st, change to yarn F, turn – 4 dc, 12 Clusters, and 6 ch-5 sps.
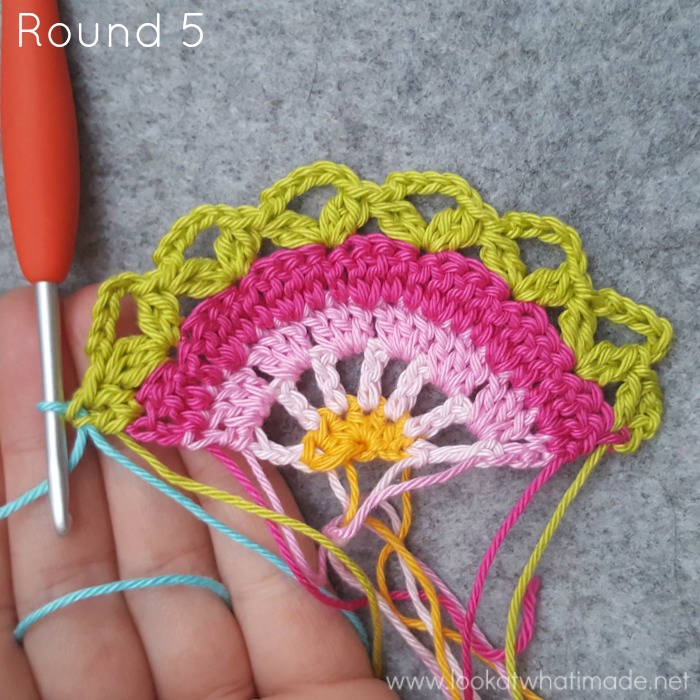
Round 6: With WS facing, ch 1 (doesn’t count as a st), make 2 sc in the st at the base of the ch-1, make a sc between the next st and the first Cluster, make 7 dc in the next ch-5 sp, [sc between the next 2 Clusters, make 7 dc in the next ch-5 sp] 5 times, make a sc between the next cluster and the next dc, sc in the last 2 sts, change to yarn G, turn – 11 sc, 42 dc.
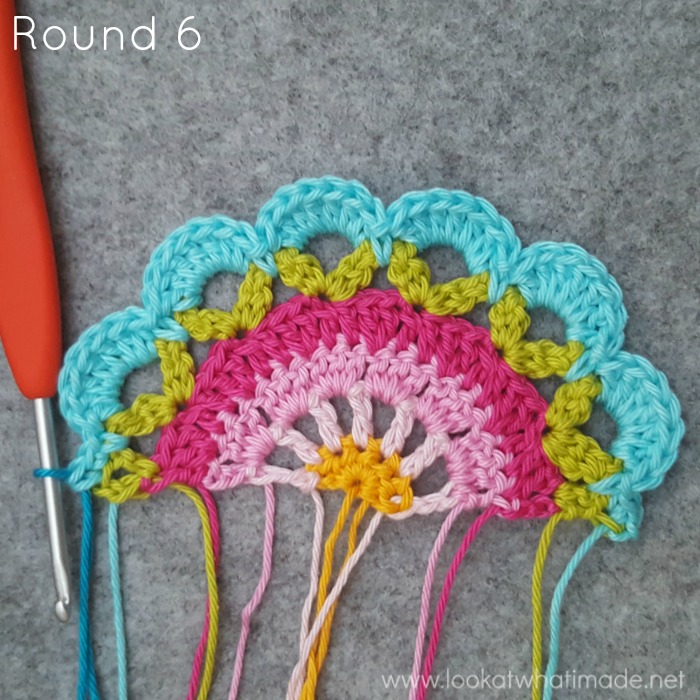
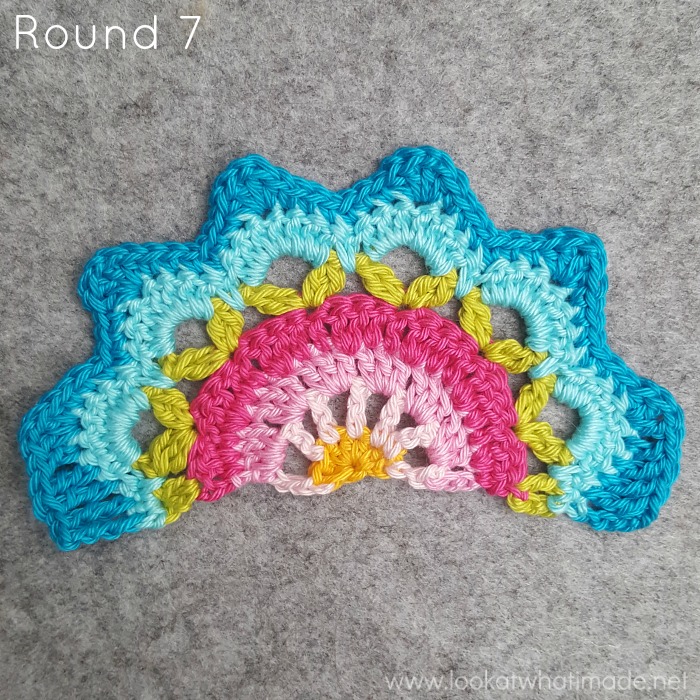
Round 7: With RS facing, ch 4 (counts as tr throughout), tr in the next st, skip the next st, tr in the next 2 sts, dc in the next st, (dc, ch 1, dc, hdc) in the next st, sc in the next 3 sts, [skip the next st, sc in the next 3 sts, (hdc, dc, ch 1, dc, hdc) in the next st, sc in the next 3 sts] 4 times, skip the next st, sc in the next 3 sts, (hdc, dc, ch 1, dc) in the next st, dc in the next st, tr in the next 2 sts, skip the next st, tr in the last 2 sts, fasten off and work away your ends – 30 sc, 10 hdc, 14 dc, 8 tr, and 6 ch-1 sps.
Adding Closure to Bag
Place the closure on top of the bag with RS facing you and flat side lined up with the top flap of the bag.
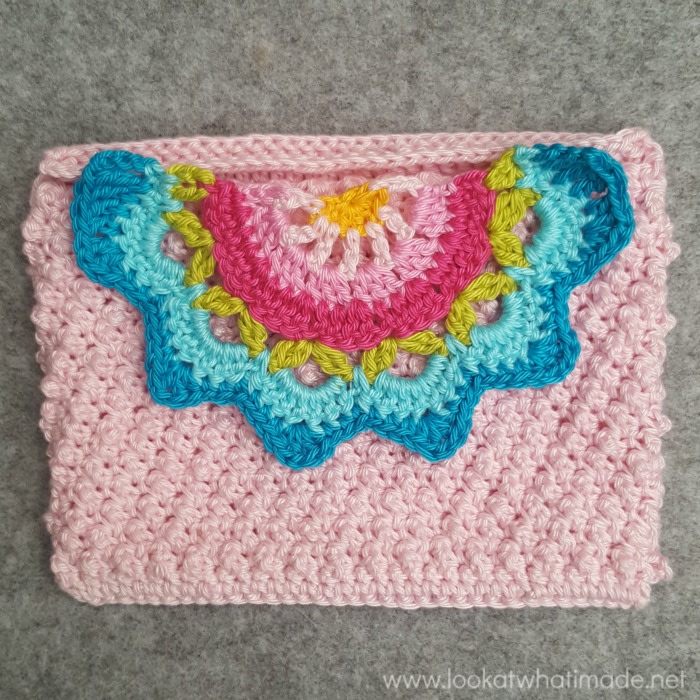
With Yarn A, sew the closure to the top flap of the bag, using whip stitches and working into the back bumps of the stitches from the closure. Stretch the closure as you work so that it lines up with the top flap.
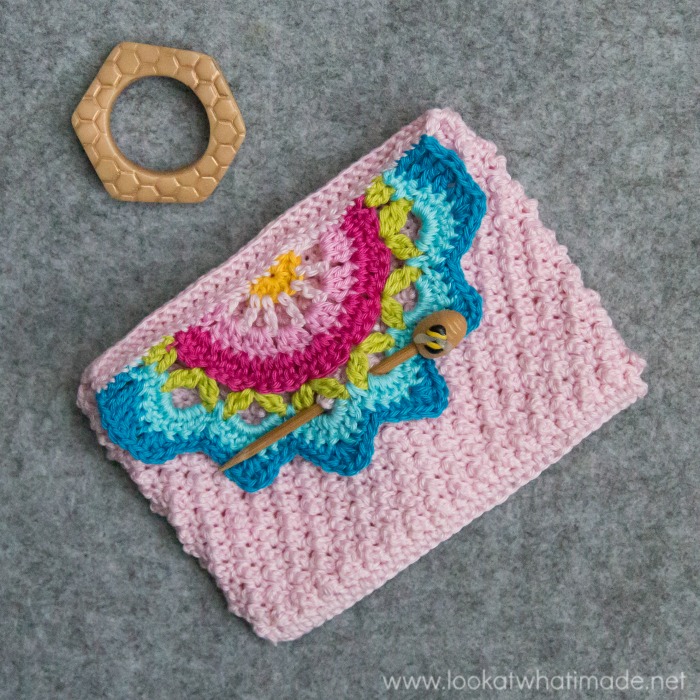
Use a shawl pin to close the Clutch, inserting it into the central two ch-5 sps from Round 5.
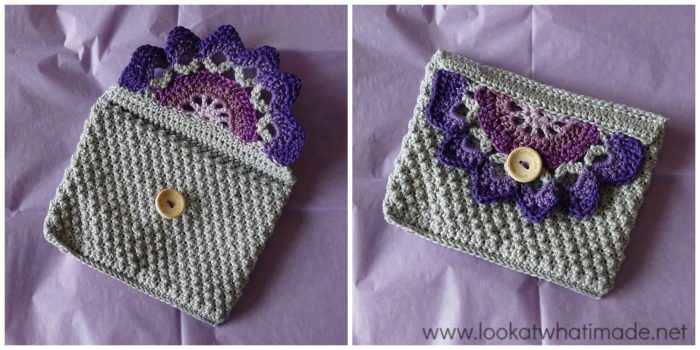
If you prefer adding a button, you can sew one to the ‘body’ of the clutch and slip it through the space between the central two Clusters from Round 5. My friend Kay did that very thing when she made hers.
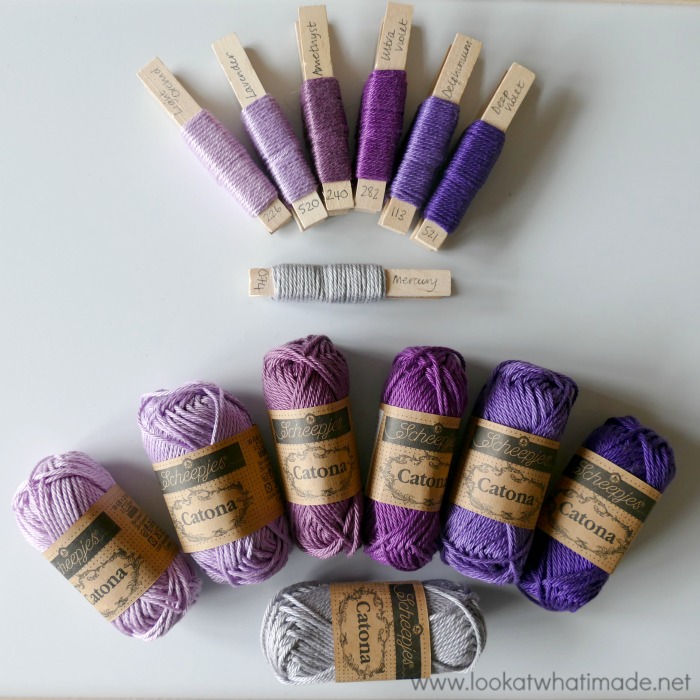
And just in case you’d like to copy her colours instead, here’s a photo of the yarn she used:
And there you have it: one colourful little clutch to keep all your most important crochet necessities safe… all except the yarn and the hooks… so maybe to keep all your second-most important crochet necessities safe?
I will be releasing the pattern for the Banksia Baby Blanket tomorrow, so I hope to see you back here then :) Whoohoo! I can’t wait.
More Inside Crochet Patterns
Recent Patterns
- Jeanette Square
- Sue Square
- Mary’s Memory (hexagon)

This blog post contains affiliate links. I only link to products I personally use or would use. All opinions are my own.


JM says
What a great idea Dedri. Something i never thought of, until now, i have other ideas for the use of the little purse. Thank you.
Hello?…. my mind must be with the australian drought at the moment!!
Dedri Uys says
I am glad you like it :) I hope you will share photos if you do x