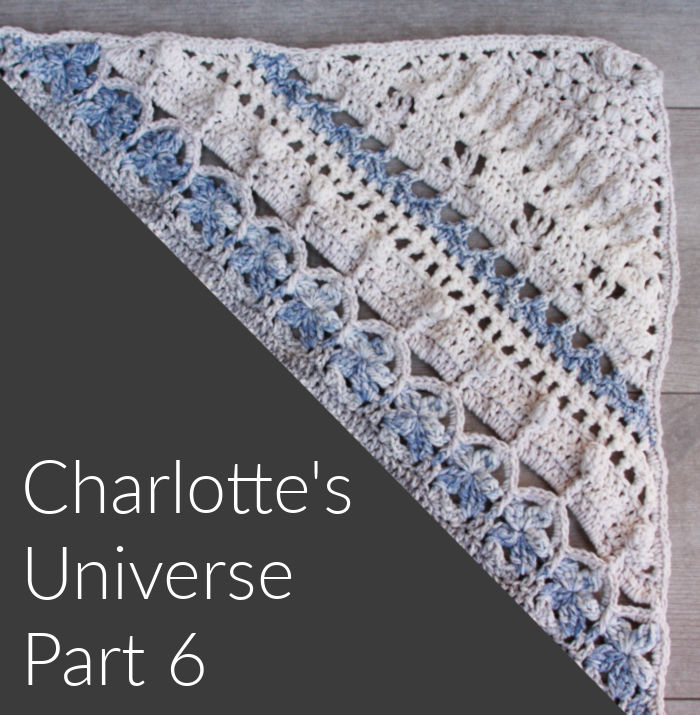
Welcome to Part 6 of Charlotte’s Universe. This week we will be completing the triangles. Most of this should be a breeze because it is largely a repeat of Part 2. The round that goes ALL THE WAY around the square will need some focus, though. Sorry!!!
When I turned 40 in June, I asked people to buy me a plant or to give me a cutting from their garden. The idea behind this is to have a garden full of ‘people’. There are Pat’s daisies, here is Esther’s hibiscus (and her Passionflower and her Chinese lanterns)… See this fig tree? That’s Cath and Simon, and this Yukka is the boys. Have I shown you my Montbretia (which is like a Crocosmia but vintage)? Lillian across the road gave me that (and the Hollyhocks and the Devon Daisies). Kay’s Agapanthus are planted in the front garden and her Primroses are planted where I can see them when I do the dishes. My mother’s Manuka died (thanx, Buddy the dog).
You get the picture: a love garden!
So as we work on this part, we are celebrating all the people that bring us joy (seasonal, annual, perennial, and evergreen). I will be celebrating all of you!!!
Charlotte’s Universe Part 6: Triangles Part 2
Resources
- You can find links to the right and left-handed video tutorials (US) for Part 6 HERE on It’s All in a Nutshell.
- Add this pattern to your Ravelry Queue.
Translations
- Dutch Information and Links by Dianne Baan
- German Translation – by Sabi Bulla and Silke Schippa-Witte
- Hebrew Translation by Michal Ben-Hur, Iris Fait, Tami Sultan Nudelman, Tali Shchori, and Sarit Grinberg
- Japanese Information and Links by Masako Kawahara
- Swedish Translation by Åza Karlsson and Ulrika Larsson
Abbreviations and Special Stitches
Please see Special Stitches and Techniques (worth bookmarking or saving as a PDF as we go forward – Take a look at THIS TUTORIAL if you don’t know how to use the print-friendly button).
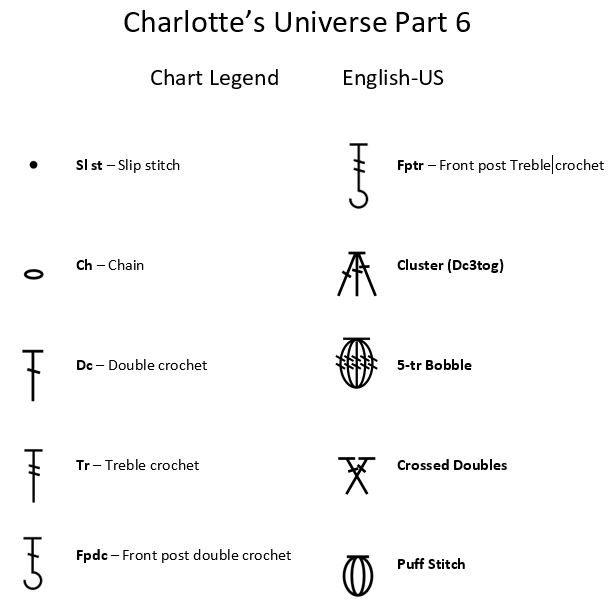
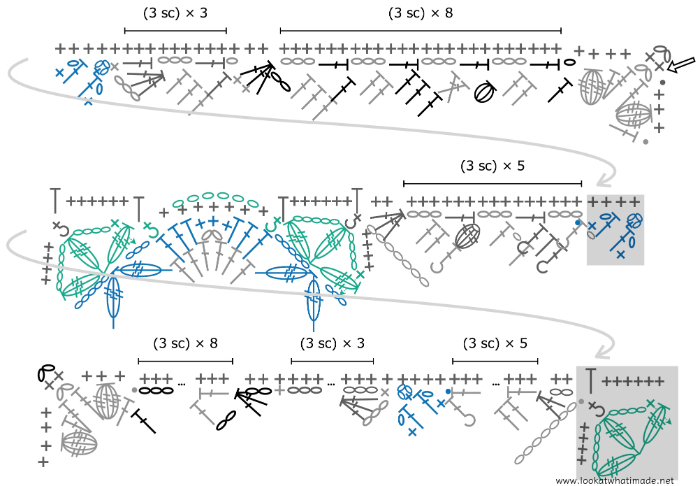
Charts
Credit: Masako Kawahara from Crochet_Hmmm
Please follow the charts in a counter-clockwise direction, regardless of whether you are right or left-handed.
Colours Per Round
Vintage and Sunshine
Follow the colour reference next to each round title {for example, Round 1 (Colour A)}.
- Vintage Charlotte
- Sunshine Charlotte
Pink Charlie
- Rows 52 – 66 – C
- Round 67 – C
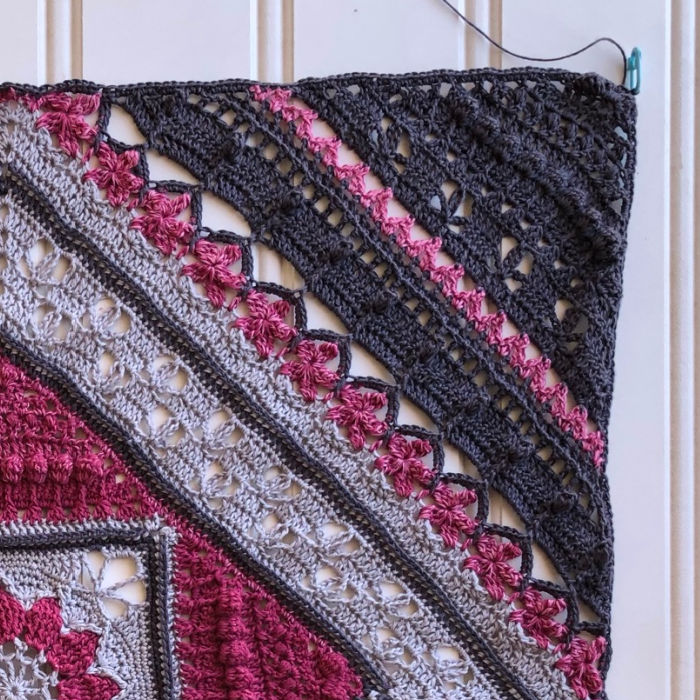
Bonus Colourways
- Sunflower Charlotte – Michael Wassenaar (Chunky Monkey)
- Space for Grace – Sabi Bulla (Skies Light)
- Latte With Love – Jenny Lowman (Scheepjes Softfun)
Esther Dijkstra will be sharing her Scheepjes Stonewashed Colours Per Round HERE.
Instructions
© Dedri Uys and Scheepjes 2021. All Rights Reserved.
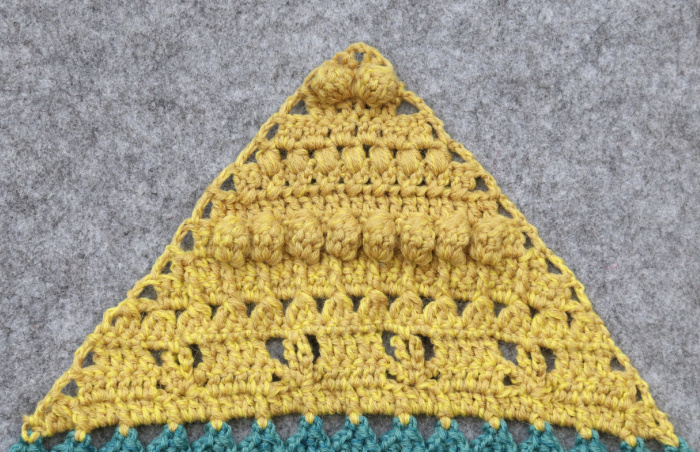
We will be completing the triangles in this part.
Row 52 (Colour A)
With WS facing, join your yarn by making a standing sc in the first Picot. (Ch 3, sc in the next Picot) 14 times. TURN.
Stitch Count: 15 sc and 14 ch-3 sps

Row 53 (Colour A)
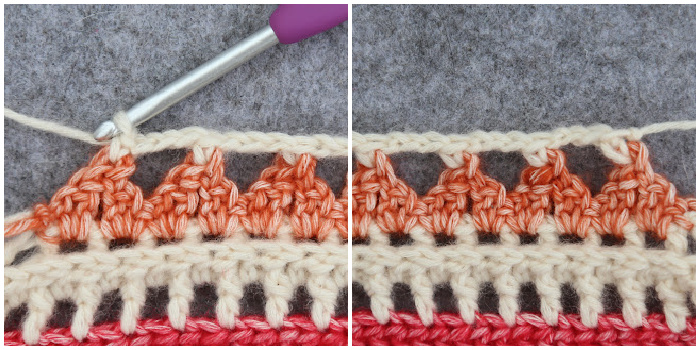
With RS facing, ch 3. Make a 3-dc Cluster in the first ch-3 sp. FPdc around the next sc. (Make 3 dc in the next ch-3 sp, FPdc around the next sc) 12 times. Make a 3-dc Cluster in the last ch-3 sp. Dc in the last sc. TURN.
Stitch Count: 13 FPdc, 38 dc, and 2 Clusters
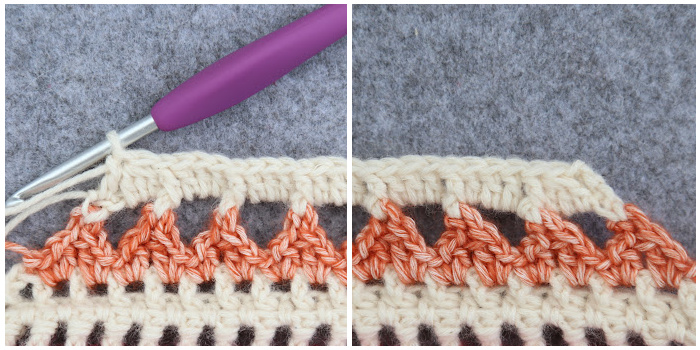

Row 54 (Colour A)
With WS facing, ch 3. Skip the next 2 sts. Dc in the next 6 sts. There should be one dc left before the FPdc. (Ch 3, skip the next 2 sts and sl st in the next st. Ch 8 and sl st into the same st so that you form a ch-8 loop. Ch 3 and skip the next 2 sts. Dc in the next 5 sts) 4 times. There should now be 4 sts left. Dc in the next st. Skip the next 2 sts and dc in the top of the beg ch-3. TURN.
Stitch Count: 29 dc, 8 ch-3 sp, and 4 ch-8 sp


Row 55 (Colour A)
With RS facing, ch 3. Skip the next 2 sts. Dc in the next 4 sts. (Ch 5, skip the two ch-3 sps and the ch-8 loop, and dc in the next 5 dc) 3 times. Ch 5, skip the two ch-3 sps and the ch-8 loop, and dc in the next 4 dc. Skip the next 2 sts and dc in the top of the beg ch-3. TURN.
Stitch Count: 25 dc and 4 ch-5 sp
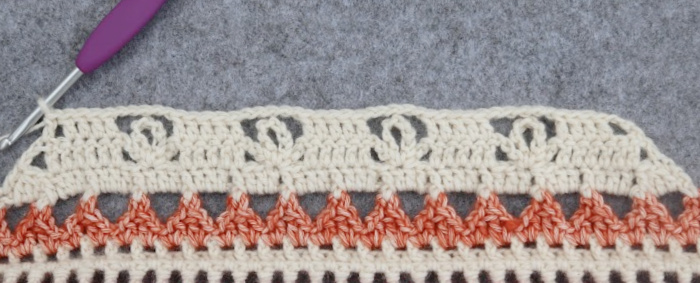

Row 56 (Colour A)
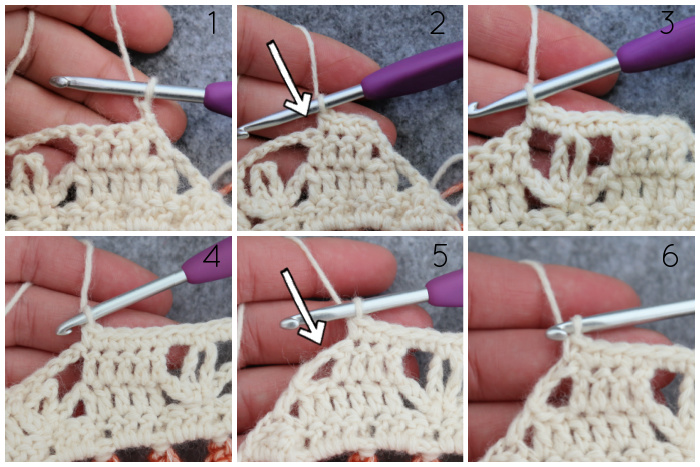
With WS facing, ch 1 (doesn’t count as a st) – Photo 1. Skip the first st. Sc in the next 3 sts {Photo 2}. Skip the next st {Indicated with an arrow in Photo 2}. (Make 5 sc into the ch-5 sp, catching the ch-8 loop with the central sc {Photo 3}. Sc in the next 5 st {Photo 4}) 3 times. Make 5 sc into the last ch-5 sp, remembering to catch the ch-8 loop with the central sc. Sc in the next 3 sts {Photo 5}. Skip the next st and sc in the top of the beg ch-3 {Photo 6}. TURN.
Stitch Count: 42 sc

Row 57 (Colour A) – Repeat of Row 19
With RS facing, ch 2, dc2tog over the next 2 sts. This is your first 3-dc Cluster and should fall over the first 3 sts. (Ch 2, make a 3-dc Cluster over the next 3 sts) 13 times. TURN.
Stitch Count: 14 Clusters and 13 ch-2 sps
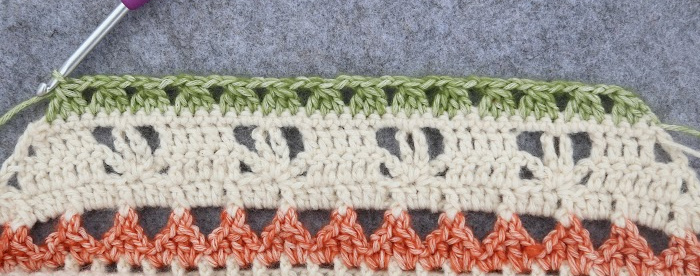

Rows 58 – 66 (Colour A)
Repeat Rows 20 – 28 (Part 2) in Colour A.
When you get to the end of Row 66, you will have completed one triangle. You will need to repeat Rows 52 to 66 for each side of the Part-4 square so that you end up with a square once again.
Round 67 (Colour A) *Also known as: “THE WORDY ROUND”*
This round has A LOT of words, so brace yourself. We are going to work all the way around Charlotte. It is not complicated; you just need to concentrate (almost as much as I had to concentrate to write this out!)
I strongly suggest that you watch the video for this round as you make it. That’s what I did this time around. Look at the 58 minute mark.
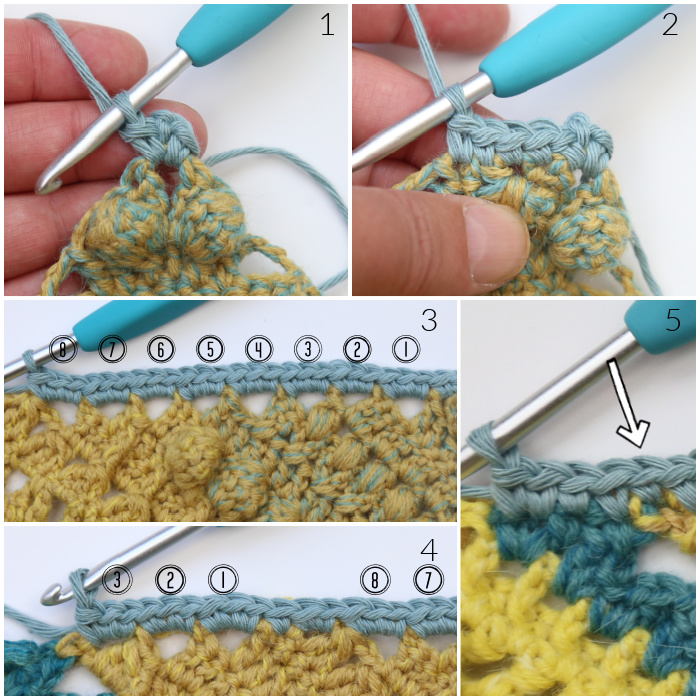
With RS facing, join your yarn by making a standing sc in any ch-2 corner sp. (Ch 2, sc) in the same sp. This is your first corner made – Photo 1.
*Sc in the next 3 sts. Sc between the 5-tr Bobble and the top of Row 65 of the Triangle {Photo 2}. Make 3 sc in the side of each of the next 8 rows {Photo 3}. Make 2 sc in the side of the Cluster. Sc in the side of the next row, which should be the sc row above the Banksia Flowers from Part 3. Make 3 sc in the side of each of the next 3 rows {Photo 4}. Sc in the side of the next row, which should be the (sc, ch 3) row above the Triangles {indicated with an arrow in Photo 5}. Working into the ‘Triangle row’, sc in the picot, skip the sc that closes the picot and sc in the next dc, sc in the next ch-1 sp, sc in the next sc {Photo 5}.
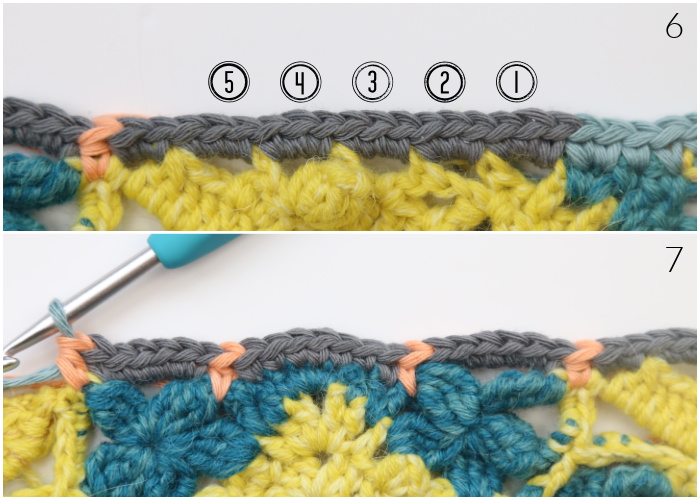
Note: There are 4 hdc in the next part. I have made them in peach so you can see where they fall.
Make 3 sc in the side of each of the next 5 rows. Make 2 sc in the side of the Cluster. Hdc in the FPsc at the top of the ‘Flower’ {Photo 6}. Make 6 sc in the next ch-5 sp from Round 42. Hdc between the next Petal and the next FPsc. Keeping the ch-6 from Round 42 behind your work, sc in each of the 7 corner sts from Round 41. The 4th sc should fall in the marked st from Round 41. Don’t remove your marker yet.
In fact, before you continue, you may want to check that the 75th st of this side falls in the st that contains the SM (see Note below). So please stop and count. You’ll be annoyed with me if your count is right and I made you waste your time. You’ll be SUPER annoyed at yourself if you don’t, and you end up having to redo the entire round!!!
Hdc between the next FPsc and the next Petal. Make 6 sc in the next ch-4 sp from Round 42. Hdc in the FPsc at the top of the ‘Flower’ {Photo 7}.
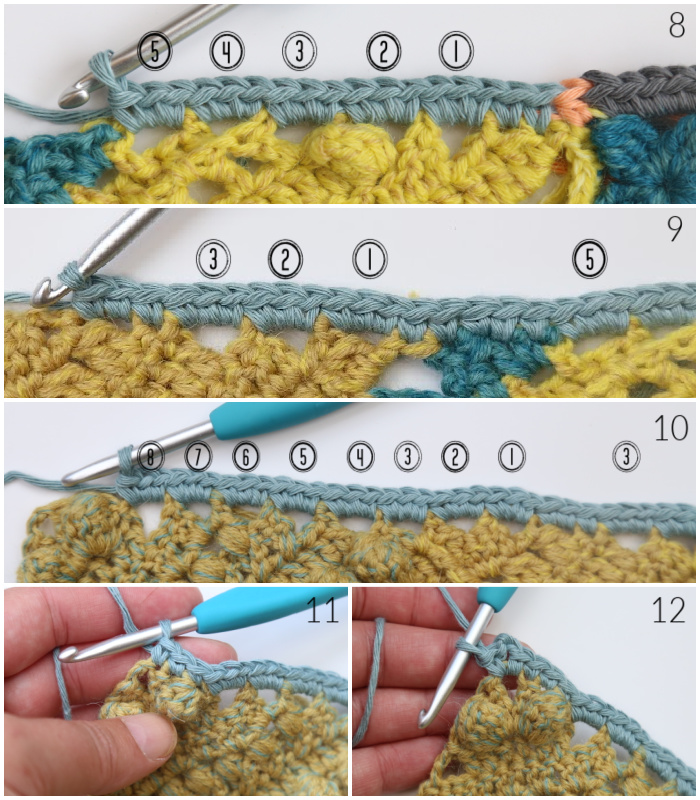
Make 2 sc in the side of the Cluster. Make 3 sc in the side of each of the next 5 rows {Photo 8}. Working into the ‘Triangle row’, sc in the next sc, sc in the next ch-1 sp, sc in the next dc, sc in the picot. Sc in the side of the next row, which should be the (sc, ch 3) row above the Triangles. Make 3 sc in the side of each of the next 3 rows. Sc in the side of the next row, which should be the sc row above the Banksia Flowers from Part 3. Make 2 sc in the side of the Cluster {Photo 9}. Make 3 sc in the side of each of the next 8 rows {Photo 10}. Skip the sl st. Sc in the last 3 sts {Photo 11}. (Sc, ch 2, sc) in the next ch-2 corner sp {Photo 12}.*
Repeat from * to * 3 more times, omitting the last corner on the last repeat. Join to the first sc with a sl st.
Stitch Count Per Side: 148 st {144 sc and 4 hdc –not including ch-2 corner sps}
Note: The 75th stitch of each side should fall in the marked stitch from Round 41. Once you have completed all four sides and you have checked your stitch counts, please go ahead and remove those stitch markers.
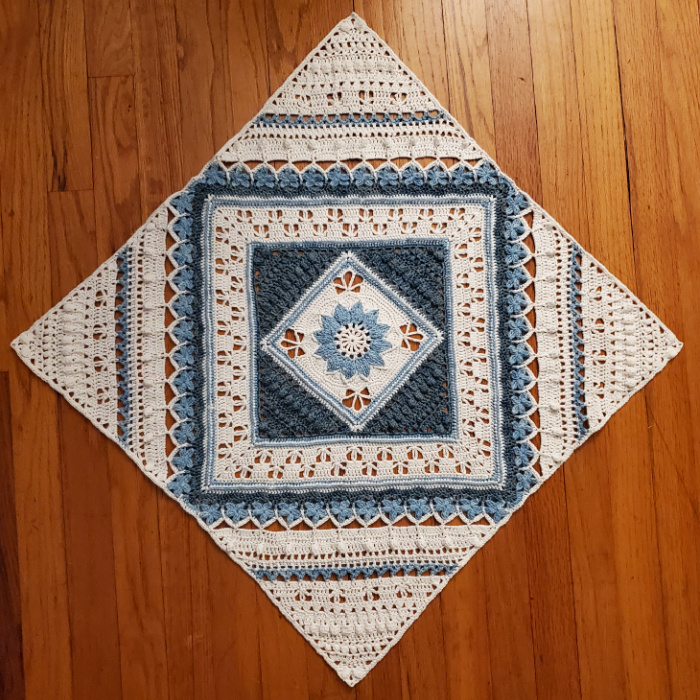
Wow… I think that deserves a good strong cup of tea and 30 minutes of doing absolutely nothing!
Space for Grace Colourway by Sabi Bulla
Have a wonderful week!!

This blog post contains affiliate links. I only link to products I personally use or would use. All opinions are my own.


Kelsey says
Hi Dedri!
Does the 75 ct on one half of the side include the sc from the corner, or not?
Thank you for the gorgeous pattern!
Jenny Lowman says
The 75th stitch does include the first sc of the corner, yes. You should have marked this stitch previously :)
Scarlett says
I think the last row deserves something stronger than a cup of tea. ;)
Carolyn says
This is a masterpiece, Dedri! But for so many other reasons, I am so happy God brought you into my life. I am so very blessed to have you as my friend. Love to you!