Welcome to Part 12 of Charlotte’s Universe. I am getting a little bit sad as the end draws near. *Mental Shake and Reframe* That just means that a new adventure is on the horizon. Ahhh, that’s better!
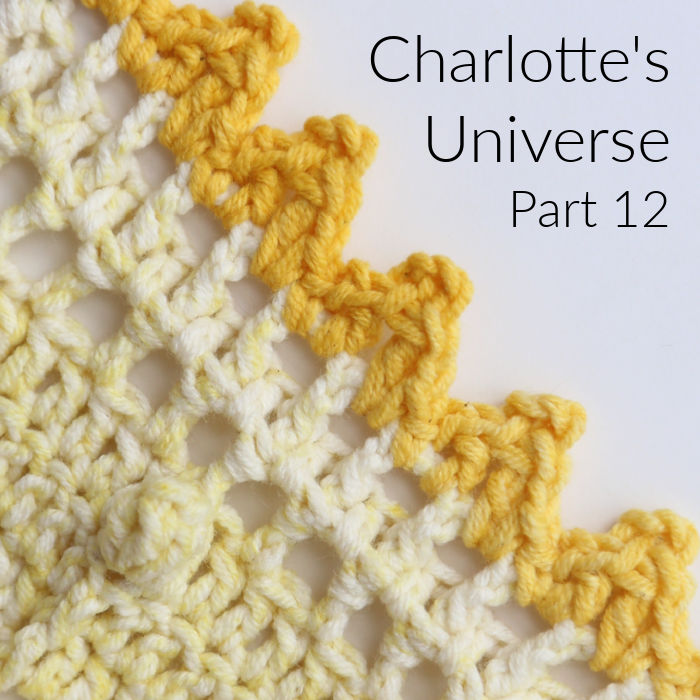
In this part, we will be revisiting Part 5, but with way more stitches. Hopefully, you will find the rhythm of the back-and-forth without colour changes soothing. Remember that you will need A LOT of stitch markers/scrap yarn markers for this part.
Charlotte’s Universe Part 12: {Almost There}
Resources
- You can find links to the right and left-handed video tutorials (US) for Part 12 HERE on It’s All in a Nutshell.
- Add this pattern to your Ravelry Queue.
Translations
- Dutch Information and Links by Dianne Baan
- German Translation – by Sabi Bulla and Silke Schippa-Witte
- Hebrew Translation by Michal Ben-Hur, Iris Fait, Tami Sultan Nudelman, Tali Shchori, and Sarit Grinberg
- Japanese Information and Links by Masako Kawahara
- Swedish Translation by Åza Karlsson and Ulrika Larsson
Abbreviations and Special Stitches
Please see Special Stitches and Techniques (worth bookmarking or saving as a PDF as we go forward – Take a look at THIS TUTORIAL if you don’t know how to use the print-friendly button).
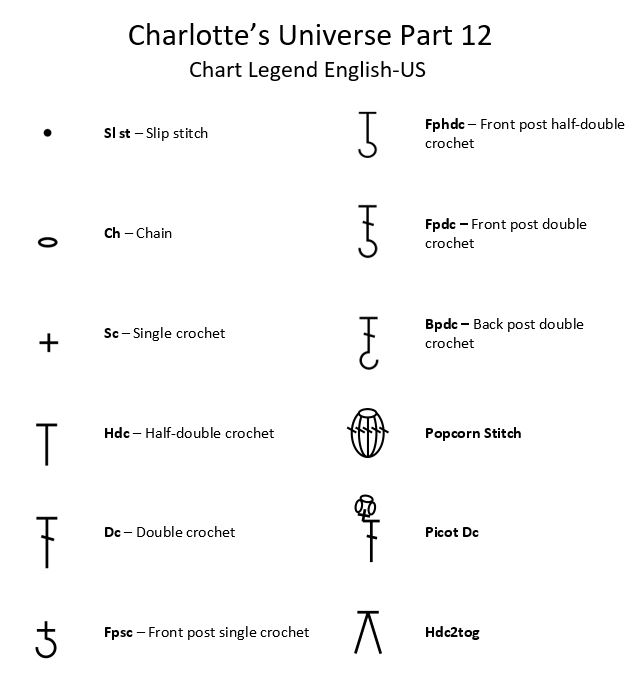
Charts
Credit: Masako Kawahara from Crochet_Hmmm
Please follow the charts in a counter-clockwise direction, regardless of whether you are right or left-handed.
Colours Per Row
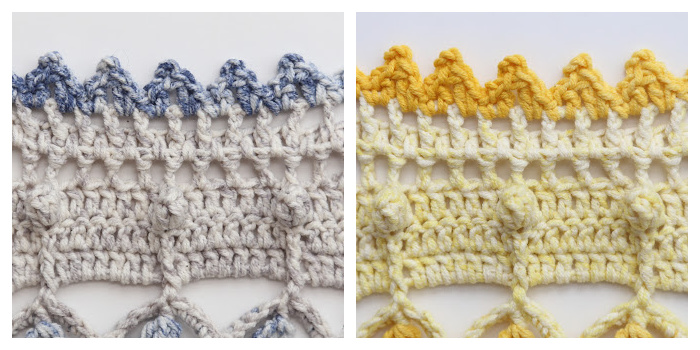
Vintage and Sunshine
Follow the colour reference next to each row title {for example, Row 1 (Colour A)}.
Pink Charlie
- Row 103 – B
- Row 104 – B
- Row 105 – B
- Row 106 – B
- Row 107 – B
- Row 108 – A
- Row 109 – A
- Row 110 – A
- Row 111 – C
Bonus Colourways
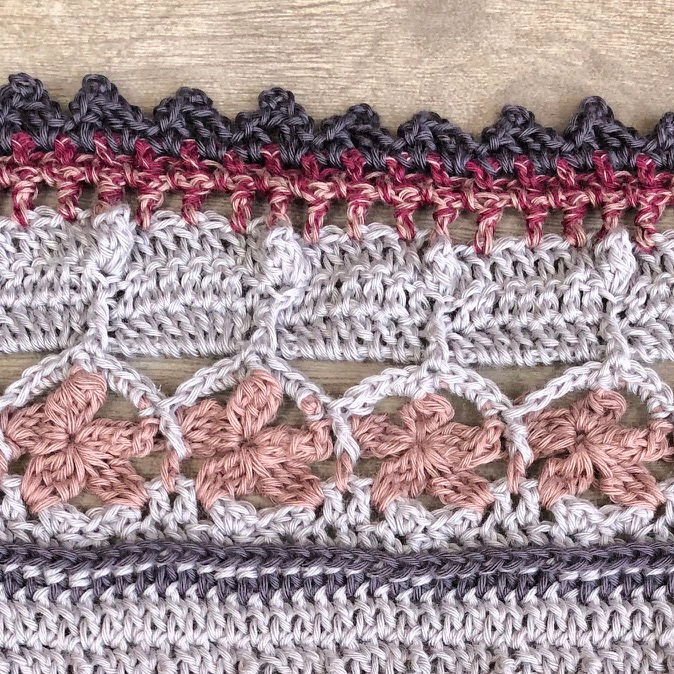
- Sunflower Charlotte – Michael Wassenaar (Chunky Monkey)
- Space for Grace – Sabi Bulla (Skies Light)
- Latte With Love – Jenny Lowman (Scheepjes Softfun)
Esther Dijkstra will be sharing her Scheepjes Stonewashed Colours Per Round HERE.
Instructions
© Dedri Uys and Scheepjes 2021. All Rights Reserved.
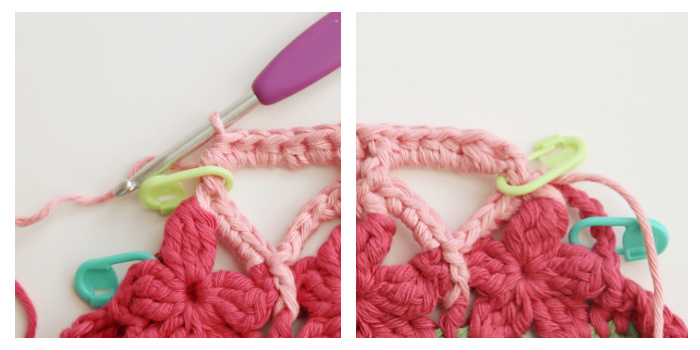
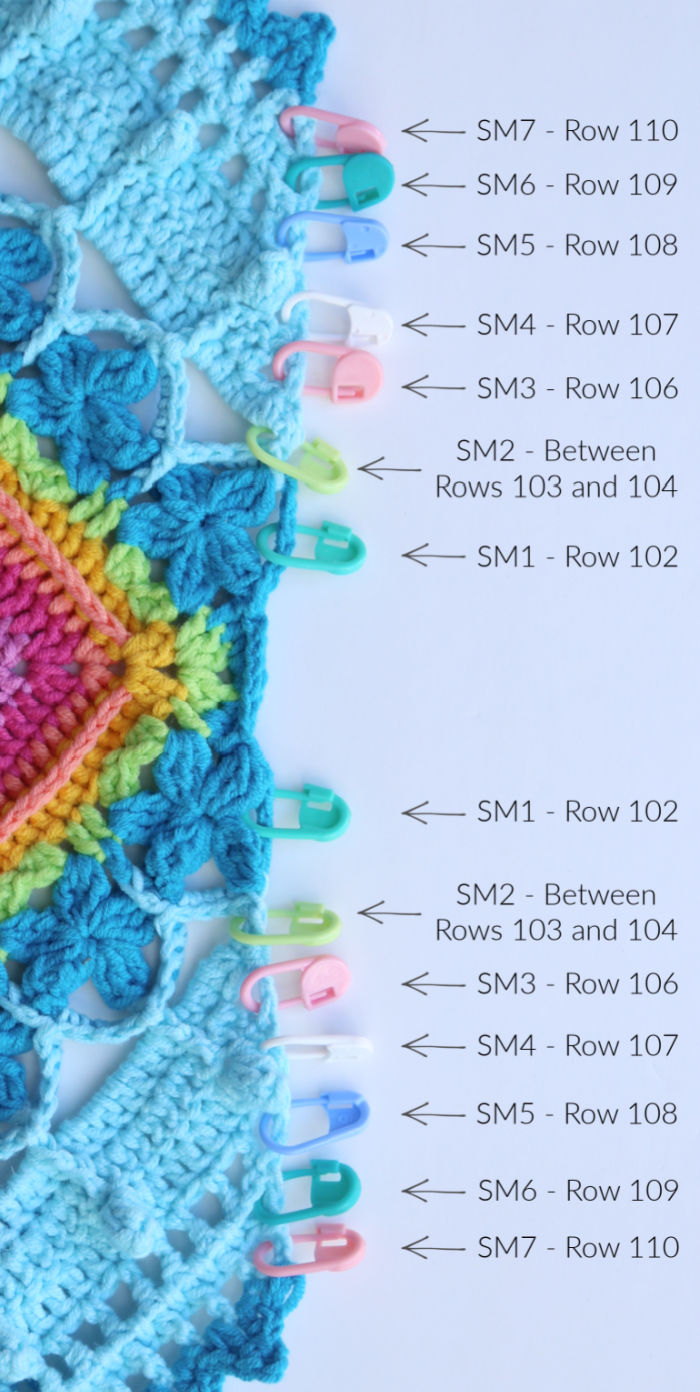
Part 12 is a repeat of Part 5, but with more stitches. You will be marking the start and end of some (specified) rows with a SM in this part. Do not remove these SM until instructed to do so in the next part (see the photo at end of this part).
- Rows 103 – 105 are similar to Rows 43 – 45, but with minor changes.
- Rows 106 – 111 are a repeat of Rows 46 – 51 (just with more repeats), so they will be written-only, with a single photo at the end of each row to show the placement of the SM. If you need step-by-step help with (or charts for) those rows, please see Part 5 of Charlotte’s Universe. I have included the corresponding Row numbers in {grey brackets}.
Row 103 (Colour A) – Arches
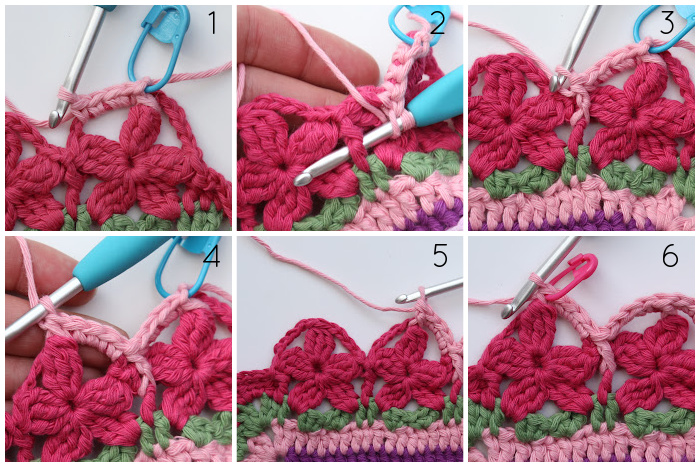
With RS facing, join your yarn by making a FPsc around the second (marked) 3-tr Bobble of any side. Remove the SM and place it in the FPsc to help you identify it in the next row. (Make 4 sc in the next ch-5 sp {Photo 1}. FPdc around the next dc from Round 101, two rounds down {Photos 2 and 3}. Make 4 sc in the next ch-4 sp. FPhdc around the next central 3-tr Bobble {Photo 4}) 27 times. There should now be one flower left {Photo 5}. Make 4 sc in the next ch-5 sp. FPdc around the next dc from Round 101. Make 4 sc in the next ch-4 sp. FPsc around the last central 3-tr Bobble {Photo 6}. Mark this FPsc with a SM to help you identify it in Row 105. TURN.
Stitch Count: 281 sts {224 sc, 2 FPsc, 27 FPhdc and 28 FPdc}

Row 104 (Colour A) – Chains
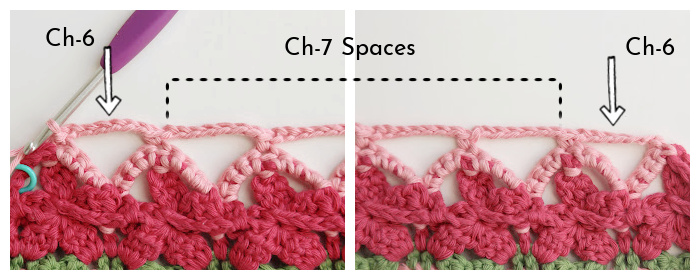
Please note that the first and last ch sps are ch-6, not ch-7.
With WS facing, ch 6, sc in the next FPhdc. You will recognize the FPhdc by the loop at the back. (Ch 7, sc in the next FPhdc) 26 times. Ch 6 and sl st into the last (marked) FPsc. Remove the SM and TURN.
You will be placing a SM between Rows 103 and 104 at the start and end of the row but doing so now will make the next row a bit fiddly, so I will remind you to do that at the end of Row 105.
Stitch Count: 27 sc, 2 ch-6 sp, and 26 ch-7 sps (not including last sl st)

Row 105 (Colour A)
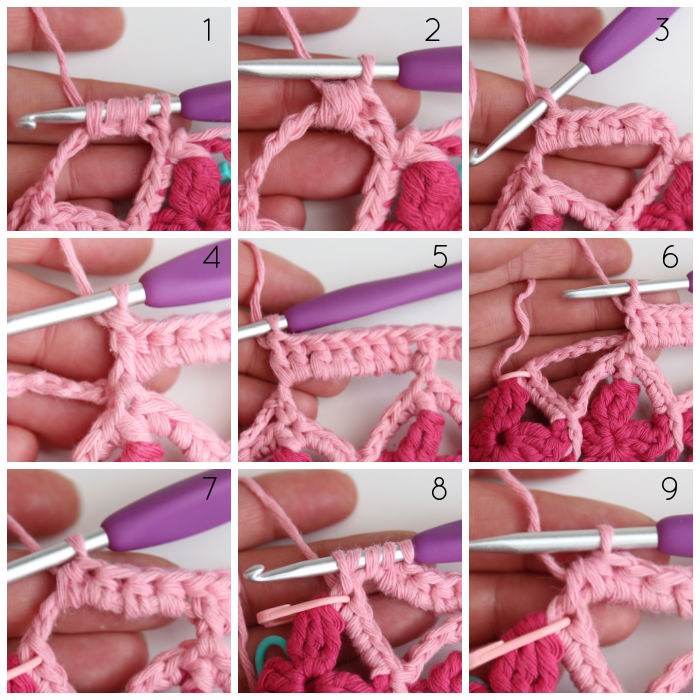
The 7 dc made into the ch-7 sps won’t take up all the space. Either make sure that you space them evenly when making them or move them along with your fingers once done. Tedious, I know, but necessary.
With RS facing, ch 1, hdc2tog in the next ch-6 sp {Photos 1 and 2}. Make 4 hdc in the same ch-6 sp {Photo 3}. (FPdc around the next sc {Photo 4}, make 7 dc in the next ch-7 sp {Photo 5}) 26 times. FPdc around the next sc {Photo 6}. Make 4 hdc in the last ch-6 sp {Photo 7}. Hdc2tog, placing the first ‘leg’ in the last ch-6 sp, and the last ‘leg’ in the (marked) FPsc from Row 103 {Photos 8 and 9}. Remove the SM and TURN.

Place a SM between Rows 103 and 104 at the start and end of the row (in other words, in the first and last ch-6 sp).
Stitch Count: 219 sts {8 hdc, 2 hdc2tog, 182 dc, and 27 FPdc}
Row 106 (Colour A) {46}
With WS facing, ch 3. Skip the next 2 st. Dc in the next 2 st. (BPdc around the next st, which will be the FPdc from the previous round. Dc in the next 7 sts) 26 times. BPdc around the next st. Dc in the next 2 st. Skip the next 2 st and make a dc in the hdc2tog. TURN.
Place a SM around the first and last st of Row 106.
Stitch Count: 215 sts {188 dc and 27 BPdc}
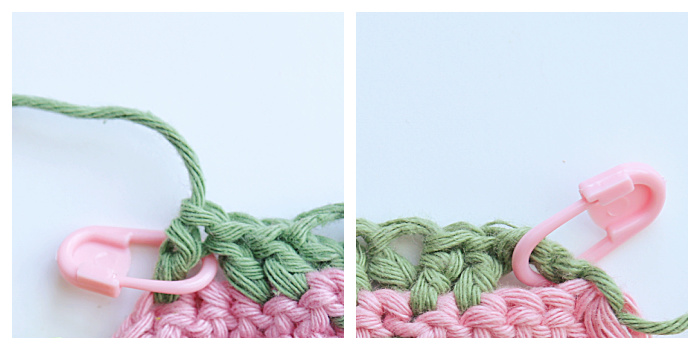
Row 107 (Colour A) {47}
With RS facing, ch 3. Skip the next 2 st. (Make a Popcorn in the next st, which should be the BPdc from the previous row. Dc in the next 7 sts) 26 times. Make a Popcorn in the next st. Skip the next 2 st and make a dc in the top of the beg ch-3. TURN.
Place a SM around the first and last st of Row 107.
Stitch Count: 211 sts {184 dc and 27 Popcorns}
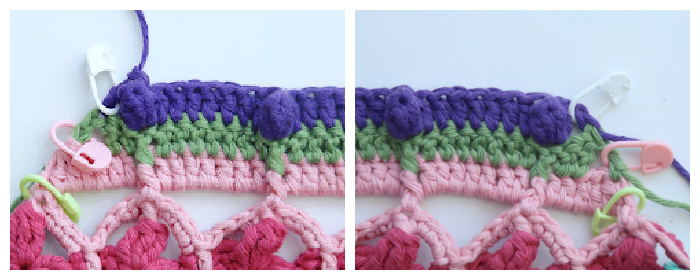
Row 108 (Colour A) {48}
With WS facing, ch 3. Skip the next 2 st, which will be the Popcorn and the next dc. *(Dc in the next st, ch 1 and skip the next st) 3 times. BPdc around the next Popcorn, ch 1 and skip the next st.*
Repeat from * to * 24 more times. (Dc in the next st, ch 1 and skip the next st) twice. Dc in the next st. Skip the next 2 st and make a dc in the top of the beg ch-3. TURN.
Place a SM around the first and last st of Row 108.
Stitch Count: 207 sts {80 dc, 25 BPdc, and 102 ch-1 sps}
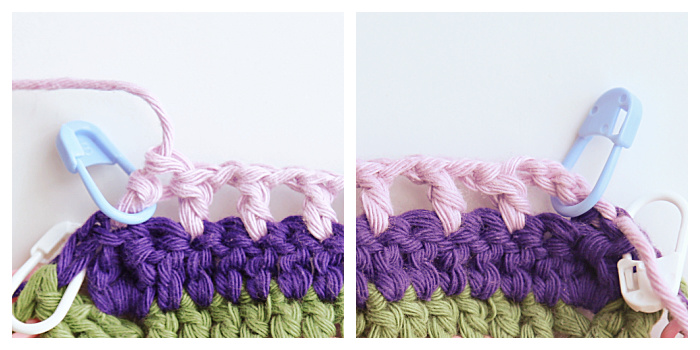
Row 109 (Colour A) {49}
With RS facing, ch 3. Skip the next st and the first ch-1 sp. (BPdc around the next st, hdc in the next ch-1 sp) 100 times. BPdc around the next st. Skip the last ch-1 sp and the next st. Dc in the top of the beg ch-3. TURN.
Place a SM around the first and last st of Row 109.
Stitch Count: 203 sts {101 BPdc, 2 dc, and 100 hdc}
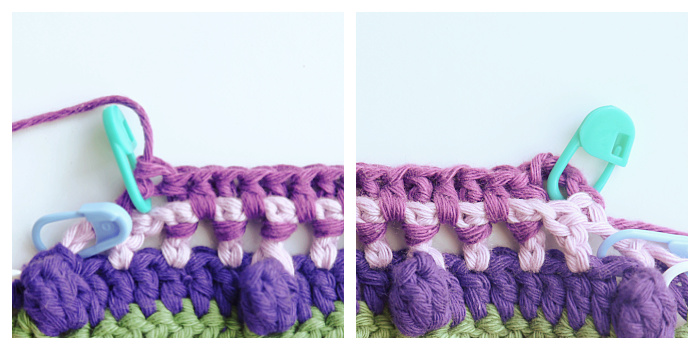
Row 110 (Colour A) {50}
With WS facing, ch 3. Skip the next 2 sts, which will be the BPdc and the hdc. (BPdc around the next BPdc, ch 1 and skip the next hdc) 98 times. BPdc around the next BPdc. Skip the next 2 sts and dc in the top of the beg ch-3. Fasten off and TURN.
Place a SM around the first and last st of Row 110.
Stitch Count: 99 BPdc, 2 dc, and 98 ch-1 sps
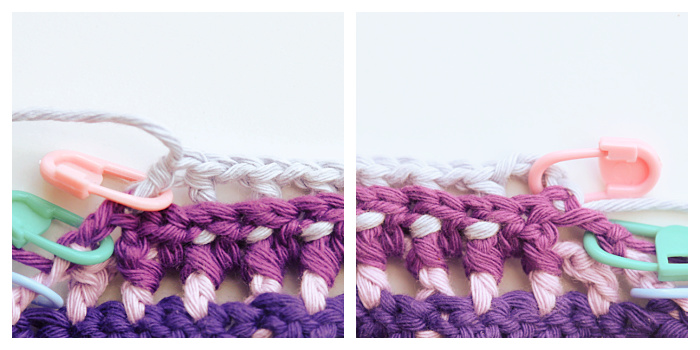
Row 111 (Colour B) – Triangles {51}
With RS facing, join your yarn by making a sl st in the first dc. Skip the next st. ([Sc, ch 1, Picot Dc] in the next ch-1 sp. [Dc, ch 1, sc] in the next ch-1 sp) 49 times. Skip the next dc and make a sl st in the top of the beg ch-3. Fasten off and TURN.
Stitch Count: 49 Triangles {each consisting of 2 sc, 1 dc, 1 Picot Dc, and 2 ch-1 sps}.
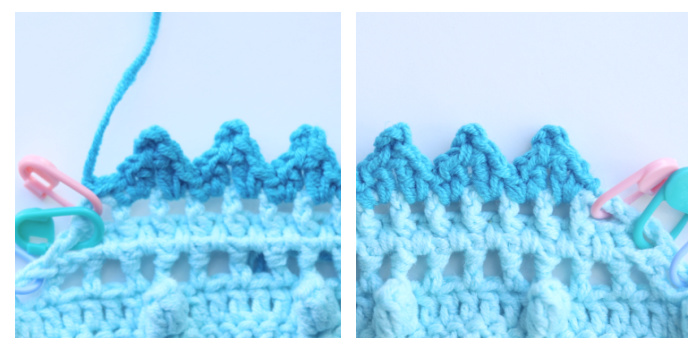
When you get to the end of Row 111, you will have completed the first side. You will need to repeat Rows 103 to 110 for each side of the Part-11 square.
Take a moment to check that you have marked the relevant spaces correctly. And you may want to save a screenshot of the photo below so that you can refer back to it next week.

This blog post contains affiliate links. I only link to products I personally use or would use. All opinions are my own.


Mart-Mari says
There is a difference between row 105 in video tutorial and written instructions.( she refers to the previous arches, but now it is different. Is it best to follow written? The hdc stitches are much shorter than dcs?
Dedri Uys says
Hi Mart-Mari, I will check the video. Always follow what the written pattern says. The differences are subtle, but they make a subtle difference to the neatness of the corners. Enjoy!
Elda Da Fonseca says
Thanks. Thanks th aka for this journey!