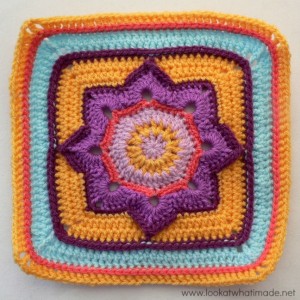
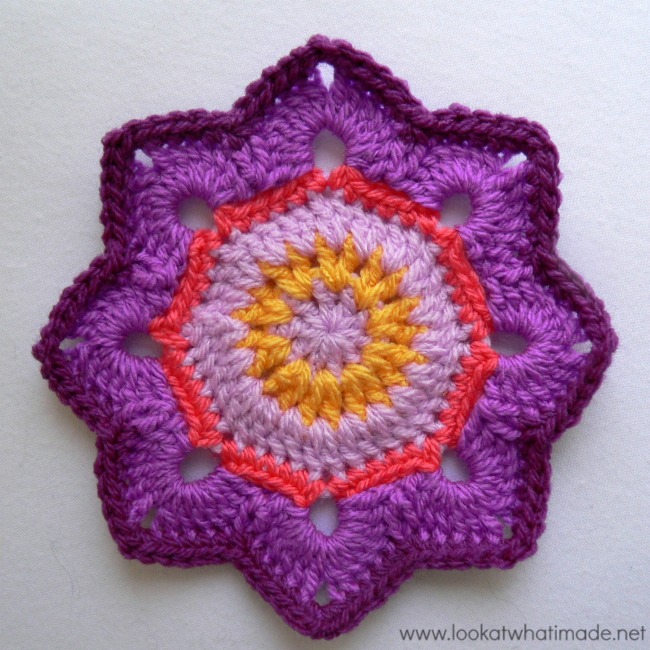
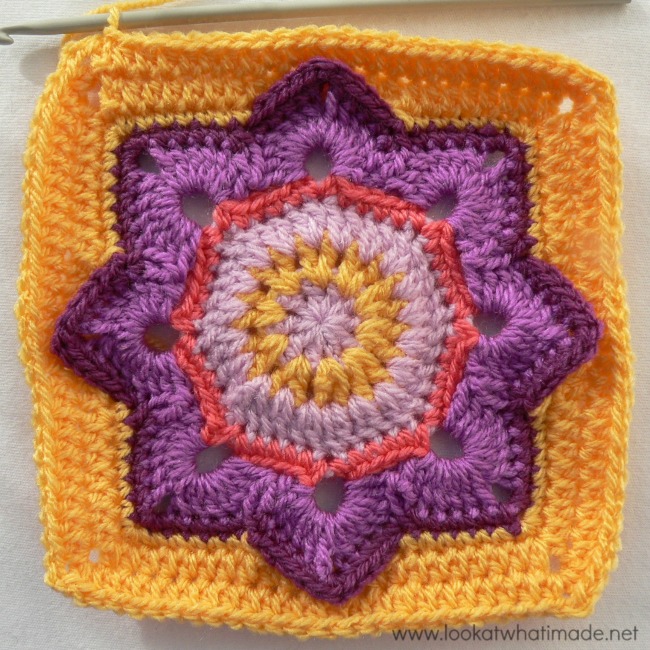
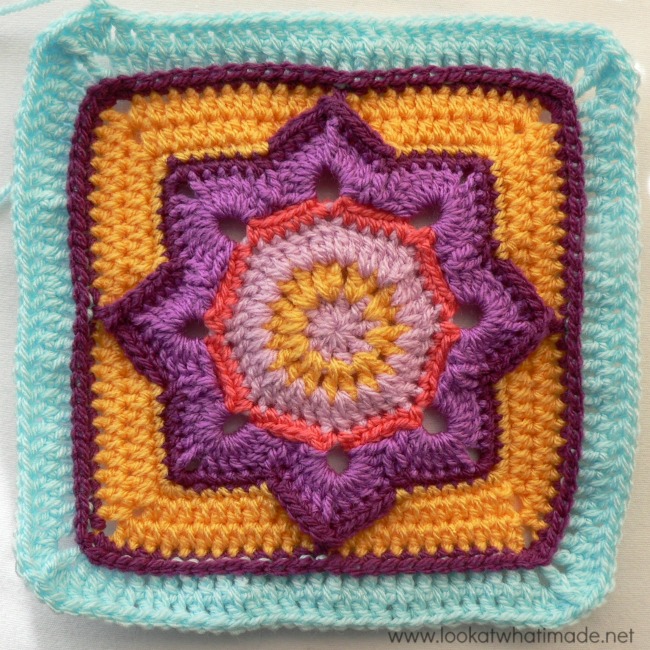
 It’s Week 7 of the Official CCC Social Group CAL (crochet-along) and this week’s block is Eight Pointed Flower by Julie Yeager. You can find all of her patterns here in her Ravelry Store. My favourite has got to be her Garden State Afghan.
If you are not familiar with the Block a Week CAL, but would like to join in, you can find all the relevant information HERE.
I found the Eight Pointed Flower Square fairly simple to make. The pattern is uncluttered and very well written. Her instructions are concise and clear.
There are three speciality stitches:
- Sc dec over 6
- Back Post Double Crochet
- Front Post Double Crochet
Each of these stitches are explained in the photo tutorial below.
Update: Rounds 4,6,7,10 and 13 all start with a sc join instead of a sl st join. This is called a “standing” single crochet and you can find my quick tutorial for it here.
If you are interested in learning more about standing half-double crochet stitches, see this photo-tutorial by Crochetncrafts. For standing double crochet stitches, see this tutorial by Tamara from Moogly.
Eight Pointed Flower
Pattern
- You can find the pattern here on Ravelry.
Suggested Materials
- 5.5 mm Clover Amour Crochet Hook (US I/9 UK 5)
- Worsted weight yarn
Size
- Using the hook and yarn specified, your square should be a nice even 12″ when you are done. The pattern includes instructions for a 9″ square as well.
- Using a 4 mm crochet hook (US G/6 UK 8) and double knit yarn, as I have done, your finished square will be about 8″ big.
My Yarn and Colour Choices
I am using Stylecraft Special DK.
- Clematis (Rounds 1 and 3)
- Saffron (Rounds 2, 7-9, 14, and Optional Round 15)
- Shrimp (Rounds 4 and 13)
- Magenta (Round 5)
- Plum (Rounds 6 and 10)
- Sherbet (Rounds 11 and 12)
Notes
- The initial ch st’s in each round are counted as a stitch.
- Stitch counts are supplied for each round. They are all clear and correct.
- US Crochet Terminology used. (See this comparative chart if you need help transcribing from US to UK)
- Please Note: The yarn used in most of the tutorial photos is Drops Paris Cotton.
Help With The Eight Pointed Flower Crochet Square
Like I have already mentioned, you can find the pattern HERE. The tips and tricks below are supplementary to the pattern, meaning that they will only help you with the pattern should you get stuck. This photo-walkthrough is NOT the actual pattern.
Thank you very much to Julie Yeager for giving us permission to do this photo-tutorial for her Eight Pointed Flower. And a special thank you to Kimberly Slifer for letting me do these tutorials and for obtaining the necessary permission.
Round 1
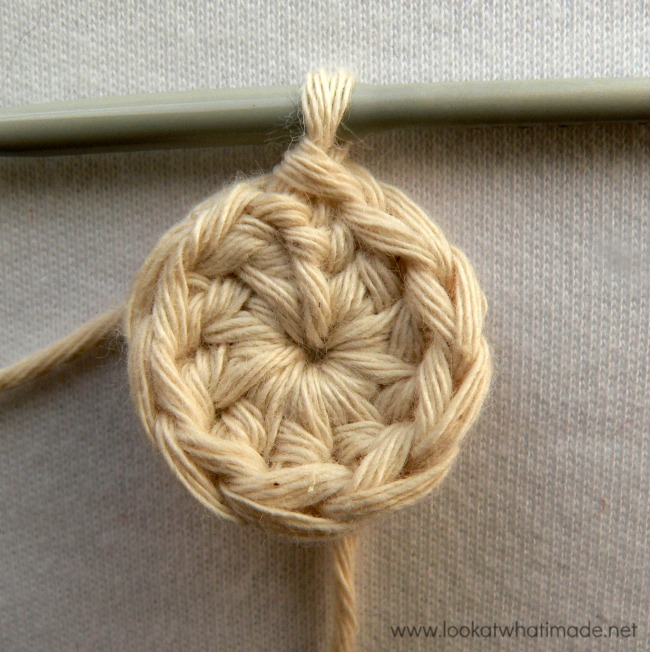
You can start this round with a magic ring stead of the initial ch-4. If you are not familiar with working into a magic ring, this video tutorial from The Crochet Crowd is very good.
Stitch count: 10 dc’s. Remember that the initial ch-3 into the ring counts as a dc.
Round 2
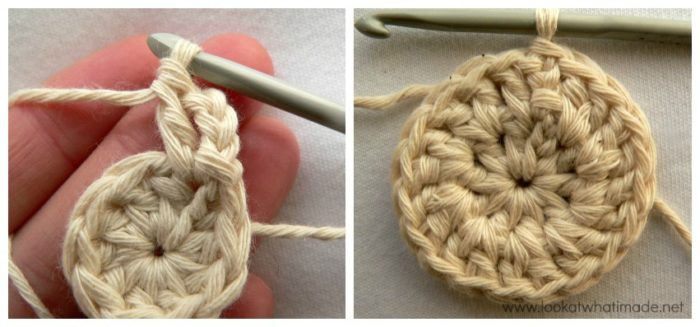
For Round 2 you are advised to join with a sl st into the space between any 2 dc’s. That means between the posts (legs) of the two stitches, not into the loops as you normally would. You will work all the stitches in Rounds 2 and 3 into the spaces between stitches.
I wanted to show you how to start these two rounds with AND without colour changes, so for Round 2 I did not change colour. Instead I started this round by making a sl st into the space between the initial ch-3 and the first dc. I then made my first dc in this same space (as instructed) and then made 2 dc’s in each subsequent space (as instructed). (I did change colour at the beginning of Round 3, so skip to those photos if you are changing colours as well.)
Round 3
Join your new colour to any space between 2 dc’s with a sl st. Ch 3 and dc in the same space. This counts as your first 2 dc’s. Make the rest of the round as instructed.
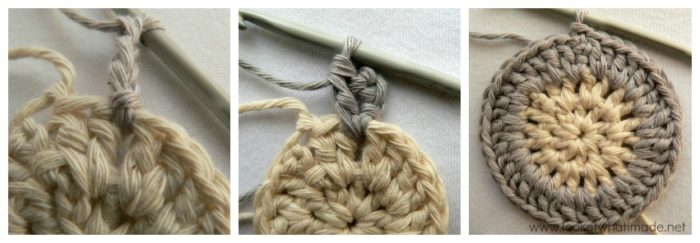
This is what my little “square” looked like at the end of Round 3:
Stitch count: 40 dc’s
Round 4
Round 4 is straightforward, but I thought you might like some visuals.
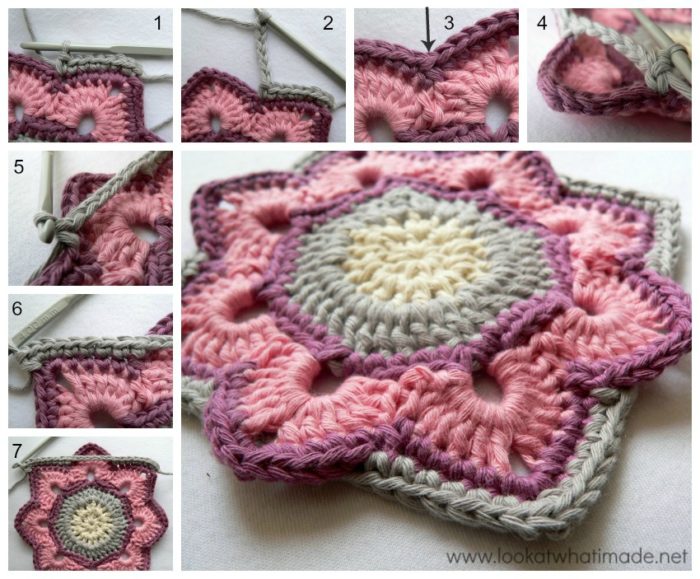
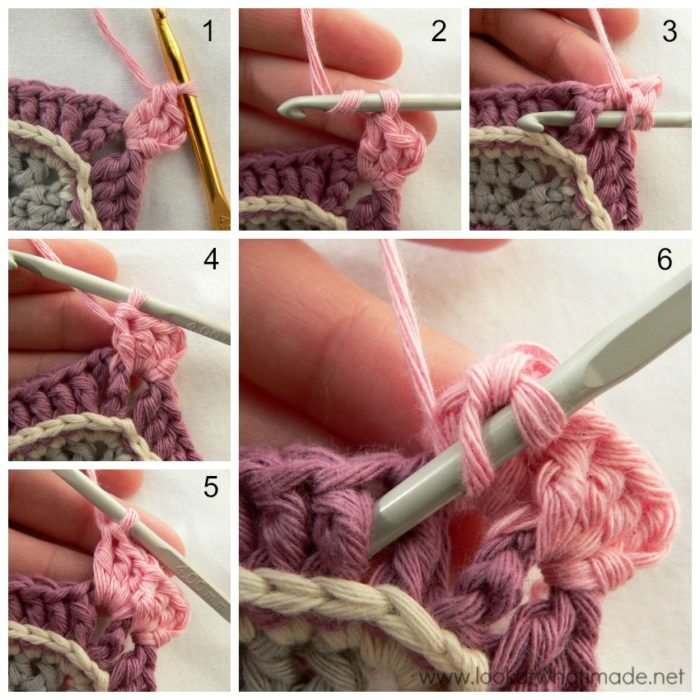
Start with a sc in any stitch (remember that photo-tutorial I mentioned earlier!). Ch 5 (Photo 1) and sc in the same st (Photo 2). This forms a ch-5 loop. Sc in the next 4 st’s (Photo 3). Repeat these instructions 7 more times so that you end up with 8 ch-5 loops, each separated by 4 sc’s. Photo 4 shows 2 completed repeats.
Photo 5 shows the completed round before joining with a sl st. You will need to sl st to the first sc, which is indicated with an arrow in Photo 5.
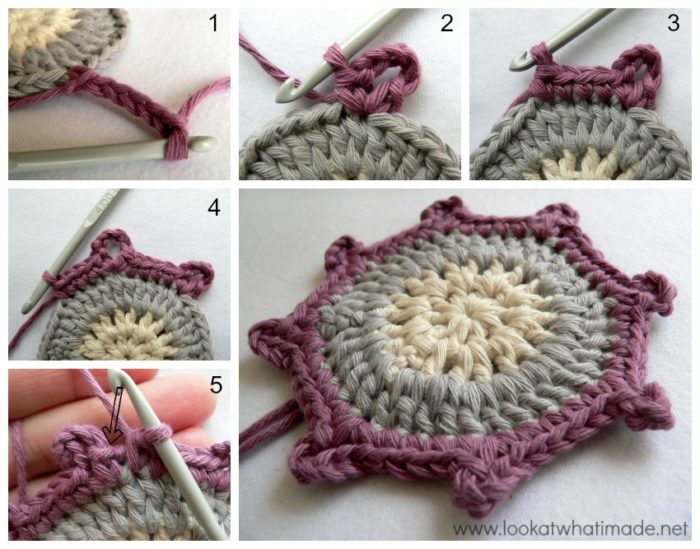 Here is my completed Round 4. I was a bit leery about the Shrimp, but decided to keep it.
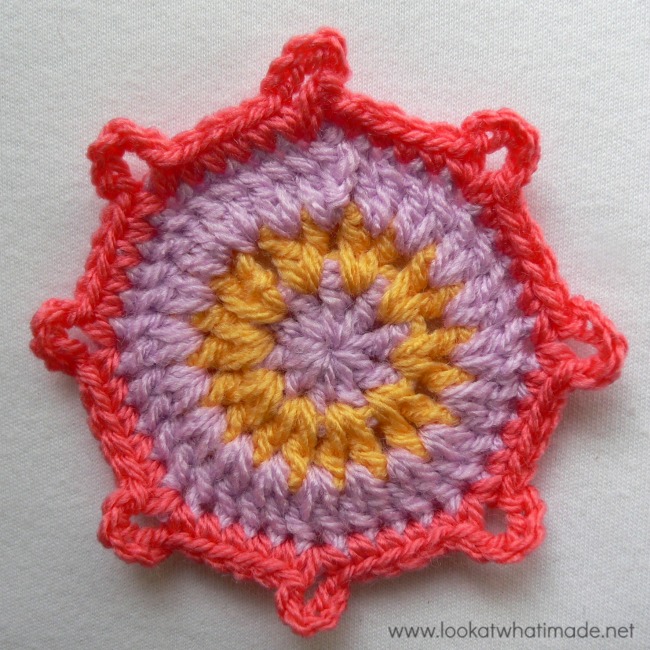
Stitch count: 48 sc’s, 8 ch-5 loops
Round 5
In Round 5 you will be making the petals. Each petal consists of (7 dc, ch-3, 7 dc) worked into a ch-5 loop. The three chain stitches will form the pointy end of each petal.
To make the first petal: Join your yarn with a sl st into any ch-5 loop. Ch 3 (counts as first dc – see Photo 1) and make 6 dc’s into the ch-5 loop. Ch 3 to form the pointy end of the petal (Photo 2) and make 7 dc’s into the same ch-5 loop (Photo 3).
When you hop from one petal to the next, make sure that you keep your tension so that the last stitch of one petal and the first st of the next petal are nice and snug and cozied up right next to each other (Photo 4).
When making the petals you will notice that the first 7 dc’s almost fill the ch-5 loop up completely (Photo 5). Scoot the stitches up as you work so that you can fit all 14 dc’s into each ch-5 loop (Photo 6).
Photo 7 shows 2 completed petals.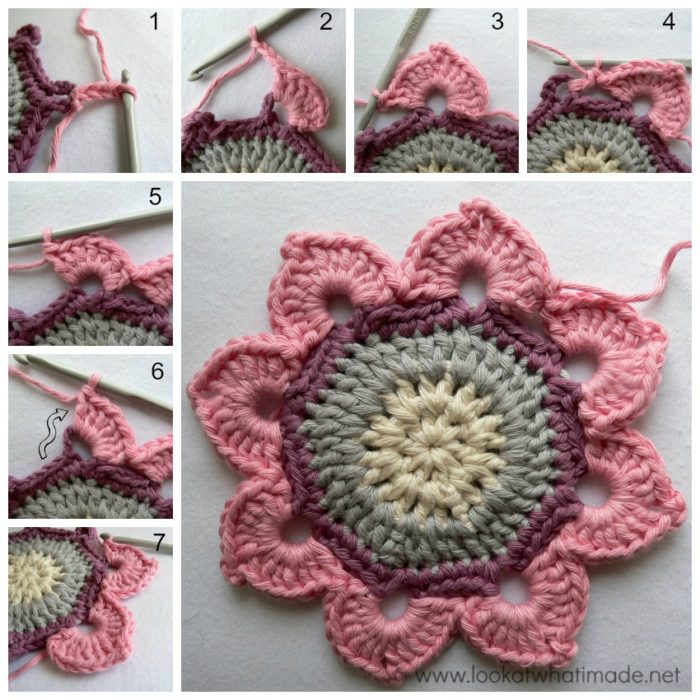 My completed Round 5. I think I prefer the muted tones of the Drops Paris Cotton…
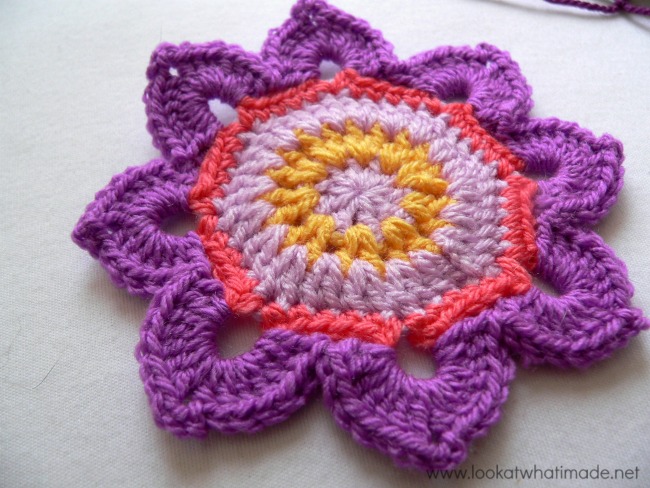
Stitch count: 112 dc, 8 ch-3 spaces
Round 6
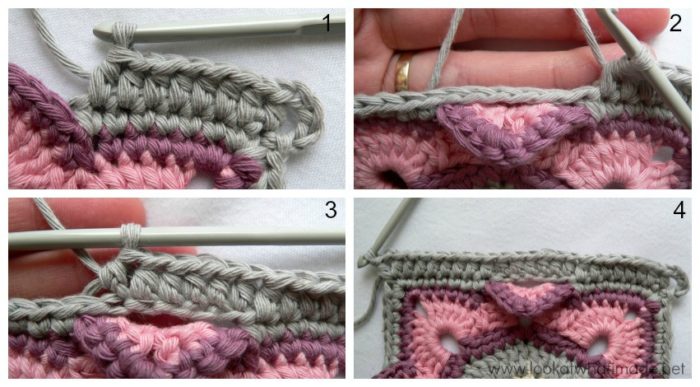
In Round 6 you will be using the sc dec over 6 stitches. Photo 1 below shows the stitches up to the sc dec over 6. To make the sc dec over 6, pull up a loop in the next st (Photo 2). Skip 4 st’s and pull up a loop in the 5th st (Photo 3). Yarn over and pull through all 3 loops on your hook (Photo 4). You now have 1 sc where you had 6 sc’s before.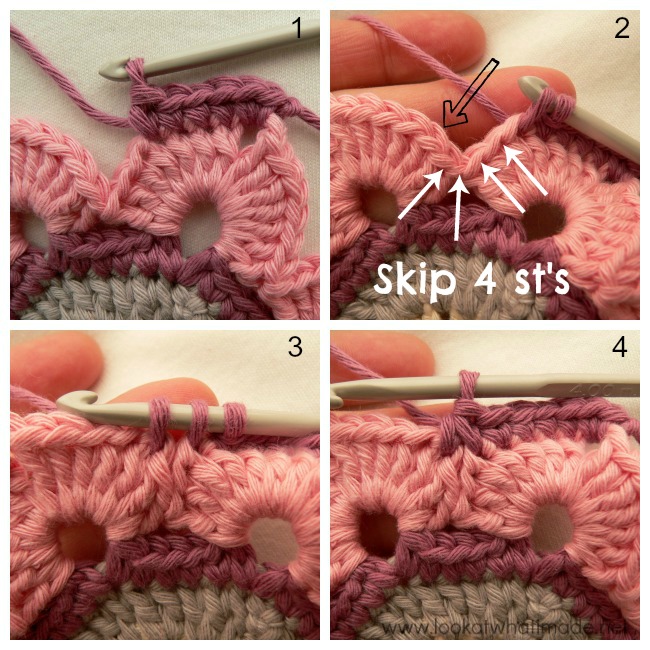
Photo 5 shows the 4 sc’s before the ch-3 space. Photo 6 shows the 3 sc’s in the ch-3 space.
Hint: When you need to sc dec over 6 OVER the initial sl st join (which will be between the petals), it can be a bit tricky counting the 4 stitches to skip. Instead, count backwards from the next ch-3 space. The stitch you want to pull your second loop up in will be the 5th st from the ch-3 space (see arrows in Photo 7). This will leave 4 stitches into which you will sc before the ch-3 space.
I hope that makes sense.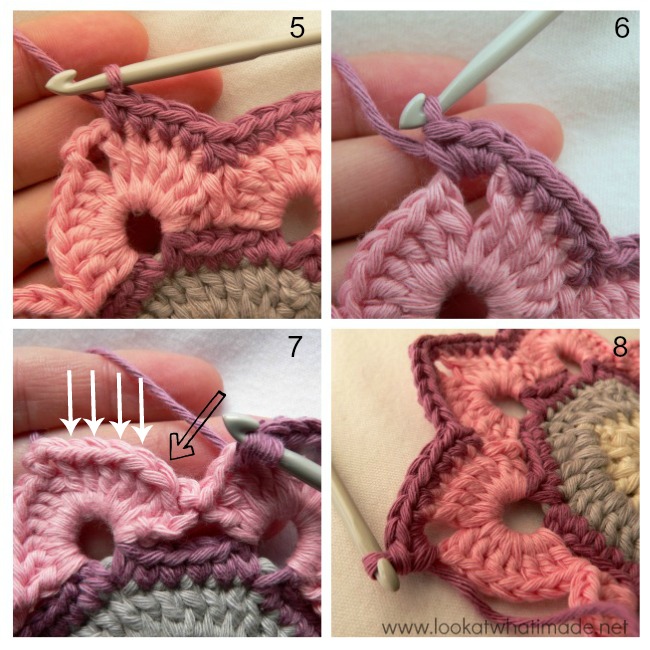 At the end of this round the instructions say to ommit the last 2 sc’s. All this means is that you will only make 1 sc into the last ch-3 space as it will already contain 2 of the 3 needed sc’s.
Stitch count: 96 st’s
Round 7
Round 7 starts with 2 sc’s in the second sc of any point (petal tip) around. You will then sc in the next 6 stitches (Photo 1). The last sc will fall in the sc dec over 6 from the previous round. You will see that the sc dec over 6 makes a visible little knot. Photo 3 below shows the sc dec over 6.
Now ch 6, relaxing your tension (Photo 2). If you keep the same tension as for all the other stitches, the chain will cause the petal to bulge when you attach the chain to the next petal (Photo 4).
Skip 11 st’s and sc in the next 6 st’s. If you’re not in the mood for counting, the first sc will fall in the next sc dec over 6. See Photo 5, which shows you the first sc made in the sc dec over 6 AND the flat, loose chain.
Make 3 sc’s in the next st, which will be the central sc at the tip of the petal (Photo 6).
This is one of your four sides done (Photo 7). Repeat for the other 3 sides. When you get to the end the pattern again tells you to omit the last 2 sc’s. This is the same as at the end of Round 6.
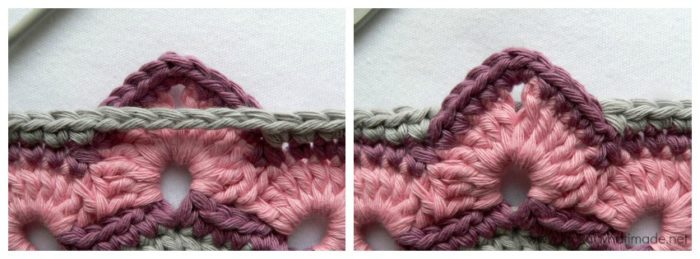
The pattern also tells you to place the petal in front of the ch-6. Don’t worry about that now. It is easier to work with the petal behind the chain. At the end of the round, just pop the petals to the front of the ch-6’s.
Round 7 done and dusted. Liking it more now that the yellow comes back into play.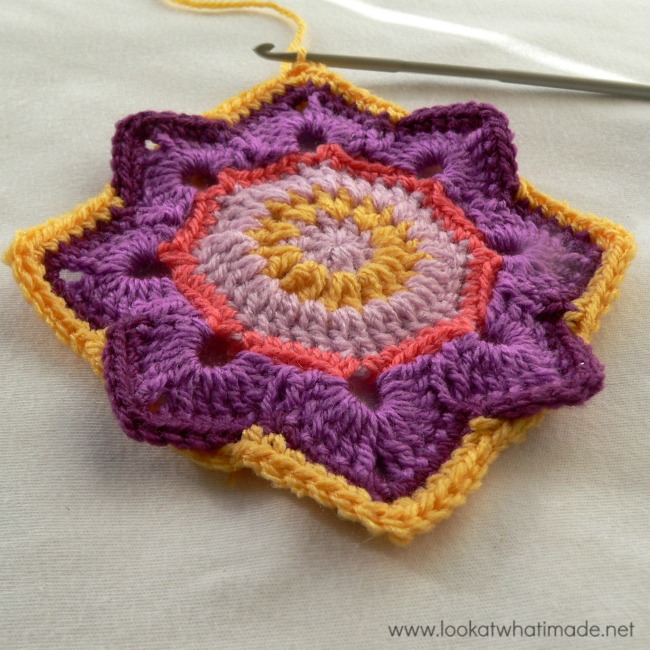
Stitch counts: 60 sc’s, 4 ch-6 spaces
Round 8
Round 8 is straightforward again. And so, for that matter, are Rounds 9 and 10.
When you get to the ch-6 spaces, I suggest working into the top loop only of each chain stitch.
- Do not work OVER the chains.
- Chain too loose? Work into the back bump of each ch st. Working into the back bump will tighten your chain up a bit.
- Chain too tight? Try working into the top two loops of each ch st (so the top loop and the back bump). Working into the top two loops will give you more elasticity than the other two methods.
Photo 1 shows the first corner and 7 hdc’s completed. Photo 2 shows the chain hiding behind the petal. Photo 3 shows the 6 hdc’s worked into the top loop of each ch st. Photo 4 shows one completed side and 2 completed corners.
Round 8. “How you doing?” (Anyone watch Friends?)
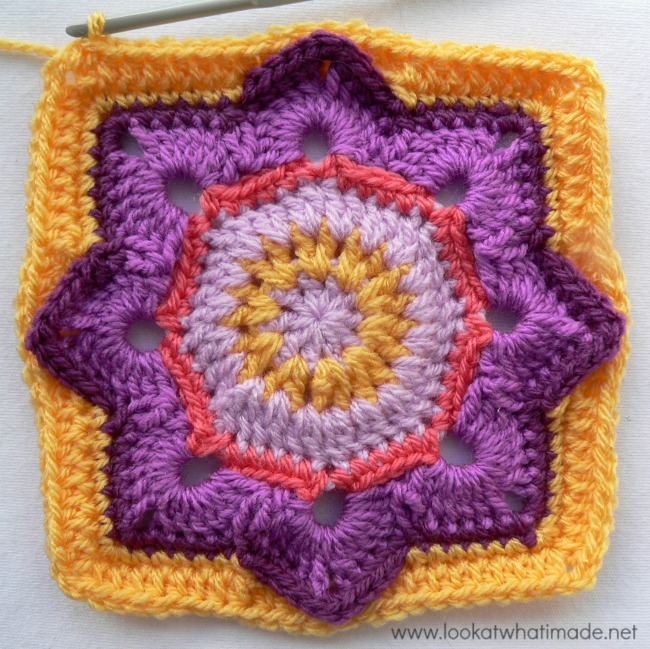
Stitch counts: 88 hdc, 4 ch-2 spaces
Rounds 9 and 10
These two rounds need hardly any explaining.
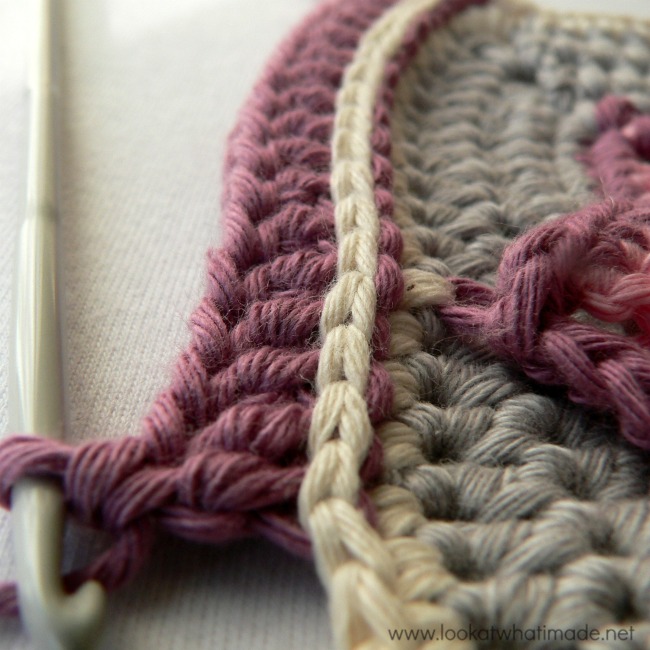
You have to be mindful of the fact that the first stitch after the corner will be “hidden”. It will be especially well concealed underneath the 3 sc’s of each corner in Round 10. See this tutorial if you need a little help figuring out which loops belong to which stitch.
Round 9 all done. In the next round we will “tack down” the 4 sticky-uppy petals.
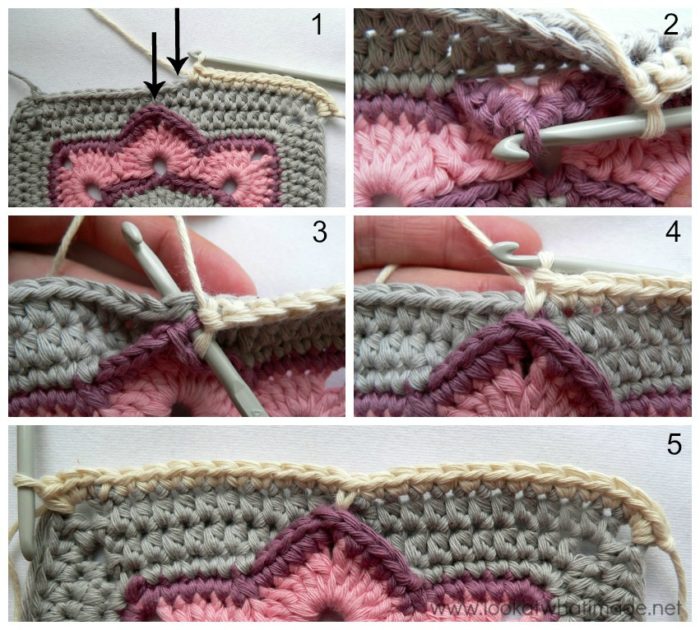
The only other thing that might need some explaining is the “tacking down” of the 4 loose petals in Round 10.
When you have made the first 12 sc’s of the side as instructed (Round 10), it will look like the petal and the next stitch don’t line up (Photo 1). “This will be a disaster,” you might think. But you would be wrong. Trust the pattern.
To attach the petal with the next sc, insert your hook into one of the vertical back bars on the central stitch of the point (so the second of the three sc’s at the point). See Photo 2. Then insert your hook into the next st of Round 9 (Photo 3) and make a sc (Photo 4). When you have completed one whole side (Photo 5), your petal will centred (although the attaching sc will be ever so slightly leaning.
Round 10. At this point I was very happy with the square (although still not sure about the Shrimp!)
If you leave the square as it is, you should have a 9″ square (provided you have used the hook and yarn specified by Julie).
Stitch counts:
- Round 9: 96 hdc’s, 4 ch-2 spaces
- Round 10: 108 sc’s
Round 11
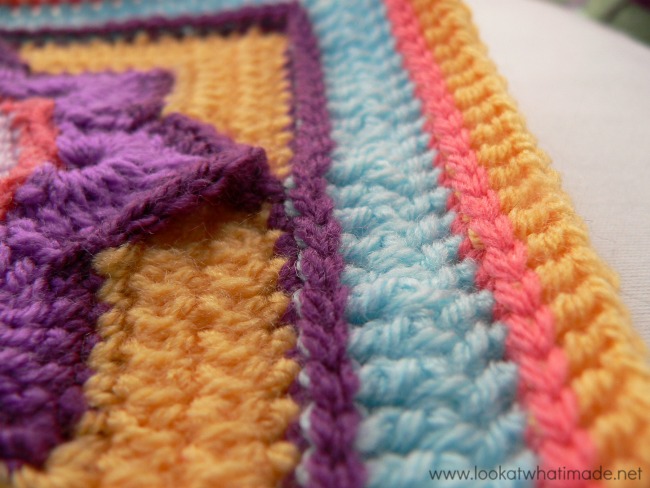
In Round 11 you will need to make Back post double crochet stitches. This just means that you are working around the posts of the stitches in the previous round instead of into the loops of the stitches.
To make any kind of back post stitches, insert your hook from BACK to front (Photo 1) and then from FRONT to back (Photo 2) around the post of the relevant stitch and then work whichever stitch is called for.
Photo 3 shows the back post slip stitch that starts the round. Notice the horizontal bar formed around the front of the post. Once you have made the slip stitch around the post of the central corner stitch (the second of the three sc’s in the corner), ch 4 as instructed in the pattern.
Then make the first bpdc (back post double crochet) by inserting your hook from BACK to front (Photo 5) and then from FRONT to back (Photo 6) around the post of the next stitch and completing a dc around the post.
Photo 7 and 8 again illustrate the horizontal bar formed around the front of the post. Notice that the horizontal bars look like “sewing” stitches. If you notice a post without a horizontal loop around it once you have completed the round, it mean that you have skipped a stitch.
Now isn’t that pretty?
Some things you might find useful to know:
- Each corner is formed by (ch-1, bpdc, ch-1)
- The 14th bpdc of the 26 dc’s on each side should fall around the post of the sc that is “holding” the petal down. If it does not, you’ve joined to the wrong stitch when starting your round, or you’ve skipped a stitch somewhere.
- When you have made a bpdc in each of the 26 st’s as instructed, the corner bpdc (so the next bpdc) should fall in the central stitch of the 3 corner sc’s in the previous round.
Round 11 done. Anyone notice yet that I use Sherbet in every single square? It’s the only colour that crops up every week. Guess I have a favourite :)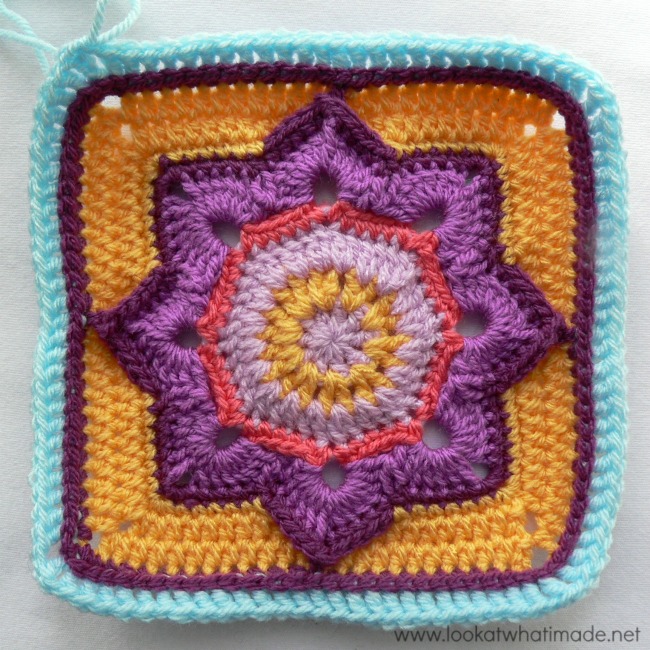
Stitch counts: 108 bpdc, 8 ch-1 spaces (2 in each corner)
Round 12
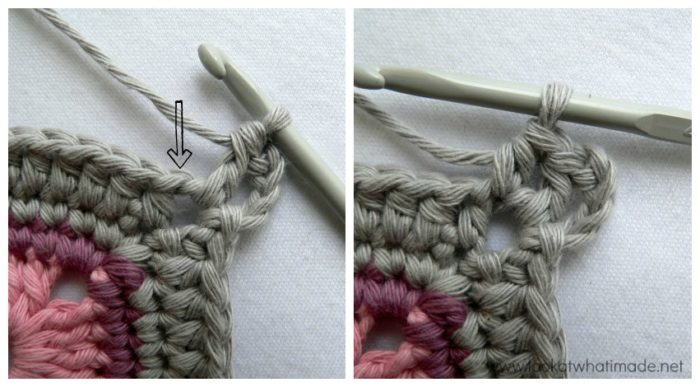
Round 12 is fairly easy as well. It starts with a ch 3 and 2 dc’s in the first ch-1 space of any corner (Photo 1). You will then need to make a front post double crochet around the post of the bpdc right in the corner (so the bpdc between the 2 ch-1 spaces). To do that, yarn over as if you are going to make a normal dc (Photo 2). Then insert your hook from FRONT to back and again from BACK to front around the post of the next st (Photo 3). Complete the dc as normal. Photo 4 isn’t very clear, but you can see the stitch wraps around the post of the bpdc. I always think it looks like when a woman wraps a towel around her head.
Anyhoo… make 3 dc’s in the second ch-1 space of the corner and you end up with one completed corner. The rest of the stitches in this round are worked between the stitches, not into the loops of the stitches. Photo 6 shows the hook inserted into the space between the first and second posts.
Stitch counts: 128 st’s
Round 13
Round 13 is basically a repeat of Round 10, you just don’t have to work into the petals like in Round 10.
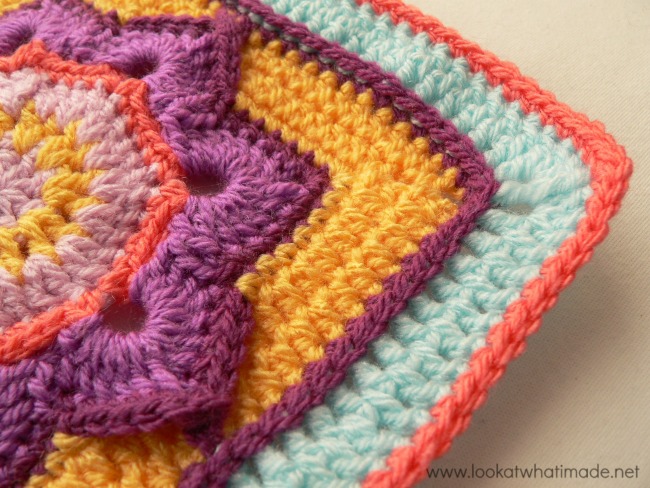
Stitch counts: 136 stitches
Round 14
Round 14 is basically a repeat of Round 11, except that each corner now contains 2 ch-2 spaces instead of 2 ch-1 spaces.
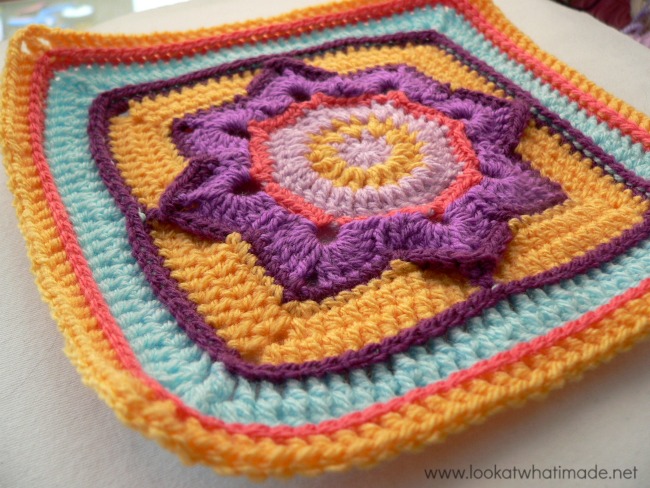
Stitch counts: 136 bpdc, 8 ch-2 spaces (2 in each corner)
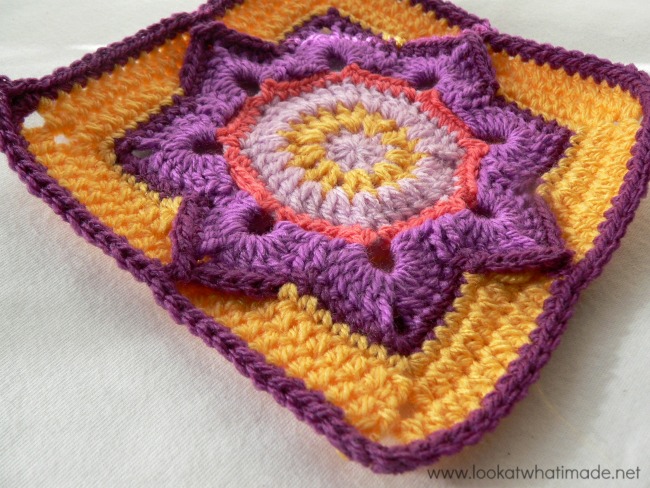
I have added an Optional Additional Round 15 to get my square to the same size as the other squares. You can find the instructions for that HERE.
Remember to subscribe to my Weekly Newsletter if you would like to be kept in the loop. You can also like my Facebook page or follow me on Bloglovin, Google+, Pinterest, Twitter, or Instagram.
More Blogs Following the CAL
- San from Loopsan – using Stylecraft in sophisticated Parchment, Denim, Mocha and Meadow
- Lou Mander from Tea, Crochet and Me – using Stylecraft in White, Mocha and Raspberry
Happy Hooking!




Debra Denkins says
Hi Dedri, I am working on Sophie and want to start the 2014 CAL I have seen pictures of blanket and its beautiful. Anyway I was wondering this is a paid pattern on Ralvery does your tutoral step out the whole pattern so I don’t have to buy the pattern :) Thank you for your help
Dedri Uys says
Debra, my tutorials are only helpful aids, not the complete patterns (except for Week 24 Grandma’s Heart, and Week 37 Prince Protea). You do need the actual patterns to be able to complete the squares.
The 3 paid-for patterns by Julie Yeager will need to be bought, but you can contact her on Ravely to tell her that you are doing the CAL, and she might still send them to you for free.
I hope that helps,
Dedri
Claire Dungey says
Hi could you let me know which of the drops Paris colours you used please, I love the colour combo. Can’t quite work out which ones the purple and green are. Thanks.
Jenny says
Hopefully Dedri will be able to answer your query for you later on, Claire :)
Louise Edwards says
Hi again lol. I forgot to say the two grey colours.
Dedri Uys says
Haha, Rene, the colours and yarn I use for most of the tutorial photos is DROPS Paris Cotton. They have a huge and wonderful variety of colours. If you would like to know the specific ones I used, just give me a shout and I will dig them up for you.
Louise Edwards says
Hi Dedri. I have been saving all the posts to the CAL as I can not start just yet ( I have other commitments :(
In some of your photo’s you are using what looks like, cream pink, violet and blackcurrant kind of colours ( I know I have probably completely messed up the name, I just wanted to give you an idea of the colours). Could you please tell me what the yarn is and where you got it from
Love the Site and your brilliant tutorials
Take care
Louise x
Suzanne says
Round 8… The Sum of All Fears, Ben Affleck. :) with a few more DVD’s lined up for other squares. Your pictorials are awesome and much appreciated. Thanks a Million x
Dedri Uys says
I do love a bit of Affleck…
I’m glad you’re enjoying the tuts! What other dvd’s have you got lined up, then? Don’t try and watch Game of Thrones and crochet at the same time. Something will suffer, and it won’t be Game of Thrones. If I had a penny for every frogged round attributed to Tyrion, I’d be rich!
Suzanne says
Lined up for tomorrow I have the three Transformer movies! Seen them before so I don’t have to pay full attention.I’m off work at the moment as I’ve had my knee repaired. (Everything is fine.) So I’ve got loads of time to hook but I don’t seem to be working very fast. My son said, ‘It’s because it’s like school holidays… You know you’ve got weeks so you don’t focus till the week before you due back!’
Carrie P. says
WOW! this tutorial is fantastic and really helped me a lot with this block during this CAL I have joined. Thanks so much.
Dedri Uys says
Thank you, Carrie. I’m glad you found it helpful.
Karen Hardecker says
Where did you buy your yarn pack from?
Dedri Uys says
Hi Karen. I bought it from Wool warehouse. They have very good deals sometimes. I bought my drops paris cotton there too when it was half-price.
San says
And again a really lovely square and an amazing tutorial! Are you actually making two full squares now every week? x
Joanne Morrow says
Dedri, thank you once again for your wonderful tutorial!! You make it so easy to crochet and complete the CAL!! I couldn’t do the CAL without your help!! Thanks so much!!
marjam17 says
I like how this turned out. Actually I like how all of them have turned out. Where are you getting the patterns from?
Wish I had the imagination to make up new blocks. Maybe that will be one of my next projects.
Your site is inspiring!
Dedri Uys says
Hi :) All the blocks are on Ravelry. They are by other designers and have been selected (by Kimberly Slifer) for inclusion in the Block a Week CAL 2014 that she is hosting over at the Official CCC Social Group on Facebook. Are you tempted to join?
Sakeenah says
What a great tutorial! Beautiful colors too. Thank you so much this looks like a fun square to make. Hmm, wonder if I could catch up with this CAL.
Dedri Uys says
Hi Sakeenah. We’ve only done 7 out of 45 squares, so there’s plenty of time left. I’m sure you can catch up :)
Rhondda Mol says
Another beautiful block and super helpful walk through :) I’m sure a lot of people really appreciate these tutorials Dedri :) Hope you are doing well!! R
Dedri Uys says
Hi Rhondda, and thank you. I like doing these squares sooo much. You tempted enough yet to give in and add one more project to your overladen hook?
Nicoleen says
Dit lyk baie interessant!
Dedri Uys says
Dankie, Nicoleen