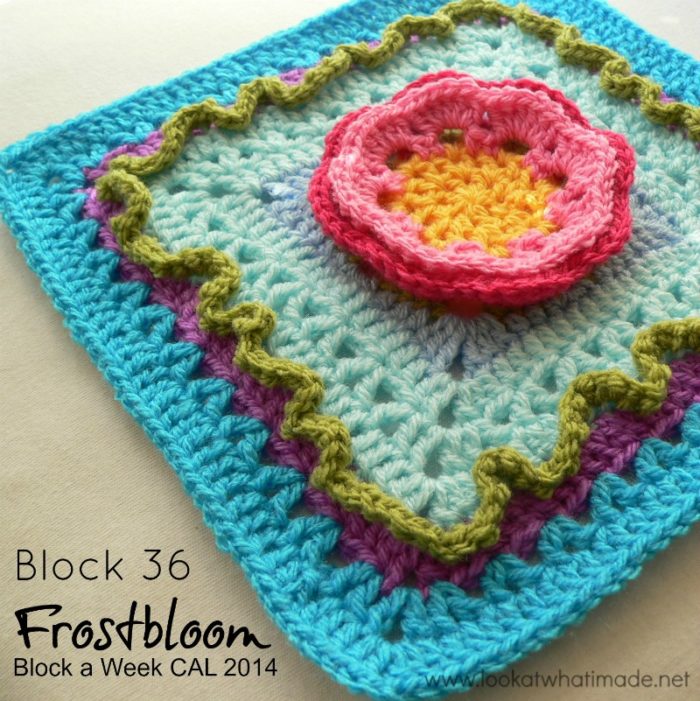
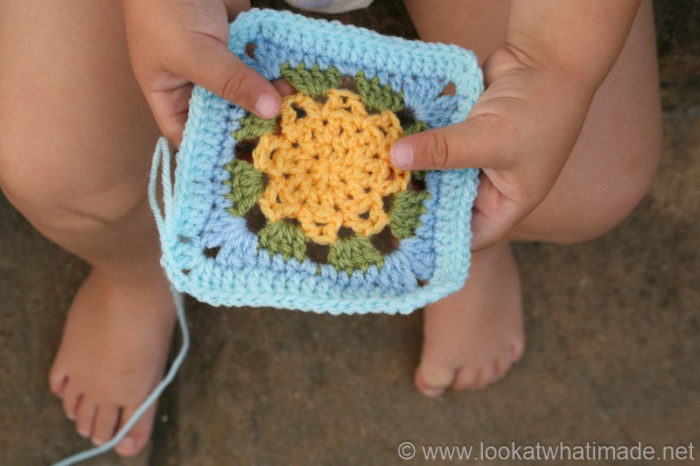
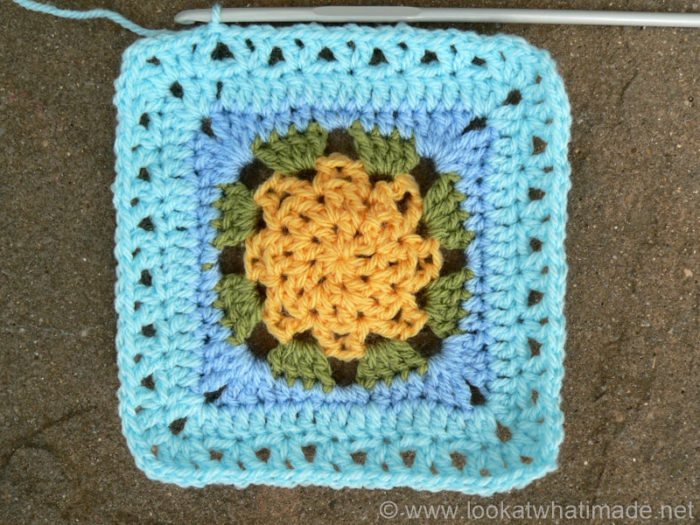
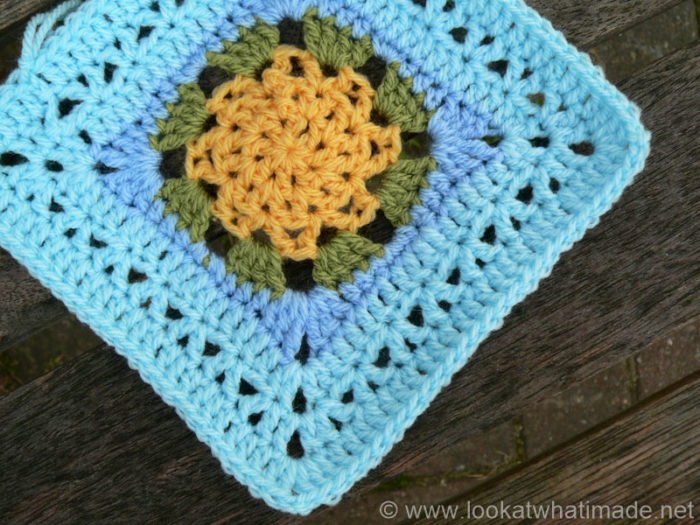
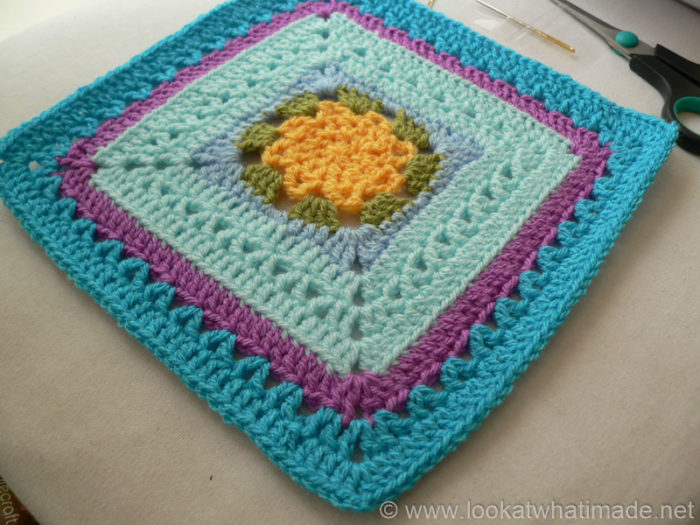
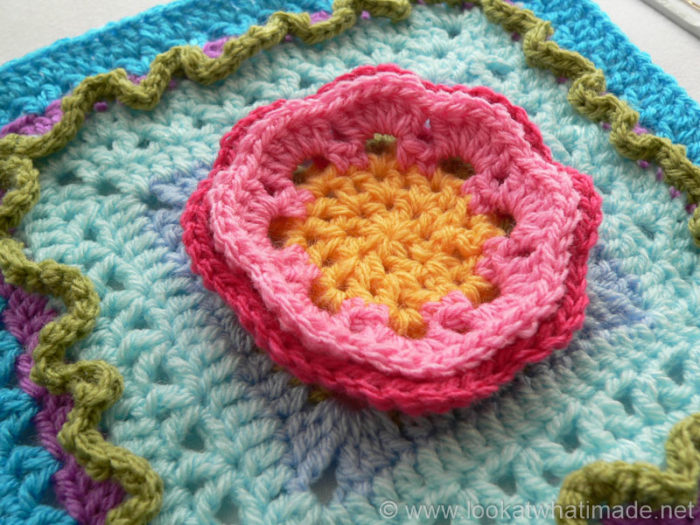
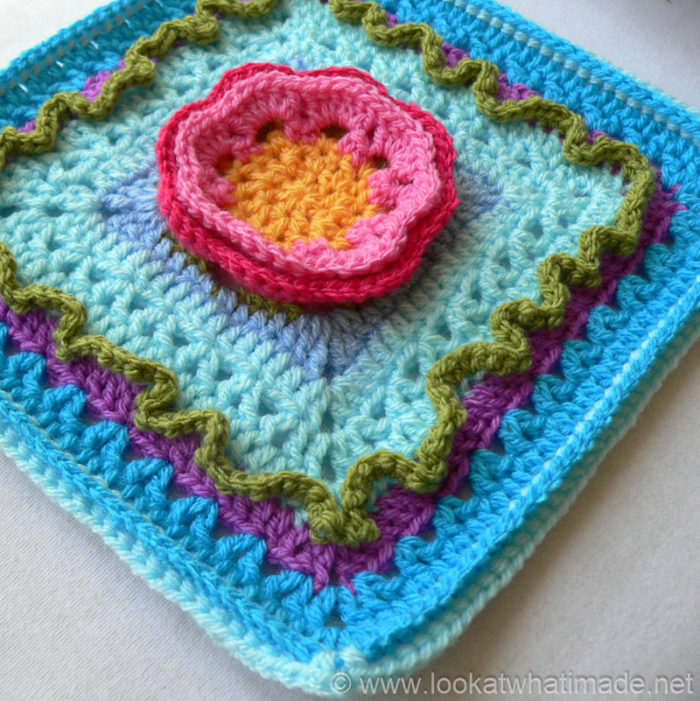
Block 36 of the Block a Week CAL (hosted by Kimberly Slifer) is Shan Sevcik’s Frostbloom Square. This square works up quite quickly. The only thing that takes a little bit of time is adding the surface detail (flower petals and ruffle round). I actually like this square with and without the surface detail. It has such a simple elegance to it.
If you are using the same hook and yarn for all your squares, they will not all come out the same size. I have now added a post outlining the extra rounds I added to each square to get them to the size of Block 1, which was the biggest. You can find that here.
Frostbloom Crochet Square
{Pattern © 2013 Shan Sevcik. Photo tutorial done with kind permission}
Pattern
Available as a Free Ravelry Download.
Suggested Materials
- 5.5 mm Clover Amour Crochet Hook (US I/9 UK 5) OR 5 mm crochet hook (US H/8 UK 6)
- Worsted weight yarn
Size
- Using the hook and yarn specified, your square should be a nice even 12″ when you are done.
- Using a 4 mm crochet hook (US G/6 UK 8) and double knit yarn, as I have done, your finished square will be about 8.5″ big.
My Yarn and Colour Choices
I am using Stylecraft Special DK.
- Saffron (Rounds 1 – 3)
- Fondant (Rounds 4 and 5)
- Pomegranate (Rounds 6 and 7)
- Meadow (Round 8 – not visible, and Round 16 – surface ruffle)
- Cloud (Round 9)
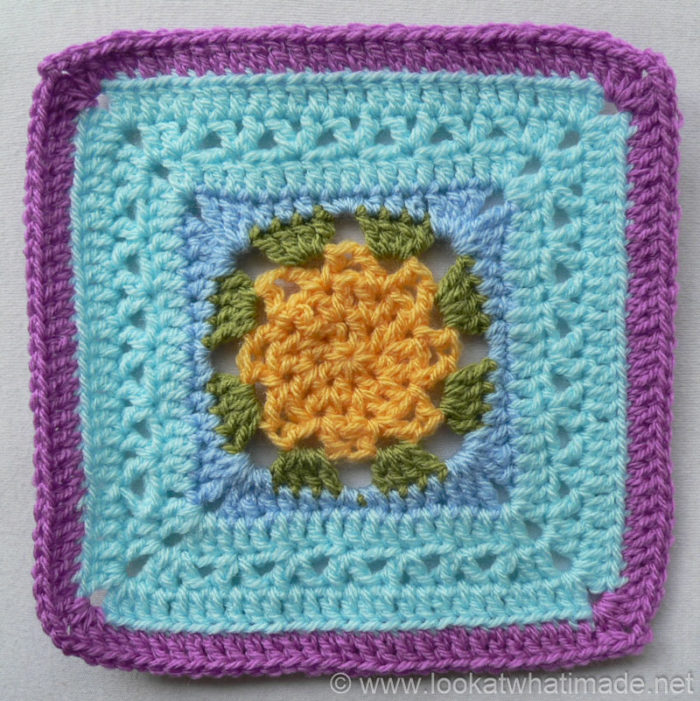
- Sherbet (Rounds 10 – 12, and Optional Additional Round 17)
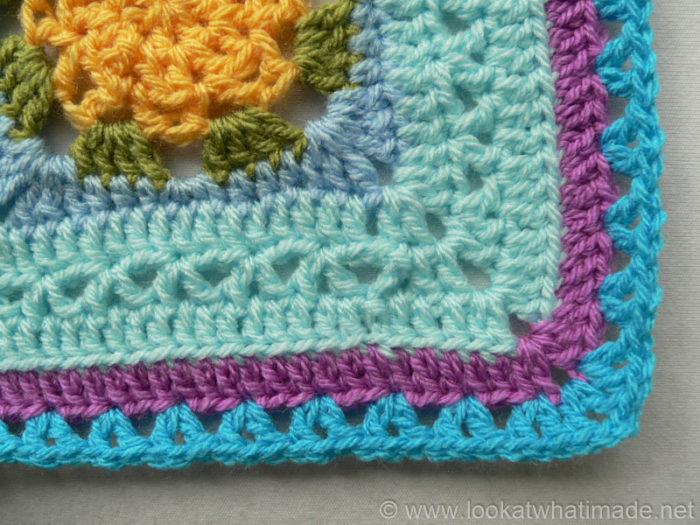
- Magenta (Round 13)
- Turquoise (Rounds 14 and 15)
Notes
- US Crochet Terminology used. (See this comparative chart if you need help transcribing from US to UK)
Special Stitches
- V Stitch – (dc, ch 1, dc) in the same stitch or space
- Edc – Extended double crochet (video tutorial)
Frostbloom Square Photo Tutorial
This photo-walkthrough is NOT the actual pattern and should not be used instead of the pattern, but rather in conjunction with it.
Thank you very much to Shan Sevcik for giving us permission to do this photo-tutorial for her Frostbloom Square. And a special thank you to Kimberly Slifer for letting me do these tutorials and for obtaining the necessary permission.
Round 1
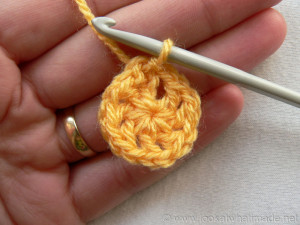 You can start this round with a magic ring instead of the initial ch-4 ring.
Magic Ring Instructions for Round 1
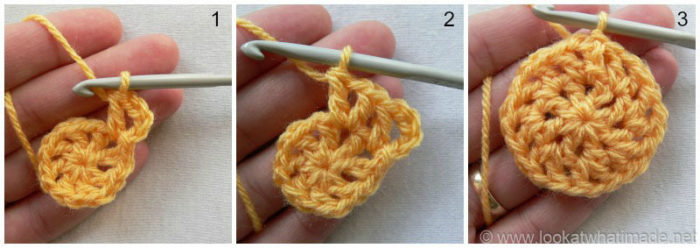
Into a magic ring: ch 4 (this counts as a dc + ch-1). (Dc, ch 1) seven times.
Pull the ring tight. Join to the third ch of the beginning ch-4 with a sl st or use the invisible join. Make sure that you understand which stitch to join to if you do use it!
If you are not familiar with working into a magic ring, this video tutorial from Moogly is clear and easy to follow.
Please remember, when working into a magic ring you HAVE to work away your initial tail very well. If you just cut it, your whole square might unravel!
Stitch count: 8 dc’s and 8 ch-1 spaces
Round 2
Note: If you are not into blocking your squares, I suggest doing this round in hdc’s instead of dc’s, otherwise the central circle will “bowl” a bit until you have blocked your square.
- If you are using the same colour, sl st into the next ch-1 space. Ch 4 (counts as dc + ch-1) and make a dc in the same space. This is your first V st made (Photo 1).
- If you are using a new colour, join with a standing double crochet in any ch-1 space around. (Ch 1, dc) in the same space. This is your first V st made.
(Skip the next dc and make a V st in the next ch-1 space) seven times (Photo 2). Join to the third ch of the beginning ch-4 (or the top of the standing double crochet) with a sl st (Photo 3).
Stitch count: 16 dc’s and 8 ch-1 spaces {8 V st’s}
Round 3
Note: If you are not into blocking your squares, I suggest doing this round in hdc’s instead of dc’s, otherwise the central circle will “bowl” a bit until you have blocked your square.
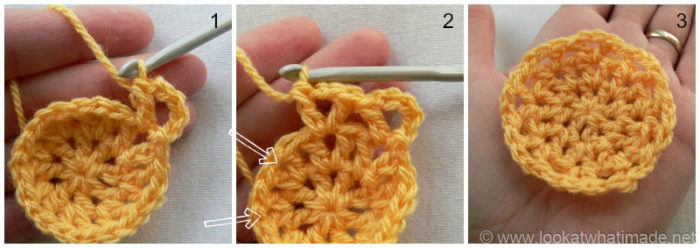
- If you are using the same colour, sl st into the next ch-1 space. Ch 5 (counts as dc + ch-2) and make a dc in the same space (Photo 1).
- If you are using a new colour, join with a standing double crochet in any ch-1 space around. (Ch 2, dc) in the same space.
*Skip the next 2 dc’s. (Dc, ch 2, dc) in the next ch-1 space (Photo 2).* Repeat from * to * 6 more times. Join to the third ch of the beginning ch-5 (or the top of the standing double crochet) with a sl st (Photo 3).
Stitch count: 16 dc’s and 8 ch-2 spaces
Please note: when you add the petals later on, I will be referring to the (dc, ch 2, dc) groupings in this round as V stitches.
We are now going to jump to Round 8! Why? Because Rounds 4 – 7 form the petals of the central flower and it is easier to add them after you have completed the square. You can find the instructions for Rounds 4 – 7 at the end of this tutorial.
Please note that you will need to be able to identify the dc’s from Rounds 2 and 3, so if you are not comfortable with “reading” your stitches yet, you might want to mark the first dc of any V st in Rounds 2 AND 3.
Round 8
As written.
This round is worked only into the ch-2 spaces from Round 3.
If you are swapping over to a new colour, you can start with a standing double crochet instead of the initial ch-3 (Photo 1). Please note that this round won’t really be visible once the petals are added, so there is no need to change colours at this point.
- You want to end up with 4 dc’s in each ch-2 space (Photo 3).
- You should have 2 ch st’s between each 4-dc group (Photo 2).
Stitch count: 32 dc’s and 8 ch-2 spaces
Round 9
In this round you will skip the first stitch after every space (the hidden stitch).
- If you are using the same colour, sl st into the next st. Ch 2 (counts as hdc) and hdc in the next 2 st’s).
- If you are using a new colour, join with a standing hdc in the second dc of any 4-dc group. Hdc in the next 2 st’s (Photo 1).
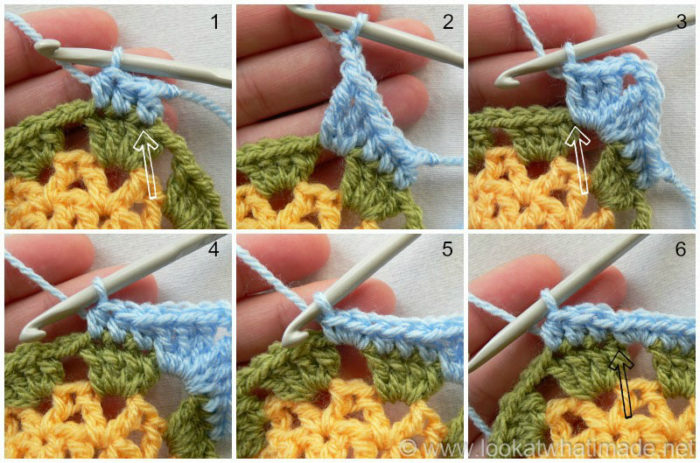
*(Dc, edc, tr, ch 2, tr, edc, dc) in the next ch-2 space (Photos 2 and 3). Skip the first dc of the next 4-dc group. Hdc in the next 3 dc’s (Photo 4). Make 3 sc’s in the next ch-2 space (Photo 5). Skip the first dc of the next 4-dc group. Hdc in the next 3 dc’s (Photo 6).* Repeat from * to * 3 times, omitting the last 3 hdc’s on the last repeat. Join to the top of the beginning ch-2 (or the standing hdc) with a sl st.
Stitch counts:
- Total: 60 st’s and 4 ch-2 corner spaces {12 sc’s, 24 hdc’s, 8 dc’s, 8 edc’s, and 8 tr’s}
- Per Side: 15 st’s {3 sc’s, 6 hdc’s, 2 dc’s, 2 edc’s, and 2 tr’s}
Round 10
As written.
There should be 15 dc’s between each corner and 19 dc’s per side. Remember not to skip that first hidden stitch.
Stitch count: 76 st’s and 4 ch-2 corner spaces {19 dc’s per side}
Round 11
As written.
The first V st of each side should fall in the first dc of each side. Don’t accidentally skip the first hidden stitch. The last V st of each side should fall in the last dc of each side.
Please Note: corners in this round are (dc, ch 2, dc) NOT (2 dc, ch 2, 2 dc)!
Stitch count: 28 V st’s, 8 dc’s, and 4 ch-2 corner spaces {7 V st’s and 2 dc’s per side}
Round 12
- If you are using the same yarn, ch 3 (counts as dc). Dc in the next ch-1 space, dc in the next 2 dc’s. You should have 4 dc’s in total at this point (including the initial ch-3) and the last dc should fall in the last dc before the ch-2 corner space.
- If you are using a new colour, join your yarn by making a standing double crochet in the same st as the sl st join. Dc in the next ch-1 space, dc in the next 2 dc’s. You should have 4 dc’s in total at this point and the last dc should fall in the last dc before the ch-2 corner space.
*(2 dc, ch 2, 2 dc) in the corner space. Dc in each of the first 2 dc’s. (Dc in the next ch-1 space, dc in the next 2 dc’s) seven times.* Repeat from * to * 3 times, omitting the last 4 dc’s on the last repeat.
Stitch count: 108 dc’s and 4 ch-2 corner spaces {27 dc’s per side}
Round 13
As written, remembering to work into the back loops only!
Stitch count: 124 dc’s and 4 ch-2 corner spaces {31 dc’s per side, 27 dc’s between corners}
Round 14
As written. This Round is a repeat of Round 11, but with more V st’s per side.
Stitch count: 44 V st’s, 8 dc’s, and 4 ch-2 corner spaces {11 V st’s and 2 dc’s per side}
Round 15
As Round 12 (see Round 12 of the Photo Tutorial), but with 11 repeats instead of 7.
Stitch count: 156 dc’s and 4 ch-2 corner spaces {39 dc’s per side}
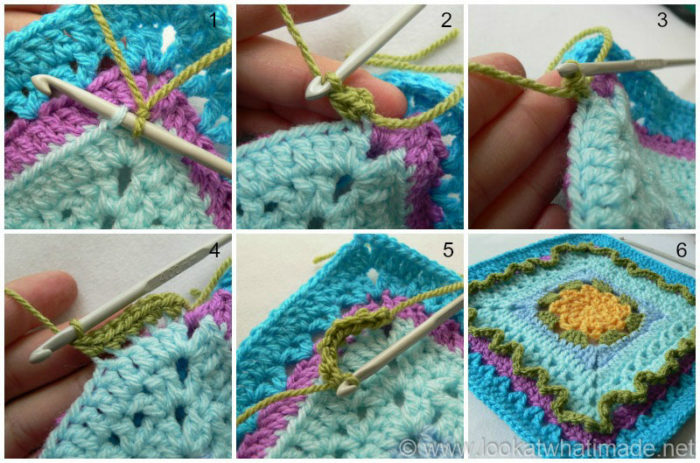
Round 16
As written.
I have found that the easiest way to add surface crochet to front loops is to fold whatever came after the front loops to the back so that the front loops stand out (Photos 2 – 4). This way I am not snagging the stitches of the next row/round.
Stitch count: 216 sc’s and 4 ch-1 spaces {54 sc’s per side}
Righto. Back to the petals!
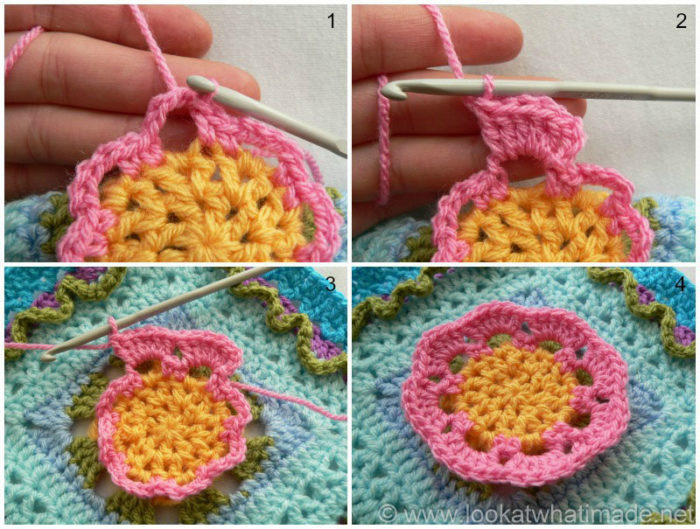
Round 4
Before you start Round 4, identify the stitches of Round 2 that you will be working into.
You will be working into each dc from Round 2, starting in the first dc of any V st around. In the photo below you can see the V’s (indicated with V) and the dc’s (indicated with arrows).
Can you see that the dc’s are grouped in 2’s? The second dc of each 2-dc grouping is the first dc of a V st. You will be starting in the first dc of any V st around.
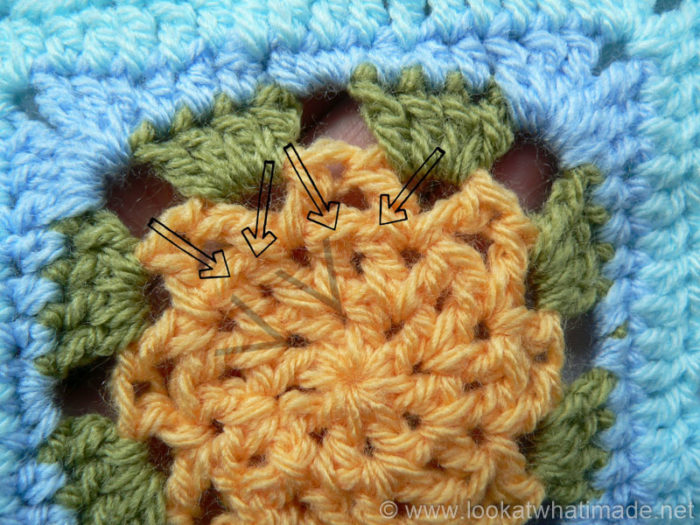
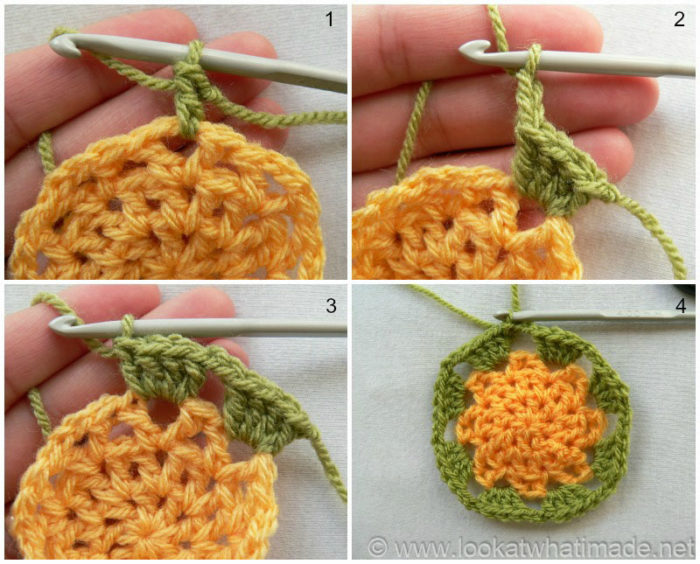
Working into the st’s of Round 2: join your yarn by making a standing single crochet in the first dc of any V st around (Photos 1 and 2). (Ch 4 and skip the ch-1 space that contains the V st from Round 3. Sc in the next 2 dc’s – see Photo 3) 8 times, omitting the last sc on the last repeat (Photo 4).
Join to the top of the standing single crochet with a sl st.
Stitch count: 16 sc’s and 8 ch-4 spaces 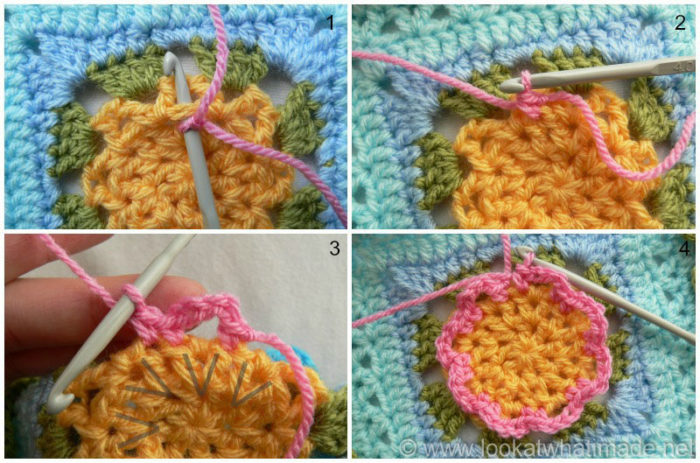
Round 5
As written.
Stitch count: 48 dc’s
Round 6
Before you start Round 4, identify the stitches of Round 3 that you will be working into.
You will be working into each dc from Round 3, starting in the first dc of any V st around. In the photo below you can that the dc’s are grouped in 2’s. The second dc of each 2-dc grouping is the first dc of a V st. You will be starting in the first dc of any V st around.
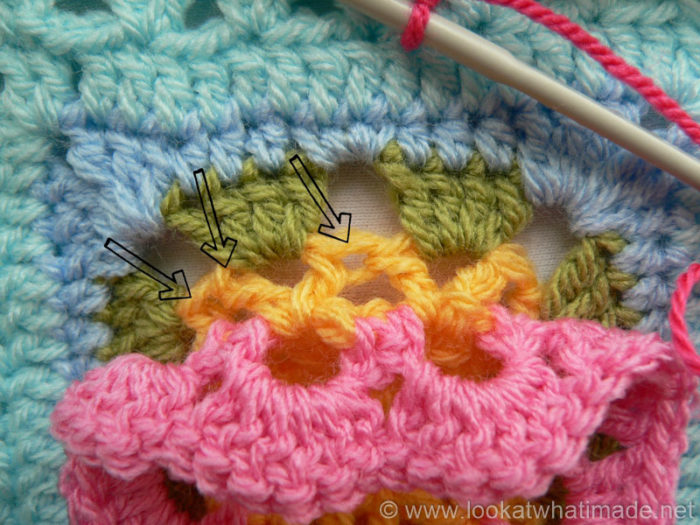
Working into the st’s of Round 3: join your yarn by making a standing single crochet in the first dc of any V st around (Photo 1). (Ch 5 and skip the ch-2 space that contains the 4 dc’s from Round 8. Sc in the next 2 dc’s – see Photo 2) 8 times, omitting the last sc on the last repeat (Photo 4).
Join to the top of the standing single crochet with a sl st.
Stitch count: 16 sc’s and 8 ch-5 spaces 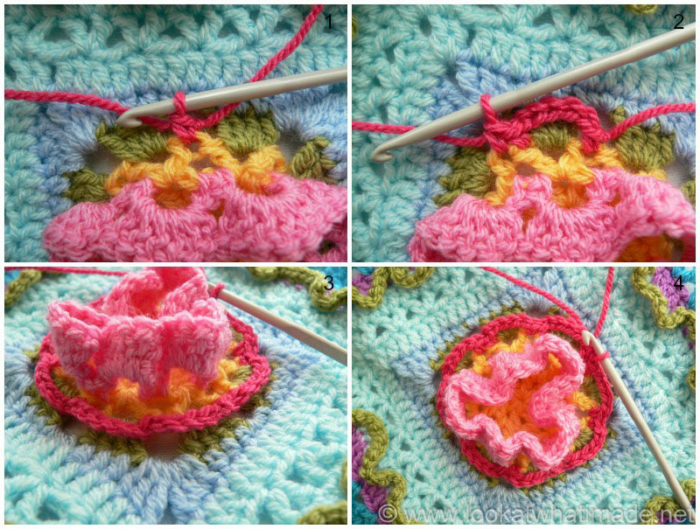
Round 7
As written.
Stitch count: 56 dc’s
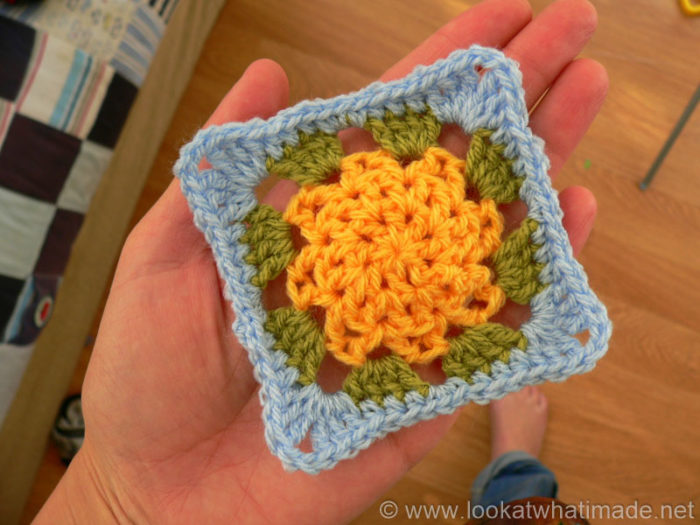
This is the square after having added an Optional Additional Round 17, which makes this square the same size as the largest of the squares (Odyssey) with a final stitch count of 164 st’s.
Happy Hooking!




ELIZABETH RIVERA says
The written pattern for this block is different and does not come out as the block you show.
Dedri Uys says
Hi Elizabeth. I’ve just compared my tutorial to the written pattern and it looks like nothing has changed in the written pattern. What are you having trouble with so that I can better assist you?