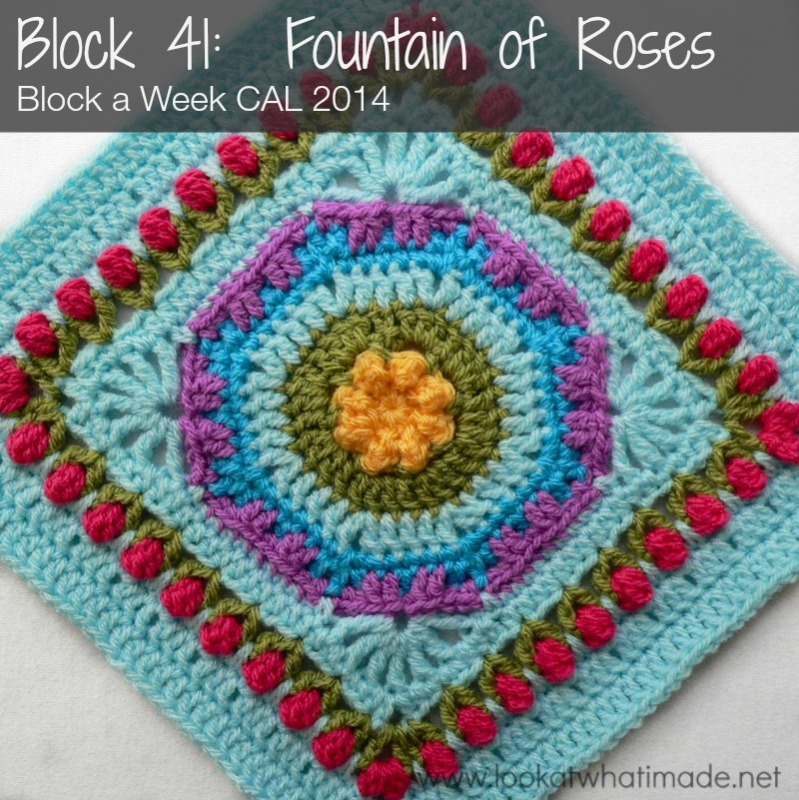
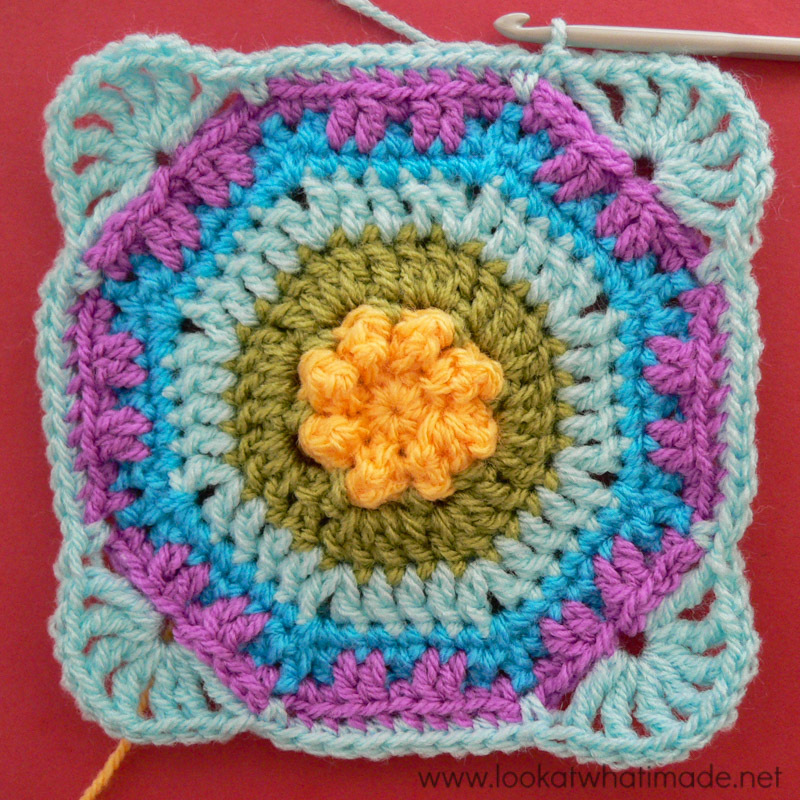
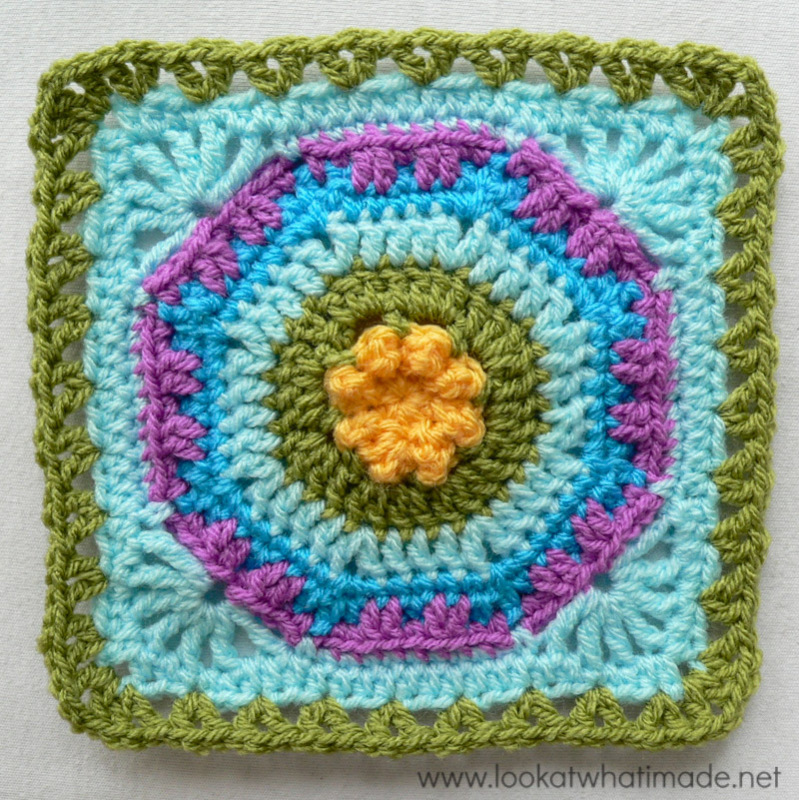
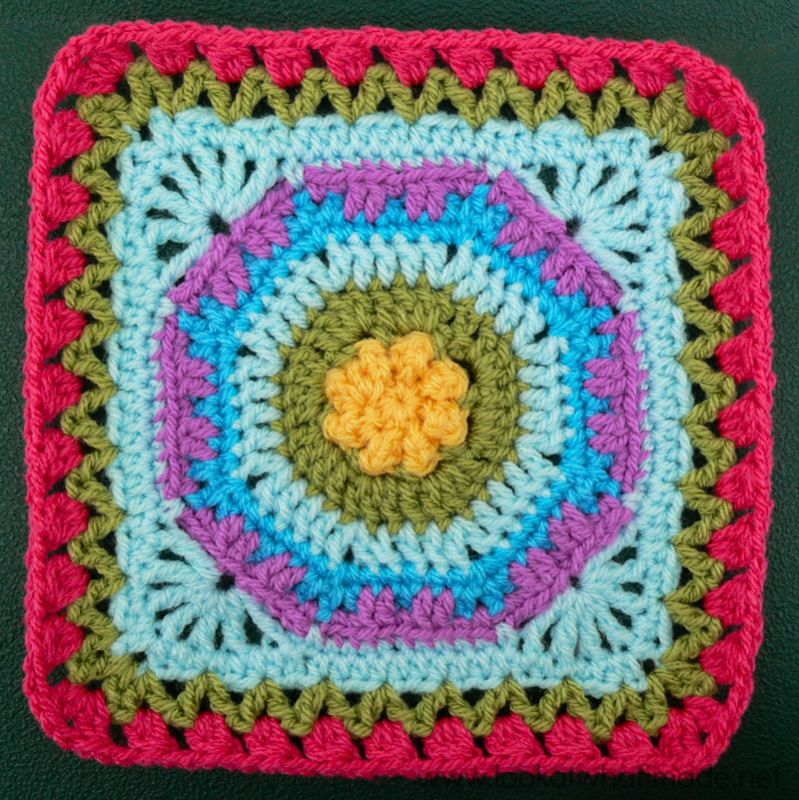
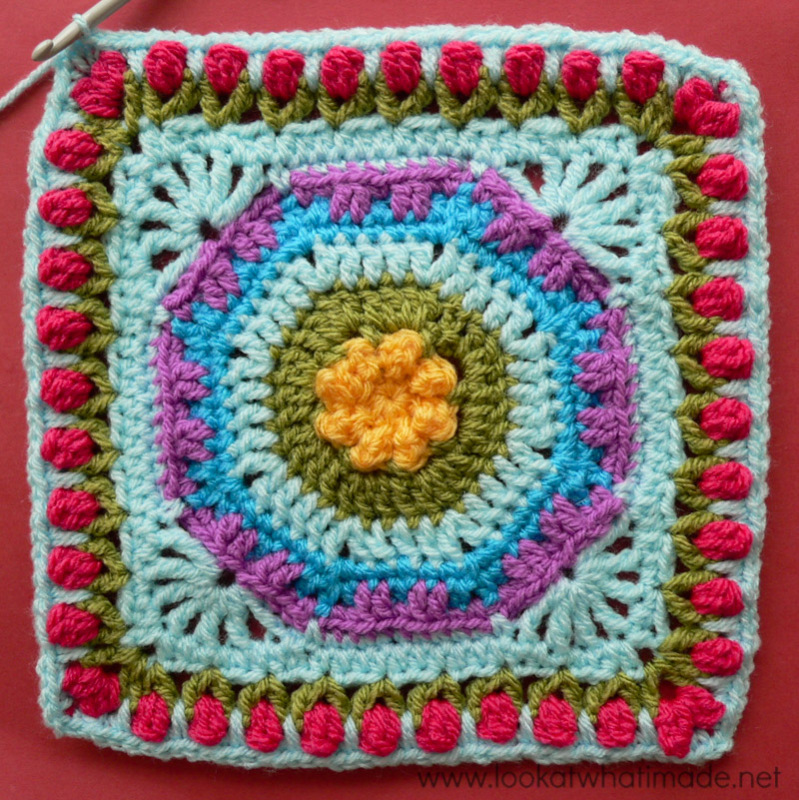
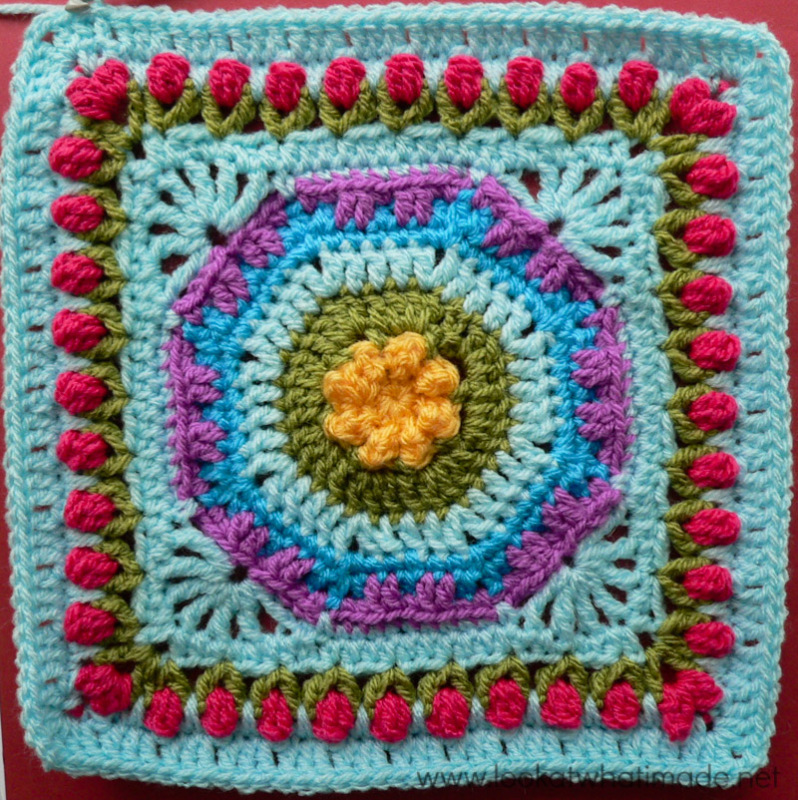
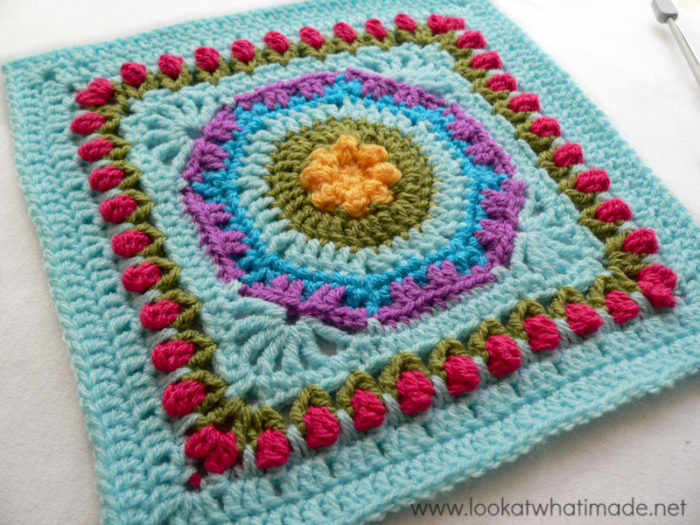
Block 41 of the Block a Week CAL (hosted by Kimberly Slifer) is Shan Sevcik’s Fountain of Roses Square. I love this square. It really does look like a fountain surrounded by roses :)
Please Note: I have stopped my square at the optional Round 14 (as supplied in Shan’s pattern) because it was too big at the end of Round 17. Instead I have added an additional Round 15 (plain dc) to get my square to the required size. This seems to be a problem unique to me as most of the other people making the square have found that it works up to the correct size at the end of Round 17.
This photo tutorial stops at the end of the optional Round 14, but by then you should be comfortable with making the v-stitches and the flowers, so I am sure you can manage the last 3 rounds on your own. I really wish I could have squeezed in that extra round of roses. Maybe I will rework this square when my finger’s all better and my stitches aren’t so sloppy…
Fountain of Roses Square
{Pattern © 2013 Shan Sevcik. Photo tutorial done with kind permission}
Pattern
Available as a Free Ravelry Download.
Suggested Materials
- 5.5 mm Clover Amour Crochet Hook (US I/9 UK 5)/5 mm crochet hook (US H/8 UK 6)
- Worsted weight yarn
Size
- Using the hook and yarn specified, your square should be a nice even 12″ when you are done (see pattern for which round to stop at when using the different hook sizes (I/H)).
- Using a 4 mm crochet hook (US G/6 UK 8) and double knit yarn, as I have done, your finished square will be about 8″ big.
My Yarn and Colour Choices
I am using Stylecraft Special DK.
- Saffron (Rounds 1 and 2)
- Meadow (Rounds 3, 4, and 11)
- Sherbet (Rounds 5, 9, 10, 13, 14, and Optional 15)
- Turquoise (Round 6 and 7)
- Magenta (Round 8)
- Pomegranate (Round 12)
Notes
- US Crochet Terminology used. (See this comparative chart if you need help transcribing from US to UK)
- If you feel like practising the invisible join, feel free to use it instead of the sl st join. Make sure that you understand which stitch to join to if you do use it!
Special Stitches
- V stitch: (dc, ch 1, dc) in the same stitch.
- Spiked Sc: Insert your hook into the indicated stitch and draw up a long loop (to the height of the other stitches). Yarn over and draw through both loops on your hook.
- Dc cluster (dcCL): Yarn over and insert your hook into the indicated stitch. Yarn over and pull up a loop (3 loops on hook). Yarn over and pull through 2 loops (2 loops on hook). Yarn over and insert your hook into the SAME stitch. Yarn over and pull up a loop (4 loops on hook). Yarn over and pull through 2 loops (3 loops on hook). Yarn over and pull through all 3 loops.
- Multi-stitch cluster (multiCL): Yarn over and insert your hook into the indicated stitch. Yarn over and pull up a loop (3 loops on hook). Yarn over and pull through 2 loops (2 loops on hook). Yarn over and insert your hook into the SAME stitch. Yarn over and pull up a loop (4 loops on hook). Yarn over and pull through 2 loops (3 loops on hook). Yarn over and insert your hook into the SAME stitch. Yarn over and pull up a loop (5 loops on hook). Yarn over and pull through all 5 loops.
Corrections
Round 10: Stitch count of 68 hdc’s should be 76 hdc’s.
Fountain of Roses Square Photo Tutorial
This photo-walkthrough is NOT the actual pattern and should not be used instead of the pattern, but rather in conjunction with it. Make sure that you have downloaded the pattern HERE.
Thank you very much to Shan Sevcik for giving us permission to do this photo-tutorial for her Fountain of Roses Square. And a special thank you to Kimberly Slifer for letting me do these tutorials and for obtaining the necessary permission.
Round 1
As written.
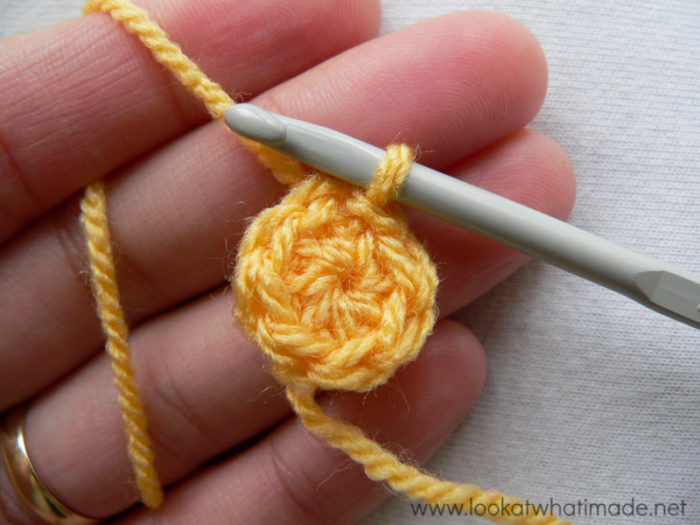
The pattern advises you to leave a long initial tail of yarn. This is just in case round 2 flattens out a bit and you feel the need to “pull it in” by sewing into it as directed at the end of the pattern. I did not need to do this, but you might have to.
If you are not familiar with working into a magic ring, this video tutorial from Moogly is clear and easy to follow.
When you eventually get around to sewing your initial tail of yarn away, you HAVE to work it away very well. If you just cut it, your whole square might unravel!
Stitch count: 8 hdc’s
Round 2
As written.
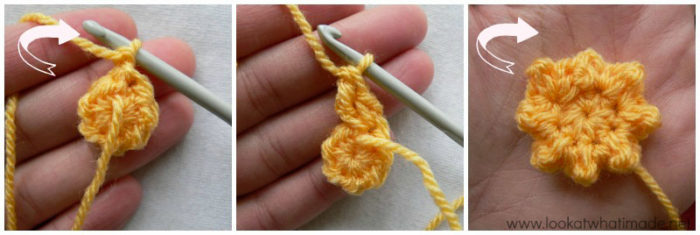
Remember to turn your work so that the back of Round 1 is facing you when you begin Round 2. If you need help with making the bubble stitches, see Round 2 of Crocodile Flower. Just remember that Crocodile Flower has 12 “bubble” stitches in the second round and Fountain of Roses only has 8.
Remember to turn your work again at the end of Round 2 so that the “bubbles” are facing you. The rest of the square will be worked in rounds without turning (as usual).
Stitch count: 8 sc’s and 8 tr’s = 8 bubble stitches
Round 3
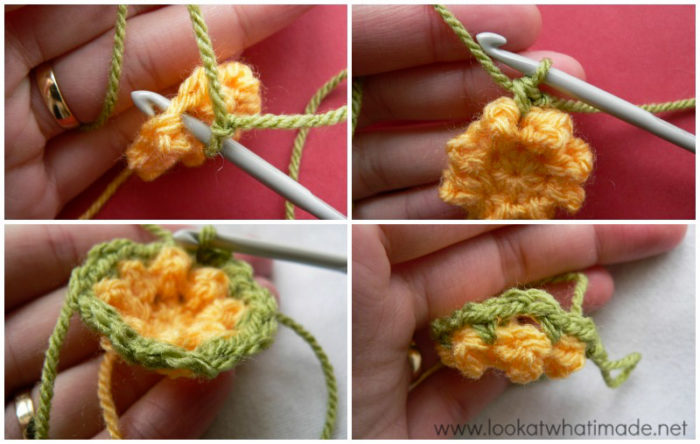
- If you are using the same colour, ch 1 and sc in the same st as the sl st join.
- If you are using a new colour, join your yarn by making a standing single crochet in the same stitch as the sl st join (or any sc around). You will find the sc’s in the “valley” between the bumps formed by the tr’s. The top 2 loops of the sc’s will be pointing slightly backwards due to the fact that they were made with the wrong side of the “square” facing you.
*Ch 2, skip the next tr and sc in the next sc* 7 times. Ch 2. Skip the last tr. Join to the first sc with a sl st.
Stitch count: 8 sc’s and 8 ch-2 spaces
Round 4
I suggest using the same colour for this round, but you are welcome to use a different colour.
- If you are using the same colour, ch 3 (this counts as your first dc).
- If you are using a new colour, join your yarn by making a standing double crochet in the top of any sc around.
Complete the round as written.
You want to end up with a dc in each sc, and 3 dc’s in each ch-2 space. Now would be an excellent time to make sure that you have 8 repeats in total. I got this far with only 7, so I had to frog it and start over.
As the next round is made into the back loop only, I strongly suggest that you finish this round with the invisible join.
Stitch count: 32 dc’s
Round 5
- If you are using the same colour, ch 3 (this counts as your first dc).
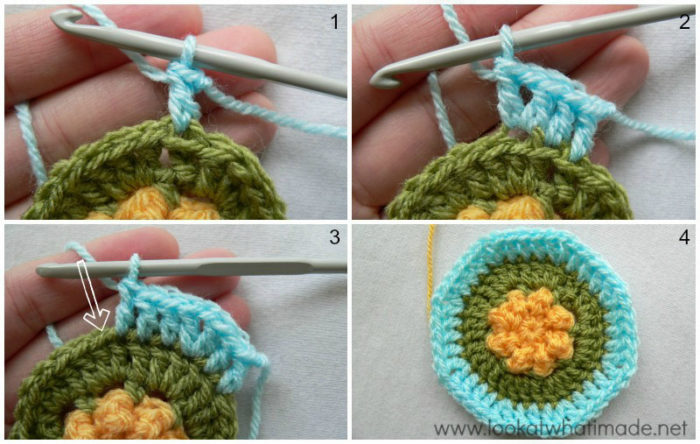
- If you are using a new colour, join your yarn by making a standing double crochet in the back loop only of the same stitch as the sl st join. You will notice below that I have used the invisible join, making it possible to work into the back loop only of the “fake” first stitch (Photo 1).
As written.
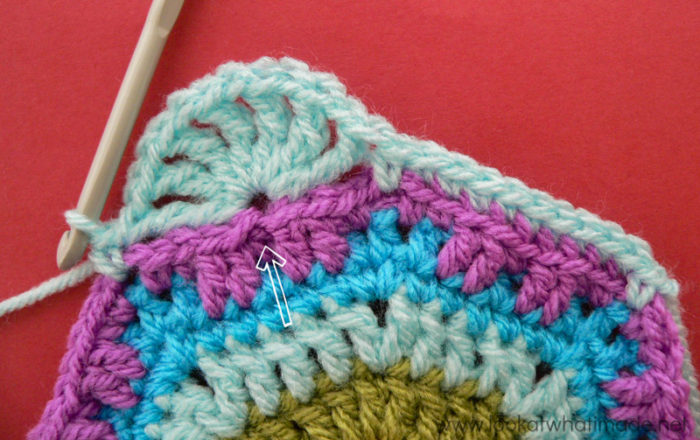
Each V-stitch should fall in the central dc of the 3-dc groups made into the ch-2 spaces from Round 3 (illustrated in Photo 2 and indicated with an arrow in Photo 3).
Stitch count: 40 dc’s and 8 ch-1 spaces
Round 6
- If you are using the same colour, sl st into the next ch-1 space. (Ch 1, sc) twice into the ch-1 space.
- If you are using a new colour, join your yarn by making a standing single crochet in any ch-1 space around. (Ch 1, sc) into the same ch-1 space.
As written.
Remember that the first dc after the ch-1 space will be partially hidden by the (sc, ch 1, sc) you just made into it. Don’t accidentally skip this stitch, otherwise you will only be able to make 4 sc’s between ch-1 spaces, not 5 like you should. See this tutorial if you need help identifying which loops belong to which stitch.
Stitch count: 56 sc’s and 8 ch-1 spaces
Round 7
- If you are using the same colour, ch 2 (this counts as your first hdc) – please note that you will be adding another chain stitch to this beginning ch-2 below, making for an initial ch-3.
- If you are using a new colour, join your yarn by making a standing hdc in the same stitch as the sl st join.
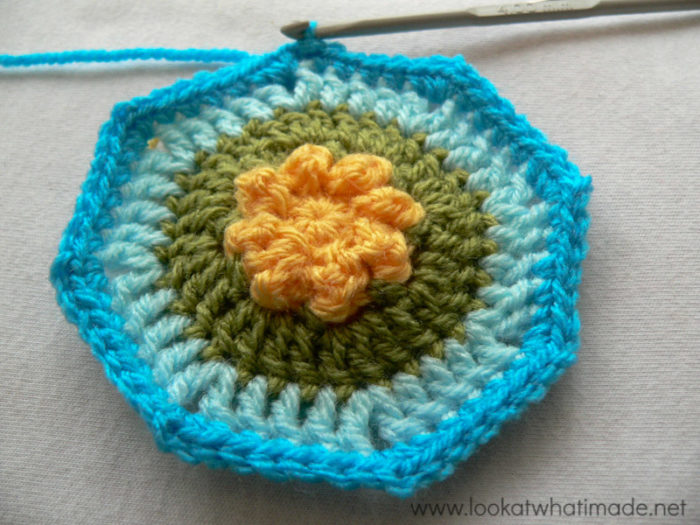
*Ch 1 and hdc in the ch-1 space. (Ch 1, hdc) in the next stitch, which will be slightly hidden. (Ch 2, skip the next 2 st’s and hdc in the next stitch) twice (Photo 1).* Repeat from * to * 7 more times, omitting the last (hdc + ch-1) on the last repeat. Join to the second ch of the beginning ch-3 (or the top of the standing hdc) with a sl st. Fasten off and work away your tails of yarn.
Stitch count: 32 hdc’s, 16 ch-1 spaces, and 16 ch-2 spaces
Round 8
It can be tricky getting into the hdc right after a chain space. If you struggle, pull on the chain before the hdc to open up the little hole between the top 2 loops and the bottom loop of the hdc.
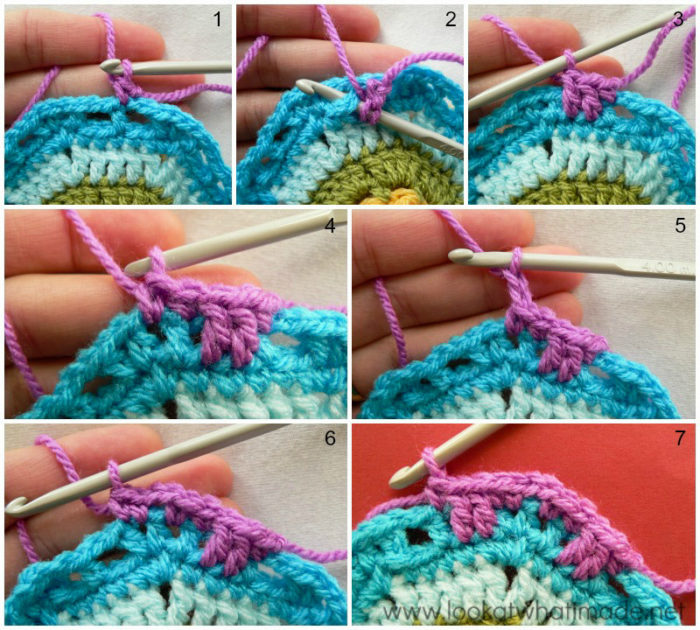
Join your new yarn by making a standing single crochet in the central hdc of any side (in other words the hdc between the 2 ch-2 spaces – see Photo 1).
*Dc in the next 2 skipped stitches from Round 6 directly below the next ch-2 space from Round 7. Make sure that you work in front of the ch-2 space, not over it. The easiest way to do this is to fold the ch-2 from Round 7 down behind your work so that it is out of the way (Photos 2 and 3).
Sc in the next st of Round 7, which will be the first hdc of the 3 corner hdc’s. Sc in the next ch-1 space (Photo 4). Ch 2 (Photo 5) and skip the next hdc. Sc in the next ch-1 space. Sc in the last hdc of the corner (Photo 6). Dc in the next 2 skipped stitches from Round 6 as before. Sc in the next st of Round 7, which will be the central hdc between the 2 ch-2 spaces from Round 7 (Photo 7).* Repeat from * to * 7 more times, omitting the last sc on the last repeat. Join to the first sc with a sl st. Fasten off and work away your tails of yarn.
Stitch count: 40 sc’s, 32 dc’s, and 8 ch-2 spaces
Round 9
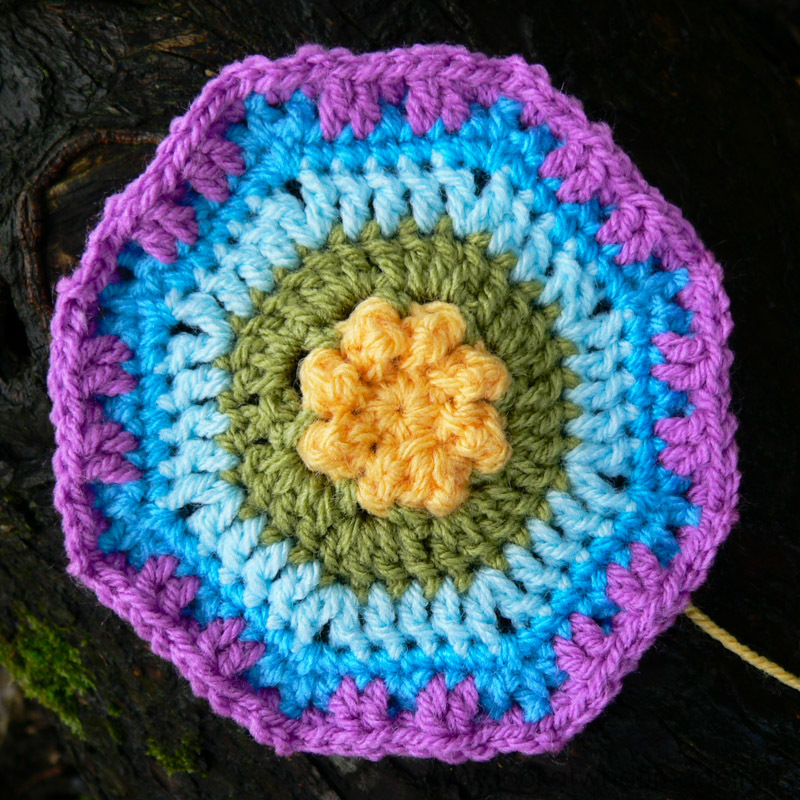
Join your new yarn by making a standing single crochet in any ch-2 corner around and continue as written.
Remember to work in the back loops only except when working into the ch-2 corners.
The 7 trebles should all fall in the sc between the two 2-dc groups on every second side. Make sure that you have 7 trebles and 6 ch-1 spaces before continuing on. You don’t want to frog because of a missed treble!
Stitch count: 44 sc’s and 4 7-treble fans {each 7-treble fan consists of 7 trebles and 6 ch-1 spaces}
Round 10
As written.
This round is not hard, but you have to concentrate when working into the trebles and ch-1 spaces. The corners should fall in the central treble (the fourth treble of the 7-treble fan). Fasten off at the end of this round and work away your tails of yarn.
Stitch count:
- Total: 100 st’s and 4 ch-2 corner spaces {24 sc’s, 76 hdc’s}
- Per Side: 25 st’s {6 sc’s and 19 hdc’s}
Round 11
Join your yarn by making a standing double crochet in any ch-2 corner space around. Ch 2 and dc in the same ch-2 space. This is your first corner made.
*(Dc, ch 1, dc) in the first stitch, which will be slightly hidden. This is your first V-stitch made (Photo 1). (Skip the next 2 st’s and make a V-stitch in the next stitch) 8 times. The last V-stitch should fall in the last hdc before the next ch-2 corner space (Photo 2). (Dc, ch 2, dc) in the ch-2 corner space. This is your corner made.* Repeat from * to * 3 more times, omitting the last corner on the last repeat. Join to the top of the standing double crochet with a sl st. Fasten off and work away your tails of yarn.
Stitch count: 36 V-stitches, 8 dc’s (in the corners) and 4 ch-2 corner spaces {9 V-stitches per side}
Round 12
As written.
- If you have any problems making the dc clusters, have a look at the tutorial for Week 38’s May Pole Square (first paragraph of Round 12 and Photos 2-4 of the same round).
- If you have problems making the multi-stitch cluster, have a look at Round 13 of May Pole (and Photos 2-4 of the same round).
You want to end up with 2 dc clusters in each corner (Photo 1), and a multi-stitch cluster in the ch-1 space of each V-stitch (Photo 2).
Stitch count: 36 multi-stitch clusters, 8 dc clusters, and 44 ch-2 spaces (including the 4 ch-2 corner spaces)
Round 13
- If you are using the same colour, sl st into the ch-2 corner space. (Ch 1, sc, ch 2, sc) in the same ch-2 space. This is your first corner made.
- If you are using a new colour, join your yarn by making a standing single crochet in any ch-2 corner around. (Ch 2, sc) in the same ch-2 space. This is your first corner made (Photo 1).
*Make a fpsc around the next dcCL (Photo 2). (Sc in the next ch-2 space. Make a spiked sc between the 2 V-st’s of Round 11 directly below the ch-2 space. Sc in the same ch-2 space (Photo 3). Make a fpsc around the next cluster stitch) 10 times. (Sc, ch 2, sc) in the ch-2 corner space.* Repeat from * to * 3 more times, omitting the last corner on the last repeat. Join to the first sc with a sl st.
Photo 5 shows the corner and the first fpsc of the next side completed. Don’t forget to make the fpsc’s!
Stitch counts:
- Total: 172 st’s and 4 ch-2 corner spaces {88 sc’s, 40 spiked sc’s, and 44 fpsc’s}
- Per Side: 43 st’s {22 sc’s, 10 spiked sc’s, and 11 fpsc’s}
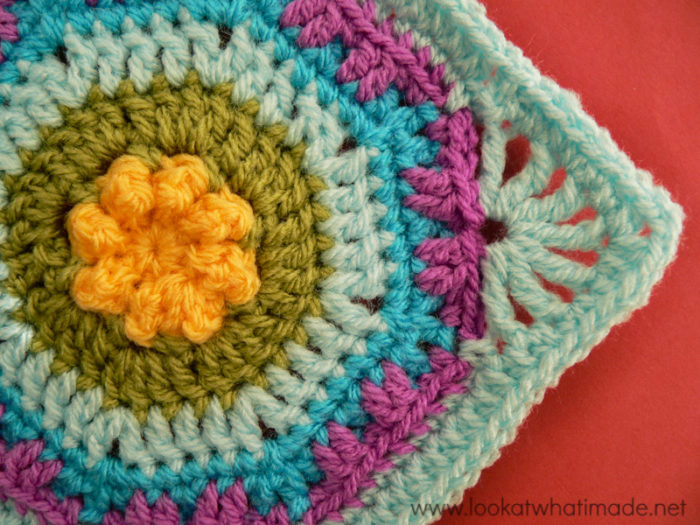
Just look at those beautiful little flowers!
Round 14
Remember my note about using the Optional Round 14 (as supplied in the pattern) instead of continuing on by adding another set of roses. If you want to continue on to make another round of roses, this Round will not apply to you and you should follow the pattern and disregard the tutorial for this round.
As written.
You are basically skipping each fpsc in this round. See how the dc’s are grouped in little clusters of 3, with the skipped stitches falling over the top of the flowers.
Stitch count: 144 st’s and 4 ch-2 corner spaces {36 st’s per side}
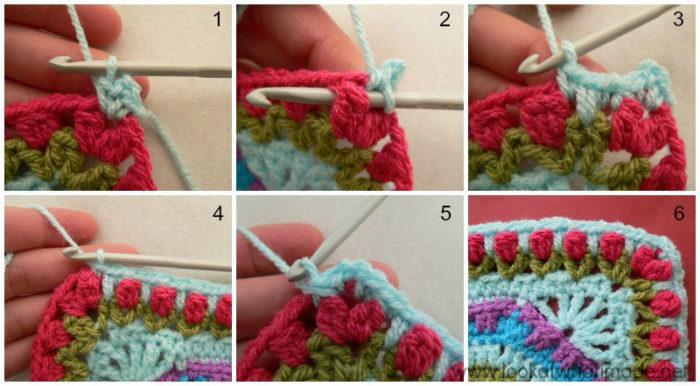
I have added an optional additional Round 15 to get my final round stitch count to 164 and my final size to 8.5″. See this post if you would like to read more about why I add additional rounds or if you want to see the additional round for this (and other) squares.
Join the Block a Week CAL
If you would like to be part of the Block a week CAL on Facebook, please join the Official CCC Social Group (you must be logged into Facebook to do so) so that you can access and utilize the support and encouragement of all the lovely ladies on there.
You can also join the Block a Week CAL Flickr Group so that you can inspire others and be inspired yourself.
For those of you who do not like Facebook, you can always follow along with me here. I will be posting the blocks every week.
Remember to subscribe to my Weekly Newsletter if you would like to be kept in the loop. You can also like my Facebook page or follow me on Bloglovin, Google+, Pinterest, Twitter, or Instagram.
More Blogs Following the CAL
- San from Loopsan – using Stylecraft in sophisticated Parchment, Denim, Mocha and Meadow
- Lou Mander from Tea, Crochet and Me – using Stylecraft in White, Mocha and Raspberry
- Wendy from Little Wendy Crochet (Dutch photo tutorials)
Happy Hooking!








Carol says
Dedri, You made comment about reworking this after finger healed and stitches “not so sloppy”…???? I wish my stitches looked “sloppy” like this! your work is beautiful! I credit you and Lucy [Attic 24] for helping me increase my own crochet abilities and widening my horizons, so to speak, enabling me to select from some more advanced patterns than I could before “meeting” you online!
Your talents are so great and you make it easy to go forward – gave me confidence to TRY things I never would have looked at!
Dedri Uys says
Carol, thank you so much for your lovely comment. I am so pleased to hear that you feel more confident. That is the entire reason for these tutorials. To boost and uplift you in your crochet knowledge and confidence x
Hazel Abernethy says
Hi Dedri
Should your list of colour choices be Round10 sherbert
Round 11 meadow
Round 12 pomegranate
I used the list without checking on your tutorial. Have frogged back to end of round 9 ready to have another go at it tomorrow
Dedri Uys says
You are correct, thank you for pointing that out. I have now amended the colour list to reflect the correct colours.