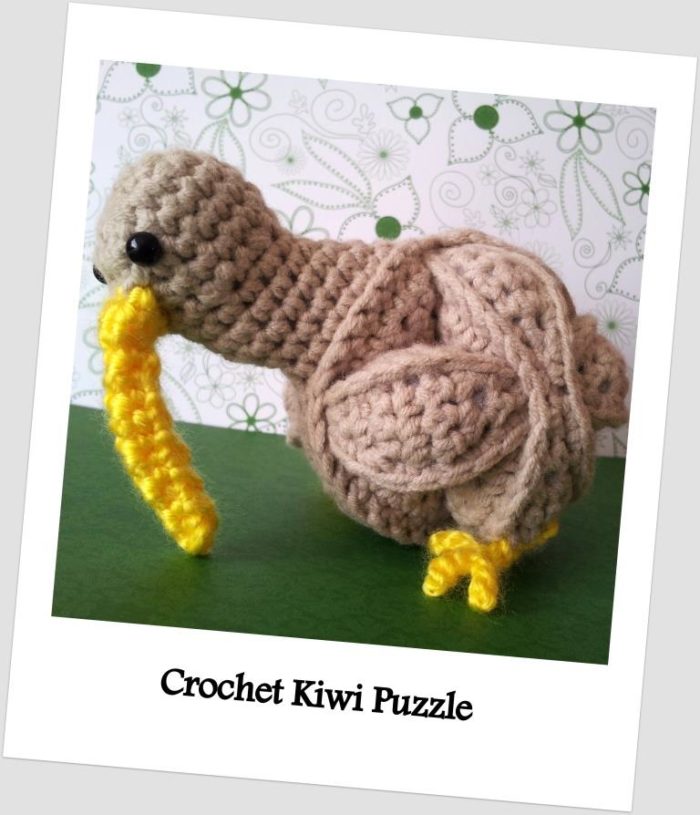
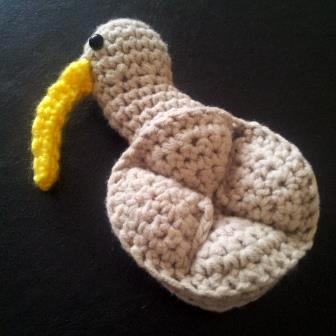
Welcome to the word of Amamani (Amigurumi Amish Puzzle Animals). If you have never made one of my Amamani, which is QUITE likely, this FREE pattern for the Crochet Kiwi Puzzle is just the thing to whet your appetite. It is essentially a Crochet Amish Puzzle Ball with a head and two feet.
If you are interested in finding out more about my Puzzle Animals, or you just want to see my other Amamani, you can read more about them here. Pretty soon I hope to have a whole Noah’s ark full of patterns.
Now why a Kiwi bird, you may very well ask. It is such a random, pointless bird…
Well, one of my testers asked me if I could make a Kiwi for KiwisoupCreations. So I did. More or less. My husband is NOT impressed, but pooh to him. It’s as close to a Kiwi as I am humanly able to get it.
So get your crochet on and make one of these, why don’t you? And if you were wondering if eyelash yarn would work, IT DOESN’T. I spent what feels like forever crocheting an eyelash yarn Kiwi and it came out looking like an elliptical fluff ball. Plus eyelash sucks to crochet amigurumi with.
I have based this Crochet Kiwi Puzzle on my Mini Amish Puzzle Ball. The “ball” part is less than 10 cm in diameter but it’s still perfect for little hands (or cats if you prefer).
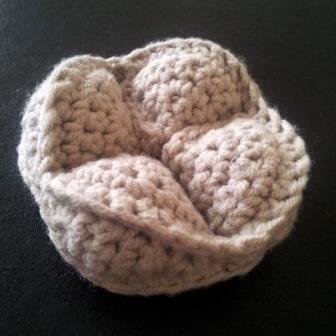
The Puzzle comes apart into 3 segments which can be assembled and taken apart at will, hence the “puzzle”. The segments are quite tight and thus tricky to slip over each other, but believe me, you don’t want it any looser, because the segments relax over time. Especially if you take the puzzle apart a lot.
Crochet Kiwi Puzzle Pattern (Amamani)
©Dedri Uys 2013. All Rights Reserved
Instructions
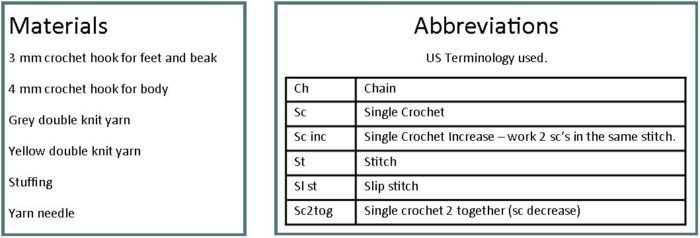
Note: Repeat all instructions between *asterisks* the number of times stated. *Sc inc, sc* x 3, for example, will mean Sc inc, sc, sc inc, sc, sc inc, sc.
Wedges
(Make 12)
With Grey Yarn and a 4 mm crochet hook:
1. Ch 2. Sc x 3 in 2nd ch from hook. Ch 1 and turn. (3)
2. Sc inc in each st. Ch 1 and turn. (6)
3. *Sc inc, sc* x 3. Ch 1 and turn. (9)
4. *Sc inc, 2 x sc* x 3. Ch 1 and turn. (12)
5. *Sc inc, 3 x sc* x 3. Ch 1 and turn. (15)
6. *Sc inc, 4 x sc* x 3. Ch 1. (18)
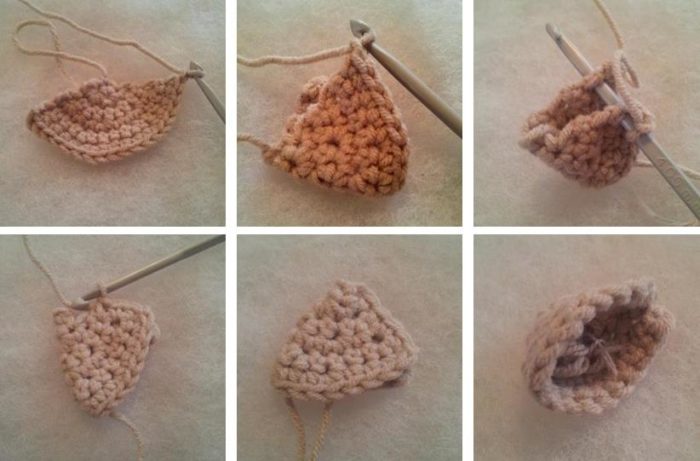
Fold the half-circle in half and join the open side of the resulting wedge together by making 5 sc’s along this edge. You will effectively be working one sc through both layers of each row. Ch 1 and bind off.
Work away your tails. I prefer just pulling them through the st at the top of the wedge and then using them as part of the stuffing for the wedge.
Lids
With Grey Yarn and a 4 mm crochet hook:
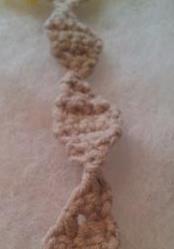
Hold your horses! Don’t make the following wedge lids just yet. This is just an explanation of how to do them when they appear in the pattern. So when I say “make a wedge lid”, this is how you will do it. And you will need to do it 11 times, so study up.
1. Ch 2. Sc inc in 2nd ch from hook. Ch 1 and turn (2)
2. Sc in each st. Ch 1 and turn. (2)
3. Sc inc in each st. Ch 1 and turn. (4)
4. Sc in each st. Ch 1 and turn. (4)
5. Sc in each st. Ch 1 and turn. (4)
6. Sc2tog x 2. Ch 1 and turn. (2)
7. Sc in each st. Ch 1 and turn. (2)
8. Sc2tog.
Feet
(Make 2)
With Yellow Yarn and a 3 mm crochet hook:
1. Ch 9.
2. Sl st in the 2nd ch from hook and next 2 st’s. *Ch 4. Sl st in 2nd ch from hook and next 2 st’s.* x 2. Sl st x 5 up leg. Ch 1 and bind off.
Beak
(Make 1)
With Yellow Yarn and a 3 mm crochet hook:
1. Ch 4.
2. Sc in 2nd ch from hook and next 2 st’s. Ch 1 and turn.
3. Sc x 3. Ch 1 and turn. (3)
4-12. Sc x 3. Ch 1 and turn. (3)
13. Sc inc x 3. Ch 1 and turn. (6)
14. Sc inc, 4 x sc, sc inc. (8)
Ch 1. Fold the beak in half lengthwise and sl st through both layers into each row down the side. Ch 1 and bind off. Keep a nice long tail, because you will work it back through the beak later on and use it to help anchor the beak to the head.
“Chain of lids” Segment
I think the chain of lids is probably the easiest segment to get started with. Make sure you have 4 of your wedges ready.
This segment will form the “sides” of your kiwi bird.
Following the instructions, work a wedge lid. When you get to the end of row 8, start again at row 1. Repeat rows 1 – 8 3 more times. This will give you a chain of 4 “lids”. On the very last “lid” of the chain, ch 1.
Now, insert your hook into the last st of the lid and the first st of one of the wedges. Make a sc. Continue working a sc through both layers (into each st and row) until you have worked 9 sc’s.
Hint: start with the sc seam of the wedge to your right.
Add the next wedge, again working 9 sc’s into it. Continue working around until you have worked one side of each of the 4 wedges. Now you are going to work around the other side of the chain of lids. Make your first sc of the opposite side into the first st of your chain of lids (which will already have a st worked into it) and the NEXT st of the wedge. Continue working around the 4th wedge, stuffing as you go. When you get back to the last st of the first wedge, join to the first st with a sl st and bind off. Use the tail of yarn to join the tips of the first and last wedges together. Alternatively you can sl st them together before binding off, which is what I prefer.
Feet Segment
1.  Ch 2. Sc inc in 2nd ch from hook. Ch 1 and turn (2)
2. Sc in each st. Ch 1 and turn. (2)
3. Sc inc in each st. Ch 1 and turn. (4)
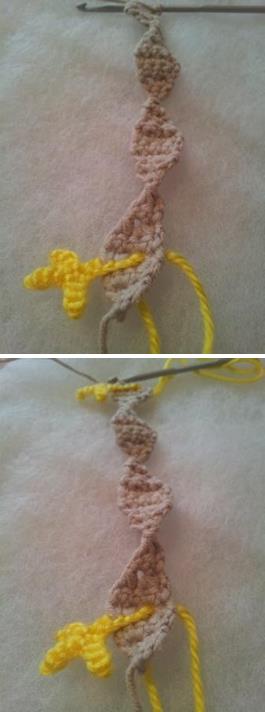
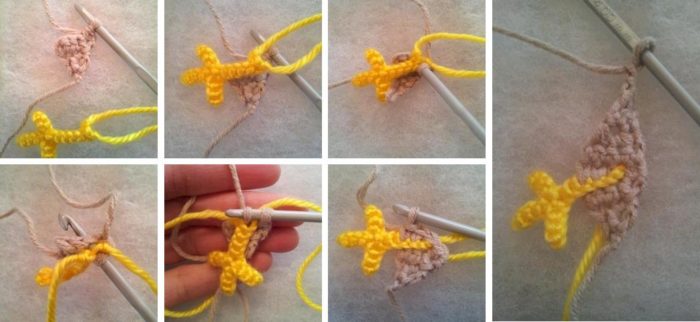
4. Sc in the first st. Now place one of your feet in front of the lid with the toes pointing to your left and the wrong side of the foot facing you. Insert your hook into the st at the top of the leg and the next st of the wedge and make a sc. Sc through the next 2 st’s of the leg AND the st’s of the lid (so both layers). Ch 1 and turn. (4)
5. Sc in each st. Ch 1 and turn. (4)
6. Sc2tog x 2. Ch 1 and turn. (2)
7. Sc in each st. Ch 1 and turn. (2)
8. Sc2tog.
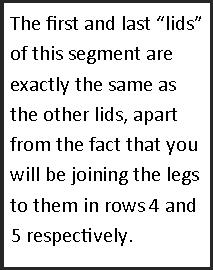
Now repeat the pattern for the “normal” wedge lid 2 times so that you end up with 3 lids, the first of which has a foot on it.
For the 4th lid (and the other foot):
1. Ch 2. Sc inc in 2nd ch from hook. Ch 1 and turn (2)
2. Sc in each st. Ch 1 and turn. (2)
3. Sc inc in each st. Ch 1 and turn. (4)
4. Sc in each st. Ch 1 and turn. (4)
5. Sc in the first st. Now place one of your feet in front of the lid with the toes pointing to your left and the wrong side of the foot facing you. Insert your hook into the st at the top of the leg and the next st of the wedge and make a sc. Sc through the next 2 st’s of the leg AND the st’s of the lid (so both layers). Ch 1 and turn. (4)
6. Sc2tog x 2. Ch 1 and turn. (2)
7. Sc in each st. Ch 1 and turn. (2)
8. Sc2tog.
Ch 1 and turn your lids so that the feet are facing away from you. Place one of your wedges behind the first lid and sc through the first 4 rows of the lid and the first 4 st’s of the wedge (so both layers). This should bring you to the foot. Fold the foot down (out of the way) and sc into the next row and st. Continue, making 4 more sc’s through both layers. When you get to the end of the wedge lid, join the next 2 lids as before. When you get to the last lid, 5 sc’s will take you up to the foot. Fold it down and out of the way as before and continue working all the way around the chain of lids, stuffing as you go. When you get back to the last st of the first wedge, join to the first st with a sl st and bind off. Use the tail of yarn to join the tips of the first and last wedges together. Alternatively you can sl st them together before binding off.
Head Segment
Head
Worked in a spiral, so just make the first st of each round in the first st of the previous round. Use a running stitch marker if you prefer. I always do.
With grey yarn and a 4 mm crochet hook:
1. Into a magic ring: ch 1, sc x 6. (6)
2. Sc inc x 6. (12)
3. *Sc inc, sc* x 6. (18)
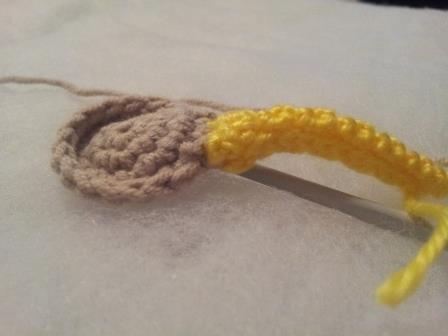
4. Sc x 14. Place the beak on top of your head with the seam facing you. Insert your hook from back to front into the last st of the beak (the first st on your right) and from front to back into the 3d st from the right. Now insert your hook into the next st of the head and work a sc through ALL 3 LAYERS. Make a sc through both layers of the next 2 st’s. Fold the other side of the beak flat and make your last sc through the first st on the left, the 3d st on the left AND the next st of the head (so 3 layers again). These stitches will be quite tough to get into, so just force your hook through.
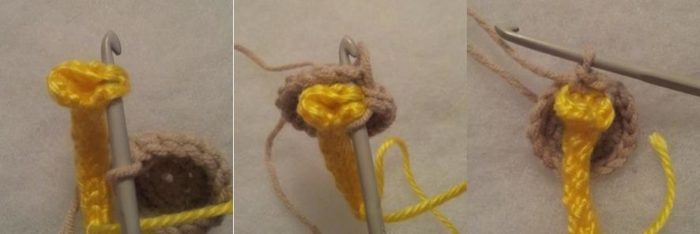
5. Sc x 18
6. Sc x 18. Attach your eyes now if you are using safety eyes. You need to attach them between rounds 2 and 3, more or less in line with the sides of the beak. Scroll down a bit and have a look at the photos if you are confused.
7. *Sc2tog, sc* x 6. (12)
8. Sc x 10, sc inc x 2. (This increase should fall under the beak.) (14)
9. Sc x 4, sc inc x 2, sc x 4, sc2tog x 2. (Increases should fall on the back fold of the neck.) (14)
10. Sc x 5, sc inc x 2, sc x 3, sc2tog x 2. (14)
11. Sc x 6, sc inc x 2, sc x 6. (16)
12. Sc x 7, sc inc x 2, sc x 7. (18)
13. Sc in the next st and sl st in the next.
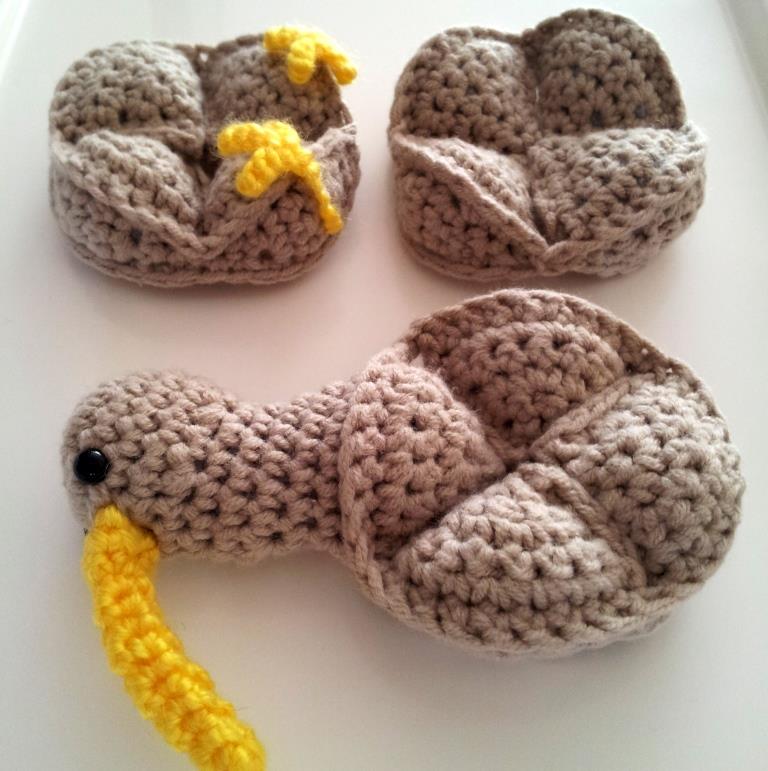
Now work 3 wedge lids. When you get to the end of the last wedge lid, ch 1. Place one of your wedges behind the first wedge lid and sc x 9 through both layers as before. Continue attaching wedges to your lids until you get to the head. Make the first sc of the head into the st that already has a sl st worked into it. Continue around the head, joining it to its wedge and stuffing as you go. Attach the other sides of the wedge lids as before and when you get to the last st, sl st in the first st to join and bind off. Work away your tails.
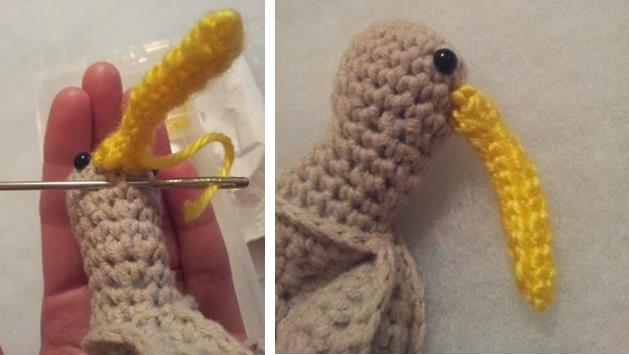
Almost done. Just one more little thing. Take the tail of yellow yarn at the end of the beak and thread it through the beak so that your tail of yarn is right next to the Kiwi’s head. Now sew the underside of the beak to the head. This just neatens up the beak, otherwise it tends to flop up a bit.
Building your Crochet Kiwi Puzzle
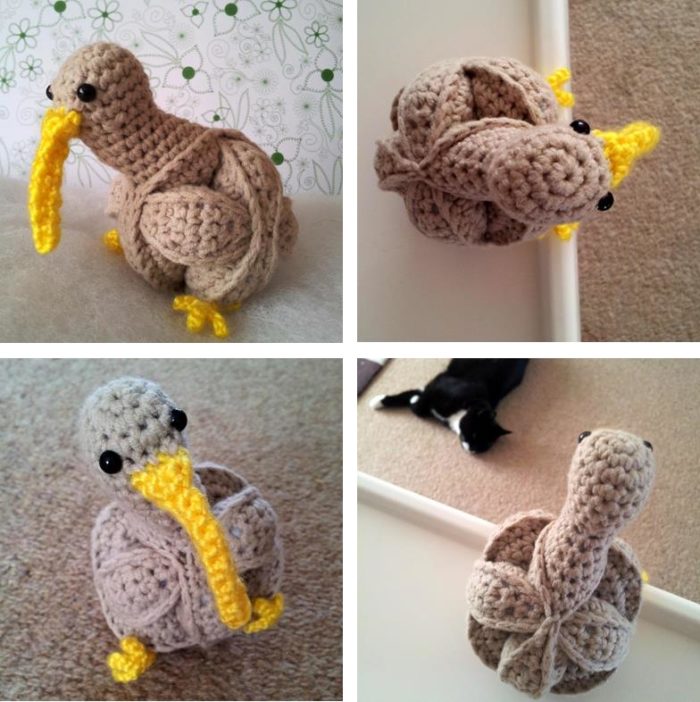
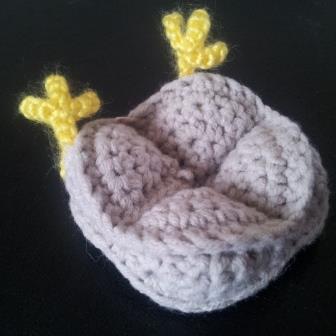
Slip the lids segment over the feet segment so that the lids segment runs horizontally when the feet are on the ground. Now slip the head segment into the gaps vertically. The head segment and the feet segment should run vertically, while the lids segment should be horizontal.
Think that is a cumbersome explanation? You try explaining how to build a puzzle ball in words. Pictures are much easier, so look at them and copy!
Please note that this Kiwi bird is essentially a ball, so it is not going to stay upright without help.
If you enjoy making this Crochet Kiwi Puzzle, have a look at some of my other Puzzle Animals. They range in difficulty with the rhinosaur and the elephant being the easiest and the giraffe being the most complicated (to date). But if you know how to join in the round and work short rows, you’ll be grand!
Translations
This pattern is now available in Dutch (translated, with permission, by Magda Wellens from Aurorashandwerkwereldje)
Free Related Patterns
- Crochet Octopus Puzzle
- Octopus Fabric Puzzle
- Crochet Amish Puzzle Ball
- Mini Crochet Amish Puzzle Ball
- Crochet Flower Ball
Related Patterns For Sale
- Dinosaur
- Gregor the Rhinosaur
- Eleanor the Elephant
- Gemina the Giraffe
- Hermione Horse
- Skillie the Turtle
- Brill the Lion
- Chloe the Cow
Remember to subscribe to my newsletter if you would like to be kept in the loop. You can also like my Facebook page or follow me on Bloglovin or Google+.
Happy Hooking!






Irene says
would love to make this for a great-granddaughter.Thank You!!
Linda Graimm says
I SO love this little Kiwi. In spite of the fact that I don’t have any babies around, I will make it anyway just because it’s SO adorable. TYVM. You do good work!
E.Lynn says
Well I came to your site to check out the tiny cars and ended up taking a sharp right turn to the kiwi. I made her with a few mistakes and figured out the positioning (will be much better when I correct the mistakes on the next one). I’m hooked, so to speak, and just downloaded your book. Will invade my stash closet and hopefully come up with some colorful Amamani! Thank you.
Beverly says
ahaha! I burst out laughing when I put my Kiwi together! It is so darn cute! I am anxious to make the other patterns now. I am not design inclined, so perhaps you could come up with a heart-shaped something for Valentine’s Day? Thank your for sharing your creativity.
Dedri Uys says
Beverly, I am so pleased that you liked your little kiwi. I don’t know if I will have time to do anything for Valentine’s Day, but if I do it will be with you in mind :)
Heather says
Such a great looking Kiwi! (I should know, being one myself!) hehe Can’t wait to make him :)
I have just ordered your book, so I’m sure I will soon have a whole collection of amamani rolling around for my niece to play with. Thank you!
Dedri Uys says
Hi Heather. Thank you :) Feel free to contact me if anything is unclear.
geminoda says
Bellos trabajos ya tengo el libro, pero me gustaria empezar por una pelota, ademas no hablo ingles, podria decirme como empezar , mil gracias
un abrazo genoveva de Peru
Dedri Uys says
Hi Genoveva
If you do not speak/understand English, you are going to have a very hard time following the book, I’m afraid. I suggest making the ball first so that you get a feel for how the puzzles work.
Thank you!
Dedri
WonderCrochet says
Hey! I was reading how you were having trouble making the kiwi fuzzy. Could you perhaps make the lids using the loop stitch? It might just look like a bird with a bunch of loops all over it, but it might work. I think I’ll try it on the next bird amamani I make.
When I was making the head for Kiwi I read, “6. Sc x 18. Attach your eyes now if you are using safety eyes.” so I thought it meant attach the eyes on row 6! Am I the only stupid person who thought that the eyes were supposed to be attached under the beak :)?
Dedri Uys says
Hehe…I will go have another look at the pattern. There are probably other people that have had the same problem x