There has always got to be a story with me, hasn’t there? And this one begins with a wonderfully wet walk.
Christiaan has returned to work today after two weeks of annual leave. That means that I had to do the nursery run with all three boys in tow and it was RAINING! Jaco and I were soaked. Lord Xander fell asleep in his buggy, all cosy under the rain canopy.
Gillian from across the road must have taken pity on us, because she offered to stay with them while I went to pick Pieter up again. And on her birthday too! I made her some cupcakes, by the way. Four Victoria Sponge cupcakes and four Marmite Cupcakes – using THIS RECIPE – because she too is a LOVER not a hater.
The boys are now asleep. So my plan was to blog about Pieter’s birthday party, which is all I can think about doing, but I realized I still had to do the Marshmallow Superheroes post. That wasn’t possible, because it, in turn, needed this post right here about the black royal icing.
Now let me tell you a little bit about this black royal icing recipe. When I made Jaco’s Elmo cookies last year, I realized I didn’t have any black gel food colour. “‘n Boer maak ‘n plan”, as we say in Afrikaans, so this farmer’s daughter made a plan.
One tip I can give you is to ALWAYS have a stash of black fondant lurking about. It is a nightmare to make yourself and tastes horrid if you manage. It’s not that much more expensive than buying white and colouring it yourself, so do yourself a massive favour and just buy it!
To make black royal icing you will need equal parts royal icing and black fondant. It doesn’t have to be precise. Eyeball it. You can always add more of one or the other later.
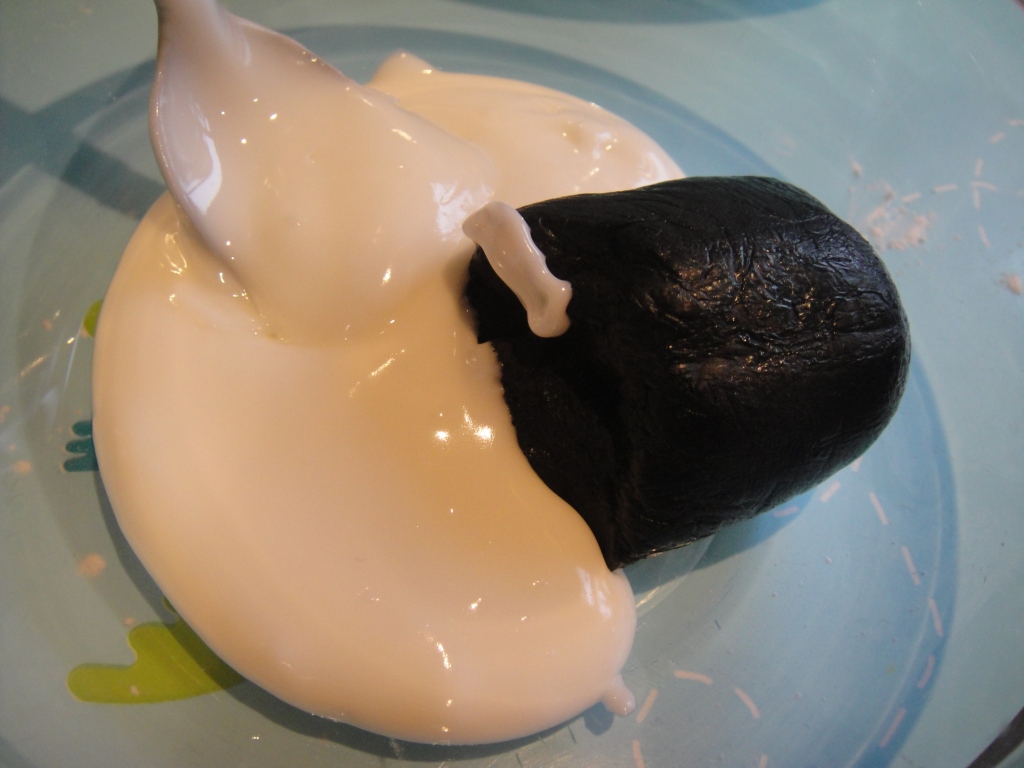
Mix it thoroughly. You will notice that the royal icing seems very thick in the photo below. That is because I have added less royal icing to begin with. It is waaay easier to add more royal icing than to add more fondant. Adding more fondant results in manual labour to remove the lumps.
If the mixture seems more gray than black, take heart…
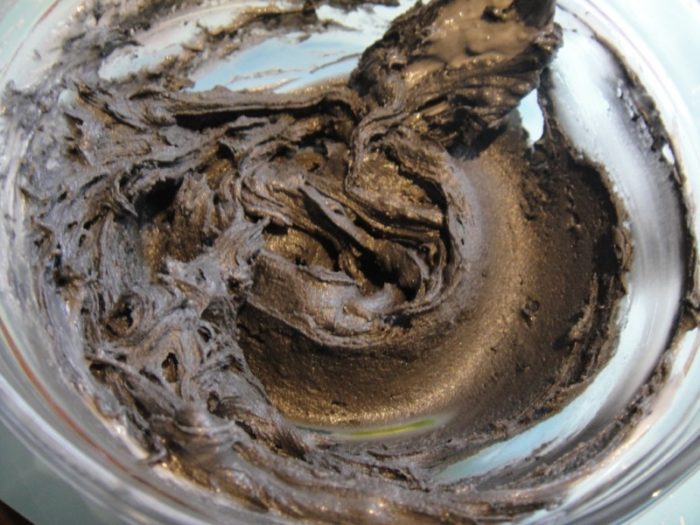
…it darkens as it stands. For the purposes of this photo the royal icing wasn’t covered, but please cover your royal icing very well. It dries at the speed of light.
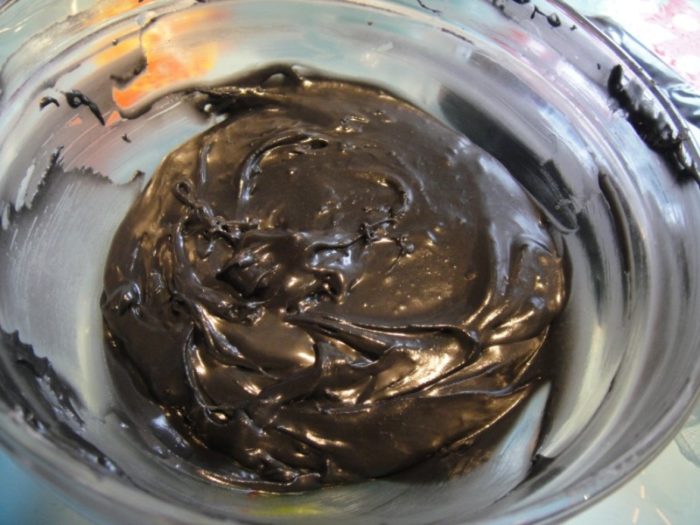
After about 20 minutes of waiting you should be rewarded with a lovely jet-black royal icing that takes slightly longer than normal royal icing to dry.
This is an example of the finish you can expect when using this mixture. Yours might look more professional though. I’m still practicing my icing

Remember to clean up after yourself :)

I hope you find this tip useful and would love to hear from you if you make black royal icing using this method.



Mary L Taylor says
I just came across your site and am so grateful for finding you. You’re a lifesaver! Thank you for the above post for getting black royal icing. I can’t wait to run out and buy some black fondant at my local cake supply and try this.
Dedri Uys says
I’m so pleased you like the tip. Do let me know how you get on with your black royal icing :)
Vicki says
You are an absolute lifesaver, can’t thank you enough for this tip!!
Dedri Uys says
Lol, sounds like you were in a bind? I hope it worked ok. I needed a quick batch on the weekend and lo and behold! No black fondant to be seen. I had to settle for dark brown. Boo!
Ty says
Very clever. Handy tip to commit to memory. well done you ;-)