Welcome to Part 5 of the Scheepjes Ubuntu CAL 2018. Last week we started on our half-diamonds and I was absolutely delighted to see you all finish so quickly (and with hardly any assistance)! My favourite bit about Part 4 was seeing all the pretty Manta rays/moths in your photos. Once you mentioned them, I couldn’t stop seeing them :)
This week, as we continue growing our half-diamonds, we will complete the large central flowers on each motif. As most of you already know, Sophie was my first ‘yarn baby’. One of the most prominent design elements in Sophie is the large central flowers that ‘grow’ out of Sophie’s Garden. When I was designing Ubuntu, I wanted to echo those flowers to celebrate the journey Sophie took so many people on. The sense of community I (and so many others) found through that CAL in 2015 is what inspired the message and feeling behind this present CAL, so I thought it only fair to honour it!
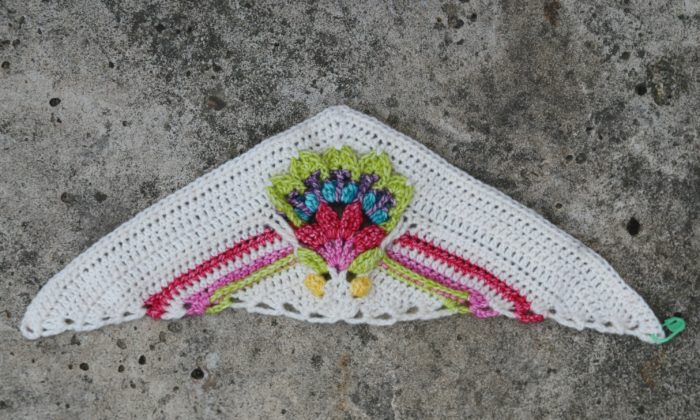
I have a special photo challenge lined up for this part, so please keep an eye on my Instagram account this weekend. EDIT: See Photo Challenge at the bottom of this post.
You will find all the links and information you need under ‘Resources‘ below. If you have stumbled on this post accidentally and don’t know what Ubuntu is, you can read more about it HERE (Information) and HERE (Concept).
Resources
- Part 5 Pattern PDF
- Part 5 Video Tutorial (UK terminology) by Esther Dijkstra from It’s All in a Nutshell
- Official Scheepjes – International Group (English) or the Official Scheepjes – Nederlandse Groep (Dutch). You have to be logged into Facebook in order to access the link to the groups.
- Add the CAL to your Ravelry Queue
- If you are on Instagram, you can find me HERE. Please add your photos using #scheepjesubuntucal2018 or #scheepjesubuntucal.
- Special Stitches and Techniques (including a gauge square)
Ubuntu CAL 2018 Part 5: Half-diamond Part 2
Although this pattern will not have a step-by-step photo tutorial, I will be sharing photos of each completed round (and some of the trickiest bits). I am using a different colour for each round so that you can clearly see stitch placement. I will also share notes and tips as I go.
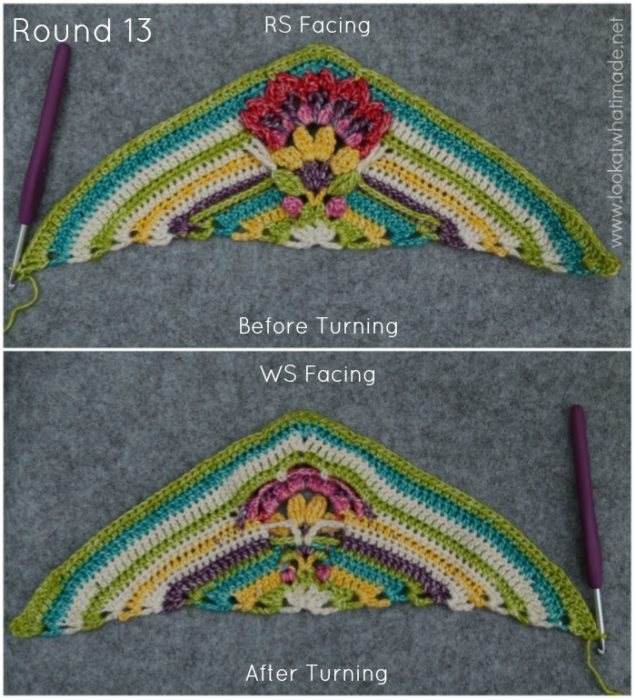
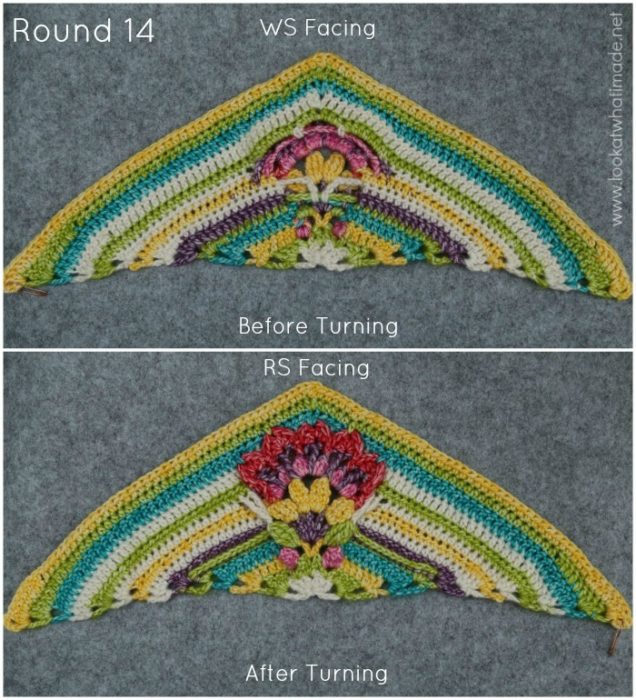
- When you are turning at the end of every round, please note that the front of the last round won’t necessarily be the front of your work! You will know that the Right Side is facing you if the Popcorns from Round 3 are facing you.
- Remember that you are making 6 of these half-diamonds, changing colours where instructed.
***Before continuing with the half-diamonds, we will make a Flower in the non-pointy corner of each half-diamond. The flower consists of three rows (Flower Rows 1, 2, and 3).***
Flower Row 1
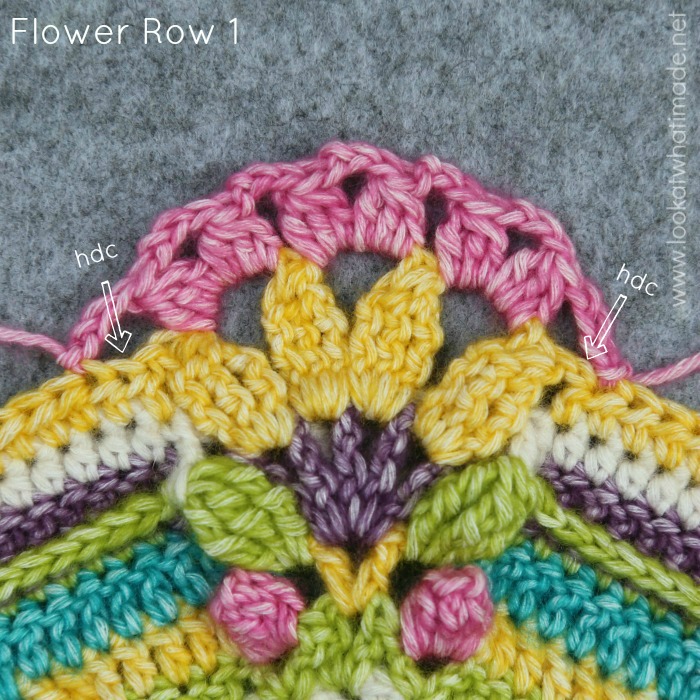
If you are finding it hard to identify which loops belong to which stitch when you start this row, turn your work around before starting this row (so that the WS of the half-diamond and the front of Round 8 is facing you). Mark the second to last hdc before the Flower from Round 8 with a SM. Mark the second hdc AFTER the flower with a SM, remembering that there is a ch-1 sp after the last Petal. Turn your work back around so that the RS of the half-diamond is facing you. Work into the marked sts and remove the stitch markers when you are done. There should be one skipped hdc on either side of the ‘Flower’ (see arrows below).
Flower Row 2
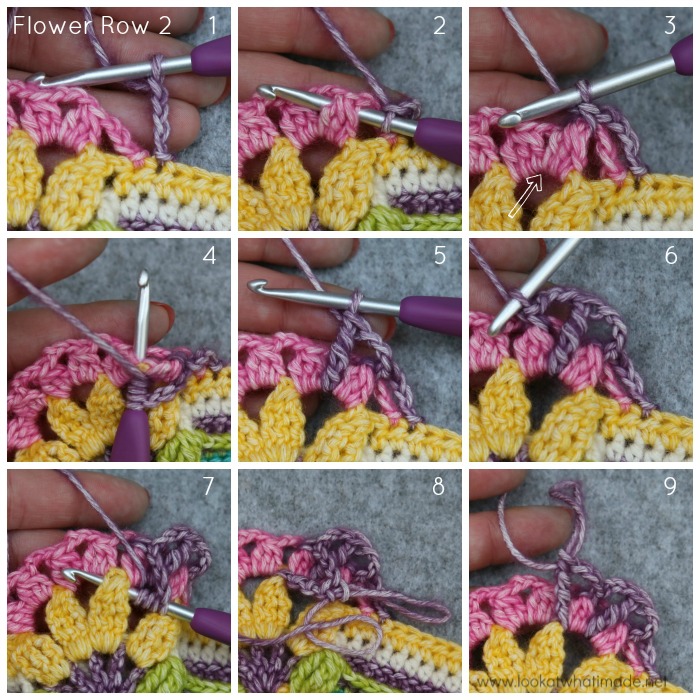
The pattern tells you that “This row will need a bit of concentration!” It is not exaggerating! This is not the hardest round of the pattern by any stretch of the imagination, but you will need to be careful about which stitch you put where. Take this one slow and switch the tv off!
- Photos 1 – 3 show the start of the Round and the first FPsc made.
- When making the Dtr sts BETWEEN the two Bobbles from Flower Row 1, you will need to squish the Bobbles apart so that you can get into the ch-4 sp from Round 8 {Photos 3 – 5}.
- When making the FPdtr sts around the Petals from Round 8, insert your hook from front to back and again from back to front around the ENTIRE Petal {Photos 7 – 9}.
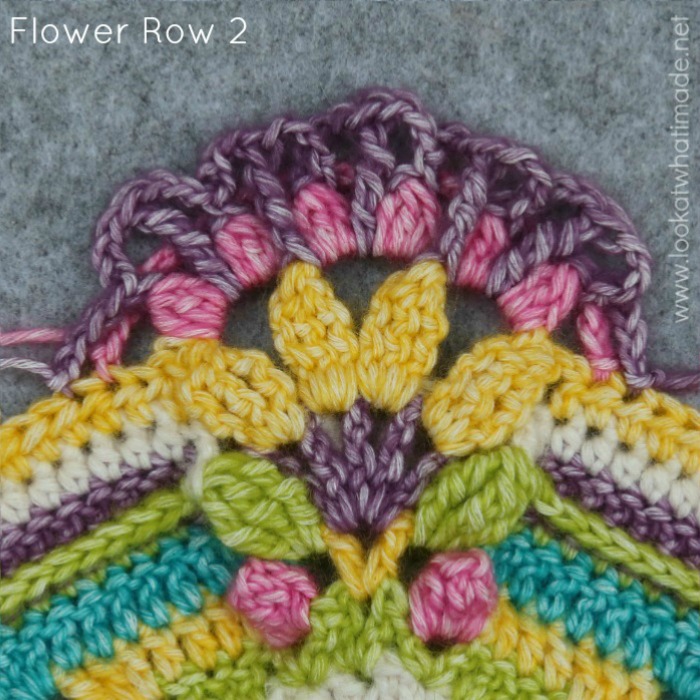
When you have finished this round, double-check the photo below to make sure that you have made all the stitches/spaces in all the right places.
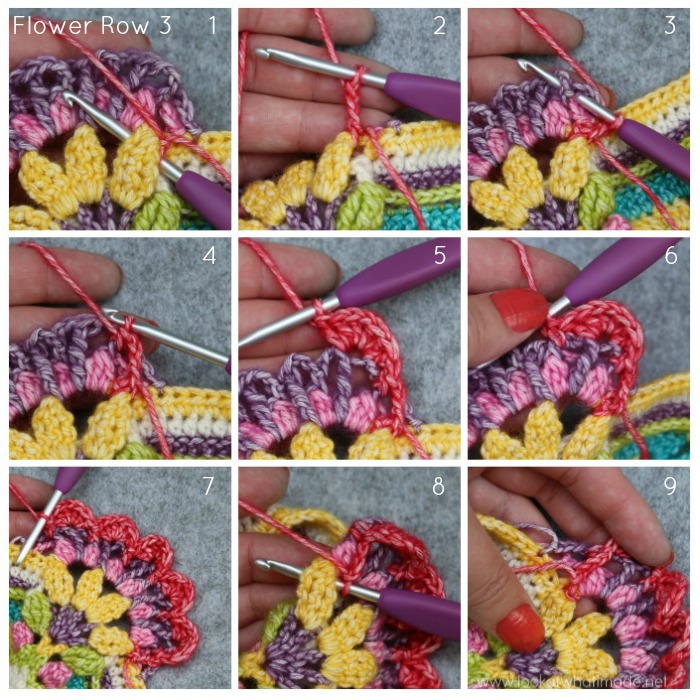
Flower Row 3
In this round, you will make FP stitches around the first and last Petals of Round 8 {Photos 1, 2, 8, and 9}. The remainder of the FP stitches and Petals will be made into Flower Round 2 {Photos 3 – 7}. This is another slow and careful round. At the end of this round, make sure that you have 5 Petals, which is the most important thing about this round.
This is what your Flower should look like now, all neatly framed by the Flower Row 3 colour.
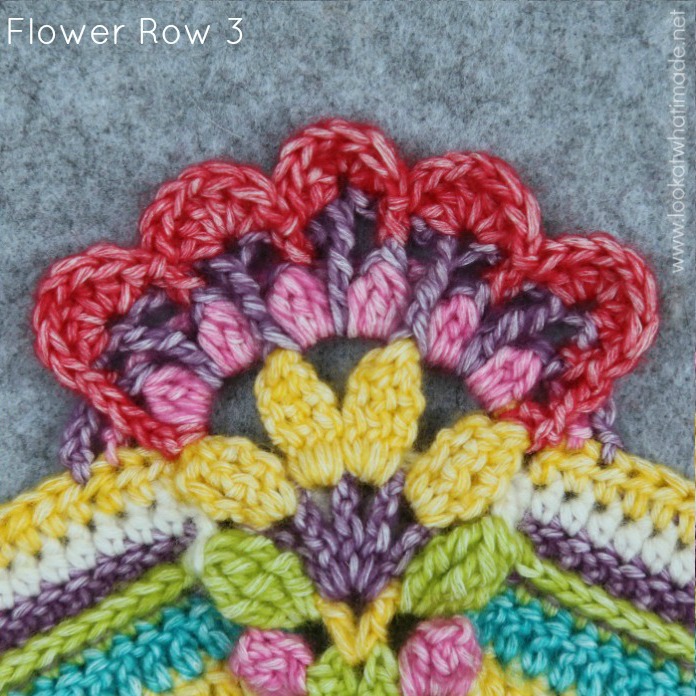
Your flower is now complete. You will ‘catch’ the Petals from Flower Row 3 in Rounds 12 and 13. We will now continue making the half-diamond.
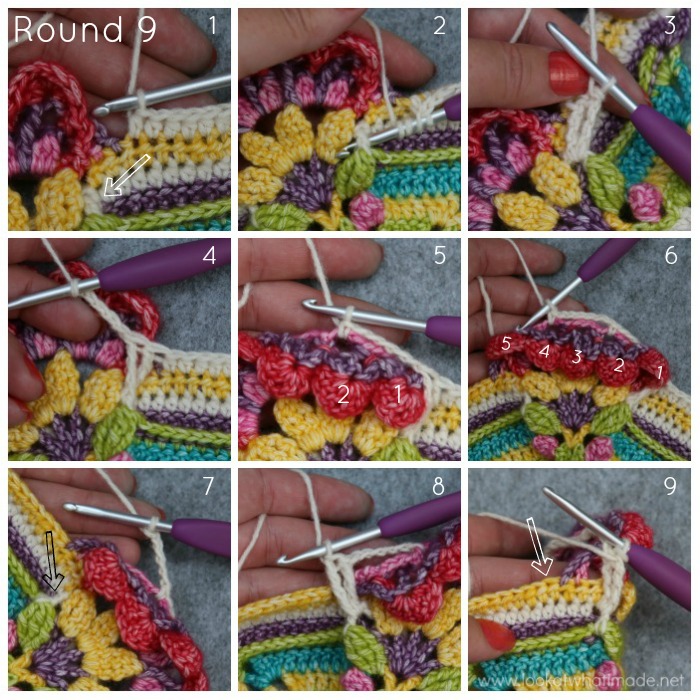
Round 9
- The arrow in Photo 1 shows the FPdc from Round 7 that you will need to work around. Photos 2 – 4 show both FPdtr completed. Don’t worry if their loops are ‘gappy’ {Photo 4}.
- When working behind the Petals from Flower Row 3, make sure that you identify them correctly so that you can place the two sc behind them accurately {Photos 5 and 6}.
- The arrow in Photo 7 shows the FPdc from Round 7 that you will need to work around. Photo 8 shows both FPdtr completed.
- The arrow in Photo 9 shows the st that you will make your first st of the second side in.
This is what Round 9 should look like from the front (RS facing) and the back (WS facing).
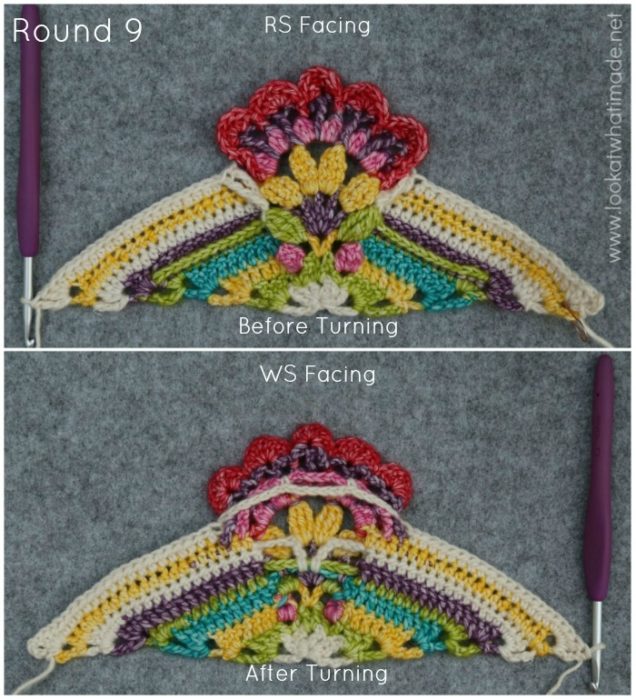
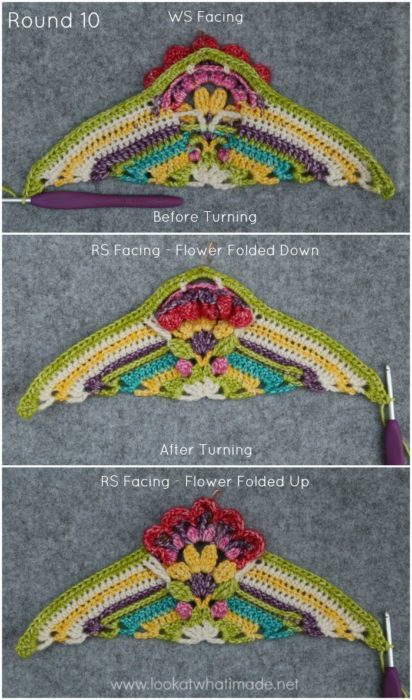
Round 10
This is a simple round. I have included photos of the RS facing with the flower folded down (so you can see the actual sts of Round 10 after turning) and the flower folded up.
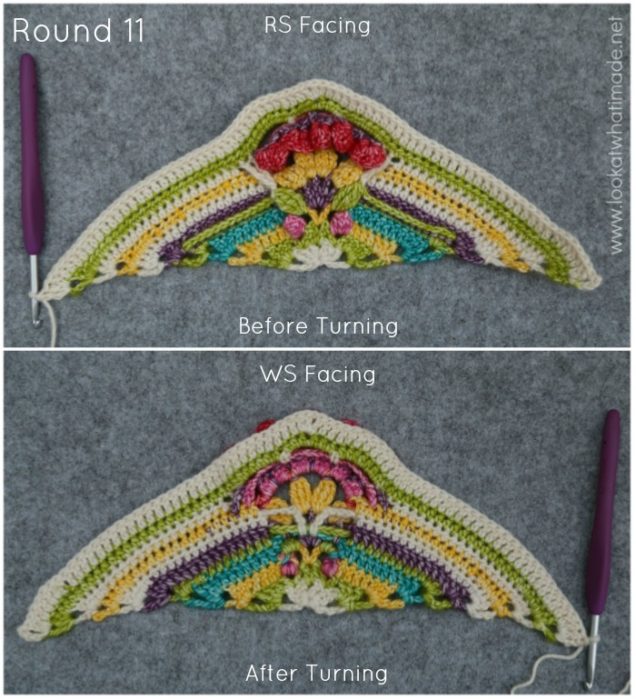
Round 11
Don’t worry about the fact that Round 11 will wobble behind the flower. Once we ‘tack’ the flower down in the next two rounds, it will look just fine :)
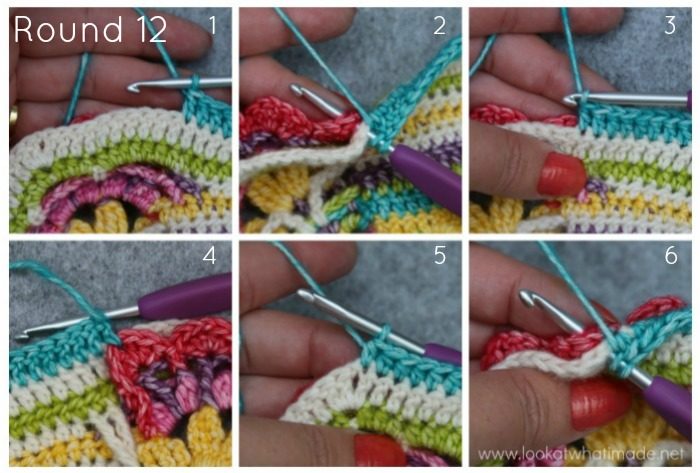
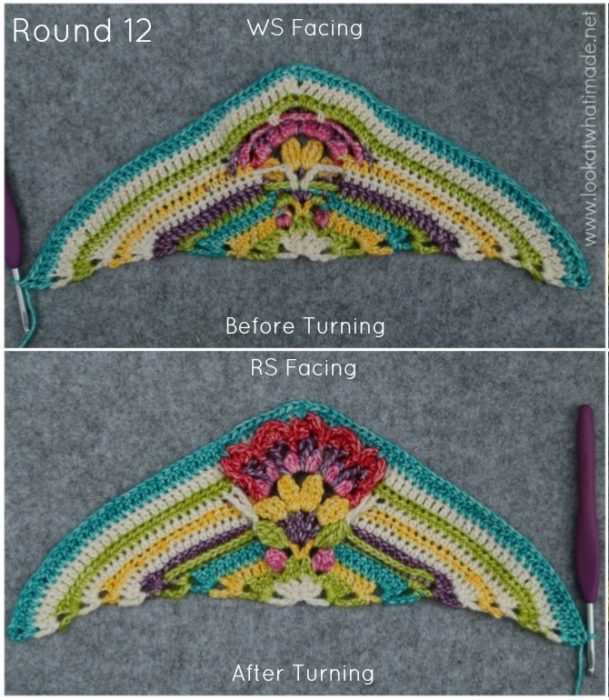
Round 12
In this round, you will ‘catch’ 3 of the Petals from Flower Row 3.
- Photos 1 – 4 show the first Petal being ‘caught’, from both sides.
- Photo 5 shows the stitches up to the corner.
- Photo 6 shows the second Petal being caught.
You will catch the remaining Petals in the next round.
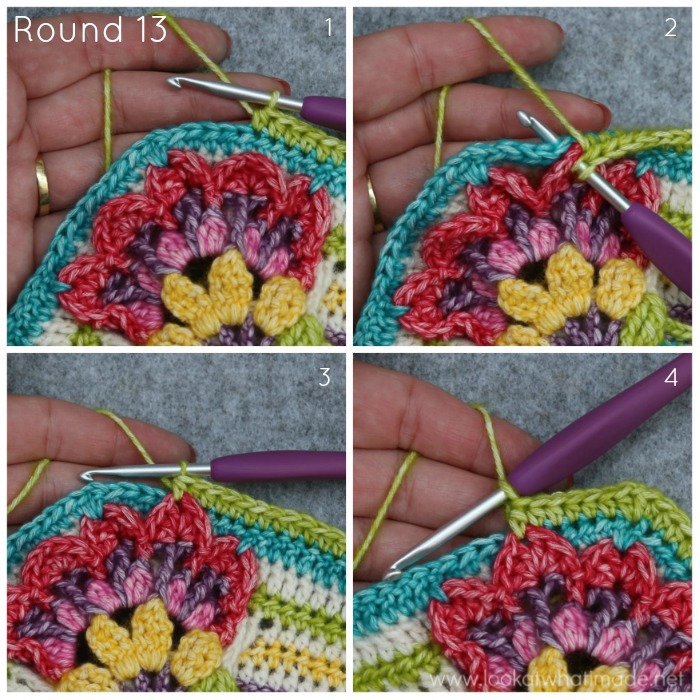
Round 13
- Photos 1 – 3 show the first Petal being caught.
- Photo 4 shows the last remaining Petal being caught.
Almost there!
Round 14
The last round is an easy one :) Double check your stitch count so that you are ready for next week!
This one was a bit harder than last week, wasn’t it? Nevertheless, I hope you thoroughly enjoyed it! I just LOVE this flower :)
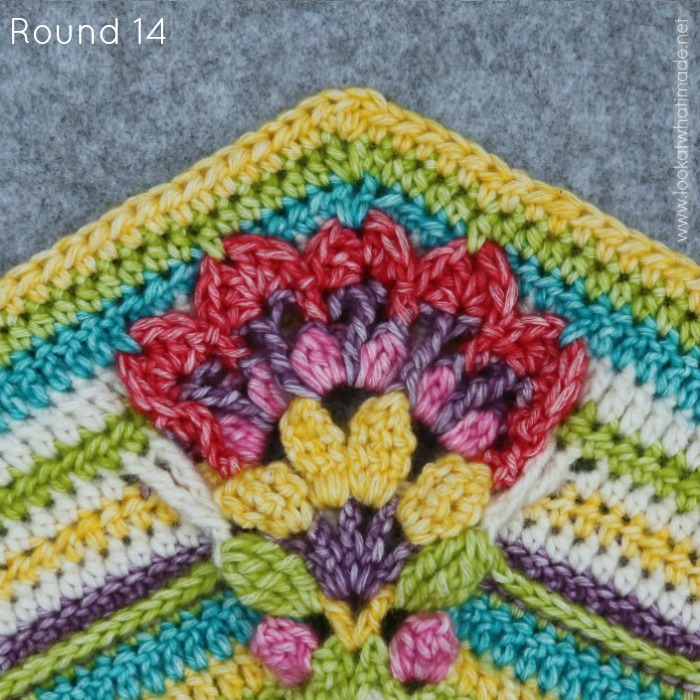
Photo Task 3
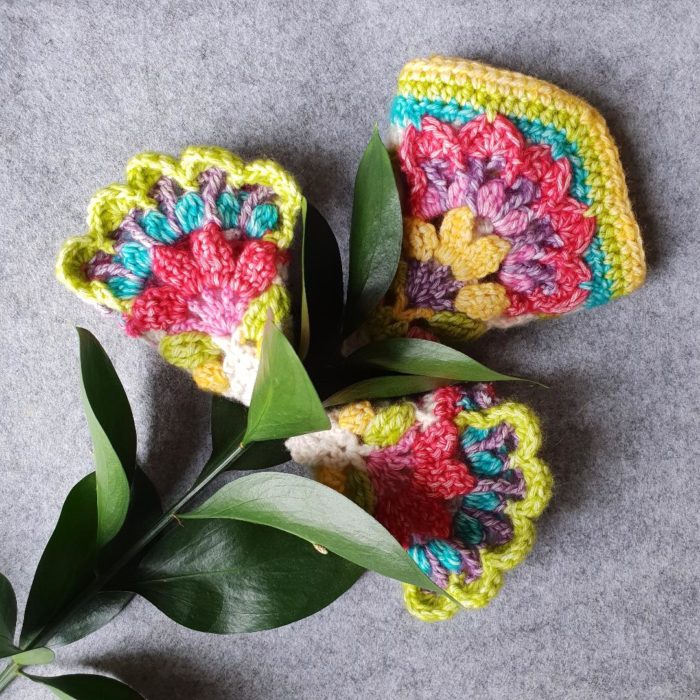
I have thoroughly enjoyed looking at all your photo task photos so far. Your enthusiasm has got me all excited for this next one, which is to create a bouquet with your Part 5 pieces. I couldn’t quite get mine to look as pretty as it did in my mind, but you get the idea :)
Photo Task 3: #ubuntubouquet.
Please note that this photo challenge is not ‘officially’ part of the CAL, but more a way for us to get to know each other a bit better. I would love it if you would share these photos with me on Instagram so that we can all ‘Ooooh’ and ‘Aaaah’! I kindly request that we keep these photo tasks out of the Facebook groups as the groups are dedicated to supporting the technical aspects of the CAL. If you don’t have Instagram, please feel free to use the Contact Me button at the top of this page so that we can open a dialogue and exchange photos via email.
Have a fantastic week and I will see you back here for Part 6 next week. Not long now before we can start joining!

This blog post contains affiliate links. I only link to products I personally use or would use. All opinions are my own.


