Welcome to Part 11 of the Scheepjes Ubuntu CAL 2018. This week, we will be adding a few Corner Flowers and expanding our border before completing it next week. I can’t believe that we are almost done!
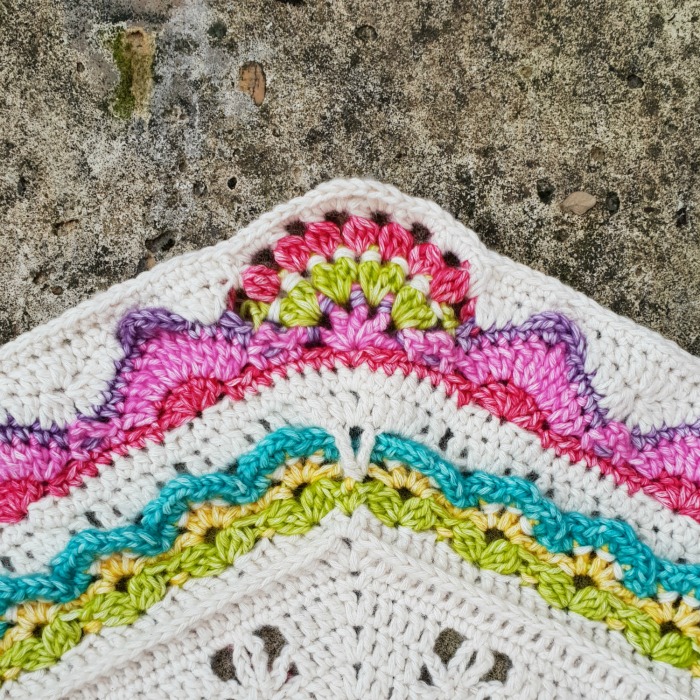
You will find all the links and information you need under ‘Resources‘ below. If you have stumbled on this post accidentally and don’t know what Ubuntu is, you can read more about it HERE (Information) and HERE (Concept).
Resources
- Part 11 Pattern PDF
- Part 11 Video Tutorial (UK terminology) by Esther Dijkstra from It’s All in a Nutshell
- Official Scheepjes – International Group (English) or the Official Scheepjes – Nederlandse Groep (Dutch). You have to be logged into Facebook in order to access the link to the groups.
- Add the CAL to your Ravelry Queue
- If you are on Instagram, you can find me HERE. Please add your photos using #scheepjesubuntucal2018 or #scheepjesubuntucal.
- Special Stitches and Techniques (including a gauge square)
Ubuntu CAL 2018 Part 11: Border Part 5
Although this pattern will not have a step-by-step photo tutorial, I will be sharing photos of each completed round (and some of the trickiest bits). I am using a different colour for each round so that you can clearly see stitch placement. I will also share notes and tips as I go.
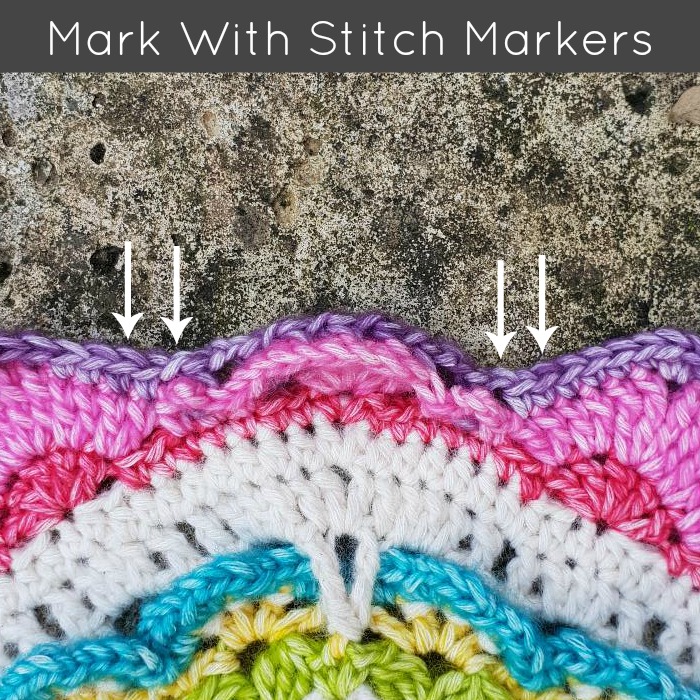
Before continuing with the border, we will make a Flower in each corner. The flowers consist of two rows (Corner Flower Rows 1 and 2). Double check the placement of your stitch markers before you start!
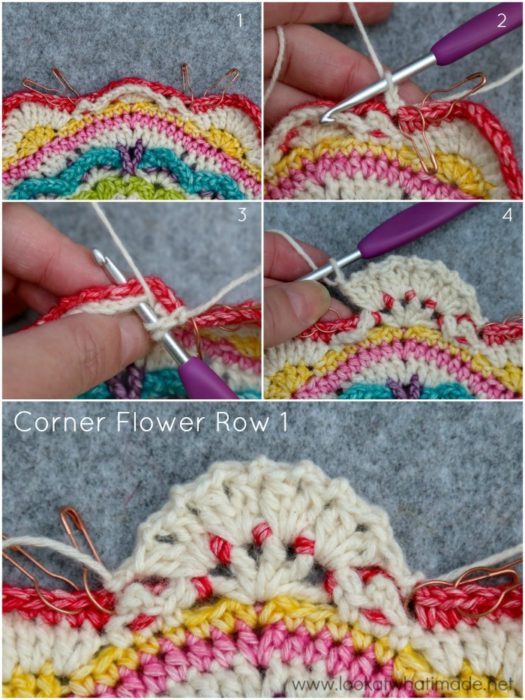
Corner Flower Row 1
Before you start, identify the 4 ch-1 sps of each corner Scallop from Border Round 17. Except for the first and last joining sts, you will only be working into these ch-1 sps. Ignore all other stitches and ch-2 sps.
- Don’t forget to the ch-1 after the sl st {Photo 2}.
- Remember to work OVER the ch-1 sps from Border Round 18 {Photo 3}.
- Don’t forget the ch-1 before joining with a sl st in the marked ch-1 sp after the Scallop {Photo 4}.
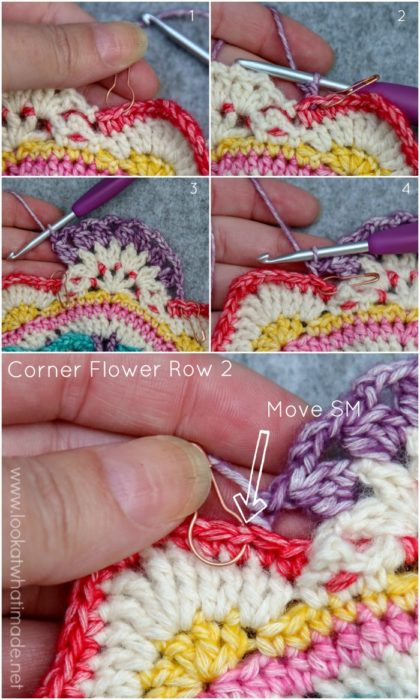
Corner Flower Row 2
Except for the first and last joining sts, you will ONLY be working into the ch-2 sps of Corner Flower Row 1. Ignore all other stitches and ch-1 sps.
- Identify the marked sc from Border Round 18 before any corner Scallop.
- Photo 2 shows the standing BPsc completed.
- Photo 3 shows all the stitches completed, ready for the (ch-1, BPsc join).
- Photo 4 shows the row completed. Don’t forget to move that last SM!
I just love these corner flowers :)
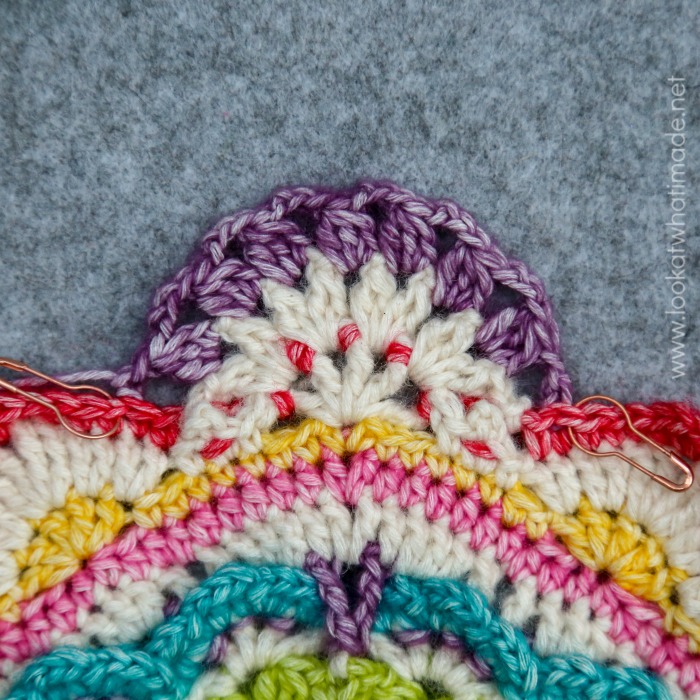
We will now continue with the border.
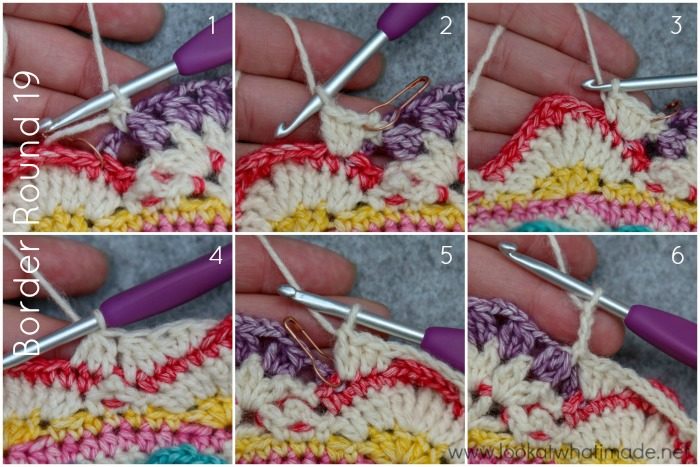
Border Round 19
Things to note in this round:
- Photo 1 shows the first FPsc completed.
- Photo 2 shows the 3 dc made into the marked st from the previous round.
- Photo 3 shows the hdc before the ch-sp.
- Photo 4 shows the two Clusters at the center of each repeat.
- Photo 5 shows the last 2 dc made into the marked stitch.
- Photo 6 shows the (FPsc, ch-3) repeats made into the Corner Flower.
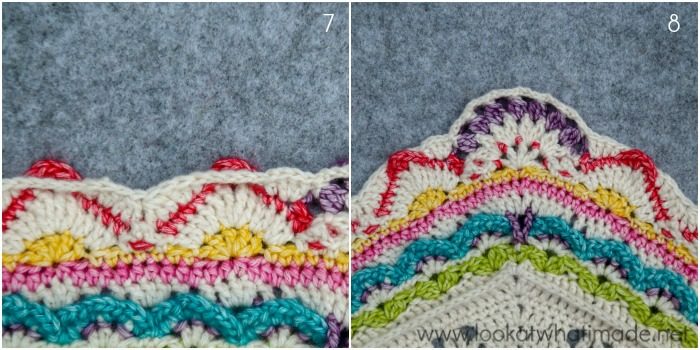
- Photo 7 shows the sides with the ch-4 spaces in front of the ‘Hills’.
- Photo 8 shows the sides with the ch-4 spaces BEHIND the ‘Hills’.
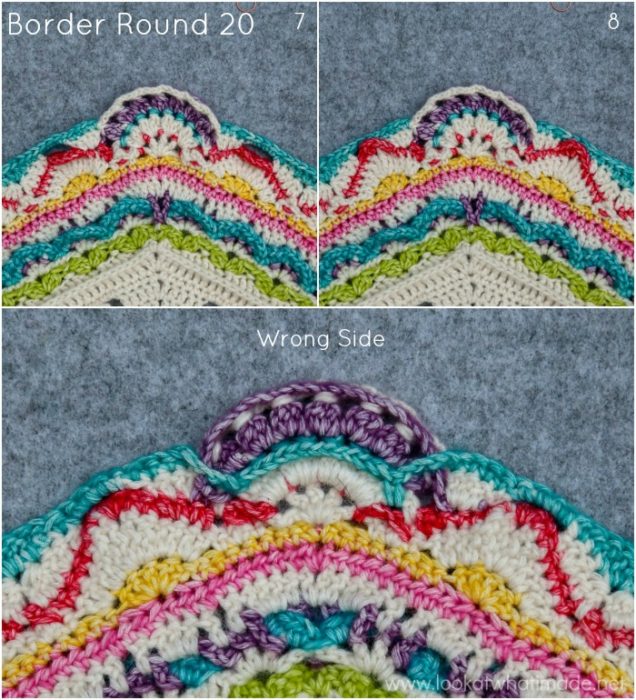
Border Round 20
When making the BPsc into Corner Flower Row 1, it is easier if you turn your work towards you so that you can see what you are doing {Photos 5 and 6}.
- The first st will fall in the marked st from the previous round.
- Check that you are able to make 4 sc before the next ch-sp.
- The last st of the round should fall in the st before the first FPsc.
- Don’t forget to ch 4 (both here and at the start of the next side)!
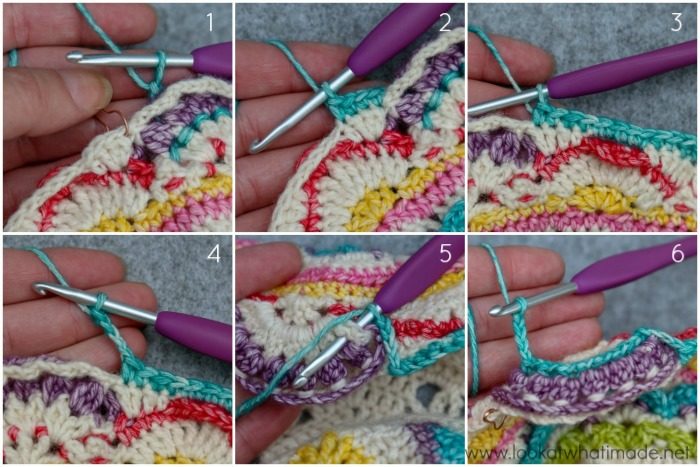
That was a pretty simple round, wasn’t it?
Border Round 21
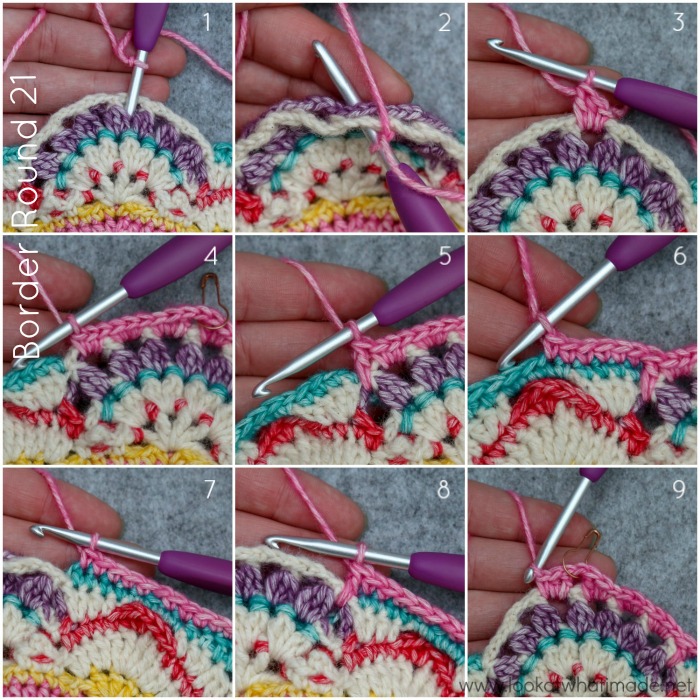
When starting this round, remember to work over the ch-3 sp from Border Round 19 {Photos 1 – 3}.
Remember to work OVER Border Round 19 when making the first dc after the Corner Flower {Photos 4 and 5}. As a helpful landmark/reference, remember to check that the last st of each repeat (as indicated in the pattern) falls in the second sc made into the ch-4 sp {Photo 6}. Remember to work OVER Border Round 19 when making the last dc before the Corner Flower {Photo 8}.
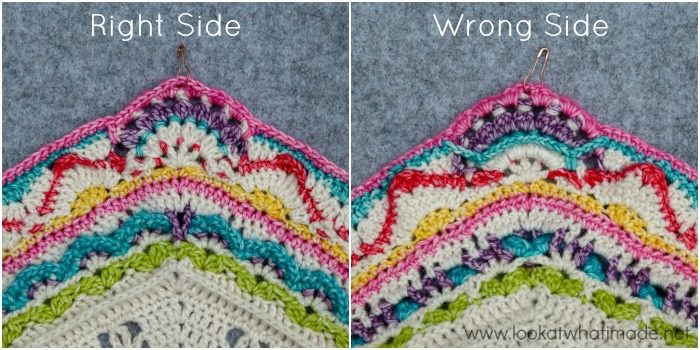
Remember also to mark your ch-1 corner sps with a SM {Photo 9}.
I hope you have an amazing week and I will see you back here for Part 12 (the final part) next week.

This blog post contains affiliate links. I only link to products I personally use or would use. All opinions are my own.


sabah omar jebreen says
dear Dedri
I amfollowing your amazing pattern of Ubuntu…. this week when i tried to download the PDF from the resources list it did not open or even finish the process…. through i tried with other PDF and managed well …. please check it and thank you again