Welcome to the second and final Bonus pattern for the Scheepjes Ubuntu CAL 2018. It is a dainty beaded friendship pendant and I absolutely love it!
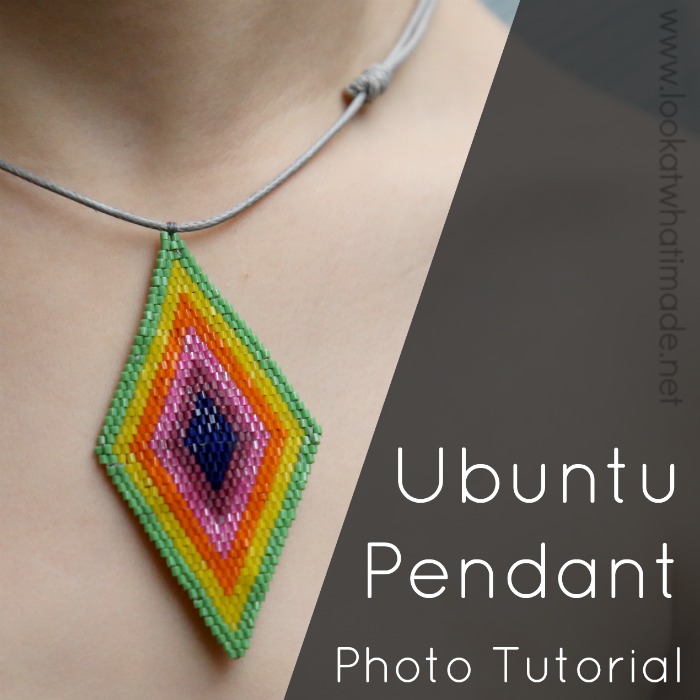
Beading kits were included in the Medium and Large Ubuntu kits. If you didn’t buy one of these kits, you can still join in, though. You will find all the materials needed under ‘Materials‘ below.
If you have stumbled on this post accidentally and don’t know what Ubuntu is, you can read more about it HERE (Information) and HERE (Concept).
For this pattern, Esther has not done a step-by-step video tutorial of the completed pendant, but she has done a tutorial that walks you through the 3 different beading stitches you will need to complete your pendant. You can find her video HERE. You will also find my step-by-step photo tutorial below.
Materials
Included in the Kit:
- Small glass beads (Size 15/0) in 6 different colours (purple, blue, green, yellow, orange, pink)
- Beading Loom (not needed for this pendant, only for the Friendship Bracelet)
- Cord (about 85cm/33.5″)
- Beading Needle
- Thread
Additional Materials:
- Scissors
- Beading Template (below)
Ubuntu Beaded Diamond Pendant
Before you start, you might find it useful to tip a few beads of each colour into a flat container as it is easier to pick them up that way than having to pick up individual pots every time.
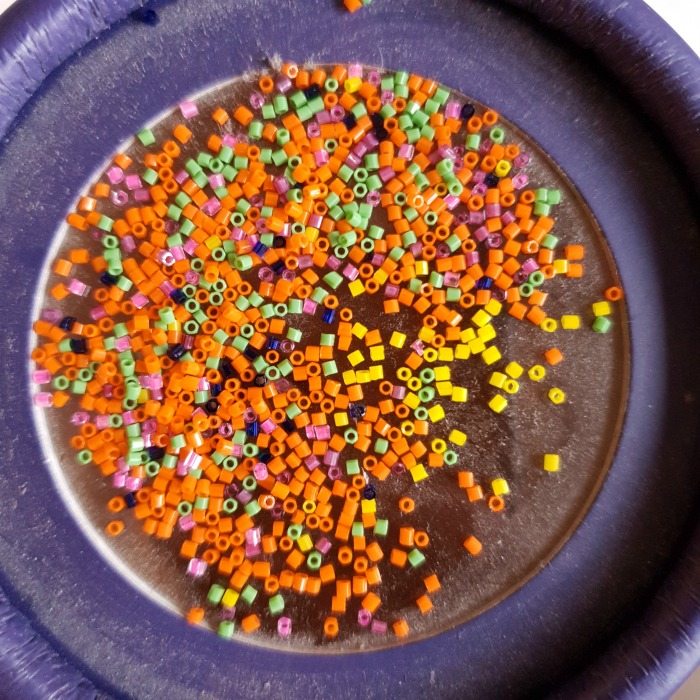
The beads are extremely small, so I recommend sitting somewhere with VERY good light!
In this tutorial, you will learn how to do 3 stitches:
- Ladder stitch
- Brick Stitch
- Decreasing Brick Stitch
- Regular Brick Stitch
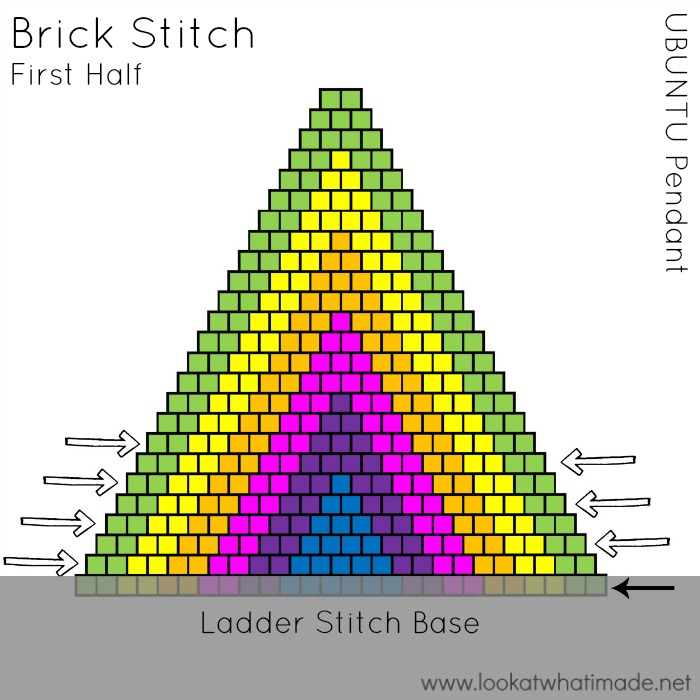
You will make the pendant using the colours in the template below. You might find it useful to mark the rows off as you make them, although the repeat is pretty straightforward.
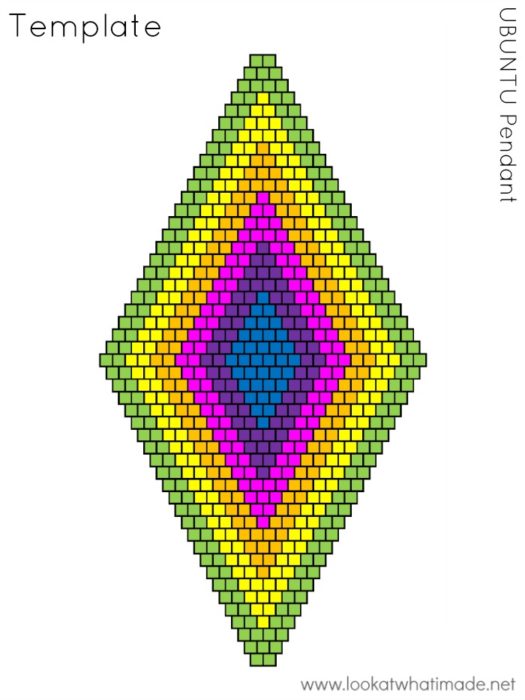
To begin your pendant, you will use the ‘Ladder Stitch’.
The Ladder stitch is used to join beads together in a ‘base’ row, giving you a foundation to work from when you are making a shaped design. For this tutorial, we will be using a single needle ladder stitch.
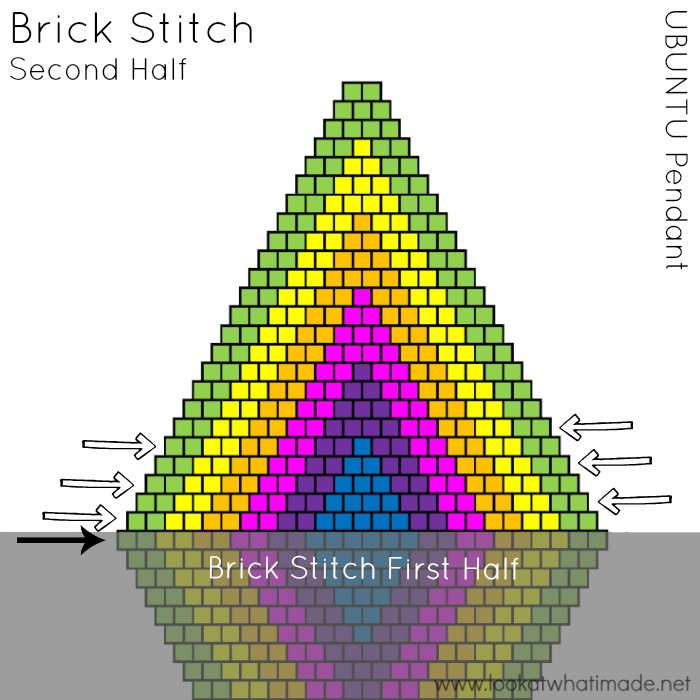
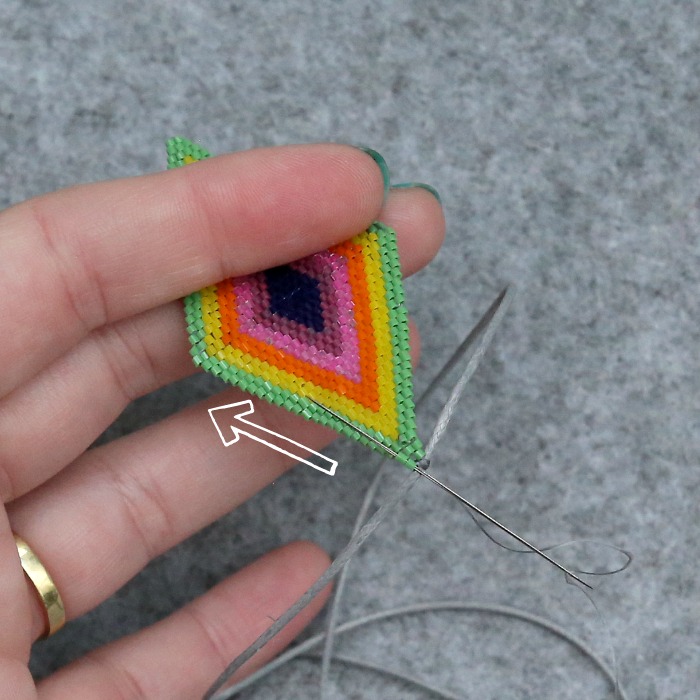
We will start on the widest row of the design {indicated with an arrow in the picture below}.
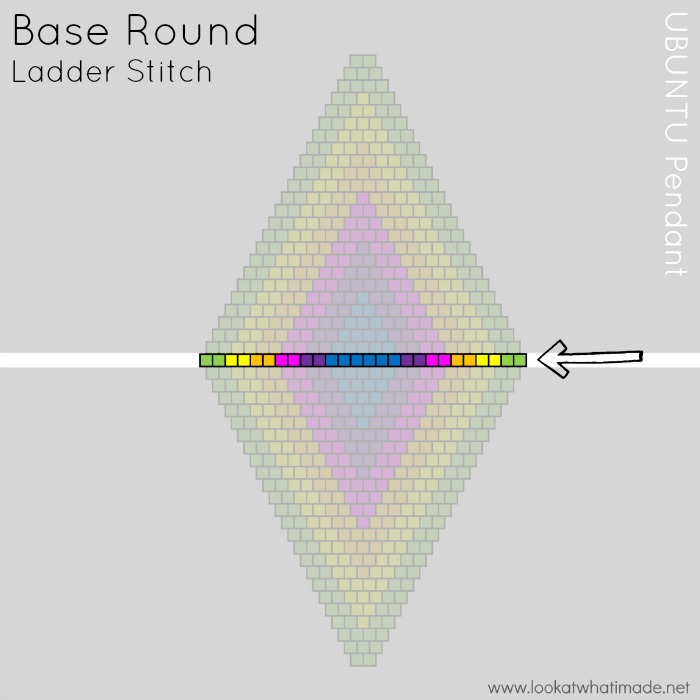
Ladder Stitch
Note: Please tighten your thread after adding every bead, otherwise your base row will be loose and sloppy.
Starting the Ladder Stitch
Start with a 200cm/79″ length of thread. Pick up the first two beads of the base round. In this case, that will be two green beads. Thread the beads onto the thread so that they lie in the middle of the length of thread.
The side of the thread closest to the needle and pointing away from you will be your working thread.
Insert your needle through both beads again, working in the same direction as you did originally (in other words, insert your needle from the bottom to the top so that the thread forms a circle on the right side (left, if you are left-handed).
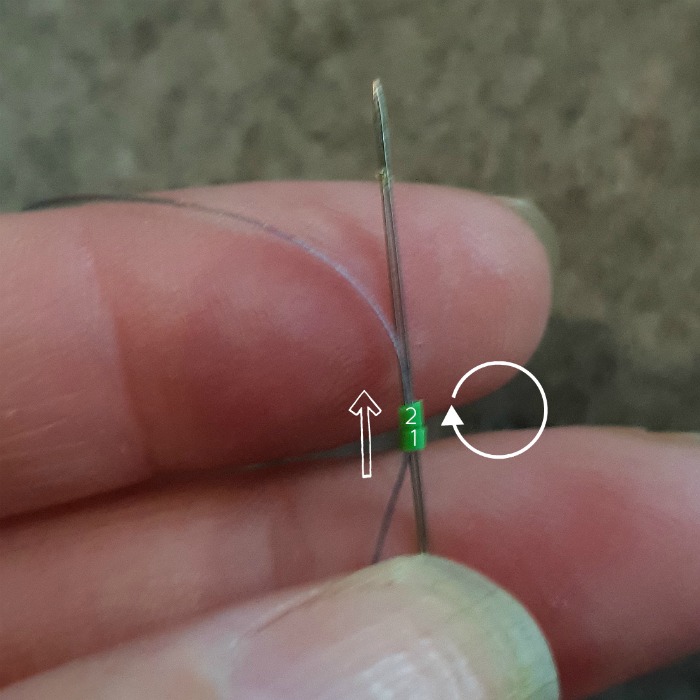
Pull on your thread so that the beads lie side by side. When the stitch is complete, both of your thread ends should be on the same side of the beads (pointing towards you) – the beginning thread end in the first bead and the working thread in the second bead.
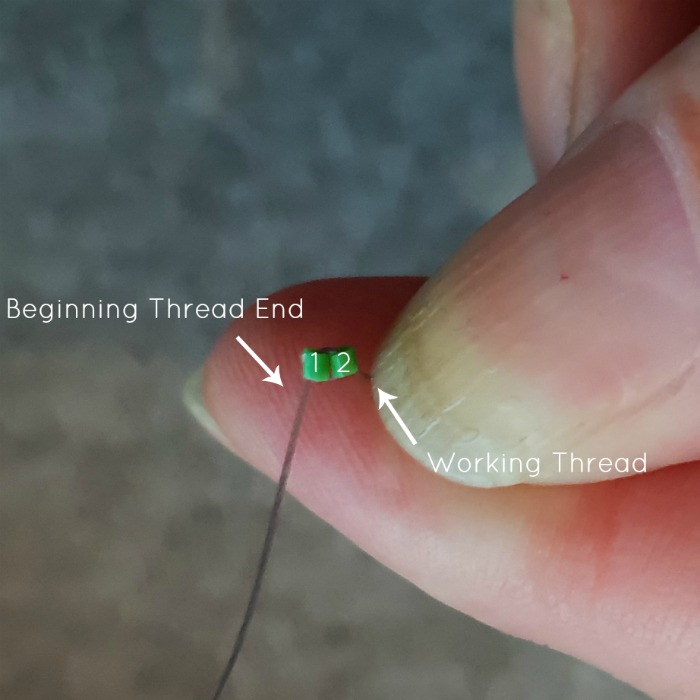
Continuing the Ladder Stitch
To add the next bead, pick up the next bead (following the template) and insert your needle back down through the second bead so that the thread once more forms a circle on the right (left, if you are left-handed), enclosing the added bead.
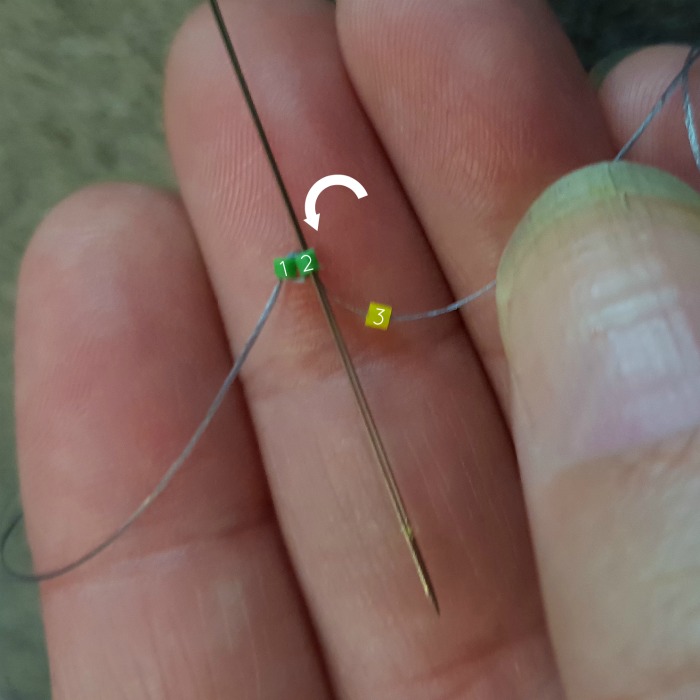
Pull the thread tight so that the beads are once again side by side.
Each ladder stitch makes a small circle through two beads, joining them together. To complete each ladder stitch, you will need to go through each ‘pair’ one and a half times. The first complete ‘pass’ (the circle) locks the two beads together. The second ‘half-pass’ positions your thread ready for adding the next bead. That is what we will do next.
Completing the Ladder Stitch
To complete the ladder stitch, insert your needle back up through the last bead added.
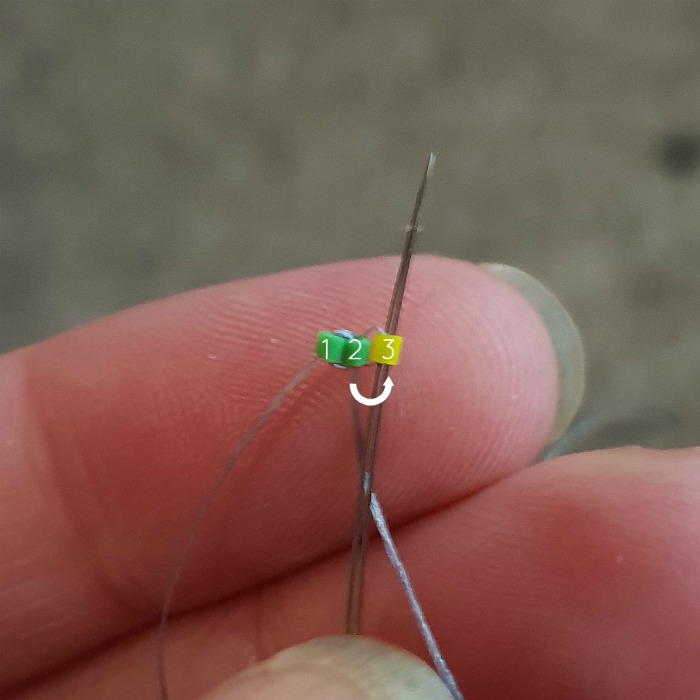
Your working thread should now be at the top (facing away from you and on the opposite side of the row as the beginning thread end).
On the next complete pass, having picked up your next bead, you will be inserting your needle through the bottom of the third bead to complete the circle. You will then insert it from the top into the fourth bead to position it for the next bead. Please note that each one-and-a-half pass will start on opposite sides of the row.
Continue adding beads until you have completed the first (central) row of the template above. Our central row is 26 beads wide. You will need to TURN at the end of this row.
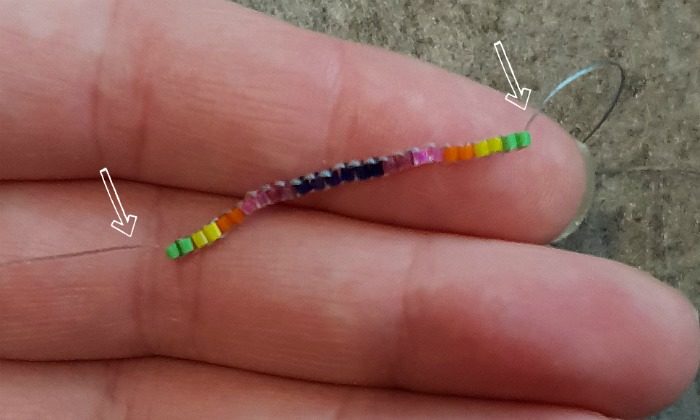
Don’t worry if this base row feels a bit loose and not very straight. It will straighten up as we add the rest of the beads. As long as you have pulled your thread tight after adding each bead, you will be fine.
To make the rest of the pendant, we will be using the Brick Stitch. We will make the top half of the Diamond Pendant first (the First Half).
Each Row will start with a Decreasing Brick stitch, followed by Regular Brick Stitches. We will cover both below.
Brick Stitch
Decreasing Brick Stitch
- At the start of each row, your working thread will come out of the top of the first bead to the right (left, if you are left-handed).
- If you look at the top of the beads, you will see that there is a thread ‘bridge’ between each pair of beads.
- To start your Decreasing Brick Stitch (which starts each row), you will need to pick up the first two beads (as indicated in the template – green in this case). You will then need to skip the first ‘bridge’ and insert your needle under the second bridge. It is easiest if you insert your needle towards you (so from the front to the back).
- Pull your thread tight. This will cause the two added beads to make a pyramid between the first three beads of the previous row.
- Insert your needle back up the second of the two added beads.
- Then insert your needle back down the first of the two added beads.
- Finally, insert your needle back up the second of the two added beads, completing your circle-and-a-half.
Pull your thread tight. This will pull the first two beads of the row together side by side and remove the gap formed by the initial ‘pyramid’.
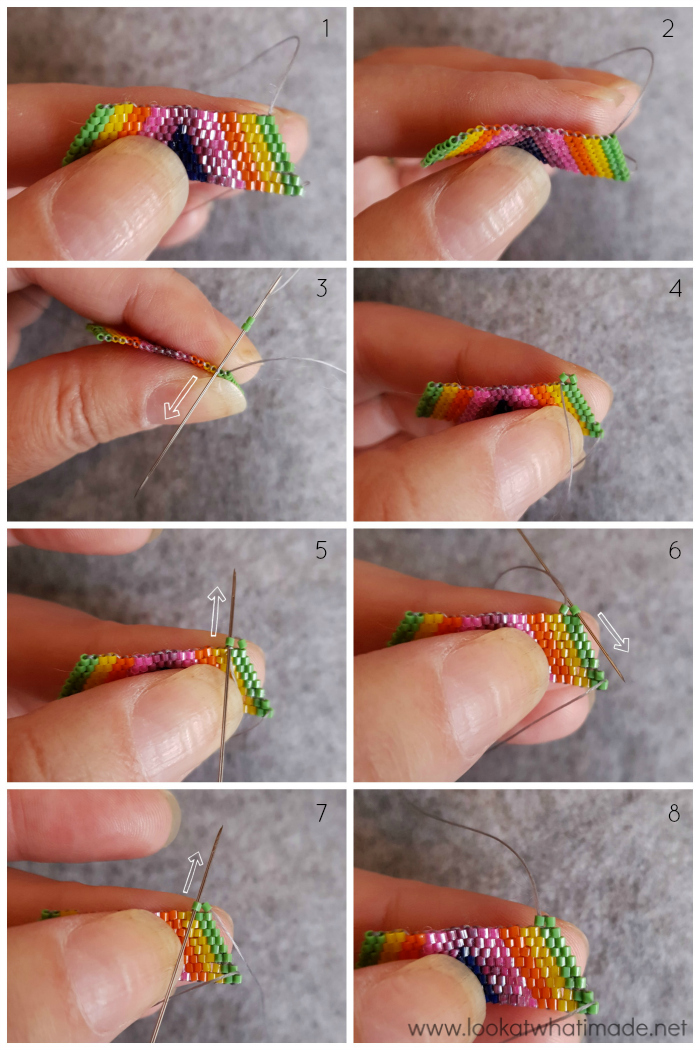
Regular Brick Stitch
You will use these instructions to create each subsequent Brick Stitch in each row.
- Pick up the next bead (following the colour template). Insert your needle under the next thread bridge, working towards you (in other words, from the back to the front).
- Insert your needle back into the same bead from the bottom to the top.
- Pull your thread tight to secure this bead next to the previous bead.
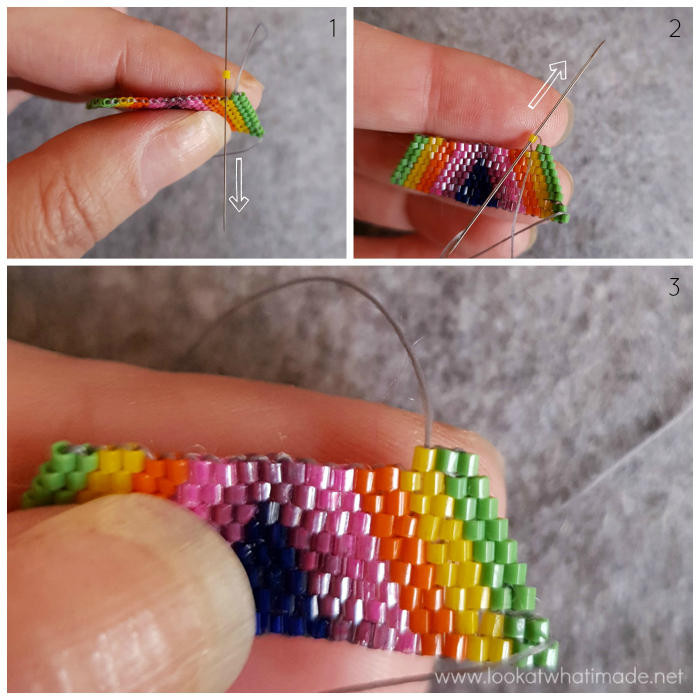
Continue in this fashion until there is only 1 bead left of the current row. Pick up the last bead and secure it using the last thread bridge. When you have worked into it as before, it should fit snugly between the last two beads of the previous row and your working thread should be at the top of your work. Turn and continue the next row just like this one.
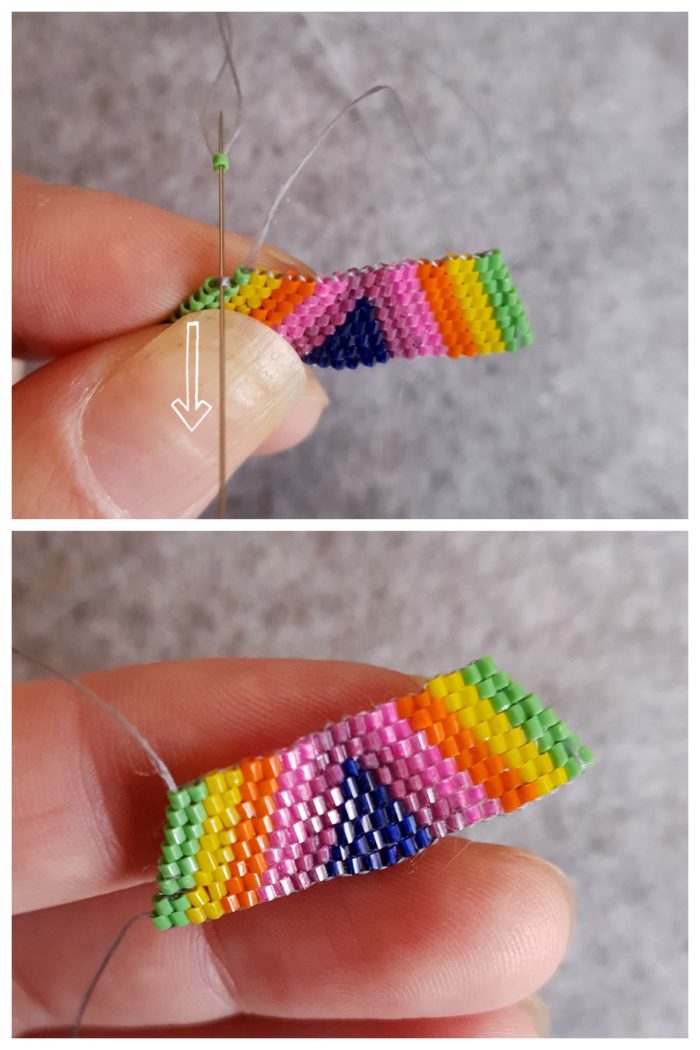
If you need to fasten off your thread (which you will need to do half-way through your first and second half), do so by inserting your needle through adjacent beads in previous rows, following the diagonal design of the pendant. Work through quite a few rows before cutting your thread.
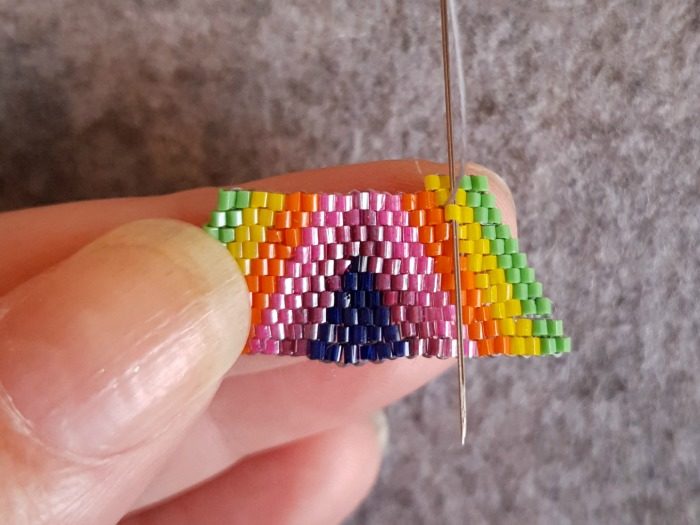
Add new thread in the same way, adding about 150cm/59″ and making sure to leave a long enough end to work away.
Continue following the template until you get to the last row. The last row will consist of a single Decrease Brick Stitch.
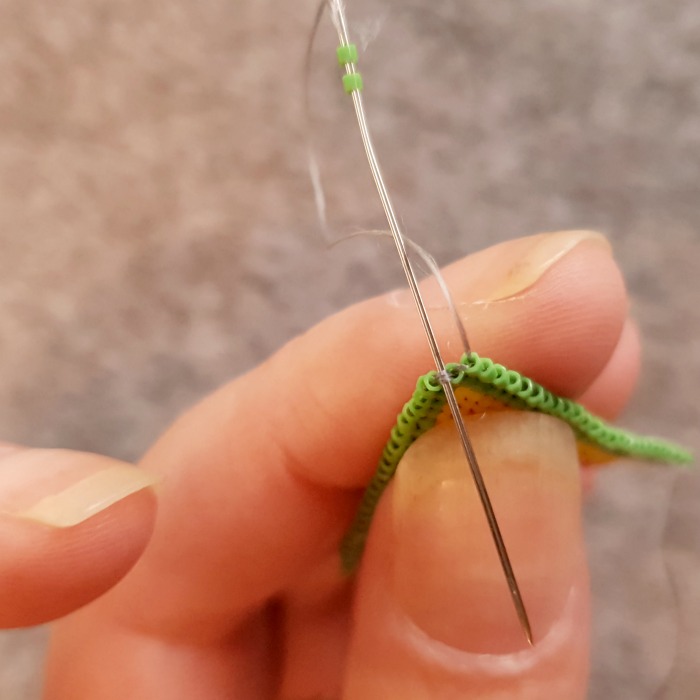
At the end of the first part, you will need to work your ends away again. Insert your needle through the first st of each row, working into at least 10 rows. Cut your thread.
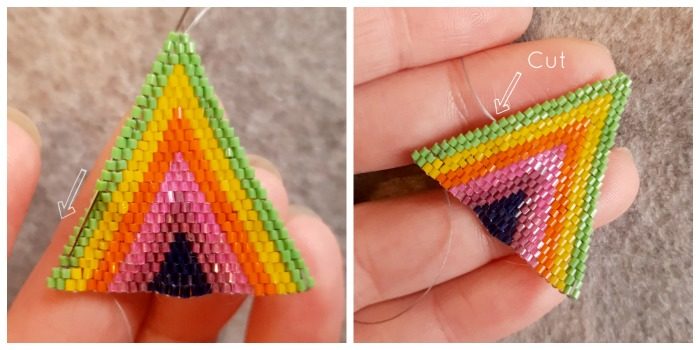
Second Brick Stitch Half
At this point, you will have a triangle. You will need to turn this triangle upside down so that the point is facing down and the base row is facing up. You will need to pick up the beginning thread end, which will become your working thread. It will be coming out of the bottom of the first bead.
Before we start, we will need to change the direction in which this thread is pointing.
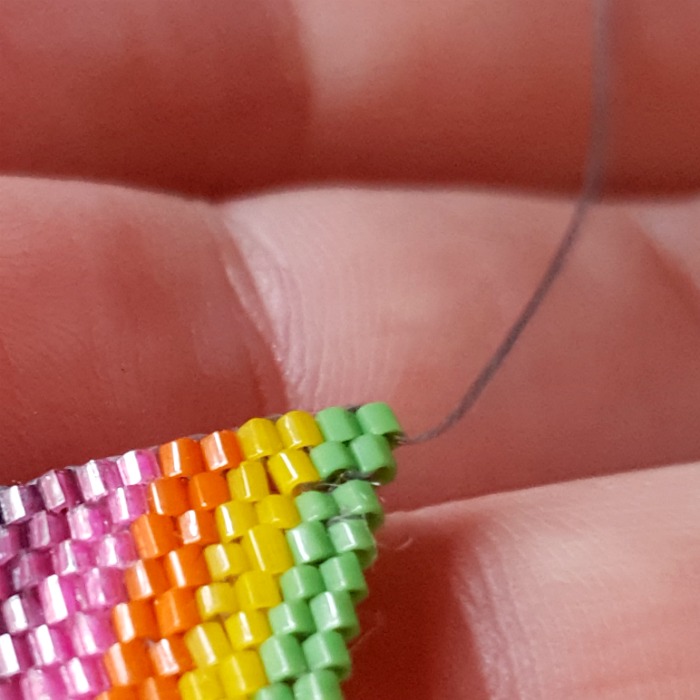
To do so, thread your needle with this yarn end and insert it from bottom to top into the second bead of the base row.
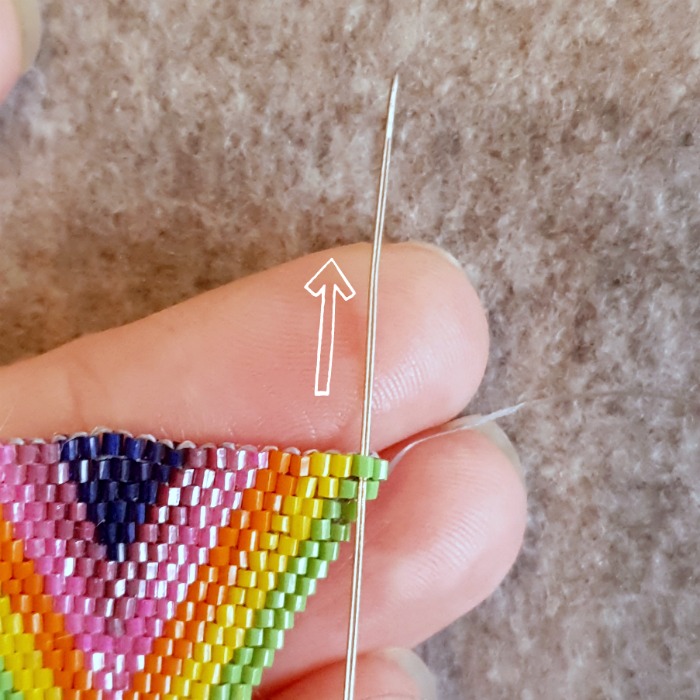
Then insert it from the top to the bottom into the third bead of the base row.
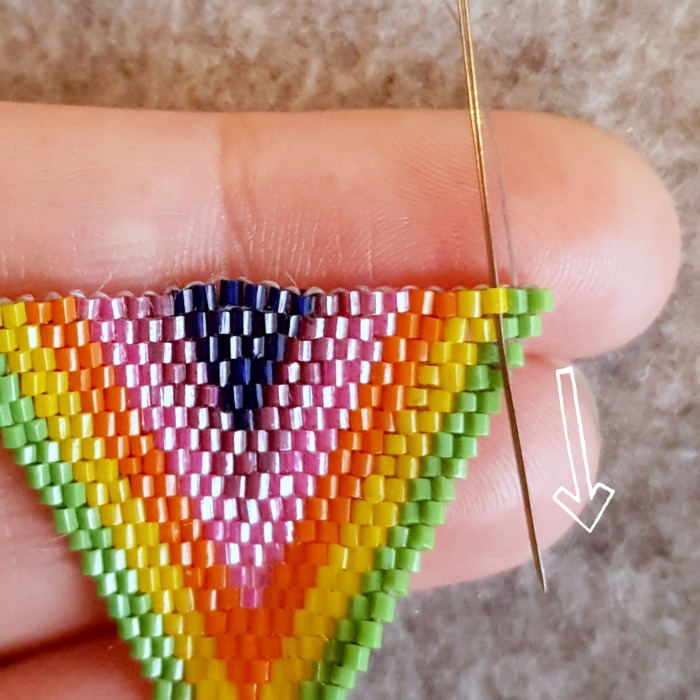
Pull your thread tight. Insert your needle into the first bead of the base row from bottom to top, skipping the second bead.
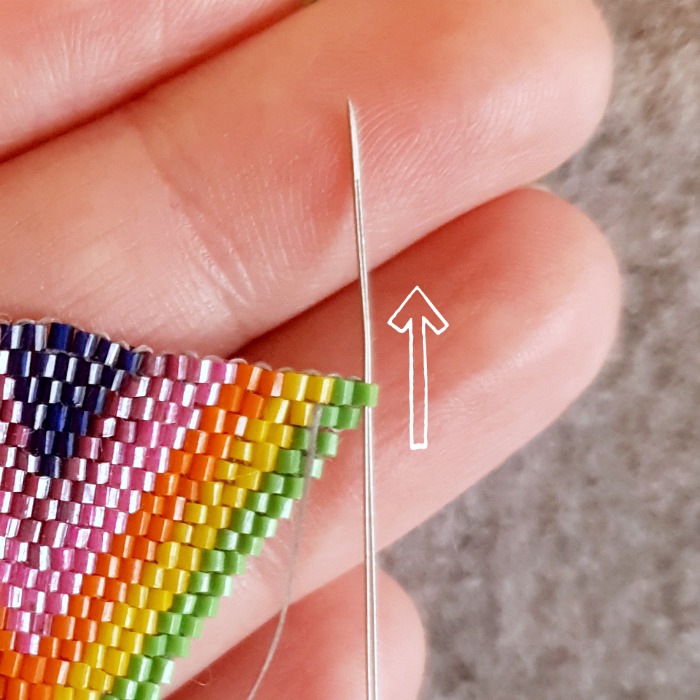
Pull your thread tight and continue following the template to complete the second half of the pendant.
When you have completed the second half, do not fasten off. You will need at least 15cm/6” of thread to attach the second half to your necklace and work away your ends.
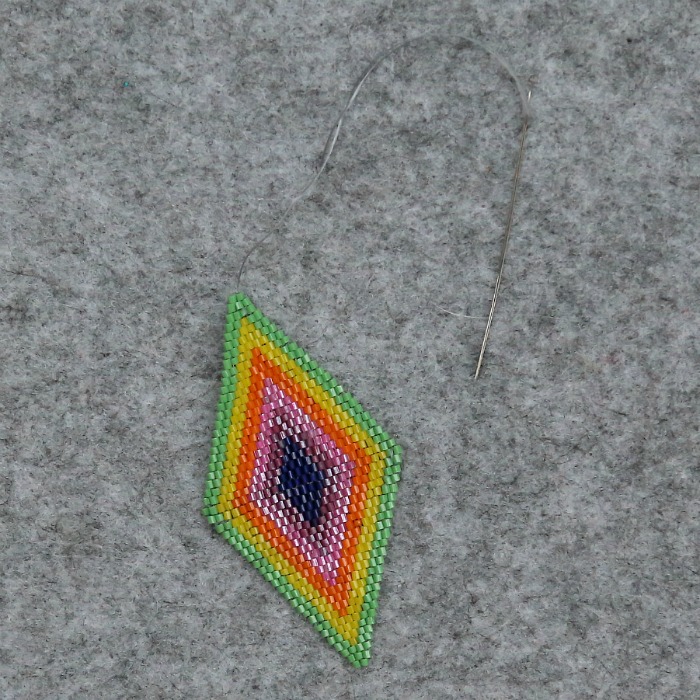
Making the Necklace
To create the necklace, we will be using sliding slip knots. Using sliding knots like this means that you can adjust the length of your necklace to suit your needs/attire.
Making the Slip Knots
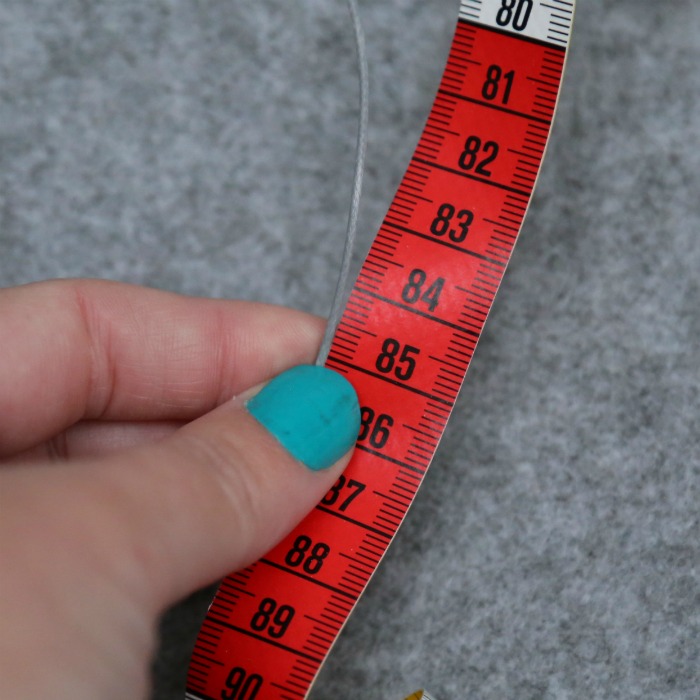
Put the pendant to one side and pick up the string that you will use to create your necklace. Cut the desired length, making sure that you cut a length that will easily fit over your head + 20 cm/8”. I chose to use 85cm/33.5”.
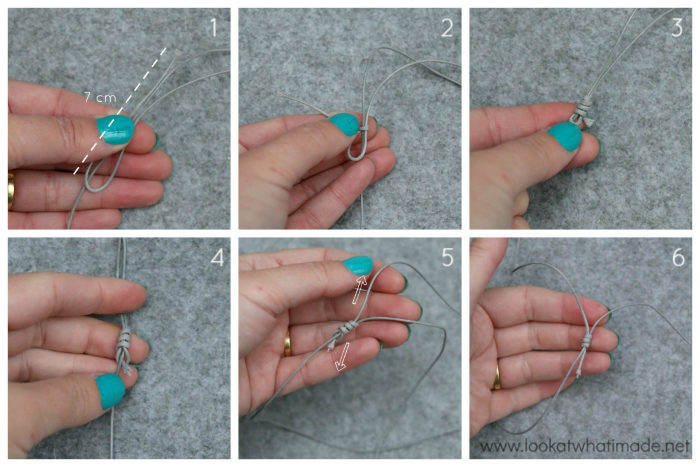
Place the string down so that it forms a circle with the ends overlapping generously.
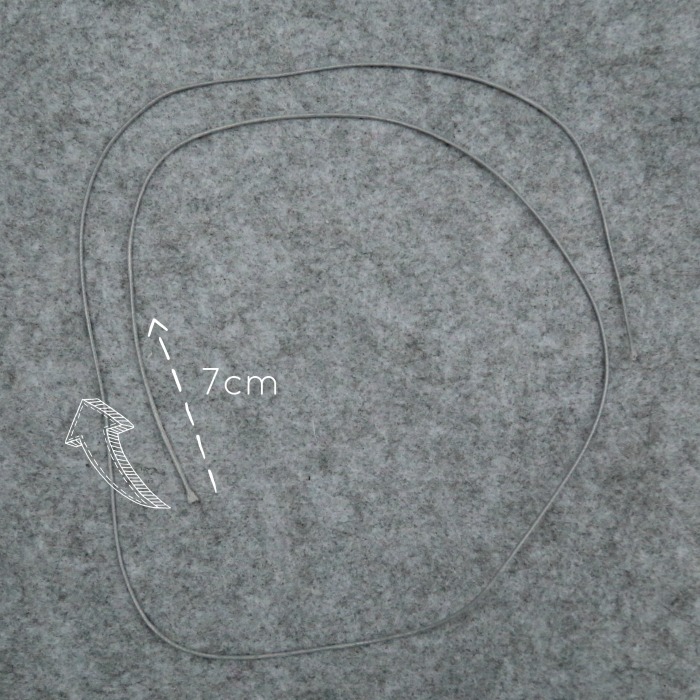
- Measure 7cm/2.7” from one of the ends and fold it at this point, placing the folded end on top of the circle. Pinch all three strands together.
- Fold the end under the other two strands and then over the top of both, roughly 1cm/0.4” from the loop formed by the fold.
- Wind the end around all three strands three more times, working in the direction of the fold and making sure that the ‘twists’ fall next to each other (not over each other).
- Push the end through the loop from the bottom to the top.
- When tightening the knot, ignore the long dangling end (which we will knot in the next step). Take hold of the short end (the one you just pushed through the loop) and carefully pull on the circle to tighten the loop. At the same time, pull gently on the short end to tighten the twists.
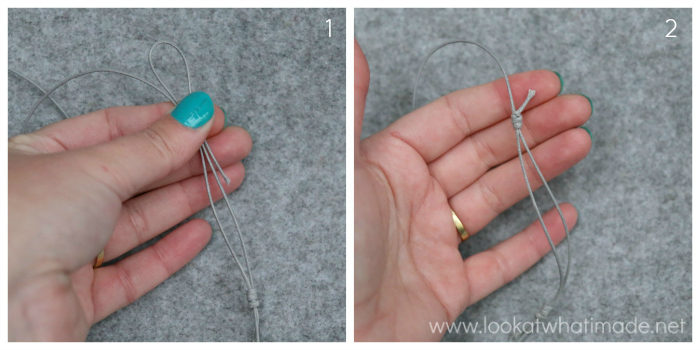
When you have done this, check that you are able to slide this knot along the string that forms the circle. The knot should be snug but not too tight. If you feel it is too loose, pull on the short end a little bit more.
- Place the long (dangling) end on top of the circle and fold it as before.
- Make another slip knot as above and check that it slides along the string easily but not too easily.
Sealing the Slip Knots
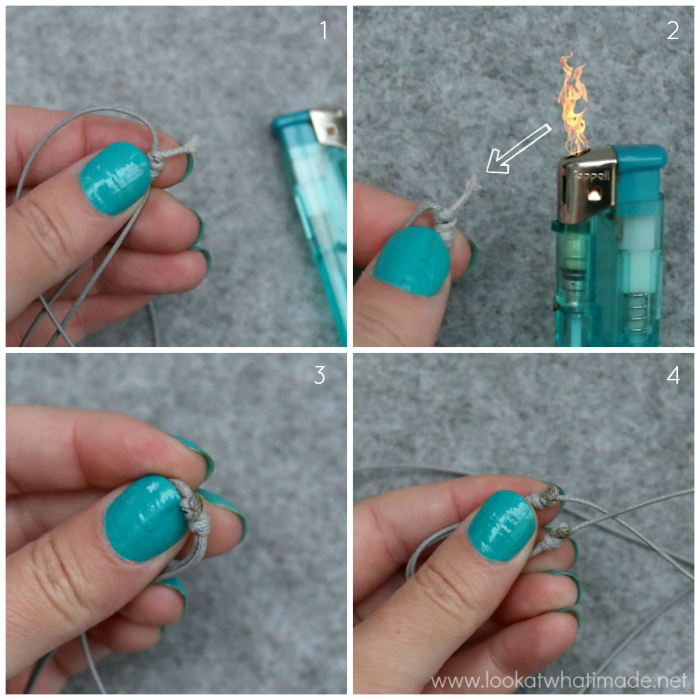
- Trim your two short ends so that they are roughly 1cm/0.4”.
- Using a lighter and being very careful not to burn the actual necklace, heat the short end so that it forms a little plastic ball. Do this slowly as you don’t want the end to catch fire. If it does, blow on it! As you heat it, the plastic ball will creep closer and closer to the slip knot.
- When it is adjacent to the slip knot, quickly use the side of the lighter to tap/smear it onto the side of the knot (while it is still melted). This will secure the end.
- Do the same for the other short end. Make sure that you smear the melted end onto the knot, NOT the necklace!
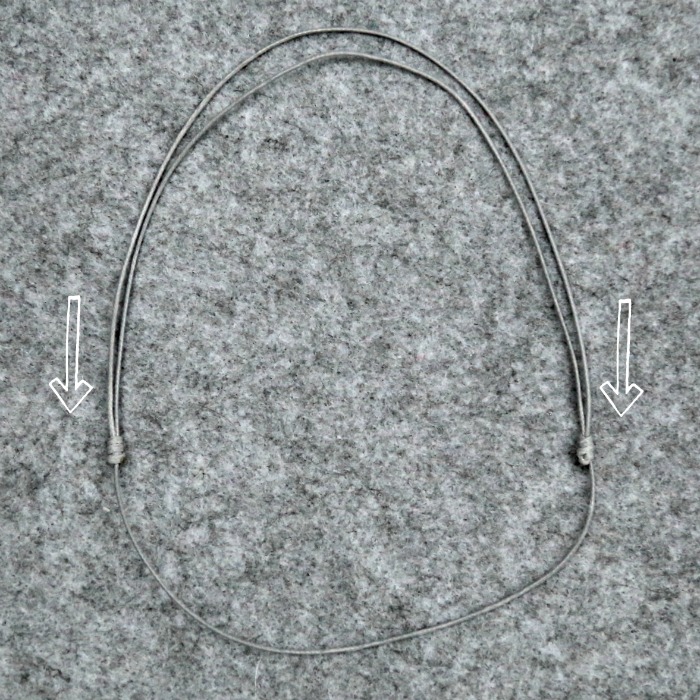
Check that you can still slide the knots easily. The double-layered side of the necklace will be the back. The single-layer will will be the front. We will be attaching the pendant to this side.
Attaching the Pendant
- Before you attach the pendant, you want to identify the centre of your necklace. To do this, fold the necklace in half, placing the two slip knots next to each other for alignment. Pinch the end farthest away from the slip knots so that it forms a loop.
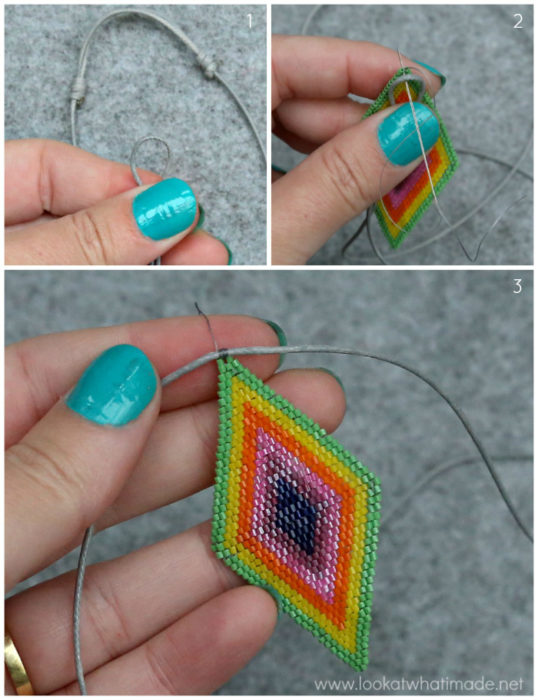
- Pick your pendant up and place it behind this loop. Working from front to back, insert your needle into the loop of the necklace and under the ‘thread bridge’ of the last row of the pendant. Pull your thread through tightly to create a stitch.
- Working over the string of the necklace and into the same space on the pendant, make at least 4 more stitches.
Working Away Ends
Work your end away by inserting your needle down through the first bead of each row. I find it easiest to work through two beads at a time. Make sure that you work your end away through at least 10 rows.
Cut your thread, slip your necklace over your head, and marvel at your creative genius!!! I reckon a little black dress won’t go amiss at this point 😊
I hope you have enjoyed this project. Thank you so much for joining me on this wonderful journey!

This blog post contains affiliate links. I only link to products I personally use or would use. All opinions are my own.


