Welcome to the first Bonus pattern for the Scheepjes Ubuntu CAL 2018. It is a dainty beaded friendship bracelet. I’m not sure about you, but my beading skills are quite rusty, so it was extremely fulfilling to try my hand at this craft again after almost a decade. I sincerely hope that you will join me in this adventure!
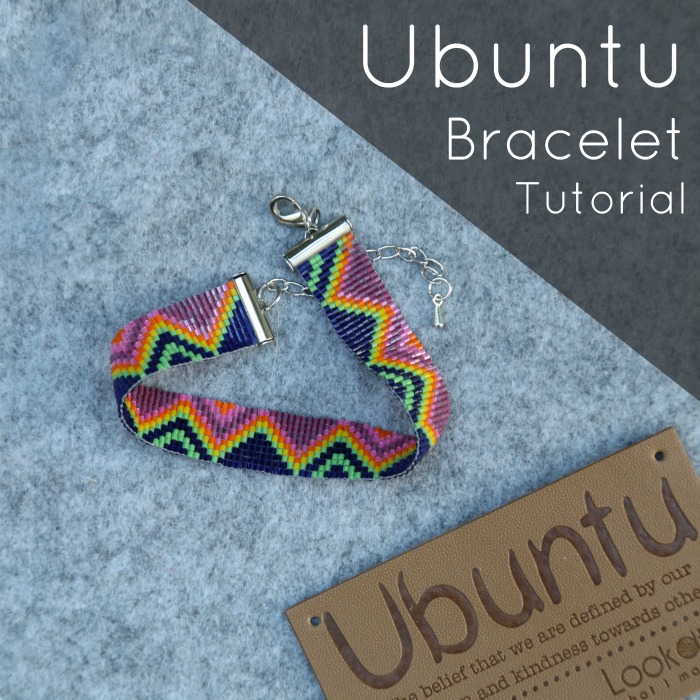
Beading kits were included in the Medium and Large Ubuntu kits. If you didn’t buy one of these kits, you can still join in, though. You will find all the materials needed under ‘Materials‘ below.
If you have stumbled on this post accidentally and don’t know what Ubuntu is, you can read more about it HERE (Information) and HERE (Concept).
Once again, Esther has done a brilliant step-by-step video to help you create your bracelet. You will also find my step-by-step photo tutorial below.
Ubuntu Friendship Bracelet
Terms
- Warp – The lengthwise or longitudinal warp threads are held stationary and tensioned on a frame or loom.
- Weft – the thread that is drawn through the warp (from left to right and right to left) is called the weft
Materials
Included in the Kit:
- Small glass beads (Size 15/0) in 6 different colours (purple, blue, green, yellow, orange, pink)
- Beading Loom (see ‘Assembling the Loom‘ below)
- Cord (used for next week’s Pendant and not necessary for the bracelet)
- Beading Needle
- 13mm Slide Connector Lobster Clasp
- Thread
Additional Materials:
- All Purpose Glue (I used Gorilla Super Glue Brush and Nozzle)
- Scissors
- Beading Template
- Sellotape or Washi tape
Size
If you follow the template, you will get a bracelet roughly 15cm/6″ long (+ 7.5cm/3″ maximum play on the clasps) by 1.5cm/0.7″ wide.
If you need a longer/wider bracelet, please add another colour repeat before ending your bracelet.
1. Assembling the Loom
Before you can start, you will need to assemble your loom. If you are using a different loom, you will need to follow the manufacturer’s instructions.
The loom in the kit consists of 9 Wooden Pieces:
- 2 Ends (End Panel 1 and End Panel 2)
- 2 Rods
- 4 Knobs (two with grooves in them and two round knobs)
- 1 thin rectangular Edging Piece
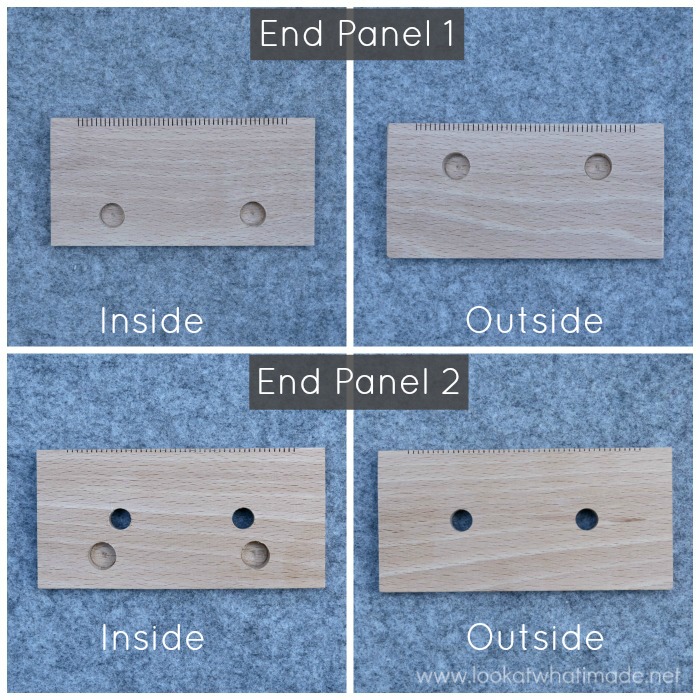
Before you start assembling the loom, identify the inside and outside of End Panels 1 and 2. Notice that the ridged edges are at the top and should remain at the top. You will be using those ridges to thread your loom.
- End Panel 1 has two indentations on each side. The side with the indentations closest to the ridged edge is the Outside.
- End Panel 2 has two holes that go straight through the panel and two indentations on one side. The side without indentations is the Outside.
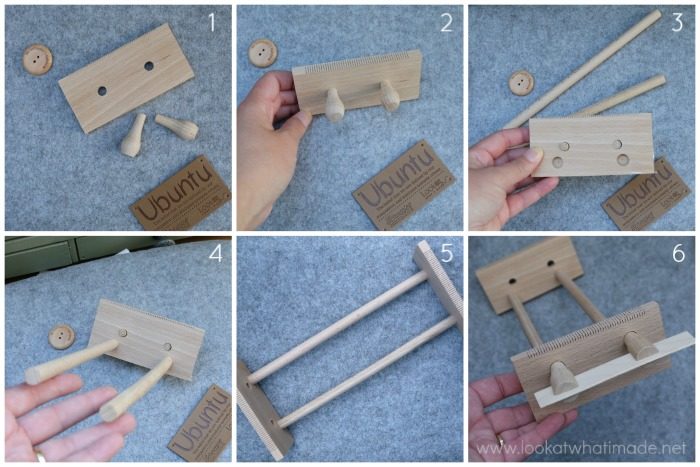
Pick up End Panel 2 and insert the round knobs into the holes so that they are on the outside of End Panel 2 {Photos 1 and 2}. Turn End Panel 2 around {Photo 3}. Insert the two rods into the indentations on the inside of End Panel 2 {Photo 4}. Pick up End Panel 1 and place the indentations on the inside so that they align with the other ends of the rods. Apply enough pressure to secure the rods into the indentations {Photo 5}. Esther found it useful to place the loom end-on and bang it (gently and with cushioning) with a hammer.
Lastly, insert the two grooved knobs into the indentations on the outside of End Panel 1, making sure that the grooves line up horizontally, and slide the thin Edging Piece into the grooves {Photo 6}. These knobs and the edging piece don’t slot together as tightly as the other pieces, but this is not an issue. As soon as you start threading your warp, the tension will pull them tight.
If you have any issues assembling your loom, please take a look at the video.
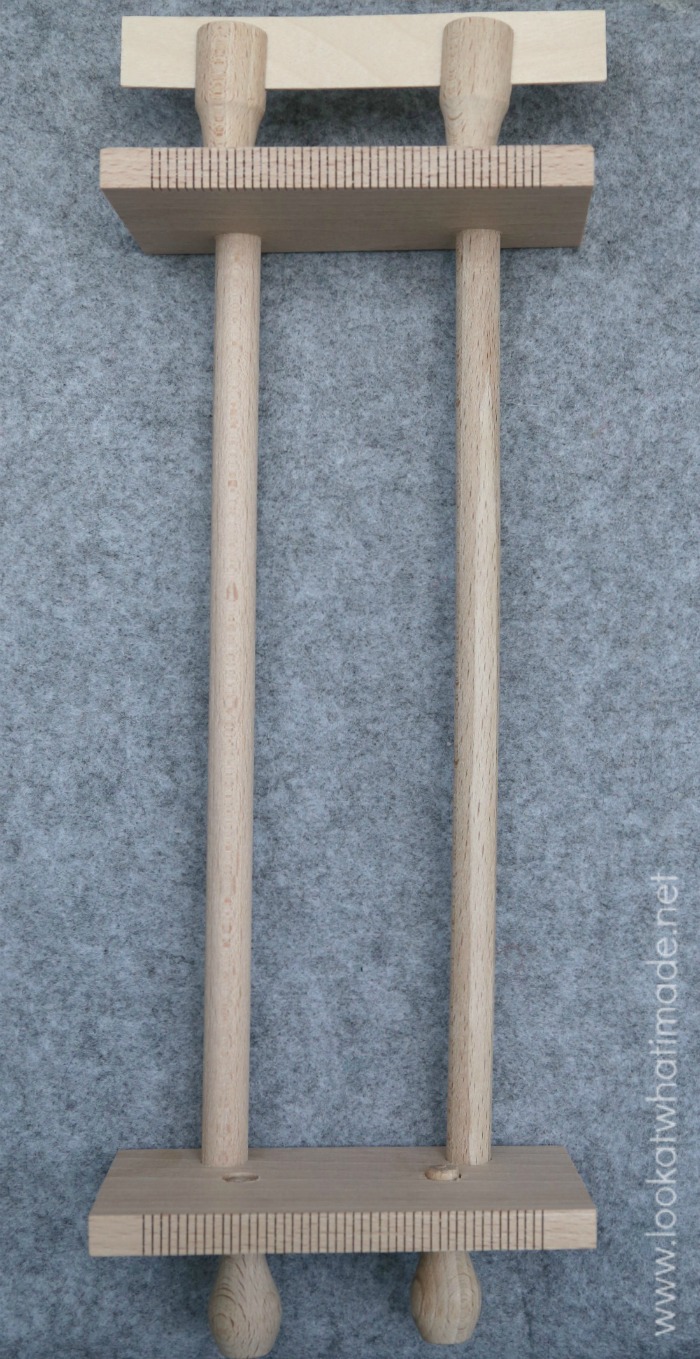
This is what you should end up with!
2. Wrapping/Threading the Warp
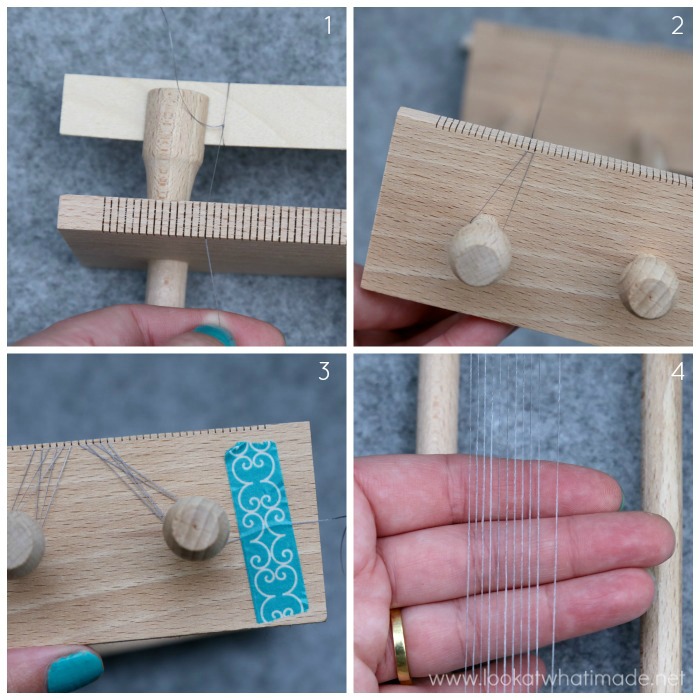
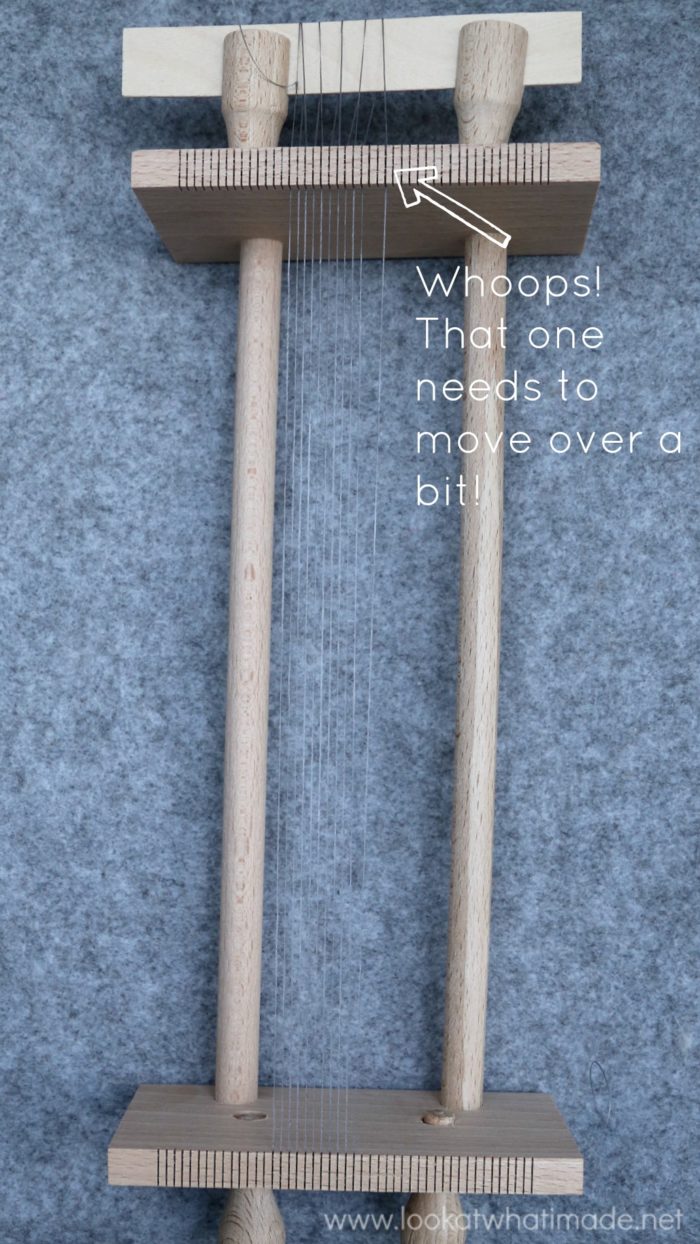
To start wrapping your warp, take your spool of thread and knot it to the edging piece just inside the left-most knob (right-most, if you are left-handed). Then run the thread through one of the ridges (on End Panel 1) between knobs {Photo 1}. Run the yarn all the way to the other side of the loom and insert it through a ridge on that side. You don’t have to count the ridges to make sure that it’s the exact same one as the other side. It just needs to look reasonably straight. Wind the thread around the knob closest to it and then insert it into the next ridge {Photo 2}. When you get back to the other side, insert it into the next ridge and then run your thread around the edging piece {see photo below collage}.
Making sure to keep your tension tight, keep winding your thread like this until you have 11 vertical threads {Photo 4}. You might find it easier to start wrapping your thread around the other round knob when you get about halfway {Photo 3}. When you have 11 vertical theads, wind your thread around the round knob a few times, cut, and secure the end to the loom with a bit of sellotape or washi tape {Photo 3}.
When you are done, take a moment to look at your work. Count your threads and make sure that there are 11. Then make sure that all your threads fall in adjacent ridges. If they don’t, gently lift them and scootch them up so that they do.
3. Starting the Bracelet
To create your bracelet, you will need to follow the chart/template, which you can find HERE. I have split it up into two parts so that it would fit on the page without being teeny tiny. I have also included tick boxes along the sides so that you can mark off your rows as you go.
You might find it useful to tip a few beads of each colour into a flat container as it is easier to pick them up that way than having to pick up individual pots every time.
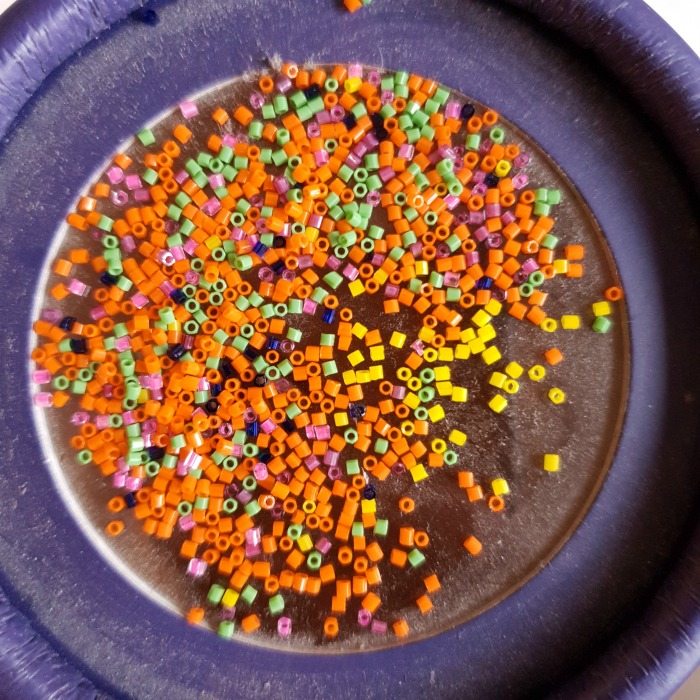
The beads are extremely small, so I recommend sitting somewhere with VERY good light!
To start, take a comfortable length of thread (I used about 1.5m each time) and thread your beading needle. Make a knot around the left-most warp thread, close to the End Panel farthest away from you, leaving a 10cm/4″ end.
You will thread your beads following the chart, working from Side B to Side A (A to B, if you are left-handed).
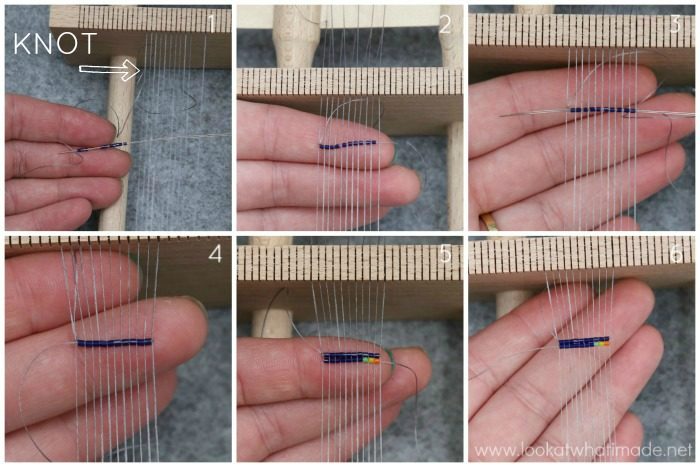
Load your first 10 beads (which are, luckily, all blue). When you have ‘loaded’ your first row of beads, insert your needle from left to right under the warp (right to left, if you are left-handed) – see Photo 1. When you have pulled the thread all the way through, push the beads so that they abut the knot. Your beads should now be under your warp.
Push the beads up between the threads of the warp so that there is one bead between each pair of threads {Photo 2}. This row is the trickiest part of the bracelet, so don’t worry if it feels very fiddly. You might find it easiest to spread the beads apart a little bit. You will tighten them when you insert your needle again in a moment and pull through.
Once you have your beads correctly spaced, insert your needle through all the beads, making sure that your needle lies ON TOP OF the threads of the warp so that the beads will be ‘caught’ {Photo 3}.
When doing this ‘pass’, you will find it helpful to push the beads up with the index finger of your left hand (right, if you are left-handed). If your needle gets stuck, use the tip of the needle to lift the current bead and push your needle over the warp so that you can insert it into the next bead.
Pull tight so that the beads abut each other tightly {Photo 4}. Continue loading the beads as per the template {Photo 5}, remembering to pull tight on the second pass {Photo 6}, until you have about 15cm/6″ of thread left.
4. Adding New Thread/Working Away Ends
Working Away Ends
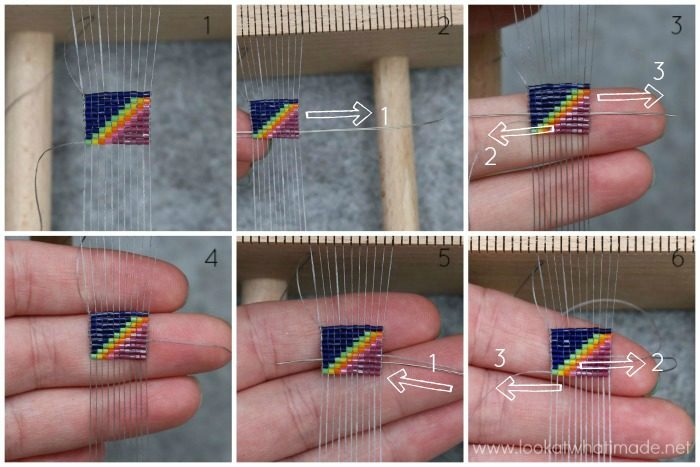
When you see that you don’t have a lot of thread left, you will need to work away the current thread. Do so by working back through the previous 3 rows, working from the side closest to the thread to the side farthest away from it. You should end up on the right (left, if you are left-handed). Cut your thread about 4cm away from the bracelet {Photos 1 – 4}.
Adding New Thread
Cut a new length of thread and thread your needle. Starting one row down from where you finished working away your end, insert your needle through all the beads from right to left (left to right, if you are left-handed), leaving a 4cm end {Photo 5}. Then insert it into the next row in the opposite direction. Finally, insert it into the next row in the opposite direction again. Your thread should now be on the left of your bracelet (right, if you are left-handed) and in the last row made {Photo 6}.
5. Continuing the Bracelet
Continue adding beads, following the chart and fastening off/adding thread as needed.
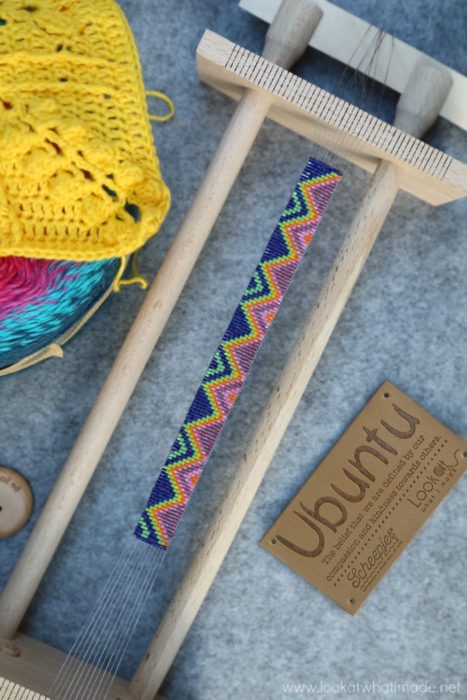
At the end, your bracelet will be 15cm/6″ long (with extra length provided by the clasp). If you feel like you need a winder bracelet, please feel free to repeat the pattern one more time before finishing off. You will have enough beads to do this AND make the Pendant next week.
6. Finishing Off
Cutting the Threads
When you have completed the bracelet (remembering that you can continue or stop early as it suits you), you will need to cut the warp.
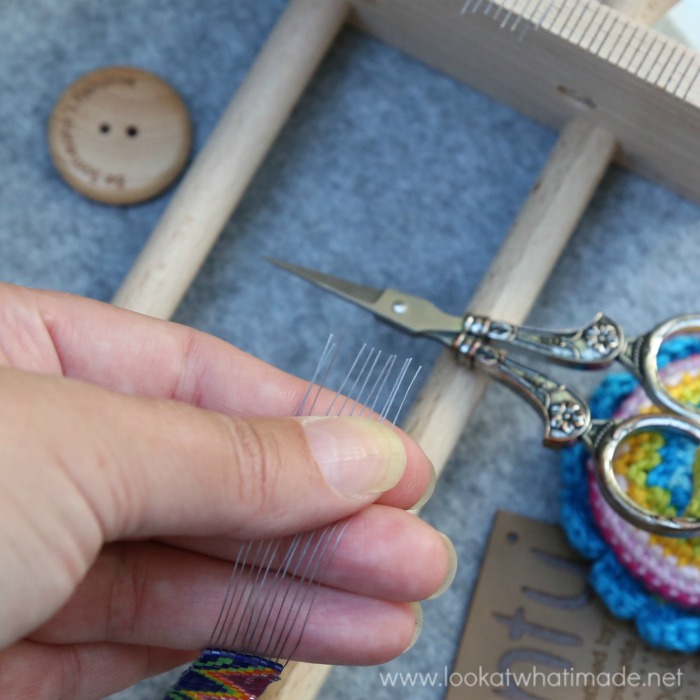
Cut the warp at the top and the bottom of the bracelet, leaving yourself as much room as possible to knot these threads together.
Cut the threads along the sides as well, trimming them very close to the sides of the bracelet.
Knotting the Ends
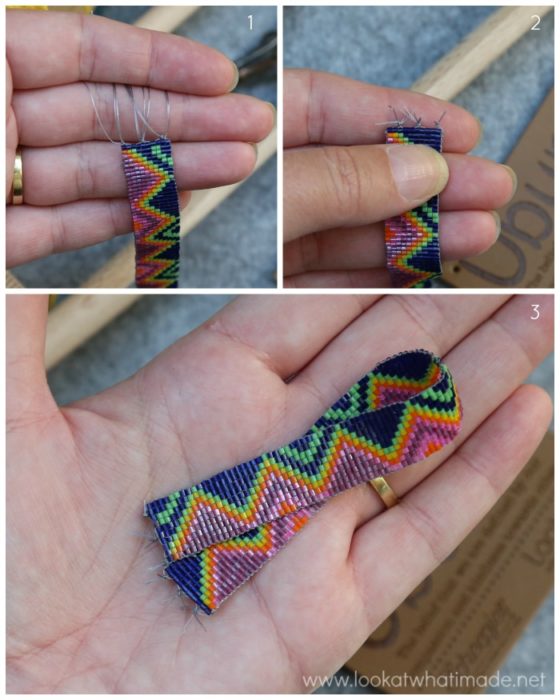
Working in pairs (or in sets of 4), knot the threads at the top and the bottom together. As you have an uneven number of warp threads, you will have to knot the last 3 strands together {Photo 1}.
Don’t worry about the fact that you are creating knots. These will be hidden by the closure. Trim the ends to about 1cm/0.4″ away from the knots {Photos 2 and 3}.
Glueing the Ends
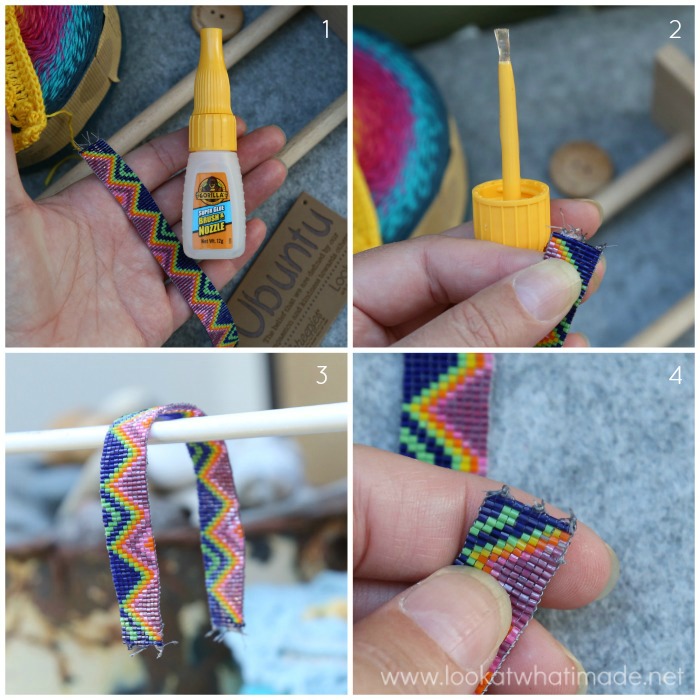
Take a little bit of glue and dab it on the knots at each end {Photos 1 and 2}. Let the glue dry for an hour or two {Photo 3} then cut the threads close to the knots {Photo 4}.
Adding the Clasps
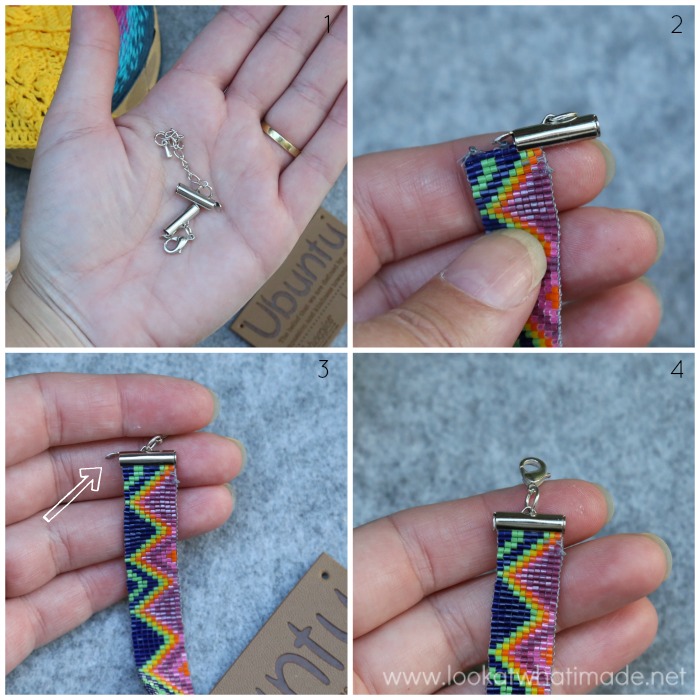
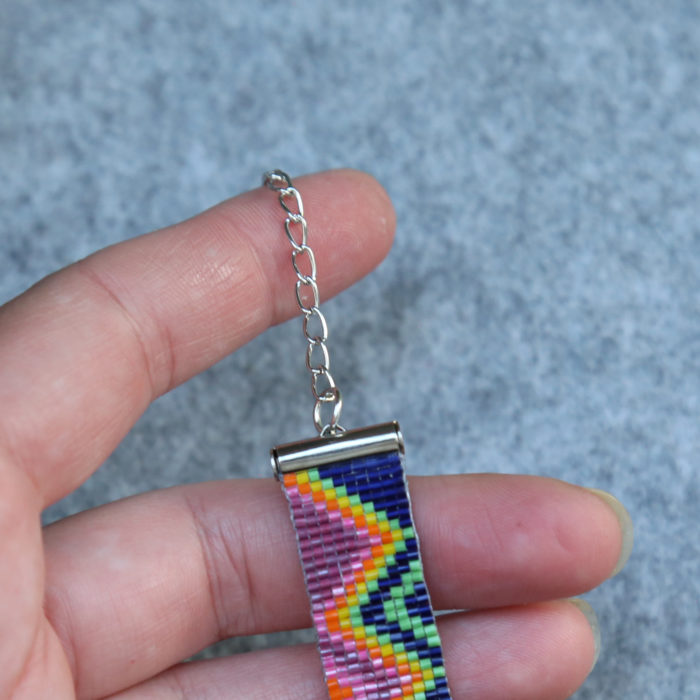
There are two clasps in the kit. Take one of them and slide it over the first row of beads, placing the slot in the clasp between the first and second row so that the clasp covers the first row {Photo 2}. You might need to flick the lid of the clasp up a little bit so that it slides easily over the first row.
Push the lid of the clasp down quite firmly to close it. It might help if you use a pair of pliers {Photos 3 and 4}.
Do the same on the other side.
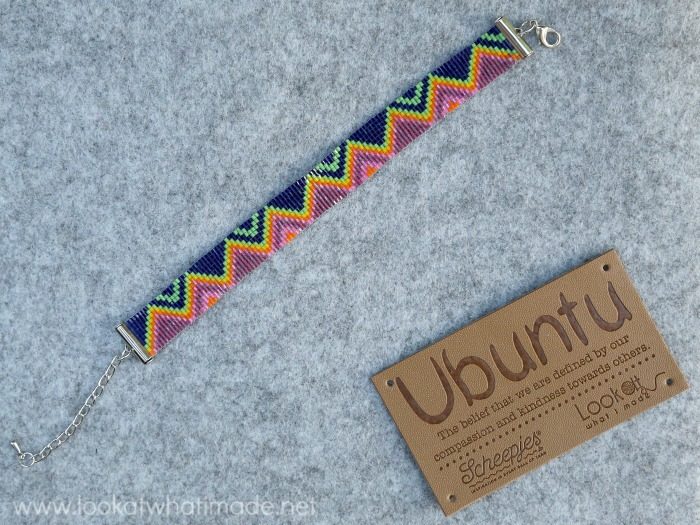
When you are done, your bracelet is complete!! Put it on and do a little happy dance!
I hope you have enjoyed this project. Next week, I will be sharing the pattern for the Pendant. I hope you will join us for that.

This blog post contains affiliate links. I only link to products I personally use or would use. All opinions are my own.


Andrea Nikolic says
Yay thank you! I got this kit as a gift but it came without instructions. I made the bracelet!
Thanks again,
Dedri Uys says
Hi :) I hope you enjoyed it. The beads are quite tiny, but I love how it turned out. Do you mean the blanket kit came without instructions?
Joy says
oh wow, now a new craft to learn.. thanks to your clear instruction, I just might try as it looks like fun :) :)
Jenny says
I will be learning along with you, Joy! Quite excited to give this a go! Jenny :)