In Part 19 of Sophie’s Universe we are looking at 2 squares you can use to grow your square Sophie into a rectangle. If you are going to add these squares I strongly recommend that you add a border, which we will look at next week.
I realize that squares are not everyone’s cup of tea, so at the bottom of this post you can find a suggested alternative.
The most important thing is that you are happy with your final blanket, so if you are unsure of which growing method you would like to use, consider waiting until next week to see what the border looks like.
I realize that this “mystery” element of the CAL has been frustrating for some people, but I hope that it also added to the excitement for some.
Update: I was adamant that I didn’t want to make any of my Sophies rectangular, but Mr Lookatwhatimade loves the squares and is equally adamant that I should. So I will be growing my small Sophie after all. Let’s hope Jenny loves me enough to make some more squares for me…
Sophie’s Universe Part 19 – Sophie’s Choices
©Dedri Uys 2014. All Rights Reserved. Photos by It’s All in a Nutshell used with permission.
Resources
- Add this CAL to your Ravelry Queue
- Sophie’s Universe CAL 2015 Information
- Use the Print-friendly button at the bottom (right) of this post to print/save this tutorial. Don’t know how? Find out HERE.
- You can see Esther’s videos HERE: Jack and Lydia.
Translations
- Dutch Translation by Dianne Baan
- German Translation by Maja Heidingsfelder
- Spanish Translation by Lynda Hernandez
- French Translation by Sandra Larvin (with Video Tutorials by Géraldine Cymer)
- Danish Translation by Tina Poulsen
- Russian Translation (with Video) by Natalie V. Alimpieva
- Swedish CAL Information by Emma Vingqvist, Agnetha Magnusson, Åza Karlsson, and Ulrika Larsson
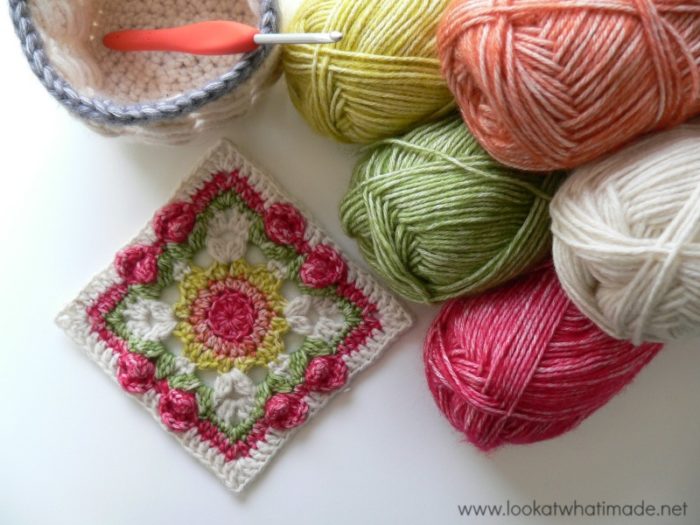
Materials
For the purposes of this tutorial, I am using Scheepjeswol Cotton 8 (available from Wool Warehouse) and a 3.25 mm Clover Amour Crochet Hook (US D/3 UK 10).
| Lydia | |||
| Cotton 8 | Softfun | Stonewashed XL | |
| Round 1 | Light Pink | Light Rose | Moonstone |
| Round 2 | Pink | Dark Rose | Lemon Quartz |
| Round 3 | Fuchsia | Bordeaux | Deep Amathyst |
| Round 4 | Light Green | Olive | Canada Jade |
| Round 5 | Light Turquoise | Light Blue | Moonstone |
| Round 6 | Pink | Dark Rose | Deep Amathyst |
| Round 7 | Light Pink | Light Rose | Corrundum Ruby |
| Jack | |||
| Cotton 8 | Softfun | Stonewashed XL | |
| Round 1 | Violet | Pink | Moonstone |
| Round 2 | Light Purple | Violet | Amazonite |
| Round 3 | Moors | Cyclamen | Green Agate |
| Round 4 | Light Green | Olive | Lemon Quartz |
| Round 5 | Light Turquoise | Light Blue | Moonstone |
| Round 6 | Heath | Heath | Blue Apatite |
| Round 7 | Moors | Cyclamen | Green Agate |
You can find the yardages per round HERE.
Optional Squares
Some of you might remember the Piccadilly Square I made up on my commute to work one morning last October (originally named after the Piccadilly Line tube I take every day and on which I crochet A LOT). You can see my Facebook post about it HERE. I also used it in my Foursquare Tutorial.
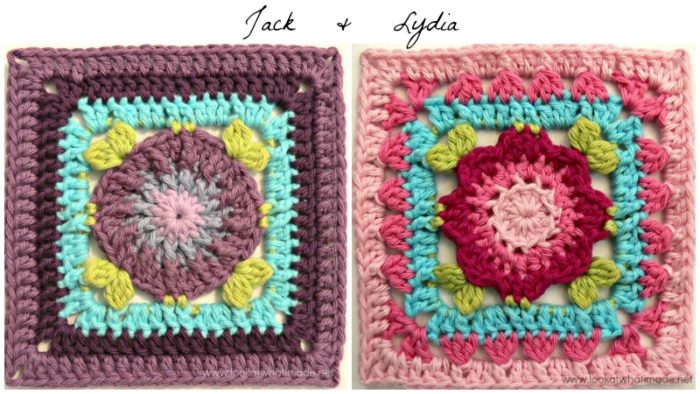
Although the square is quite simple I just love it. So to grow your square Sophie into a rectangle I will be sharing 2 variations of this square (named Jack and Lydia, after the “real” Sophie’s siblings).
Before you Start
The final stitch count for Sophie’s Universe is 216 stitches per side (not including ch-2 corner spaces). This is 9 x 24 stitches.
Each square has a final stitch count of 22 stitches per side. Add to that the two ch-2 corners and you get 24 “stitches”. We are including these ch-2 corners as “stitches” because they take up space and will have to be worked into when joining your squares to Sophie.
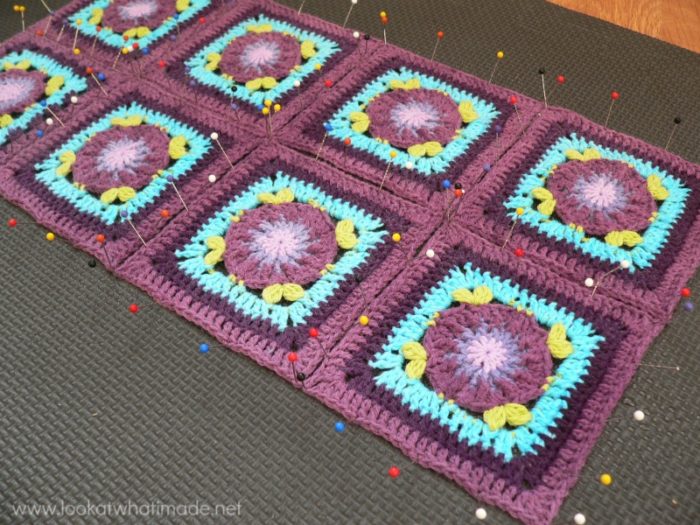
You will therefore need 9 squares for the top of Sophie and 9 for the bottom. I will only be using “Jack” squares…
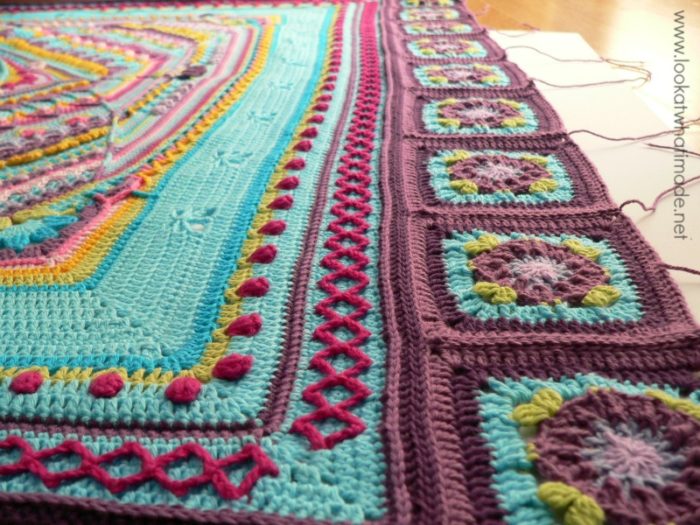
… but Esther (who does the videos) has alternated Jack and Lydia so that you can see what it looks like.
Rectangularifying Sophie
(Yes, that’s a made-up word)
Step 1: Patterns
You can find the pattern for Jack and Lydia HERE. Esther has kindly provided video tutorials for both squares. You can find them at the start of each pattern.
Update: Penny Davis has modified the Lydia square to create ‘Dedri’s Rose Garden’. You can find the tutorial for that HERE, should you choose to make that square instead.
Step 2: Decide on Your Layout and Colours
Have a little play with a piece of paper and some colouring pencils. Or alternatively you can use PicMonkey and upload a photo of your (blocked) Sophie along with the images below. Make a collage with 9 squares along the top edge of your Sophie and see how you like it. You can find a tutorial for using PicMonkey to decide on the layout of an afghan HERE.
-
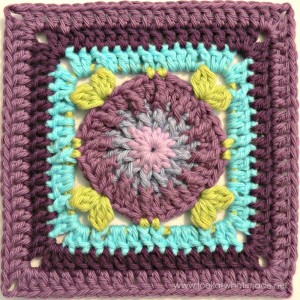
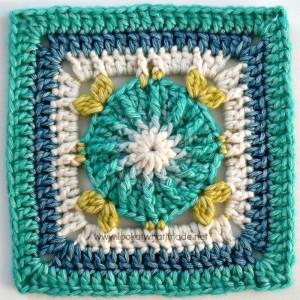
- Jack Cotton 8
-
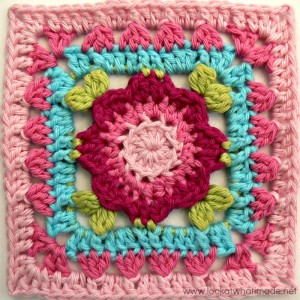
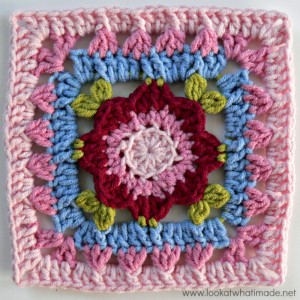
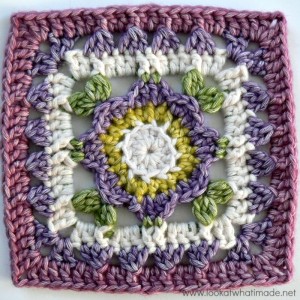
- Lydia Square – Cotton 8
-
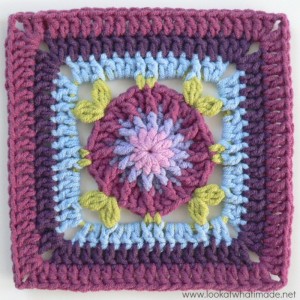
- Jack Square – Softfun
-
- Lydia Softfun
-
- Jack Stonewashed XL
-
- Lydia Stonewashed XL
Remember that you will need 9 squares along the top and 9 along the bottom, so 18 in total.
You can either use the colours I will be using (listed under Materials above), or you can use up the scraps left over from making Sophie. Please note that the scraps for the small version should be enough, whereas the left-over yarn for the medium and larger versions won’t be.
Step 3: Make the Squares
As I have already mentioned, the stitch count for the squares matches up with the stitch count for Sophie (if using 9 squares). However, the size of the squares might not necessarily match up. You want your squares to be a ninth of the size of one side of Sophie (phew…lots of of’s again).
My small Sophie is 100 cm, meaning that each square should measure 11 cm (ish). Using the 3.25 mm Clover Amour Crochet Hook (US D/3 UK 10) I used for the small Sophie made the squares exactly 10 cm. So I went up a hook size (to a 3.5 mm). This made the squares 11 cm, which was perfect!
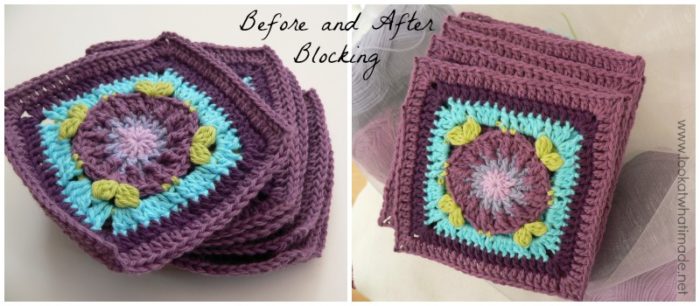
Remember to block your squares before measuring.
Blocking will also make it easier to attach your squares as you will have straight edges to work with, not wobbly ones.
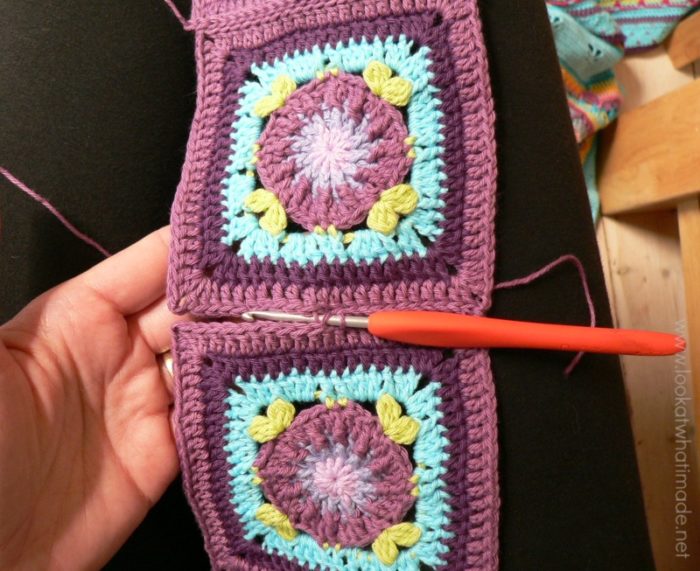
Step 4: Joining the Squares
When you have made all your squares, you will need to attach them to each other in 2 strips of 9, as if you were making 2 scarves.
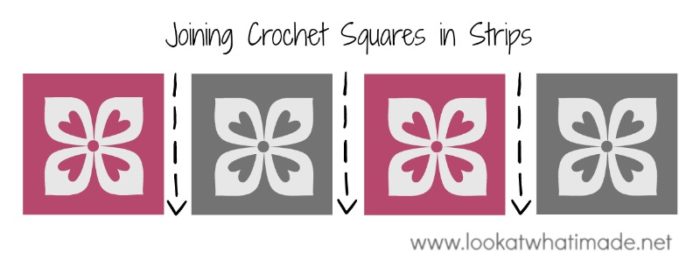
I recommend using the zipper join if your outside rounds are all the same colour. Remember to have a look at Esther Dijkstra’s Video Tutorial HERE.
If the outside rounds of your squares are all a different colour, I recommend using the Slip Stitch Outside Loops Only Join (Right Sides Together) by Lucy from Attic 24.
If you don’t like either of these 2 methods, you can find more options HERE.
Step 5: Attaching the Squares to Sophie
Once you have your two “strips”, use the joining method you chose above to attach the strips to the top and bottom of Sophie.
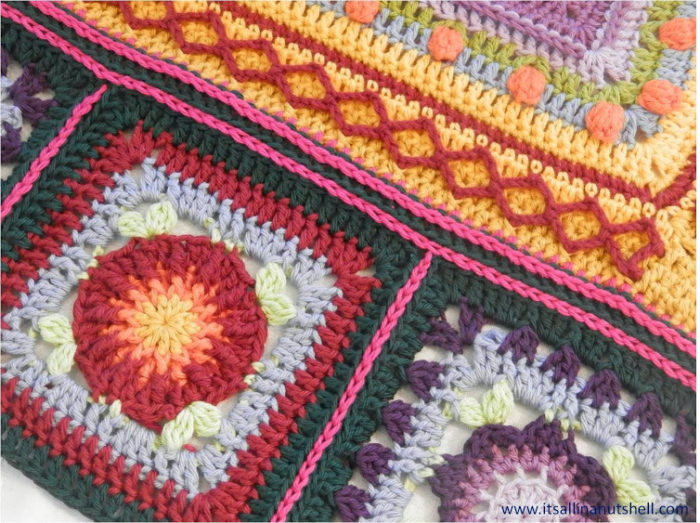
You will notice that the 2 corner spaces on Sophie will need to be worked into as well, technically giving you 2 more stitches on Sophie than on the “strips”. You will need to do a teeny tiny bit of fudging. The easiest way to do this is to skip two of the stitches along the length of Sophie. Don’t skip 2 st’s right next to each other. Space the “skips” out a bit so that they are not obvious.
Once you have attached both strips you are ready to add your border, which we will look at next week.
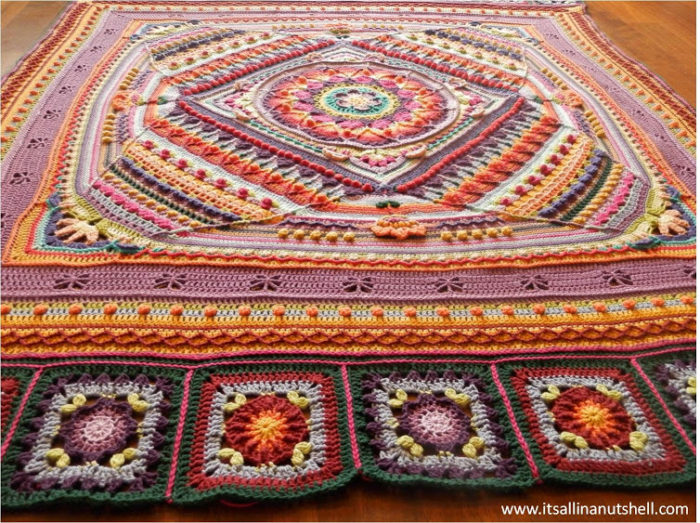
Alternative (Rows)
If you don’t like the squares, you can always use the As We Go Stripey Blanket by Not Your Average Crochet. There are lots of different stitch arrangements, making it highly adaptable.
To use this pattern to grow your Sophie into a rectangle, you will need a multiple of 24 + 1 stitches. As already mentioned, the last round of Sophie has 216 stitches (and 2 ch-2 corner spaces), giving you (nine multiples of 24) + 2. To make it work you will need to work into both the corner spaces and skip 1 stitch along the side when making your first row.
The great thing about this pattern is that you can completely individualize your Sophie by choosing which rows to make and which ones to leave out. Because of the infinite possibilities I have NO way of telling you how much yarn (or which colours) you will need.
I hope we see you back here next week for the border.

This blog post contains affiliate links. I only link to products I personally use or would use. All opinions are my own.


Lynda McKenzie says
I only finished my Sophie last week, being late to the game! I am new to crocheting and have thoroughly enjoyed every single minute, and can’t wait to start more of your patterns!
My Sophie is the stonewashed XL one. I’m crocheting Lydia squares at the moment to add on to my Sophie as well as Betty’s beautiful Border. I’ve followed the suggested colours for everything, but I can’t find anywhere that tells me which colour the zipper join should be, or round 0 for Betty’s Beautiful Border. I bought the XL Lydia add on pack, and don’t want to run out of wool by using the wrong colour, but I’m also so new to this, I don’t want to ruin the lovely effect by making a wrong choice. Can’t find any photos anywhere of a stonewashed XL Sophie with the Lydia pack add on. I’ve searched everywhere!
Thanks in advance, and also a huge thanks for making me love crochet!
Dedri Uys says
Hi Lynda. The instructions and colours for ‘Round 0’ (Base Round) can be found HERE in Part 20. You should join the squares (zipper method) using the same colour as the last round of the squares. I hope that helps :)
Jessica Stephens says
I was wondering what if you wanted to do the squares but wanted to keep the square shape. Obviously you would just make more squares but as I intend to follow this brilliant cal through to the end, how would that adjust the count for the border? Is it recommended to choose a top and bottom or is it possible to adjust the border pattern to accommodate squares all the way around? I apologize if this has already been asked. I love this beautifully written pattern and I admire and applaud all the hard work and love that has gone into it. Thank you so much for sharing this with the world :)
Dedri Uys says
Hi Jessica.
The border instructions are written in such a way that you can use them for a square or a rectangle, so it shouldn’t be a problem if you want to add squares all the way around to maintain a square. You will just need to make sure that you have the required multiple of stitches before you start doing your border. You can do this by either adding an extra round or two before you start the border, or by skipping a stitch or two on each side when making the first round of the border.
Jessica Stephens says
Thank you for getting back to me and thank you for the advice. It’s appreciated.
Dedri Uys says
You’re welcome, Jessica. Let me know if you have more questions.
Jenny says
Oh sorry to hear that Irene! Take your time and don’t let Sophie strain your wrist too much. Hopefully she will be kind and not stress you too much :)
Shami Immanuel says
Dedri thanks for this great project. I have completed all the official rounds and here is my sophie. I am going to continue with the as we go stripey blanket.
http://www.shamiatcraft.blogspot.in/2015/05/sophies-garden-progress-so-far.html
Rita says
I know you’re busy so I’m typing fast. How/what should I do to make a continuous border around the entire Sofie’s Universe using the As We Go Stripey Blanket method? It’d be awesome to turn Sophie into an actual queen size spread.
Jenny says
Dedri has given some ideas for everyone to try and figure out how to use for their own means Rita.
Have a look at the stitches in the as we go blanket and see what corners correspond to the stitches Dedri has used for the corners and then start counting :)
Jenny says
Rita, part 20 should explain the borders perfectly :)
mary says
Dedri
You have received numerous notes of gratitude and I am adding to that. But specifically I want to recognize how much you have added (and continue to add) to the virtual crochet community, a club that truly spans the globe when you think about it! It would be so much less without you. And you have raised the bar on all things crochet.
I have no idea how you have found the time to work on projects, invent new ones, tidy up WIPs, keep up on these postings, and still have a full time job and fuller-time family. You are an inspiration.
My 2 Sophies are nearing completion, and then I need to figure out how to make sure they are used!
Which leads to me to my question: Considering how remarkably prolific you are, I wonder what you do with all your finished projects? I mean a family can only have so many afghans/blankets, no matter how awesome they are.
ELDA DA FONSECA says
Hi Didri,
I love you for giving us such inspiration! I learnt to crochet by myself while being a Little girl just looking my friend’s grandmother., then I did some pillow while beint in my tweinties and only now at 56 I came back to crochet thanks to the designs I have seen. Yours is the most ! I love it, I am making part 13 now and hope to catch 18 within next week.
My daughter Micaela loves the blanket I am making for her, I want to make another one for my older daugther who
also loves this kind of work ! I have learnt so much with you ! I am more than thankfull!! love your Works and thanks again for the inspiration you are !
Elda from Uruguay
Jenny says
Hi Elda!
Thank you! How lovely to hear that Sophie is being made and enjoyed in Uraguay :)
Stevey Lupo says
Just a quick note! Thanks so much for taking the time to teach us all Sophie! This was my first crochet project. I taught myself with your help. I am proud to say I am starting number 18 today. A little behind but I did it!!!! She is beautiful. I am officially a crochet fanatic! Much credit goes to my husband who helped cook on the tough parts. Also spending hours reading novels to me while I crocheted ripped out and re crocheted parts. I cant wait for your next project. I want to crochet the world. Thank you again for your help and planning, you made me feel a sense of pride I havent felt in a long time!!
mary says
18!!!! Wow. I’d love to see photos!
Deanne says
Hey Dedri, I just LOVE the squares. I am going to use them. However, I want to keep my Sophie square, so just a quick question, will it work if I just add one additional square for each corner? I am sure it will, since the squares are all the same size, but I just wanted to double check. I am not up to this week yet, I am a couple of weeks behind, but I am saving and printing each week as it is published. On another note, thank you so much for a wonderful pattern. I have received compliments galore and referred people to your site whenever they comment. XXXX
Linda Shoaf says
You are an amazing woman! I have looed forward to each week to see what the new additions would be. Two week ago I had to stop working on my Sophie so I could finish the Sophie I was making for my Mom for Mother’s Day. She loves hers too. Thank you so much for sharing and I hope there are more CAL’s in the future.
Jenny says
Linda, I always say you can’t keep a good woman down! I too hope to see more CALs from Our Guru Dedri in the future :)
Tammy R. says
I can not even start telling you how much I have enjoyed this CAL. I love pattern challenges, you challenged me. I love texture, you taught me textures. I am easily bored when doing repetitive stitches, none of that here.
I have been sick over the past month or so, and not been able to stick with it, but have been watching the progress of the Sophies and can’t wait to get started again.
I am excited about rectangulating my Sophie, but am going to wait to see how big she is going to be before I decide what to do. (I am using RHSS, so she is pretty big already)
I have enjoyed the entire process. Choosing colors and placement (I even did a heart transplant half way through because she just wasn’t quite right), learning new patterns and techniques, counting (and frogging), I am going to be sad to see it end, but now I know that the next challenge I come across, I will think about Sophie’s Universe, and all of your guidance & tips and jump right in.
Thank you! Thank you! Thank you!
Dedri Uys says
Tammy, thank you so much for your comment. I am so pleased that you have found the journey enlightening. A heart transplant sounds scary! I am assuming Sophie pulled through. Well done.
Have a wonderful week!
Heather says
Dedri, thank you so much for Sophie. She is just wonderful. But I have a ‘bad’ question to ask lol. My Sophie is one that the center bulges :( And I’ve read somewhere (can’t rem where now) about taking/cutting the center out of Sophie to make her lay more flat. What do you think or how would you go about doing that? Heather x
Jenny says
Heather, I would just block Sophie thoroughly, several times if needed. I would not be brave enough to chop her up! :)
Arna says
Thank you for sharing your beautiful pattern with all of us. I haven’t finished my first one just yet and my family is picking out the colors for the next one. I am going to visit my mom next week and it has been a long time since she has crocheted but she has asked if I could bring my Sophie because she wants to try crocheting one. You are a very talented designer and I appreciate your sharing..I have always crocheted but have never made anything as beautiful as my Sophie. Thank you to all the people that has spent time putting this together for the CAL
Jenny says
So pleased you are making multiple Sophies! I have two on the go and another two Gardens ready to grow on!
Thank you Arna :)
Marty says
You’ve blown my stodgy ideas about crochet right out of the water! You are incredible – and generous – and beautiful! Mr. Lookatwhatimade is a lucky man. Thanks for sharing Sophie with all of us!
Rita C Hunt says
i like some items
Dolores says
I love the squares and want it to be a rectangle, so I’m going with them and the border. Thanks so much for the lovely patterns and the joy of making it.
garnet abdelmalak says
i love this idea of continuing on. and i love jack and lydia. thanks dedri
Alison says
The whole Sophie’s Universe has been a delight to watch grow each week. The Mystery of it has been the best and has made me look forward to Sunday’s every week to see what is coming next. I hope you do another one soon. Hope you don’t mind me saying but i think both of the new squares that are used today would have looked nice if they matched the colours of the centre flower and those from circle at the very beginning of the Sophie. Love both the new squares. Haven’t been able to start my Sophie yet which is driving me insane. This is the most beautiful crochet piece in the universe :)
Alison says
Apologies Dedri, the red flower square does match the colours from the circle but how about a third square using the same flower from the centre. It is such a lovely turquoise colour and such a lovely flower, shame notto use them again. Looking forward to next Sunday already. Thankyou for all the hard work you have put in both on Sophie and your website which must take ages to do each week.
Dedri Uys says
Hi Alison. You are free to use the central flower to create your own square. There are 2 reasons why I didn’t do it. Number 1 is that I wanted smaller scares than the complete central flower could afford. Secondly I wanted a square that was quicker to work up and less complicated. This should not, however, hamper your own efforts, bearing in mind that the central flower is an adaptation of a Chris Simon design and any “design use” of it would have to be cleared with her.
I hope that helps,
dedri
Pam Beeching says
Superbly rich and sumptuous! When I catch up, these will look just perfect. Nice ideas for joining too. A lovely way to ‘wind down’ from the frenzied excitement of the main event. Many thanks.
Dedri Uys says
You are welcome, Pam x