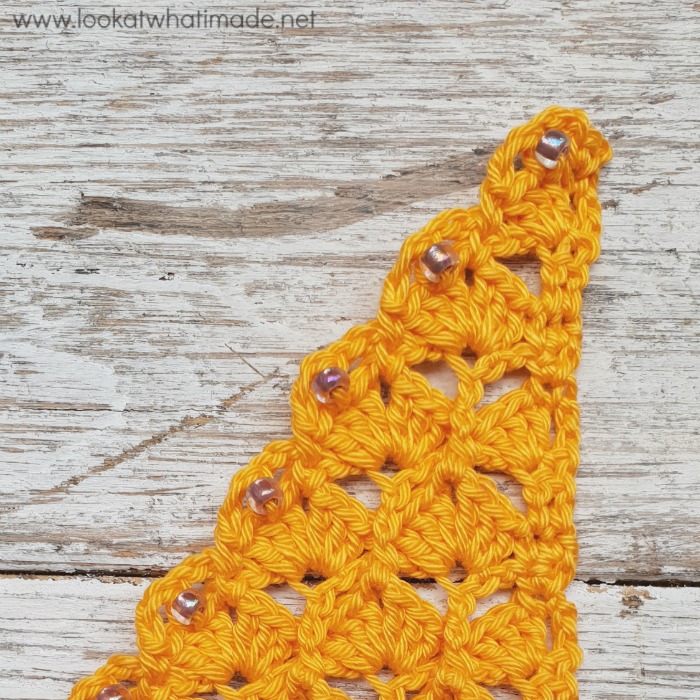
I am very pleased to introduce you to the ‘My Voyage Shawl’ I designed for my recent Australia/New Zealand Cruise adventure. It uses one cake of Scheepjes Whirl and has a make-as-you-go beaded edge on one side.
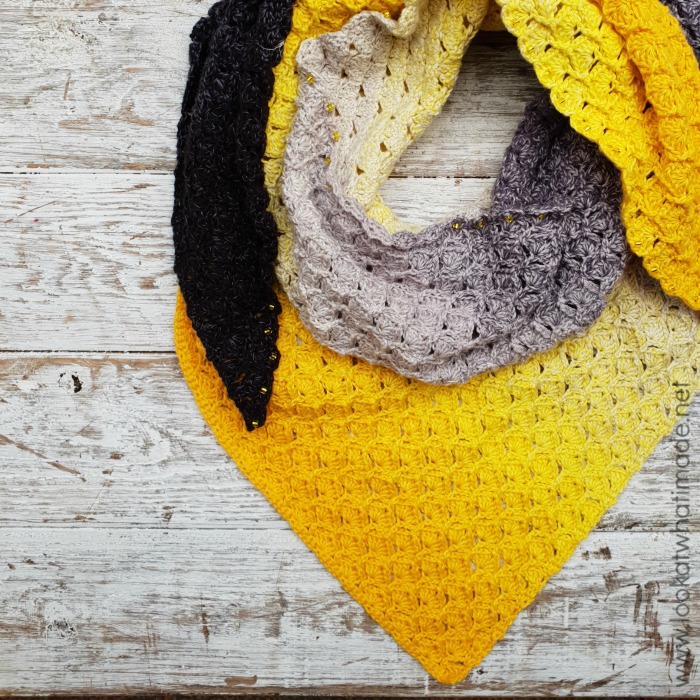
There is a very long story behind the My Voyage Shawl. So long, in fact, and so full of adventures, that I might never be able to tell it all. I am also well aware of the fact that you might be too busy having your own adventures to read about mine. Therefore, I have broken this post up into bits so that you can skip straight to the parts that bring you joy. If you choose to read it all (keeping in mind that it is bed-time in the UK now and also my mother’s birthday following on from my sister’s birthday yesterday), I suggest a strong cup of tea and/or a tub of ice-cream before reading on.
My Voyage Shawl
- A Bit About the Cruise
- A Bit About the Inspiration
- My Voyage Shawl Pattern
- Blocking
- All the Pretty Colours
A Bit About the Cruise
About a year ago, Jo Patton and Paula Storm from Crafty Adventures asked me if I would be interested in doing some workshops on a cruise ship. I am sure you can imagine my excitement and the delighted YES that bounced out of my chest! If you missed my squealing post about it, you can find it HERE.
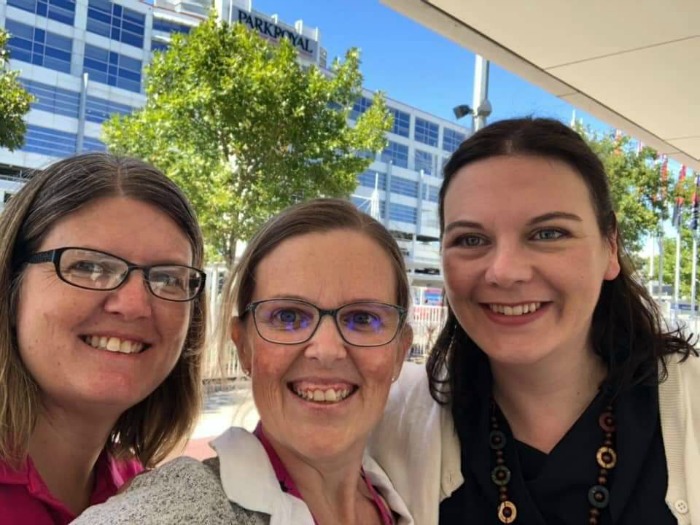
Jo Patton, Paula Storm, and me (Dedri Uys) Outside Melbourne Airport
I really, REALLY want to write a separate post about the cruise because I have SO many pretty photos and stories to share with you. I hope I get around to it, but just in case I don’t, here are some of the highlights:
- Going on my first Cruise

- THE FOOD!
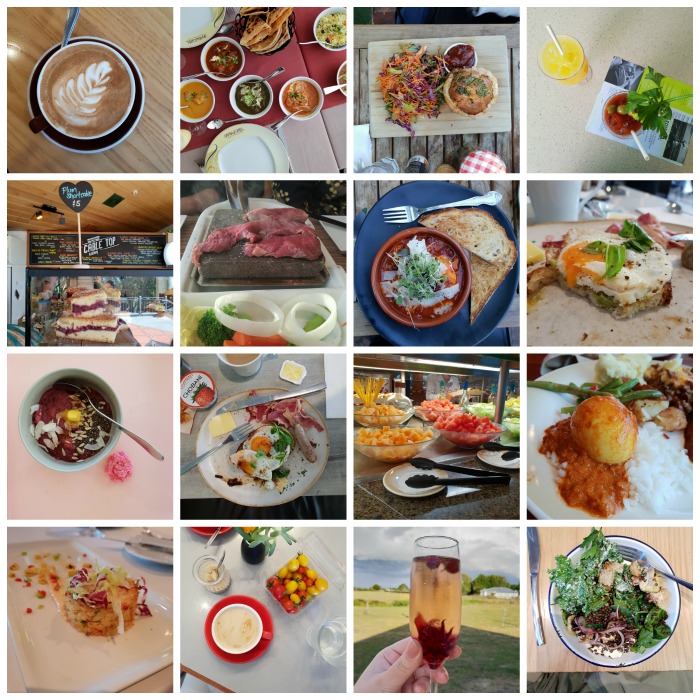
- Visiting Australia (albeit ever so fleetingly) and New Zealand (where we stayed with my sister for a while after the cruise)
- Being surrounded by nothing but tranquil beauty while we sailed through The Sounds in New Zealand

Milford Sound (pictured), Dusky Sound, Doubtful Sound
- Visiting Bendigo Woollen Mills and Bendigo Pottery (that trip deserves a post all of its own)
- Meeting Shelley Husband from Spincushions and Maggie Bullock (best known from the I can Read Charts CAL Tutorial and her charts for Jane Crowfoot’s Frida’s Flowers)
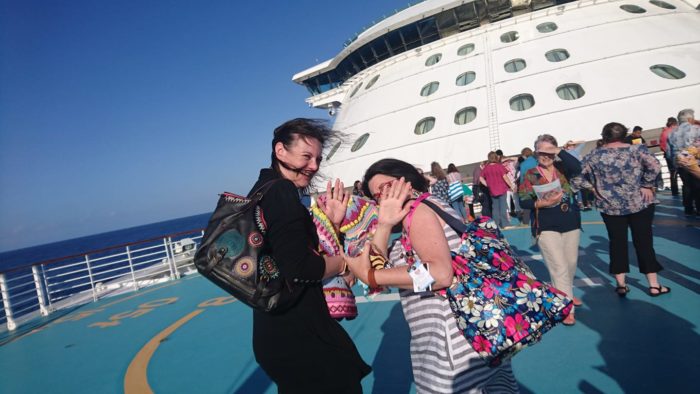
Me and Shelley Husband pretending to fend off the lovely photographer (Melissa Driver). Note my gorgeous Desigual bag (gifted and well-loved) with embroidered mandalas all over it!
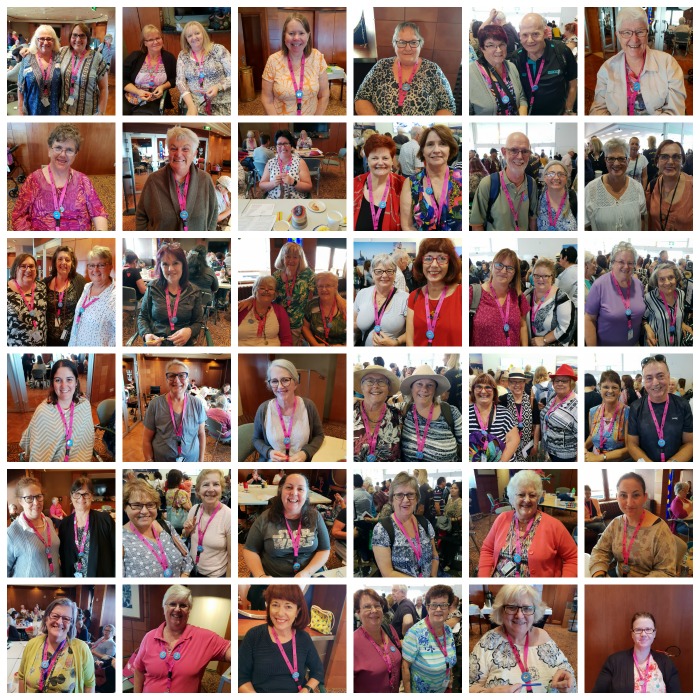
- Meeting so many wonderful people; not just the ladies (and gent) who attended the workshops, but random other people like the couple next to us at dinner each night, the couple I took a photo of in the Sounds and then saw everywhere I went, the brilliant staff (always so friendly and caring)…
- Attending an applique workshop hosted by Mandy Murray (you can find her on her website Sew Quirky or HERE on Instagram) – YES, I can sew! I learned to sew almost before I learned to walk!!
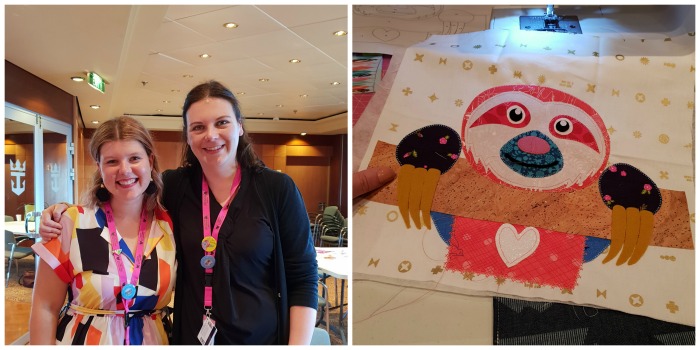
Left: Mandy Murray and Yours Truly; Right: Cuddleee the Sloth (pattern available HERE).
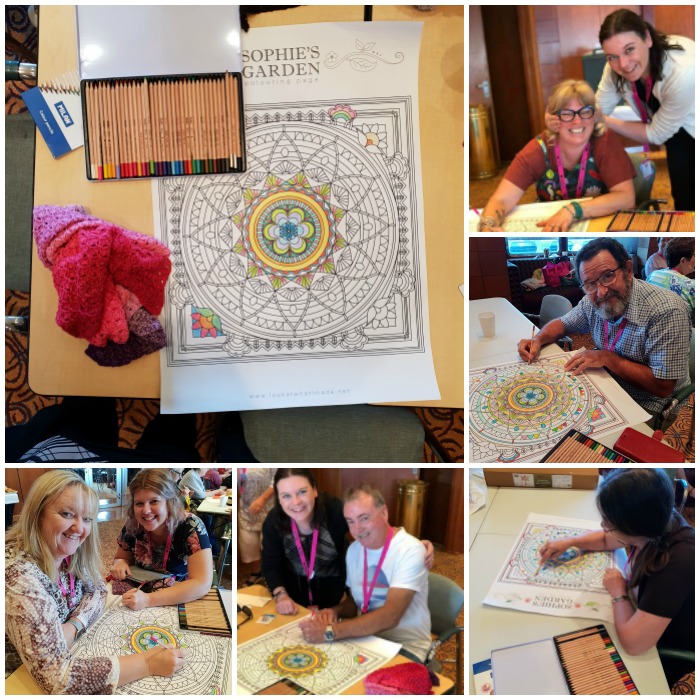
- Watching people colour in the as-yet-unreleased colouring pages for Sophie. I thought it would be fun to ask the attendees and their partners to do this as a keepsake for me. The colouring pages were designed by Claire Norden, whom I met on my South African tour. She also has some gorgeous (free) crochet designs that you can find on Ravelry HERE.
- Three weeks away from my computer with nothing to do but eat and crochet and socialise (THIS, for me, was huge and very much needed!)
- Drinking coffee on my sister’s deck first thing in the morning, listening to the cows moo their way through the mist.
The most wonderful thing about the whole trip was the fact that I got to share the experience with my mom and my sister, both of whom I haven’t seen for years due to the oceans separating us. If I wrote a book about it, this photo would be the cover photo. You can read more about this photo on Instagram HERE.
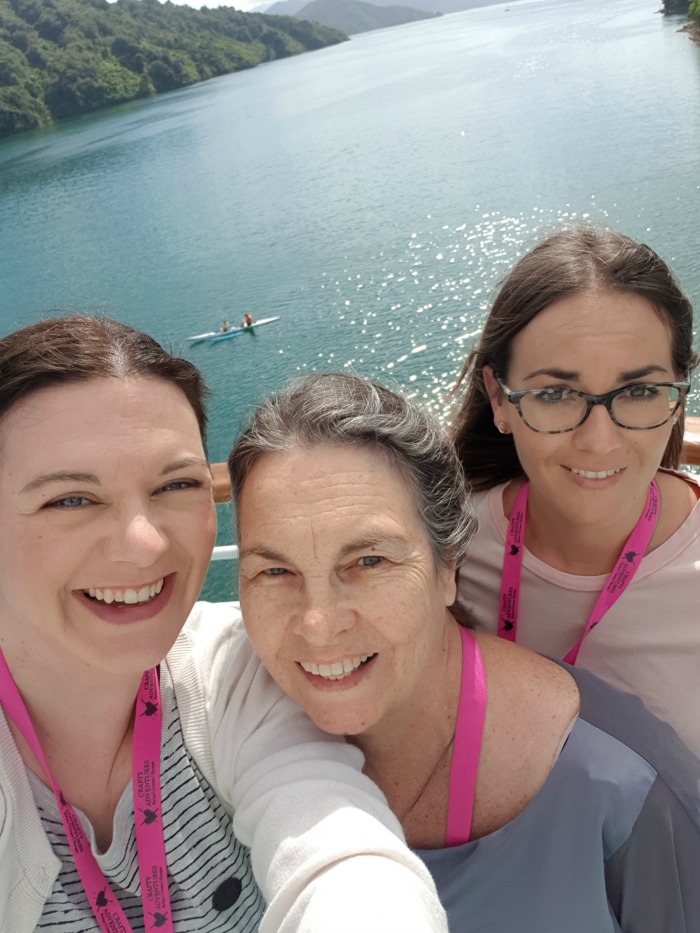
Me (Dedri Uys), my Mom (Minette Strydom), and my sister (Ance Strydom), almost alone on the ship in Picton
One last highlight was the morning Pony McTate came to visit me at my sister’s house. Everyone else had gone out, so for one entire morning, I pretended that the house (the beautiful, spacious house with its beautiful spacious kitchen and its beautiful wrap-around deck) was ALL mine! I had a lot of fun playing hostess in ‘my house’. I have been following Pony on Instagram for two years now (?) and it was such a treat to meet her in real life. You can see my Instagram post about it HERE. This is one of the selfies she took of us (note the Sophie that my mom made my sister):
A Bit About the Inspiration
And now, on to the yarn and the pattern.
When I first started thinking about my first design (of two) for the cruise, I tried all sorts of weird and wonderful things, thinking that I would have to do something epic to celebrate this epic adventure. In the end, I kept returning to a simple repeat that made my heart sing. When I did my workshops with Be Inspired in South Africa in 2016, I was working on a pattern repeat for the Wonder CAL blanket 2016. My mom and I could not agree on whether the stitches looked like Quiver trees or Egyptian fans, so I decided to call it Quiver Fans. Knowing that I would share this new experience with my mom and sister, and being drawn again and again to that particular stitch, it seemed like the perfect fit to use that stitch for this design.
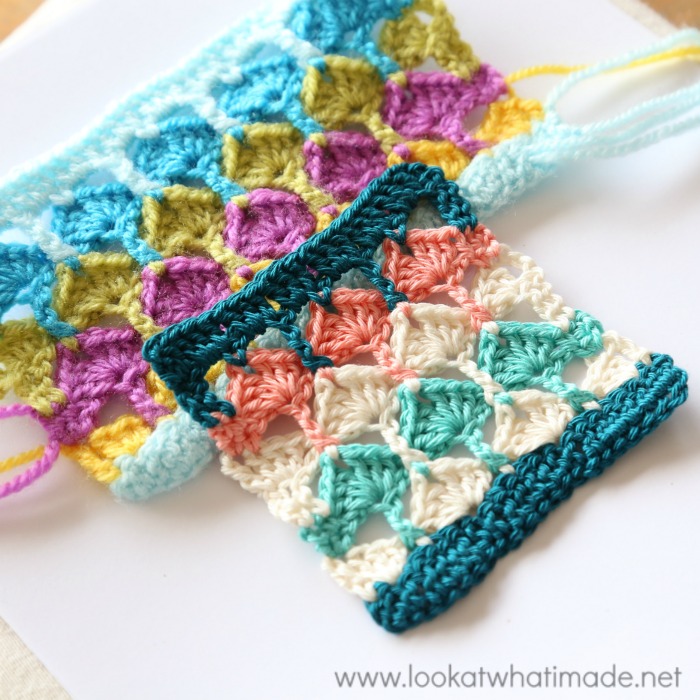
Although the shawl I have chosen to feature is yellow (24 hours of Summer, so still quite fitting), I actually designed this shawl with colours that put me in mind of a cruise ship and the sea. Just like with the My Story Shawl, I wanted the My Voyage Shawl to tell a story… a story of blues and light greys and glorious teally petrol.

The obvious choice, for me, was Scheepjes Whirl in the colourway Sea Breeze Tease (isn’t the name perfect too??).
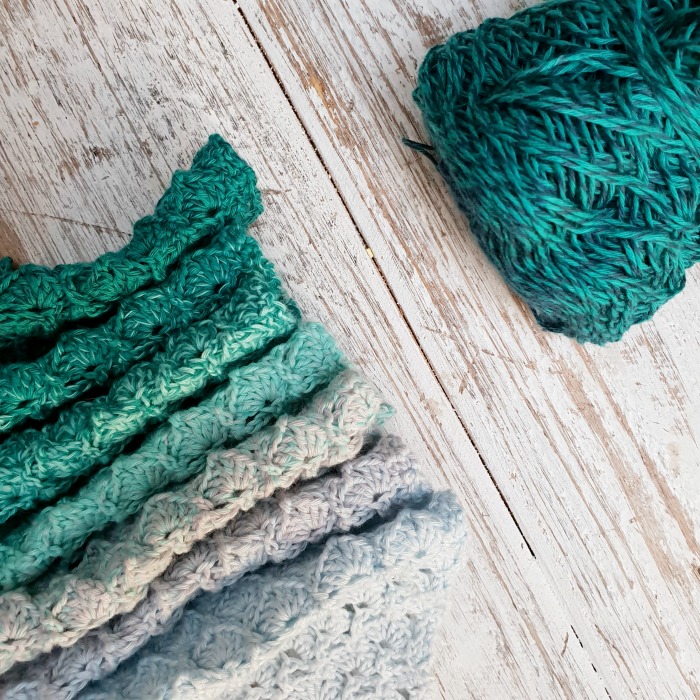
I found everything about this colourway calm and soothing. The pattern repeat, once mastered, was mindful and relaxing. And the bonus? Every second row was rewarded with the addition of a sparkling bead.
I had three people test the pattern for me before the cruise. Mainly because I wanted the instructions to be as accurate as I could make them, but secretly because I wanted to see as many colourways as last-minute-possible. I would like to thank Lynnette Wilkie, Janet Cairns, and Hazel Raven for testing the pattern for me.
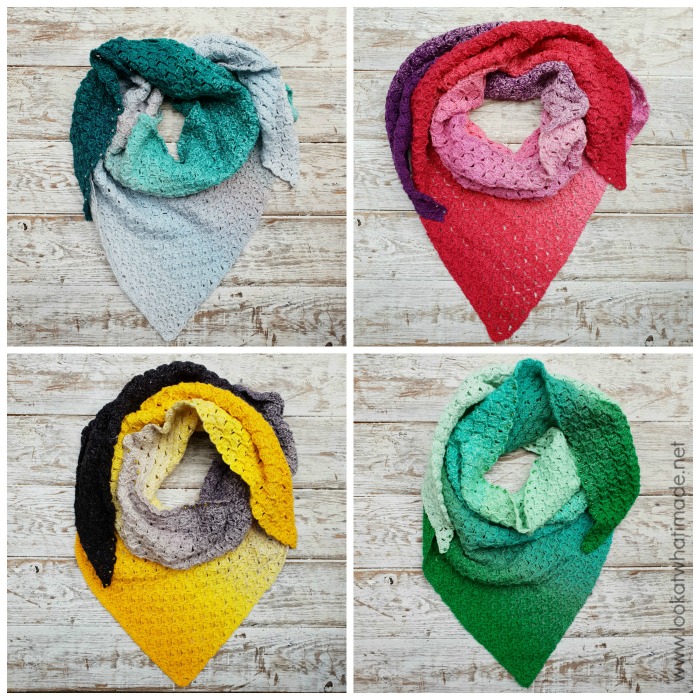
Top Left: Sea Breeze Tease (781) by me; Top Right: Turkish Delight (778) by Hazel Raven; Bottom Left: Dandelion Munchies 787 by Janet Cairns; Bottom Right: Peppermint Patty Cake (775) by Lynnette Wilkie
Before we get down to the very serious business of the pattern, can I just say that Boy Number Two liked this shawl so much that he wore it to school for a week before the cruise? I actually had to steal it off of him so that I could take it with me.
I couldn’t resist sharing a photo below because I just adore the way these boys embrace my passion for all things yarn!
My Voyage Shawl Pattern
© Dedri Uys 2019. All Rights Reserved.
Charted by Maggie Bullock
Designed for the February 2019 Crafty Adventures Cruise.
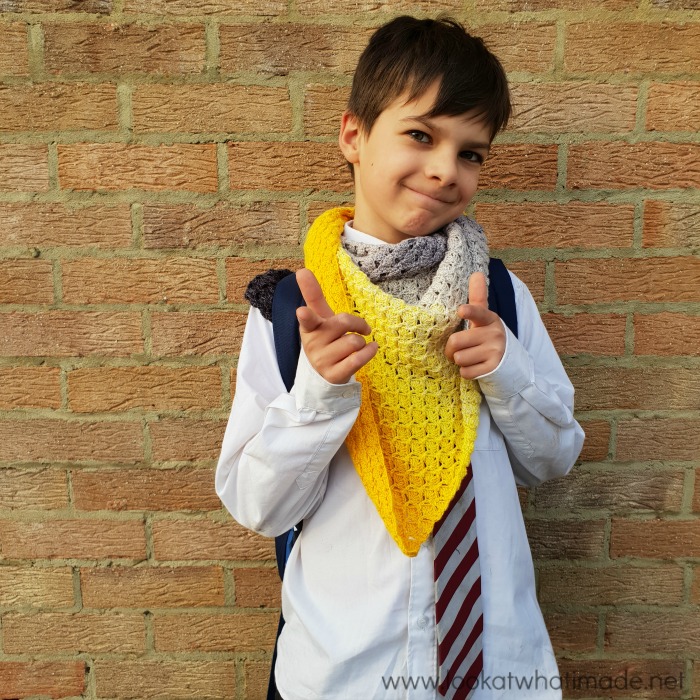
Too Cool for School
Information
Resources
- Add the Pattern to your Ravelry Queue or buy the ad-free written-only PDF of this pattern in my Ravelry Store (US Terminology). If you do not wish to purchase the formatted PDF, you can use the Print-friendly button at the bottom of this post to save/print the pattern. You will be able to remove the parts you don’t want to print.
- Hashtag: #myvoyageshawl
- More Crafty Adventures Cruises:
- Carnival Spirit South Pacific Cruise departing Sydney 26th of August 2019 – Featuring workshops by Vanessa Smith (Crochet) and Sandy Walker (Tunisian Crochet)
- Arne and Carlos Knitting Cruise departing Sydney on the 27th of March 2020 (you can find more information in the Facebook Group HERE.
Materials
- 3mm crochet hook (I recommend Clover Amour – see my hook review HERE)
- 1 ball of Scheepjes Whirl in any colour you fancy
- 73 x Size 6 beads in a colour that matches your whirl – I recommend Debbie Abrahams beads
Abbreviations
US Terminology
- Beg – Beginning
- BP – Back post (see Special Stitches below)
- Ch – Chain
- Dc – Double crochet (yarn over once)
- Hdc – Half-double crochet
- Rem – Remaining/remains
- RS – Right side
- Sc – Single crochet
- Sl st – Slip stitch
- SM – Stitch marker
- St/sts – Stitch/stitches
- Tr – Treble crochet (Yarn over twice)
- WS – Wrong side
Punctuation
- * An asterisk indicates pattern repeats. You will need to repeat all the instructions between asterisks the number of times specified. This is a hard-core repeat and will consist of multiple instructions.
- Square Brackets [] are used to indicate a group of sts to be worked in the same st/sp.
Special Stitches
- Back Post Stitches – Identify the post of the stitch you want to work around. Insert your hook from the back to the front and then from the front to the back around the post of the stitch so that the post lies behind your hook. Complete your stitch as normal. You might find it easier to twist your work forward so that you can see what you are doing.
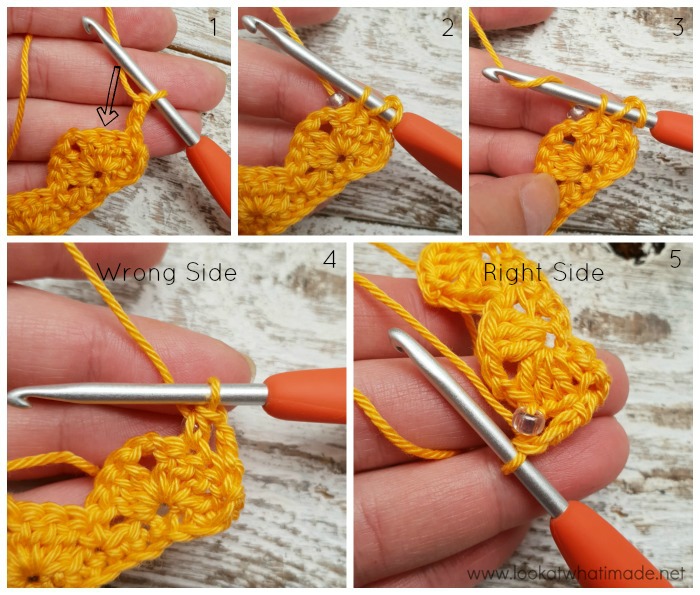
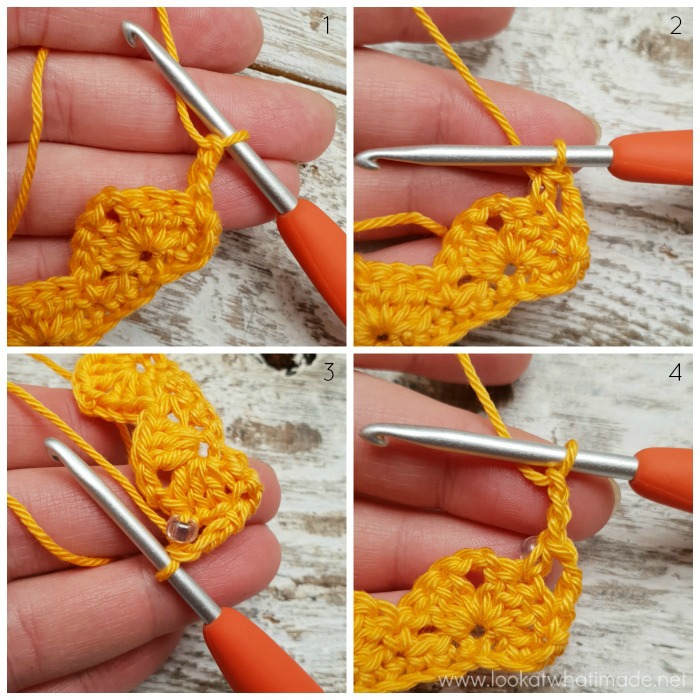
- Bead Hdc – yarn over, insert your hook into the indicated st and pull up a loop. Move the bead so that it abuts your work {Photos 1 and 2}. Yarn over {Photo 3} and pull through all 3 loops, enclosing the bead {Photo 4}. The bead will pop to the back of your work, which will be the Right Side {Photo 5}.
Gauge
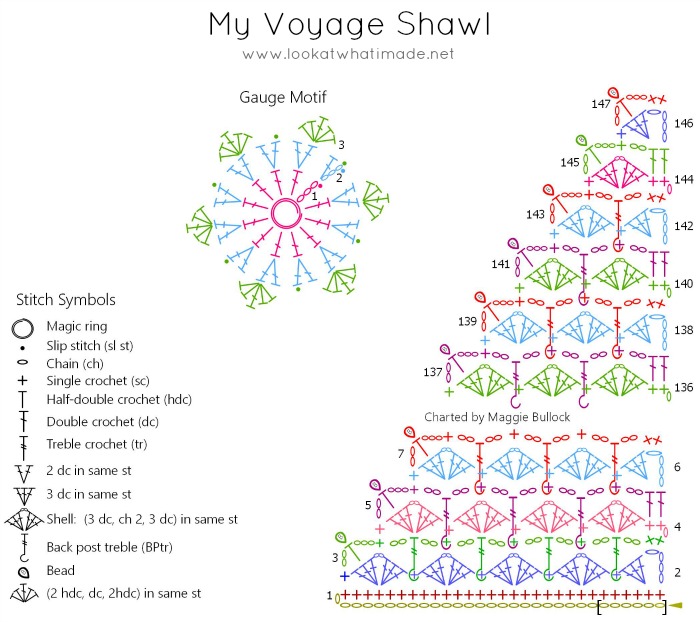
You can find a chart under Chart below.
Make the following gauge motif:
Round 1: Into a magic ring, ch 3 (counts as dc throughout), 11 dc. Join to the top of the beg ch-3 with a sl st. {12 dc}
Round 2: Ch 3, dc in the st at the base of the ch-3. Make 2 dc in each of the rem 11 dc. Join to the top of the beg ch-3 with a sl st. {24 dc}
Round 3: *Skip the next st, [2 hdc, dc, 2 hdc] in the next st, skip the next st, sl st in the next st.* Repeat from * to * 5 more times. The last sl st will fall in the st that contains the joining sl st. Fasten off and work away ends. {6 Petals, each containing 4 hdc and 1 dc}
Your little flower should measure 4.5cm from the tip of one Petal to the tip of the opposite Petal.
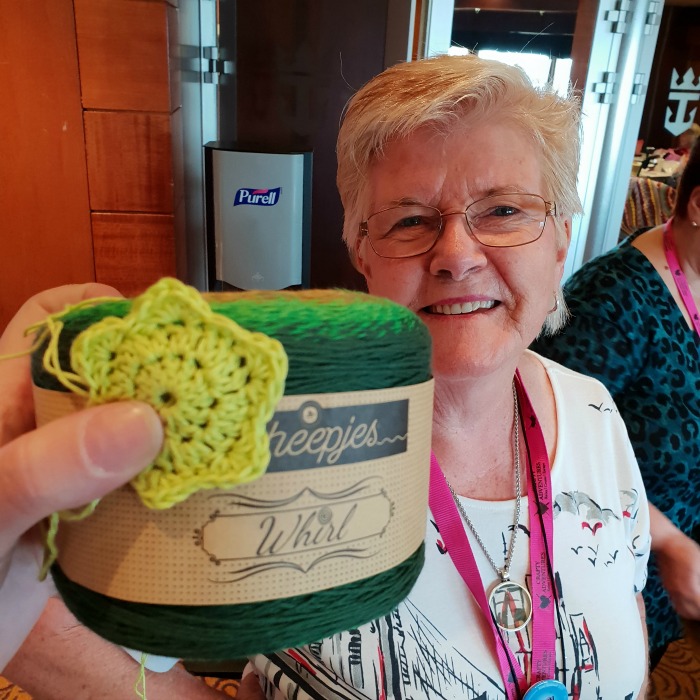
Gauge Motif made by beginner crocheter Mary Prentice (pictured), whose daughter and granddaughter I met at the Waltham Abbey Wool Show 2017
Size
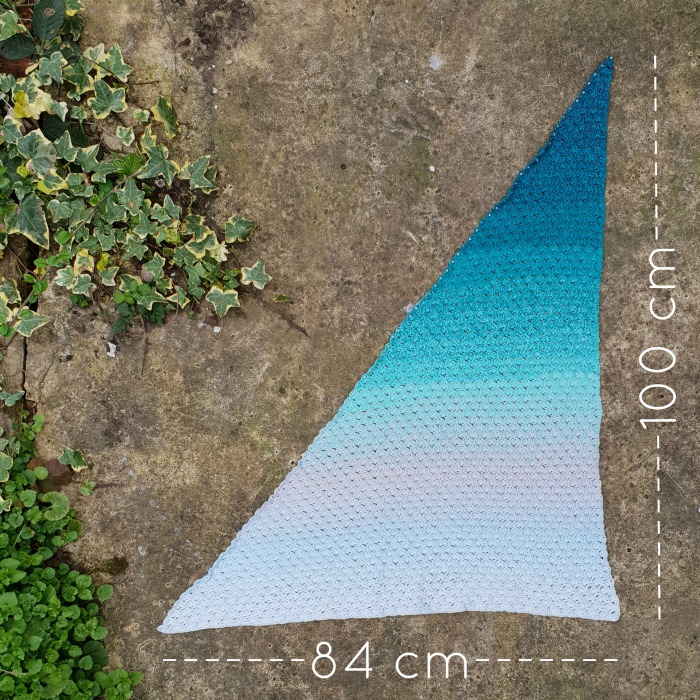
Your shawl will be approximately 84cm wide by 100cm long (unblocked). Please note that the length can vary widely depending on your personal tension and the way it affects your ‘longer’ stitches.
Notes
For this pattern, you will need a multiple of 6 chains in your foundation row, which will give you a multiple of 6 + 5 sts in Row 1.
If you find that your first row is more than 87cm wide, omit stitches in multiples of 6 until it measures less than 87cm. When you have finished your shawl, reverse unpick the unnecessary chains. You can always make a much bigger shawl. If you do decide to do that, though, please note that you will use a lot more yarn.
You will need to ‘load’ some beads before you start. Don’t load all your beads at once. It will make it harder to work with your yarn. Load half first, and when you run out, cut your yarn and load the other half. Remember to work these ends away later.
This pattern uses the Quiver Fans Stitch, with the start and end of each row adjusted to suit the shape of the shawl. I have linked to the tutorial where I thought it might be beneficial.
Chart
Instructions
Using a beading needle, place 37 beads on your yarn before you start, remembering that you will cut your yarn and add the remaining beads when you run out.
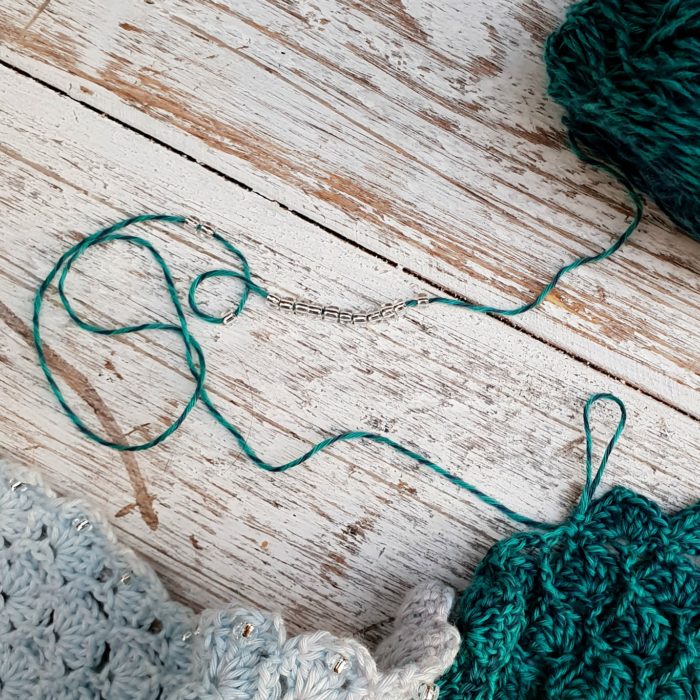
Ch 222, taking care not to chain too tightly. This should measure roughly 90cm.
Row 1
Working into the top loop only of each foundation ch, sc in the second ch from the hook and each ch across. Turn.
Stitch Count: 221 sc
Note: At the end of this row, your work should measure roughly 84cm wide. If it measures more than 87cm, there is a good chance that you will run out of yarn. Please see Notes above.
Row 2
With RS facing, ch 4 (counts as a tr throughout), make 3 dc in the next st (counts as Half-fan throughout), skip the next 2 sts, sc in the next st.
*Skip the next 2 sts, [3 dc, ch 2, 3 dc] in the next st (counts as Fan throughout), skip the next 2 st, sc in the next st.* Repeat from * to * until you have worked into each st. Turn.
Stitch Count: 36 Fans, 1 Half-fan, 37 sc, and 1 tr
Row 3
Tip: If you need help with the instructions between asterisks (*), please see Row 2 of the tutorial for the Quiver Fans Stitch HERE.
With WS facing, ch 2 {Photo 1}, make a Bead Hdc in the second dc of the first Fan {Photos 2 and 3}, ch 3 {Photo 4}. Counts as Edge throughout. Sc in the next ch-2 sp.
*Ch 2, BPtr around the next sc (which you will find between Fans), ch 2, sc in the next ch-2 sp.* Repeat from * to * until you have worked into every ch-2 sp. Ch 2, BPtr around the next sc, ch 2, make 2 sc in the last tr. Turn.
Stitch Counts:
- Edge: 5 ch, 1 Bead Hdc
- Row: 38 sc, 36 BPtr, and 72 ch-2 sps
Row 4
With RS facing, ch 1 (doesn’t count as a st throughout), sc in the first 2 sts.
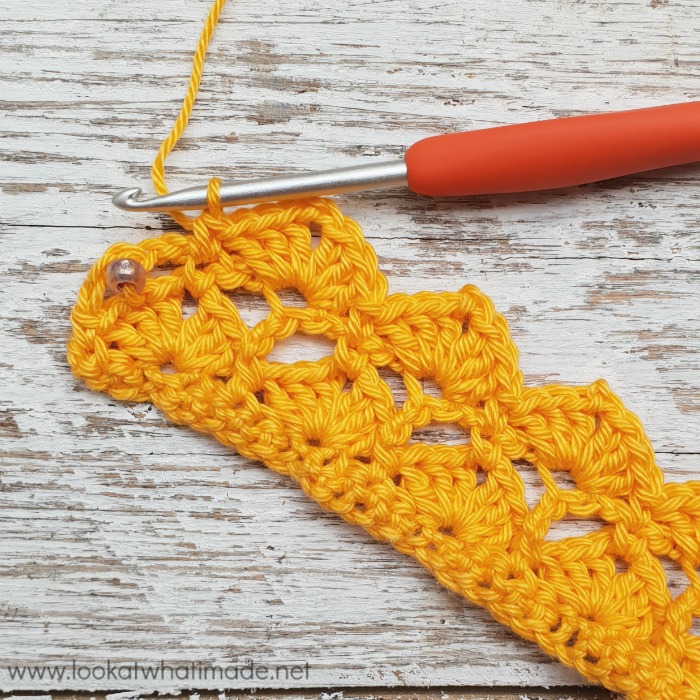
*Skip the next ch-2 sp, [3 dc, ch 2, 3 dc] in the next BPtr, skip the next ch-2 sp, sc in the next sc.* Repeat from * to * until you have worked into each st (not including the Edge). Turn.
The photo below shows the last sc of the row completed.
Stitch Count: 36 Fans and 38 sc
Row 5
With WS facing, ch 2, make a Bead Hdc in the second dc of the first Fan, ch 3. Sc in the next ch-2 sp.
*Ch 2, BPtr around the next sc two rows down (which you will find between Fans), ch 2, sc in the next ch-2 sp.* Repeat from * to * until you have worked into every ch-2 sp. Ch 2, dc in the last 2 sc. Turn.
Stitch Counts:
- Edge: 5 ch, 1 Bead Hdc
- Row: 36 sc, 35 BPtr, 2 dc, and 70 ch-2 sps
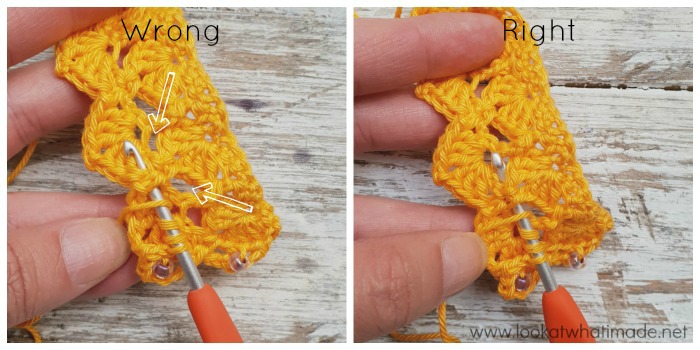
Tip: If you need any help with the placement of the BPtr sts in this row, please see the photo tutorial for Row 4 of the Quiver Fans Stitch. If you don’t want to check out that tutorial, please note the following:
When making your BPtr sts, you won’t be going around the sc from the previous row {see photo on the left below}. Instead, you will be working around the sc two rows down. This makes it neater and easier (because you are inserting your hook into the large ch-2 sps on either side of that sc – indicated with arrows in the photo on the left and illustrated in the photo on the right.
Row 6
With RS facing, ch 4, make 3 dc in the next dc. Skip the next ch-2 sp, sc in the next sc.
*Skip the next ch-2 sp, [3 dc, ch 2, 3 dc] in the next BPtr, skip the next ch-2 sp, sc in the next sc.* Repeat from * to * until you have worked into each st. Turn.
Stitch Count: 35 Fans, 1 Half-fan, 36 sc, and 1 tr
Row 7
With WS facing, ch 2, make a Bead Hdc in the second dc of the first Fan, ch 3. Sc in the next ch-2 sp.
*Ch 2, BPtr around the next sc two rows down, ch 2, sc in the next ch-2 sp.* Repeat from * to * until you have worked into every ch-2 sp. Ch 2, BPtr around the next sc two rows down, ch 2, make 2 sc in the last tr. Turn.
Stitch Counts:
- Edge: 5 ch, 1 Bead Hdc
- Row: 37 sc, 35 BPtr, and 70 ch-2 sps
Rows 8 – 143
As Rows 4 – 7.
Note: At the end of Round 143, you should have 3 sc, 1 BPtr, and 2 ch-2 sps, not including Edge.
Row 144
With RS facing, ch 1, sc in the first 2 sts. Skip the next ch-2 sp, [3 dc, ch 2, 3 dc] in the next BPtr, skip the next ch-2 sp, sc in the next sc. Turn.
Stitch Count: 1 Fan and 3 sc
Row 145
With WS facing, ch 2, make a Bead Hdc in the second dc of the first Fan, ch 3. Sc in the next ch-2 sp. Ch 2, dc in the last 2 sc. Turn.
Stitch Counts:
- Edge: 5 ch, 1 Bead Hdc
- Row: 1 sc, 2 dc, and 1 ch-2 sp
Row 146
With RS facing, ch 4, make 3 dc in the next dc, skip the next ch-2 sp, sc in the next sc. Turn.
Stitch Count: 1 Half-fan, 1 sc, and 1 tr
Row 147
With WS facing, ch 2, make a Bead Hdc in the second dc of the Fan, ch 3. Make 2 sc in the last tr. Fasten off and work away your ends.
Stitch Counts:
- Edge: 5 ch, 1 Bead Hdc
- Row: 2 sc
I hope you thoroughly enjoy making this shawl! If you share any photos of your completed shawl, please remember to use #myvoyageshawl so that I can find them.
Blocking
I strongly recommend blocking your shawl before you wear it. Depending on how tight you make your chains, you might find that the beaded edge curls over before blocking. The safest way to block your work is of course to wet block it, but I know from first-hand experience that ironing Whirl on a lowish heat (while stretching it) will yield the same results without ‘killing‘ the yarn.
All the Pretty Colours
Before we talk about colours, I would like to thank Scheepjes for donating all the yarn for the workshops (as well as extra goodies like the After Party patterns for LillaBjorn‘s Bolero Shrug and Canadutch‘s Read Between the Lines). I think it is safe to say that the ladies LOVED using Whirl and Catona for the two patterns we covered.
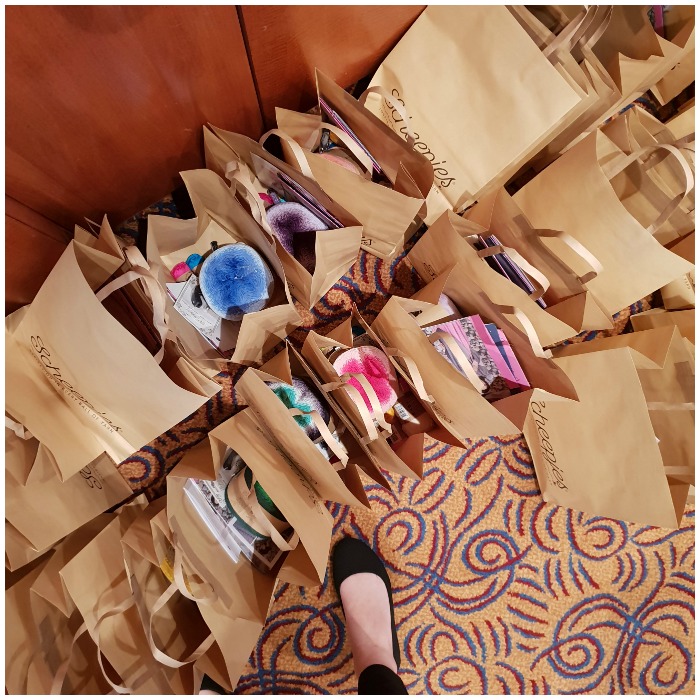
The great thing about debuting a pattern at a workshop is that you get to see first-hand how people interact with the pattern. So, really, I should credit all the ladies at the workshop for being a tester. This is how, for example, I realised that more than half of the people were working to a looser tension than the one specified in the pattern, which led me to change the original pattern slightly before publishing it here for you. Another great thing, in this instance, was that I got to see so many different colourways worked up.
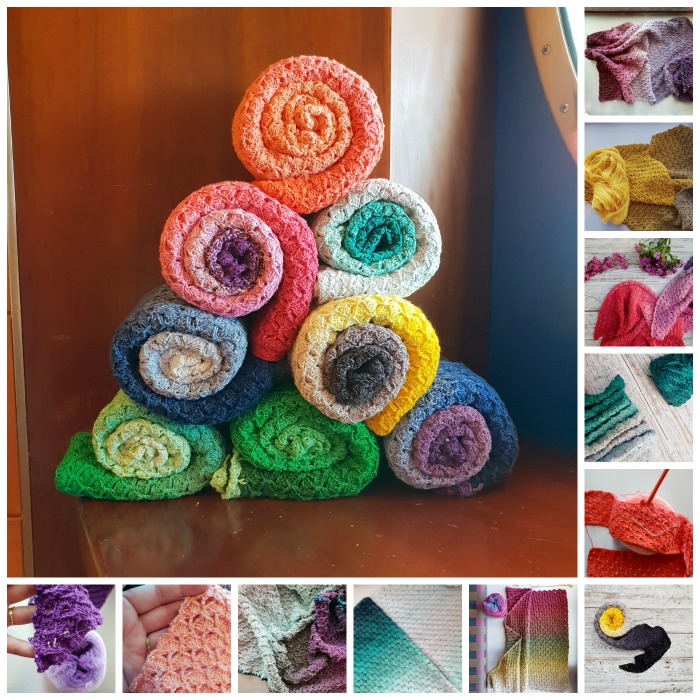
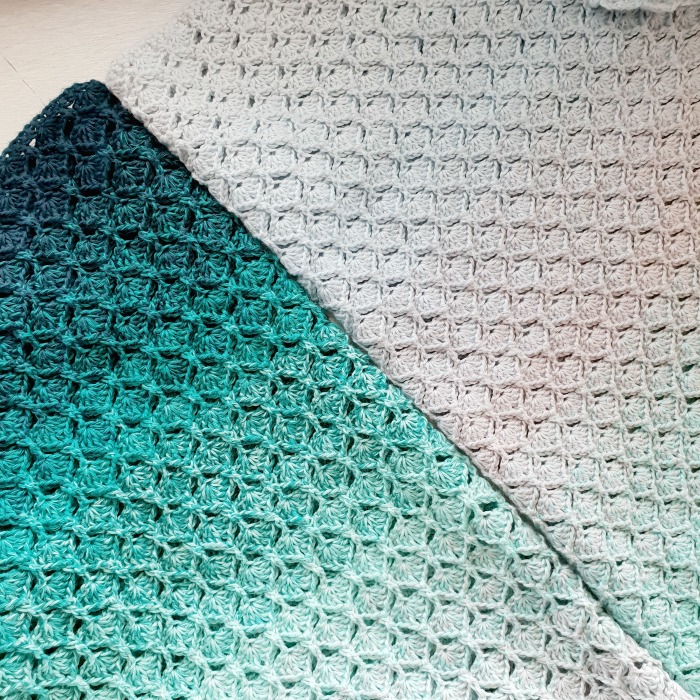
Not only did I get to see all the different colourways, but I also got to see the same colourways worked from the inside AND the outside. This is my Sea Breeze Tease (outside-in on the right) next to Charmaine Schafer’s Sea Breeze Tease (inside-out on the left). The final shawls turned out completely different, even though they used the same colourways.
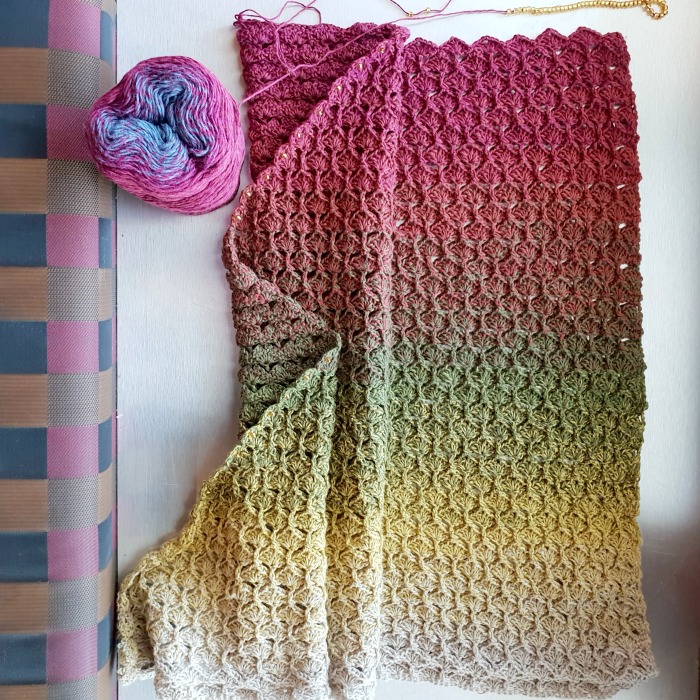
One last Spark-Joy moment was realising that some of the colourways I never would have thought of using myself, like Golden Glowworm (564) and Rhubarb Bumble (782) below, turned out to be my favourites when worked up. And just look at how well the Rhubarb Bumble matched the upholstery on the ship!
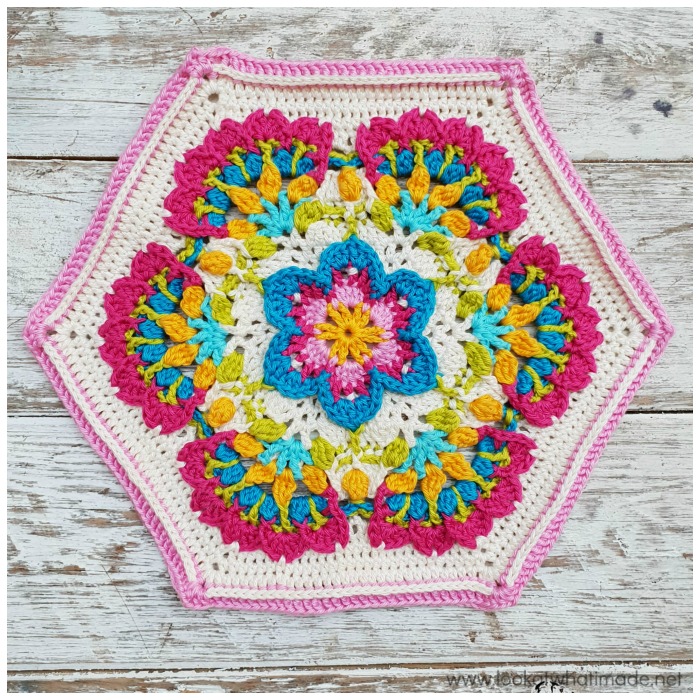
With that all said, and leaving you with a firm suggestion to have SO MUCH FUN choosing your own personal colourway and bead selection, let me leave you with a photo of the second design we worked on on the cruise. It is called Mary’s Memory, and makes me all sorts of nostalgic sad-happy.

This blog post contains affiliate links. I only link to products I personally use or would use. All opinions are my own.


Anna B says
This shawl is gorgeous and I would love to try making it. Just wondering if I don’t want to use beads, would I still do the hdc, just without the bead on it?
Dedri Uys says
Hi. Yes. You just disregard the beading instructions and follow the rest of the pattern as written.
Meme Smith says
I love this pattern. What is the name of the stitches/pattern. I’ve seen it or something similar before. I would have loved to go with you all, but in my condition I don’t ever think its likely. But its wonderful to see how happy you all are and how much you enjoyed the trip.
Dedri Uys says
Hi Meme. I’ve called the stitch Quiver Fans. It is a repeat I figured out, although it is quite possible that someone else has figured out the same repeat unbeknownst to me. We used it for the Wonder CAL blanket in 2016.
Michele says
Loved reading about your adventures and seeing the beautiful patterns….here’s to your next one
Roberta McIntyre says
I do not see the color your shawl was advertised in (which caught my eye) and I don’t remember if you mentioned the color in the instructions. Could you please give us the color way used?
Jenny says
It is Scheepjes Whirl Dandelion Munchies, Roberta.
Jenny :)
Christina says
The pattern goes to row 7, but the repeat is 4-7. Won’t that make two Bptr rows one after the other? I’m a new crocheter and I love this pattern, but need a little clarification on the repeat rows.
Dedri Uys says
Hi Christina.
Row 7 is a back post row. When you have completed Row 7 (red on the chart), you will repeat Row 4, which is a Fan row, not a BP row (pink on the chart), followed by 5 again (BP Purple) followed by 6 (Fan Light Blue), followed by 7 again (BP red).
I hope that helps.
Violetta says
Wonderful cruise, fantastic friends and a lovely shawl! Thank you so much!
Elizabeth says
I am looking forward to making this; it is a lovely pattern. I REALLY appreciate all the helpful photos!!
Jenny says
I am looking forward to making this shawl too, Elizabeth!
Jenny :)
Nerissa says
Dedri, I am happy for you that you had such an amazing journey. Beautiful pictures! Hello to your Mother and Sister from Kentucky, USA. And as always your pattern is exquisite, with such beautiful colors by Scheepjes. I love the Sea Breeze Tease colorway. Thank you for your skillful instructions and notes as this will be my next project. Can you give us a link to Mary’s Memory, or is this another project you may share with us? It is so flowery and colorful, just laying the hexagon on a table would make a room cheerful.
Dedri Uys says
Hi Nerissa. Thank you for your lovely message :) Mary will be coming soonish x
Michelle Chua says
A lovely shawl denoting your memorable voyage!
Dedri Uys says
Thank you :)
Sarah says
Thank you so much! I’m so excited to make this on my first cruise! Off to purchase now.
Dedri Uys says
Enjoy every moment!