Welcome to Part 13 of the Maya’s Meadow CAL. In this part, we will join all our columns. How exciting is that?? The first join will take some concentration, but by the fourth one you’ll be whizzing along. Please refer to the video for this part if you need any help.
Resources
- Introduction Post
- Abbreviations and Special Stitches
- I’ve done a video tutorial for Part 13. You can find that HERE:
Translations
Part 13: Joining All the Columns
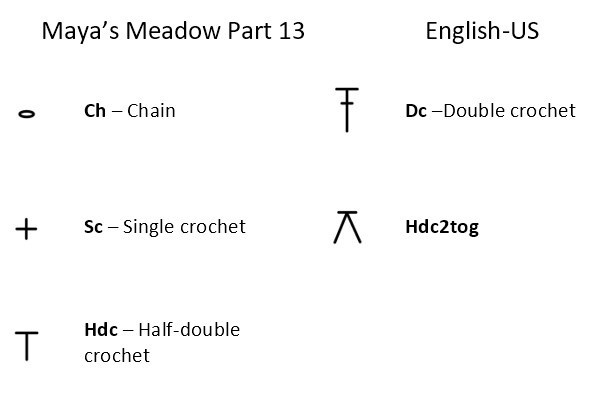
Chart and Abbreviations
Charts by Masako Kawahara from Crochet_hmmm
Instructions
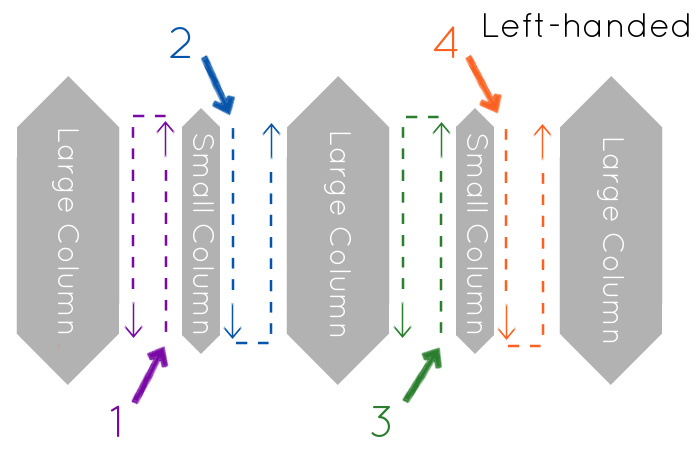
You will now join all 5 columns to each other, referring to the Layout Diagram below for placement.
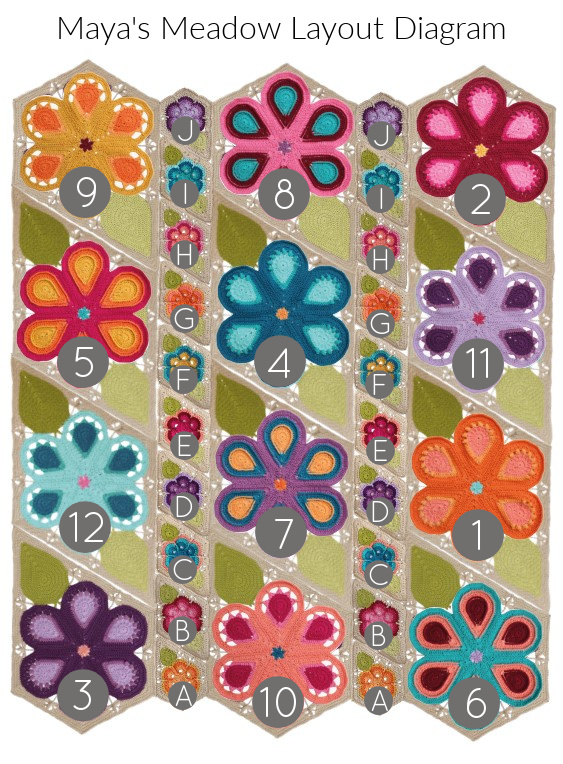
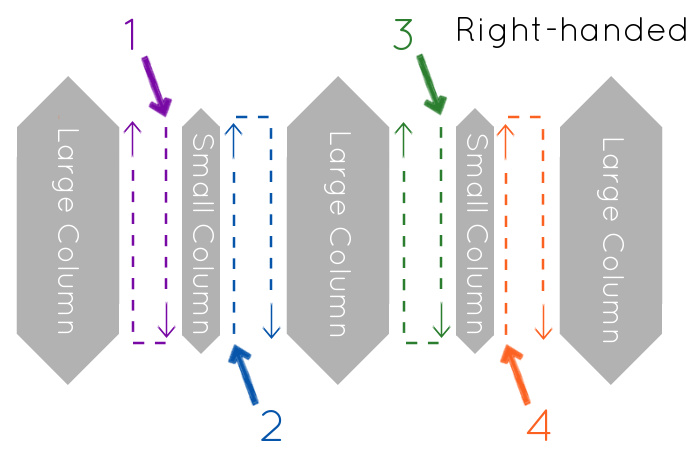
Firstly, you will work into the side of a Small Column, then into the side of a Large Column (Joining Row 1), before joining the two to each other with sc sts (Joining Row 2). You will do this four times so that all the columns are joined. This has the same vibe as when we joined the motifs to each other, but with WAAAYYY more sts.
All joining will be done with Yarn P.
Joining Row 1
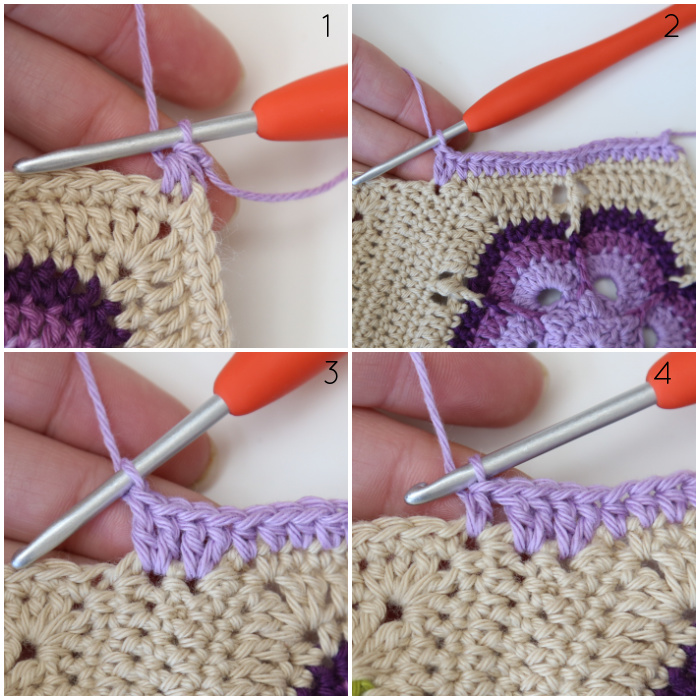
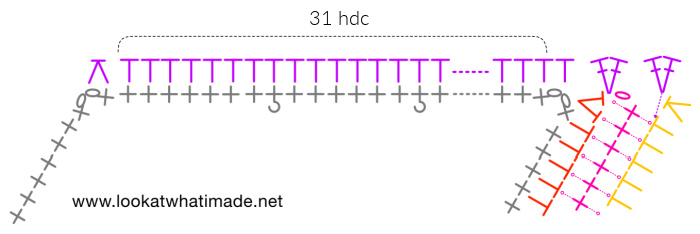
Starting in a Small Column: Join your yarn by making a standing hdc2tog in the ch-2 sp and the first st after the ch-2 sp {Photo 1}. Hdc in the next 16 sts. Hdc in the next ch-2 sp. {18 hdc}

*Make 2 dc in the second hdc of Joining Row 1 (which contains a sc from Joining Row 2) – Photo 2. Make 2 dc in the last hdc of Joining Row 1 (which contains the same sc from Joining Row 2) – Photo 3. Hdc in the next ch-2 sp {Photo 4}, hdc in the next 32 sts, hdc in the next ch-2 sp.* {4 dc and 34 hdc}
Rep from * to * 7 more times.
Make 2 dc in the second hdc of Joining Row 1 (which contains a sc from Joining Row 2). Make 2 dc in the last hdc of Joining Row 1 (which contains the same sc from Joining Row 2).
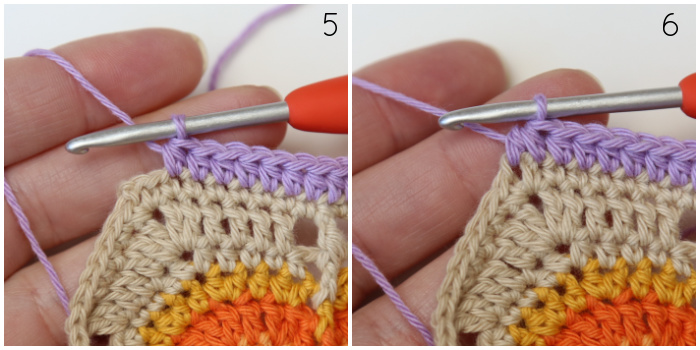
Hdc in the next ch-2 sp, hdc in the next 31 sts {Photo 5}, hdc2tog in the last st and the next ch-2 sp {Photo 6}. {4 dc and 33 hdc}
You should now have made a total of 359 sts into the Small Column.
Working into the Large Colum: hdc2tog in the corner ch-2 sp and the next st {Photo 7}. Hdc in the next 49 sts {Photos 8 and 9}. Hdc in the next ch-2 sp {Photo 10}. {51 hdc}
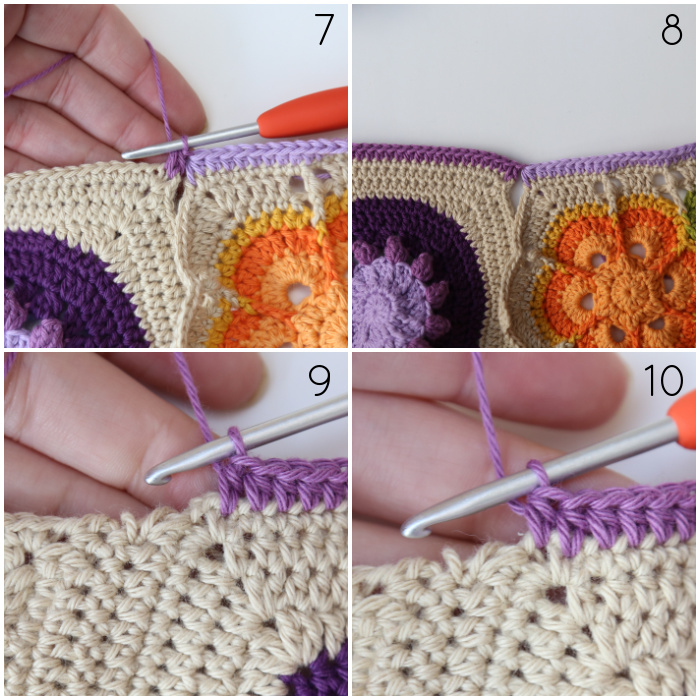

*Make 3 dc in the second hdc of Joining Row 1 (which contains a sc from Joining Row 2) – Photo 11. Make 2 dc in the last hdc of Joining Row 1 (which contains the same sc from Joining Row 2) – Photo 12. Hdc in the next ch-2 sp {Photo 13}, hdc in the next 96 sts, hdc in the next ch-2 sp.* {5 dc and 98 hdc}
Rep from * to * once.
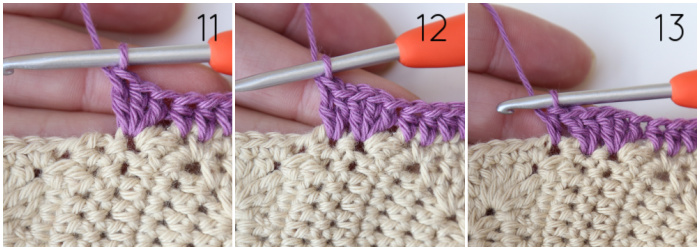

Make 3 dc in the second hdc of Joining Row 1 (which contains a sc from Joining Row 2). Make 2 dc in the last hdc of Joining Row 1 (which contains the same sc from Joining Row 2).
Hdc in the next ch-2 sp, hdc in the next 95 sts {Photo 14}, hdc2tog in the last st and the next ch-2 sp {Photo 15}. {5 dc and 97 hdc}
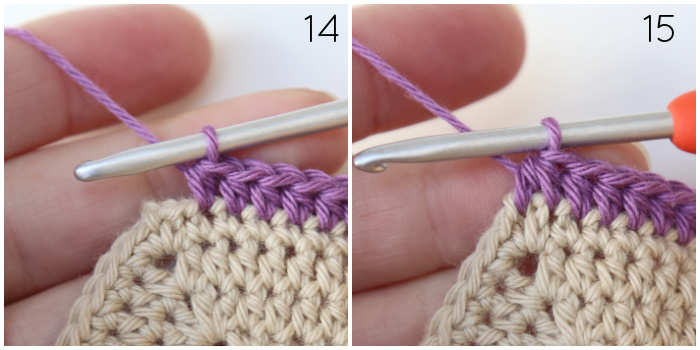

You should now have made a total of 359 sts into the Large Column.
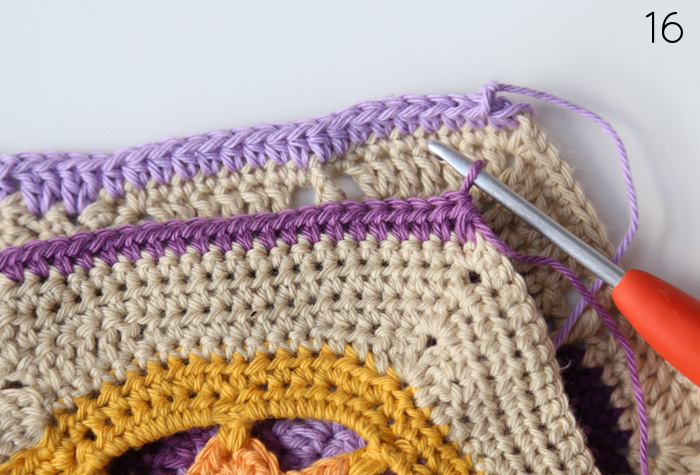
Fold the second column over onto the first column so that Joining Row 1 of each motif is on top of each other and the WS of the second column is facing you. Make sure you don’t accidentally twist the columns!
Joining Row 2
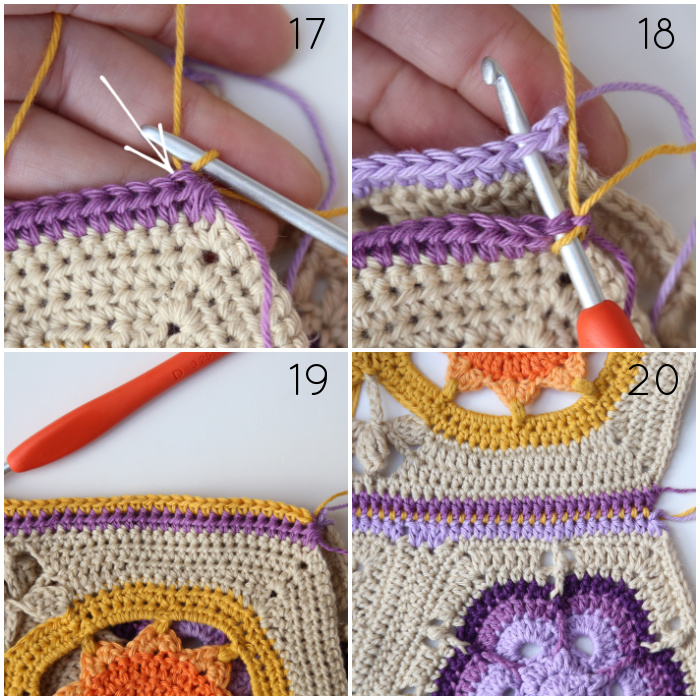
Ch 1. Insert your hook into the first st of the top layer (remembering that the loops will be AFTER the post because the back of this motif is facing you) and the second st of the bottom layer {Photo 18}. Make a sc. Working through both layers, sc in the next 357 sts. Photo 19 shows the sc sts made, photo 20 shows the join opened up. Fasten off. {358 sc}

And voila! Your joins should look something like this :) Don’t worry about the leaves bulging slightly. With a light blocking, everything will flatten out!
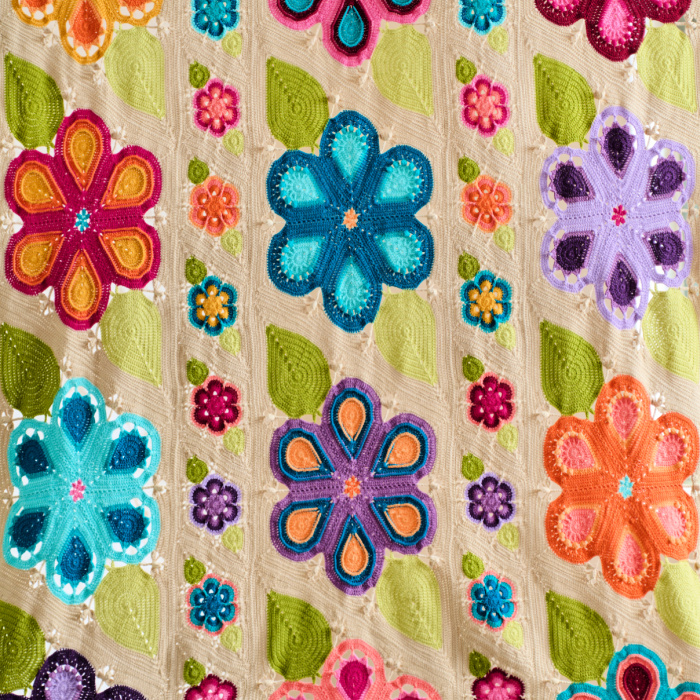
Once you have joined all your columns, you can go ahead and continue with Part 14: Border Part 1 HERE.

This blog post contains affiliate links. I only link to products I personally use or would use. All opinions are my own.
