I designed this Floral Tea Cozy for Amanda Bloom’s Little Box of Crochet back in 2016. I had so much fun with this project and still use my Tea Cozy A LOT. Who would have thought that something so simple could make a body so happy…
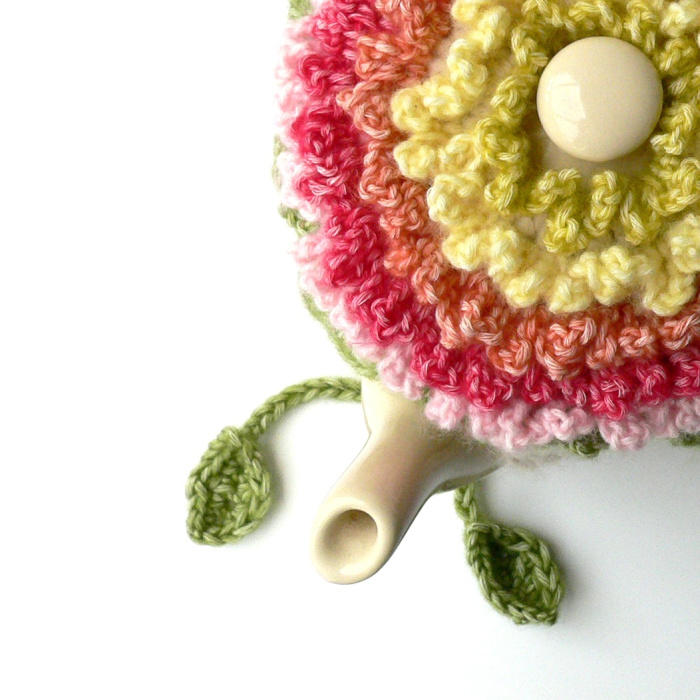
Until recently, the pattern was exclusive to Little Box of Crochet and the Little Box of Crochet book. I am delighted to announce that I will now also be sharing the pattern here on my website so that you can make your very own Floral Tea Cozy.
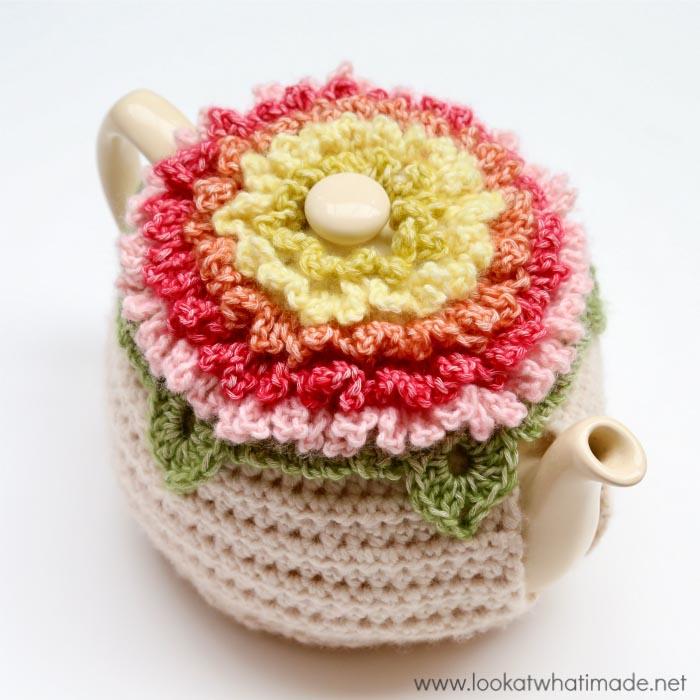
The pattern uses a mix of Scheepjes Stonewashed (Sports weight) and Scheepjes Stonewashed XL (Aran weight). Stonewashed XL makes for a nice thick body, whereas the regular Stonewashed yarn gives the flower and leaves a bit of bounce and drape. I used roughly 45g of Stonewashed XL and less than 5g each of colours A – F, which makes it the perfect project for using up scraps of colourful yarn.
If you read my original post about this tea cozy, you’ll know that I went all romantic while I was designing it. If you haven’t read it, the long and short of it is that Christiaan made me tea in a teapot with a tea cozy a few days after we met and it was the first of many ‘I want to marry this guy’ moments.
Today we celebrate 17 years of marriage, and I am so grateful to have him in my life. And, sentimental soul that I am, I will be drinking a cup of Rooibos Buchu tea from my teapot (with my teacozy) as I press publish on this pattern.

5 November 2005, Calitzdorp, Western Cape, South Africa
Floral Tea Cozy Pattern
© Dedri Uys and Scheepjes 2022. All Rights Reserved.
Resources
- Add This Pattern to your Ravelry Queue
- Hashtag: #floralteacozy
If you prefer a formatted ad-free US PDF version of this pattern (both Photo Tutorial and Written-only), you can buy it HERE in my Ravelry Store.
Materials
- 5mm crochet hook*
- For the Cozy: Scheepjes Stonewashed XL (70% cotton/30% acrylic),50g/75m/82yds
- Main Colour (MC): Moon Stone
- For the Flower and Leaves: Scheepjes Stonewashed (78% cotton/22% acrylic), 50g/130m/142yds
- Colour A: Lemon Quartz
- Colour B: Citrine
- Colour C: Coral
- Colour D: Red Jasper
- Colour E: Rose Quartz
- Colour F: Canada Jade
*I use Clover Amour Crochet hooks. You can buy them from Amazon.co.uk, Amazon.com, or Habbedash. For this pattern, I used a 5.5mm crochet hook because I crochet VERY tight.
Abbreviations
US Terminology
- BL – Back loop
- Ch – Chain
- FL – Front loop
- Hdc – Half-double crochet
- Rem – Remaining/remains
- RS – Right side
- Sc – Single crochet
- Sl st – Slip stitch
- Sp/sps – Space/spaces
- St/sts – Stitch/stitches
- () – Repeat instructions between parentheses the number of times specified
- * – Repeat instructions between asterisks the number of times specified
Notes
- You might have to adapt this pattern slightly to fit your teapot. You can do this by changing your hook size or by making more/fewer rows.
- When working into the initial chains, work into one loop only.
- Rounds 1 – 6 are worked in the back loop only (BL). Don’t worry if they don’t look too neat. You will use the front loops (FL) to create the flower later on.
Instructions
Top
Ch 15. Join to the first ch with a sl st to form a ring.
Round 1: Ch 1 (doesn’t count as a st throughout), 2 hdc in the same ch, 2 hdc in each rem ch. Join to the BL of the first hdc with a sl st. {30 hdc}
Round 2: Ch 1, 2 hdc in the BL of the st at base of ch, BLhdc in the next 2 sts. (2 BLhdc in the next st, BLhdc in the next 2 sts) 9 times. Join to the BL of the first hdc with a sl st. {40 hdc}
Round 3: Ch 1, 2 hdc in the BL of the st at base of ch, BLhdc in the next 7 sts. (2 BLhdc in the next st, BLhdc in the next 7 sts) 4 times. Join to the BL of the first hdc with a sl st. {45 hdc}
Round 4: Ch 1, 2 hdc in the BL of the st at base of ch, BLhdc in the next 8 sts. (2 BLhdc in the next st, BLhdc in the next 8 sts) 4 times. Join to the BL of the first hdc with a sl st. {50 hdc}
Round 5: Ch 1, 2 hdc in the BL of the st at base of ch, BLhdc in the next 4 sts. (2 BLhdc in the next st, BLhdc in the next 4 sts) 9 times. Join to the BL of the first hdc with a sl st. {60 hdc}
Round 6: Ch 1, 2 hdc in the BL of the st at base of ch, BLhdc in the next 9 sts. (2 BLhdc in the next st, BLhdc in the next 9 sts) 5 times. Join to the BL of the first hdc with a sl st. Mark the 34th st with a st marker so that you can find it later on. {66 hdc}
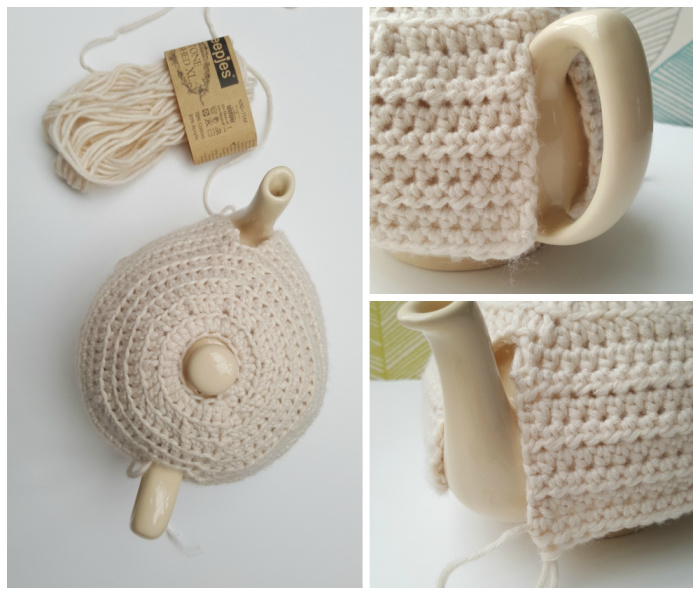
You will now make the sides in 2 separate ‘flaps’, working in rows and inserting your hook through both loops of each st.
Side A
Row 7: Ch 1, hdc in the st at base of ch. Hdc in the next 30 sts. There should be 2 sts left unworked before the st marker. Turn. {31 hdc}
Row 8: Ch 1, hdc in the st at base of ch, hdc in the next 30 sts, turn. {31 hdc}
Rows 9 – 17: Repeat Row 8. Fasten off at the end of Row 17. {31 hdc}
Side B
Row 7: With the RS facing, join your yarn by making a sl st in the marked st from Round 6. Ch 1, hdc in the st at base of ch. Hdc in the next 30 sts, turn. {31 hdc}
Row 8: Ch 1, hdc in the st at base of ch, hdc in the next 30 sts, turn. {31 hdc}
Rows 9 – 17: Repeat Row 8. Fasten off at the end of Row 17. {31 hdc}
Check that your cozy fits over your teapot. Pull the sides down slightly and check that they reach past the bottom of the handle and spout. If you need to add more rows, do so now.
Adding the Flower
You will now make the flower by working into the remaining loops of the initial chain-ring, and into the front loops formed by working into the back loops in Rounds 2 – 6.
Hold your tea cozy the right way up when working into the front loops. In other words, hold it with the top pointing away from you.
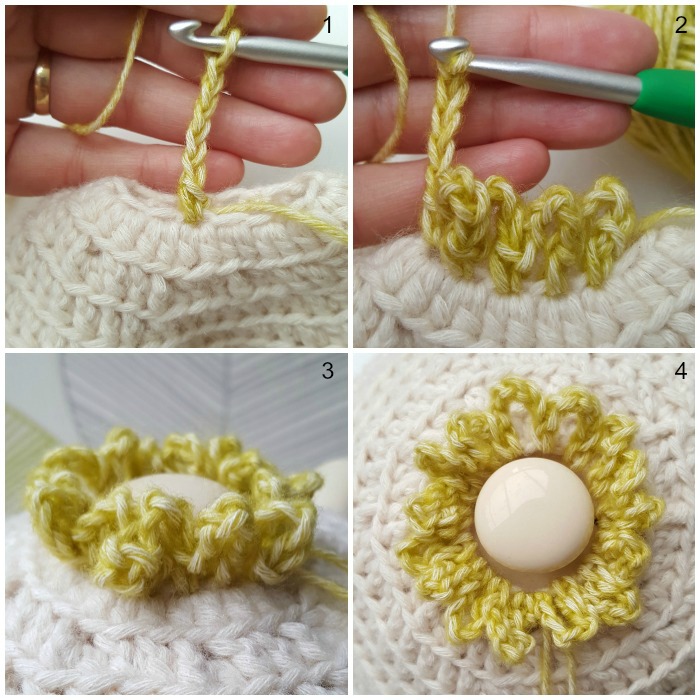
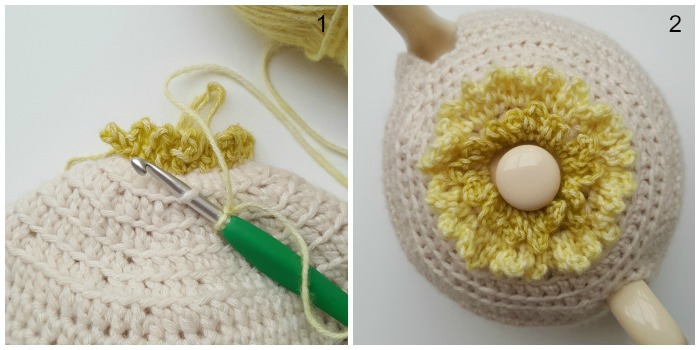
Round 1: Join Colour A by making a sc in both remaining loops of any ch from the initial ch-ring. (Ch 5 {Photo 1}, sc in the next ch) until you have worked into every ch. Ch 5 and sl st into the ch that contains the first sc. Fasten off and work away your ends. Photo 2 shows a few of the ch-5 loops made. Photos 3 and 4 show Round 1 completed from the side and from the top. {15 sc and 15 ch-5 loops}
Round 2: Join Colour B by making a sc in any FL from Round 1 {Photo 1}. (Ch 5, sc in the next FL) until you have worked into every ch. Ch 5 and sl st into the FL that contains the first sc. Fasten off and work away your ends. Photo 2 shows Round 2 of the Flower completed. {30 sc and 30 ch-5 loops}
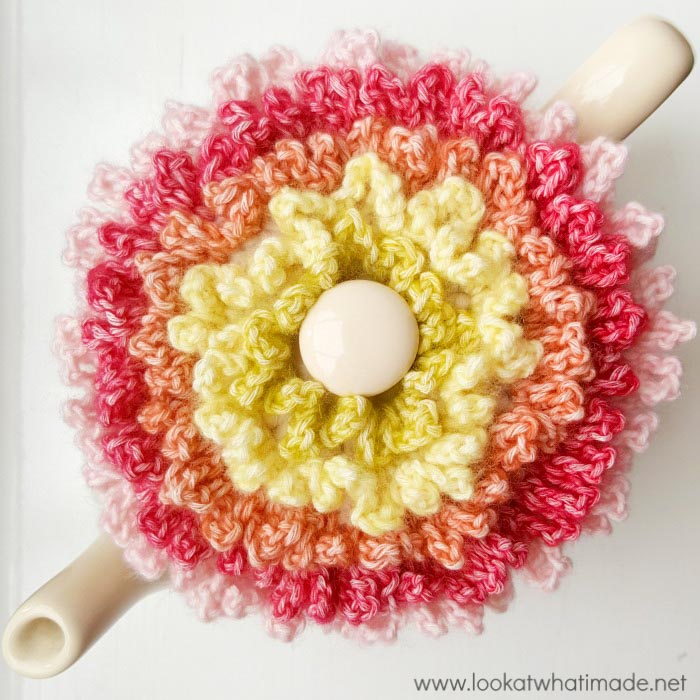
Round 3: Repeat Round 2 with Colour C, working into the FL of Round 2. {40 sc and 40 ch-5 loops}
Round 4: Join Colour D by making a sc in any FL from Round 3. (Ch 6, sc in the next FL) until you have worked into every ch. Ch 6 and sl st into the FL that contains the first sc. Fasten off and work away your ends. {45 sc and 45 ch-6 loops}
Round 5: Join Colour E by making a sc in any FL from Round 4. (Ch 7, sc in the next FL) until you have worked into every ch. Ch 7 and sl st into the FL that contains the first sc. Fasten off and work away your ends. {50 sc and 50 ch-7 loops}
Adding the Leaves
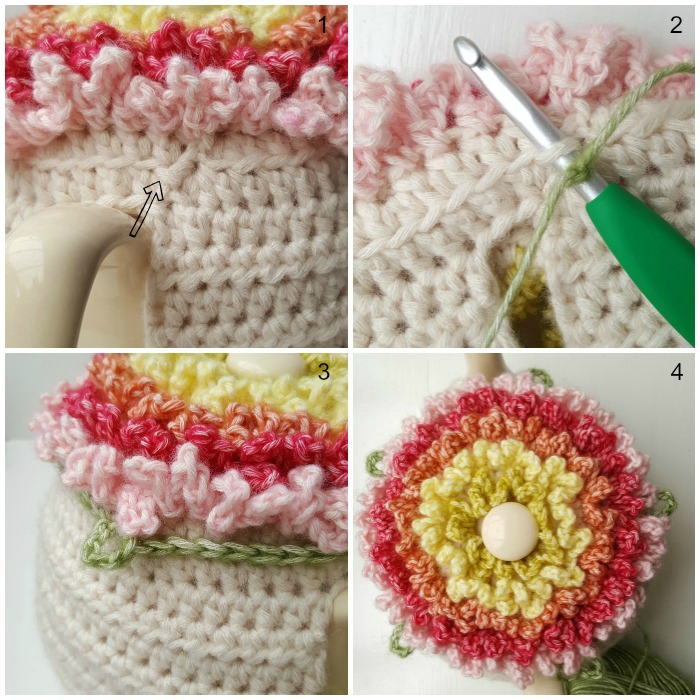
Round 1: Join Colour F by making a sc in the first FL of Round 5 {indicated with an arrow in Photo 1 and illustrated in Photo 2}. Sc in the next 11 sts. (Ch 5, sl st in the same st {Photo 3}. Sc in the next 12 st) 4 times. Ch 5 and sl st in the same st. Join to the first sc with a sl st, sl st in the next 2 st, turn. {60 sc and 5 ch-5 sps}
Photo 4 shows all 5 ch-5 spaces. You will be making the leaves in these sps in the next round.
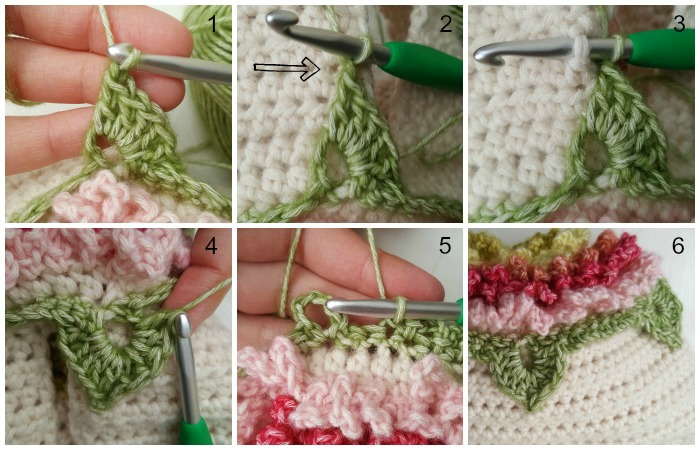
Round 2: *Skip the next 2 sts and make 5 dc in the next ch-5 sp {Photo 1}. Ch 1, flatten the leaf and anchor it to the cozy by making a sl st around the post of the st from Row 9 directly below the ch-5 sp {Indicated with an arrow in Photo 2 and illustrated in Photo 3}. Ch 1 and make 5 dc into the same ch-5 sp {Photo 4}. Skip the next 2 sts and sl st in the next st. (Ch 3, sl st in the next st) 7 times {Photo 5}.* Repeat from * to * 4 more times. The last sl st will fall in the same st as the first sl st. Fasten off and work away your ends. {5 Leaves and 35 ch-3 sps – not including sl sts}
Making The Drawstring
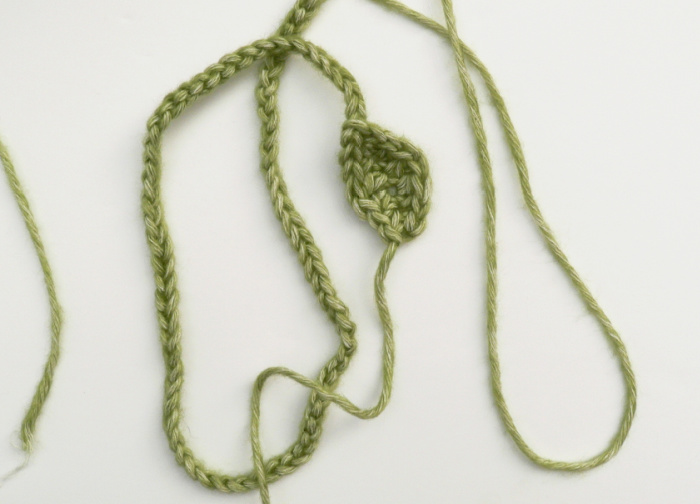
Using Colour F and leaving a 1-meter yarn end, ch 90.
Making the First Leaf
Sl st in the second ch from the hook.
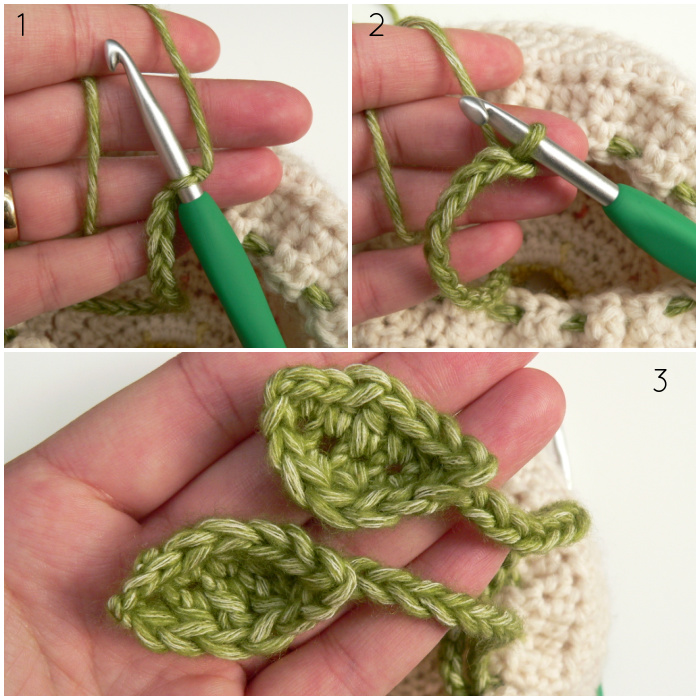
*Sc in next ch, hdc in next ch, dc in next ch, hdc in next ch, sc in next ch. Ch 2 and sl st into the second ch from the hook to form a picot. Working back up the other side of the leaf and into the remaining loops of each ch, sc in the next ch, hdc in next ch, dc in next ch, hdc in next ch, sc in next ch. Sl st into the next ch and fasten off.*
Thread the long yarn end onto a large blunt needle. Starting beneath the handle of your Teapot, weave the chain through the last row of Side A, spacing the weaving 2 sts apart {Photos 1 and 2}. When you reach the end of Side A, weave the chain through the last row of Side B in the same manner to create your drawstring {Photo 3}.
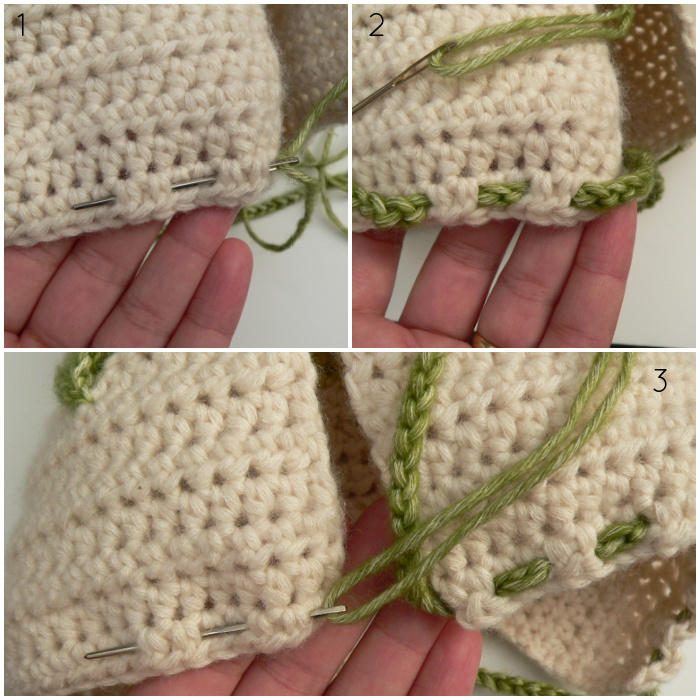
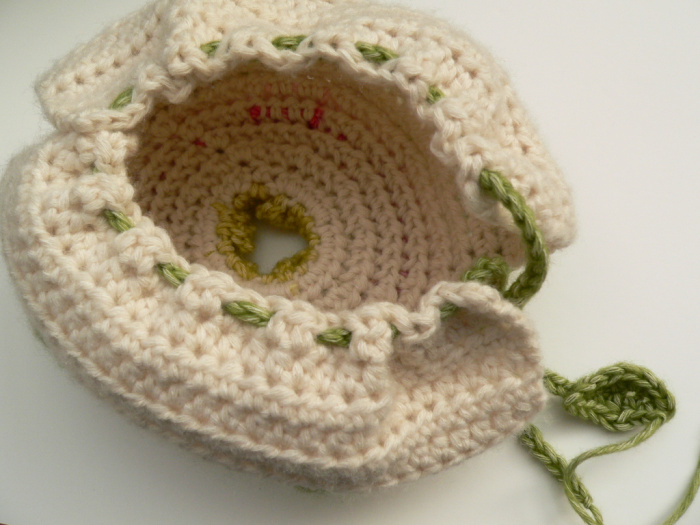
Pull the chain all the way through.
Insert your hook into the first chain of the drawstring {Photo 1} and pull up a loop using the long yarn end {Photo 2}. To create your second leaf, repeat the instructions from * to * above. Fasten off and work away your ends.
Gather the drawstring to create a snug fit around your teapot.
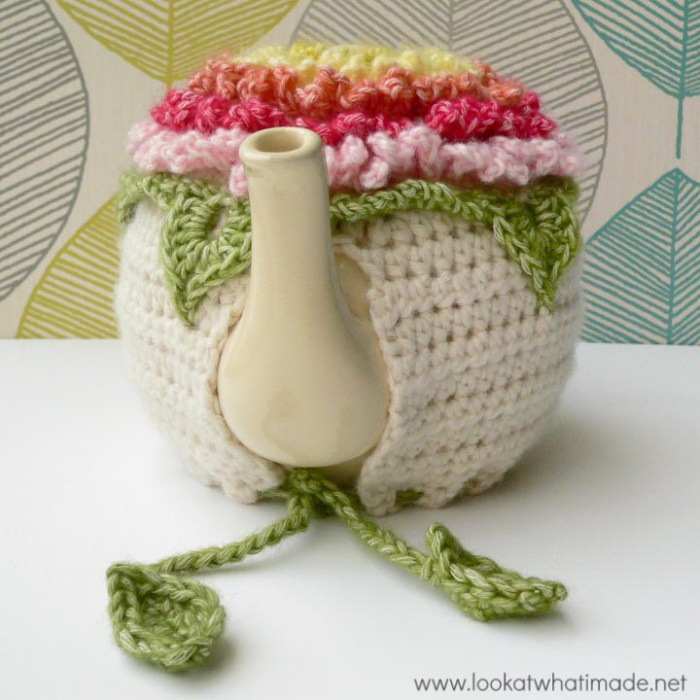

I hope you enjoy making your very own Floral Tea Cozy!

This blog post contains affiliate links. I only link to products I personally use or would use. All opinions are my own.


Kristen Arold-Bender says
Hi there,
So beautiful! How big is your teapot roughly? There are so many sizes and shapes now, that it’s hard to tell. I guess one could always add extra stitches to the sides if it is bigger in diameter?
Thanks,
Kristen
Jenny Lowman says
I made the pattern and it fits a 4 cup round teapot perfectly, if that is any help. It is quite a forgiving fit if a cosy as it is fully open at one edge.
BW ~ Jenny
Carol says
Lovely tea cozy and beautiful pic of you and hubby.
Thank you for dedicating your time to sharing all your awesome patterns.
Totsiens
Dedri Uys says
Jy is baie welkom Carol :)