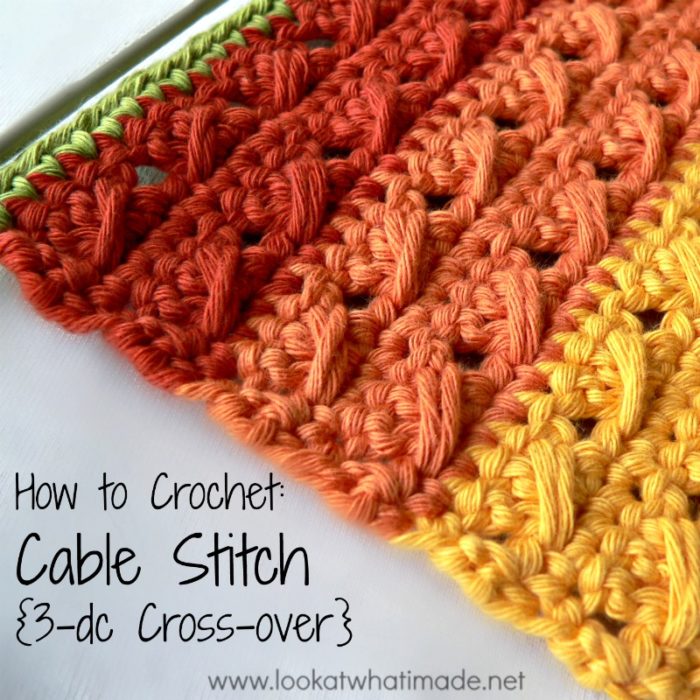
How to Crochet: Cable stitch {3-dc Cross-over}
We used the cable stitch in this week’s square for the Block a Week CAL 2014, and I loved it so much that I thought I should do a tutorial on it (and use it in some patterns while I’m at it). The crochet cable stitch, or 3-dc cross-over, is worked over 4 st’s. It is tricky to work this stitch into a foundation chain, so I suggest starting with a base row/round with multiples of 4 st’s. If you need help figuring out how many chains to make for your required/preferred base row/round, see this post by Rhonda from OombawkaDesign.
Working in Rounds/Spirals
When working in rounds, start with a base round with multiples of 4 st’s. This stitch does not lend itself well to increasing in the round, but is perfect for things like cowls or boot-cuffs where each round has the same number of stitches. If you are working in rounds without turning, all the cables will slant the same way.
Working in Rows
When working in rows, start with a base row that has multiples of 4 (+2) st’s. These 2 extra stitches allow for a dc on either end of the row, which is vital if you would like a straight edge.
If you are working in rows, you can either repeat the cable stitch in each row, in which case your cables will slant right in one row and left in the next (see the yellow dishcloth below). Or you can alternate the cable stitch rows with rows of standard single crochet, in which case all your cables will slant in the same direction (see the striped dishcloth below).
You can find the patterns for these dishcloths here. 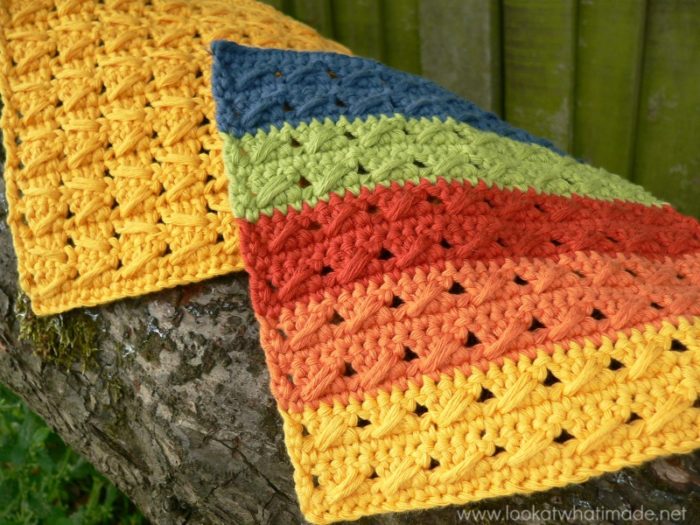
Crochet Cable Stitch Photo Tutorial {3-dc Cross-over}
Chart Symbol and Written Instructions

Example
For my example, I am starting with a base row of 14 sc’s. When making sc rows, you need to add 1 chain to the stitch count. I will therefore start with 15 ch’s to give me a base row of 14 sc’s, which will be (3 multiples of 4) + 2 st’s.
Row 1
Ch 15. Sc in the second chain from the hook and each ch across (Photo 1). Turn.
Stith Count: 14 sc’s 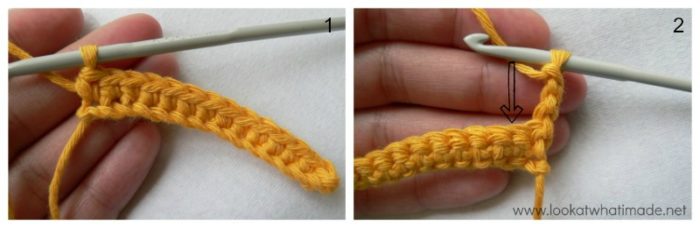
Row 2
- If you are going to use the same colour, ch 3 (this counts as your first dc – see Photo 2 above) or start with a chainless double crochet.
- If you are going to use a different colour, start with a standing double crochet in the last sc of the previous round.
*Skip the next st (indicated with an arrow in Photo 2). Dc in the next 3 st’s (Photo 3). Working over the 3 dc’s, yarn over and insert your hook into the skipped stitch (indicated with an arrow in Photo 4). Pull up a loop to the height of the dc’s – see Photo 5. This loop should encompass the 3 dc’s and should be visible on the front AND back of your work. (Yarn over and pull through 2 loops) twice, completing an extended (or long) dc (Photo 6).* Repeat from * to * 2 more times. Dc in the last st (Photo 9).
Stitch Count: 2 dc’s and 3 cable stitches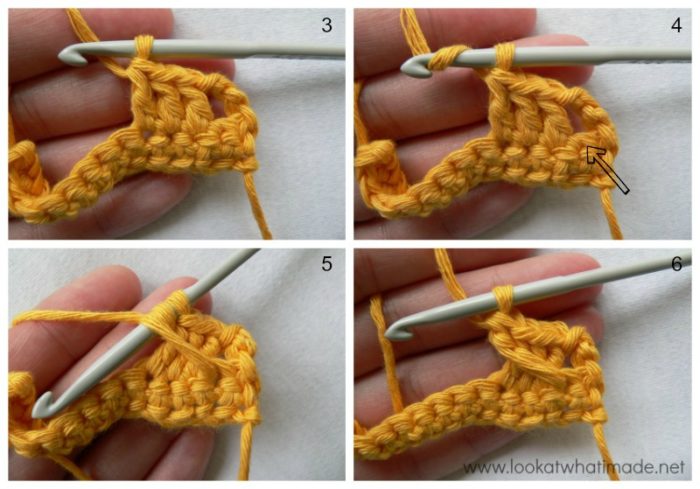 Photos 7 and 8 below illustrate the second cable stitch being made, with the skipped stitch indicated with an arrow.
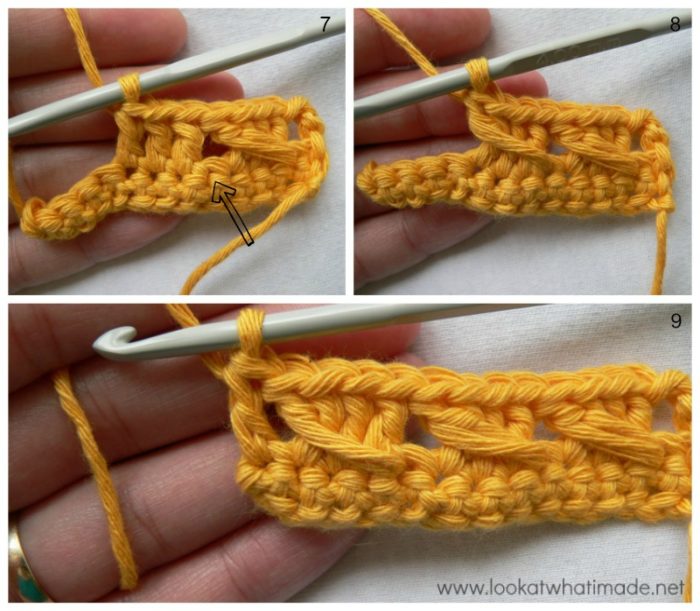 You can use this stitch anywhere you would like to add some dainty texture to your work, provided that you have a multiple of 4 st’s to work into, and keeping in mind that you will need 2 extra stitches if you are working in rows.
I hope you have found this tutorial useful and feel inspired to make something using this stitch, like these 2 free crochet dishcloths.
Free Cable Stitch Patterns
These two gorgeous patterns below use a modified version of the cable stitch, but the principle is the same!
- Cross-over Long DC Cowl by CrochetN’Crafts
- Cross-over Long DC Hat by CrochetN’Crafts
More Tutorials
- Crochet Puff Stitch
- Standing Single Crochet
- How to Crochet in the Round: Spiral vs Joining
- Invisible Join
- Completely Flat Zipper Method for Joining Squares
Remember to subscribe to my Weekly Newsletter if you would like to be kept in the loop. You can also like my Facebook page or follow me on Bloglovin, Google+, Pinterest, Twitter, or Instagram.
Happy Hooking!


Stef says
awesome
Robin says
Thanks! Easy to follow directions for useful, pretty work. You rock!
cyndi says
Your instructions say this: (This loop should encompass the 3 dc’s and should be visible on the front AND back of your work.)
what am I doing wrong? My cable only shows on one side of my work? please help.I love this dishcloth pattern!!! Can you help me with what I might be doing wrong?
Dedri Uys says
Hi Cyndi. I suspect that you are making your crossed dc in front of the 3 dc instead of over them. It’s hard to explain in words, but you might find this video tutorial useful. It’s the same stitch but a slightly different stitch count.
Kathy Larsen says
I really love this pattern and your easy to follow instructions, thanks so much.
Donna says
I am so glad I found your site and tutorial. I tried a different variation than your suggestions…I did 2 rows of the cable stitch and 1 rorow of single crochet. It makes a kind of arrow look on the two rows. Thanks for great directions!
Dedri Uys says
Donna, that sounds intriguing. I would love to see a photo!
Surley says
Gostei muito do tutorial.
Anjelica says
Sim! Que boa!!!!
Jennifer says
I love the tutorials. Do you have YouTube video tutorials as well? I learn a bit better via video.
Katlin Donnelly says
Much better tutorial than allfreecrochet.com. I think I’ve got it, thanks!!!
Bertha Arellano says
I liked this stitch I made boot cuffs for my daughter and they came out real nice thank you
Dedri Uys says
You’re welcome. A friend of mine has a gorgeous bootcuff pattern using this stitch.
Carmen says
Me encanta este punto. Muchas gracias.
Carmen
nelymar says
Hello, I’m nely. I write from Spain…I love to crochet, and of course I love your blog! well that explains and step by step pictures… it is wonderful…Thank you for sharing, and for their effort and dedication to helping others…I am very grateful to you, keep it…Go ahead!!!Kisses, nelyEstoy using the translator, I hope you understand well, jejeejejej
Dedri Uys says
Hi, thank you so much for commenting and for taking the time to use translator to do so. Your comment made me smile :)
Cathy Cray says
I love your crochet patterns!
Gracie B says
That’s a grrrreat tutorial! I do believe I can make that dishcloth now! Thanks so much!
Auli Vuorio says
Thanks for pictures. I’m beginner if crochet so pics help a lot :)
Ina Kruger says
Very interesting stitch.
rosario says
muy bonito su trabajo y bastante bien explicado la felicito para las que no tenemos mucha practica …gracias
Dedri Uys says
Thank you, Rosario :)
Erin Kathleen Caron says
I love it! What yarn did you use?
Dedri Uys says
Hi Erin. I used DROPS Paris Cotton. I love it, apart from the fact that it does split a lot!