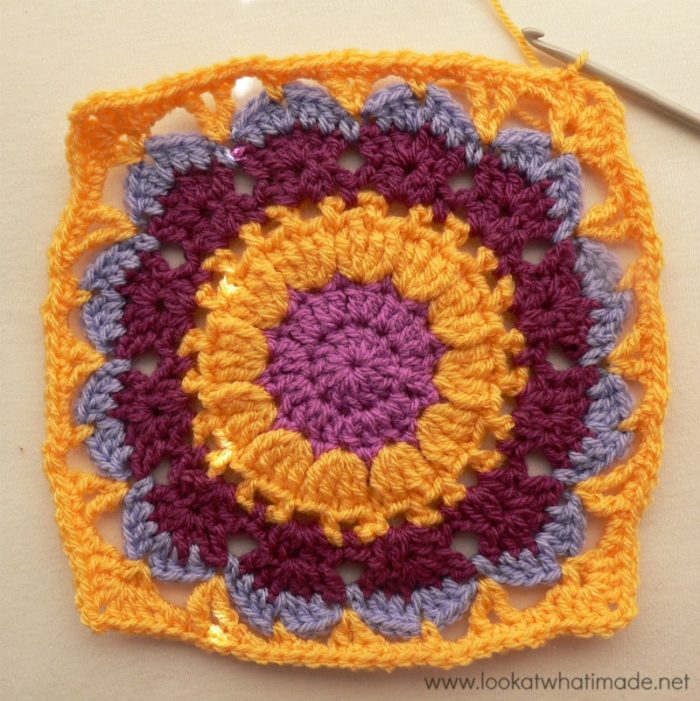
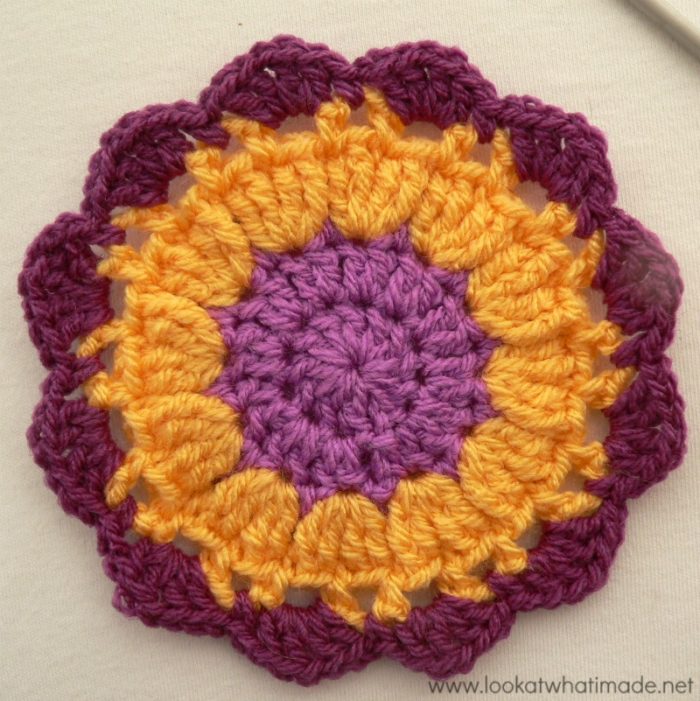
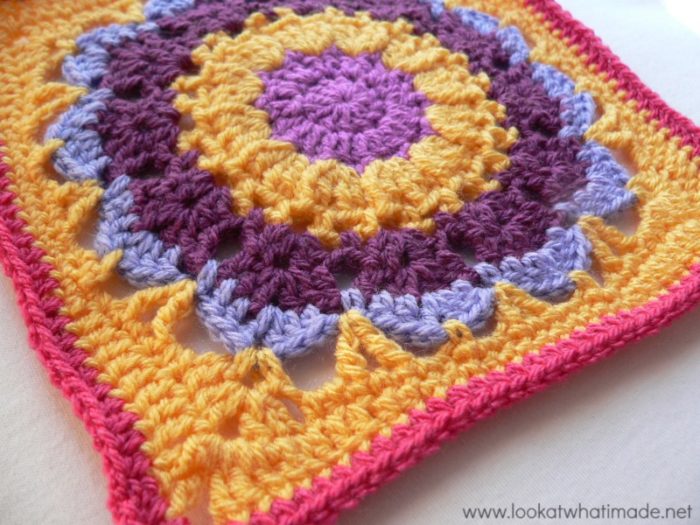
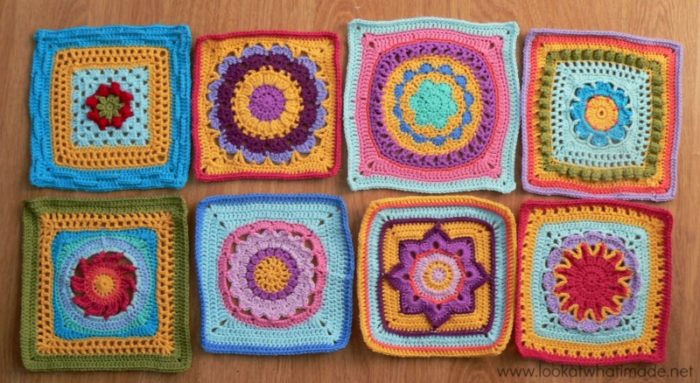
Block 8 of the Block a Week CAL (hosted by Kimberly Slifer) is Melissa Green’s lovely Cocoa Puff Square. I found the Cocoa Puff Square simple to make and it works up very quickly once you get past Round 4. The large flower motif lends itself really well to a two-colour combo.
If you are not familiar with the CAL, you can find all the details HERE.
There are a few stitch-combo’s in this pattern, but they are all very simple:
- Beg Shell: (ch 3, dc, ch 1, 2 x dc) in the same space or stitch
- Shell: (2 x dc, ch 1, 2 x dc) in the same space or stitch
- Sm Shell/V-st: (dc, ch 1, dc) all in the same space or stitch
- TR V-St: (tr, ch 1, tr) all in the same space or stitch
Each of these stitch-combinations are explained in the photo tutorial below.
Cocoa Puff Crochet Square
©Melissa Green. All Rights Reserved.
This photo tutorial has been done with Melissa’s permission.
Pattern
- You can find the complete written pattern HERE on Ravelry.
Suggested Materials
- 5.5 mm Clover Amour Crochet Hook (US I/9 UK 5)
- Worsted weight yarn
Size
- Using the hook and yarn specified, your square should be a nice even 12″ when you are done.
- Using a 4 mm crochet hook (US G/6 UK 8) and double knit yarn, as I have done, your finished square will be about 8″ big.
My Yarn and Colour Choices
I am using Stylecraft Special DK.
- Magenta (Rounds 1 -3)
- Saffron (Rounds 4, 5, 9, 10, 11)
- Plum (Rounds 6 and 7)
- Lavender (Round 8)
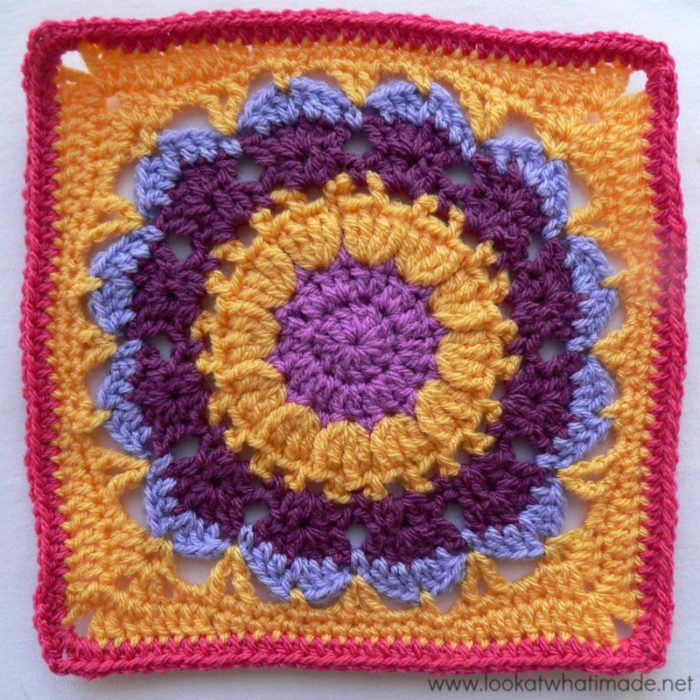
- Pomegranate (Rounds 12 and Optional 13)
Notes
- The initial ch st’s in each round are counted as a stitch.
- Stitch counts are supplied for each round. I have supplied them below as well (with some added total stitch counts).
- US Crochet Terminology used. (See this comparative chart if you need help transcribing from US to UK)
- Please Note: The yarn used in most of the tutorial photos is Drops Paris Cotton.
Corrections
- Round 7: The pattern tells you to omit the last dc of the last repeat. Don’t omit it.
- Round 8: Stitch count states that you should have 24 ch-1 spaces. You should have 36 ch-1 spaces.
- Round 9: Where the pattern tells you to repeat 3 times, understand that it is 3 more times (so 4 sides in total).
Help With The Cocoa Puff Crochet Square
Like I have already mentioned, you can find the pattern here. The tips and tricks below are supplementary to the pattern, meaning that they will only help you with the pattern should you get stuck. This photo-walkthrough is NOT the actual pattern.
Thank you very much to Melissa Green for giving us permission to do this photo-tutorial for her Cocoa Puff Square. And a special thank you to Kimberly Slifer for letting me do these tutorials and for obtaining the necessary permission.
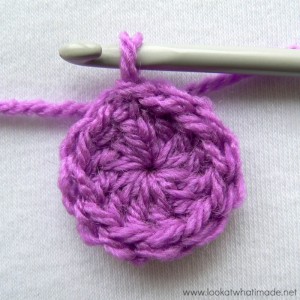
Round 1
You can start this round with a magic ring instead of the initial ch-4.
Magic Ring Instructions for Round 1
Into a magic ring: ch 3 (this counts as your first dc). Dc x 11 into the ring and pull the ring tight. Join to the top of the initial ch-3 with a sl st. If you are not familiar with working into a magic ring, this video tutorial from The Crochet Crowd is very good. Please remember, when working into a magic ring you HAVE to work away your initial tail very well. If you just cut it, your whole square might unravel!
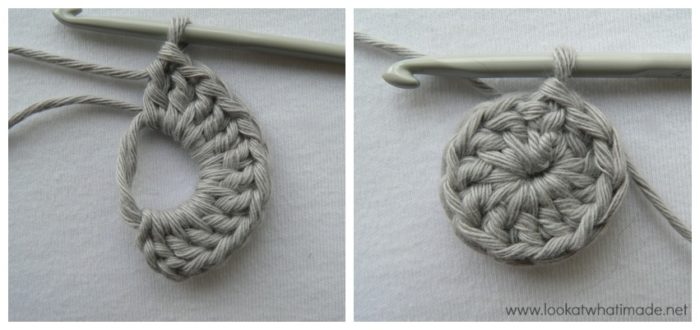
Stitch count: 12 dc’s. Remember that the initial ch-3 into the ring counts as a dc.
Round 2
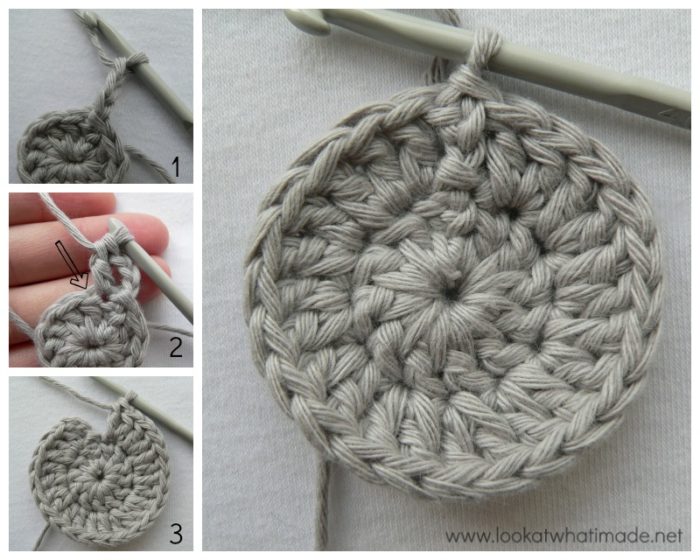
Remember to make your first dc in the same st as the initial ch-3 (Photo 2). This will count as your first dc increase.
Make sure that you make your next dc in the top loops of the first dc from the previous round. The loops of this stitch might be slightly obscured by the fact that you made your sl st join into the top of the ch-3 next to it – see the arrow in Photo 2.
If you struggle to identify which loops belong to which stitch, see this tutorial. It has a section about the anatomy of stitches when working in the round. I will refer to this tutorial quite a bit throughout this photo tutorial.
Stitch count: 24 dc’s
Round 3
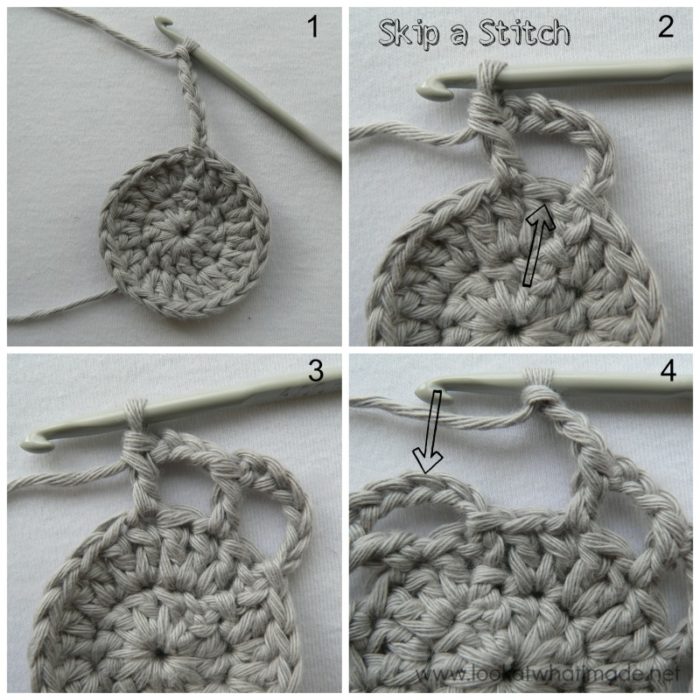
Round 3 starts with a ch-6 (Photo 1). This counts as your first dc and ch-3 space. Skip the first dc (indicated with an arrow in Photo 2). *Dc in the next dc, ch 3 and skip the next dc*. Repeat until you get to the end of the round. Join to the third ch of the initial ch-6 (indicated with an arrow in Photo 4).
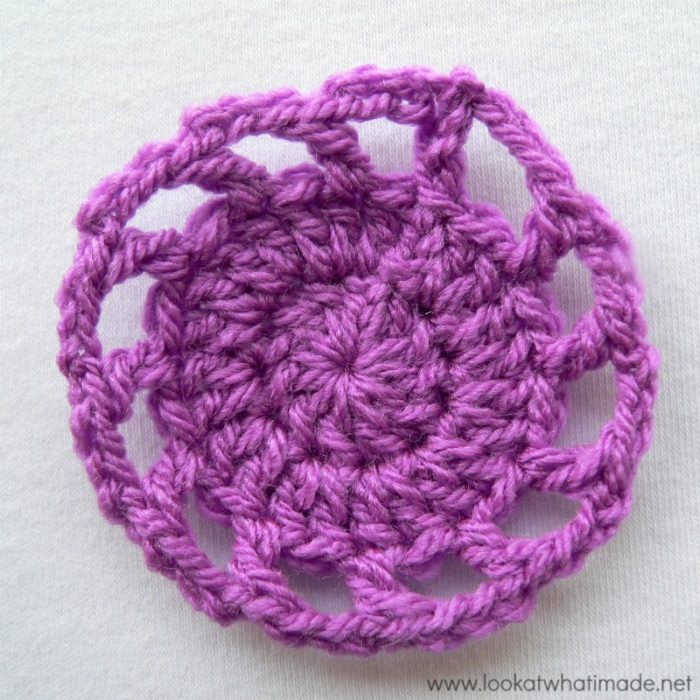
This is what my little “square” looked like at the end of Round 3:
Stitch count: 12 dc’s and 12 ch-3 spaces
Round 4
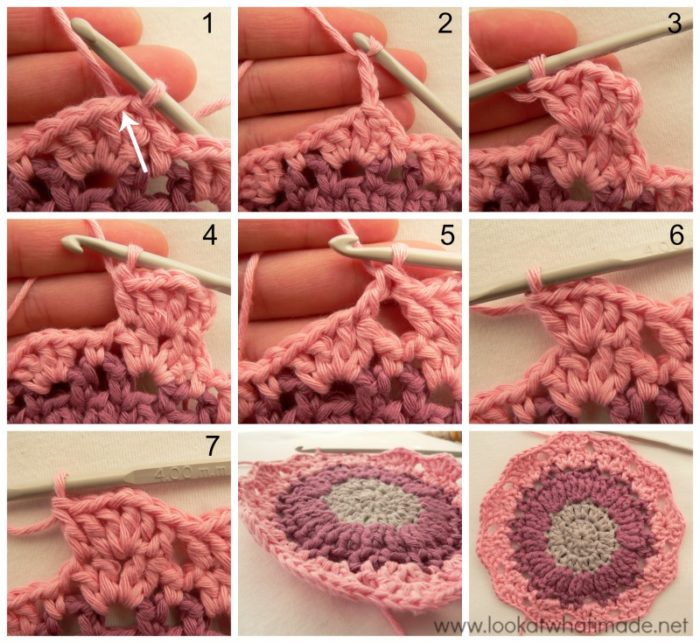
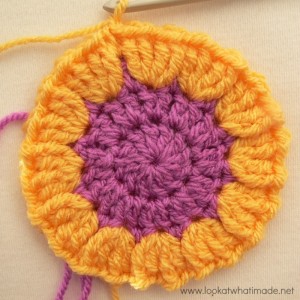 In Round 4 you will be working into the stitches/spaces of Round 3 AND the skipped dc’s from Round 2. The instructions tell you to start with a (sl st, ch 1, sc) all in any dc from Round 3. I prefer to start with a standing sc as it makes absolutely no difference to the outcome of the pattern and just looks a little bit neater.
See THIS TUTORIAL if you don’t know how to make a standing single crochet.
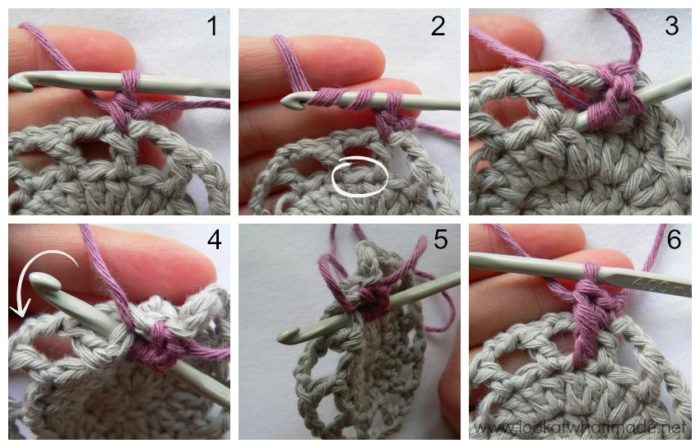
So start with either a standing single crochet or a (sl st, ch 1, sc) in any dc from Round 3 (Photo 1). Yarn over twice to start your first treble and then insert your hook into the skipped dc from Round 2, which will be below your first ch-3 space (circled in Photo 2 and illustrated in Photo 3).
Now flip the ch-3 from Round 3 so that it is BEHIND your crochet hook. You don’t want to work over it, you want to work IN FRONT of it (Photo 4). If you have a look at Photo 5 below, you will see that my hook is inserted into the loops of the dc from Round 2 and that the corresponding ch-3 from Round 3 is behind my hook and out of the way.
Complete your treble crochet as you normally would (Photo 6).
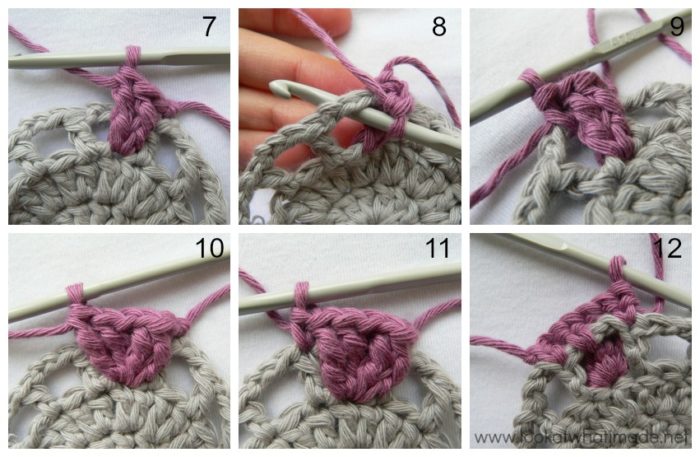
Make another treble crochet in the same dc from Round 2 (Photo 7).
Now insert your hook into the ch-3 space behind your first two trebles (Photo 8) and make a sc (Photo 9).
Make 2 more treble crochet stitches in the same dc as the first 2 treble crochet stitches (Photo 10) and then make a sc in the next dc from Round 3 (Photo 11). Photo 12 shows you what your work should look like from the back at this point.
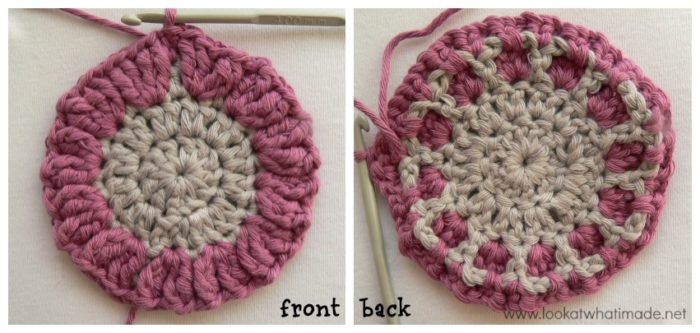
Following the pattern, complete Round 4. Regardless of whether you started with a standing single crochet or the traditional (sl st, ch 1, sc), join to the first sc with a slip stitch when you get to the end of the round.
This is what your completed Round 4 should look like from the front and from the back.
If your “square” is slightly wobbly/wavy at the end of Round 4, don’t worry about it. 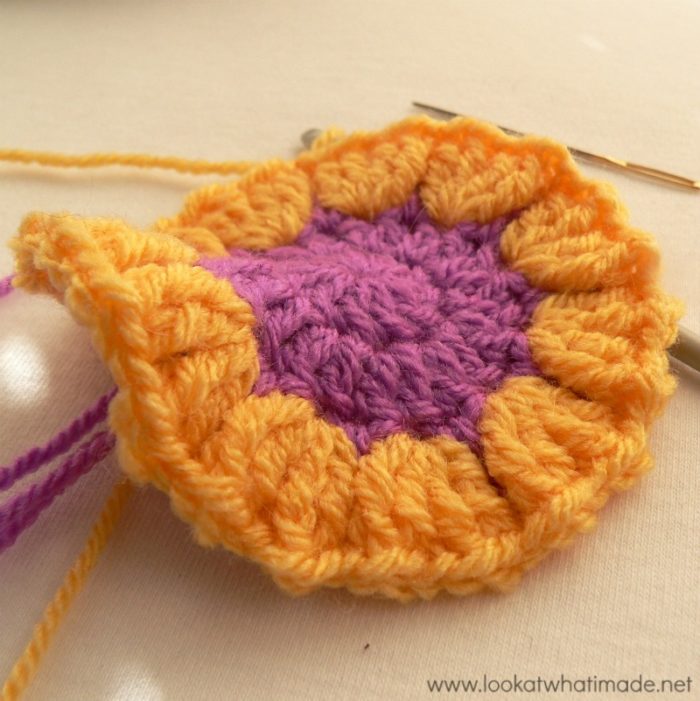
Stitch count: 72 st’s (48 tr’s and 24 sc’s)
Round 5
Round 5 is an easy one.
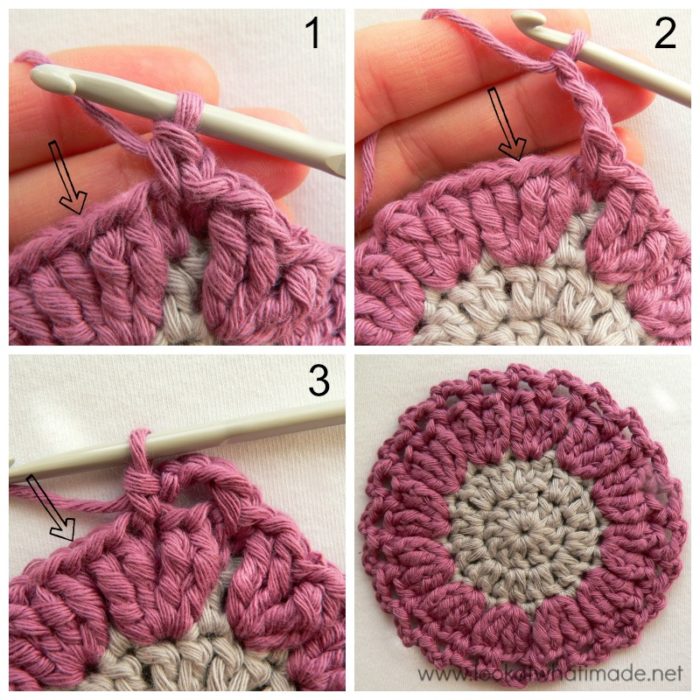
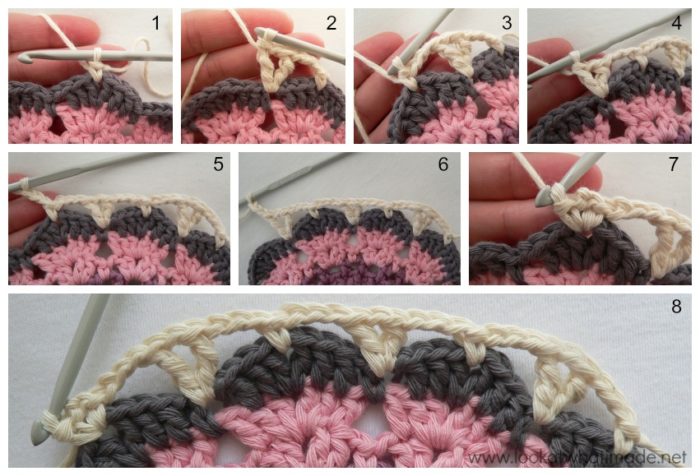
Start with a (ch 1, sc) in the same stitch as the slip stitch join (Photo 1) and then ch 3 (Photo 2). You will only work into the sc’s from Round 4 (indicated with arrows in Photos 1-3), skipping the 2 tr’s between each sc. So in each sc around: (sc, ch 3).
When you get to the end of the round and have made your last ch-3, join to the first sc with a sl st.
Round 5 completed with front and back views: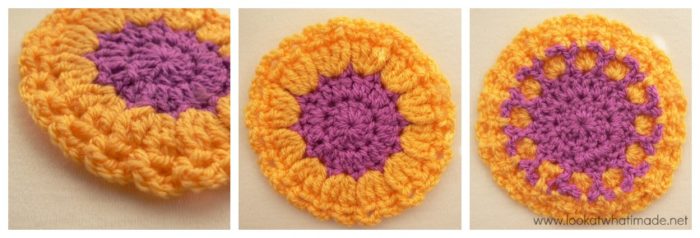
Stitch count: 24 sc and 24 ch-3 spaces
Round 6
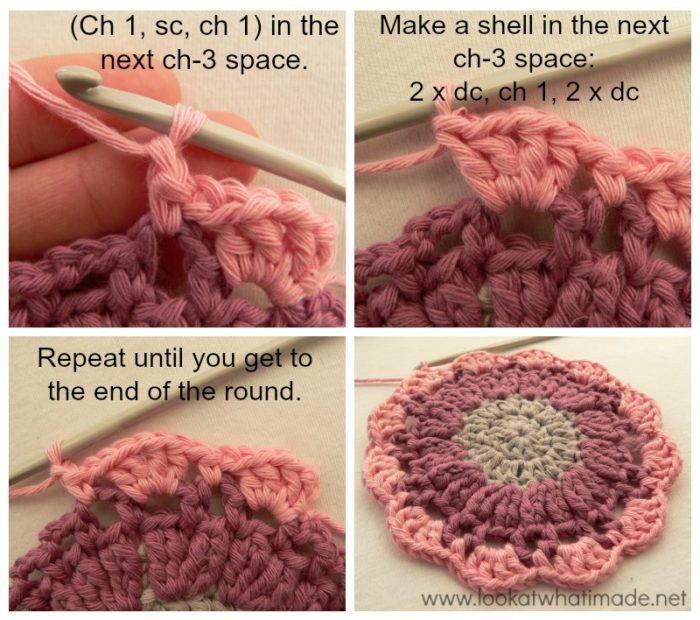
For Round 6, join your yarn with a sl st in any ch-3 space. Make a beg shell (beginning shell) in the same space (see photo collage below).
*(Ch 1, sc, ch 1) in the next ch-3 space. Make a shell in the next ch-3 space (see photo collage below).* Repeat until you get to the end of the round. You should end with a (ch 1, sc, ch 1) in the last ch-3 space. Join as instructed.
Stitch count: 60 st’s (48 dc’s, 12 sc’s) and 36 ch-1 spaces. Put another way: 12 shells, 12 sc’s and 36 ch-1 spaces.
Round 7
The shells in this round are worked into the ch-1 spaces of the shells in the previous round.
Slip stitch in the next stitch (remember that the top of the first dc might be slightly obscured by the sl st join into the top of the ch-3). See Photo 1. Ch 3 (this counts as your first dc – Photo 2) and then make a shell in the ch-1 space (Photo 3).
Now the pattern tells you to dc in the next dc, the top of which will be hidden by the stitches you just made into the ch-1 space. I chose to skip this first dc and dc into the next dc (Photo 4). I just liked the symmetry better. But feel free to scootch the stitches of the shell up to get into the first dc. See this tutorial if you need a little refresher about which loops belong to which stitch.
*Dc in the second dc of the next shell (so the dc right before the ch-1 space – see Photo 5). Make a shell in the ch-1 space (Photo 6) and dc in the last dc of the shell (Photo 7).* Repeat for each shell around. Join as instructed.
Remember to disregard the note about omitting the last dc (in the pattern).
If your “square” bowls slightly at this point, don’t worry about it.
Stitch counts: 72 dc’s (12 shells + 24 dc’s)
Round 8
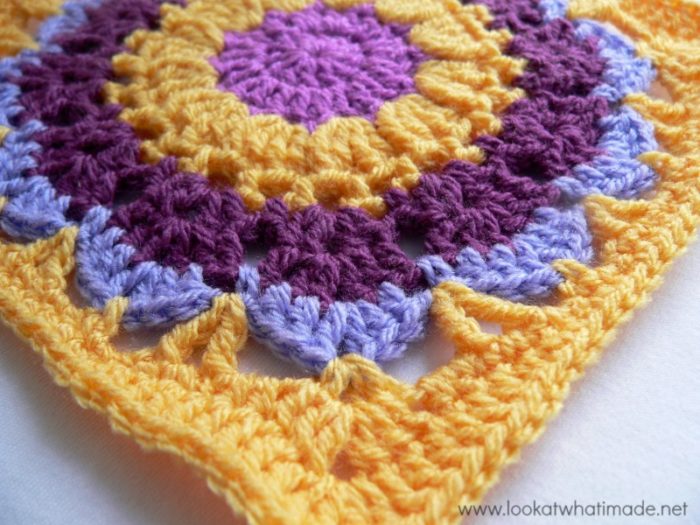
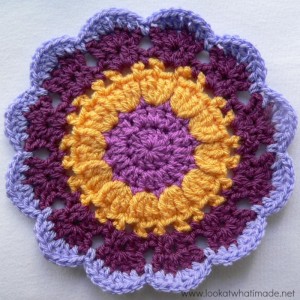 In this round the shells are again worked into the ch-1 spaces of the shells in the previous round. I have changed colour to make it easier for you to see what I am doing.
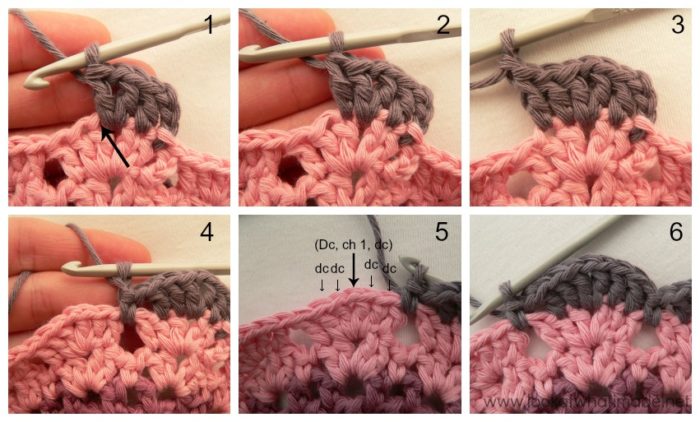
Sl st in the next dc. Ch 3 (counts as the first dc) and dc in the next dc. Make a Sm shell (dc, ch 1, dc) in the ch-1 space (Photo 1). Dc in the next 2 st’s. The loops of the first stitch will be slightly hidden by the stitches of the Sm shell. Just push them to one side so that you can get into the loops of that first dc (indicated with an arrow in Photo 1 and illustrated in Photos 2 and 3).
*(Ch 1, sc, ch 1) in the space between shells (Photo 4). Dc x 2, starting in the second dc of the next shell. (Dc, ch 1, dc) in the ch-1 space. Dc in the next 2 dc’s. See Photos 5 and 6.* Repeat this until you get to the end of the round, finishing with a (ch 1, sc, ch 1) in the space between the last 2 shells. Join as instructed.
Stitch counts: 84 st’s (72 dc’s and 12 sc’s).
Round 9
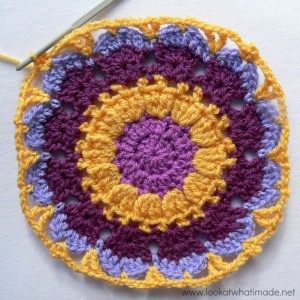 In this round you will work into the ch-1 spaces in the centre of each petal and the sc’s between petals.
I started this round with another standing single crochet, but feel free to use the standard (sl st, ch 1 sc) method (Photo 1).
*Ch 3 and make a Tr V-st (tr, ch 1, tr) in the first sc (Photo 2). Ch 3 and sc in the next ch-1 space (Photo 3). Ch 3 and make a V-st (dc, ch 1, dc) in the next sc (Photo 4). Ch 3, sc in the next ch-1 space (Photo 5). Ch 3, Tr V-st in the next sc (Photo 6). Ch 3 and (Sc, ch 2, sc) in the next ch-1 space (Photo 7). This will form your corner.* Repeat around, omitting the last sc of the last corner.
Stitch count: 40 st’s (16 sc’s, 8 dc’s, 16 tr’s), 24 ch-3 spaces, and 4 ch-2 corners
Round 10
Ch 3 (counts as your first dc). *Hdc x 2 in the first ch-3 space (Photo 1). Sc into the tr, sc into the ch-1 space, sc into the tr (Photo 2). Sc x 2 into the ch-3 space (Photo 3). Sc into the sc (Photo 4). Sc x 2 into the ch-3 space (Photo 5). Sc into the dc, sc into the ch-1 space, sc into the dc (Photo 6). Sc x 2 into the ch-3 space. Sc into the sc (Photo 7). Sc x 2 into the ch-3 space. Sc into the tr, sc into the ch-1 space, sc into the tr (Photo 8). Hdc x 2 into the last ch-3 space before the corner (Photo 9).
Dc in the first sc of the corner (Photo 10). (Dc x 2, ch 2, dc x 2) into the corner ch-2 space (Photo 11). Push the corner stitches out of the way so that you can make the next st (Photo 12). Dc into the last sc of the corner*. Repeat around, omitting the last dc of the last repeat. Join as instructed.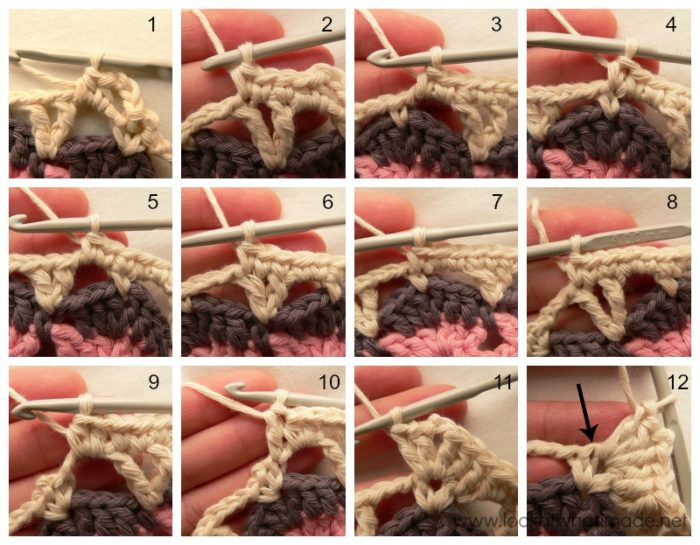
Stitch count: 116 st’s (16 hdc’s, 24 dc’s, 76 sc’s) and 4 ch-2 spaces.
Round 11
As written in the pattern.
Stitch counts: 132 st’s (52 sc’s, 16 hdc’s, 48 dc’s, 16 tr’s) and 4 ch-2 corners. There are 33 st’s on each side.
Round 12
As written.
Stitch counts: 148 hdc’s (37 on each side) and 4 ch-2 corners
I have added an Optional Additional Round 13 to get my square to the same size as the other squares. You can find the instructions for that HERE.
Remember to subscribe to my Weekly Newsletter if you would like to be kept in the loop. You can also like my Facebook page or follow me on Bloglovin, Google+, Pinterest, Twitter, or Instagram.
Happy Hooking!



Chatti says
In Rnd 9, there needs to be a ch 3 between the Tr V-st and the corner (sc, ch 2, sc.) Thank you for doing this awesome tutorial. I love the colors you choose for your squares each week!
Dedri Uys says
Thank you so much, Chatti. I have changed it.
San says
I love your squares! They’re so happy :)
Mindi says
Very pretty. I like yours even better than all the nice examples on Ravelry.
Dedri Uys says
Thank you, Mindi. I wasn’t convinced about my colours at all. I wanted to just use two and then changed my mind midway. x