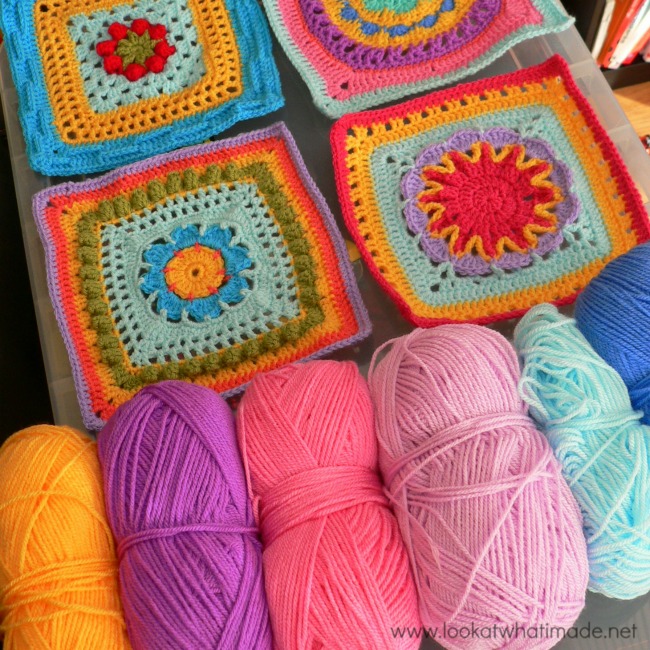
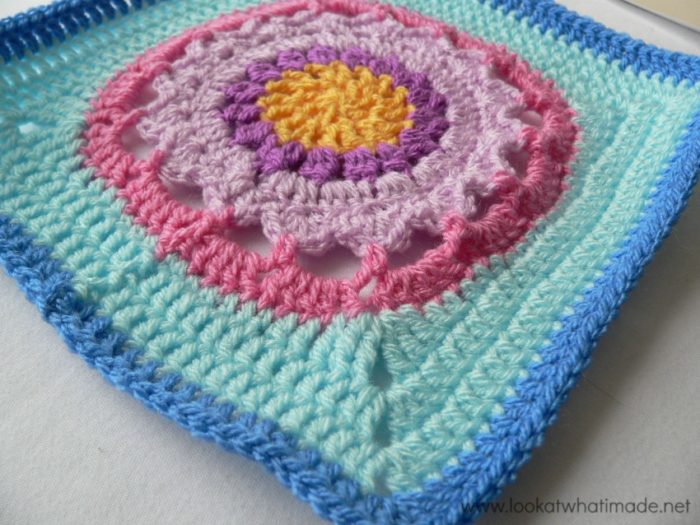
It’s Week 5 of the Official CCC Social Group CAL (crochet-along) and this week’s block is Starfire by the talented Melinda Miller from MoCrochet. Yes, you keen observer. Popcorn Parade (Week 2) and Basket of Berries (Week 4) were also designed by her.
If you are not familiar with the Block a Week CAL, but would like to join in, you can find all the relevant information HERE. The post includes a list of all the blocks to date.
The Starfire Crochet Square is classed as intermediate, but just like Popcorn Parade and Basket of Berries, it is very simple. There is one speciality stitch (the Bobble stitch), for which I have provided a photo tutorial.
Starfire
Pattern
- You can find the pattern here on Ravelry.
Suggested Materials
- 5 mm Clover Amour Crochet Hook (US H/8 UK 6)
- Worsted weight yarn
Size
- Using the hook and yarn specified, your square should be a nice even 12″ when you are done.
- Using a 4 mm crochet hook (US G/6 UK 8) and double knit yarn, as I have done, your finished square will be about 8″ big.
My Yarn and Colour Choices
I am using Stylecraft Special DK.
- Saffron (Rounds 1-2)
- Magenta (Round 3)
- Clematis (Rounds 4-5, and Optional Round 12)
- Fondant (Rounds 6-7)
- Sherbet (Round 8-10)
- Aster (Round 11)
Corrections and Notes
- The initial ch st’s in each round are counted as a stitch. Sometimes the pattern indicates this, sometimes it does not. The only one that DOESN’T count as a st is the ch-1 at the beginning of Round 8. That is why the pattern tells you to sc in the same st as the ch-1 in Round 8 and why you join to the first sc at the end of the Round 8, not the ch st.
- Round 2: “sl st into 3rd of 4th ch” should be “sl st into 3rd of 4 ch st’s”.
- Round 8: 92 stitches, not 96.
- Some of the rounds do not include stitch counts so I have added them below.
Help With The Starfire Crochet Square
Like I have already mentioned, you can find the pattern here. The tips and tricks below are supplementary to the pattern, meaning that they will only help you with the pattern should you get stuck. This photo-walkthrough is NOT the actual pattern.
Thank you very much to Melinda Miller for giving us permission to do this photo-tutorial for her Starfire Square. And a special thank you to Kimberly Slifer for letting me do these tutorials and for obtaining the necessary permission.
Round 1
You CAN start this round in a magic ring, but I suggest that you don’t unless you are VERY comfortable with your crochet skills. See that little hole in the centre caused by making your stitches into the first chain (the one farthest away from your hook)? I have a tip to make it disappear.
At the end of Round 1 you are told to sl st into the 4th ch of the beginning ch-5. Be careful with your counting here. The first chain stitch (the central hole) already contains all the other stitches, so don’t forget to count it as well. You should be joining to the fourth chain, not the fifth chain right next to the first dc, otherwise you will lose that first ch-1 space. See photos below.
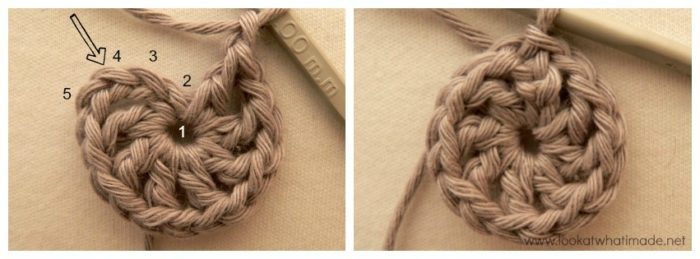
Stitch count: 8 dc’s and 8 ch-1 spaces. Remember that three of the initial 5 ch’s count as a dc.
To get rid of the central hole, use your initial tail of yarn and thread it clockwise through all the stitches of the first round. Do this twice and then pull it tight. Now thread your yarn counter-clockwise through all the stitches and cut your yarn. This might seem obvious, but you will need to skip one stitch when you start threading your yarn counter-clockwise (see central photo below). If you don’t skip a stitch when changing direction, you will just unravel the tail again.
 Round 2
In this Round you will be working into each ch-1 space AND each dc. In this pattern there are quite a few places where the stitches appear “hidden”. Please see this tutorial about hidden stitches to make sure that you know which loops belong to which stitch.
Once you’ve made your first dc into the ch-1 space, the top of the next dc might be slightly hidden. Make sure that you work the next st into the dc (indicated with an arrow in the first photo below and illustrated in the second photo).
To join the round, sl st to the third chain of the 4 initial ch st’s (last 2 photos below).
Stitch count: 16 dc’s and 16 ch-1 spaces
 Round 3
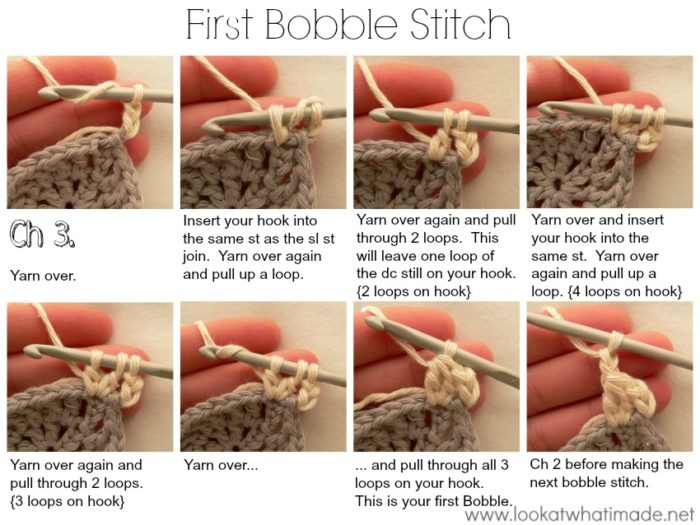
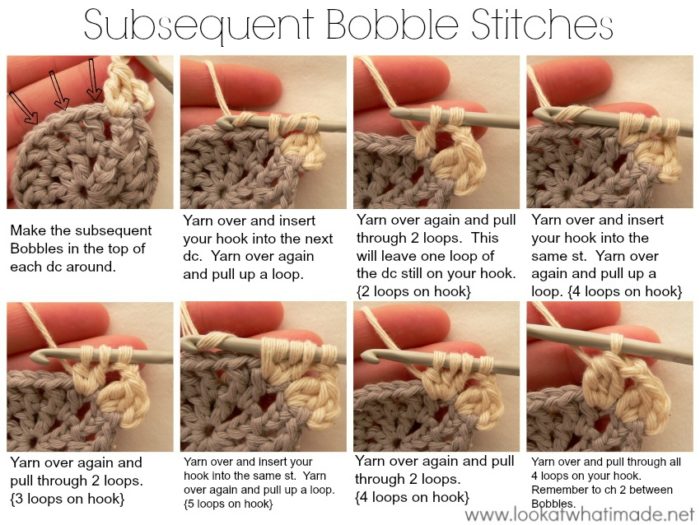
In this round you will be making 16 Bobble stitches, each spaced by 2 ch st’s. The Bobbles are straightforward, but just in case you’ve never made them, I have included two photo-tuts. One shows you how to make the first Bobble and the other one shows you how to make subsequent Bobbles.
When you get to the end of Round 3 you will need to join to the top of the first Bobble with a sl st.
Stitch count: 16 Bobbles + 16 ch-2 spaces.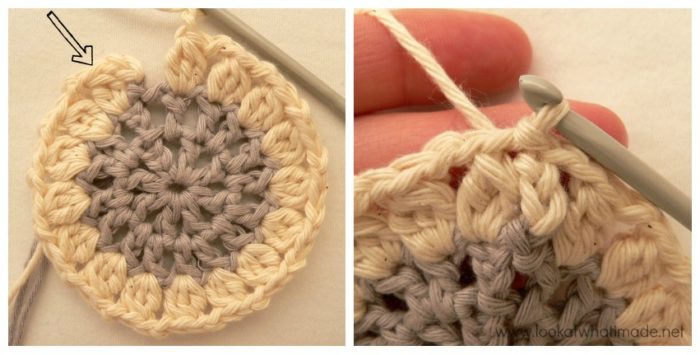
Round 4
This round is simple, but the top of the Bobble stitches tend to be a bit hidden again. So after you have made 3 dc’s into the first ch-2 space, you will need to make a dc into the top of the next Bobble (indicated with an arrow in the second and fourth photos below and illustrated in the third photo).
Stitch count: 64 dc’s
Hint: Count your stitches at the end of this round. I had to frog both my samples because I wasn’t paying attention and only made 2 dc’s in some of the ch-2 spaces. You are going to be MOST annoyed if you have to frog at the end of the next round, so count now.

Round 5
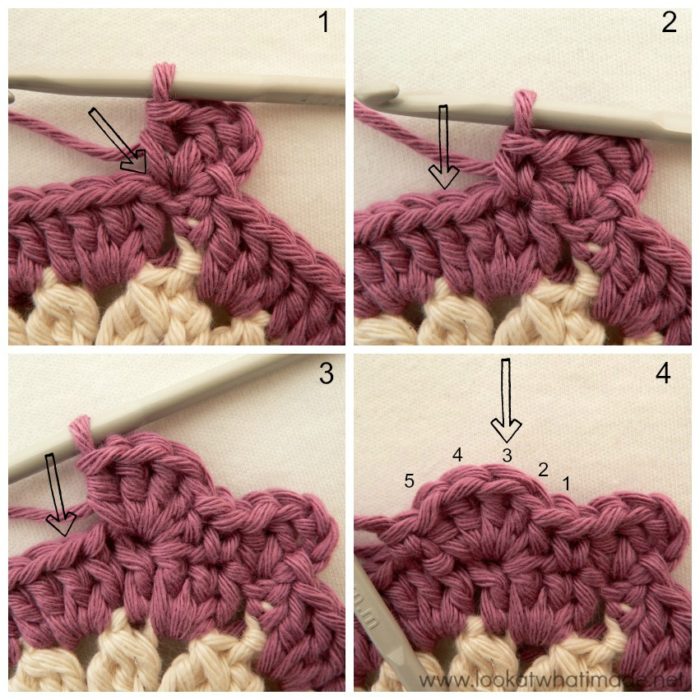
In this round you will work 16 “fans”, which consist of (hdc, 3 x dc, hdc).
After you have worked (dc, hdc) into the same st as the sl st join (this is half a fan and will be completed at the end of the round), the top of your first dc is going to be really hidden (Photo 1). Luckily you are not going to work into this stitch, but skip it instead. Regardless, make sure that you know where it is so that you are skipping only one stitch, not two. So after you have skipped that stitch, sc in the next st. Skip the next st and make a fan in the next st (indicated with an arrow in Photo 2). Skip the next st and sc in the next st (indicated with an arrow in Photo 3). Et cetera, et cetera, et cetera…
Photo 4 above shows one completed fan, with an arrow indicating the central stitch of the fan that you will need to work into in the next round.
Stitch count: 16 fans, 16 sc’s
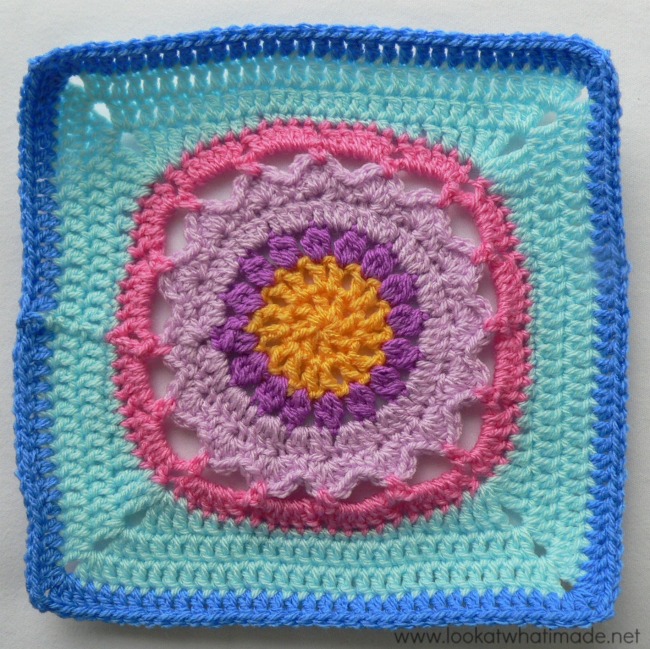
And this is what your square should look like at the end of Round 5. I know I am stating the obvious when I keep pointing out how pretty the flowers are, but I just can’t help it. Every time I finish the central flower of a square I just want to stop right there and make a whole bunch more.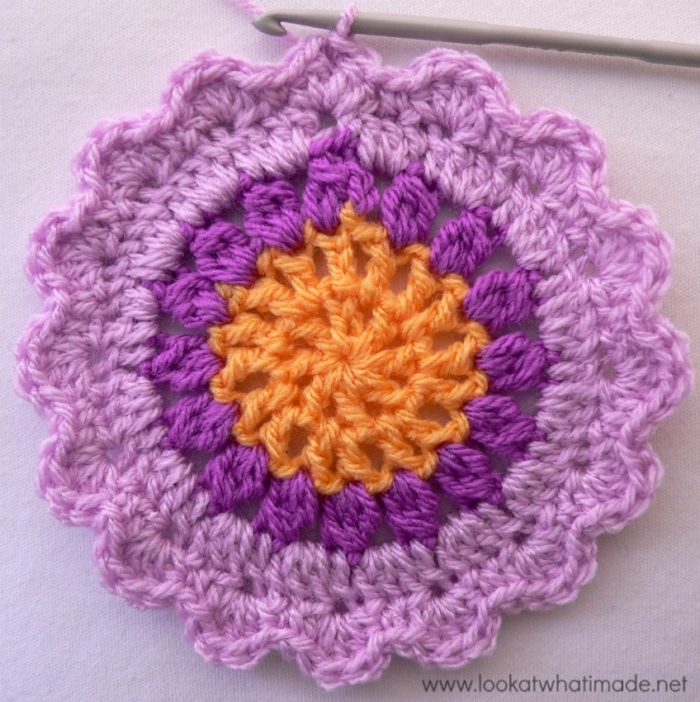
Round 6
Round 6 is easy!
Stitch count: 80 ch’s, 16 sc’s
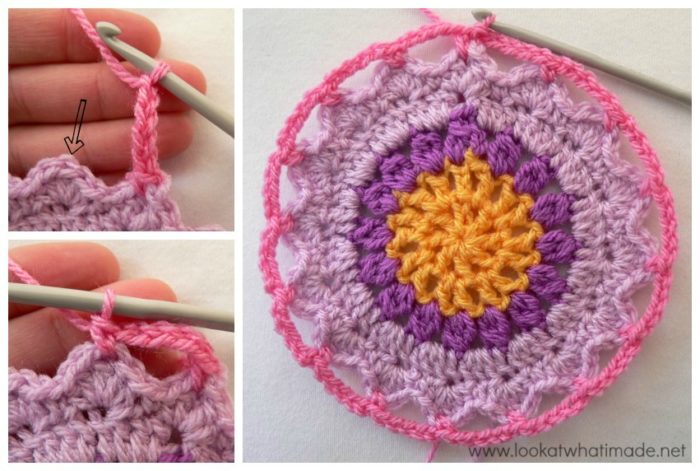
Round 7
At the end of Round 7 your work will pull up like a bowl. Do not be alarmed. All will be well again at the end of the next round.
Stitch count: 80 dc’s (including initial ch-3)
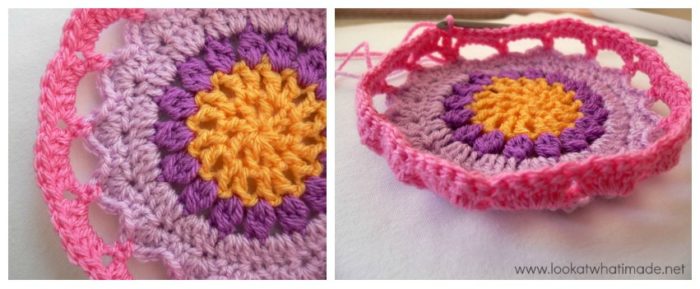
Round 8
And now the circle starts becoming a square. In this and subsequent rounds, you will have to be mindful of those hidden stitches right after the corners.
Stitch counts:
- Total: 92 stitches and 4 x ch-2 spaces
- Per Side: 23 stitches on each side (19 between corners and 2 in each corner)
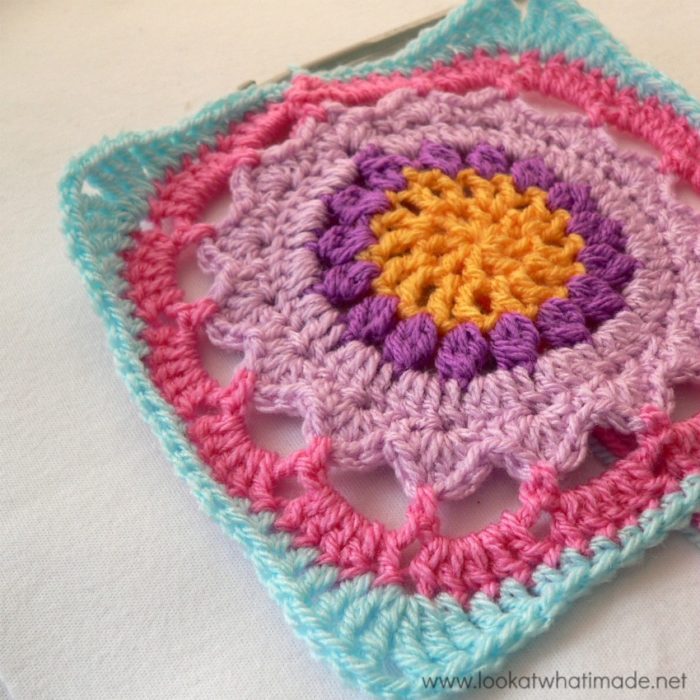
Round 9
Stitch counts:
- Total: 108 stitches and 4 x ch-2 spaces
- Per Side: 27 stitches on each side (23 between corners and 2 in each corner)
Round 10
Stitch counts:
- Total: 124 stitches and 4 x ch-2 spaces
- Per Side: 31 stitches on each side (27 between corners and 2 in each corner)
Round 11
Stitch counts:
- Total: 140 stitches and 4 x ch-2 spaces
- Per Side: 35 stitches on each side (31 between corners and 2 in each corner)
I have added an Optional Additional Round 12 to get my square to the same size as the other squares. You can find the instructions for that HERE.
All done!
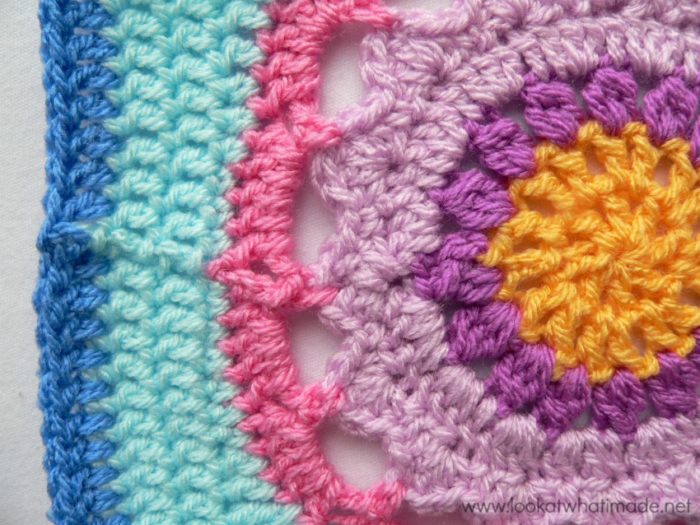
The seam on this square is a tiny bit obvious.
My friend San (from Loopsan) has done a quick tutorial for getting rid of the seam. You can find that HERE. In all fairness I should also admit that I didn’t go to any particular trouble to avoid the seam. In fact, I didn’t even change colour on the slip stitch like I should have done. So my bad!
All in all I loved this square. I think it was the quickest one of the whole bunch. And so simplistically pretty. I am completely enamoured with Melinda’s designs.
Join the Block a Week CAL
If you would like to be part of the Block a week CAL on Facebook, please join the Official CCC Social Group (you must be logged into Facebook to do so) so that you can access and utilize the support and encouragement of all the lovely ladies on there.
You can also join the Block a Week CAL Flickr Group so that you can inspire others and be inspired yourself.
For those of you who do not like Facebook, you can always follow along with me here. I will be posting the blocks every week.
Remember to subscribe to my Weekly Newsletter if you would like to be kept in the loop. You can also like my Facebook page or follow me on Bloglovin, Google+, Pinterest, Twitter, or Instagram.
More Blogs Following the CAL
- San from Loopsan – using Stylecraft in sophisticated Parchment, Denim, Mocha and Meadow
- Lou Mander from Tea, Crochet and Me – using Stylecraft in White, Mocha and Raspberry
Happy Hooking!




Taylor Murray says
I cannot get to the pattern, it takes me to a weird casino page that looks like a scam. Can you email it to me?
Thank you very much!
Jenny Lowman says
Hi Taylor. Please try accessing the original pattern via Ravelry
Here
Beebs says
Sorry, me again! I forged ahead (although my earlier comment not properly posted yet, still waiting moderation…). Now onto round 7, which in the pattern I have downloaded says 5 SC in each 4 chain space. Yet when I look at this page, it says for round 7 you should have 80 DC at the end of it, including a chain 3 at the start (which isn’t in the pattern I have as it’s SC not DC). Your photo looks like DC.
Help, I’m confused now! Am I looking at the wrong pattern??? Or perhaps it’s been changed or updated since this CAL? Again, it looks ok, but I just want to make sure I’m not totally off on a strange tangent because I don’t know what I’m doing :-) Thanks in advance.
Dedri Uys says
Hi Beebs.
I’m sorry that you are having issues with this pattern! I’ve had a quick look and Melinda has indeed updated the pattern (2018), so it is now slightly different to the photo tutorial. You can see this difference if you compare the first (featured) photo on Ravelry to all the other photos down the side of the pattern. Thank you for bringing this to my attention. I will make a note in the post once I have compared the two versions. Go with the new (written) pattern for this one x.
Paula says
I am SO confused and this should be so easy buy I cannot wrap my head around the part in this round where it says: In the first ch work (1 dc, ch 1) 7 times, sl st into 4th ch of beg ch-5. Pull beg tail to close the hole. BUT in your photos, you do not show these initial stitches. Then when I go back & read what you have it says: At the end of Round 1 you are told to sl st into the 4th ch of the beginning ch-5. Be careful with your counting here. The first chain stitch (the central hole) already contains all the other stitches, so don’t forget to count it as well. You should be joining to the fourth chain, not the fifth chain right next to the first dc, otherwise, you will lose that first ch-1 space.
Dedri Uys says
Paula, the photo (on my site) of the first round shows the initial ch-5 with the 7 dcs and the 7 ch-1 spaces made into the first chain of the initial ch-5. There is also an arrow pointing to the 4th dc of the initial ch-5, which is the stitch you should join to. The note is only there to remind you to count your initial chains very carefully so that you don’t accidentally join the the fifth chain instead of the fourth.
Rhondda says
So pretty Dedri! Your blanket is going to be stunning!