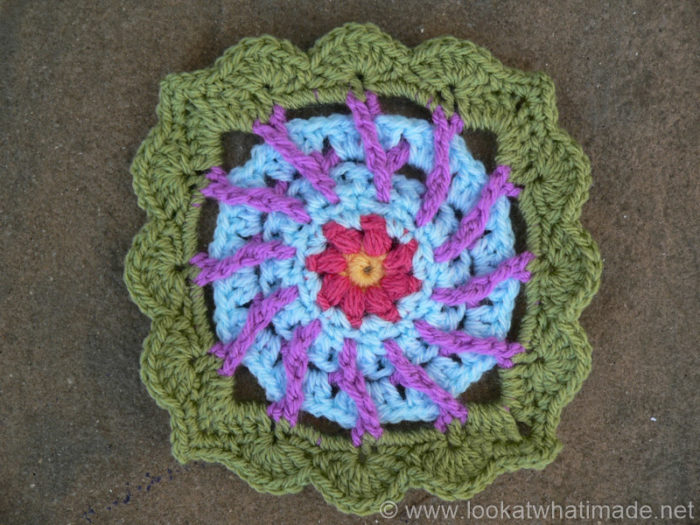
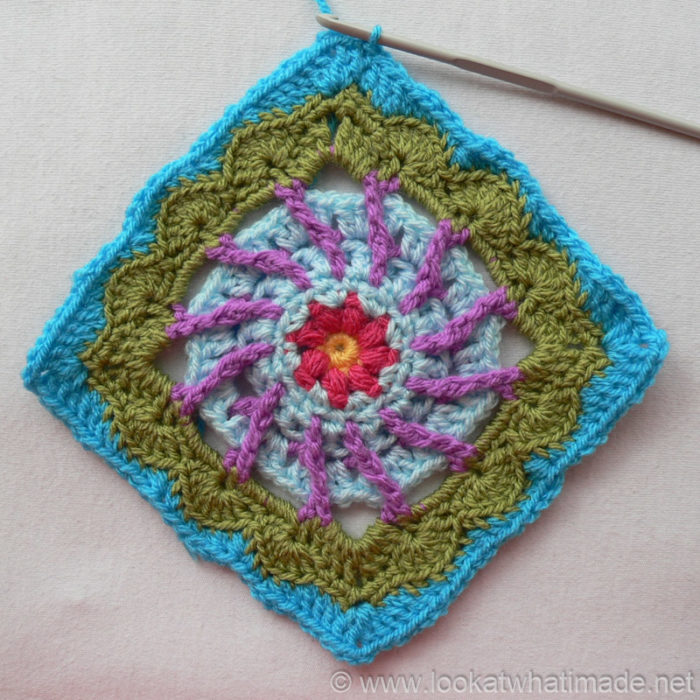
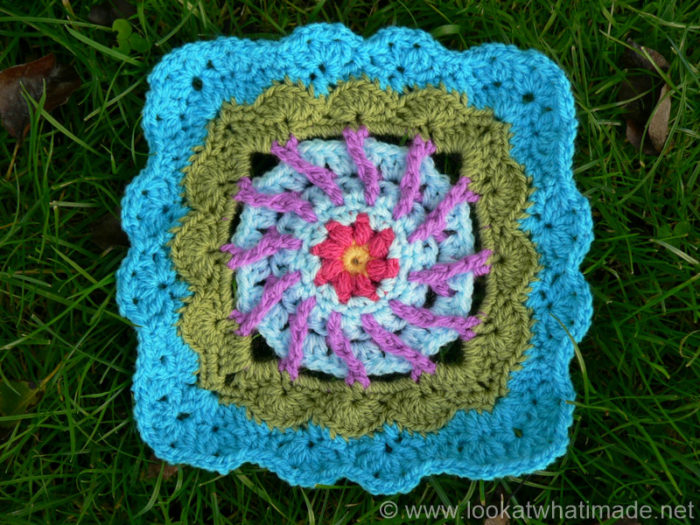
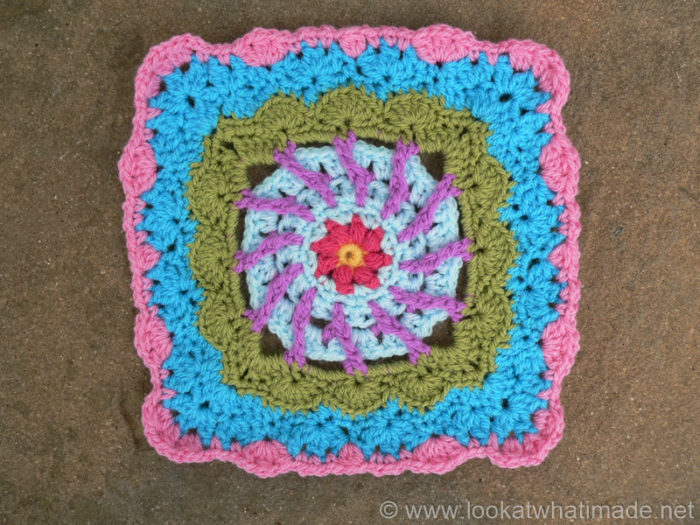
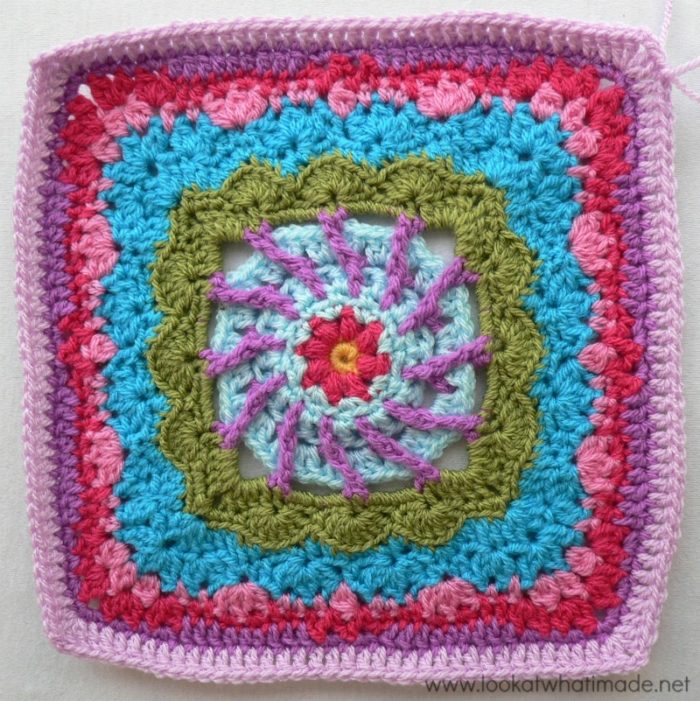
Block 38 of the Block a Week CAL (hosted by Kimberly Slifer) is Shan Sevcik’s May Pole Square. This square utilises quite a few interesting stitches and techniques, so find yourself a quiet spot and enjoy!
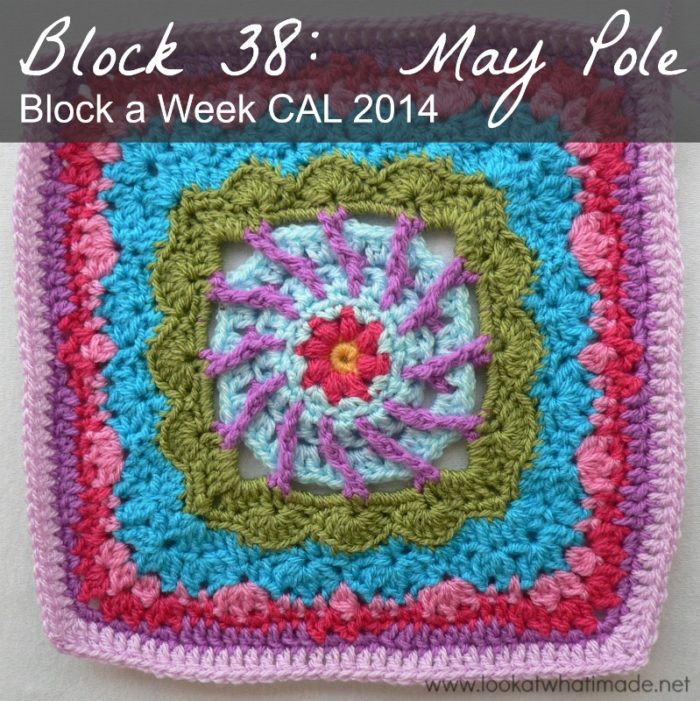
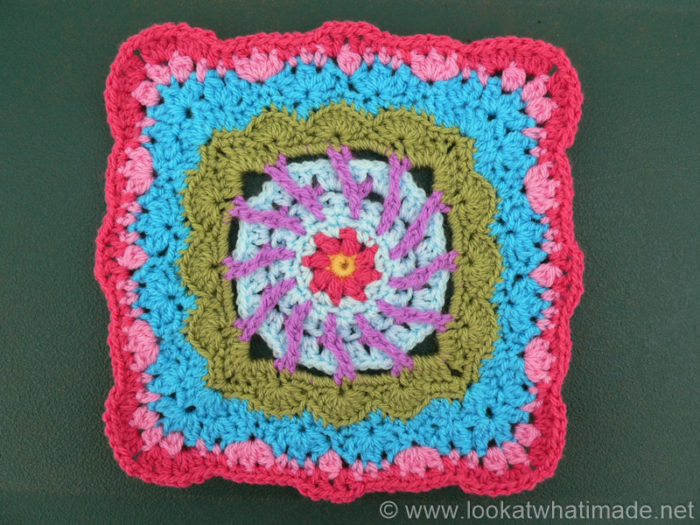
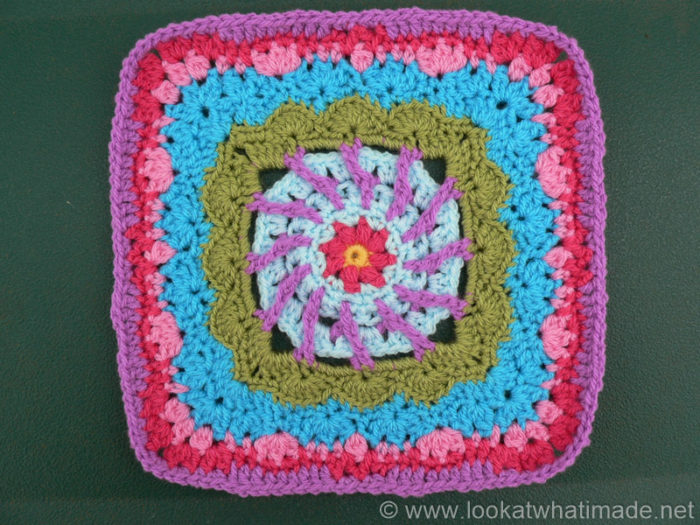
If you are using the same hook and yarn for all your squares, they will not all come out the same size. I have now added a post outlining the extra rounds I added to each square to get them to the size of Block 1, which was the biggest. You can find that here.
May Pole Crochet Square
{Pattern © 2013 Shan Sevcik. Photo tutorial done with kind permission}
Pattern
Available as a Free Ravelry Download.
Suggested Materials
- 5 mm Clover Amour Crochet Hook (US H/8 UK 6)
- Worsted weight yarn
Size
- Using the hook and yarn specified, your square should be a nice even 12″ when you are done.
- Using a 4 mm crochet hook (US G/6 UK 8) and double knit yarn, as I have done, your finished square will be about 8.5″ big.
My Yarn and Colour Choices
I am using Stylecraft Special DK.
- Saffron (Round 1)
- Pomegranate (Rounds 2 and 14)
- Sherbet (Rounds 3 – 5, and 7)
- Magenta (Rounds 6, 8, and 15)
- Meadow (Rounds 9 and 10)
- Turquoise (Rounds 11 and 12)
- Fondant (Round 13)
- Clematis (Rounds 16 and Optional 17)
Notes
US Crochet Terminology used. (See this comparative chart if you need help transcribing from US to UK)
Special Stitches
- Puff stitch: (Yarn over, insert your hook into the indicated stitch and pull up a long loop) 3 times. Yarn over and pull through all the loops on your hook. You can see this tutorial. The tutorial is for a 5-dc puff stitch, but it will give you an idea of what is expected.
- V stitch: (dc, ch 1, dc) in the same stitch.
- Dc cluster (dcCL): Yarn over and insert your hook into the indicated stitch. Yarn over and pull up a loop (3 loops on hook). Yarn over and pull through 2 loops (2 loops on hook). Yarn over and insert your hook into the SAME stitch. Yarn over and pull up a loop (4 loops on hook). Yarn over and pull through 2 loops (3 loops on hook). Yarn over and pull through all 3 loops.
- Multi-stitch cluster (multiCL): Yarn over and insert your hook into the indicated stitch. Yarn over and pull up a loop (3 loops on hook). Yarn over and pull through 2 loops (2 loops on hook). Yarn over and insert your hook into the SAME stitch. Yarn over and pull up a loop (4 loops on hook). Yarn over and pull through 2 loops (3 loops on hook). Yarn over and insert your hook into the SAME stitch. Yarn over and pull up a loop (5 loops on hook). Yarn over and pull through all 5 loops.
May Pole Square Photo Tutorial
This photo-walkthrough is NOT the actual pattern and should not be used instead of the pattern, but rather in conjunction with it.
Thank you very much to Shan Sevcik for giving us permission to do this photo-tutorial for her May Pole Square. And a special thank you to Kimberly Slifer for letting me do these tutorials and for obtaining the necessary permission.
Round 1
As written.
If you are not familiar with working into a magic ring, this video tutorial from Moogly is clear and easy to follow.
Please remember, when working into a magic ring you HAVE to work away your initial tail very well. If you just cut it, your whole square might unravel!
Stitch count: 8 sc’s
Round 2
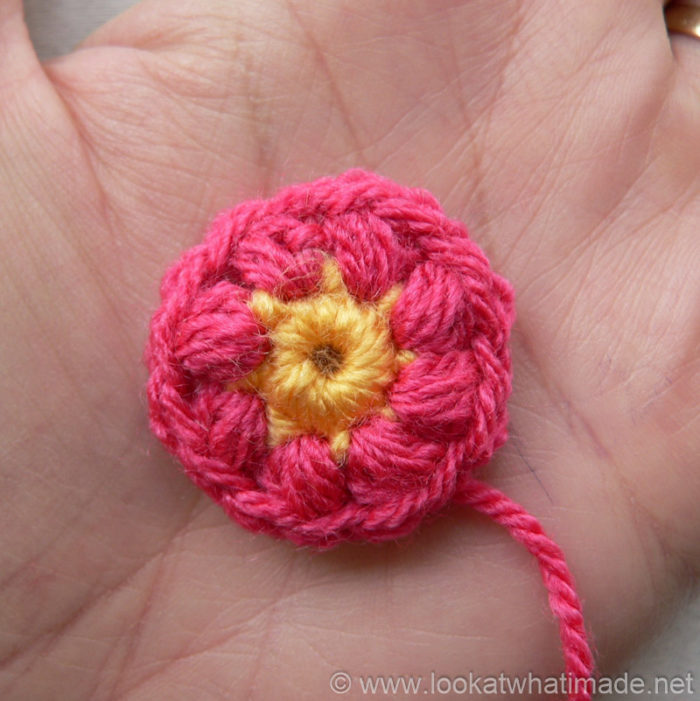
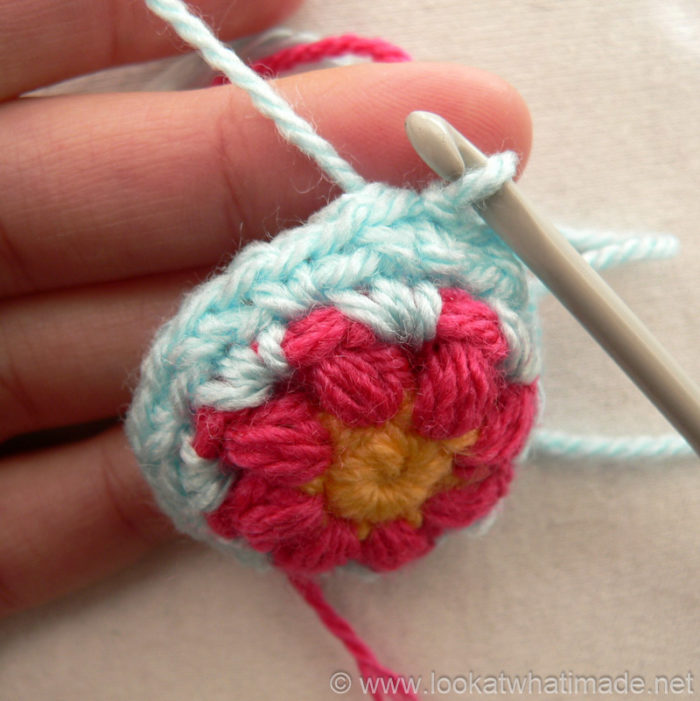
As written. Have a look at this puff stitch tutorial if you need some help making the puff stitches. The tutorial is written for 5-dc puff stitches, but the principle remains the same.
Stitch count: 8 puff stitches and 8 ch-1 spaces
 Round 3
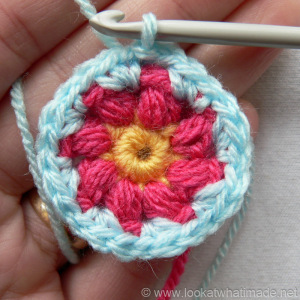
- If you are using the same colour, sl st into the next ch-1 space. (Ch 1, 2 sc) in the same ch-1 space.
- If you are using a new colour, join with a standing single crochet in any ch-1 space around. Sc in the same ch-1 space.
(Ch 1, skip the next st, and make 2 sc’s in the next ch-1 sp) 7 times. Ch 1 and join to the first sc with a sl st.
You should now have 24 stitches and spaces. In the next round you will be working into every second stitch/space.
Stitch count: 16 sc and 8 ch-1 spaces
Round 4
- If you are using the same colour, (ch 1, sc) in the same st as the sl st join.
- If you are using a new colour, join with a standing single crochet in the same stitch as the sl st join.
(Ch 1, skip the next stitch or space, and sc in the next stitch or space) 11 times. Ch 1 and join to the first sc with a sl st.
Your “square” will pull up into a bowl at this point. Don’t worry about it. It will correct itself soon.
Stitch count: 12 sc’s and 12 ch-1 spaces
Round 5
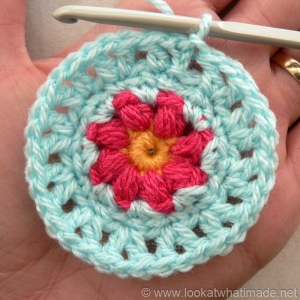 As written.
You will be working into each of the 12 sc’s from the previous round, skipping the ch-1 spaces of the previous round.
Have a look at your work if you have never made V-stitches. Can you see that each (dc, ch 1, dc) forms a little V, the bottom of which rests in a single crochet stitch? When instructed to work into the V-stitches, you will be working into the ch-1 space between the 2 “legs” of each V.
Also take a close look at Round 4. Can you identify the skipped ch-1 spaces from Round 4 that fall between the bases of the V-stitches? You will be working into these ch-1 spaces as well.
Stitch count: 12 V-stitches (24 dc’s and 12 ch-1 spaces)
Round 6
In the pattern notes Shan suggests that you do an edc instead of a fptr if the fptr’s are too loose. In fact, she used edc’s herself, so that is what I used too.
- If you are using the same colour, sl st into the next ch-1 space (which will be between the “legs” of the next V-stitch.
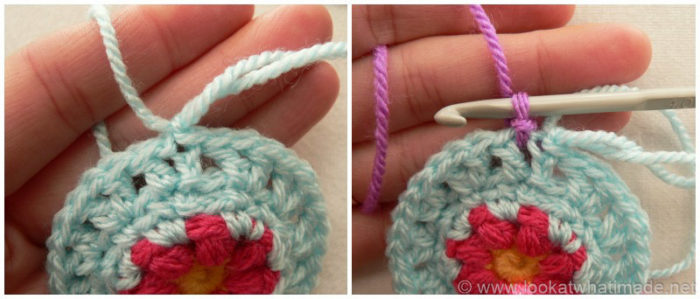
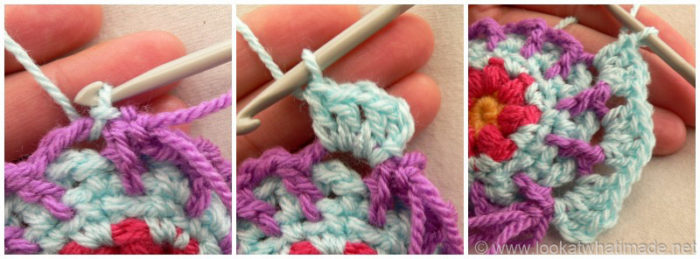
- If you are using a new colour, I suggest that you don’t cut the yarn from Round 5, but rather run it up the back of your work as suggested in the pattern. To do that, ch 1 with the existing colour and then pull up a long loop. Make sure to tug on the chain stitch so that it forms a little secure (temporary) knot. This will just prevent the sl st join for working itself loose while you make Round 6. Remove your hook from your Round 5 yarn, leaving the long loop dangling (Photo below left). Pick up your new colour. Join it by making a sl st in the first ch-1 space after the sl st join (Photo below right).
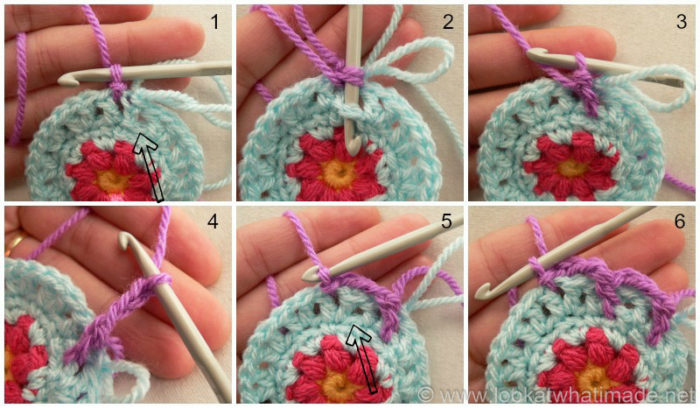
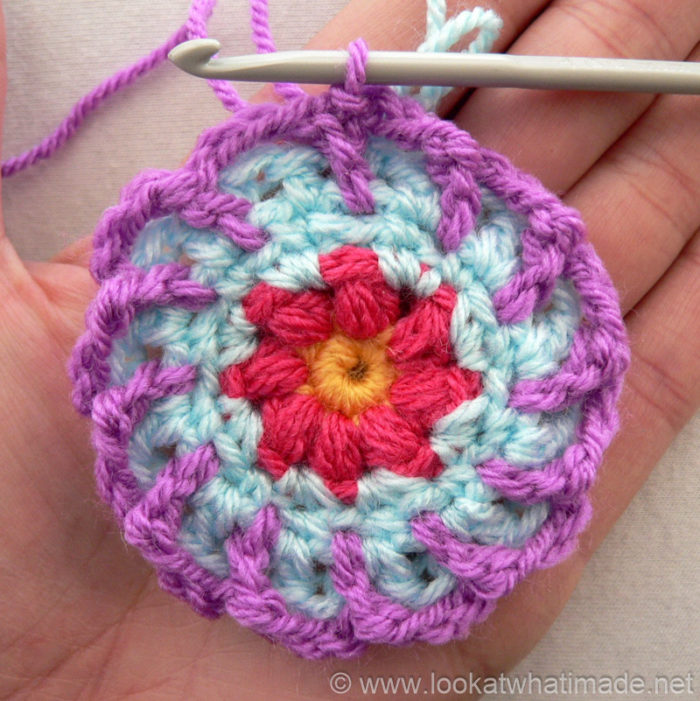
*Working in front of Round 5, make an extended dc (edc) – see this video tutorial – in the ch-1 space from Round 4 directly BEFORE the current V-stitch. In other words, the ch-1 space from Round 4 directly to the right of the current V-stitch (to the left if you are left-handed) – see Photos 1 – 3. It is easier if you insert your hook from back to front into the ch-1 space as illustrated in Photo 2. Ch 3 (Photo 4) and make a sl st into the next ch-1 space from Round 5 (Photo 5).* Repeat from * to * 11 times, omitting the last sl st on the last repeat. Join to the top of the first edc with a sl st.
Stitch count: 12 edc’s and 12 ch-1 spaces
- Per Side: 13 st’s and 6 ch-1 spaces per side {6 dc’s, 1 hdc, and 6 sc’s}
- Total: 52 st’s, 24 ch-1 spaces, and 4 ch-2 spaces {24 dc’s, 4 hdc’s, and 24 sc’s}
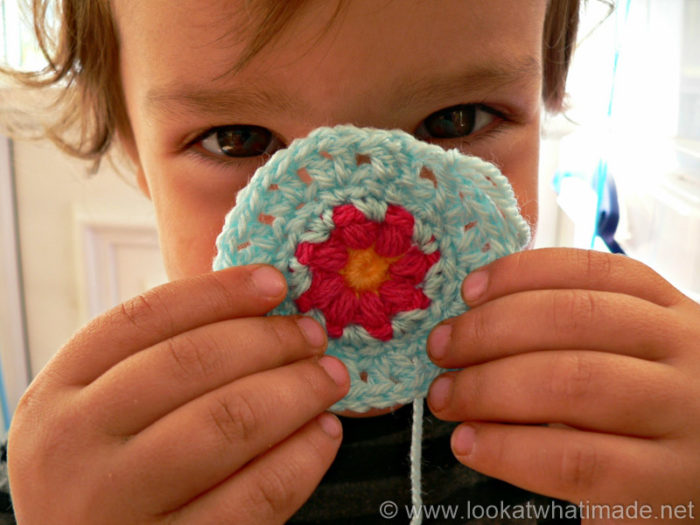
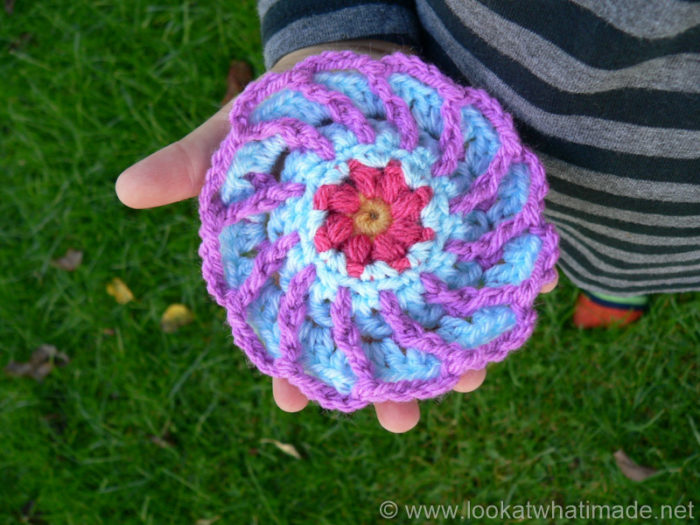
This would make a really great flower if you finished off at this point…
Round 7
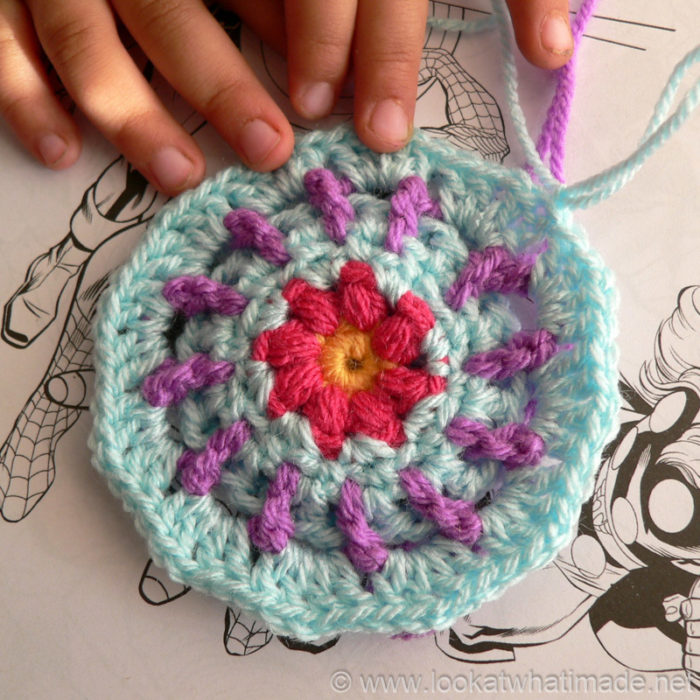
If you are going to use the same colour for Round 8 as you used for Round 6 (to continue the spirals), ch 1 and pull up a long loop of your Round 6 colour before starting Round 7 (as before).
Pick up the loop from the end of Round 5 and then continue making Round 7 as written.
You want to end up with 12 groups of (2 dc, ch 1, 2 dc). Each group will be worked into a ch-3 space.
If you are running your Round 6 yarn up the back of your work, please make sure that it is BEHIND your work when you join at the end of this round, otherwise it’s going to look a bit funny.
Stitch count: 48 dc’s and 12 ch-1 spaces
Round 8
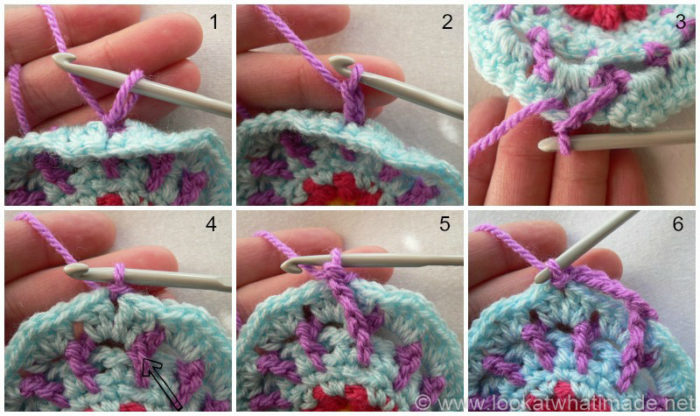
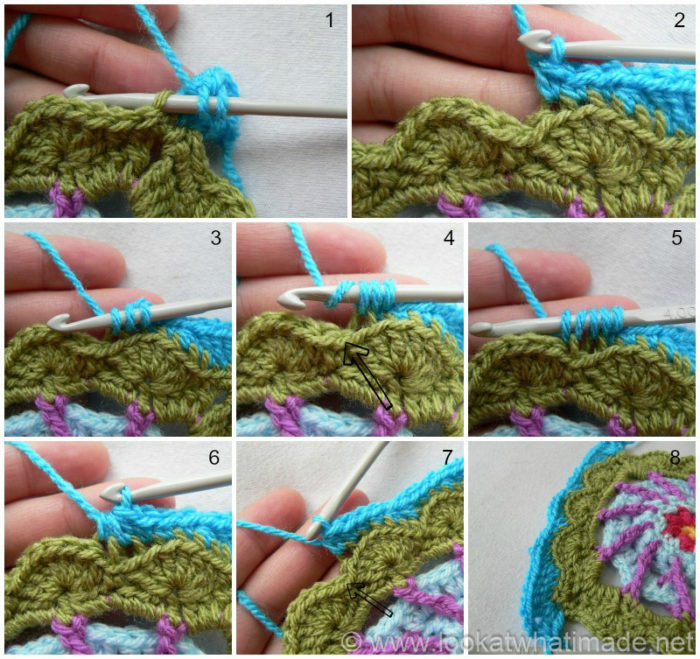
- If you are using the yarn from Round 6, pick up the loop and ch 2 (to get you to the right height). This ch-2 should be BEHIND Round 7 (Photos 1 and 2). If it is in front of Round 7, undo your sl st join and make sure that your Round 6 yarn is BEHIND Round 7 when you join. Sl st into the next ch-1 space of Round 7 (Photos 3 and 4).
- If you are using a new colour, join with a sl st to any ch-1 space around.
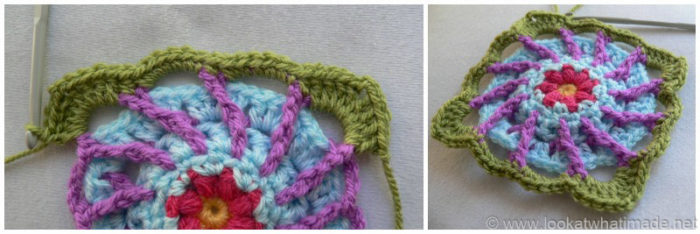
(Make a fptr around the edc from Round 6 to the right of the ch-1 space (left if you are left-handed) – indicated with an arrow in Photo 4 and illustrated in Photo 5. Ch 5 and sl st into the next ch-1 space) 12 times, omitting the last sl st on the last repeat (Photo 6). Join with a sl st to the first fptr.
Stitch count: 12 fptr’s and 15 ch-5 spaces
Round 9
As written.
This one’s an easy one. Remember to check your stitches and don’t accidentally skip the hdc’s!
Stitch count: 48 sc’s, 12 hdc’s, 24 dc’s, and 4 ch-2 corner spaces {12 sc’s, 3 hdc’s, and 8 dc’s per side}
Round 10
- If you are going to use the same colour, sl st your way to the next ch-2 corner space. (Ch 1, sc, ch 2, sc) in the same space. This is your first corner made.
- If you are using a new colour, join your yarn by making a standing single crochet in any corner space around. (Ch 2, sc) in the same corner space. This is your first corner made.
*Sc in the next 2 st’s (Photo 1). Remember not to accidentally skip that first hidden stitch. Skip the next 2 st’s and make 6 dc’s in the next st, which will be the hdc (Photo 2). Skip the next 3 st’s and sc in the next st (Photo 3). Skip the next 2 st’s. Make 7 dc’s in the next st, which will be the hdc (Photo 4). Skip the next 3 st’s and sc in the next st (Photo 5). Skip the next 2 st’s and make 6 dc’s in the next st, which will be the hdc. Skip the next 2 st’s and sc in the last 2 st’s. (Sc, ch 2 sc) in the corner ch-2 space (Photo 6).* Repeat from * to * 3 more times, omitting the last corner on the last repeat. Join to the first sc with a sl st.
Stitch count: 32 sc’s, 8 6-dc shells, 4 7-dc shells, and 4 ch-2 corner spaces {8 sc’s, 2 6-dc shells, and 1 7-dc shell per side}
Round 11
Apart from the corners, all the stitches in this round are made into the back loop only (blo).
- If you are going to use the same colour, sl st your way to the next ch-2 corner space. Ch 3 (counts as your first dc). (Dc, ch 2, 2 dc) in the same ch-2 space. This is your first corner made.
- If you are using a new colour, join your yarn by making a standing double crochet in any corner ch-2 space. (Dc, ch 2, 2 dc) in the same ch-2 space. This is your first corner made.
*Working into the back loops only: dc in the next 3 sc’s. Don’t accidentally skip the first hidden stitch (Photo 1). Hdc in the next 2 dc’s. Sc in the next 3 st’s. There should now be one dc left unworked of the first 6-dc shell (Photo 2).
Hdc2tog, skipping the center sc. To do this, yarn over and insert your hook into the next dc. Yarn over and pull up a loop (3 loops on hook) – see Photo 3. Skip the sc (indicated with an arrow in Photo 4). Yarn over and insert your hook into the next dc, which will be the first dc of the next shell. Yarn over and pull up a loop (5 loops on hook) – see Photo 5. Yarn over and pull through all 5 loops (Photo 6).
Hdc in the next dc (second dc of shell). Sc in the next 3 dc’s (third, fourth, and fifth dc’s of shell). Hdc in the next dc (sixth dc of shell). Hdc2tog, skipping the central sc (seventh dc of central shell and first dc of last shell). Sc in the next 3 dc’s, hdc in the last 2 dc’s, and dc in the next 3 sc’s. (2 dc, ch 2, 2 dc) in the ch-2 corner space (Photo 8).* Repeat from * to * 3 times, omitting the last corner on the last repeat.
Stitch counts:
- Total: 108 st’s {40 dc’s, 36 sc’s, 8 hdc2tog’s, 24 hdc’s, and 4 ch-2 corner spaces}
- Per Side: 27 st’s {10 dc’s, 9 sc’s, 2 hdc2tog’s, and 6 hdc’s}
Round 12
- If you are going to use the same colour, sl st your way to the next ch-2 corner space. Ch 2, dc into the ch-2 corner space. This counts as your first dcCL (dc cluster).
- If you are using a new colour, join your yarn by making a sl st in any ch-2 corner space. Ch 2, dc into the ch-2 corner space. This counts as your first dcCL (dc cluster).
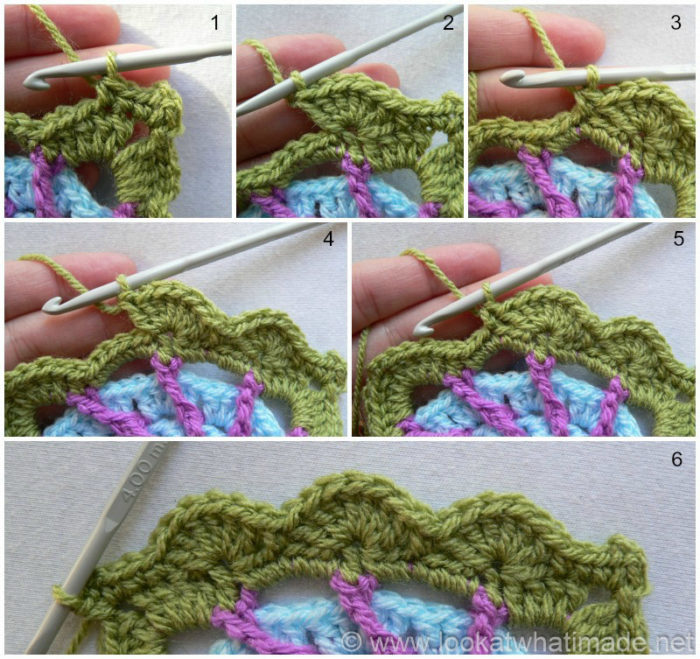
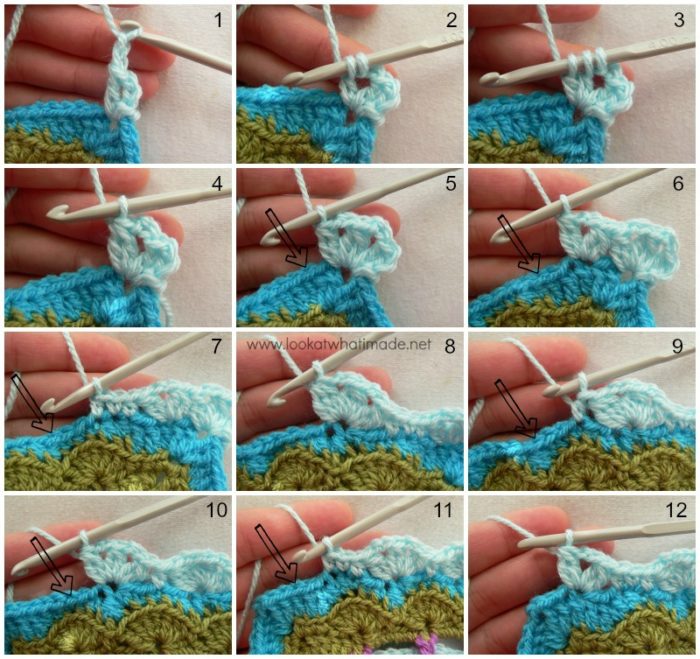
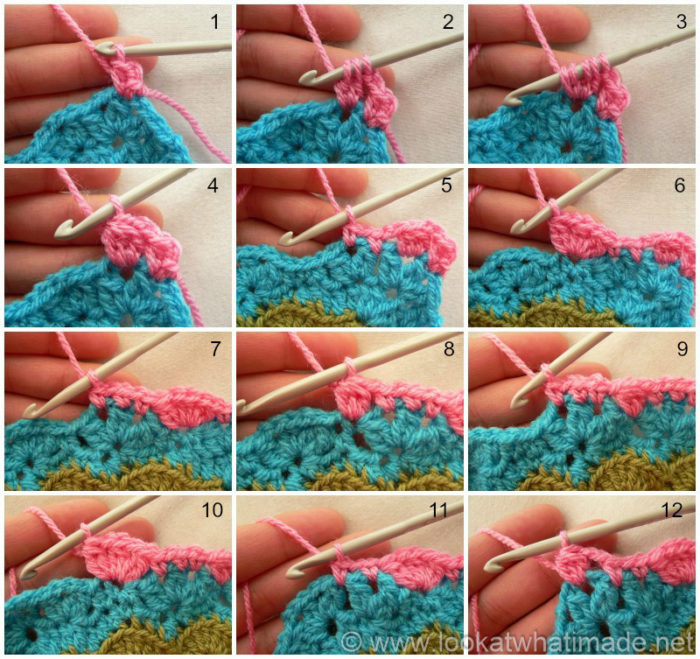
Ch 2 (Photo 1). Yarn over and insert your hook into the same ch-2 space. Yarn over and pull up a loop (3 loops on hook). Yarn over and pull through 2 loops (2 loops on hook) – see Photo 2. Yarn over and insert your hook into the SAME space. Yarn over and pull up a loop (4 loops on hook). Yarn over and pull through 2 loops (3 loops on hook) – see Photo 3. Yarn over and pull through all 3 loops (Photo 4). This is a dcCL made. Ch 2, dcCL in the same ch-2 space. You should now have 3 dcCL’s in the same corner space (Photo 5). This is your corner made.
*Skip the next 2 st’s (remembering to count the first hidden stitch). (DcCL, ch 2, dcCL) in the next st (indicated with an arrow in Photo 5 and illustrated in Photo 6). Skip 2 st’s. Hdc in the next st, sc in the next st, hdc in the next st (Photo 7).
Skip 2 st’s. (DcCL, ch 2, dcCL, ch 2, dcCL) in the next st (Photo 8). Skip 2 st’s and hdc in the next st (Photo 9). Skip 2 st’s and (dcCL, ch 2, dcCL, ch 2,dcCL) in the next st (Photo 10). Skip 2 st’s. Hdc in the next st, sc in the next st, hdc in the next st (Photo 11). Skip 2 st’s. (DcCL, ch 2, dcCL) in the next st (Photo 12). Skip the last 2 st’s. (DcCL, ch 2, dcCL, ch 2, dcCL) in the ch-2 corner space.*
Repeat from * to * 3 more times, omitting the last corner on the last repeat. Join to the top of the beginning dcCL with a sl st.
Stitch count: 52 dcCL, 20 hdc’s, 8 sc’s, and 32 ch-2 spaces {13 dcCL, 5 hdc’s, 2 sc’s, and 8 ch-2 spaces per side}
Round 13
This round needs a strong cup of coffee and a super quiet corner. I found myself having to re-read each stitch for every repeat. This round is not complicated, but it is concentration-intensive. And so, for that matter, is Round 14. I am not sure that writing it all out below will make it any easier, but I took pity on you and did it anyway. Have fun!
- If you are going to use the same colour, sl st your way to the central dcCL of the next corner. Ch 2, dc into the ch-2 corner space. This counts as your first dcCL (dc cluster).
- If you are using a new colour, join your yarn by making a sl st in the central dcCL of any corner. Ch 2, dc into the ch-2 corner space. This counts as your first dcCL (dc cluster) – see Photo 1.
*Ch 2. Make a multiCL in the next ch-2 space. To do that, yarn over and insert your hook into the indicated space. Yarn over and pull up a loop (3 loops on hook). Yarn over and pull through 2 loops (2 loops on hook). Yarn over and insert your hook into the SAME space. Yarn over and pull up a loop (4 loops on hook). Yarn over and pull through 2 loops (3 loops on hook) – see Photo 2. Up to this point the instructions are exactly the same as for the dcCL, but now comes the twist! Yarn over and insert your hook into the SAME space. Yarn over and pull up a loop (5 loops on hook) – see Photo 3. Yarn over and pull through all 5 loops (Photo 4).
Ch 2 and sc between the next 2 dcCL’s. Ch 1 and sc in the next ch-2 space (Photo 5). Skip the next 2 st’s. (DcCL, ch 1, dcCL, ch 1, dcCL) in the next sc (Photo 6).
Skip the next 2 st’s. Sc in the next ch-2 space. Ch 1 and sc in the next st. Ch 1 and sc in the next ch-2 space (Photo 7). Ch 1, skip the next st and make a miltiCL in the next hdc (Photo 8).
Ch 1, sc in the next ch-2 space. Ch 1 and sc in the next st. Ch 1 and sc in the next ch-2 space (Photo 9). Skip the next 2 st’s. (DcCL, ch 1, dcCL, ch 1, dcCL) in the sc (Photo 10).
Skip 2 st’s. Sc in the next ch-2 space. Ch 1 and sc between the next 2 dcCL’s (Photo 11). Ch 2. Make a multiCL in the next ch-2 space (Photo 12). Ch 2 and make a dcCL in the central corner dcCL.*
Repeat from * to * 3 times, omitting the last dcCL on the last repeat. Join to the top of the beginning dcCL with a sl st.
Stitch count: 12 multiCL’s, 28 dcCL’s, 40 sc’s, 16 ch-2 spaces, and 48 ch-1 spaces {3 multiCL’s, 7 dcCL’s, 10 sc’s, 4 ch-2 spaces, and 12 ch-1 spaces per side}
Round 14
This round is another concentration-intensive round, but just read each instructions as you make it and you will be fine…so…
As written.
Stitch count: 32 dcCL’s, 8 V-stitches, 24 hdc’s, 48 sc’s, 16 ch-1 spaces (not including the ch-1’s in the V-stitches), and 4 ch-2 corner spaces {8 dcCL’s, 2 V-stitches, 6 hdc’s, 12 sc’s, and 4 ch-1 spaces per side}
Round 15
As written.
Stitch count: 68 sc’s, 24 hdc’s, and 48 dc’s {17 sc’s, 6 hdc’s, and 12 dc’s per side}
Round 16
As written.
Stitch count: 152 dc’s and 4 ch-2 corner spaces {38 dc’s per side}
Optional Additional Round
Although this square is already the right size, it needs a few more stitches to get it to the same final stitch count as the other squares. I have used bpsc’s to increase the stitch count without enlarging the square by much. You can find the instructions for the optional additional round here.
Join the Block a Week CAL
If you would like to be part of the Block a week CAL on Facebook, please join the Official CCC Social Group (you must be logged into Facebook to do so) so that you can access and utilize the support and encouragement of all the lovely ladies on there.
You can also join the Block a Week CAL Flickr Group so that you can inspire others and be inspired yourself.
For those of you who do not like Facebook, you can always follow along with me here. I will be posting the blocks every week.
Remember to subscribe to my Weekly Newsletter if you would like to be kept in the loop. You can also like my Facebook page or follow me on Bloglovin, Google+, Pinterest, Twitter, or Instagram.
More Blogs Following the CAL
- San from Loopsan – using Stylecraft in sophisticated Parchment, Denim, Mocha and Meadow
- Lou Mander from Tea, Crochet and Me – using Stylecraft in White, Mocha and Raspberry
- Wendy from Little Wendy Crochet (Dutch photo tutorials)
Happy Hooking!




Lee Ann Steinmetz says
Dear Dedri,
You know that old saying, “I can’t walk and chew gum at the same time?” That’s me trying to make this square! I’ve made almost 30 squares so far, and this is the one I feel like snuggling under. I feel so much love coming from it! Thank you so much for all of your help!
Love,
Lee Ann
Dedri Uys says
Lol. I have heard that saying before :) It’s a very pretty square. The designer did well with this one x
Roy says
Great Patterns Thx
Cheryl L says
I love, love, love this pattern/tutorial and several others! As my crocheting skills increase, I’m always looking for beautiful ways to create. Thank you!!! My mind is racing with projects!!
san says
Stunning! :) Can’t wait to see how the finish blanket will turn out! x