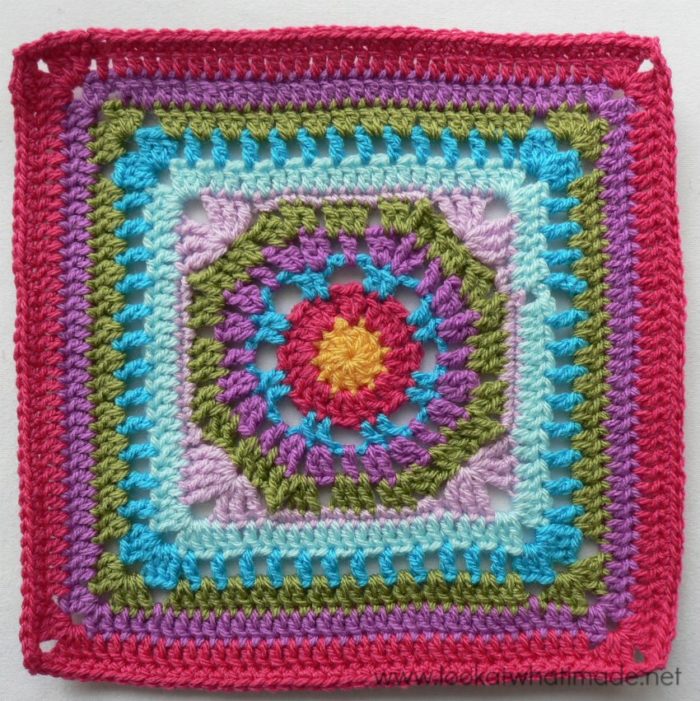
Block 19 of the Block a Week CAL (hosted by Kimberly Slifer) is Donna Mason-Svara’s pretty Lemony Lime Citrus Square. My square does not look very Lemony Lime Citrus, I’ll be the first to admit. The original was done with Hobby Lobby “I Love This Yarn” in Buttercup, Pistache, and White. And it does look quite citrusy. My version is more like an exotic fruit salad.
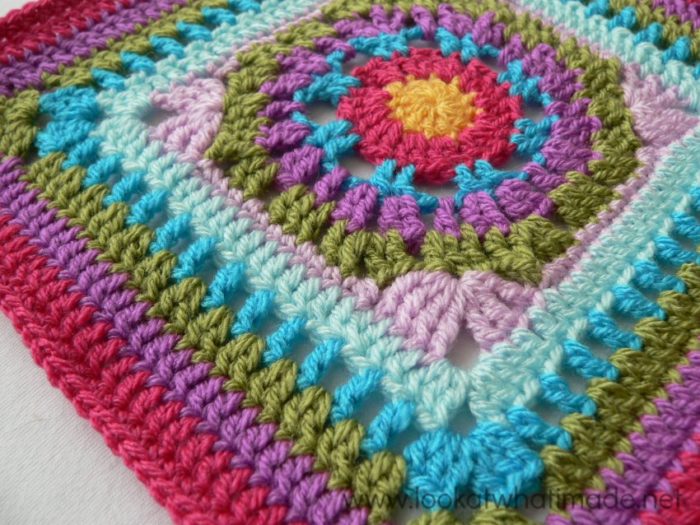
If you are unfamiliar with Donna’s designs, do yourself a MASSIVE favour and have a look at either her Ravelry Store or her blog, SmoothFox Crochet. She has some amazing blankets and squares!
Lemony Lime Citrus Crochet Square
{Pattern © 2010 Donna Mason-Svara. Photo tutorial done with kind permission}
Pattern
You can find the pattern here on Ravelry.
Suggested Materials
- 5 mm Clover Amour Crochet Hook (US H/8 UK 6)
- Worsted weight yarn
Size
- Using the hook and yarn specified, your square should be a nice even 12″ when you are done.
- Using a 4 mm crochet hook (US G/6 UK 8) and double knit yarn, as I have done, your finished square will be about 8″ big.
My Yarn and Colour Choices
I am using Stylecraft Special DK.
- Saffron (Round 1)
- Pomegranate (Rounds 2, 11, and Optional Round 12)
- Turquoise (Rounds 3 and 8)
- Magenta (Rounds 4 and 10)
- Meadow (Rounds 5 and 9)
- Clematis (Round 6)
- Sherbet (Round 7)
Notes
- The initial ch st’s in each round are counted as a stitch, except for the initial ch st in Round 6, which doesn’t count as a stitch.
- US Crochet Terminology used. (See this comparative chart if you need help transcribing from US to UK)
- Please Note: The yarn used in most of the tutorial photos is Drops Paris Cotton.
Lemony Lime Citrus Photo Tutorial
This photo-walkthrough is NOT the actual pattern and should not be used instead of the pattern, but rather in conjunction with it.
Thank you very much to Donna Mason-Svara for giving us permission to do this photo-tutorial for her Lemony Lime Citrus Square. And a special thank you to Kimberly Slifer for letting me do these tutorials and for obtaining the necessary permission.
Round 1
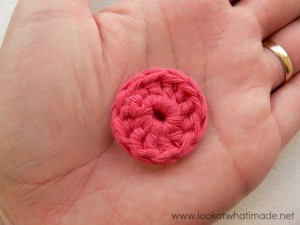 You can start this round with a magic ring instead of the initial ch-4.
Magic Ring Instructions for Round 1
Into a magic ring: ch 3 (this counts as your first dc). Dc x 11 into the ring and pull the ring tight. Join to the top of the initial ch-3 with a sl st. If you are not familiar with working into a magic ring, this video tutorial from The Crochet Crowd is very good. Please remember, when working into a magic ring you HAVE to work away your initial tail very well. If you just cut it, your whole square might unravel!
Stitch count: 12 dc’s
Round 2
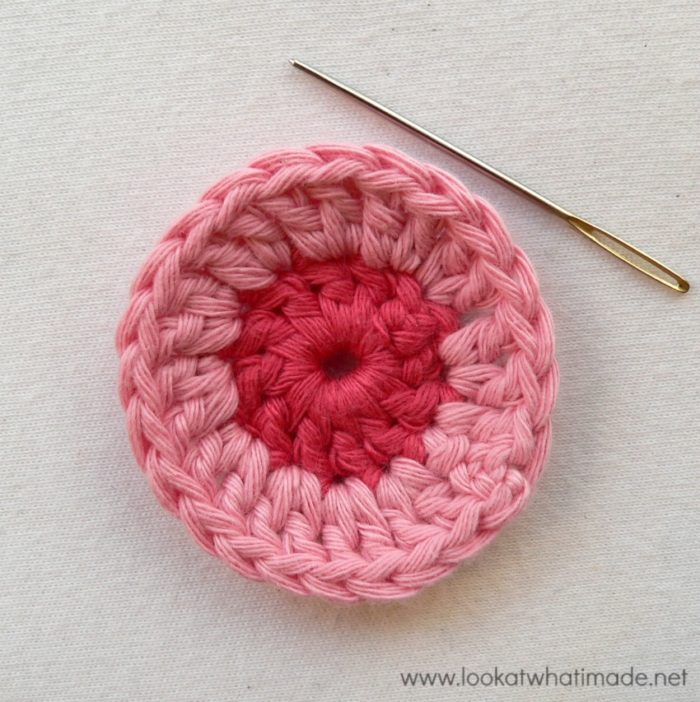
Round 2 is an easy one: 2 dc’s in each stitch around. Remember that the initial ch-3 counts as a dc.
Stitch count: 24 dc’s
Round 3
You can start with a ch-3 for your first dc (as in the pattern), or you can start with a standing double crochet (as I have done). Either way, when you have made that first st/ch-3, dc in the next st and ch 3 (Photo 1). *Skip the next st, dc in the next 2 st’s and ch 3 (Photo 2).* Repeat around and join as instructed in the pattern. Don’t forget that skipped stitch (indicated with an arrow in Photo 2).
At the end of this round your work will pull up slightly (Photo 4). This will be corrected in the next round.
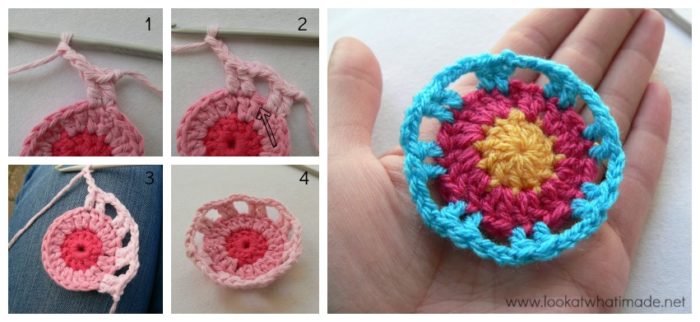
Stitch count: 16 dc’s and 8 ch-3 spaces
Round 4
Ch 3 (counts as your first dc) and dc in the same stitch. (Remember you can start with a standing double crochet instead.) The pattern tells you to mark this second dc. Feel free to do so, but it isn’t necessary if you are following this tutorial. Ch 2 (Photo 1) and make 2 dc’s in the next stitch (Photo 2). Ch 1 (Photo 3), dc in the ch-3 space, and ch 1 again (Photo 4).
*Make 2 dc’s in the next st, ch 2, and make 2 dc’s in the next st (Photo 5). Ch 1, dc in the ch-3 space, ch 1.* Repeat around as instructed in the pattern and join to the top of the beginning ch-3 (or standing double crochet) with a sl st.
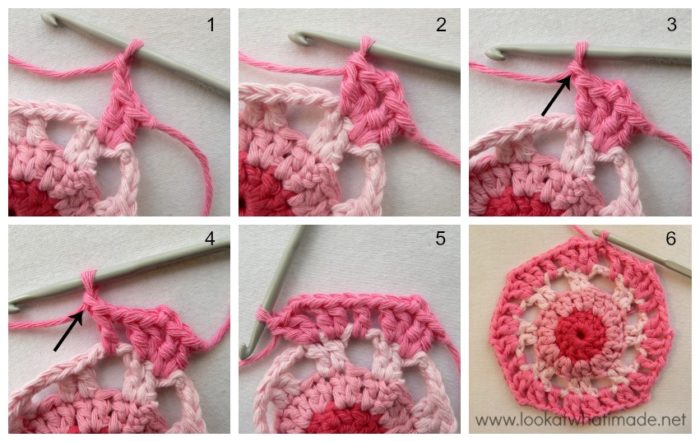 Round 4 of the Lemony Lime Citrus Square in all it’s Stylecrafty Glory!
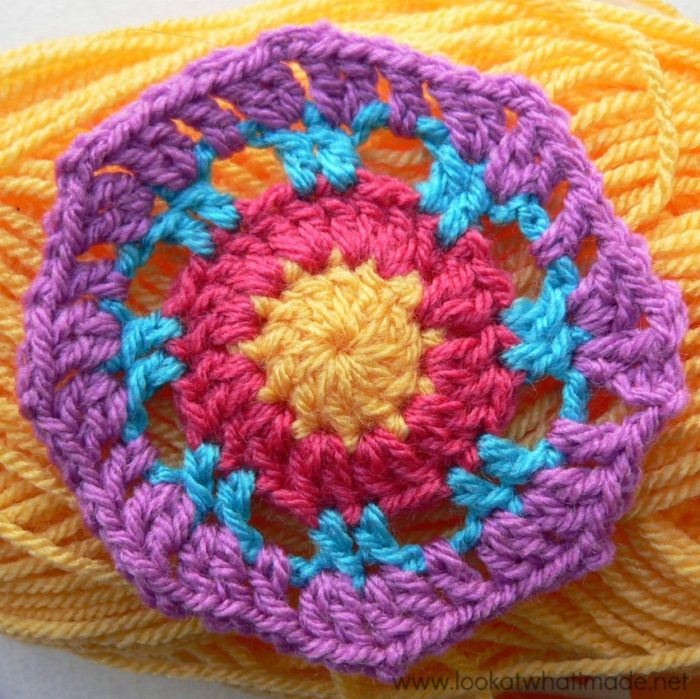
Stitch count: 40 dc‘s, 8 ch-2 spaces, and 16 ch-1 spaces
Round 5
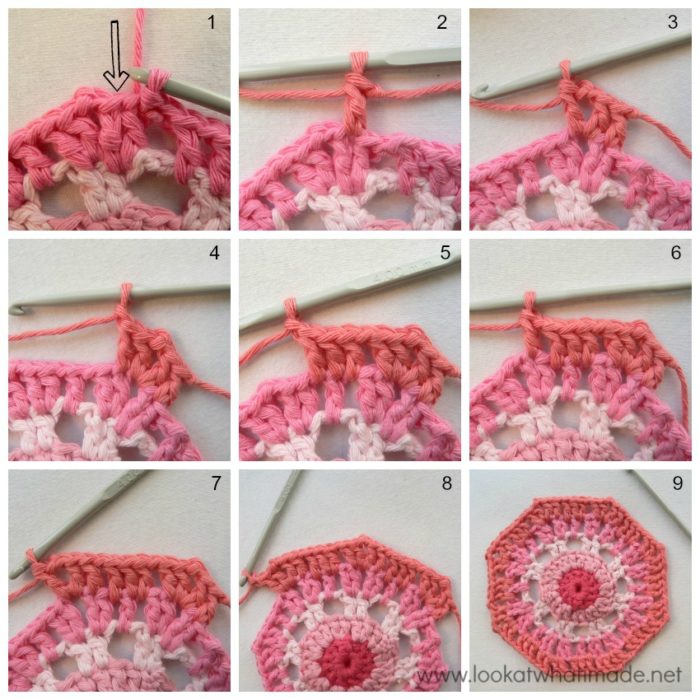
- If you are going to keep using the same colour, sl st into the next st (indicated with an arrow in Photo 1).
- If you are going to use a different colour for this round, join your yarn by making a sl st in the st after the sl st join (indicated with an arrow in Photo 1).
You want to start this round in the dc right before the ch-2 corner space in the previous round.
Ch 3 (this counts as your first dc). See Photo 2. (Dc, ch 2, dc) into the ch-2 corner space (Photo 3). Dc in the next st (Photo 4). If you need help identifying which loops belong to which stitch, see this tutorial. Ch 1 and skip the next st. Dc into the ch-1 space. Dc into the next dc. Dc into the ch-1 space. Ch 1 (Photo 5) and skip the next stitch. You want to end up with 3 dc’s (this will form your side), separated from the corners by a ch st on either side.
*Dc in the next st (Photo 6). Note that this dc should fall in the dc before the corner ch-2 space. (dc, ch 2, dc) into the corner ch-2 space (Photo 7). Dc in the next st. Ch 1 and skip the next st. Dc in the ch-1 space. Dc in the next dc. Dc in the next ch-1 space. Ch 1 and skip the next st.* Repeat around and join as instructed in the pattern.
In Photos 7 and 8 you can see the 3 central dc’s and the ch st’s on either end.
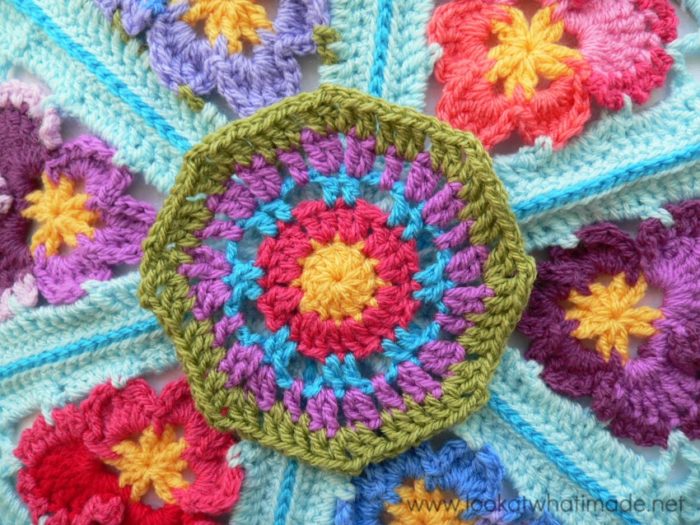
 This is Round 5 having a little nap on the Pansy Pizza. I told him he wasn’t allowed to, but since last week’s square got to have a nap on it, it caused a terrible tantrum, so I gave in.
Who knew crochet squares could be such diva’s!
Stitch count: 56 dc’s, 8 ch-2 spaces, and 16 ch-1 spaces
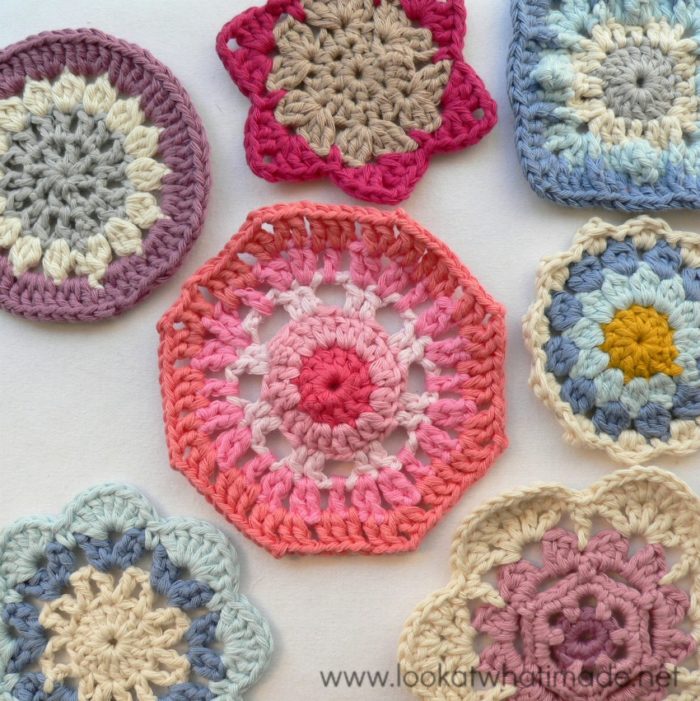
Ps. I thought you might like to see some of the centers I have collected so far. Whatever will I be doing with them?
Round 6
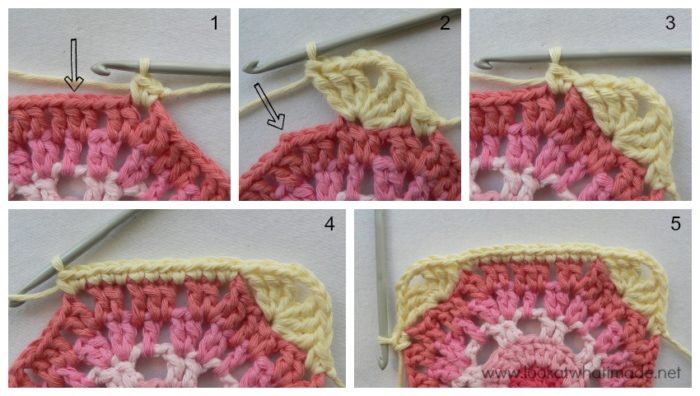
Squaring up now. Start in any corner ch-2 space around. I suggest starting with a standing single crochet. Make another sc in the same ch-2 space (Photo 1). *(3 tr, ch 3, 3 tr) in the central dc of the 3-dc group (indicated with an arrow in Photo 1 and illustrated in Photo 2). Make 2 sc’s in the next ch-2 space (indicated with an arrow in Photo 2 and illustrated in Photo 3). Working into each st and ch-1 space across, make 9 sc’s. (If you need a stitch by stitch explanation, you will find it in the pattern). Make 2 sc’s in the next ch-2 corner (Photo 4).*
Repeat around and join as instructed in the pattern.
Round 6 in DROPS Paris Cotton and Stylecraft Special DK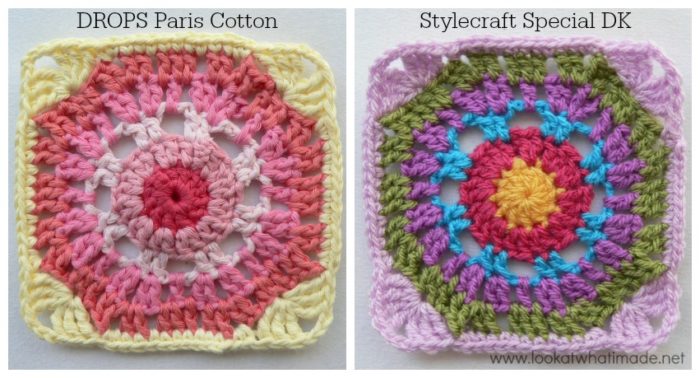
Stitch counts:
- Per Side: 19 st’s per side {6 tr’s and 13 sc’s}
- Total: 76 st’s and 4 ch-3 spaces {24 tr’s, 52 sc’s, and 4 ch-3 spaces}
Round 7
Ch 3 (counts as your first dc) and dc in the next 4 st’s (Photo 1). *(3 dc, ch 3, 3 dc) into the corner ch-3 space (Photo 2). Dc in the next 19 st’s.* Repeat around and join as instructed in the pattern. On the last repeat you will only make 14 dc’s, as you have already made the first 5 dc’s at the beginning of this round.
Be careful not to miss the first stitch after the corner.
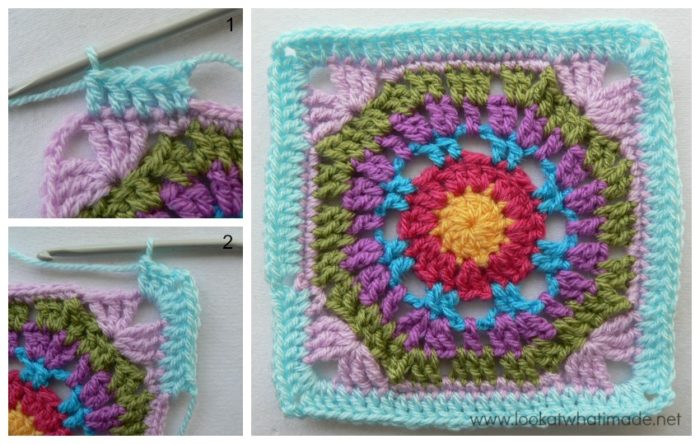
Stitch counts: 100 dc’s and 4 ch-3 spaces {25 dc’s per side}
Round 8
This round is straightforward. I have included some close-up photos, but I don’t think you need help with this one. One thing to look out for is that first hidden stitch. When skipping the first stitch after the corner, be mindful of the fact that the first stitch is slightly hidden (Photo 3). Don’t accidentally skip 2 stitches. You will be very annoyed when you get to the end of the round and your stitches don’t tally.
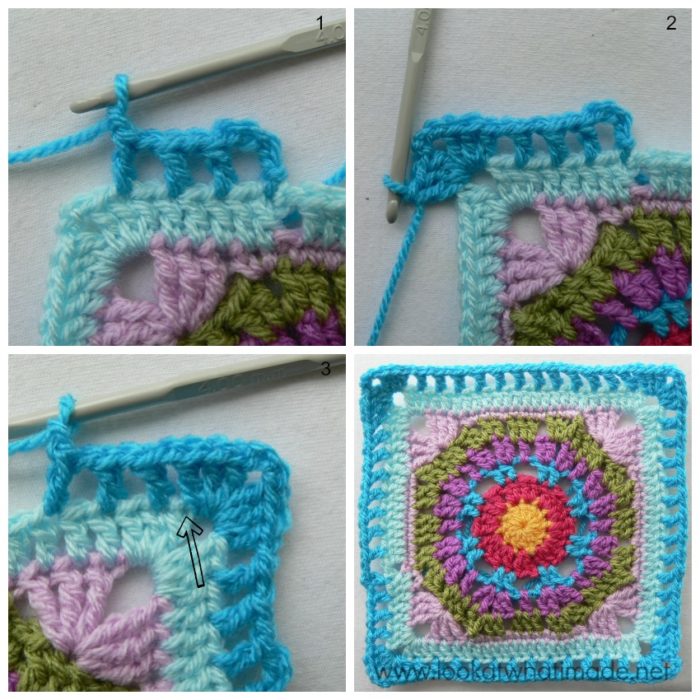
Stitch counts: 72 dc’s, 52 ch-1 spaces, and 4 ch-3 spaces {18 dc’s and 13 ch-1 spaces per side}
Round 9
In Round 9 there is only one thing to look out for. Yours truly forgot to make the ch st’s before and after each corner (indicated with an arrow below). Don’t make the same mistake.
Apart from that, Round 9 is easy :) You are basically making 2 dc’s in each ch-1 space around, and a (3 dc, ch 3, 3 dc) corner in every corner ch-3 space.
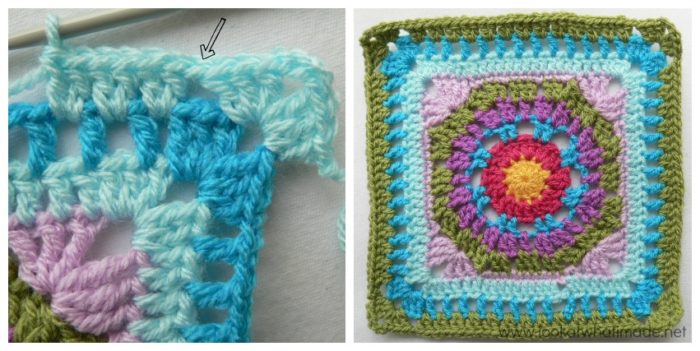
Stitch count: 128 dc’s, 4 ch-3 spaces, and 8 ch-1 spaces {32 dc’s and 2 ch-1 spaces per side}
Round 10
Round 10 is a standard dc round.
There are only 2 things to look out for:
- The first st after each corner AND the last stitch before each corner should be skipped (indicated with an arrow below)
- The corners are (2 dc, ch 3, 2 dc)
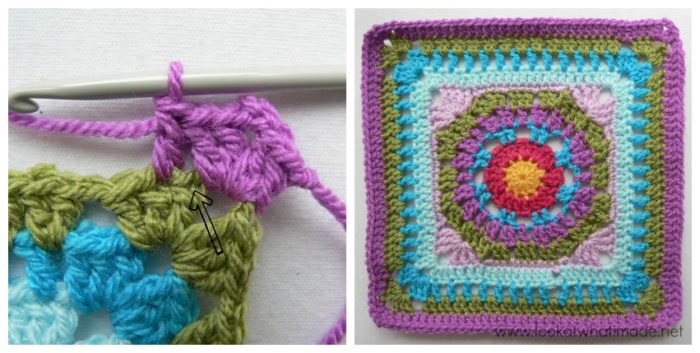
Stitch count: 144 dc’s and 4 ch-3 spaces. {36 dc’s per side}
Round 11
My bad. I forgot to take a photo of Round 11 before adding the extra sc round. Round 11 is a repeat of Round 10, but with the corners again being (3 dc, ch 3, 3 dc).
Stitch count: 160 dc’s and 4 ch-3 spaces. {40 dc’s per side}
I have added an Optional Additional Round 12 to get my square to the same size as the other squares. You can find the instructions for that HERE.
Remember to subscribe to my Weekly Newsletter if you would like to be kept in the loop. You can also like my Facebook page or follow me on Bloglovin, Google+, Pinterest, Twitter, or Instagram.
Happy Hooking!



Janet zimmerman says
I do not unde stand crochet block 19 of the Afghan the long cross stitch is confusing
Jenny says
Janet, may we suggest that you also look up the original designer’s pattern for this square? You might find it more helpful, as Dedri’s write up is not intended to be a full replacement of the original pattern.
Ravelry link here
Hope that helps more.
BW Dedri and Jenny
Gigi says
I know I’m a little late to the CAL but I am loving it. I have a question on Round 11 of Square 19. Round 10 had 36 dc per side and round 11 you are adding 3 dc in each corner so wouldn’t that make round 11 have 42 dc per side instead of 40? Thanks in advance for the help!
Dedri Uys says
Hi Gigi. You are skipping the first and last stitch of each round, so you are adding 6 and taking away 2, which leaves you with 4 more stitches than the previous round. Does that make sense?
Doris says
Hello Dedri!
I love your patterns, the description and your photos. I think there is a very small mistake.
Round 10: Stitch count: 144 dc’s and 4 ch-3 spaces. {36 sc’s per side}
I think 36 dc per side (Doublecrochet not single crochet).
A question: in your photos you are using the Drops Paris yarn. Have you also finished this blanket? If yes do you have any photos? :-).
Kind regards
Doris
Dedri Uys says
Hi Doris. Thank you for pointing that out. I have now amended it :)
I didn’t do the whole blanket in Drops Paris. I only did parts of it for the photo tutorials. I am saving all the partial bits for another project, but I need quite a few more.
Friedel McLachlan says
Hi Dedri — dink dit is hoogtyd dat jy daar centres van jou klaar “hak” (my familie se term vir hekkel) in blokke — ek is baie nuurskierig om te sien hoe hulle gaan lyk. Gedink teen die tyd het jy al 10 komberse / kussings klaar met die patrone. Baie dankie vir jou wonderlike tuts. Het blok 20 sommer so van my laptop af ge-hak. Groete
Friedel
:-)
Dedri Uys says
Friedel, ek squirrel hulle almal weg vir ‘n latere projek. Ek het nogal nie so baie blokkies soos wat jy sou dink nie! Ek is bly jy geniet die tuts en dis def. beter om sommer van die rekenaar af te hak. Ek sal nooit al daai tuts uitprint nie. Ink is net te duur!
fariba says
Hi dear , I really enjoyed your pattern , these are great . Thank you so much . I hope you have a happy weekend.