This King Protea Mandala is another Dribs and Drabs design. The centre was borrowed from my Front Post Frenzy Potholder (although it would be more accurate to say that I designed the Front Post Frenzy with this particular pattern in mind). The rest of the pattern was nabbed from Sophie’s Mandala (Medium).
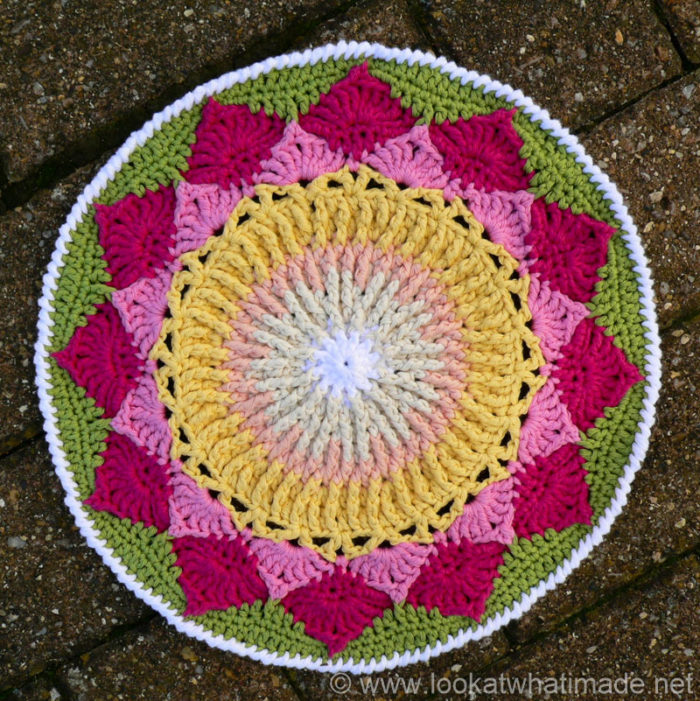
In case you were wondering, you can use this pattern and continue on with the rest of Sophie’s Garden, in which case you would end up with a King’s Garden or a Protea Field or whatever. The point is, you can insert the first 8 rounds of this pattern into Sophie’s Garden, should you wish to do so.
Update: Sophie’s Garden has now been grown into Sophie’s Universe, so you could use this centre as an alternative centre for that. Please note that you will have to make the Front Post Frenzy centre (first 8 rounds) with a smaller hook than the rest of the Universe to assure that your blanket doesn’t bulge.
The King Protea is my favourite of all the proteas, which is just perfect, seeing as it is also the South African National Flower! This design is my nod to both the flower and my heritage. The King Protea has the largest head in the genus and is also known as the Giant Protea, Honeypot, or King Sugar Bush. Now isn’t that a beautiful name? Maybe I should call this pattern the King Sugar Bush instead…
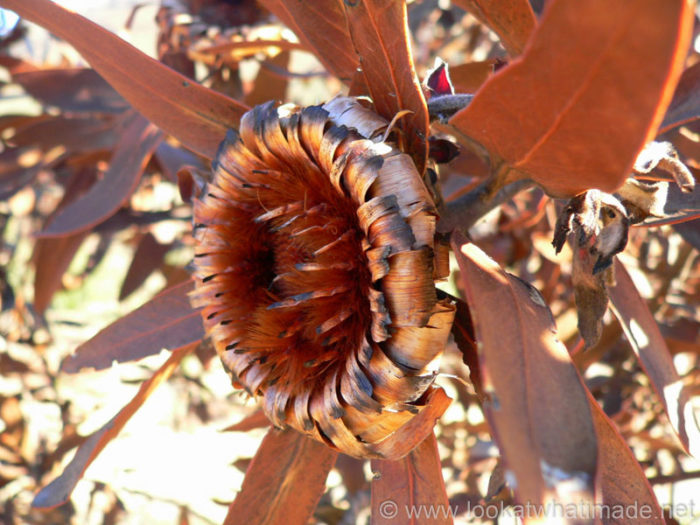
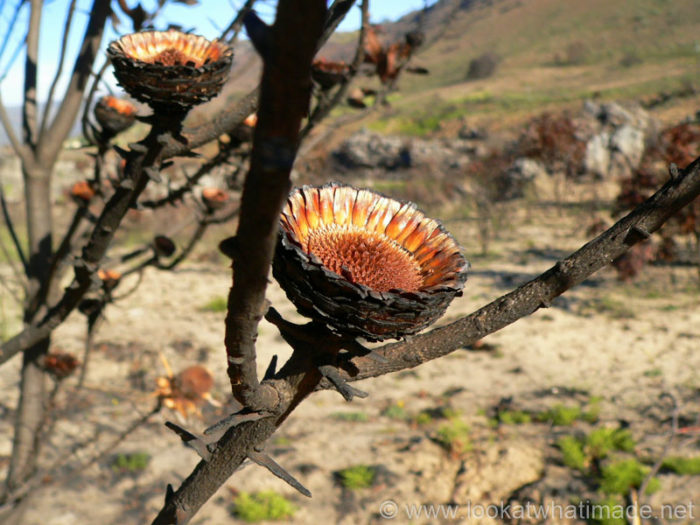
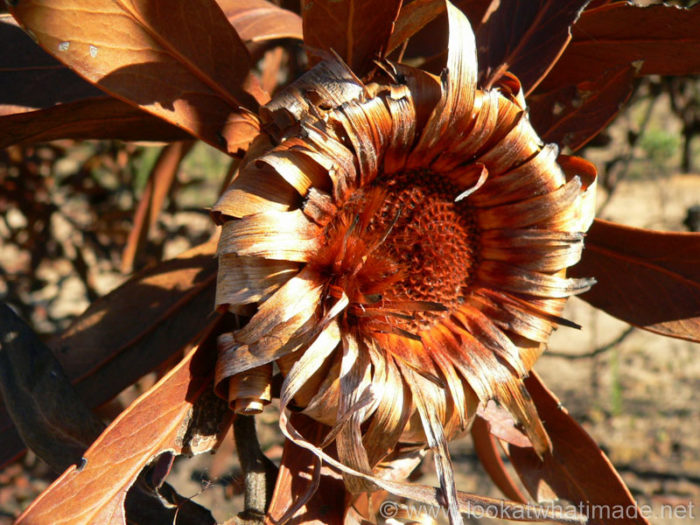
When we were in South Africa in April, we drove past these stunning burnt King Proteas.
My parents-in-law say that it was a very hectic bushfire that caused it, and by hectic I mean right up to some people’s doorsteps! I have not applied a filter to these photos. This beautiful bronze is all that was left of the once-colourful Proteas.
King Protea Mandala Pattern
©Dedri Uys 2014. All Rights Reserved (See Terms of Use)
Below you will find the written-only pattern (with a picture or two, because I couldn’t resist), as well as links to the two separate photo tutorials that cover each round step-by-step.
Difficulty
Intermediate
Gauge
Using worsted weight yarn and dc stitches:
8 rows and 18 st’s per 4” (10 cm) square.
Size
11.5” (29 cm) in diameter.
Materials
- 4 mm crochet hook (US G/6 UK 8)
- Worsted weight yarn or double knit yarn (light worsted weight) – approx. 130 m/140 yards
- Yarn Needle
Colours
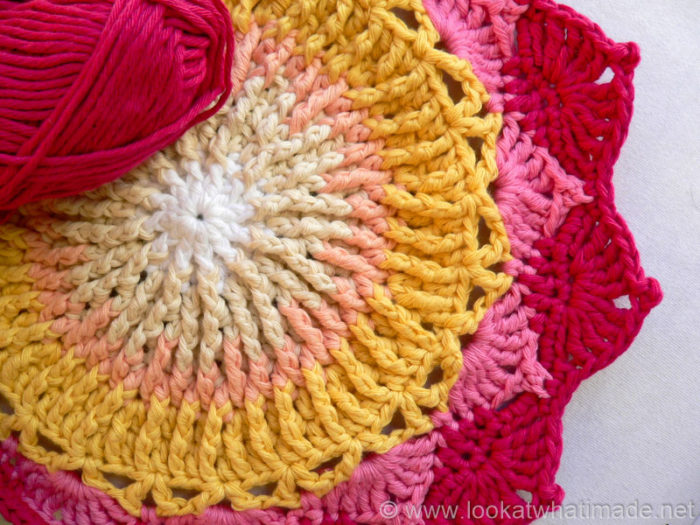
I used DROPS Paris Cotton in the following shades:
- White (Rounds 1 and 2)
- Off-white (Rounds 3 – 5)
- Peach (Round 6)
- Vanilla (Rounds 7 – 9)
- Medium Pink (Round 10)
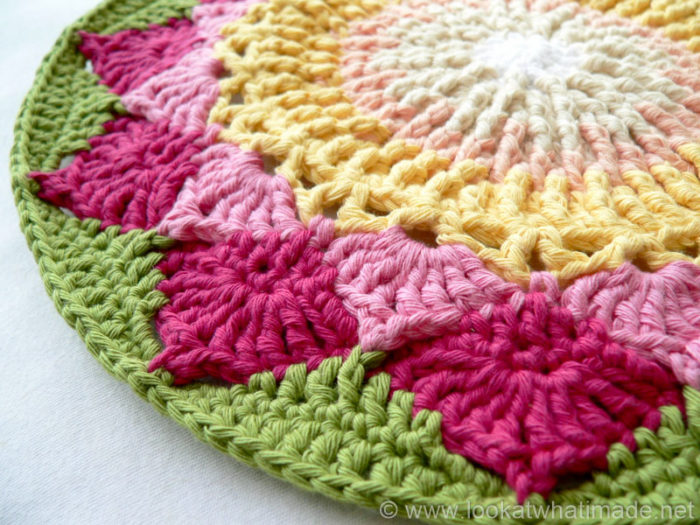
- Heather (Rounds 11 – 13)
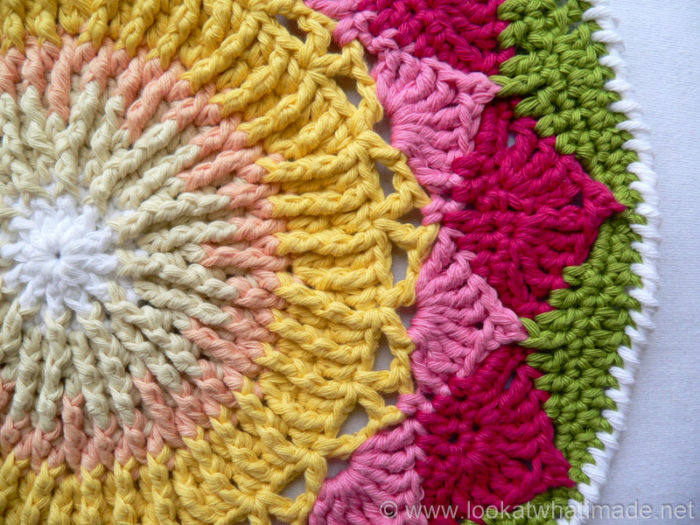
- Pistacho (Rounds 14 – 16)
- White (Round 17)
Abbreviations
US Terminology used (US/UK comparison chart here)
- Dc – Double crochet
- Fpdc – Front post double crochet
- Fpdtr – Front post double treble
- Fptr – Front post treble crochet
- Hdc – Half-double crochet
- Sc – Single crochet
- Tr – Treble crochet
- * – Repeat instructions between asterisks the amount of times specified. This is a hardcore repeat and will consist of multiple instructions.
- () – Repeat instructions between parentheses the amount of times specified. This is a lower level repeat.
Special Stitches
- Crab stitch – This stitch is also known as the reverse single crochet. See this tutorial.
- Picot: Ch 3, sl st in the third chain from the hook
- Standing Stitches – Standing sc’s, hdc’s, and dc’s are stitches used to start the round without the need for the traditional beginning chain. Links to tutorials are supplied in each relevant round.
- V-stitch: (Dc, ch 2, dc) in the same stitch
Notes
- The initial ch st’s in each round are counted as a stitch, except for the rounds that start with a single crochet.
- In this pattern, most of the increases will be made by working into the top of a specific stitch AND around the posts of that same stitch (where indicated).
Resources
- Add this pattern to your Ravelry Queue
- Photo tutorial for Rounds 1 – 8
- Photo tutorial for Rounds 9 – 17
Instructions
Round 1
Into a magic ring: ch 3 (this counts as your first dc). Make 11 dc’s into the ring. Join to the top of the beginning ch-3 with a sl st.
If you are not familiar with working into a magic ring, this video tutorial by Tamara from Moogly is very good. Please remember, when working into a magic ring you HAVE to work away your initial tail very well. If you just cut it, your whole project might unravel!
Stitch count: 12 dc’s
Round 2
- If you are using the same colour, ch 3 (this counts as your first dc) and make a fpdc around the beginning ch-3 of the previous round.
- If you are using a new colour, join your yarn by making a standing double crochet in the same st as the sl st join and then make a fpdc around the beginning ch-3 of the previous round.
(Dc in the blo of the next dc, make a fpdc around the post of the same stitch) in every stitch around. Join to the top of the beginning ch-3 (or the standing double crochet) with a sl st.
Stitch count: 24 st’s {12 dc’s and 12 fpdc’s}
Round 3
- If you are using the same colour, ch 3 (this counts as your first dc).
- If you are using a new colour, join your yarn by making a standing double crochet in the same st as the sl st join.
*Dc in the next st (which will be the fpdc from the previous round) and make a fptr around the post of the same stitch. Dc in the next st.* Repeat from * to * 11 times. Omit the last dc on the last repeat. Join to the top of the beginning ch-3 (or the standing double crochet) with a sl st.
Stitch count: 36 st’s {24 dc’s and 12 fptr’s}
Round 4
- If you are using the same colour, ch 3 (this counts as your first dc) and then make a fptr around the beginning ch-3 of the previous round (or the post of the standing double crochet).
- If you are using a new colour, join your yarn by making a standing double crochet in the same st as the sl st join and then make a fptr around the beginning ch-3 of the previous round (or the post of the same standing double crochet).
Dc in the next dc, fptr around the post of the next fptr. *Dc in the next dc, fptr around the post of the same stitch, dc in the next dc, fptr around the post of the next fptr.* Repeat from * to * 10 times. Join to the top of the beginning ch-3 (or the standing double crochet) with a sl st.
Stitch count: 48 st’s {24 dc’s and 24 fptr’s}
Round 5
- If you are using the same colour, ch 3 (this counts as your first dc).
- If you are using a new colour, join your yarn by making a standing double crochet in the same st as the sl st join.
*Dc in the next st (which will be the fptr from the previous round) and make a fptr around the post of the same stitch. Dc in the next dc, fptr around the post of the next fptr, dc in the next dc.* Repeat from * to * 11 times. Omit the last dc on the last repeat. Join to the top of the beginning ch-3 (or the standing double crochet) with a sl st.
Count your stitches at the end of this round! You are going to be mightily annoyed if you realize later that you’ve goofed up (like I did).
Stitch count: 60 st’s {36 dc’s and 24 fptr’s}
Round 6
In this round, you will be working into the stitches of Round 4 only where indicated. The rest of the stitches are all made into Round 5.
- If you are using the same colour, ch 3 (this counts as your first dc) and then make a fpdtr around the post of the dc in Round 4 directly below the stitch you just worked into.
- If you are using a new colour, join your yarn by making a standing double crochet in the same st as the sl st join and then make a fpdtr around the post of the dc in Round 4 directly below the stitch you just worked into.
(Dc in the next dc, fptr around the post of the next fptr) twice. *Dc in the next dc, fpdtr around the post of the dc in Round 4 directly below the stitch you just worked into. (Dc in the next dc, fptr around the post of the next fptr) twice.* Repeat from * to * 10 times. Join to the top of the beginning ch-3 (or the standing double crochet) with a sl st.
Stitch count: 72 st’s {36 dc’s, 24 fptr’s, and 12 fpdtr’s}
Round 7
- If you are using the same colour, sl st into the next st (which will be the fpdtr). ch 3 (this counts as your first dc) and then make another dc in the same stitch.
- If you are using a new colour, join your yarn by making a standing double crochet in the stitch after the sl st join (which will be the fpdtr). Then make another dc in the same stitch.
*(Fptr around the post of the next dc, dc in the next fptr) twice. Fptr around the post of the next dc. Make 2 dc’s in the next fpdtr.* Repeat from * to * 11 times. Omit the last 2 dc’s on the last repeat. Join to the top of the beginning ch-3 (or the standing double crochet) with a sl st.
Stitch count: 84 st’s {48 dc’s and 36 fptr’s}
Round 8
- If you are using the same colour, ch 3 (this counts as your first dc) and then make a fptr around the beginning ch-3 of the previous round (or the post of the standing double crochet).
- If you are using a new colour, join your yarn by making a standing double crochet in the same st as the sl st join and then make a fptr around the beginning ch-3 of the previous round (or the post of the same standing double crochet).
(Dc in the next dc, fptr around the post of the next fptr) three times. *Dc in the next dc and make a fptr around the post of the same st. (Dc in the next dc, fptr around the post of the next fptr) three times.* Repeat from * to * 10 times. Join to the top of the beginning ch-3 (or the standing double crochet) with a sl st.
Stitch count: 96 st’s {48 dc’s and 48 fptr’s}
Round 9
- If you are going to use the same colour: Ch 5 (counts as the first dc and ch-2) and then dc in the same st. This is your first V-stitch made. Ch 1.
- If you are going to use a different colour, start with a standing double crochet in the same stitch as the sl st join, then ch 2 and dc in the same st. This is your first V-stitch made. Ch 1.
*Skip 3 st’s, make a V-stitch in the next st, ch 1.* Repeat from * to * 22 times. Join to the third ch of the beginning ch 5 (or to the top of the standing double crochet) with a sl st.
Stitch count: 24 V-stitches and 24 ch-1 spaces between V-stitches {48 dc’s, 24 ch-1 spaces, and 24 ch-2 spaces}
Round 10
Note: In this round, you will only be working into the ch-2 spaces, in other words, the space between the 2 “legs” of each V-stitch.
- If you are going to use the same colour, sl st in the next ch-2 space, ch 1 and sc in the same space.
- If you are going to use a different colour, start with a standing single crochet in the next ch-2 space.
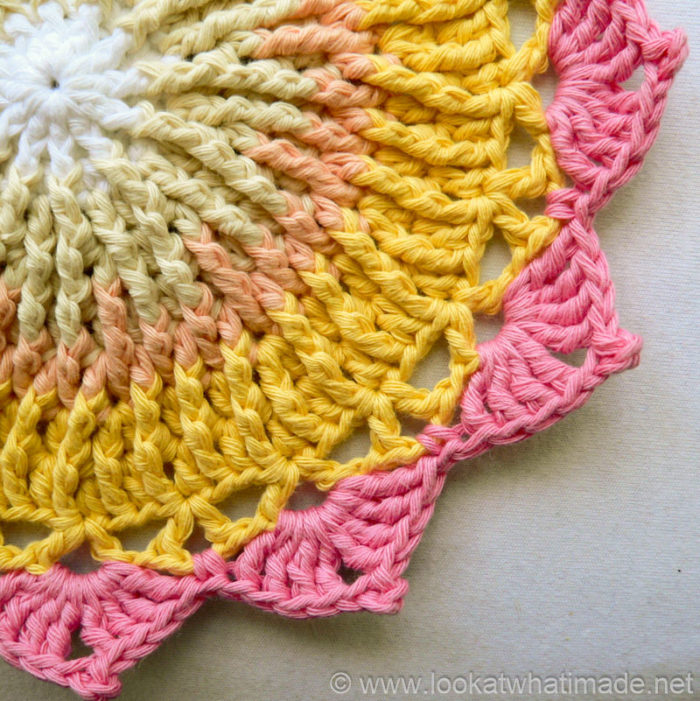
*Make 4 tr’s into the next ch-2 space. Ch 3 and sl st in the third ch from the hook. You should now have a little picot at the top of the fourth tr. Make 4 more tr’s into the same ch-2 space. Sc in the next ch-2 space.* Repeat from * to * 11 times. Omit the last sc on the last repeat. Join to the first sc with a sl st. Fasten off and change colours.
Stitch counts:
- Total: 12 petals and 12 sc’s {96 tr’s and 12 sc’s}
- Per Petal: 8 tr’s, 1 picot {1 sc between petals}
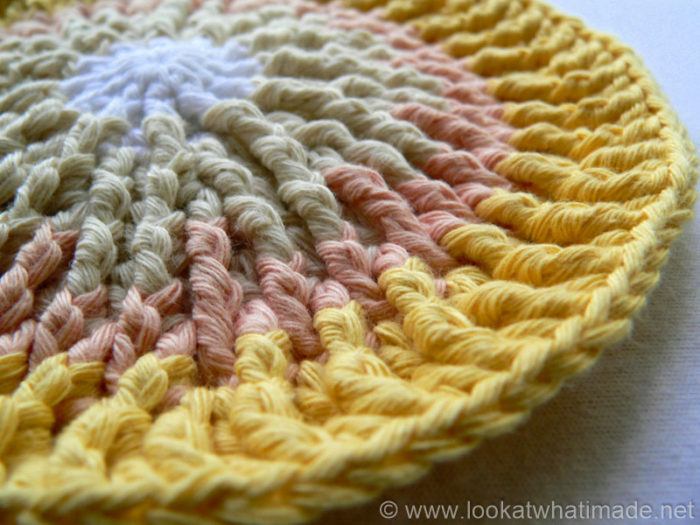
One thing I absolutely love about the front post stitches is that they make the prettiest ridged pattern on the back of the work.
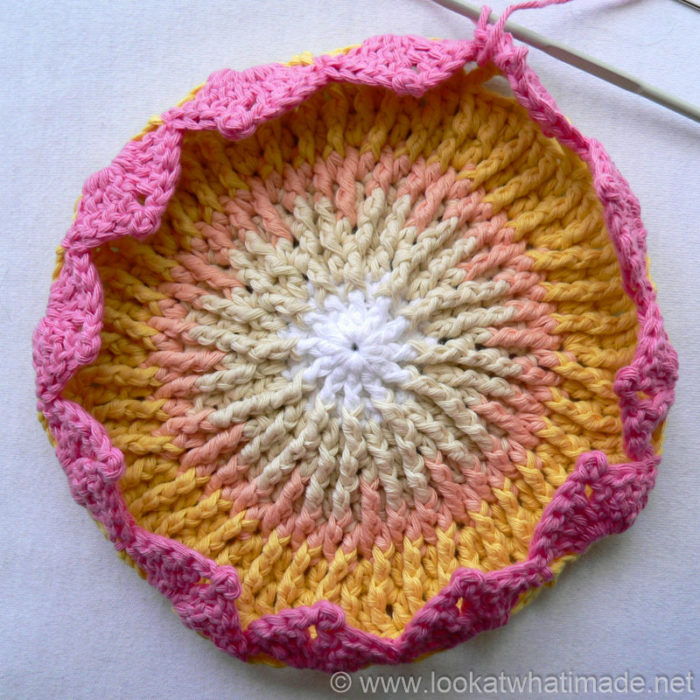
I love how the petals curl in at the end of this round. It’s almost as if she is shy and trying to cover herself.
Round 11
Optional: if you would like to give the petals more definition, feel free to work into the BLO in this round.
Join your new yarn by making a standing half-double crochet in the first tr of any petal around. If you have trouble identifying which loops belong to which stitch, see this tutorial. It touches on the anatomy of stitches when working in the round.
After making your first hdc, sc in the next tr of the petal. Ch 6. Sc in the seventh tr of the petal and hdc in the last tr. Dc in the sc between petals. *Hdc in the first tr of the next petal and sc in the next tr. Ch 6. Sc in the seventh tr of the petal and hdc in the last tr. Dc in the sc between petals.* Repeat from * to * 10 times. Join to the standing hdc with a sl st.
Stitch count: 12 dc’s, 24 hdc’s, 24 sc’s, and 12 ch-6 spaces.
Round 12
- If you are going to use the same colour, ch 1 and sc in the same st. Then sc in the next st.
- If you are going to use a different colour, start with a standing single crochet in the same st as the sl st join and then sc in the next st.
*Make 6 sc’s in the ch-6 space behind the petal. Sc in the next 5 st’s.* Repeat from * to * 10 times. Make 6 sc’s in the last ch-6 space and then sc in the last 3 st’s. Join to the first sc with a sl st.
Stitch count: 132 sc’s
Round 13
Notes: The first sc of each repeat will fall in the third sc made into the ch-6 space. The two 4-tr groups which form each petal will fall on either side of the dc in Round 11. When skipping the 3 st’s after the petal, be mindful of the fact that the first stitch to skip will be slightly hidden.
- If you are going to use the same colour, ch 4 (this counts as your first tr) and then make 3 tr’s in the same st.
- If you are going to use a different colour, join your new colour by making a sl st in the same st as the sl st join. Ch 4 (this counts as your first tr) and then make 3 tr’s in the same st.
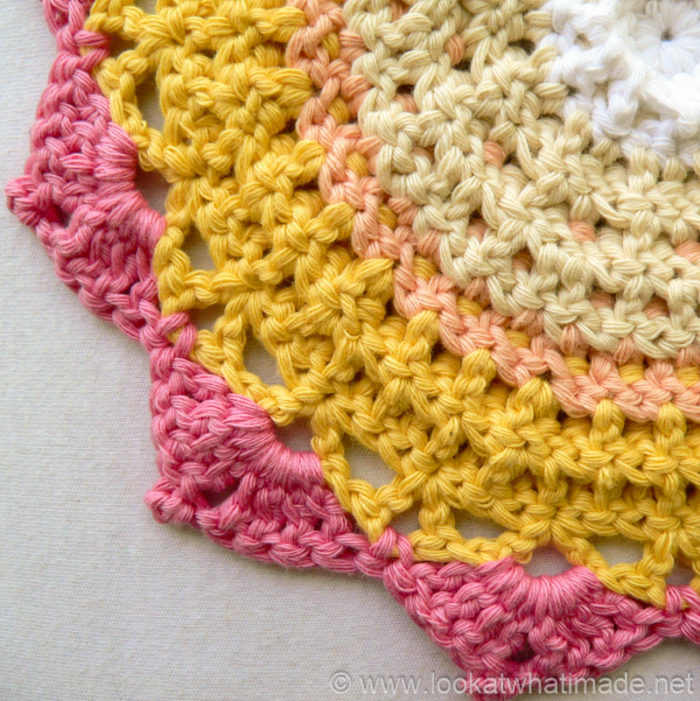
*Skip 3 st’s (see Notes above). Sc in the next st. Catch the picot from Round 10 by inserting your hook into the second ch of the picot AND into the next st from Round 12 and completing a sc through both layers. Sc in the next sc. Skip 3 st’s. Make 4 tr’s in the next st. Make a picot (as in Round 10) and then make 4 tr’s in the next st.* Repeat from * to * 10 times.
Skip 3 st’s. Sc in the next st. Catch the picot by making a sc through the picot from Round 10 and into the next st of Round 12 (as before). Sc in the next sc. Skip 3 st’s. Make 4 tr’s in the last st. Make a picot. Join to the top of the beginning ch-4 with a sl st. Fasten off and change colours.
Stitch count:
- Total: 12 petals and 36 sc’s {96 tr’s and 36 sc’s}
- Per Petal: 8 tr’s, 1 picot {3 sc’s between petals}
Round 14
Optional: if you would like to give the petals more definition, feel free to work into the BLO in this round.
Join your new yarn by making a standing half-double crochet in the first tr of any petal around. Sc in the next tr of the petal. Ch 6. Sc in the seventh tr of the petal and hdc in the last tr. Dc in the next sc, fpdc around the picot from Round 10, dc in the last sc.
*Hdc in the first tr of the next petal and sc in the next tr. Ch 6. Sc in the seventh tr of the petal and hdc in the last tr. Dc in the next sc, fpdc around the picot from Round 10, dc in the last sc.* Repeat from * to * 10 times. Join to the standing hdc with a sl st.
Stitch count: 24 dc’s, 12 fpdc’s, 24 hdc’s, 24 sc’s, and 12 ch-6 spaces.
Round 15
Round 15 is the same as Round 12, but with more sc’s.
- If you are going to use the same colour, ch 1 and sc in the same st. Then sc in the next st.
- If you are going to use a different colour, start with a standing single crochet in the same st as the sl st join and then sc in the next st.
*Make 6 sc’s in the ch-6 space behind the petal. Sc in the next 7 st’s.* Repeat from * to * 10 times. Make 6 sc’s in the last ch-6 space and then sc in the last 5 st’s. Join to the first sc with a sl st.
Stitch count: 156 sc’s
Round 16
- If you are going to use the same colour, sl st into the next st and then ch 2 (this counts as your first hdc).
- If you are going to use a different colour, start with a standing half-double crochet in the st after the sl st join.
Hdc in the next 2 st’s. The last hdc should fall in the second sc worked into the ch-6 space. *Sc in the next 2 st’s. Sc in the second ch of the picot from Round 13. Sc in the last 2 sc’s in the ch-6 space. Hdc in the next 3 st’s, dc in the next 3 st’s, hdc in the next 3 st’s. The last hdc should fall in the second sc worked into the ch-6 space.* Repeat from * to * 11 times. Omit the last 3 hdc’s on the last repeat. Join to the top of the beginning ch-2 (or the standing hdc) with a sl st. Fasten off and work away your tails of yarn.
Stitch count: 168 st’s {60 sc’s, 72 hdc’s, and 36 dc’s}
Round 17 (Optional)
Start in any stitch around with a standing single crochet. Make a crab stitch in each st around. If you are not familiar with the crab stitch, see this video tutorial. When you get to the end of the round, make a crab stitch in the same stitch as the standing single crochet. No need to join with a sl st. Just fasten off and work away your tail of yarn.
Stitch count: 168 crab stitches

This blog post contains affiliate links. I only link to products I personally use or would use. All opinions are my own.


zehra says
absolutly wonderfull work i am in my 60s and never dreamed there would be so much yet yo learn, so many tallented ladies out there willing to share, i still teach when ever i find a soul wanting to learn, so please never stop knowledge is the food for life, and i love your work.
Dedri Uys says
Thank you, Zehra :)
Nisa says
Too much mandala patterns in my mind, this one is also beautiful.
Great work : )
Charlene Boardman says
Oh Dedri, this is yet another fantastic pattern! Thank you
Maryse Barnier says
Love it . Thanks Maryse
Jane says
I didn’t like the mandalas very much until I saw these. Now, I’m in love!
Carrie says
Are you TRYING to make life hard? My CTDL (Crochet To-Do List) was already cram packed. And now with all these new designs of yours? It’ll be past insane! :) LOL! I have a feeling that I’d still be able to accomplish that if my lifes ambition was to become queen of the world and ban all crochet related items/websites including my own. I’d probably dream about all the patterns I wanted to make… much like you ;) :D. I LOVE your Star Ball BTW. xoxo
Ellisen says
Ahhhhhh, so wonderful to wake up to another of your fabulous patterns today! I want to put them all over my walls. Thanks so much for sharing another mandala with us. They brighten my day!
Dedri Uys says
Thank you, Ellisen. I would love to see yours if you ever get around to making it :)
tess says
Love this!!! ♥
~Tess