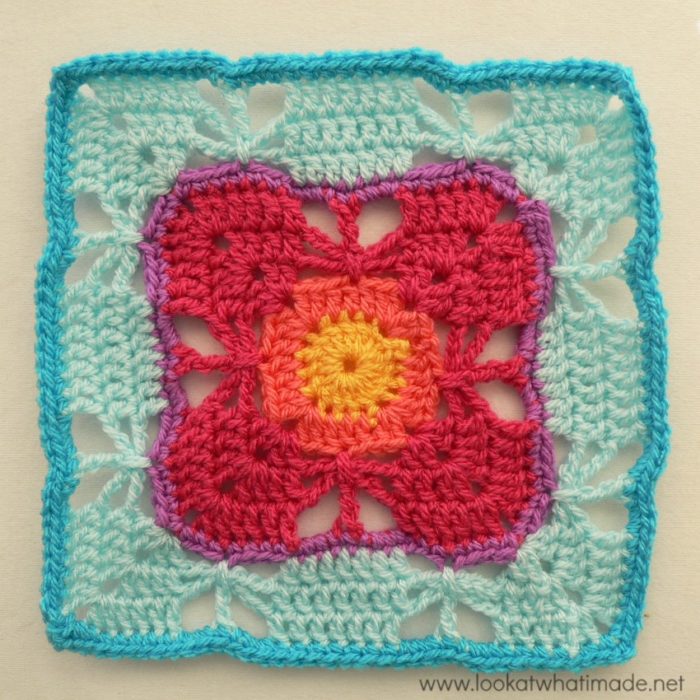
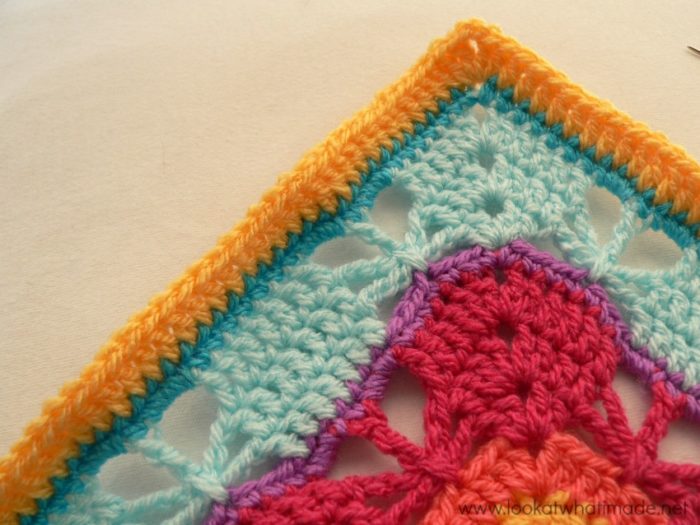
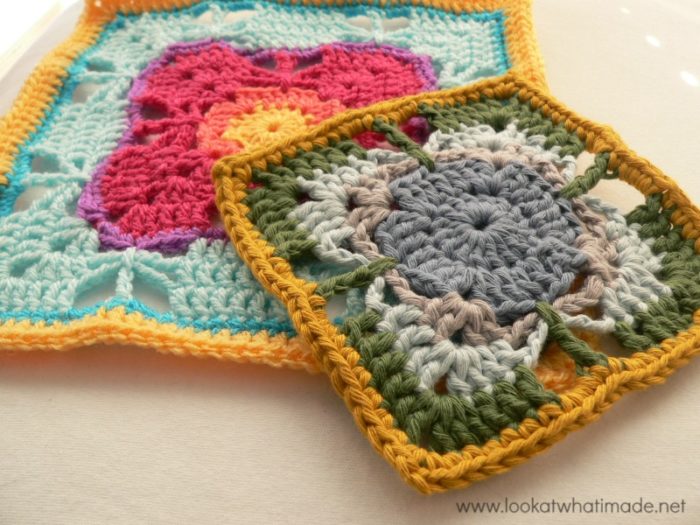
Block 10 of the Block a Week CAL (hosted by Kimberly Slifer) is Chris Simon’s deceptively easy Butterfly Garden Square. This is such a dainty, quick square. It felt like it hardly took any time to work up and just like with last week’s square, I wish I could just keep going with it and make a giant continuous blanket…
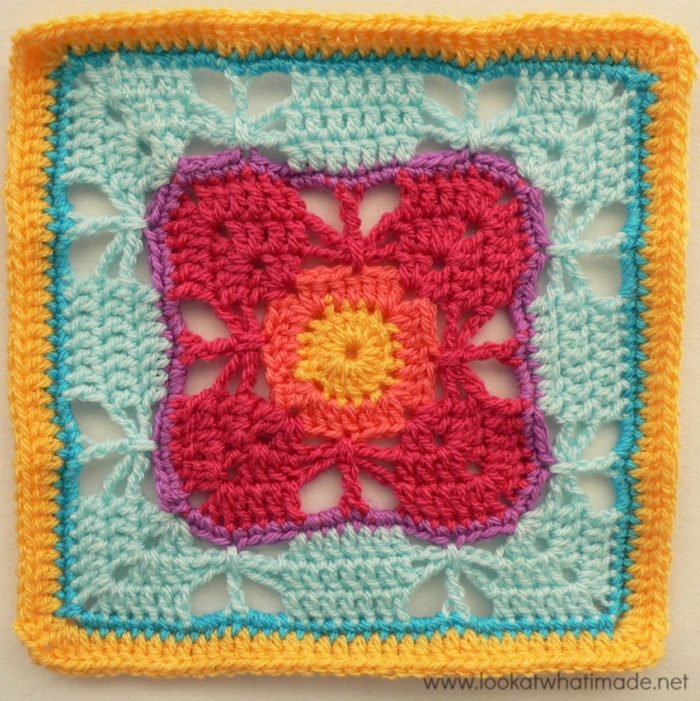
Well, the sun is still shining outside and the boys are enjoying the last of the almost-Summer rays, so I am grabbing this opportunity to finish the photo tutorial, although I don’t think you will need it this week.
If this is the first you’ve heard of the CAL, please have a look at THIS POST. It contains all the information and links for the crochet-along.
Butterfly Garden Crochet Square
{Pattern © 2004 Chris Simon. Photo tutorial done with kind permission}
Pattern
You can find the pattern here on Ravelry. If you have any problems printing the Pdf, try this link instead.
Suggested Materials
- 5 mm Clover Amour Crochet Hook (US H/8 UK 6)
- Worsted weight yarn
Size
- Using the hook and yarn specified, your square should be a nice even 12″ when you are done.
- Using a 4 mm crochet hook (US G/6 UK 8) and double knit yarn, as I have done, your finished square will be about 9″ big.
My Yarn and Colour Choices
I am using the Stylecraft Special DK.
- Saffron (Rounds 1, 11, and Optional Round 12)
- Shrimp (Round 2)
- Pomegranate (Rounds 3-5)
- Magenta (Round 6)
- Sherbet (Rounds 7-9)
- Turquoise (Round 10)
Notes
- The initial ch st’s in each round are counted as a stitch.
- Each round is joined by making a sl st into the top of the initial ch-3. If you prefer to start your rounds with a standing double crochet, you should join to the top of the standing double crochet. {See last week’s tutorial for more details. The corners in this week’s square are the same as for last week’s one, so just scroll down to the bit that says Corners after Speciality Stitches.}
- Stitch counts have not been supplied, so I have added them here.
- US Crochet Terminology used. (See this comparative chart if you need help transcribing from US to UK)
- Please Note: The yarn used in most of the tutorial photos is Drops Paris Cotton.
Butterfly Garden Photo Tutorial
This photo-walkthrough is NOT the actual pattern and should not be used instead of the pattern, but rather in conjunction with it.
Thank you very much to Chris Simon for giving us permission to do this photo-tutorial for her Butterfly Garden Square. And a special thank you to Kimberly Slifer for letting me do these tutorials and for obtaining the necessary permission.
Round 1
You can start this round with a magic ring instead of the initial ch-4.
Magic Ring Instructions for Round 1
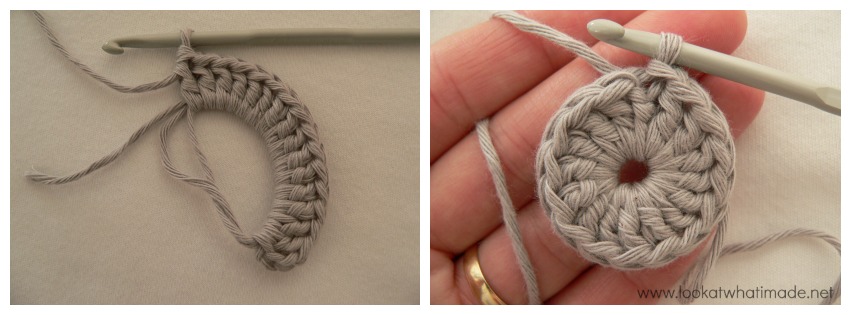
Into a magic ring: ch 3 (this counts as your first dc). Dc x 15 into the ring and pull the ring tight. Join to the top of the initial ch-3 with a sl st. If you are not familiar with working into a magic ring, this video tutorial from The Crochet Crowd is very good. Please remember, when working into a magic ring you HAVE to work away your initial tail very well. If you just cut it, your whole square might unravel!
Stitch count: 16 dc’s
Round 2
Round 2 is easy :) Actually that’s the wrong word. All the rounds are easy. Round 2 is straightforward.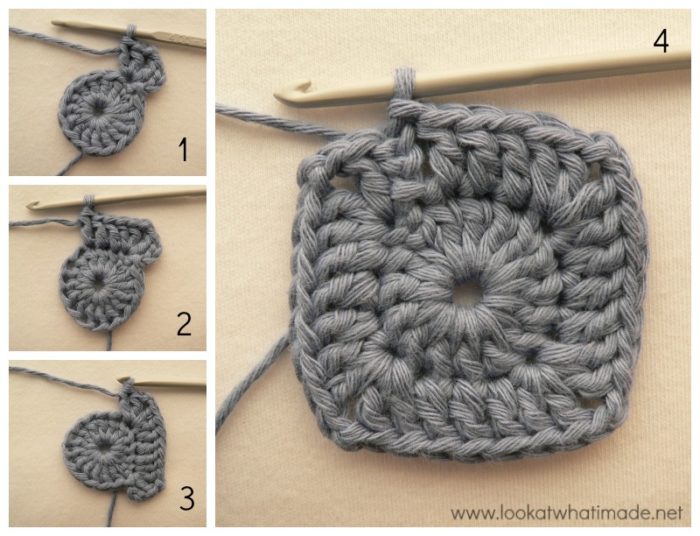
Stitch count: 28 dc’s and 4 ch-2 spaces {7 dc’s on each side}
Round 3
I love the reassuring little note before Round 3. Rounds 3,4 and 5 form the first set of butterflies.
In this round you will only be working into the ch-2 corner spaces, so still pretty simple.
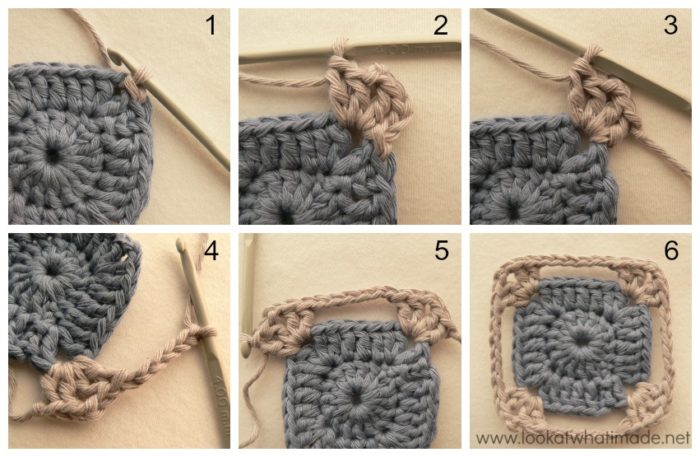
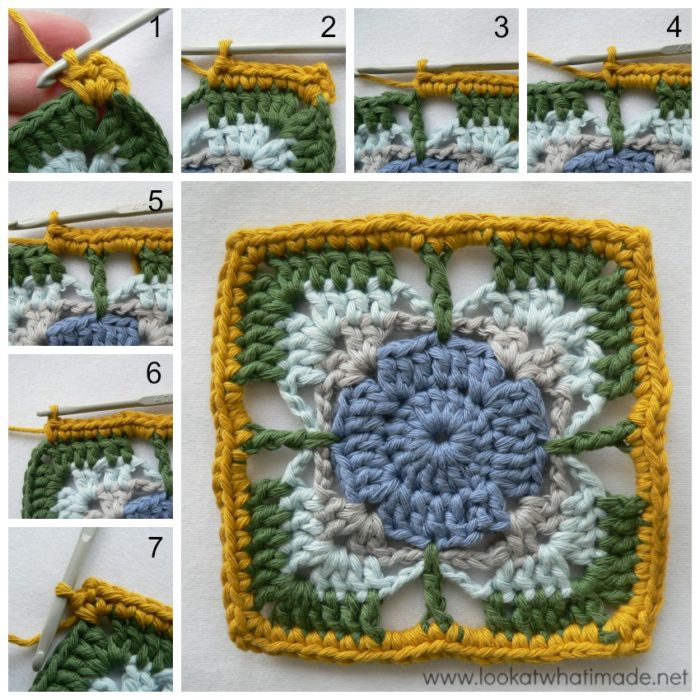
The pattern tells you to sl st your way to the ch-2 space and then make a corner (Photos 1 and 2). If you are changing colours, you might consider starting with a standing double crochet instead (Photo 3). If you don’t know what a standing double crochet is, see this excellent tutorial by Tamara from Moogly.
You will notice that I have started the rounds for the photo tutorial with standing double crochets, because I was changing colour between rounds so that you could see the stitches better. When I made my actual square I didn’t change colours, so I just slip stitched my way to the corner at the beginning of each round.
You will then chain 6 (Photo 4) and make another corner in the next ch-2 corner space (Photo 5). And continue around as instructed in the pattern. See? Easy!
Stitch count: 16 dc’s, 4 ch-6 spaces and 4 ch-2 spaces {4 dc’s and 1 ch-6 space per side}
Round 4
In this round, and subsequent rounds, it is easy to accidentally skip the first stitch after the corner. See this tutorial about corners and the elusive hidden stitch if you need a bit of help identifying the first stitch to work into after making a corner.
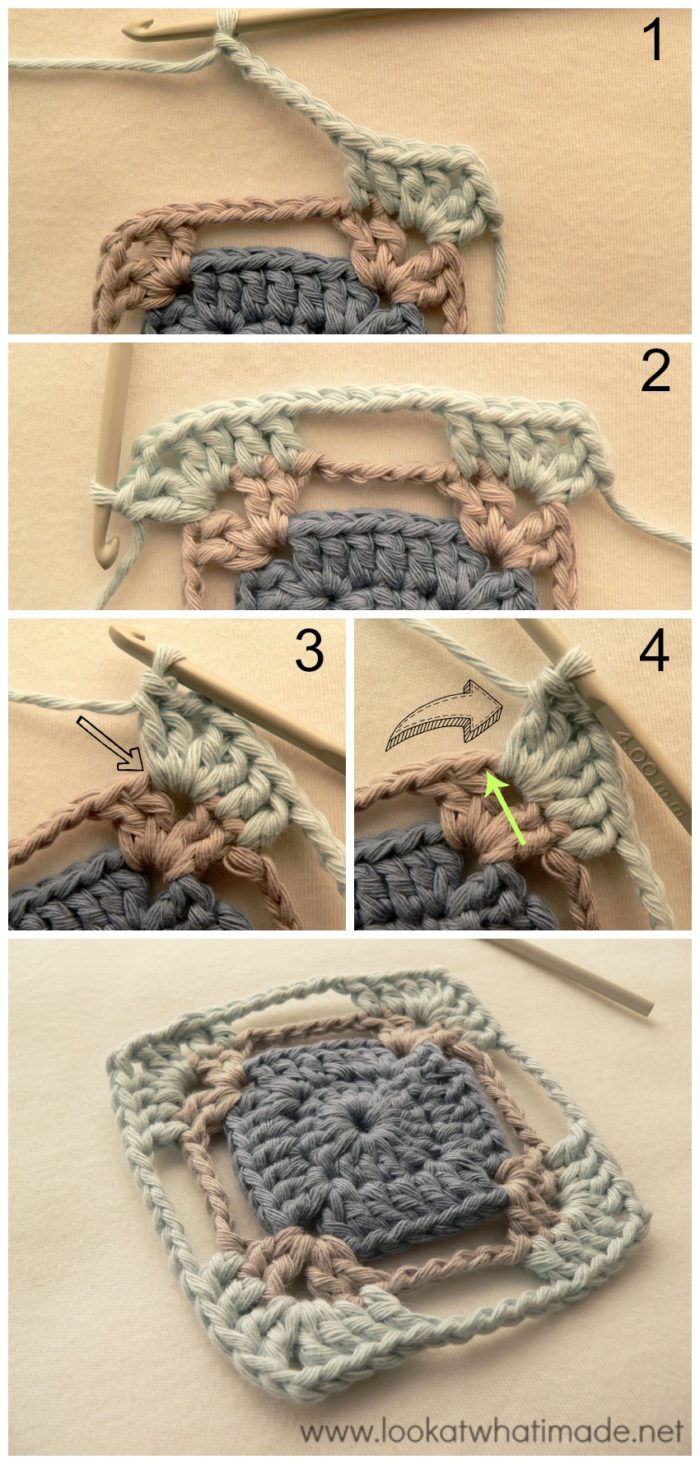
After you’ve made your first corner, dc in each of the 2 dc’s before the ch-6 space. Ch 6 (Photo 1) and then make a dc in each of the 2 dc’s AFTER the ch-6 space, skipping the ch-6 space completely. Make a corner in the ch-2 corner space (Photo 2). Continue around as instructed in the pattern.
In Photo 3 you will see that the first stitch after the corner is hidden by the stitches that you made into the ch-2 space. Scootch them up a little bit (Photo 4) to reveal the loops at the top of the first dc after the corner.
Stitch count: 32 dc‘s, 4 ch-6 spaces and 4 ch-2 spaces. {8 dc’s and 1 ch-6 space per side}
Round 5
Now comes the cool part: changing the ch-6 paces into butterflies.
After you have made your first corner, dc in each of the 4 dc’s before the ch-6 space. Ch 3 (Photo 1) and make a tr into the 4th of the 7 skipped dc’s from Round 2, working OVER the chains from Rounds 3 and 4 (Photos 2-4). Ch 3 and dc into each of the 4 dc’s AFTER the ch-6 space. Make another corner in the ch-2 corner space. Continue around as instructed in the pattern.
Stitch count: 48 dc’s, 4 tr’s, 8 ch-3 spaces and 4 ch-2 spaces. {12 dc’s, 1 tr and 2 ch-3 spaces per side}
Round 6
Round 6 is straightforward as well. Sc’s, sc’s and some more sc’s…with the occasional ch-2 space thrown in for fun.
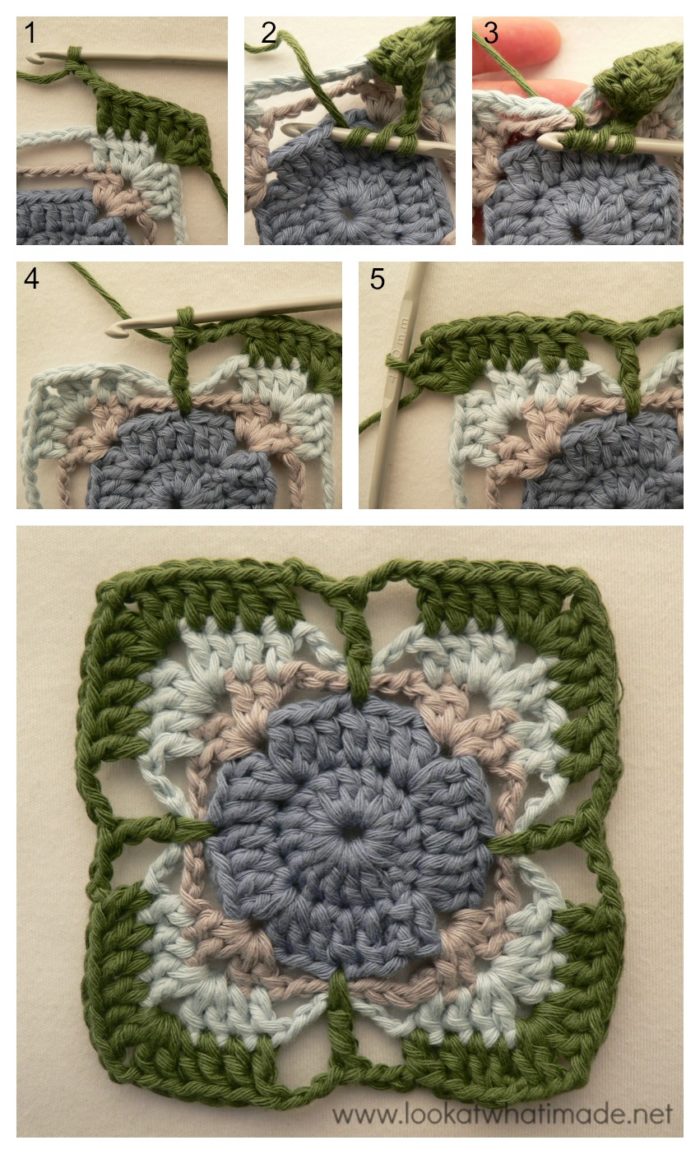
After making your first (sc, ch 2, sc) corner (Photo 1), sc in each of the next 6 dc’ (Photo 2). Make 3 sc’s into the first ch-3 space (Photo 3). Sc in the tr (Photo 4). Make 3 sc’s into the second ch-3 space (Photo 5). Sc in each of the next 6 dc’s (Photo 6). Make a (sc, ch 2, sc) corner in the ch-2 corner space (Photo 7). Continue around as instructed in the pattern.
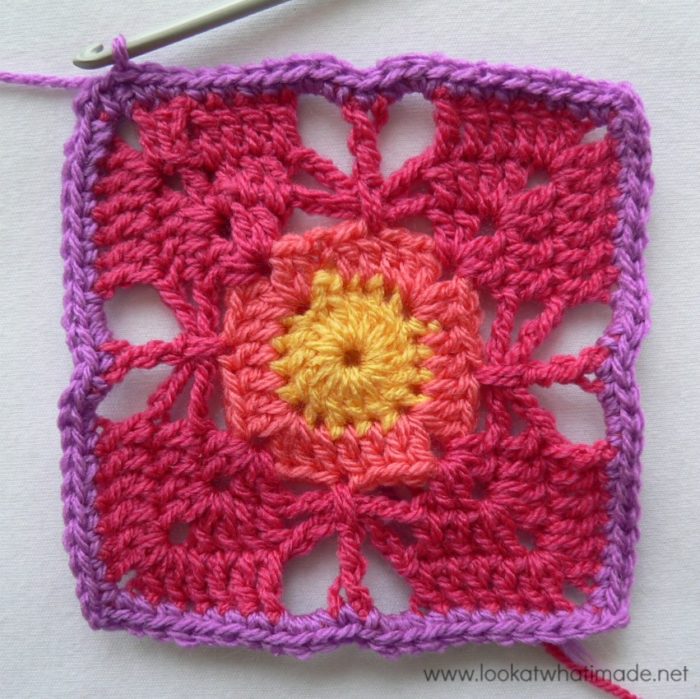
Stitch count: 84 sc’s and 4 ch-2 spaces. {21 sc’s per side}
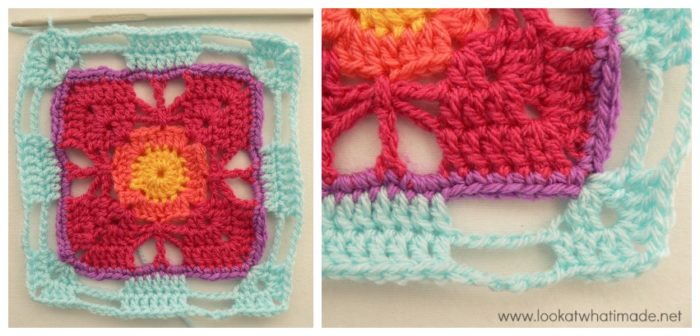
Here is my square at the end of Round 6.
Round 7
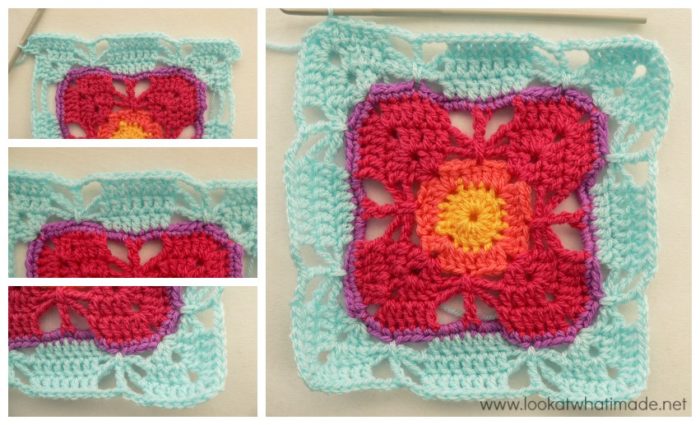
Round 7 is a repeat of Round 3, but with 2 ch-6 spaces per side instead of 1. The 2 ch-6 spaces are separated by 7 dc’s.
If you are anything like me, you like shortcuts. The shortcut in this round is knowing where to make those 7 dc’s so that you don’t have to count the skipped stitches every time. So here goes: the 7 dc’s in the middle of each side will fall over the 7 sc’s you made into the (ch-3, tr, ch-3) in the previous round. Simply find the first sc in the first ch-3 space and make your first dc into it.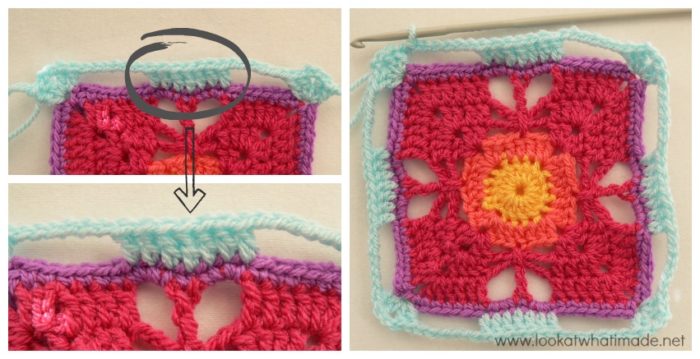
Stitch counts: 44 dc’s, 8 ch-6 spaces and 4 ch-2 spaces. {11 dc’s and 2 ch-6 spaces per side}
Round 8
Round 8 is a repeat of Round 4, but with 2 ch-6 spaces per side instead of 1, and 7 dc’s between the 2 ch-6 spaces.
Stitch counts: 60 dc’s, 8 ch-6 spaces and 4 ch-2 spaces {15 dc’s and 2 ch-6 spaces per side}
Round 9
Round 9 is a repeat of Round 5, but with 2 butterflies on each side and 7 dc’s between the 2 butterflies.
Stitch count: 76 dc’s, 8 tr’s, 16 ch-3 spaces and 4 ch-2 spaces. {19 dc’s, 2 tr and 4 ch-3 spaces per side}
Round 10
Round 10 is a repeat of Round 6. More stitches, same principle.
Stitch count: 140 sc’s and 4 ch-2 spaces. {35 sc’s per side}
Round 11
Round 11 is just a whole bunch of dc’s. 39 per side, to be exact.
Stitch count: 156 dc’s and 4 ch-2 spaces. {39 dc’s per side}
I have added an Optional Additional Round 12 to get my square to the same size as the other squares. You can find the instructions for that HERE.
Join the Block a Week CAL
If you would like to be part of the Block a week CAL on Facebook, please join the Official CCC Social Group (you must be logged into Facebook to do so) so that you can access and utilize the support and encouragement of all the lovely ladies on there.
You can also join the Block a Week CAL Flickr Group so that you can inspire others and be inspired yourself.
For those of you who do not like Facebook, you can always follow along with me here. I will be posting the blocks every week.
Remember to subscribe to my Weekly Newsletter if you would like to be kept in the loop. You can also like my Facebook page or follow me on Bloglovin, Google+, Pinterest, Twitter, or Instagram.
More Blogs Following the CAL
- San from Loopsan – using Stylecraft in sophisticated Parchment, Denim, Mocha and Meadow
- Lou Mander from Tea, Crochet and Me – using Stylecraft in White, Mocha and Raspberry
Happy Hooking!



Cookie says
I want to make a bigger square, what rows should be repeated?
Dedri Uys says
I would make the square up to Round 10 and then repeat rounds 7 – 10 until it is as big as I want it to be, bearing in mind that each subsequent repeat will have one more repeat in it than the previous one.
andrea says
Im a beginner, I don’t know how to do round 2
Dedri Uys says
Hi Andrea. My photo tutorial is not the complete pattern, just a helpful visual aid to completing the patterns. Have you downloaded the pattern, which you can find below the heading ‘Pattern’ at the top of the post?
Pien says
Hai Deidre, i’m catching up with the blocks. i make them with the same tread and hook but al the blocks are a different size. This one is very little. what can i do? (sorry for my bad english)
greetings Pien
Dedri Uys says
Pien, like I mentioned in my email, most people are adding rounds to get them all to be the same size. The blocks are written for 5 and 5.5 mm hooks, so using the same hook throughout does yield different sizes.
I will do a post soon outlining exactly what I added to each square to get them to be the same size.
Kinga says
Great tutorial with beautiful pictures! :)
Dedri Uys says
Thank you, Kinga :) I love the Cable Headband and am wondering if I have enough time to squeeze one in for my little niece…
Joanne Morrow says
Thank you Dedri for another wonderful tutorial!!
Dedri Uys says
Just a pleasure, Joanne. I hope it helped you out if you got stuck x
Rhondda Mol says
Beautiful Dedri :) I love the colours you are using and you really have a talent in your ability to explain things so clearly! Great photos too!! Hugs, R
Dedri Uys says
Thank you, Rhondda. I hope everyone finds it as clear to understand as you do. x
Carrie says
This one is so pretty! I love your colors!
P.S. I can’t wait to see what your doing with all the cotton centers ;)
Dedri Uys says
Carrie, I’ve already managed to mislay half the centers… Ah well…
wendy says
I am disappointed with block 10 as am not sure what scribd is and therefore cannot download pattern, is there any other way to download pattern please, am not on facebook either, only have very basic computer knowledge, so am thinking might have to miss this one.
Dedri Uys says
Wendy, I have now added an additional link to the pattern which doesn’t require registration to scribd. If you have a problem with that one too, please let me know.