I have always had a thing for crochet baskets. They are incredibly useful, and if you make them in stackable sizes, they don’t take up a whole lot of room.
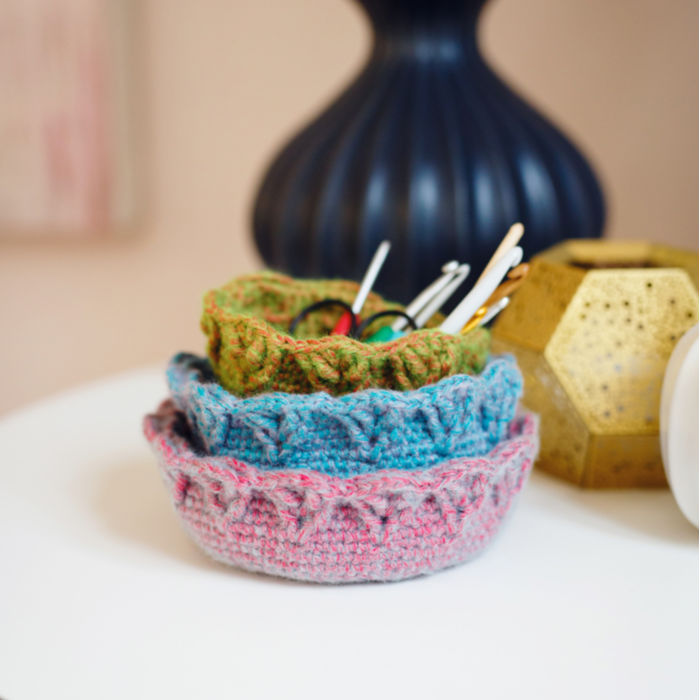
Image by Kirsten Mavric, courtesy of Inside Crochet Magazine
As I am winding down on this, my first #202020 of the year, I tought I would share this pattern with you. The baskets are simple, with a textured embellishment around the top. I designed them for Issue 96 of Inside Crochet way back in 2017.
The pattern is easy to customise as far as size goes, and they work up relatively quickly. You can make them in any hook/yarn combination, as long as your tension is such that the final item is fairly sturdy.
Enjoy!
Petal Basket Pattern {3 Sizes}
©Dedri Uys 2018. All Rights Reserved.
Add the Pattern to your Ravelry Queue
Materials
- Scheepjes Riverwashed XL (70% cotton/30% acrylic), 50g/75m/82yds
- Yarn A – Ganges (985) x 1 ball
- Yarn B – Wheaton (990) x 1 ball
- Yarn C – Seine (987) x 1 ball
- 4.5mm hook
Abbreviations
US Terminology Used (UK version available in Issue 96 of Inside Crochet)
- Ch – Chain
- Dc – Double crochet
- Hdc – Half-double crochet
- Rem – Remains/remaining
- Sc – Single crochet
- Sl st – Slip stitch
- Sp/sps – Space/spaces
- St/sts – Stitch/stitches
- Tr – Treble crochet
Punctuation
* An asterisk indicates pattern repeats. You will need to repeat all the instructions between asterisks the amount of times specified. This is a hard-core repeat and will consist of multiple instructions.
Square Brackets [] indicate repeats. You will need to repeat the instructions between square brackets the number of times specified. This is a lower level repeat.
Parentheses () are used to indicate stitches made into the same st/sp.
Special Stitches
- FP (Front Post) – Identify the post of the stitch you want to work around. Insert your hook from the front to the back and then from the back to the front around the post of the stitch so that the post lies on top of your hook. Complete your stitch as normal.
- V-st – (Dc, ch1, dc) in the same st/sp.
Notes
You can make these baskets as big/high as you want to. As long as the last round of your Base has a multiple of 6 sts, the Embellishment will work.
Gauge
Your base should measure 6.5cm/2.5” after Round 3.
Size
- Basket One: 13.5cm/5.3” diameter and 5cm/2” high
- Basket Two: 12cm/4.7” diameter and 7cm/2.7” high
- Basket Three: 8cm/3.1” diameter and 9cm/3.5” high
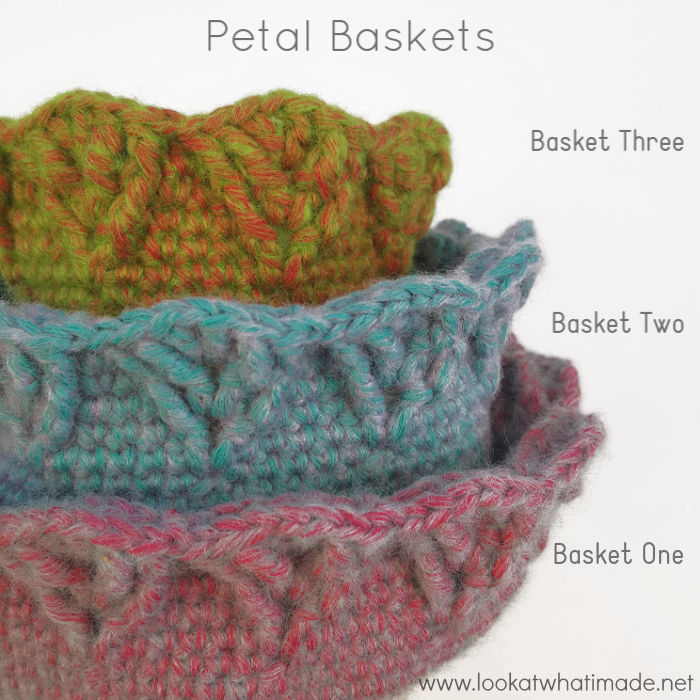
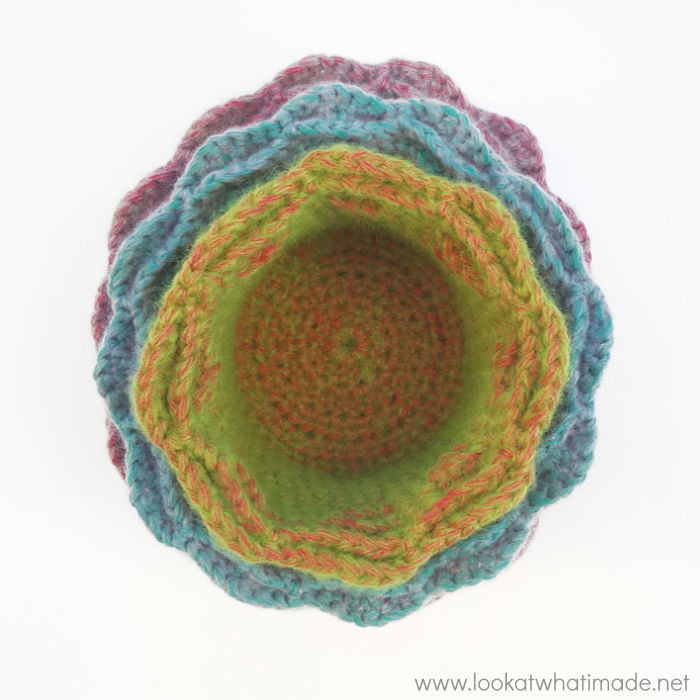
Basket One
With Colour A, make an adjustable ring, leaving a 10cm/4” tail.
Base
Round 1: Into the ring, ch 2 (doesn’t count as a st throughout), 12 dc, join to the first dc with a sl st. {12 dc}
Round 2: Ch 2, make 2 dc in each st, join to the first dc with a sl st. {24 dc}
Round 3: Ch 1 (doesn’t count as a st throughout), [2 hdc in the next st, hdc in the next st] 12 times, join to the first hdc with a sl st. {36 hdc}
Round 4: Ch 1, [2 hdc in the next st, hdc in the next 2 sts] 12 times, join to the first hdc with a sl st. {48 hdc}
Round 5: Ch 2, [2 dc in the next st, dc in the next 3 sts] 12 times, join to the first dc with a sl st. {60 dc}
Round 6: Ch 2, [2 dc in the next st, dc in the next 4 sts] 12 times, join to the first dc with a sl st. {72 dc}
Round 7: Ch 1, [2 hdc in the next st, hdc in the next 5 sts] 12 times, join to the first hdc with a sl st. {84 hdc}
Sides
Round 1: Ch 1, sc in each st around, join to the first sc with a sl st. {84 sc}
Round 2: As Round 1.
Embellishment
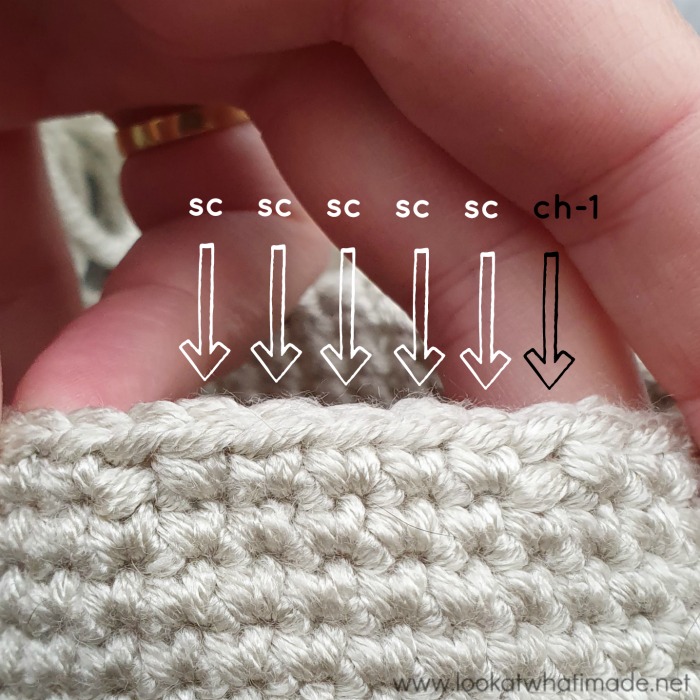
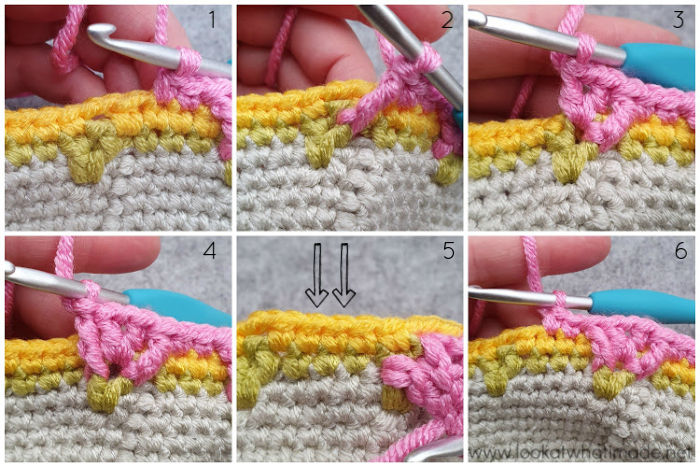
Please note that I have used Scheepjes Chunky Monkey for the following photo tutorial. It does not reflect the size or colour of the first basket. The photo tutorial is only meant to help you with the repeats needed to create the Petals.
Round 1
Ch 1, sc in the st at the base of the ch-1. [Ch 1, skip the next st, sc in the next 5 sts] until 5 sts rem. Ch 1, skip the next st, sc in the last 4 sts. Join to the first dc with a sl st.
Stitch Count: 70 sc and 14 ch-1 sps
Round 2
Ch 1, sc in the st at the base of the ch-1. [Ch 2, skip the ch-1 sp, sc in the next 5 sts] until one ch-1 sp and 4 sts rem. Ch 2, skip the ch-1 sp, sc in the last 4 sts. Join to the first sc with a sl st.
Stitch Count: 70 sc and 14 ch-2 sps
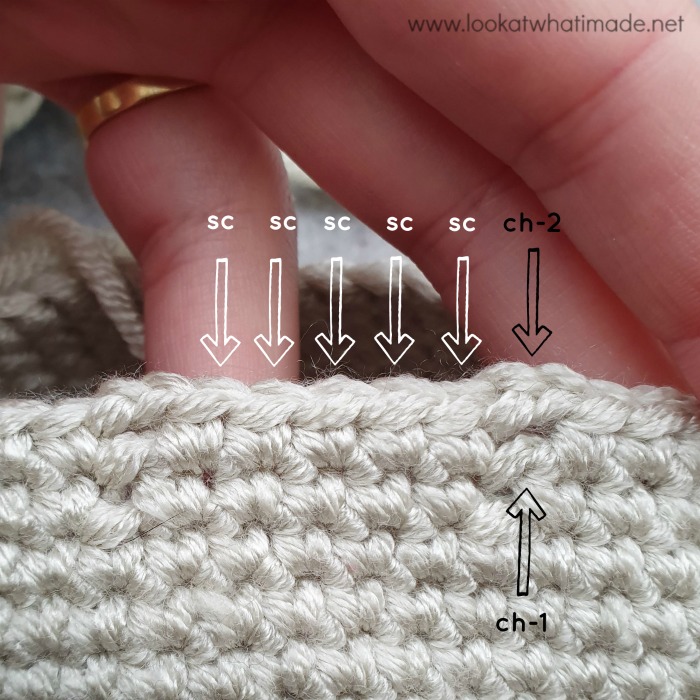
Round 3
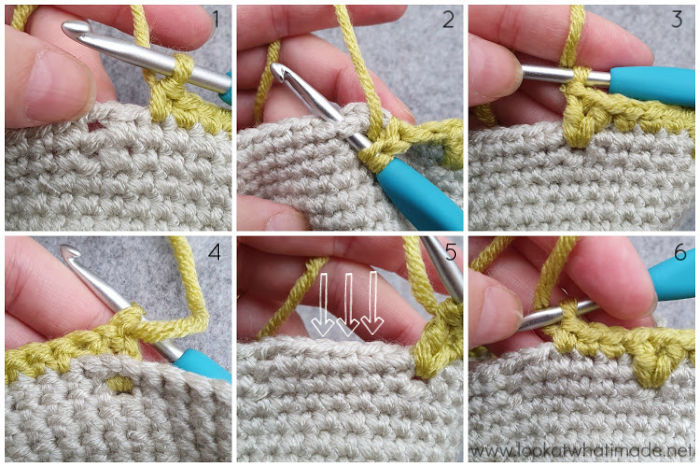
Ch 1. *Skip the next st. Working in front of ch-2 sp from Round 2, make a V-st in the ch-1 sp from Round 1 {Photos 2 – 4, with Photo 4 showing it from the Wrong Side}. Skip the next st, sc in the next 3 sts {Photos 5 and 6}.*
Repeat from * to *until you get to the end of the round. Join to the first dc with a sl st.
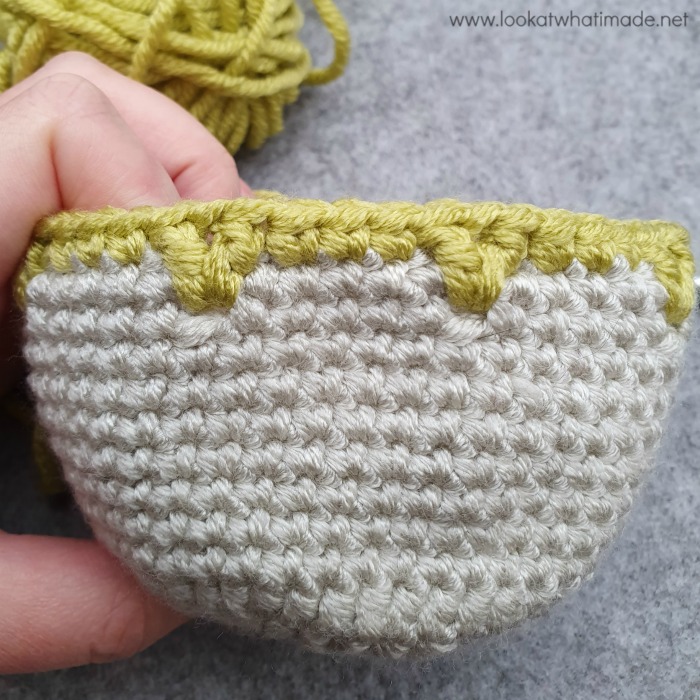
Stitch Count: 42 sc, 28 dc, and 14 ch-1 sps
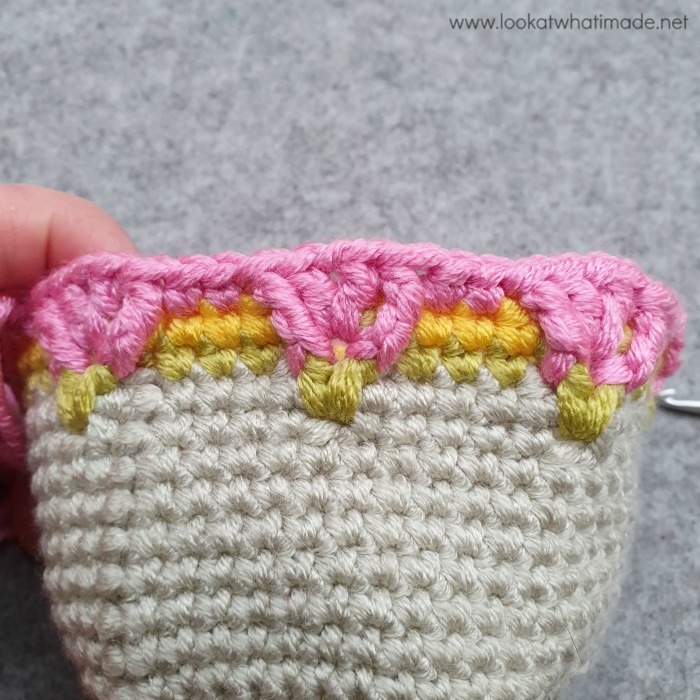
This is what it will look like when you have completed this round:
Round 4
Ch 1, sc in the st at the base of the ch-1. [Ch 2, skip the ch-1 sp, sc in the next 5 sts] until one ch-1 sp and 4 sts rem. Ch 2, skip the ch-1 sp, sc in the last 4 sts. Join to the first sc with a sl st.
Stitch Count: 70 sc and 14 ch-2 sps
Round 5
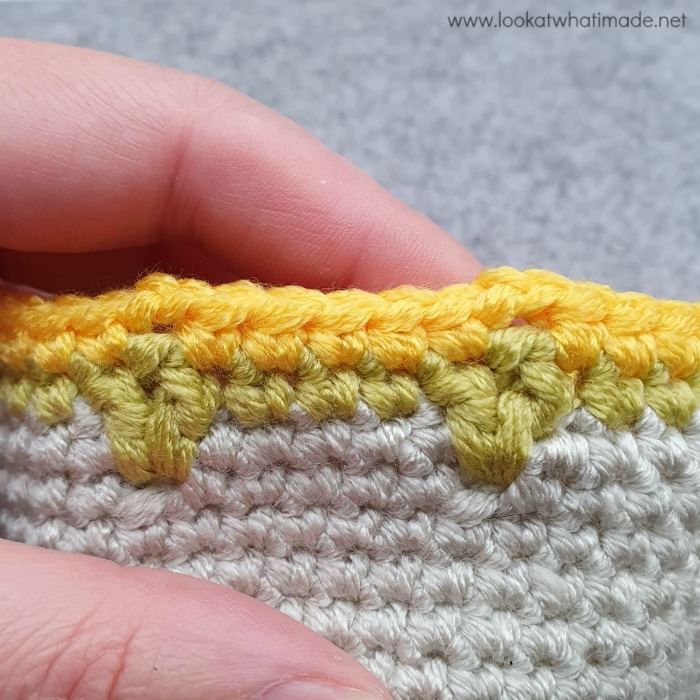
Ch 1. *Skip the next st, FPtr around the first dc of the V-st from Round 3 {Photo 2}. Working in front of ch-2 sp from Round 4, make a V-st in the ch-1 sp from Round 3 {Photo 3}. FPtr around the next dc of the V-st from Round 3 {Photo 4}. Skip the ch-2 sp and the next 2 sts of Round 4. Sc in the next 2 sts {Photos 5 and 6}.*
Repeat from * to * until you get to the end of the round. Join to the first FPtr with a sl st.
Stitch Count: 28 sc, 28 dc, 28 FPtr, and 14 ch-1 sps
Isn’t that pretty already?
Round 6
Ch 1, sc in the first 2 sts. [Ch 2, skip the ch-1 sp and the next st, sc in the next 5 sts] until 4 sts and 1 ch-1 sp rem. Ch 2, skip the ch-1 sp and the next st, sc in the last 3 sts. Join to the first sc with a sl st.
Stitch Count: 70 sc and 14 ch-2 sps
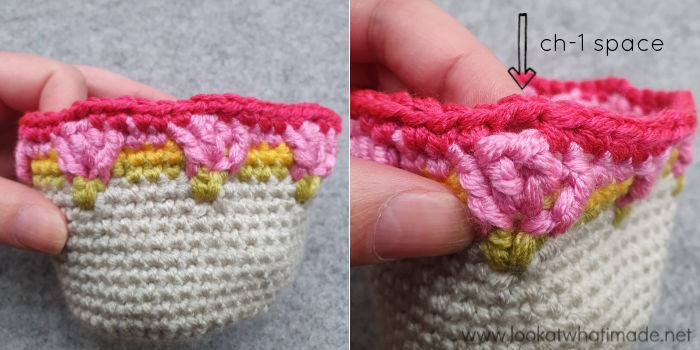
Round 7
Ch 1. *Skip the next 2 sts. FPdc around the FPtr from Round 5. FPtr around the first dc of the V-st from Round 5. Working in front of ch-2 sp from Round 6, make a V-st in the ch-1 sp from Round 5. FPtr around the next dc of the V-st from Round 5. FPdc around the next FPtr from Round 5. Skip the ch-2 sp and the next 2 sts of Round 6. Sc in the next st.*
Repeat from * to * until you get to the end of the round. Join to the first FPdc with a sl st. Fasten off and work away your ends.
Stitch Count: 14 sc, 28 dc, 28 FPdc, 28 FPtr, and 14 ch-1 sps
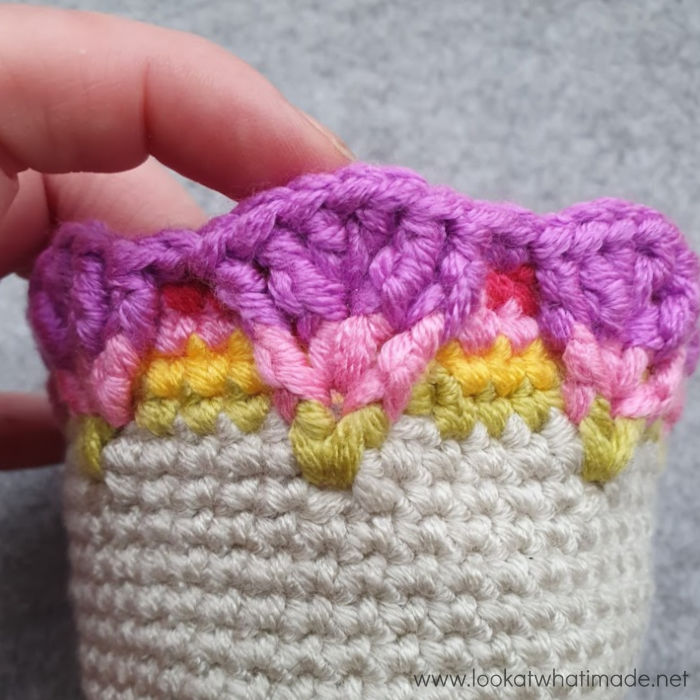
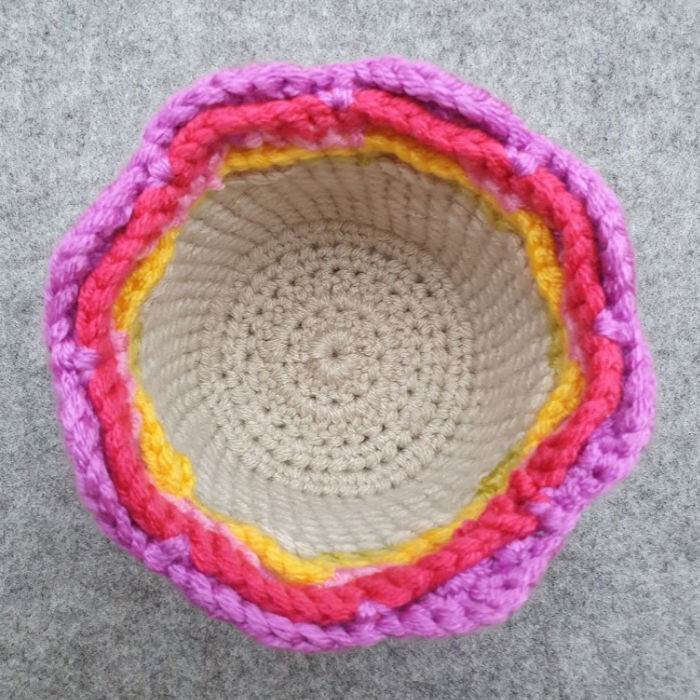
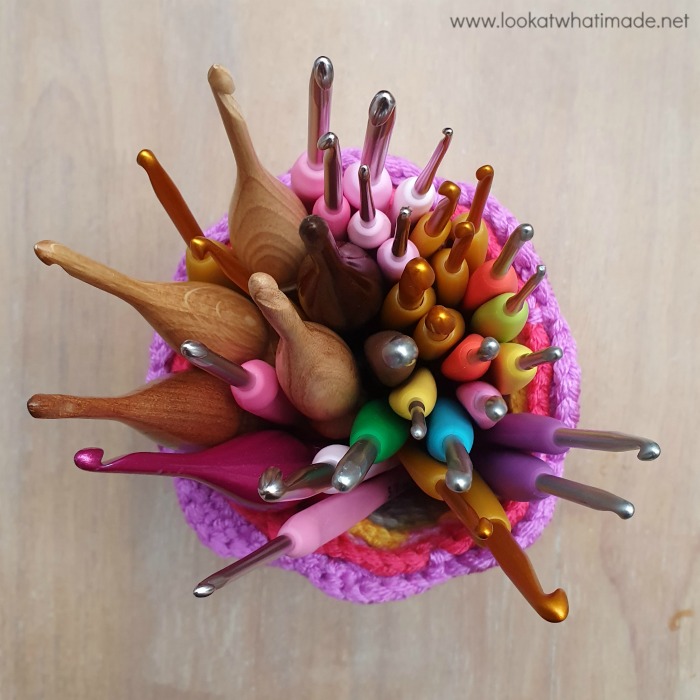
The basket I made for the photo tutorial had 4 Base rounds and 6 Side rounds. I am using it to store all my extra crochet hooks in :)
Basket Two
Base
With yarn B, make an adjustable ring, leaving a 10cm/4” tail.
Rounds 1 – 6: With Yarn B, as Rounds 1 to 6 of Base above. {72 dc at end of Round 6}.
Sides
Rounds 1 – 6: As Round 1 of Sides above. {72 sc}
Embellishment
Rounds 1 – 7: As Rounds 1 – 7 of Embellishment above.
Stitch Counts:
- Round 1: 60 sc and 12 ch-1 sps.
- Round 2: 60 sc and 12 ch-2 sps.
- Round 3: 36 sc, 24 dc, and 12 ch-1 sps.
- Round 4: 60 sc and 12 ch-2 sps.
- Round 5: 24 sc, 24 dc, 24 FPtr, and 12 ch-1 sps.
- Round 6: 60 sc and 12 ch-2 sps.
- Round 7: 12 sc, 24 dc, 24 FPdc, 24 FPtr, and 12 ch-1 sps.
Basket Three
Base
With yarn C, make an adjustable ring, leaving a 10cm/4” tail.
Rounds 1 – 4: With Yarn C, as Rounds 1 to 4 of Base above. {48 hdc at end of Round 4}.
Sides
Rounds 1 – 10: As Round 1 of Sides above. {48 sc}
Embellishment
Rounds 1 – 7: As Rounds 1 – 7 of Embellishment above.
Stitch Counts:
- Round 1: 40 sc and 8 ch-1 sps.
- Round 2: 40 sc and 8 ch-2 sps.
- Round 3: 24 sc, 16 dc, and 8 ch-1 sps.
- Round 4: 40 sc and 8 ch-2 sps.
- Round 5: 16 sc, 16 dc, 16 FPtr, and 8 ch-1 sps.
- Round 6: 40 sc and 8 ch-2 sps.
- Round 7: 8 sc, 16 dc, 16 FPdc, 16 FPtr, and 8 ch-1 sps.
I hope you enjoy making these baskets. They make brilliant gifts and are perfect for using up odd bits of yarn. You might consider using multiple strands held together to give you a sturdy ombre basket.

This blog post contains affiliate links. I only link to products I personally use or would use. All opinions are my own.


Jacqueline van Gelderen says
Hi Dedri,
My English is not very good, so I hope you can read my comment. I love those Basket(s)? I am going to make them thats for sure. You have a wunderful taste for coleurs and stichtes.
By Dedri,
Jacqueline from Holland
Sharon says
Thank you for sharing your pattern, these are very cute and useful!
Dedri Uys says
Thank you :)