Welcome to Parts 11 and 12 of the Maya’s Meadow CAL. In these parts, we will join our motifs into columns. I have chosen to break these instructions up into two parts so that people can hop between the instructions more easily if they need photographic help, but also find the individual instructions easily should they choose to make only small or large motifs.
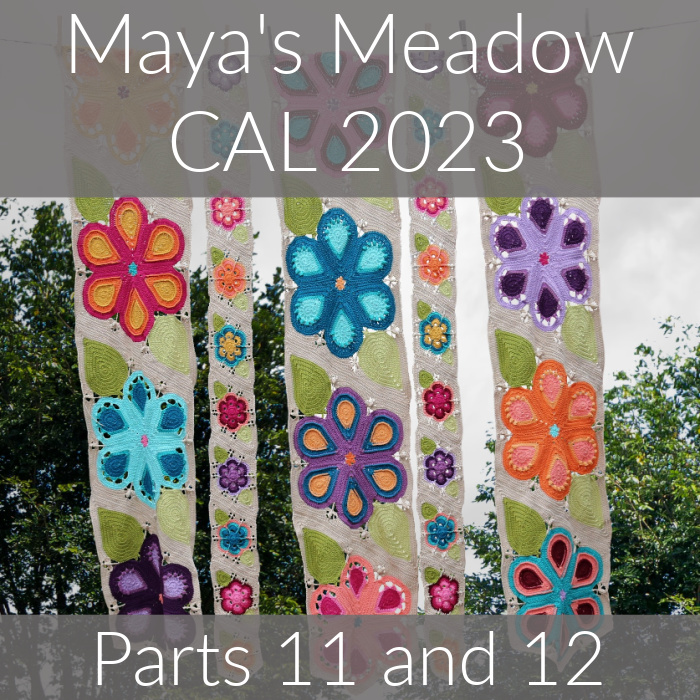
Before we start, I want to share something with you. When I started this crochet-along, I wasn’t sure that I would manage to do videos for it. Turns out I did manage to do them and actually enjoyed doing them (what a happy surprise). Up until now, it’s been quite easy to make all the parts needed for the videos, but parts 13 and 14…. Well…
For those, I had two options: make the entire blanket again to demonstrate how to join the columns and add the border, or decrochet (frog) a large portion of the border and undo some of the columns. I chose decrochet! To make it easier on my heart, I did it at the beach last Wednesday :) If you fancy having a peek, you can see the process HERE on Instagram. The things I do for my craft!!!
Resources
- Introduction Post
- Abbreviations and Special Stitches
- I’ve done a video tutorial for Parts 11 and 12. You can find that HERE:
Translations
- Japanese Information Post by Masako Kawahara
- Dutch Parts 11 and 12 (and Videos) by Michael Wassenaar
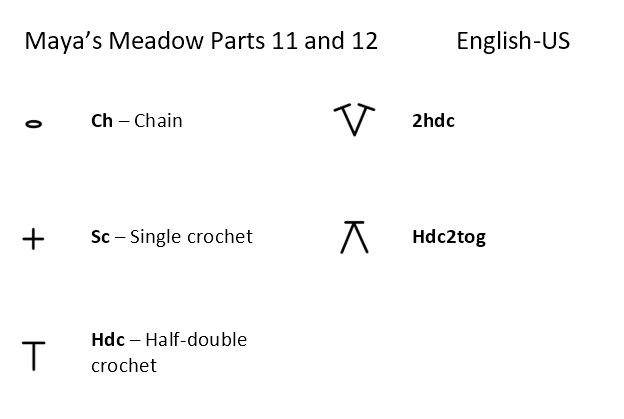
Chart and Abbreviations
Charts by Masako Kawahara from Crochet_hmmm
Notes
- Part 11 (Joining Small Motifs) has step-by-step photos and charts. Part 12 (Joining Large Motifs) is written only because the instructions are the same, just with more stitches along the side.
- The joining is a bit of an interesting one, but it yields the neatest end result. If you are tempted to join another way, your columns will be bumpy when you go to join them and the maths for the border repeats won’t work out.
Please Note: If you are left-handed, your individual motifs will be a mirror image of mine, with the colour O leaves top right, not top left.
Part 11: Joining Small Motifs
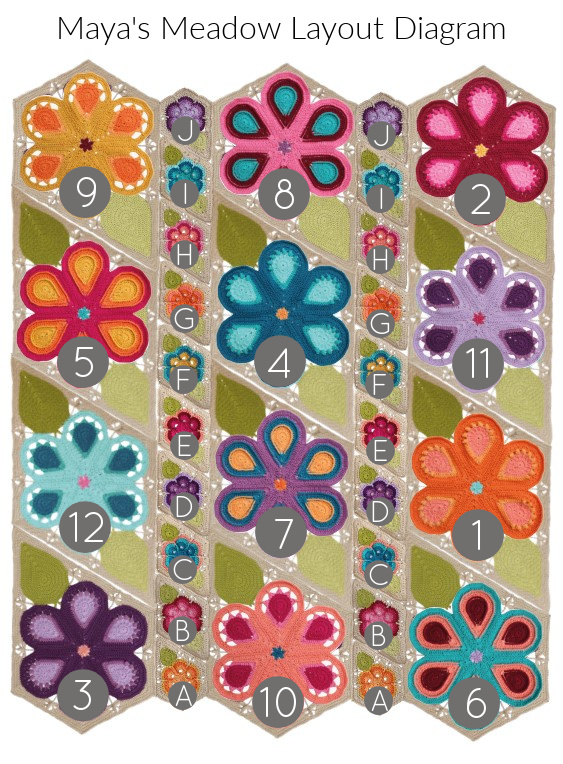
You will join your small motifs in 2 columns, each containing 10 motifs. Motifs will be joined from bottom to top, starting with A in alphabetical order. Please refer to the Layout Diagram below.
All joining will be done using Colour P. For the photos below, I am using contrasting colours to make the different steps clear.
Joining the First Column
Joining the First Two Motifs
Joining Row 1
Starting at the bottom, place your first motif (with RS facing) so that the Colour O Leaf is to your left (right, if you are left-handed) and farthest away from you.
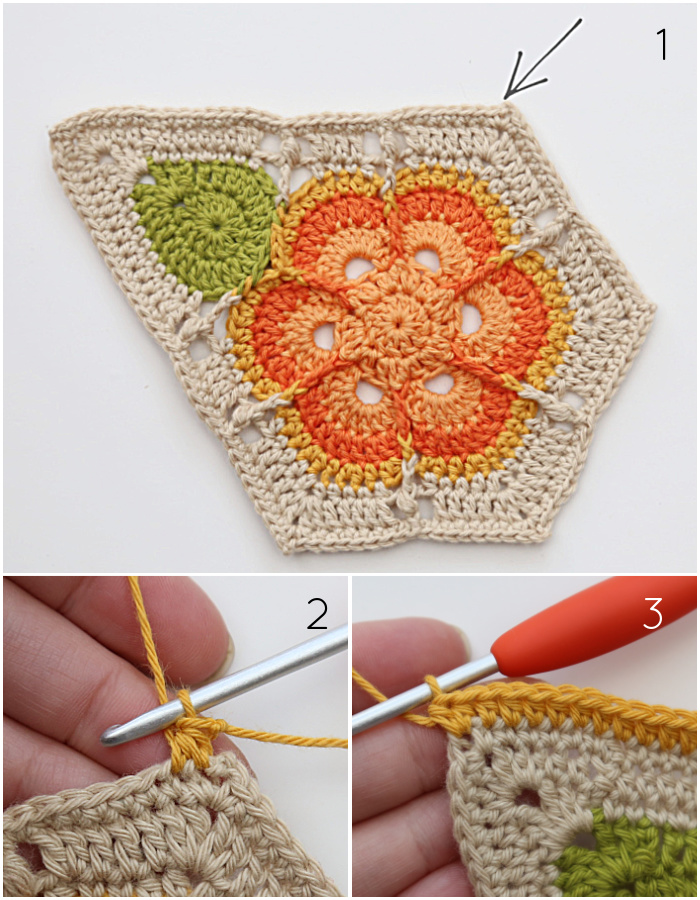
Working into the side farthest away from you, join your yarn by making a standing hdc2tog in the first 2 sts after the ch-2 corner sp {indicated with an arrow in Photo 1 and illustrated in Photo 2}. Hdc in the next 30 sts. Make 2 hdc in the ch-2 corner sp at the pointy end of the leaf {Photo 3}.
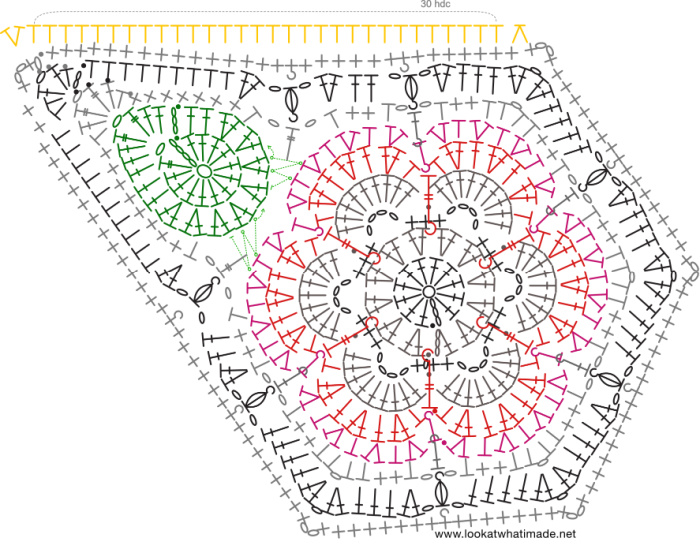
You will now work into the second motif from the bottom. What I tell you to do next will feel wrong but trust the process.
Take the second motif from the bottom and turn it so that the Colour N Leaf is to your left (right, if you are left-handed) and farthest away from you (with RS facing). Place it to the left of the motif you just worked into (right, if you are left-handed) – Photo 4.
Working into the side farthest away from you, hdc2tog in the first 2 sts after the ch-2 corner sp {Photo 5}. Hdc in the next 30 sts. Make 2 hdc in the ch-2 corner sp at the pointy end of the leaf {Photos 6 and 7}.
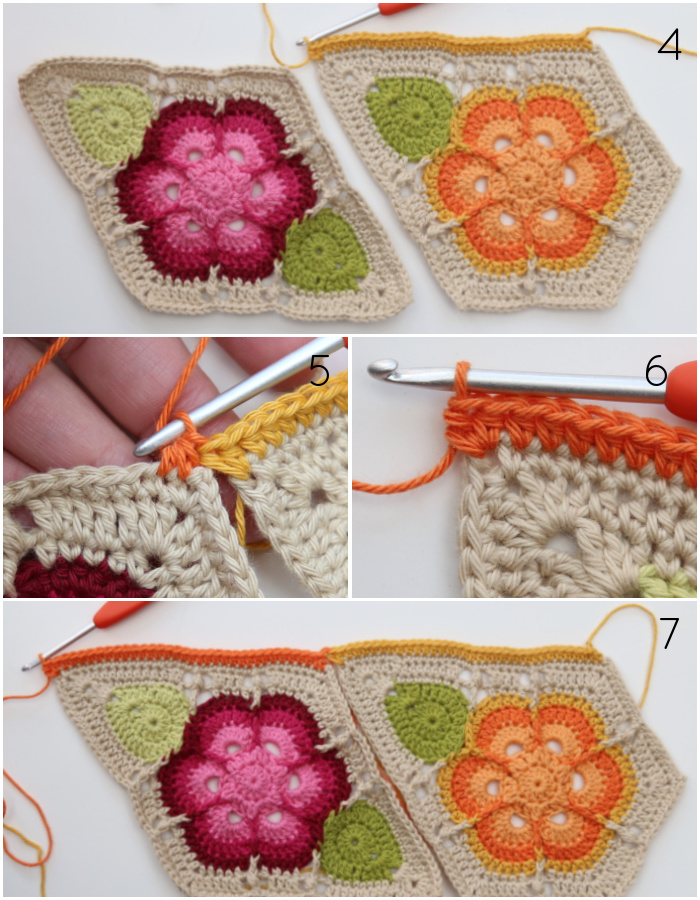
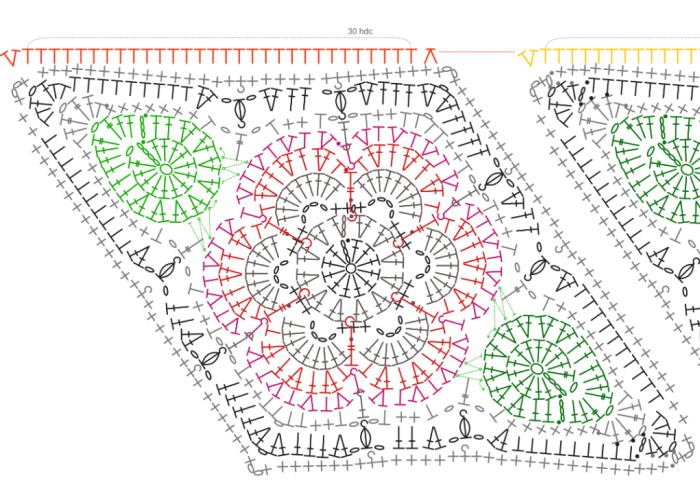
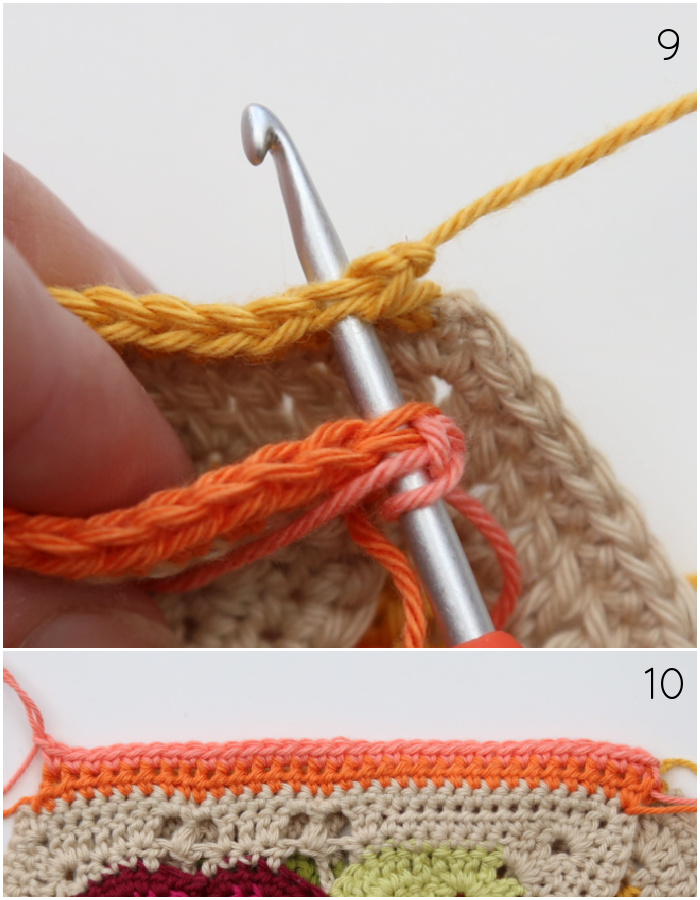
Fold the second motif over onto the first motif so that Joining Row 1 of each motif is on top of each other and the WS of the second motif is facing you {Photo 8}.
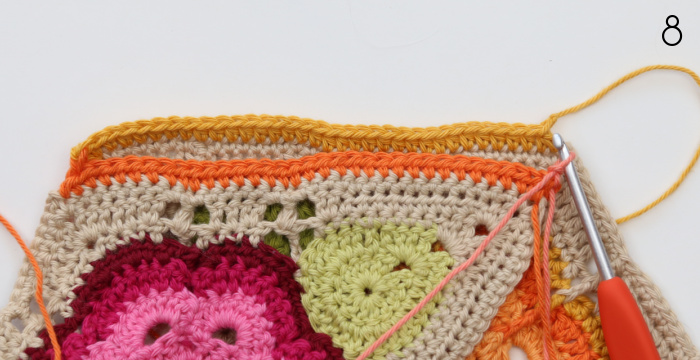
Joining Row 2
Ch 1. Insert your hook into the first st of the top layer and the second st of the bottom layer. Make a sc. Working through both layers, sc in the next 31 sts. Fasten off.

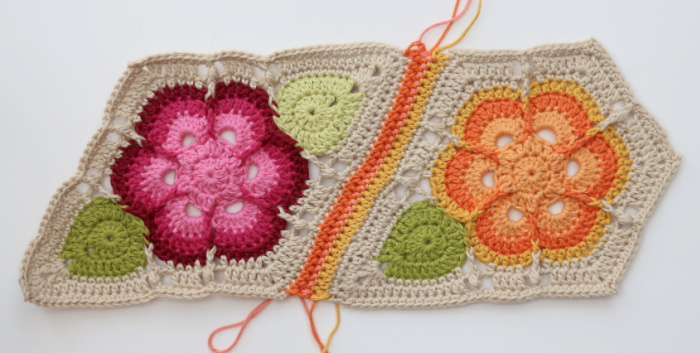
Open up your work and check that it looks like this (with Colour P, not random brights, of course):
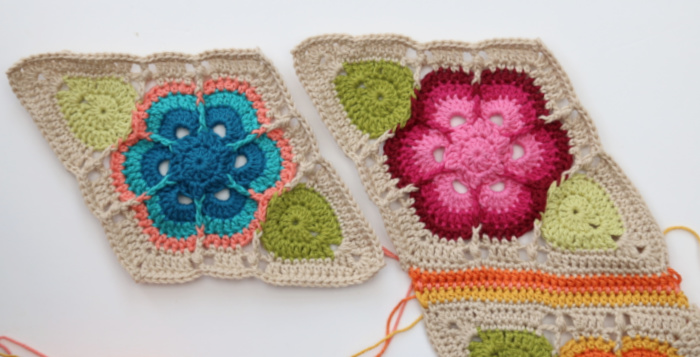
Joining The Remaining Motifs
Joining Row 1
Place your work so that the Colour O Leaf of the last joined motif is to your left (right, if you are left-handed) and farthest away from you (with RS facing).
Working into the side farthest away from you, join your yarn by making a standing hdc2tog in the first 2 sts after the ch-2 corner sp. Hdc in the next 30 sts. Make 2 hdc in the ch-2 corner sp at the pointy end of the leaf.
Take the next motif and turn it so that the Colour N Leaf is to your left (right, if you are left-handed) and farthest away from you (with RS facing). Place it to the left of the motif you just worked into (right, if you are left-handed).
Working into the side farthest away from you, hdc2tog in the first 2 sts after the ch-2 corner sp. Hdc in the next 30 sts. Make 2 hdc in the ch-2 corner sp at the pointy end of the leaf.
Fold this motif over onto the other motif so that Joining Row 1 of each motif is on top of each other (as before).
Joining Row 2
Ch 1. Insert your hook into the first st of the top layer and the second st of the bottom layer. Make a sc. Working through both layers, sc in the next 31 sts. Fasten off.
Repeat these steps until you have joined all 10 motifs in this column.
Joining the Second Column
Repeat the instructions above for the second column.
Part 12: Joining Large Motifs
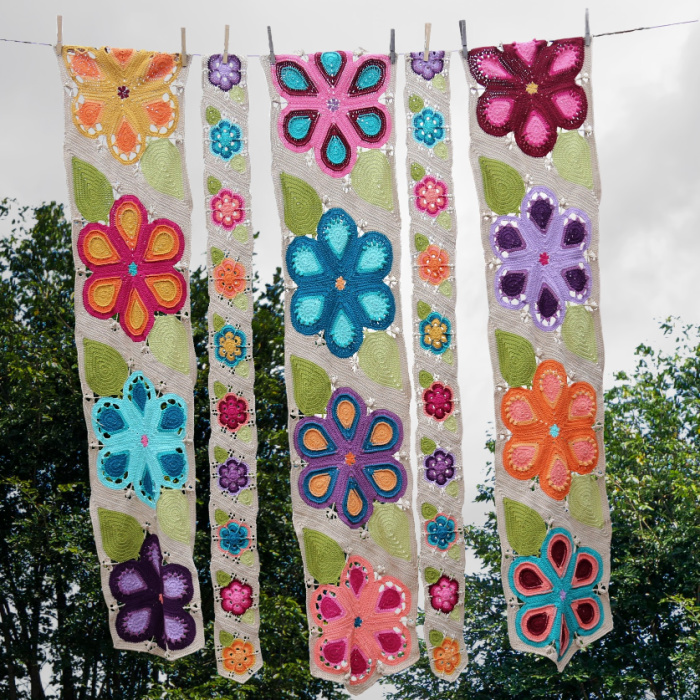
You will join your large motifs in 3 columns, each containing 4 motifs. You will be joining them in the same way you joined the Small Motifs, just with more stitches. Please refer to the Layout Diagram at the start of Part 11 for placement.
All joining will be done using Colour P.
Joining the First Column
Joining the First Two Motifs
Joining Row 1
Starting at the bottom, place your first motif (with RS facing) so that the Colour O Leaf is to your left (right, if you are left-handed) and farthest away from you.
Working into the side farthest away from you, join your yarn by making a standing hdc2tog in the first 2 sts after the ch-2 corner sp. Hdc in the next 93 sts. Make 2 hdc in the ch-2 corner sp at the pointy end of the leaf.
You will now work into the second motif from the bottom. What I tell you to do next will feel wrong but trust the process.
Take the second motif from the bottom and turn it so that the Colour N Leaf is to your left (right, if you are left-handed) and farthest away from you (with RS facing). Place it to the left of the motif you just worked into (right, if you are left-handed).
Working into the side farthest away from you, hdc2tog in the first 2 sts after the ch-2 corner sp. Hdc in the next 93 sts. Make 2 hdc in the ch-2 corner sp at the pointy end of the leaf.
Fold the second motif over onto the first motif so that Joining Row 1 of each motif is on top of each other and the WS of the second motif is facing you.
Joining Row 2
Ch 1. Insert your hook into the first st of the top layer (remembering that the loops will be AFTER the post because the back of this motif is facing you) and the second st of the bottom layer. Make a sc. Working through both layers, sc in the next 94 sts. Fasten off.
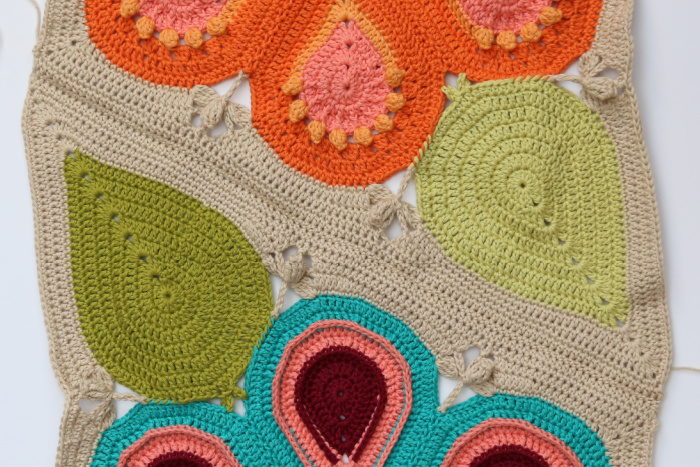
Joining the Remaining Motifs
Joining Row 1
Place your work so that the Colour O Leaf of the last joined motif is to your left (right, if you are left-handed) and farthest away from you (with RS facing).
Working into the side farthest away from you, join your yarn by making a standing hdc2tog in the first 2 sts after the ch-2 corner sp. Hdc in the next 93 sts. Make 2 hdc in the ch-2 corner sp at the pointy end of the leaf.
Take the next motif and turn it so that the Colour N Leaf is to your left (right, if you are left-handed) and farthest away from you (with RS facing). Place it to the left of the motif you just worked into (right, if you are left-handed).
Working into the side farthest away from you, hdc2tog in the first 2 sts after the ch-2 corner sp. Hdc in the next 93 sts. Make 2 hdc in the ch-2 corner sp at the pointy end of the leaf.
Fold this motif over onto the other motif so that Joining Row 1 of each motif is on top of each other (as before).
Joining Row 2
Ch 1. Insert your hook into the first st of the top layer (remembering that the loops will be AFTER the post because the back of this motif is facing you) and the second st of the bottom layer. Make a sc. Working through both layers, sc in the next 94 sts. Fasten off.
Repeat the instructions one more time to join Motifs 3 and 4 of this column.
Joining the Second and Third Columns
Repeat the instructions above for the second and third columns.
Phew, we are almost there! Next week I will tell you how to join the columns to each other before starting on Border Rounds 1 and 2. And the week after that we will complete the border. How time has flown!

This blog post contains affiliate links. I only link to products I personally use or would use. All opinions are my own.


