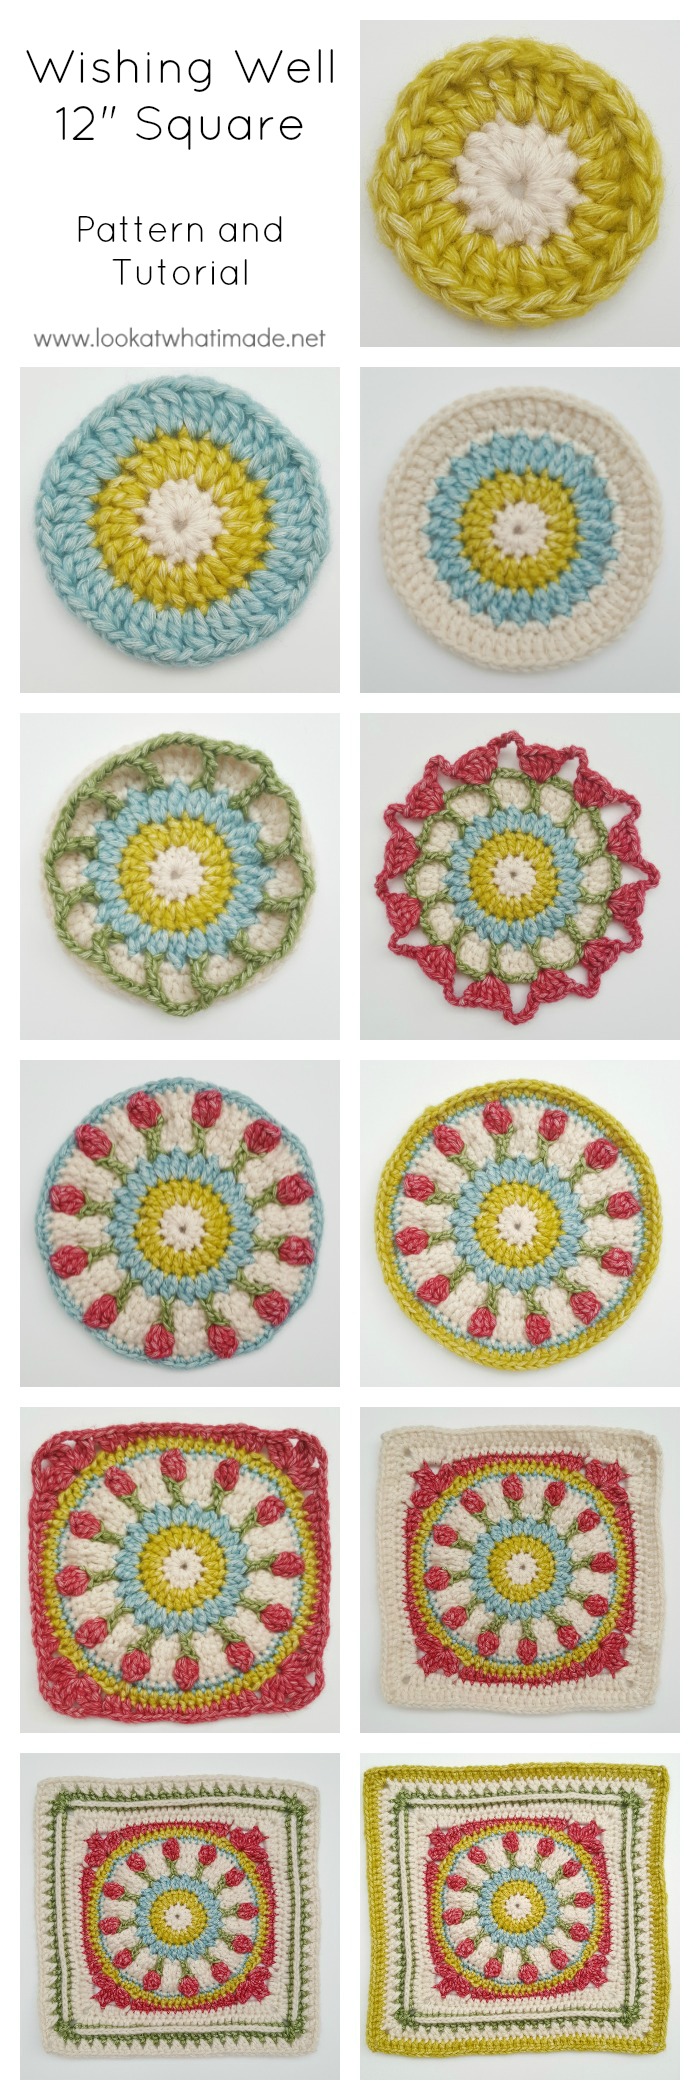
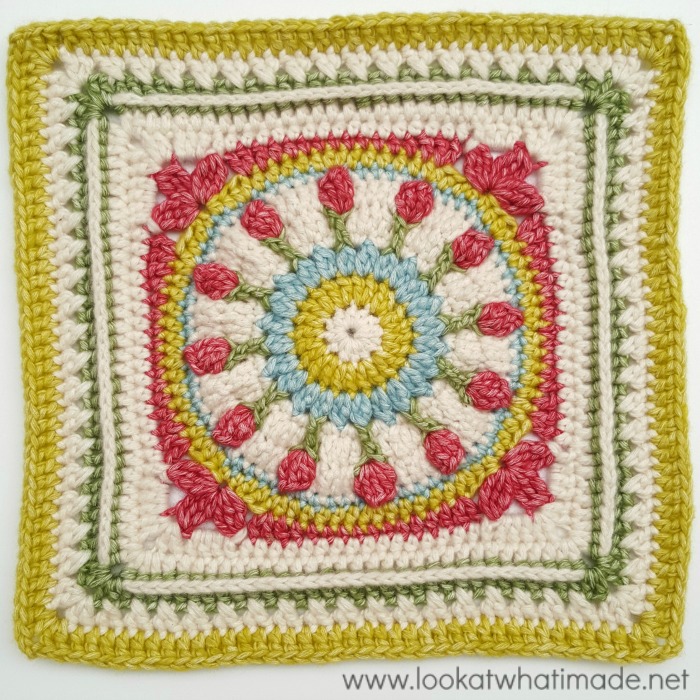
I am very excited to bring you my latest 12″ crochet square: Wishing Well. Designed for the Moogly CAL 2016, it was inspired by a flight of fancy.
My favourite book (and musical) is Les Miserables. I know the story and songs so well that I could probably perform it for you at the drop of a hat (you don’t want me to do that, though).
One of the parts that always made me sad as a child is when Mme. Thenadier tells Cosette to go and “fetch some water from the well in the wood,” to which Cosette responds: “Please do not send me out alone, not in the darkness on my own!”
I used to imagine Cosette, scared and alone, walking into the forest to find the well. My mind, rebelling against this sad vision, conjured up a magical wishing well surrounded by flowers and lit up as if a spotlight were shining on it (or a giant moonbeam if I am being totally honest).
This square is my interpretation of that imagined wishing well.
Wishing Well 12” Square
©Dedri Uys 2016. All Rights Reserved.
Tested by Jenny Lowman and Isabelle Claisse
- Ravelry: Add this pattern to your Ravelry Queue
- Hashtags: #mooglycal2016 #wishingwellcrochetsquare #lookatwhatimadedotnet
- French Translation by Véronique Malanda from Chez Horaive
Materials
- 5 mm crochet hook
- 125 meters of worsted weight yarn in 5 colours
Size
12” Square
Gauge
At the end of Round 3, your circle should measure 9 cm (3.5”)
Abbreviations
US Terminology Used
- BP – Back post (Insert hook from back to front around the post of the st)
- FP – Front post (Insert hook from front to back around the post of the st)
- Hdc – Half-double crochet
- Sc – Single crochet
- Sl st – Slip stitch
- Sp – Space
- St/st – Stitch/stitches
- Tr – Treble
- () – Repeat instructions between parentheses the amount of times specified.
- * – Repeat instructions between asterisks the amount of times specified.
Special Stitches
2-dc Cluster (Dc2tog in the Same Stitch) – Yarn over and insert your hook into the next stitch. Yarn over and draw up a loop. Yarn over and pull through 2 loops – 2 loops on hook. Yarn over and insert your hook into the same stitch. Yarn over and draw up a loop. Yarn over and pull through 2 loops – 3 loops on hook. Yarn over and pull through all 3 loops.
Standing Stitches – With a slip knot already on your hook, complete the stitch as normal. You can see a tutorial for the standing double crochet HERE.
Tr Bobble – Yarn over twice and insert your hook into the indicated stitch. Yarn over and pull up a loop. (Yarn over and pull through 2 loops) twice – 2 loops on hook. Yarn over twice and insert your hook into the same stitch. Yarn over and pull up a loop – 5 loops on hook. (Yarn over and pull through 2 loops) twice – 3 loops on hook. Yarn over twice and insert your hook into the same stitch. Yarn over and pull up a loop – 6 loops on hook. (Yarn over and pull through 2 loops) twice – 4 loops on hook. Yarn over and pull through all 4 loops.
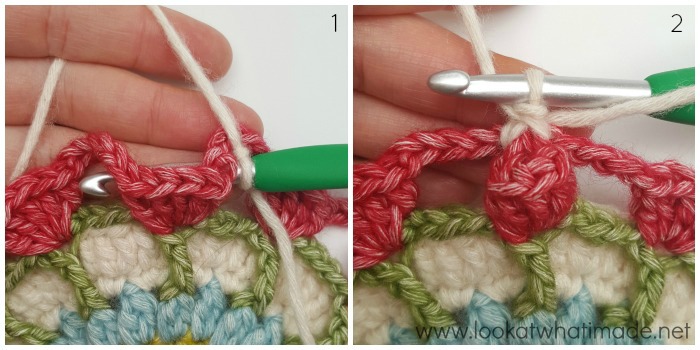
Turning 5-dc groups into Popcorns – Insert your hook from front to back into the ch-6 sp before the 5-dc group, and from back to front into the ch-6 sp after the 5-dc group {Photo 1}. Yarn over and pull up a loop. Yarn over and pull through both loops on your hook {Photo 2}. This is your FPsc made. Tug on the ch spaces so that you get a neat Popcorn.
Notes
Join to the first stitch of the round with a sl st, or use the Invisible Join. Exceptions will be highlighted.
Instructions
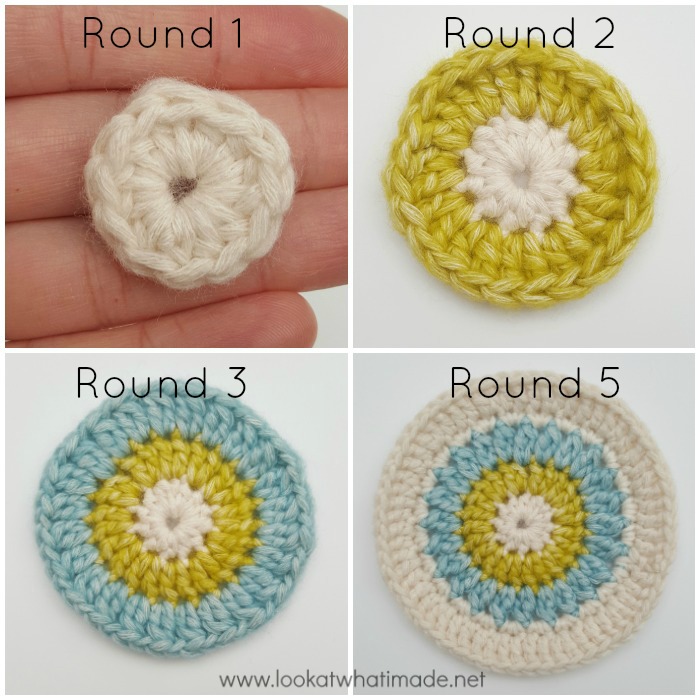
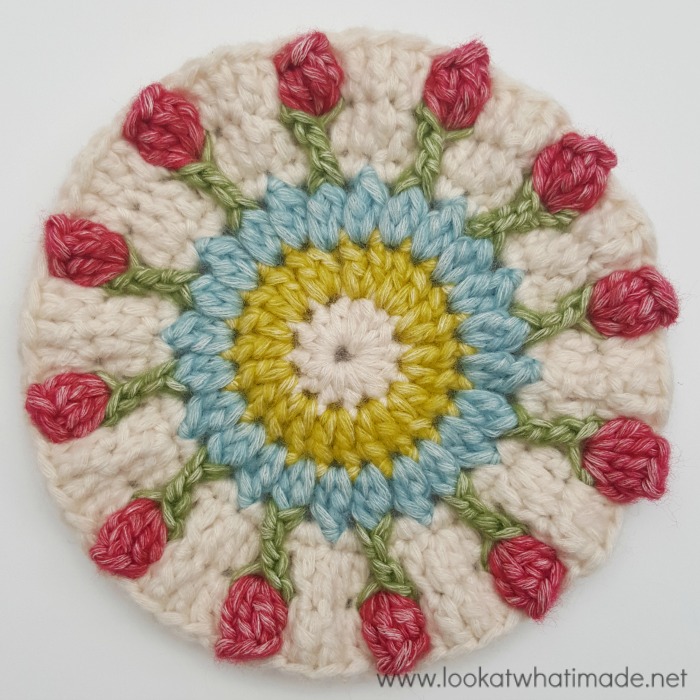
Round 1: With Colour A and working into a magic ring, ch 1 (doesn’t count as a st), 12 hdc. Join (see Notes) and fasten off. {12 hdc}
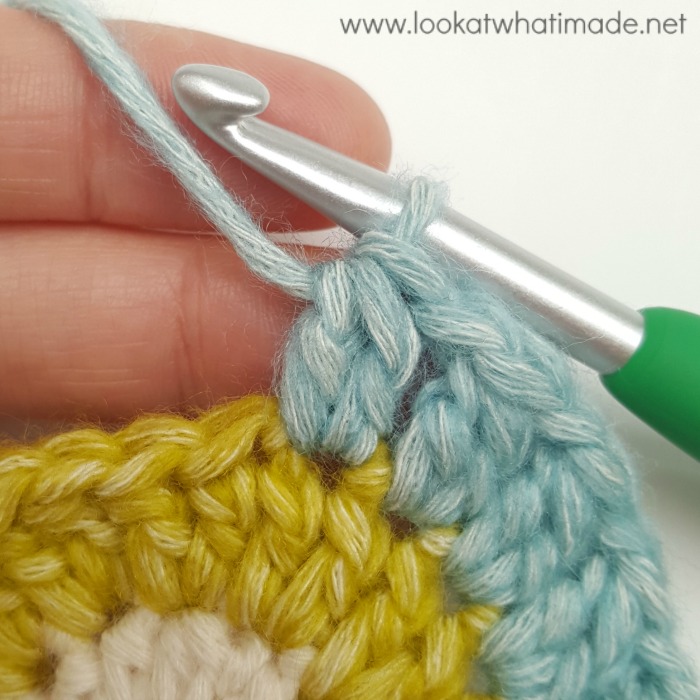
Round 2: With Colour B, join your yarn by making a standing dc in any st around. Dc in the same st. Make 2 dc in each remaining st. Join and fasten off. {24 dc}
Round 3: With Colour C, join your yarn by making a sl st in any st around. Ch 2 and make a dc in the same st. This counts as first 2-dc Cluster. (Ch 1, make a 2-dc Cluster in the next st) 23 times. Ch 1, join, and fasten off. {24 2-dc Clusters, 24 ch-1 spaces}
Round 4: With Colour A, join your yarn by making a standing sc in any ch-1 sp around. Sc in the same sp. Make 2 sc in each remaining sp. Join to the first sc with a sl st. {48 sc}
Round 5: Ch 3 (counts as first dc), dc in the same st. (Dc in the next 3 st, make 2 dc in the next st) 11 times. Dc in the last 3 st. Join and fasten off. If you are going to have trouble identifying the initial ch-3 later on, mark it with a st marker. {60 dc}
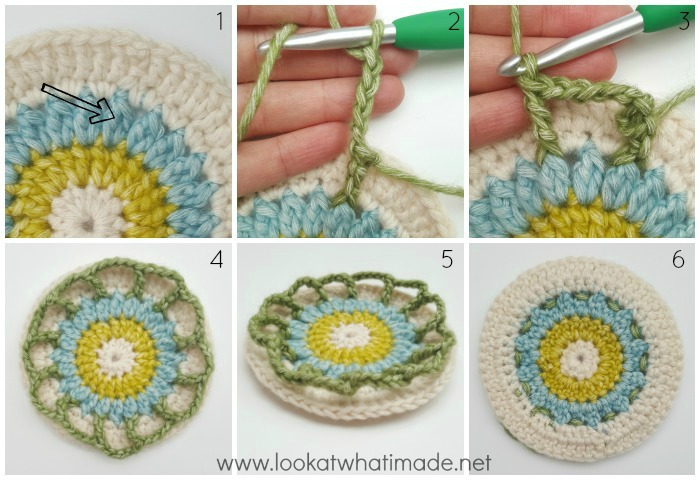
Round 6: This round will not be attached to Rounds 4 and 5. With Colour D, join your yarn by making a standing FPtr around the 2-dc Cluster from Round 3 directly below the beginning ch-3 of Round 5 {indicated with an arrow in Photo 1 and illustrated in Photo 2}. (Ch 5 and skip the next 2-dc Cluster. Make a FPtr around the next 2-dc Cluster {Photo 3}) 11 times. Ch 5 and skip the last 2-dc Cluster. Join and fasten off. {12 FPtr and 12 ch-5 sp}
Photos 4 – 6 show you what your work should look like from the front, side, and back.
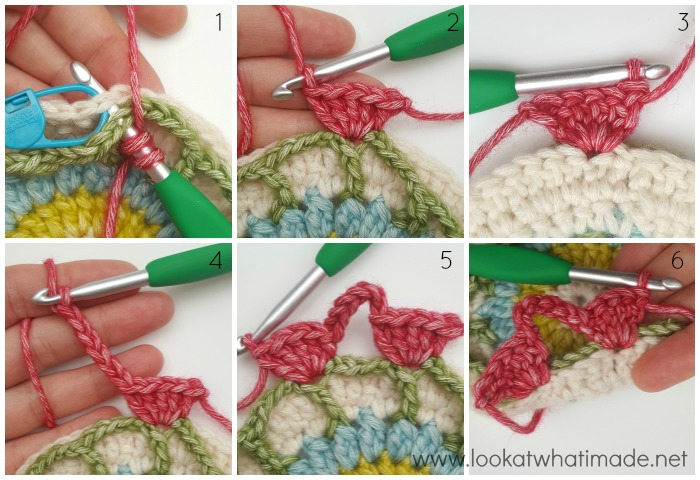
Round 7: Before you start, locate the first FPtr of Round 6, which should be directly in front of the beginning ch-3 from Round 5. This is where you will start. With Colour E, join your yarn by making a standing dc in the FPtr below the beginning ch-3 of Round 5 AND into the top of the beginning ch-3 from Round 5 (so through both layers). To do this, insert your hook into the FPtr, then insert your hook into the indicated st on Round 5 {Photo 1} and complete your dc as normal. Make 4 more dc working through both st {Photo 2 shows the front, Photo 3 shows the back}. (Ch 6 {Photo 4}. Skip the next 4 st from Round 5. The first skipped st will be slightly hidden by the 5 dc you just made. Make 5 dc in the next FPtr AND the next st of Round 5 as before {Photos 5 and 6}) 11 times. Ch 6 and skip the last 4 st of Round 5. Join and fasten off. {12 5-dc groups and 12 ch-6 sp}
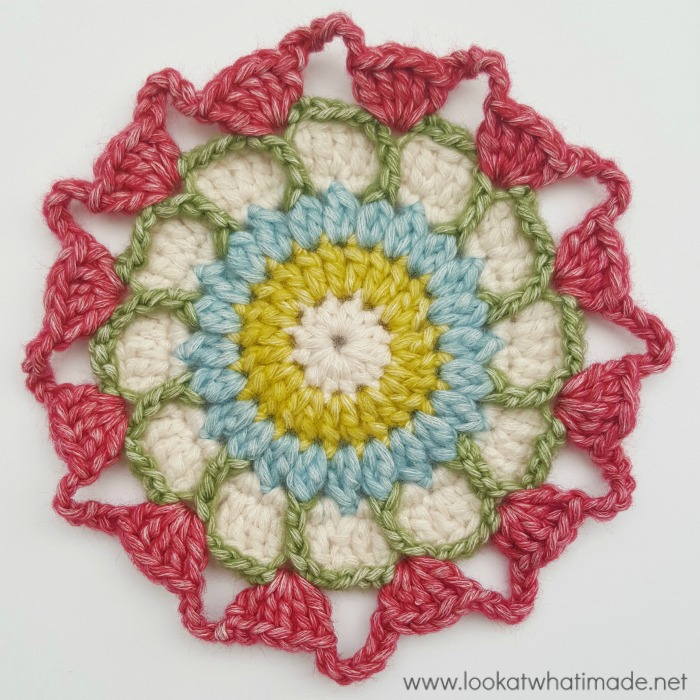
Round 8: In this round, you will be making Popcorns from the 5-dc groups (see Special Stitches above). You will also be working over the chain spaces from Rounds 6 and 7. With Colour A, join your yarn by making a standing FPsc around any 5-dc group. (Working over both chain spaces, dc in the next 3 skipped dc from Round 5, make 2 dc in the next skipped dc. FPsc around the next 5-dc group) 11 times. Dc in the next 3 skipped dc from Round 5, remembering to work over both chain spaces, and make 2 dc in the last skipped dc. Join and fasten off. {12 FPsc, 60 dc}
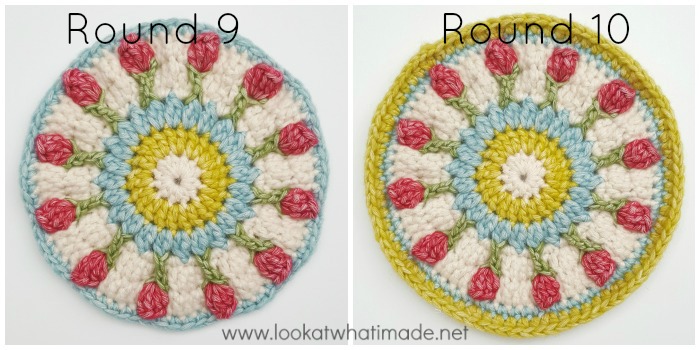
Round 9: With Colour C, join your yarn by making a standing sc in any FPsc. Sc in each of the remaining 71 st. Join and fasten off. {72 sc}
Round 10: With Colour B, join your yarn by making a standing hdc in the same st as the join. Hdc in the same st. (Hdc in the next 5 st, make 2 hdc in the next st) 11 times. Hdc in the last 5 st. Join and fasten off. {84 hdc}
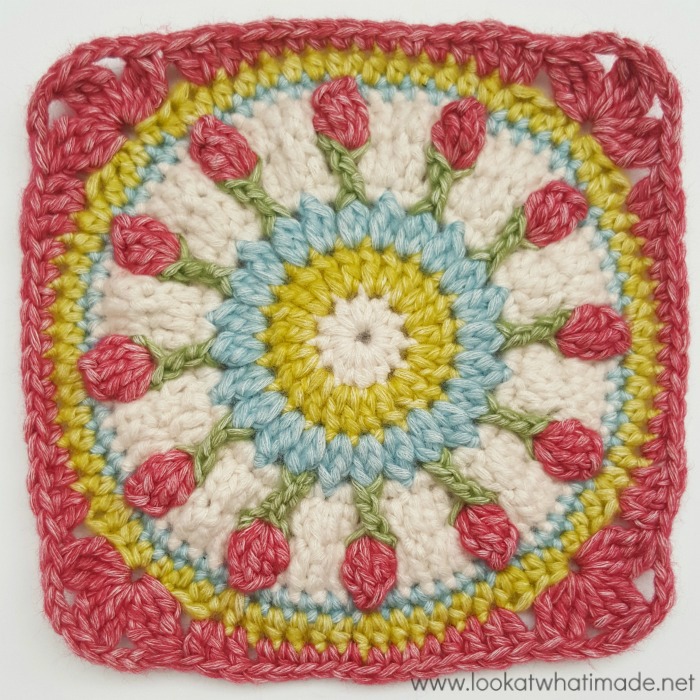
Round 11: With Colour E, join your yarn by making a standing sc in the second hdc of the previous round. Sc in the next 2 st. *Hdc in the next 2 st, dc in the next st, make 2 dc in the next st. Skip the next 3 st and make a Tr Bobble in the next st. (Ch 3, Tr Bobble in the same st) twice. Skip next 3 st, make 2 dc in next st, dc in next st, hdc in next 2 st, sc in the next 6 st.* Repeat from * to * 3 more times, omitting the last 3 sc on the last repeat. Join and fasten off. {18 st and 2 ch-3 sp per side, not including the central corner Tr Bobble – 6 sc, 4 hdc, 6 dc, and 2 Tr Bobbles}
Round 12: With Colour A, join your yarn by making a standing dc in any central corner Tr Bobble. (Dc, ch 2, 2 dc) in the same st. This is your first corner made. *Make 3 dc in the next ch-3 sp. FPdc around the Tr Bobble. Hdc in the next 16 st. Don’t accidentally skip the first st after the FPdc, which will be slightly hidden. FPdc around the next Tr Bobble. Make 3 dc in the next ch-3 sp. (2 dc, ch 2, 2 dc) in the next Tr Bobble.* Repeat from * to * 3 more times, omitting the last corner on the last repeat. Join to the first dc with a sl st. Sl st in the next st and in the ch-2 space. {28 st per side – 16 hdc, 2 FPdc, and 10 dc}
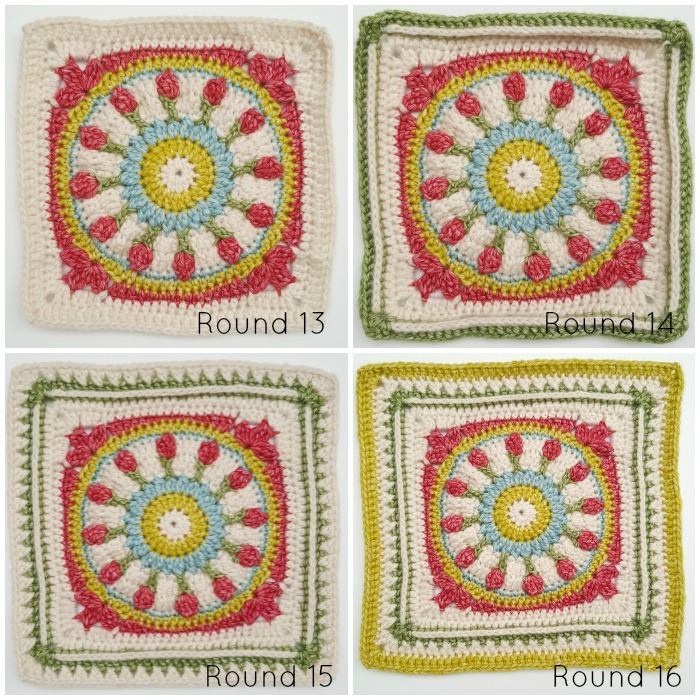
Round 13: Ch 3 (counts as dc). (Dc, ch 2, 2 dc) in the same sp. This is your first corner made. *Dc in each of the next 28 st. (2 dc, ch 2, 2 dc) in the next ch-2 corner space.* Repeat from * to * 3 more times, omitting the last corner on the last repeat. Join and fasten off. {32 dc per side}
Round 14: With Colour D, join your yarn by making a standing hdc in any ch-2 corner space. (Hdc, ch 2, 2 hdc) in the same sp. This is your first corner made. *BPdc around each of the 32 st across. (2 hdc, ch 2, 2 hdc) in the next ch-2 corner sp.* Repeat from * to * 3 more times, omitting the last corner on the last repeat. Join and fasten off. {36 st per side – 4 hdc and 32 BPdc}
Round 15: With Colour A, join your yarn by making a standing dc in any ch-2 corner space. (Dc, ch 2, 2 dc) in the same st. This is your first corner made. *Skip the first (hidden) stitch. (Skip the next st and dc in the next st. Working over the dc you just made, dc in the skipped st) 17 times. Skip the last st. (2 dc, ch 2, 2 dc) in the next ch-2 corner space.* Repeat from * to * 3 more times, omitting the last corner on the last repeat. Join and fasten off. {38 st per side – 4 dc and 34 dc}
Round 16: With Colour B, join your yarn by making a standing dc in any ch-2 corner space. (Dc, ch 2, 2 dc) in the same st. This is your first corner made. *Skip the first (hidden) stitch. Dc in the remaining 37 st. (2 dc, ch 2, 2 dc) in the next ch-2 corner space.* Repeat from * to * 3 more times, omitting the last corner on the last repeat. Join and fasten off. Work away all your ends! {41 dc per side}
I hope you enjoy making this square! If you have any questions or feedback, please leave a comment.

This blog post contains affiliate links. I only link to products I personally use or would use. All opinions are my own.

Peggy Sterling says
I’m obsessed with this pattern and the yarn colors. Could you please share the actual colors you used in the Scheepjies yarn?
Jenny Lowman says
Hi Peggy. Dedri used Scheepjes Stone Washed yarn. The colours are –
801 – Moonstone
806 – Canada Jade
813 – Amazonite
823 – Carnelian (or it could be 807 Jasper)
827 – Peridot
Caroline says
Your tutorial instructions are some of the best I’ve seen. Thank you! I really like how you managed the flower design.
Jenny Lowman says
This is a lovely square from Dedri! I have to agree with you, Caroline :) J
Marit Hogerzeil says
Thank you so much for this inspirational design. It is so generous of you to share it with all. Thank you too for all the clear explanations and photo’s. It must have taken you considerable time and effort, I am most grateful.
I have just used the design of the circle for the bottom of a makeup bag for a friend.
Warm wishes,
Marit
farida says
Its love at first sight…love love this little square. Thanks for this beauty
Theresa Eriksson says
Thank you for a beautiful design and for the inspiration.
I was planning to use the yarn Scheepjes Stonewashed (not XL) (because I recently was doing Dedri´s Rose garden <3).
What about the size, how much smaller do you think square will be (hook size 3mm) with that yarn instead?
Best regards Theresa
Dedri Uys says
Hi Theresa, that will depend very much on your gauge, but I would say roughly 8″?
Dedri