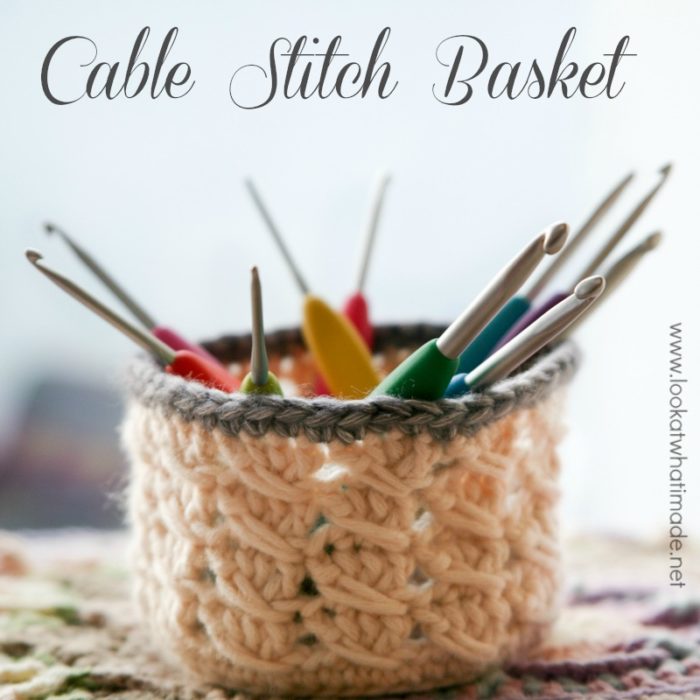
This Crochet Cable Stitch Basket is a quick and easy make. It is the perfect way to practice the Cable Stitch.
I use my Cable Stitch Basket to store my Clover Amour crochet hooks in. (The sets are currently 40% off, both on Amazon.com and Amazon.co.uk). The basket lives on my “photography desk” and has ended up in the background of a lot of my photos. It was the very first thing I made with Scheepjeswol Stonewashed XL, back when I was still deciding which yarn to use for Sophie’s Universe.
Size
Base: 9 cm (3.5″)
Height: 6.5 cm (2.5″)
Materials
- 35 meters (38 yards) of Worsted weight yarn in 2 colours. I have used Scheepjeswol Stonewashed XL {US link HERE} in 2 colours:
- Main Colour: Moonstone (841) – 33 meters (35.5 yards)
- Contrasting Colour: Black Onyx (843) – 2 meters (2.5 yards)
- 5.5 mm Clover Amour Crochet Hooks
(US 9/I UK 5)
- (5 mm hook used for the smaller basket in the tutorial below, which was made using Scheepjeswol Bloom)
Abbreviations
- Blo – Back loop only
- Ch – Chain
- Dc – Double Crochet
- Sc – Single Crochet
- () – Repeat all instructions between parentheses the amount of times specified
- Sl st – Slip stitch
- St/st’s – Stitch/stitches
Special Stitches
Cable Stitch: Skip the next stitch. Dc in the next 3 st’s. Working over the 3 dc’s, yarn over and insert your hook into the skipped stitch. Pull up a loop to the height of the dc’s. This loop should encompass the 3 dc’s and should be visible on the front AND back of your work. (Yarn over and pull through 2 loops) twice, completing an extended (or long) dc. See this tutorial if you need visual help.
Note: The first Cable Stitch of each round is a bit different from the other Cable Stitches, because you are making your extended dc into the stitch that contains the first sl st, which will count as your “skipped” stitch.
Instructions
- Add This Pattern to your Ravelry Queue
- Use the Print Friendly button at the bottom of this post if you would like to print/save this pattern.
Notes
- The base of the basket is worked in a spiral. See THIS POST if you need help working in a spiral.
- The “body” of the basket is worked by joining in the round.
- Please Note: I have used Scheepjeswol Bloom for the tutorials, so that you can see the stitches more clearly. Because this yarn isn’t as “fluffy” as the Stonewashed XL, I have used a 5 mm hook in the tutorial below to maintain a dense structure. The resulting basket fits snugly inside the Stonewashed XL basket.
Base
Use Main Colour
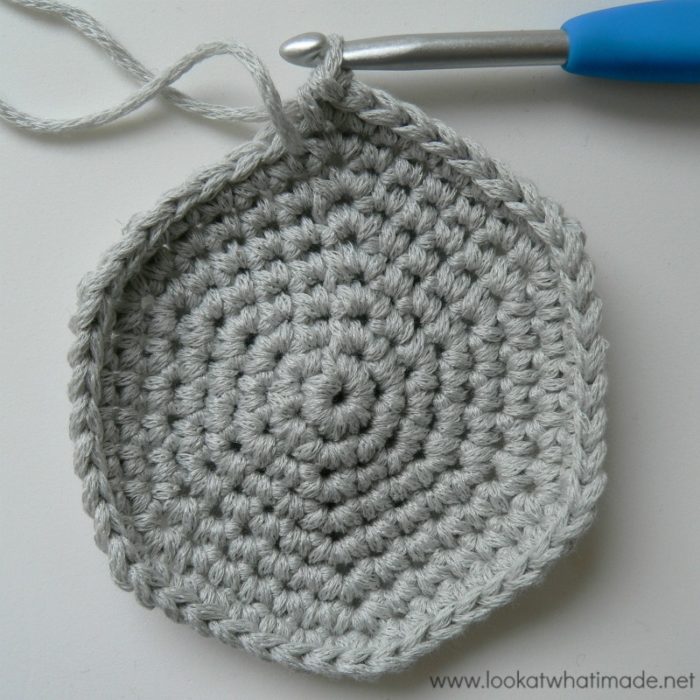
- Into a magic ring: Ch 1, make 6 sc’s. Alternatively start by chaining 2 and making 6 sc’s in the second chain from the hook. {6}
- Make 2 sc’s in each of the 6 st’s around. {12}
- (Sc in the next st, make 2 sc’s in the next st) 6 times. {18}
- (Sc in the next 2 st’s, make 2 sc’s in the next st) 6 times. {24}
- (Sc in the next 3 st’s, make 2 sc’s in the next st) 6 times. {30}
- (Sc in the next 4 st’s, make 2 sc’s in the next st) 6 times. {36}
- (Sc in the next 5 st’s, make 2 sc’s in the next st) 6 times. {42}
- (Sc in the next 6 st’s, make 2 sc’s in the next st) 6 times. {48}
Body
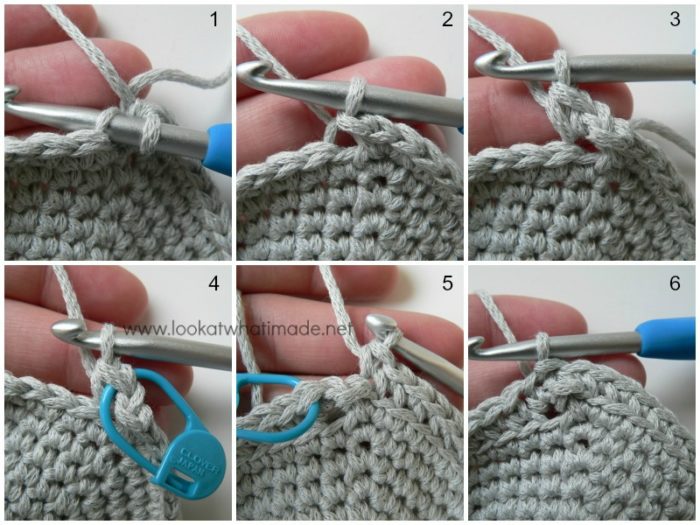
Sl st in the back loop only of the next st (Photos 1 and 2).
- Ch 1 and sc in the blo of the same stitch as the sl st join (Photo 3). Mark this stitch if you are going to find it difficult to identify it later on. Sc in the blo of the remaining 47 st’s (Photo 5). Join to the first (marked) sc with a sl st (Photo 6). Make sure that you skip the sl st and the initial ch-1 (visible in Photo 5). {48}
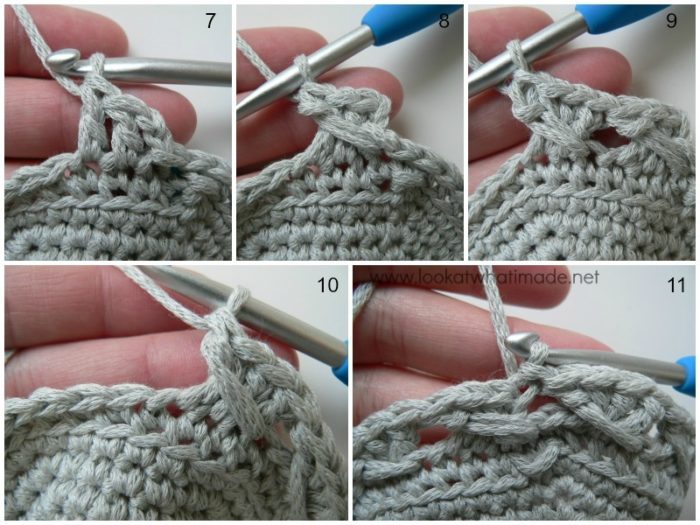
- Sl st into the next st. Ch 2. This counts as your first dc. Dc in the next 2 st’s (Photo 7). Working over the initial ch-2 and the 2 dc’s just made, yarn over and insert your hook into the same stitch as the joining sl st (in other words, into the marked sc). Pull up a loop to the height of the dc’s. This loop should encompass the initial ch-2 and 2 dc’s, and should be visible on the front AND back of your work. (Yarn over and pull through 2 loops) twice, completing an extended (or long) dc. This is your Starting Cable Stitch made (Photo 8). (Make a Cable Stitch over the next 4 st’s – see Photos 9 and 10) 11 times. Join to the top of the beginning ch-2 with a sl st (Photo 11). {12 Cable Stitches}
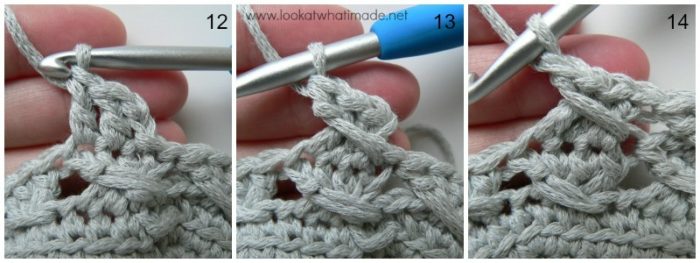
- Sl st into the next dc. Ch 2. This counts as your first dc. Dc in the next 2 st’s (Photo 12). Working over the initial ch-2 and the 2 dc’s just made, yarn over and insert your hook into the same stitch as the joining sl st (in other words, into the top of the beginning ch-2 from the previous round, which already contains a sl st). Pull up a loop to the height of the dc’s. This loop should encompass the initial ch-2 and 2 dc’s, and should be visible on the front AND back of your work. (Yarn over and pull through 2 loops) twice, completing an extended (or long) dc. This is your Starting Cable Stitch made (Photo 13). (Make a Cable Stitch over the next 4 st’s – see Photo 14) 11 times. Join to the top of the beginning ch-2 with a sl st. {12 Cable Stitches}
- Repeat Round 3. {12 Cable Stitches}
- Repeat Round 3. At the end of Round 5, bind off and work away your tails of yarn. It is well worth using the Invisible Join. {12 Cable Stitches}
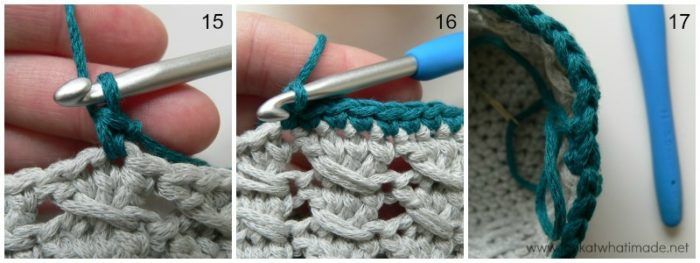
- Join your Contrasting Colour yarn by making a standing single crochet in any st around (Photo 15). Sc in each of the remaining 47 st’s (Photo 16). Fasten off and join with the Invisible Join (Photo 17).
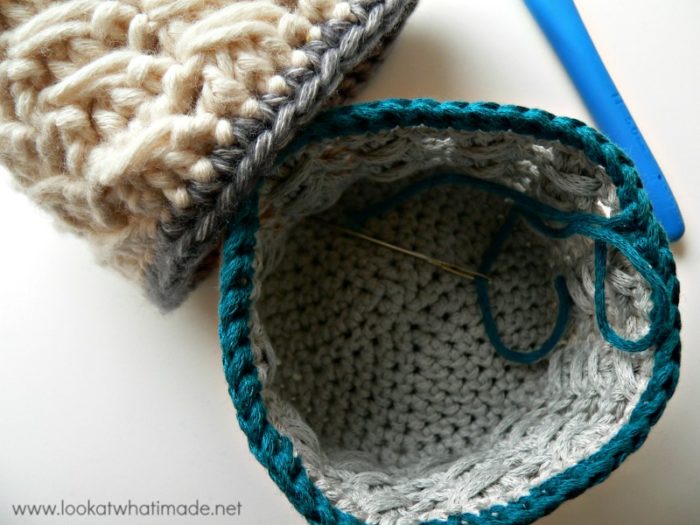
Remember to work away all your tails of yarn. Pay special attention to the initial tail of yarn, especially if you have started with a magic ring.
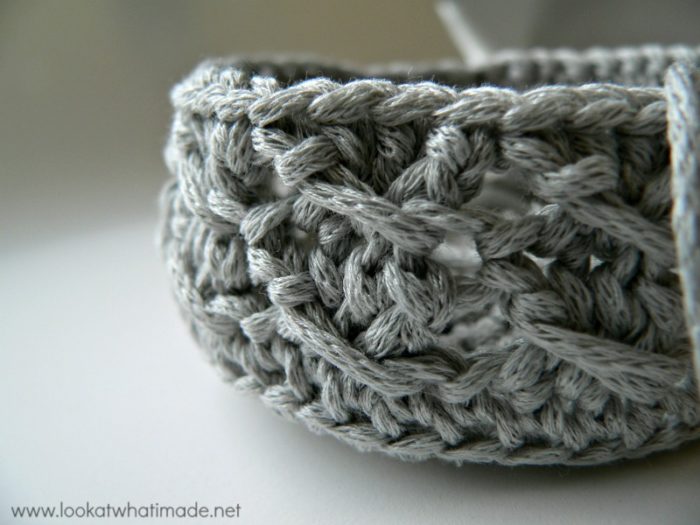
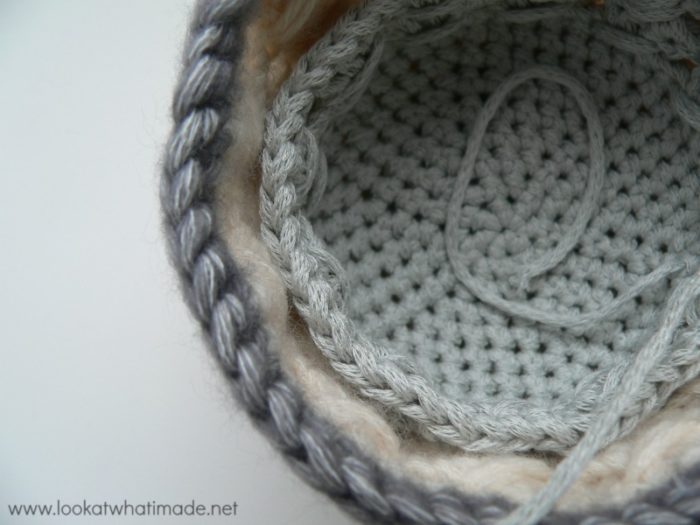
Here you can see that the Bloom basket fits snugly inside of the Stonewashed XL basket. Although the yarns are the same thickness, the Stonewashed XL is more “fluffy”, meaning that it appears more dense than the Bloom when worked up with a 5.5 mm hook. If you find that your specific brand of worsted weight works up “looser”, consider dropping down a hook size so that your basket is nice and sturdy.
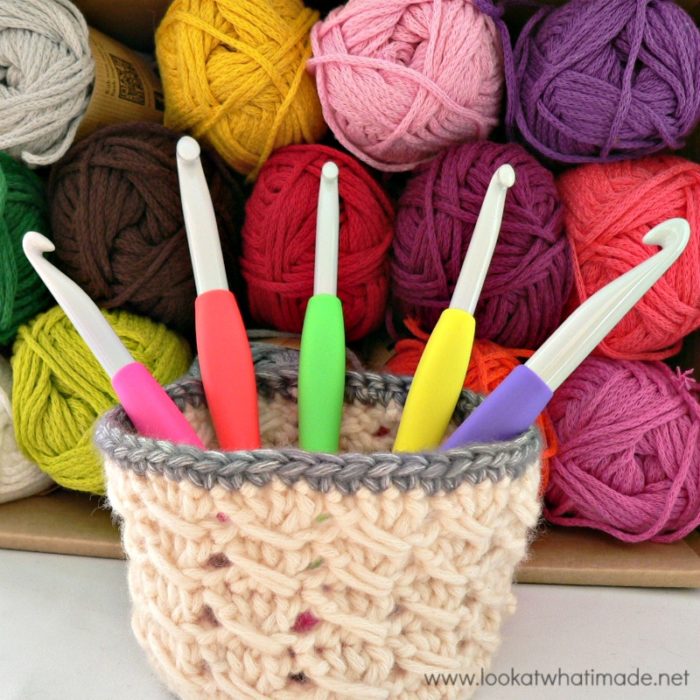
Here you can see my stash of Bloom just waiting to be turned into something awesome! You can also see my Crochet Cable Stitch Basket full of Large Clover Amour Hooks. These hooks are great when working with plarn or t-shirt yarn, but I suggest trying the standard set first to see if you like the fit and feel of the Amours.
If you like the Cable Stitch, but have no use for a Cable Stitch Basket, consider making one of these Cable Stitch Dishcloths. They are both pretty and versatile!

This blog post contains affiliate links. I only link to products I personally use or would use. All opinions are my own.


Carolyn says
How could I make this same design into a larger basket?
Carolyn
Dedri Uys says
You can just keep making base rounds, increasing by 6 in every round and making sure to end with a multiple of 4 st’s. When your base is as big as you want it to be, follow the instructions for the sides and keep going until your basket is as high as you want it to be.
Beth Ann says
Thank you! Apparently I’m allergic to leftover yarn and this is perfect!
Dedri Uys says
Lol. Left-over-itis