Jenny and I are delighted to share her Spring version of Sophie’s Dream. I love how the orange she used for the border and joining brings all the colours together. And I super love the yellow popcorns!
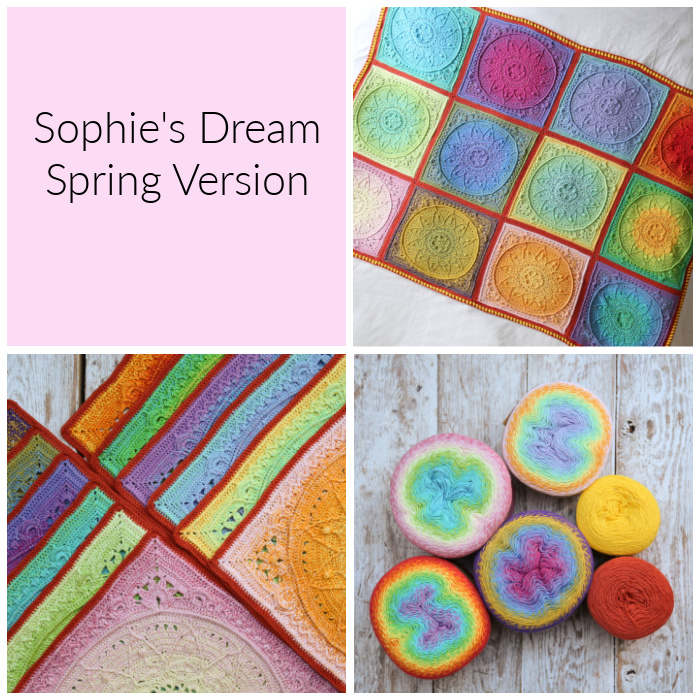
Sophie’s Spring Dream is a beautiful marriage of pastels and brights, making it perfect for those of you who like colour but prefer something a little less bold than the original (Summer) version. Don’t those colours just make your heart sing?
To create your own Sophie’s Spring Dream, you’ll have to follow the original pattern HERE. Don’t click on the link yet, though! There are a few things you need to know about this colourway if you wish to recreate it:
- Materials
- Making the ‘Gardens’
- Deciding on Your Layout
Materials
Yarn packs for Sophie’s Spring Dream are available in my Wool Warehouse Shop HERE. Packs include printed instructions for turning 12 Sophie’s Gardens into this beautiful blanket. You can find the individual balls at any of the Scheepjes Stockists HERE.
- Hooks
- 2.75mm crochet hook (Parts 1 – 3 of Sophie’s Universe)
- 3mm crochet hook (Part 4 of Sophie’s Universe and Border)
- 3.25 mm crochet hook (Joining Only)
- Yarn
- Scheepjes Whirl (60% cotton/40% acrylic), 215–225g/1000m/1093yds
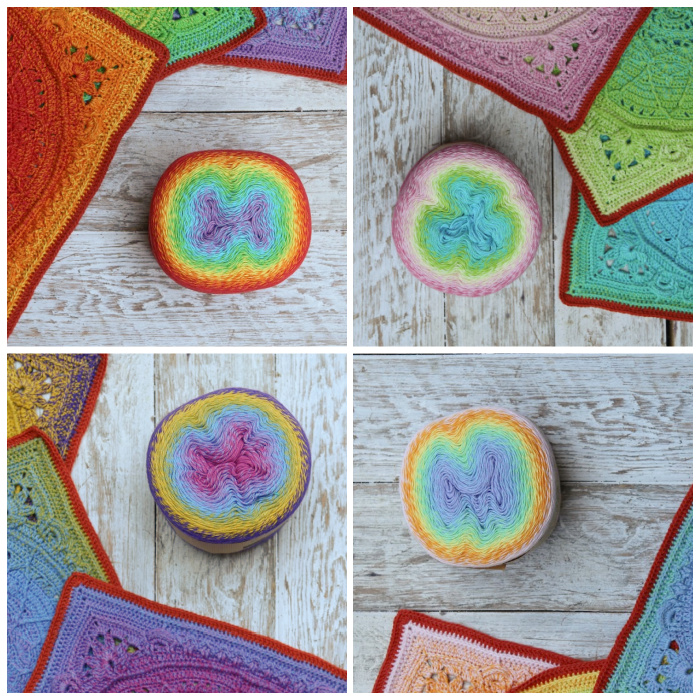
- Main Colour 1 (MC1) – 1 ball of Cotton Candy Man (760)
- Main Colour 2 (MC2) – 1 ball of Sherbet Rainbow (768)
- Main Colour 3 (MC3) – 1 ball of Lemon Cassis Cream (765)
- Main Colour 4 (MC4) – 1 ball of Jumpin Jelly (759)
- Scheepjes Whirlette (60%cotton/40%acrylic),100g/455m/497yds
- Border Colour 1 (BC1) – 2 balls of Citrus (864)
- Border Colour 2 (BC2) – 1 ball of Banana (858)
- Scheepjes Whirl (60% cotton/40% acrylic), 215–225g/1000m/1093yds
Making the Gardens
Gardens A to C
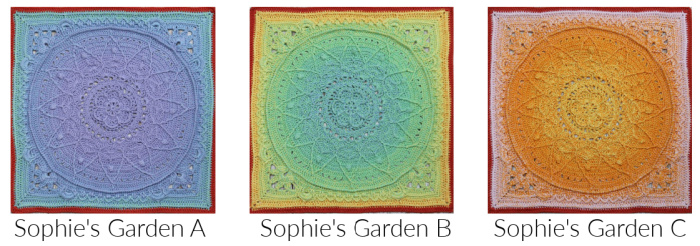
With MC1 and working from the inside to the outside of your ball, make 3 squares, labelling them A, B, and C in order of creation.
Gardens D to F
With MC2 and working from the inside to the outside of your ball, make 3 squares, labelling them D, E, and F in order of creation.
Gardens G to I
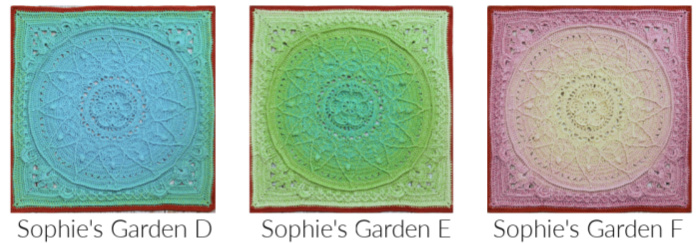
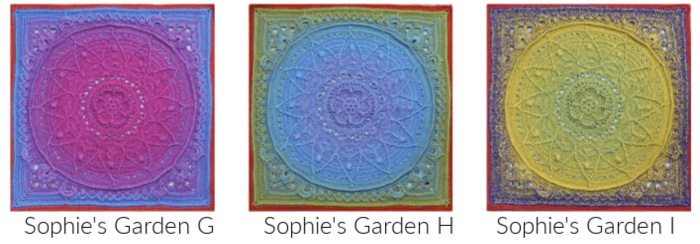
With MC3 and working from the inside to the outside of your ball, make 3 squares, labelling them G, H, and I in order of creation.
Gardens J to L
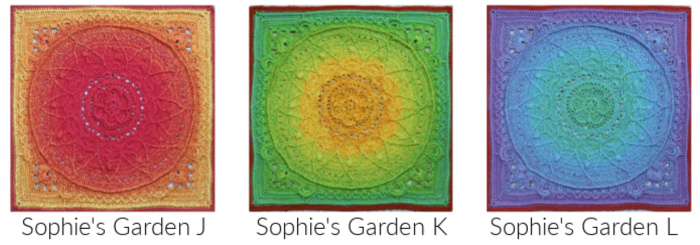
With MC4 and working from the outside to the inside of your ball, make 3 squares, labelling them J, K, and L in order of creation.
Deciding on Your Layout
Jenny’s Layout
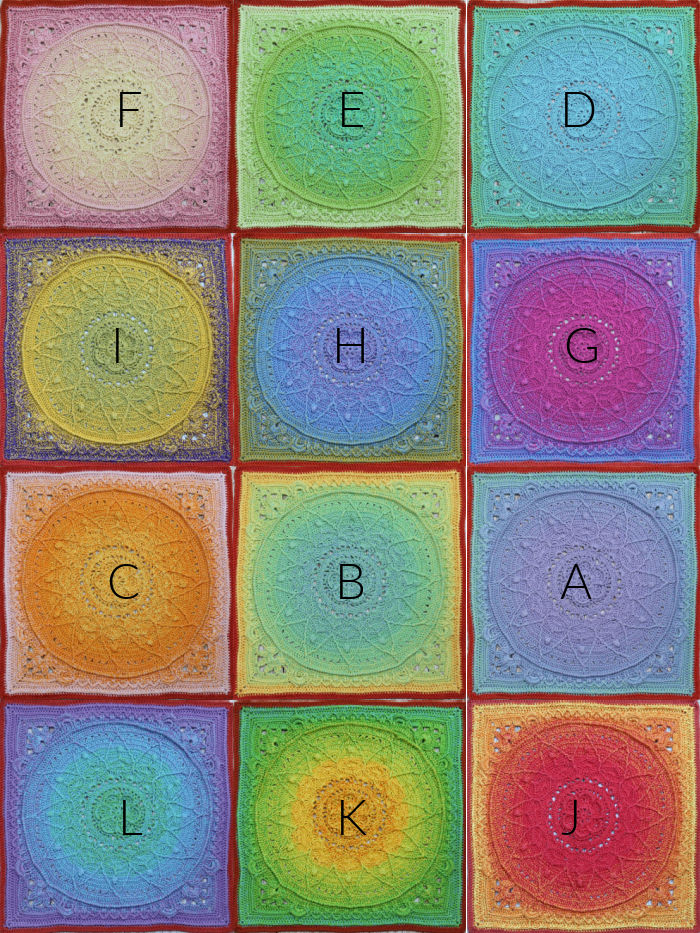
Look at all that bright beauty!!! For this one, our favourite layout was when Jenny simply placed each Whirl in its own row. What I really REALLY like is how she split the pastel and bright whirls up so that the blanket doesn’t feel colour heavy on one side and too pastel on the other.
We are aware that individual tastes vary greatly, so you are, of course, free to change your layout. You can find hints for doing so in the original pattern.
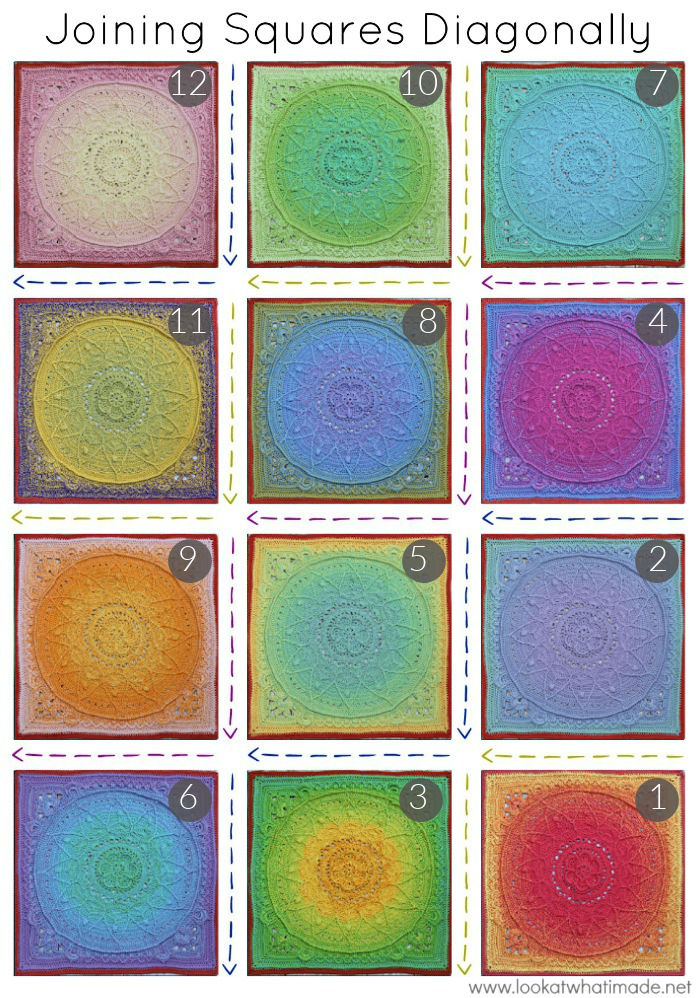
Although the joining instructions don’t change between colour versions, I am including a graphic for joining this specific colourway here. Hopefully, it will help those of you who like to visualise things.
I am also including a photo of the border for colour-placement reference:
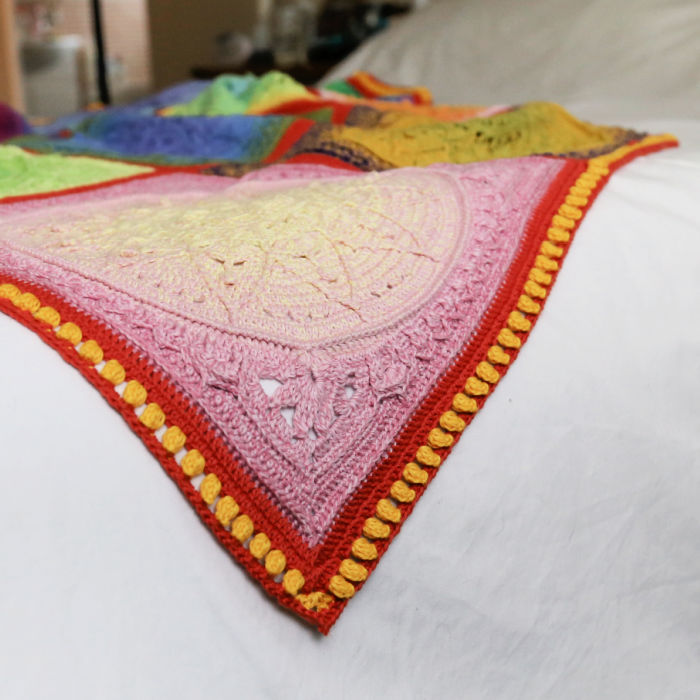
Thank you for choosing to make this blanket. If you share photos of your project, please use #sophiesdreamblanket so that we can all Ooh! and Aah!
All Four Sophie’s Dreams
- Sophie’s Summer Dream (original pattern)
- Sophie’s Winter Dream
- Sophie’s Spring Dream (This Post)
- Sophie’s Autumn Dream
More Whirl Patterns

This blog post contains affiliate links. I only link to products I personally use or would use. All opinions are my own.


Maribel says
Estoy disfrutando tanto de este trabajo. Mil gracias por compartir
Jenny Lowman says
This is my favourite Sophie’s Dream. So glad you like it!
BW
Jenny :)
Teresa Puig says
Hola Maribel, escribo desde México para preguntar si hay un tutorial en YouTube de este proyecto. Recién compré el material y estoy muy emocionada por comenzar. Mil gracias y saludos
Jenny Lowman says
Please see my previous reply to this request, Teresa :)
Teresa Puig says
Buenas noches Maribel, te escribo desde México para saber si hay un tutorial de este proyecto en youtube. Agradezco tu respuesta. Teresa Puig
Jenny Lowman says
Hi! There aren’t full videos for any of the Dream blankets, but parts 1-4 for the mandala square can be found here
HERE
Hope that helps.
dodie says
OMGosh, what an incredibly beautiful way to use those whirl yarns which I’ve been trying to rack my brain to use. There are so many patterns I’ve seen on how to use them but have never seen anything that was appealing. Those are absolutely GORGEOUS!!!
Jenny Lowman says
So glad you love the pattern as we do!
:)