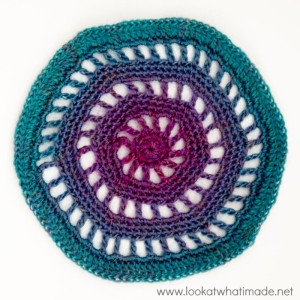
The Railway Mandala is a really simple crochet pattern. It consists of solid concentric circles, broken up by lacy spokes that give the illusion of train tracks. I have chosen to use a colour-change yarn because I like the way the changing colours remind me of the changing landscape of a long train journey.
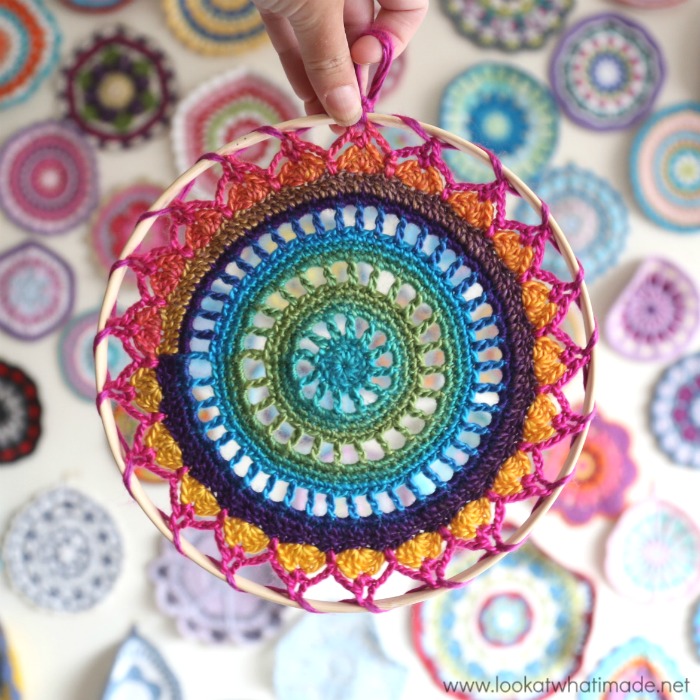
My Railway Mandala is going on my Mandala Wall
I designed this little crochet mandala for the 2016 Crochetville Blog Tour in honour of National Crochet Month (March). Since then, if I am completely honest, I forgot all about this pattern.
I forgot, that is, until I found myself looking for something to make with a small ball of colour-change scrap yarn, left over from my Life in Colour Shawl! And so I grabbed my hook and made one of these easy crochet mandalas, updating this post as I went and adding a couple of rounds for good measure.
For the original Railway Mandala, I used Scheepjes Invicta (discontinued) and a 3mm hook to create 12.5cm/5″ crochet mandalas, following the pattern from Round 1-12 and fastening off at the end of Round 12.
The colour-change for the sock yarn was really long, so the beginning and end of each round blended really well. If you are using a yarn with a medium colour-change, you will notice a clear ‘step’/colour change between the first and last stitch of later rounds (see Round 13 below). If you use a yarn with quite a short colour-change, the ‘step’ might not be as obvious because each round will contain multiple colour-changes.
Simple Railway Crochet Mandala Pattern
©Dedri Strydom 2016. All Rights Reserved. Updated 2020.
Materials (New)
- 3.5mm crochet hook*
- Scheepjes Wanderlust (Hawaii 457) – 50m/22g each
- Optional: Embroidery hoop (or similar) that is at least 1.5cm/0.6″ bigger than the unblocked mandala.
* I used a 4mm hook, but I crochet very tightly.
Gauge
7cm/2.7″ at the end of Round 5.
Size
- Unblocked: 20cm/7.8″ in diameter
- Blocked/Mounted: 22cm/8.6″ in diameter
Abbreviations
US Terminology
- Ch – Chain
- Dc – Double crochet
- Sc – Single crochet
- Sl st – Slip stitch
- Sp/sps – Space/spaces
- St/sts – Stitch/stitches
- () – Repeat instructions between parentheses the number of times specified
- [] – Stitches to be made into the same st/sp.
Special Stitches
- Magic Ring – If you are not familiar with working into a magic ring, this video tutorial by Tamara from Moogly is very good. Please remember, when working into a magic ring, you HAVE to work away your initial yarn end very well. If you just cut it, your whole project might unravel!
Railway Mandala Instructions
Round 1: Into a Magic Ring: ch 3 {counts as first dc}, make 11 dc into the ring. Join to the top of the beginning ch-3 with a sl st. {12 dc}
Round 2: Ch 5 {counts as first dc and ch-2 sp}. (Dc, ch 2) in each of the remaining 11 dc. Join to the top of the beginning ch-3 with a sl st. {12 dc and 12 ch-2 sps}
Round 3: Sl st into the next ch-2 sp. Ch 1 {doesn’t count as a stitch throughout} and make 3 sc in the same ch-2 sp. Make 3 sc in each of the remaining 11 ch-2 sps around. Join to the first sc with a sl st. {36 sc}
Round 4: Ch 1. (Sc in the next 5 sts, make 2 sc in the next st) 6 times. Join to the first sc with a sl st. {42 sc}
Round 5: Ch 1. Sc in the next 3 sts, make 2 sc in the next st. (Sc in the next 6 sts, make 2 sc in the next st) 5 times. Sc in the last 3 sts. Join to the first sc with a sl st. {48 sc}
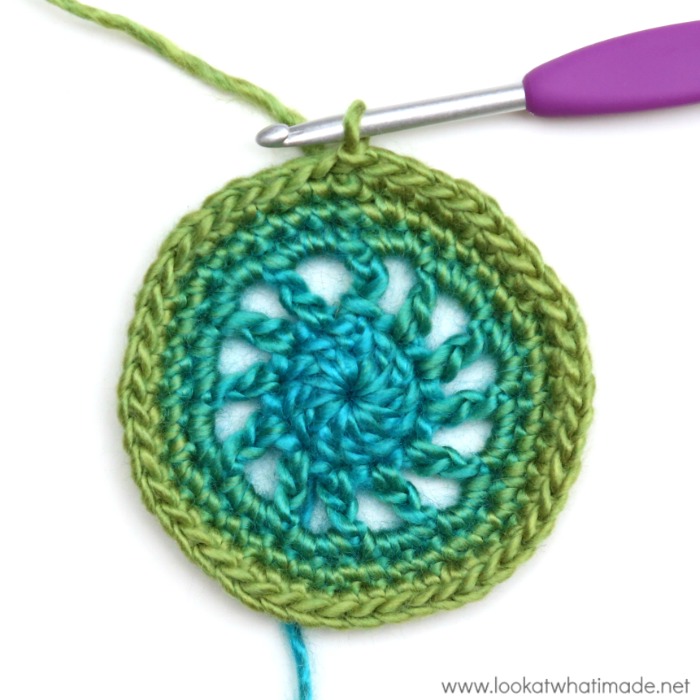
Round 6: Ch 5 {counts as first dc and ch-2 sp}. Skip the next st. (Dc in the next st. Ch 2 and skip the next st) 23 times. Join to the top of the beginning ch-3 with a sl st. {24 dc and 24 ch-2 sps}
Round 7: Sl st into the next ch-2 sp. Ch 1 and make 3 sc in the same ch-2 sp. Make 3 sc in each of the remaining 23 ch-2 sps around. Join to the first sc with a sl st. {72 sc}
Round 8: Ch 1. (Sc in the next 11 sts, make 2 sc in the next st) 6 times. Join to the first sc with a sl st. {78 sc}
Round 9: Ch 1. Sc in the next 6 sts, make 2 sc in the next st. (Sc in the next 12 sts, make 2 sc in the next st) 5 times. Sc in the last 6 sts. Join to the first sc with a sl st. {84 sc}
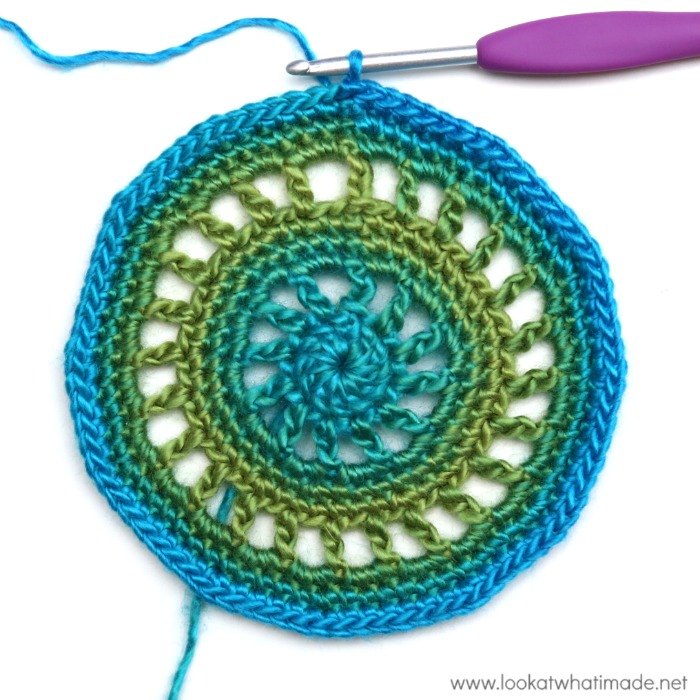
Round 10: Ch 5 {counts as first dc and ch-2}. Skip the next st. (Dc in the next st. Ch 2 and skip the next st) 41 times. Join to the top of the beginning ch-3 with a sl st. {42 dc and 42 ch-2 sps}
Round 11: Sl st into the next ch-2 sp. Ch 1 and make 3 sc in the same ch-2 sp. Make 3 sc in each of the remaining 41 ch-2 sps around. Join to the first sc with a sl st. {126 sc}
Round 12: Ch 3 {counts as first dc}. Dc in each st around. Join to the top of the beginning ch-3 with a sl st. {126 dc}
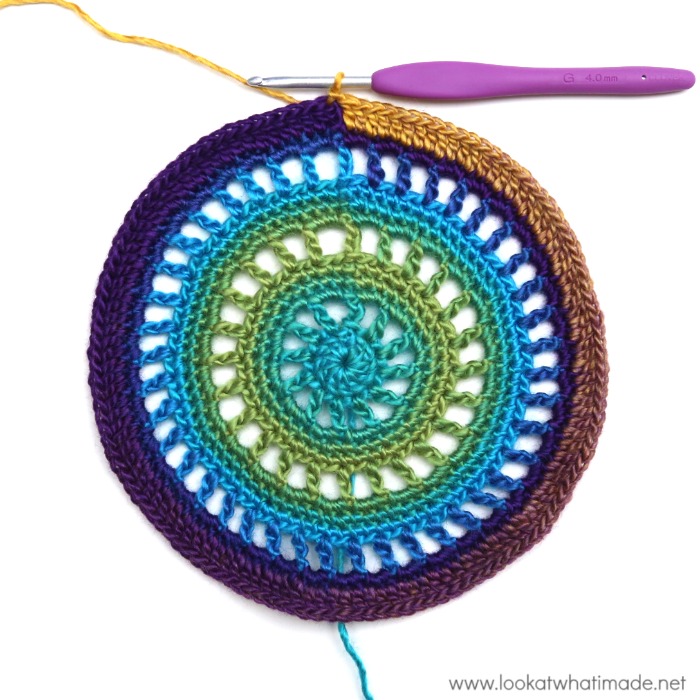
Round 13: (Skip the next 2 sts. [3 dc, ch 1, 3 dc] in the next st. Skip the next 2 sts, sl st in the next st) 21 times. The last sl st should fall in the top of the beginning ch-3 (which already contains a sl st). {21 Scallops}
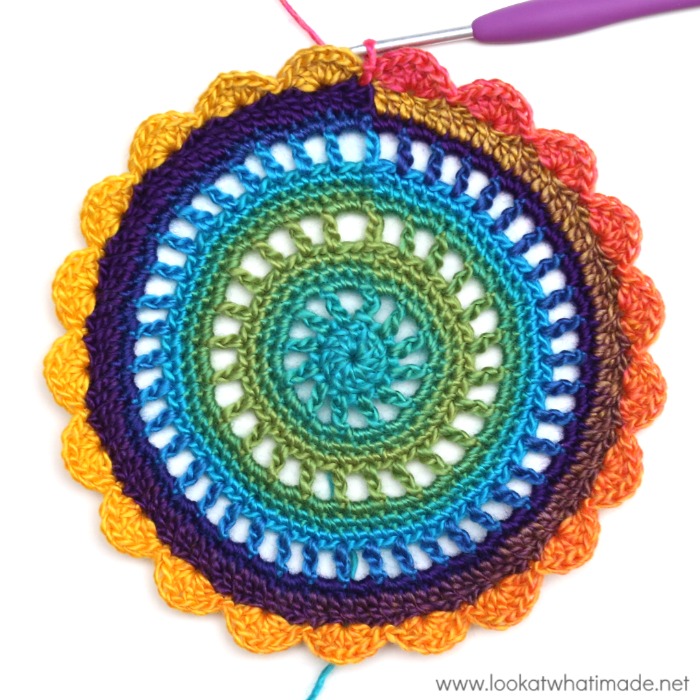
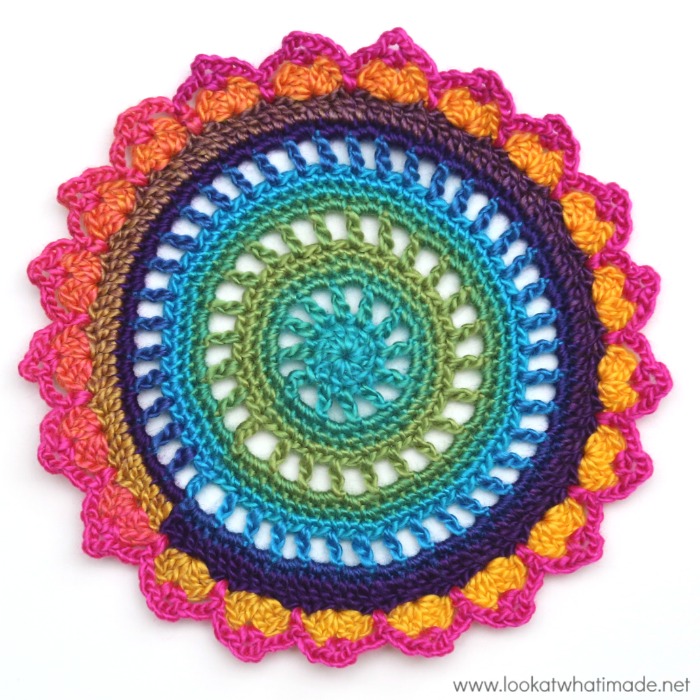
Round 14: Ch 5 {counts as first hdc and ch-3 sp}. Skip the next 3 dc. [Hdc, ch 3, hdc] in the next ch-1 sp. Ch 3, skip the next 3 dc. (Hdc in the dc from Round 12 that contains the next sl st from Round 13. Skip the next 3 dc. [Hdc, ch 3, hdc] in the next ch-1 sp. Ch 3, skip the next 3 dc) 20 times. Join to the second ch of the beginning ch-5 with a sl st. Fasten off and work away your ends. {63 hdc and 63 ch-3 sps}
Blocking
This crochet mandala needs harsh blocking to open up the lacy detail. If you aren’t going to attach it to a hoop, I suggest blocking it. If you ARE going to attach it to a hoop, you don’t need to block it before-hand. Sewing it to the (larger) hoop will stretch it out and make it look neat.
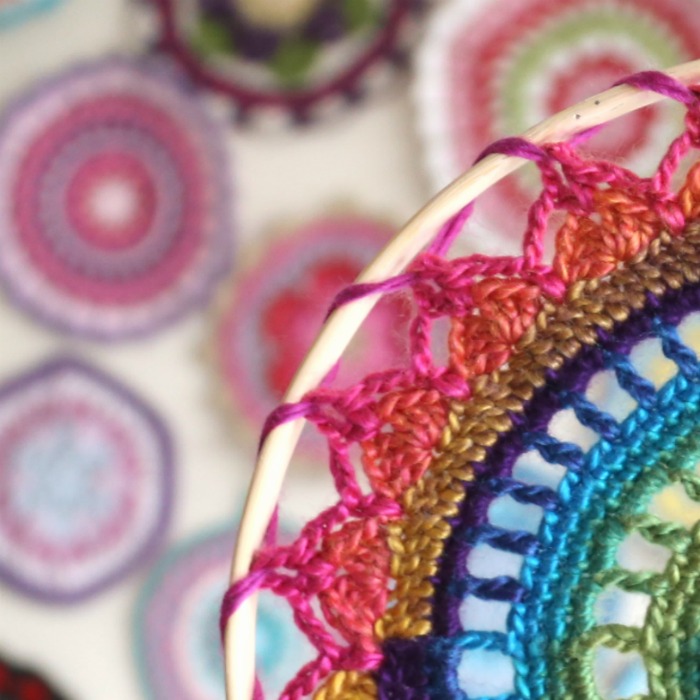
Sewing Your Mandala to a Hoop
Using overhand stitches and a long length of yarn (twice the circumference of your hoop), sew your mandala to the hoop with overhand stitches, working into the ch-3 sps at the tip of each petal.
Hashtag
If you share photos, please use #railwaymandala so that I can see them :)
More Crochet Mandala Patterns
- Fancy Nancy (Free Pattern)
- Camping in Cornwall (Free Pattern for a Rug but makes a beautiful mandala with thin yarn)
- Mandala 21 (Free Pattern by John P Kelly)
- Celestial Mandala (Paid Pattern Available in Issue 9 of Yarn Bookazine)
- Fancy Nancy
- Camping in Cornwall
- Mandala 21

This blog post contains affiliate links. I only link to products I personally use or would use. All opinions are my own.



KC says
Hi. This worked up really easily until the last round. I kept ripping it out and restarting and something wasn’t right for me. After you write “round 13 and skip next 3 ” should there be a chain 3 in there before the Skip? So I ended up adding a chain 3 on each side of the scallop. I really liked using the color change yarn I had called Landscapes as it saved me so much time changing colors and weaving in ends, which I really hate to do. Thanks.
Jenny Lowman says
Hello! Dedri’s written pattern is correctly written :)
garnet abdelmalak says
love this pattern and look forward to when you share your idea to make it square!!!
Dedri Uys says
I’ve got 7 circles now. It’s going to be a while before I square them, but I am pleased to know that someone is interested :)
Joyce Gravino says
Love this pattern e great for a set of coasters
Alma says
Thanks for the free pattern I sent for the fish and haven’t recei
ved it I checked my email and nothing there help thanks again
Dedri Uys says
Hi Alma. The code was only vaide 21 and 22 March.
Rita says
Unfortunate for me the code didn’t work
Dedri Uys says
Hi Rita. The code was only valid for one day, and stopped working at 5 pm (GMT) yesterday. Please look out for the next time I do this.
Celia says
thank you! I can’t wait to try the rhino pattern!
Katie says
Thank you so much. :D SO glad you share your talent with all of us!