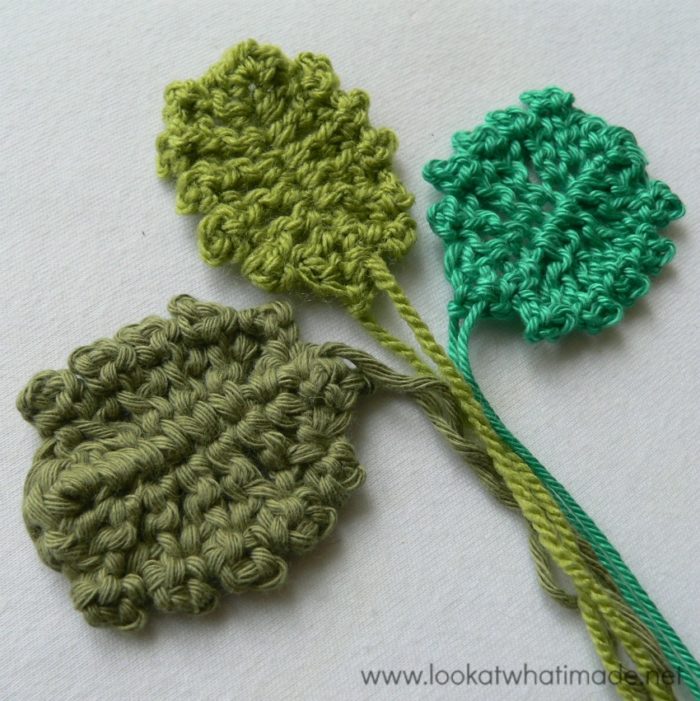
 This crochet leaf pattern was written by one of my testers, Connie Gerbrandt, and was designed to go with the Granny’s Pansies I shared a couple of weeks ago. She used the pansies and leaves to make the loveliest Mother’s Day card for her mom.
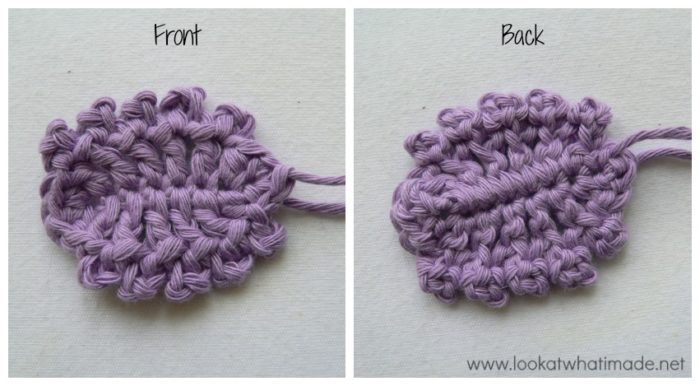
These crochet leaves are quick and easy to make, and I love the ruffled edges. Connie suggests attaching the leaf to your project of choice with the back of the leaf facing forward. This gives the leaf a more “leafy” feel.
Pansy Leaf Pattern
© Connie Gerbrandt 2014. All Rights Reserved.
Please do not copy/reproduce this pattern in any way.
Materials
- Double knit yarn (less than 3 yards per leaf)
- 4 mm Crochet Hook (US G/6 UK 8)
- Yarn Needle
Abbreviations
US Terminology Used. See this comparative chart if you would like the UK equivalents.
Ch Chain
Sc Single Crochet
Sl st Slip Stitch
Hdc Half-double Crochet
Dc Double Crochet
Special Stitches
This leaf uses a ch-3 picot and a ch-4 picot (explained in the pattern below).
Written-only Instructions
Chain 9. This will be referred to as the foundation chain throughout.
Working into the top loops only of the foundation chain: sc in the second ch from the hook. Hdc in the next ch. Chain 3 and sl st in the third ch from your hook (ch-3 picot made). *DC in the next st of the foundation chain. Chain 4 and sl st in the 4th ch from the hook (ch-4 picot made)* x4. Dc in the next st. Make 3 hdc’s in the last st of the foundation chain.
Working down the other side of the foundation chain (and over the initial tail of yarn): dc in the next st after the 3 hdc’s. *Ch 4 and sl st in the fourth ch from the hook (ch-4 picot made). Dc in the next st* x 4. Ch 3 and sl st in the third ch from the hook (ch-3 picot made). Hdc in the next st and sc in the last st. Join to the first sc with a sl st. Ch 1 and fasten off. Flip your leaf upside down and use your end tail of yarn to sew it to your object of choice.
Chart
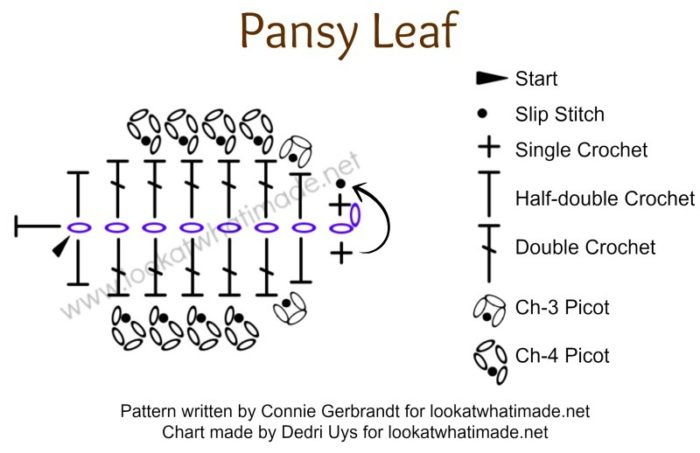
Photo Tutorial
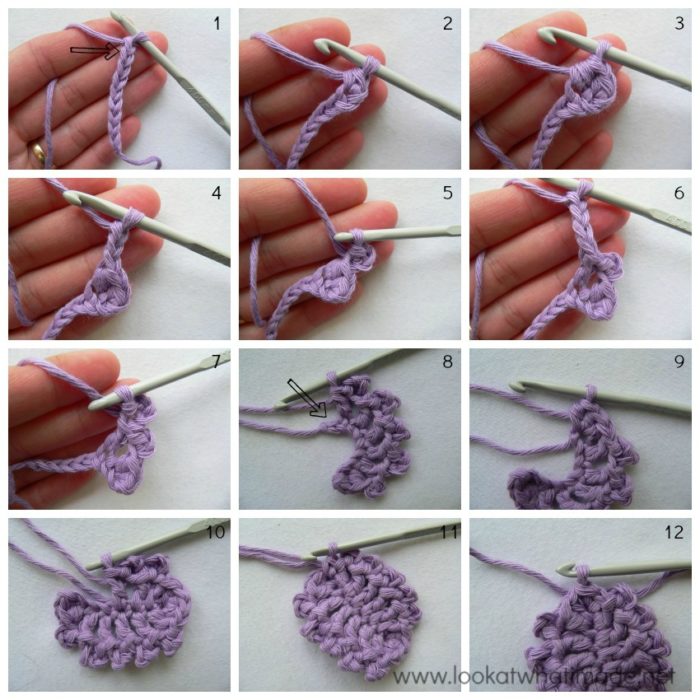
Chain 9 (Photo 1). This will be referred to as the foundation chain throughout.
Working into the top loops only of the foundation chain: sc in the 2nd ch from the hook (indicated with an arrow in Photo 1 and illustrated in Photo 2). Hdc in the next ch (Photo 3). Chain 3 (Photo 4) and sl st in the third ch from your hook (Photo 5). This is your ch-3 picot made. *DC in the next st of the foundation chain. Chain 4 (Photo 6) and sl st in the 4th ch from the hook (Photo 7). This is your ch-4 picot made.* x 4. Dc in the next st. Make 3 hdc’s in the last st of the foundation chain (indicated with an arrow in Photo 8 and illustrated in Photo 9).
Working down the other side of the foundation chain (and over the initial tail of yarn): dc in the next st after the 3 hdc’s. *Ch 4 and sl st in the fourth ch from the hook (ch-4 picot made). Dc in the next st* x 4. Ch 3 and sl st in the third ch from the hook. Hdc in the next st and sc in the last st (Photo 11). Join to the first sc with a sl st (Photo 12). Ch 1 and fasten off. Flip your leaf upside down and use your end tail of yarn to sew it to your object of choice.
I made a few of these leaves in different yarns: Patons Mercerised Cotton, Drops Paris Cotton, and Stylecraft Special DK. Of the three, the Drops worked the best, simply because it was the thickest of the three yarns. Although the Patons yielded a good enough leaf, I found the leaf a bit “holey”.
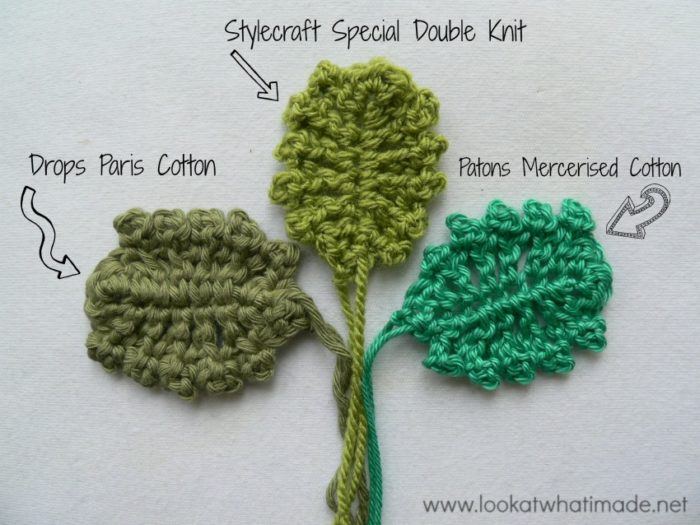
Moral of the story? When in doubt, use a thicker yarn rather than a thinner one.
Remember to subscribe to my newsletter if you would like to be kept in the loop. You can also like my Facebook page or follow me on Bloglovin or Google+.
Happy Hooking!


Mary Sheets says
Dedir, I thought this one was really good actually. I really only had to look at the instructions one time and I read the entire chart. I thought I did pretty good for my first attempt. I am encouraged!!! If you improve on this we may have to write a novel…….
Dedri Uys says
Oh, thank you :) A novel about a leaf crochet chart…that is bound to be a best-seller
Dedri Uys says
Hi Mary. I do remember your post and also understand your question. This chart is perhaps not the best example in the world. I made it to go with my instructions, not as a stand-alone chart. Having said that, I suppose I could have put more detail on it.
Most charts will have each row/round in a different or alternating colour so that you can distinguish between rounds. Had there been another round to the leaf, that would have been purple (like the foundation chain). Sometimes charts contain markers (little dots or numbers) that show you where each round ends. In this case I didn’t feel I needed it, as there is really only one round.
I will try to make my next chart easier to understand, Mary :)
Take care
Dedri
Mary Sheets says
Hello Dedri, Well, I took your chart on a test drive. I hope you remember my post asking for help in this area and a chart cal because I took this as the first prototype attempt by me. First chart I have ever followed and made something from, however, if I did not have the written instructions I would not have made the leaf correctly. I am missing something and it is my lack of understanding. I easily identified where to start by the arrow, knew to chain 9, followed the arrow around and started my row and thought wow this is going to be easy, sc, hdc, 5 dbl, 3 hdc in end chain turn and go back around the bottom loops on chain. If I did not have the instructions, I would have thought the picots were suppose to be done in the next row. Hope this makes sense, but how do I know the picots are on top or completed with the stitch below as one and not a separate row? Both sets of instructions were great but I really would like to follow a chart and make something without instructions one day. This was fun and I hope you understand my question.