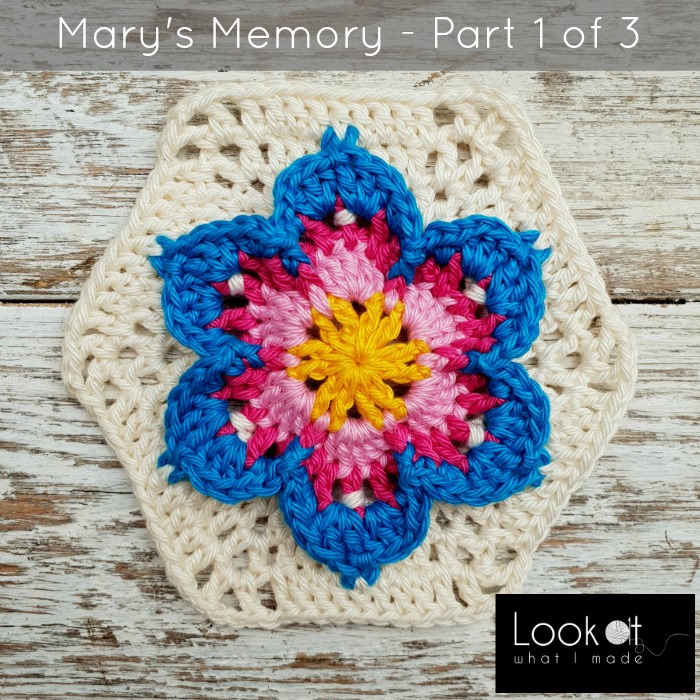
This is Part 1 of the Mary’s Memory Hexagon I designed for my February 2019 crochet cruise with Crafty Adventures. At the end of this part, you will have a gorgeous little hexagon. If you want to use this motif to create a blanket, I have included some links to complementary hexagon patterns as well as joining methods at the end of this post.
Tell me, what is it you plan to do with your one wild and precious life?
– Mary Oliver, The Summer Day
Mary’s Memory Part 1 {Mini Mary}
© Dedri Uys 2019. All Rights Reserved.
Charted by Maggie Bullock
Designed for the February 2019 Crafty Adventures Cruise.
You will find all the information (including Abbreviations, Materials, Sizes, and the Chart Legend) in the information post HERE.
Gauge
Your motif should measure 8cm/3.1” from point to point at the end of Round 4.
Instructions
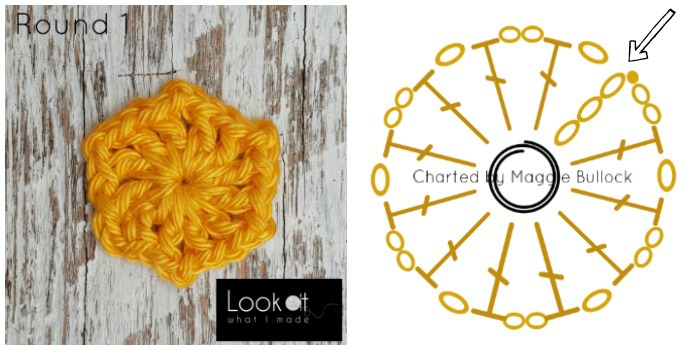
Round 1 {Yarn B}
Into a magic ring, ch 4 (this counts as your first dc and ch-1 sp) and then make a dc. [Ch 2, dc, ch 1, dc] 5 times. Ch 2 and join to the third ch of the beg ch-4 with a sl st. Fasten off and work away your ends.
Stitch Count: 12 dc, 6 ch-2 sps and 6 ch-1 sps
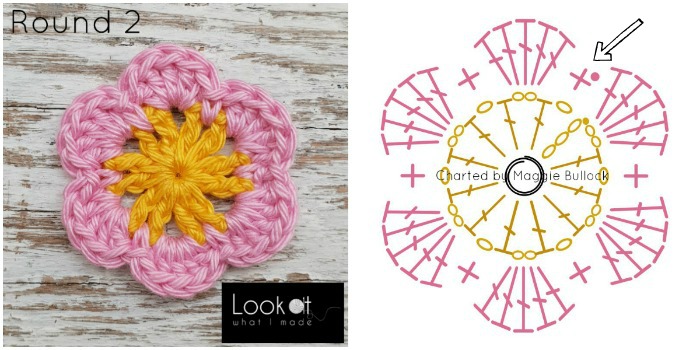
Round 2 {Yarn C}
Join your yarn by making a standing sc in any ch-1 sp around.
[Make 5 dc in the next ch-2 sp, sc in the next ch-1 sp] 5 times. Make 5 dc in the last ch-2 sp. Join to the first sc with a sl st. Fasten off and work away your ends.
Stitch Count: 30 dc and 6 sc {6 Petals}
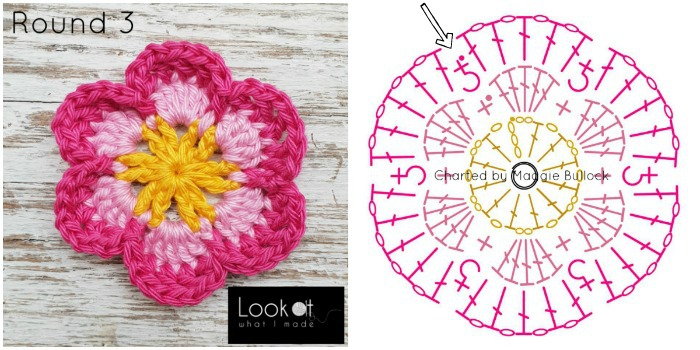
Round 3 {Yarn D}
Join your yarn by making a FPsc around the post of any sc from the previous round. You will make the FPsc exactly the same as the standing sc, but working around the post of the stitch instead of into the top 2 loops.
*(Dc, ch 1) in each of the next 4 dc, dc in the last dc. FPsc around the next sc.*
Repeat from * to * 5 more times, omitting the last FPsc on the last repeat. Join to the top of the first sc with a sl st. Fasten off and work away your ends.
You should now have 6 Petals. Each Petal should contain 5 dc and 4 ch-1 sps. There should be one FPsc between Petals.
Stitch Count: 30 dc, 6 FPsc, and 24 ch-1 sps {6 Petals}
Round 4 {Yarn E}
Join your yarn by making a FPsc around the post of any FPsc around.
*Sc in the first dc. This first dc might be slightly tricky to get into because it is right next to the FPsc. Make 2 hdc in the next ch-1 sp, make 3 dc in the next ch-1 sp. Ch 3 and sl st in the last dc to form a Picot. Make 3 dc in the next ch-1 sp, make 2 hdc in the next ch-1 sp. Sc in the next dc, which will be slightly hidden. FPsc around the next FPsc.*
Repeat from * to * 5 more times, omitting the last FPsc on the last repeat. Join to the first FPsc with a sl st. Fasten off and work away your yarn ends.
Stitch Counts:
- Total: 6 FPsc, 12 sc, 24 hdc, 36 dc, and 6 ch-3 Picots
- Per Petal: 2 sc, 4 hdc, 6 dc, and 1 ch-3 Picot {1 FPsc between Petals}
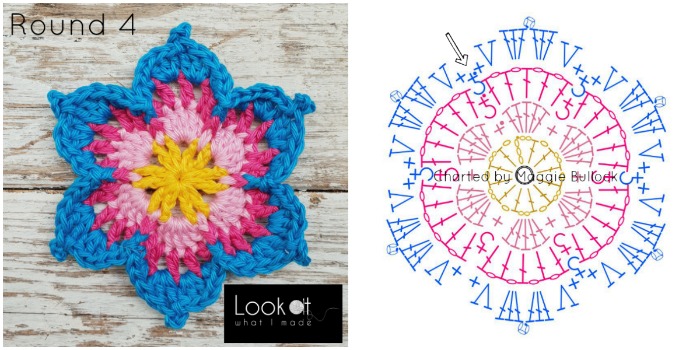
Round 5 {Yarn A}
Join yarn by making a standing BPsc around the central dc of any 5-dc group from Round 3. [Ch 6, make a BPsc around the central dc of the next 5-dc group from Round 3] 5 times. Ch 6 and join to the first BPsc with a sl st.
Stitch Count: 6 BPsc and 6 ch-6 sps
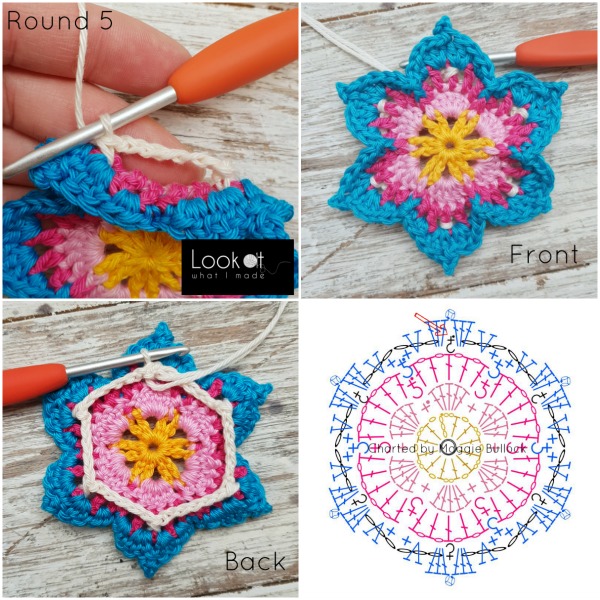
Round 6 {Yarn A}
Ch 1 (doesn’t count as a st throughout), sc in the first BPsc. [(2 sc, hdc, dc, ch 2, dc, hdc, 2 sc) in the next ch-6 sp, sc in the next BPsc] 6 times, omitting the last sc on the last repeat. Join to the first sc with a sl st. Fasten off and work away ends.
Note: The ch-2 sps will be your corner sps. When counting this round, count from ch-2 sp to ch-2 sp.
Stitch Counts:
- Total: 54 sts – 30 sc, 12 hdc, and 12 dc, not including ch-2 corner sps
- Per Side: 9 sts – 5 sc, 2 hdc, and 2 dc, not including ch-2 corner sps
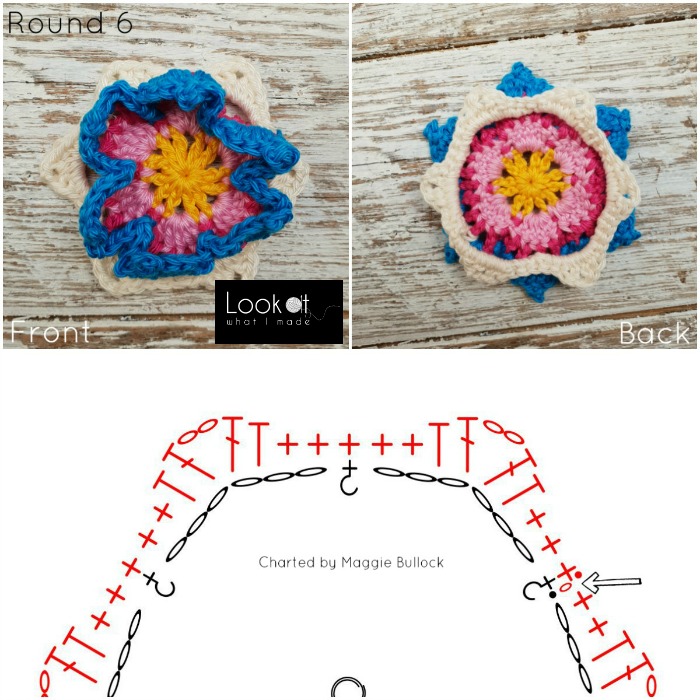
Round 7 {Yarn A}
Join your yarn by making a standing dc in any ch-2 corner sp. (Ch 2, dc) in the same ch-2 sp. This is your first corner made.
*Skip the first (hidden) st {see Photo below}, dc in the next 8 sts. (Dc, ch 2, dc) in the next ch-2 corner sp.*
Repeat from * to * 5 more times, omitting the last corner on the last repeat. Join to the first dc with a sl st.
Stitch Count Per Side: 10 dc, not including ch-2 corner sp.
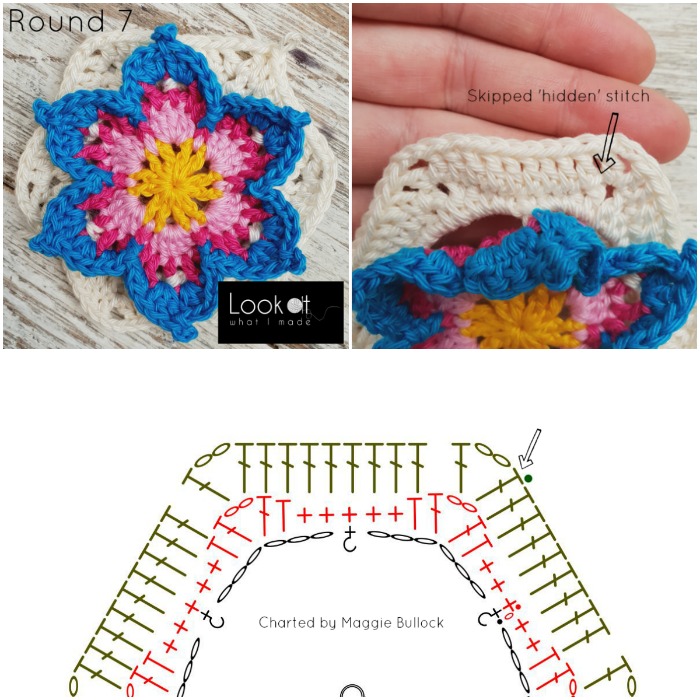
Round 8 {Yarn A}
If you do not want to continue growing your motif with Parts 2 and 3, but would rather stop at the end of this part, please ignore the instructions in blue below when making this round and continue on to the Additional round once you have finished Round 8.
Sl st into the next ch-2 corner sp. Ch 5 (counts as dc + ch-2 sp). Dc in the same ch-2 sp. This is your first corner made.
*Ch 1, skip the first (hidden) st and dc between the first two sts {Photo 1}. Skip the next st, which will be hidden by the st you just made. Dc in the next 3 sts {Photo 2}. Catch the next Picot from Round 4 by making a dc through the Picot AND the next st of Round 7 {Photo 3}. Dc in the next 3 sts of Round 7. Dc between the last 2 two sts. Ch 1. Mark this ch-1 sp with a SM. (Dc, ch 2, dc) in the next ch-2 corner sp {Photo 4}.*
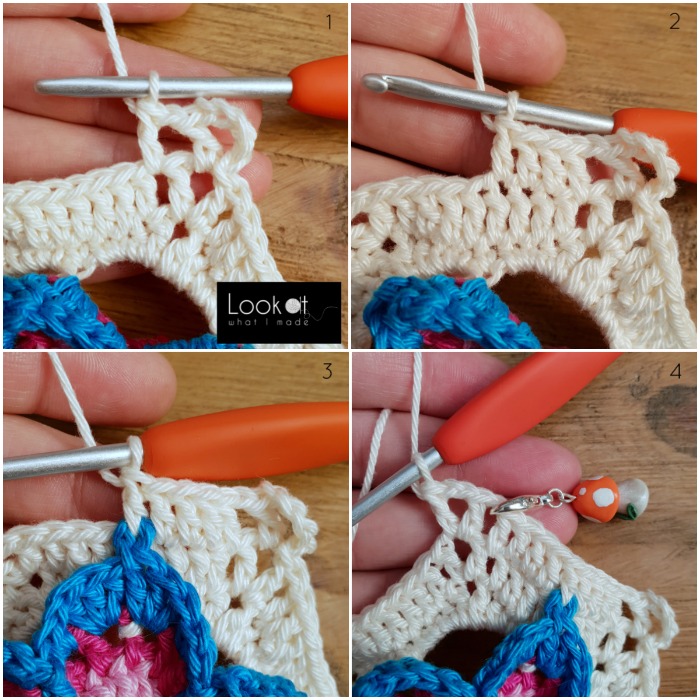
Repeat from * to * 5 more times, omitting the last corner on the last repeat. Join to the first dc with a sl st. Fasten off and work away your ends.
Stitch Count Per Side: 11 dc and 2 ch-1 sps, not including ch-2 corner sps.
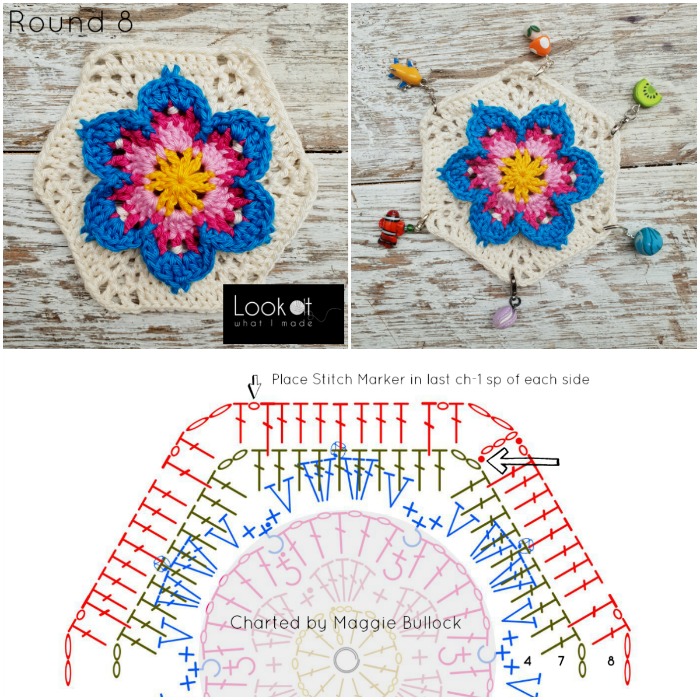
Now you are ready to:
- Continue on to Part 2
- OR Continue below if you would like to make a blanket out of these Mini Mary Hexagons
Making a Blanket out of Mini Mary Hexagons
If you prefer to stop here and make a blanket out of your Mary’s Memory Part 1 hexies, I suggest that you add an additional round to make it easier to join these motifs.
Additional Round if Stopping at the End of Part 1
Sl st into the next ch-2 corner sp. Ch 1 (doesn’t count as a st). (Sc, ch 1, sc) in the same ch-2 sp. This is your first corner made.
*Skip the first (hidden) st. Sc in the next ch-1 sp. Sc in the next 9 sts. Sc in the next ch-1 sp. Sc in the last st. (Sc, ch 1, sc) in the next ch-2 corner sp.* Repeat from * to * 5 more times, omitting the last corner on the last repeat. Join to the first sc with a sl st. Fasten off and work away your ends.
Stitch Count Per Side: 14 sc – not including ch-1 corner sps.
Complementary Hexagons
These little Mini Mary hexagons take a fair bit of time to create (and leave MANY ends). They are also quite ‘busy’ if you use them on their own.
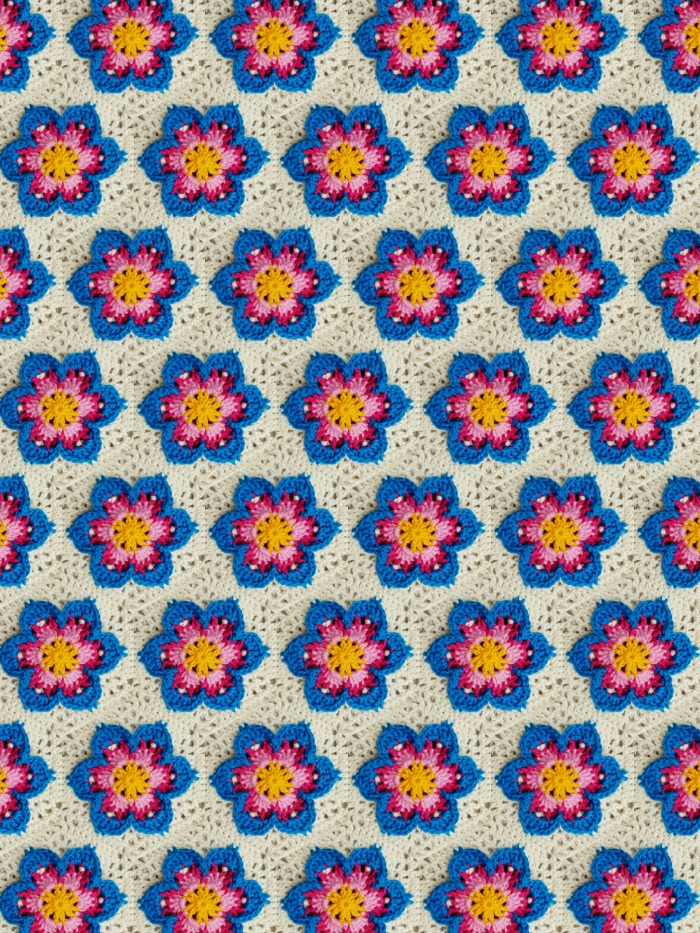
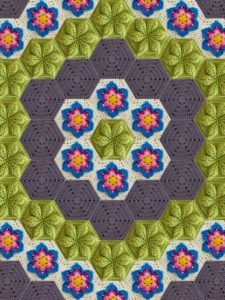
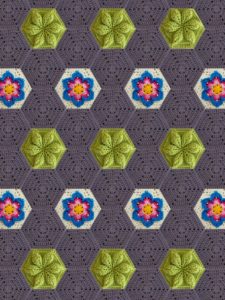
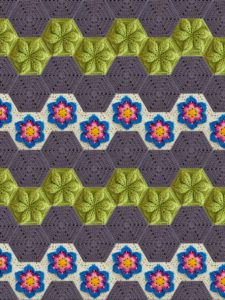
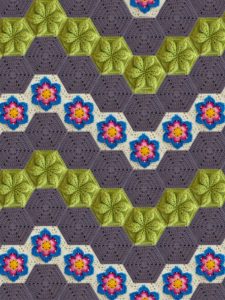
You might choose to break them up by adding some textured or plain single-colour hexagons like the ones listed below. I had a quick play with a collage maker and hit upon some configurations I quite like. Full disclosure, ‘quick play’ means I spent the last two hours faffing around with different options and loving every minute!
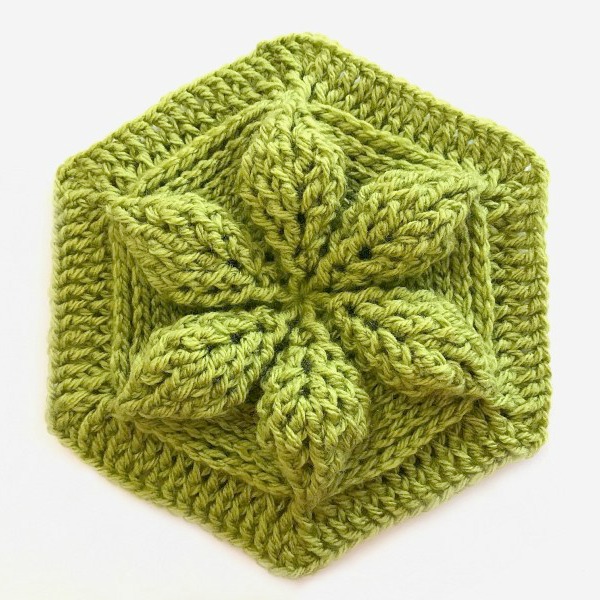
1. Embossed Crochet Hexagon by Bonita Patterns
This little Embossed Crochet Hexagon by Bonita Patterns is filled with texture, making it the perfect one-colour counterpart to a Mini Mary. If you would like to use this hexagon in conjunction with the Mini Mary hexagons to create a blanket, you will need to stop at the end of Round 10, at which point you will have 14 sts per side, not including ch-1 corner sps.
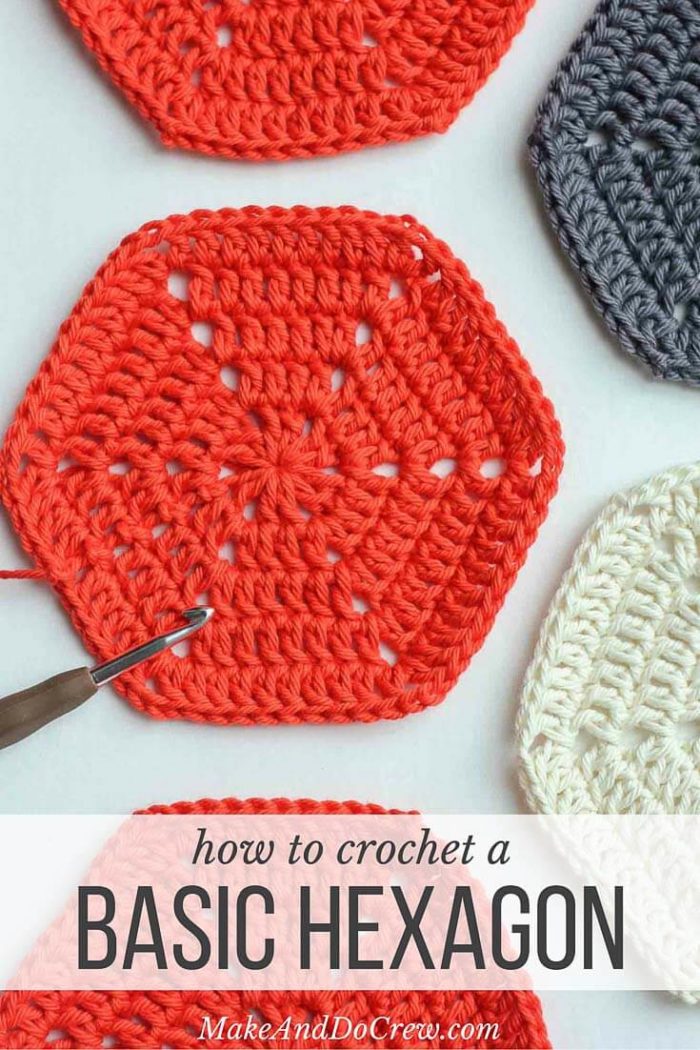
2. Basic Crochet Hexagon by Jess from Make & Do Crew
If you want something really simple, this Basic Crochet Hexagon by Jess from Make & Do Crew is the perfect option. The tutorial for this basic hexie goes up to Round 5, at which point you will have 10 dc per side. To make it work with the Mini Mary hexagon, you will need to keep repeating the instructions for two more rounds so that you end up with 7 rounds in total and 14 dc per side.
The tutorial also links to a really useful tutorial for making half-hexies, as well as a tutorial for joining (listed below)!
More Hexagon Inspiration
Here are a few more suggestions. Please note that you will need to tweak these patterns so that they have 14 stitches per side.
- Hexagon How-to by Lucy from Attic24
- Inspirational Hexies by Christina from a Spoonful of Yarn
- Blizzard Warning! by Polly from Every Trick on the Hook
Joining Methods
- Single Crochet Join as you Go (Downloadable Ravelry Tutorial by Marken of The Hat & I)
- (Sc, ch 1, skip 1) Join (Photo Tutorial by Yours Truly)
- Continuous Flat Braid Join (Photo and Video Tutorial by Rachele from Cypress Textiles)
- Invisible Seam (Sewing Tutorial by Make & Do Crew)
Back to Information Post *** Continue to Part 2

This blog post contains affiliate links. I only link to products I personally use or would use. All opinions are my own.


Eudocia Hector says
Hi Dedri
I like the flower that you made. I am a beginner crocheted. Is it possible that you can show how to make a granny square with the flower?
Dedri Uys says
Hi Eudocia.
Maybe I will convert it at some point. That is a great suggestion.
Dedri
Niamh says
I love your Mary’s Memory pattern, and I’m looking forward to making all 3 parts. Just for grins I may try making it with ombré or self-striping yarns.
Any chance of a downloadable pattern?
Thank you so much for all your work and inspiration.
Jenny says
Hi Niamh.
All Dedri’s patterns have the green Print Friendly button after her sign off. This allows you to modify and download patterns in whatever format you want.
Jenny :)
Annette Mole says
Hi Dedri
Thank you for this beautiful pattern. I definately plan to make it.
And happy birthday for Thursday.
I turn 77 on Wednesday & still going strong, loving crochet more every day.
Especially when all you lovely young ones come up with beautiful designs.
Regards
Annette
Dedri Uys says
Happy BIRTHDAY Annette!